
Spirit Plus R21PLUS - Vacuum Cleaner Riccar - Free user manual and instructions
Find the device manual for free Spirit Plus R21PLUS Riccar in PDF.


User questions about Spirit Plus R21PLUS Riccar
0 question about this device. Answer the ones you know or ask your own.
Ask a new question about this device
Download the instructions for your Vacuum Cleaner in PDF format for free! Find your manual Spirit Plus R21PLUS - Riccar and take your electronic device back in hand. On this page are published all the documents necessary for the use of your device. Spirit Plus R21PLUS by Riccar.
USER MANUAL Spirit Plus R21PLUS Riccar
text_image
SPIRIT Owner's prop Man propOwner's Manual
R21
R21PLUS
Manuel du
propriétaire
R21
R21PLUS
Manual del
propietario
R21
R21PLUS
IMPORTANT SAFETY INSTRUCTIONS
READ AND UNDERSTAND ALL INSTRUCTIONS BEFORE USING THIS UNIT
Read and understand this owner's manual and all labels on the unit before operating. Safety is a combination of common sense, staying alert, and knowing how your unit works. Use this unit only as described in this manual. Use only manufacturer's recommended attachments. To reduce the risk of personal injury or damage to your unit use only recommended accessories.
IMPORTANT:
The manufacturer cannot accept responsibility for damage caused when the appliance is not used according to the instructions, or for uses other than those for which it was intended
WARNING
To avoid fire, DO NOT use with a flammable or combustible liquid water.
or floor cleaner.
WARNING
To avoid electric shock, DO NOT expose to rain. Store Indoors.
When using this unit, basic precautions should always be followed, including the following:
- DO NOT leave unit when plugged in. Unplug from outlet when not in use and before servicing.
- DO NOT allow unit to be used as a toy. Close attention is necessary when used around or near children.
- Use only as described in this manual. Use only manufacturer's recommended attachments.
- DO NOT use with damaged cord or plug. If unit is not working properly because it has been dropped, dropped into water, left outdoors, or damaged in any way, contact a service center
- DO NOT handle plug or appliance with wet hands.
- DO NOT put any objects into openings.
- DO NOT use with any opening blocked: keep free of dust, lint, hair, or anything that may reduce air flow.
- Keep hair, loose clothing, fingers, and all parts of body away from openings and moving parts.
- DO NOT pick up anything that is smoking or burning such as cigarettes, matches, or hot ashes.
• DO NOT use to pick up hazardous chemicals. - Turn off all controls before unplugging.
- Turn unit off immediately if foam or liquid comes from machine exhaust.
- DO NOT use to pick up flammable or combustible liquids such as gasoline or use in areas where they may be present.
- DO NOT use where oxygen or anesthetics are used.
- Replace damaged or worn parts immediately with genuine original equipment parts to maintain safety.
- Use only with a properly grounded outlet. See grounding instructions.
- DO NOT use equipment out doors or in the rain.
- DO NOT use equipment near or around flammable or explosive materials, fuels, or solvents.
• DO NOT allow the unit to freeze. - Anyone designated to operate this equipment must, without fail, read and thoroughly understand all instructions and precautions prior to use.
- DO NOT operate in standing water.
- DO NOT use on liquids.
- DO NOT operate equipment under any unsafe condition.
SAVE THESE INSTRUCTIONS
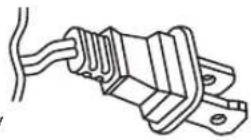
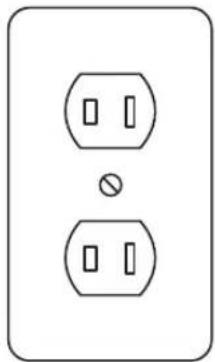
To reduce the risk of electric shock, the charger is equipped with a polarized alternating current line plug (a plug having one blade wider than the other). This plug will fit into the power outlet only one way. This is a safety feature. If you are unable to insert the plug fully into the outlet, try reversing the plug. If the plug should still fail to fit, contact a qualified electrician to replace the obsolete outlet. Do not defeat the safety purpose of the polarized plug.
natural_image
Simple line drawing of two electrical socket sockets with a bulb (no text or symbols)WARNING!
Improper connection of the equipment-grounding conductor can result in a risk of electric shock. Check with a qualified electrician or service person if you are in doubt as to whether the outlet is properly grounded. DO NOT modify the plug provided with the vacuum. If it will not fit the outlet, have a proper outlet installed by a qualified electrician.
This vacuum cleaner must be grounded. If it should malfunction or break down, grounding provides a path of least resistance for electric current to reduce the risk electric shock. This vacuum cleaner is equipped with a cord having an equipment-grounding conductor and grounding plug. The plug must be plugged into an appropriate outlet that is properly installed and grounded in accordance with all local codes and ordinances.
This vacuum cleaner is for use on a nominal 115-volt circuit and has a ground plug (see illustration). Make sure that the vacuum is connected to an outlet having the same configuration as the plug. No adapter should be used with this vacuum.
01
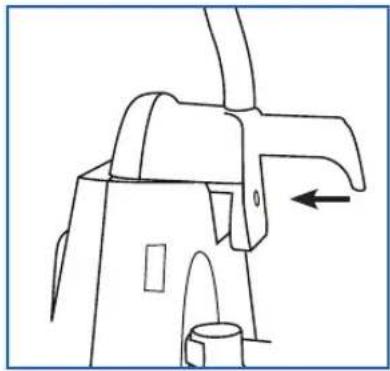
Before using the vacuum cleaner attach the handle. The vacuum cleaner and handle are packed separately. Remove the handle screws.
02
Position the handle behind the vacuum cleaner and align handle with the guides on machine. Hold the power cord down and away from the vacuum while the handle is being attached. Make sure that the switch on the handle is positioned toward the front of the vacuum cleaner.
03
Insert the handle screw and tighten securely into place.
04
The upper cord hook rotates to allow for quick access to the power cord. Rotate upper cord storage hook and wind power cord around the hooks.
natural_image
Technical line drawing of a mechanical component with an arrow indicating direction (no text or symbols)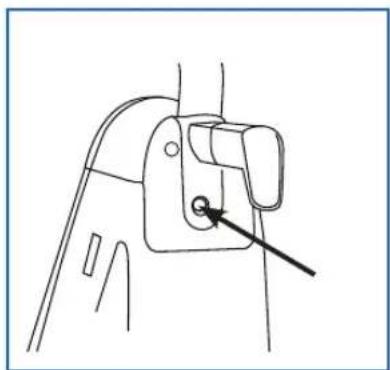
natural_image
Line drawing of a mechanical component with a pointer and arrow indicating direction (no text or symbols)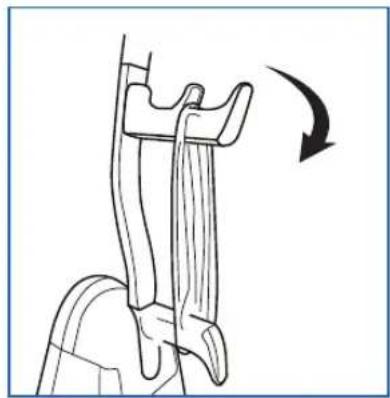
natural_image
Diagram of a mechanical component with an arrow indicating rotation (no text or symbols present)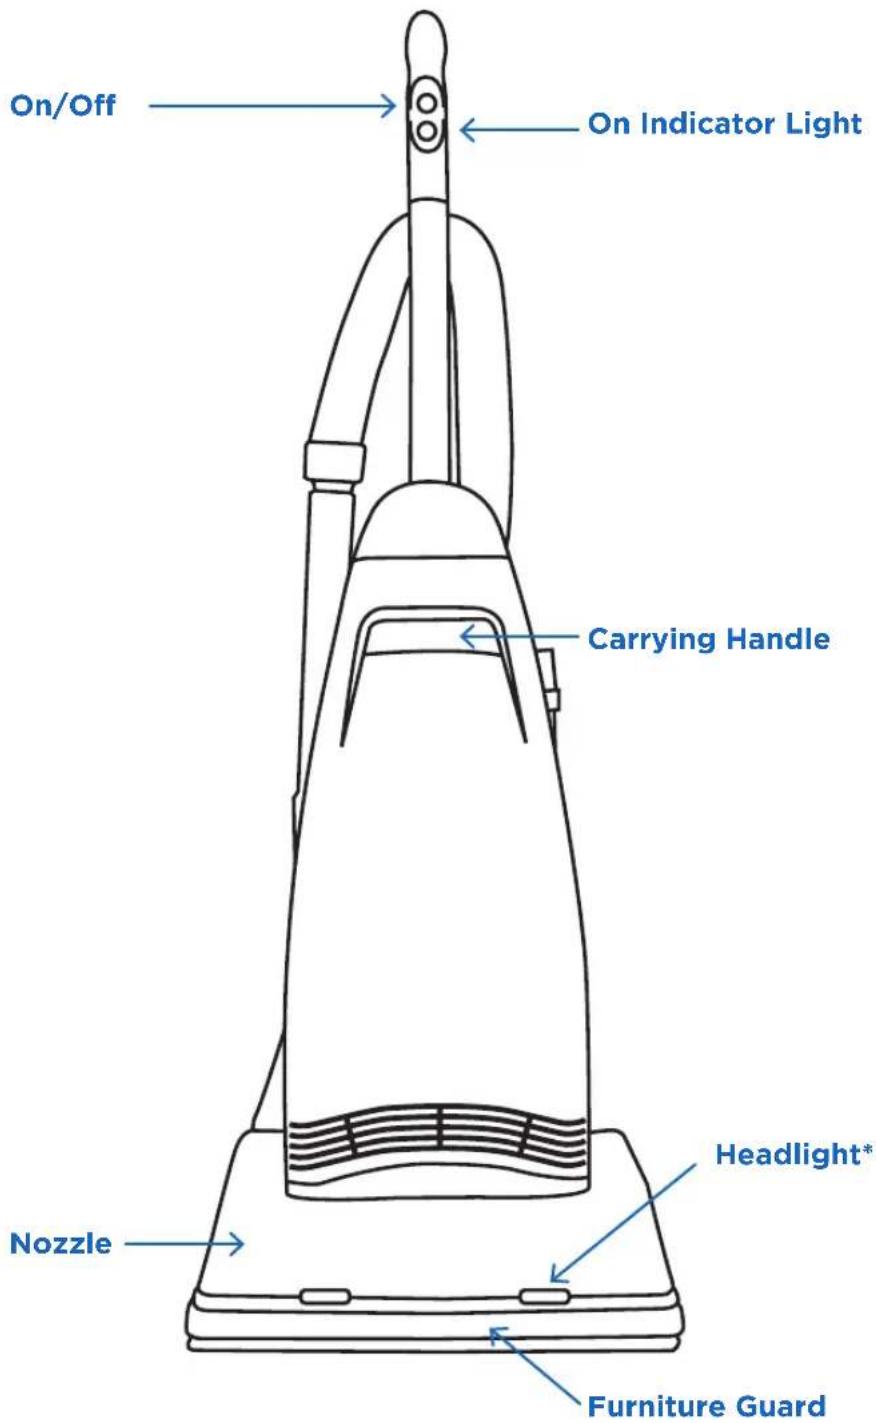
text_image
On/Off On Indicator Light Carrying Handle Nozzle Headlight* Furniture GuardTIP

The edge cleaning feature provides for improved cleaning of carpets near walls and stationary furniture. For maximum edge cleaning, place the right side of the nozzle against the wall or furniture.
*R21PLUS only
TIP

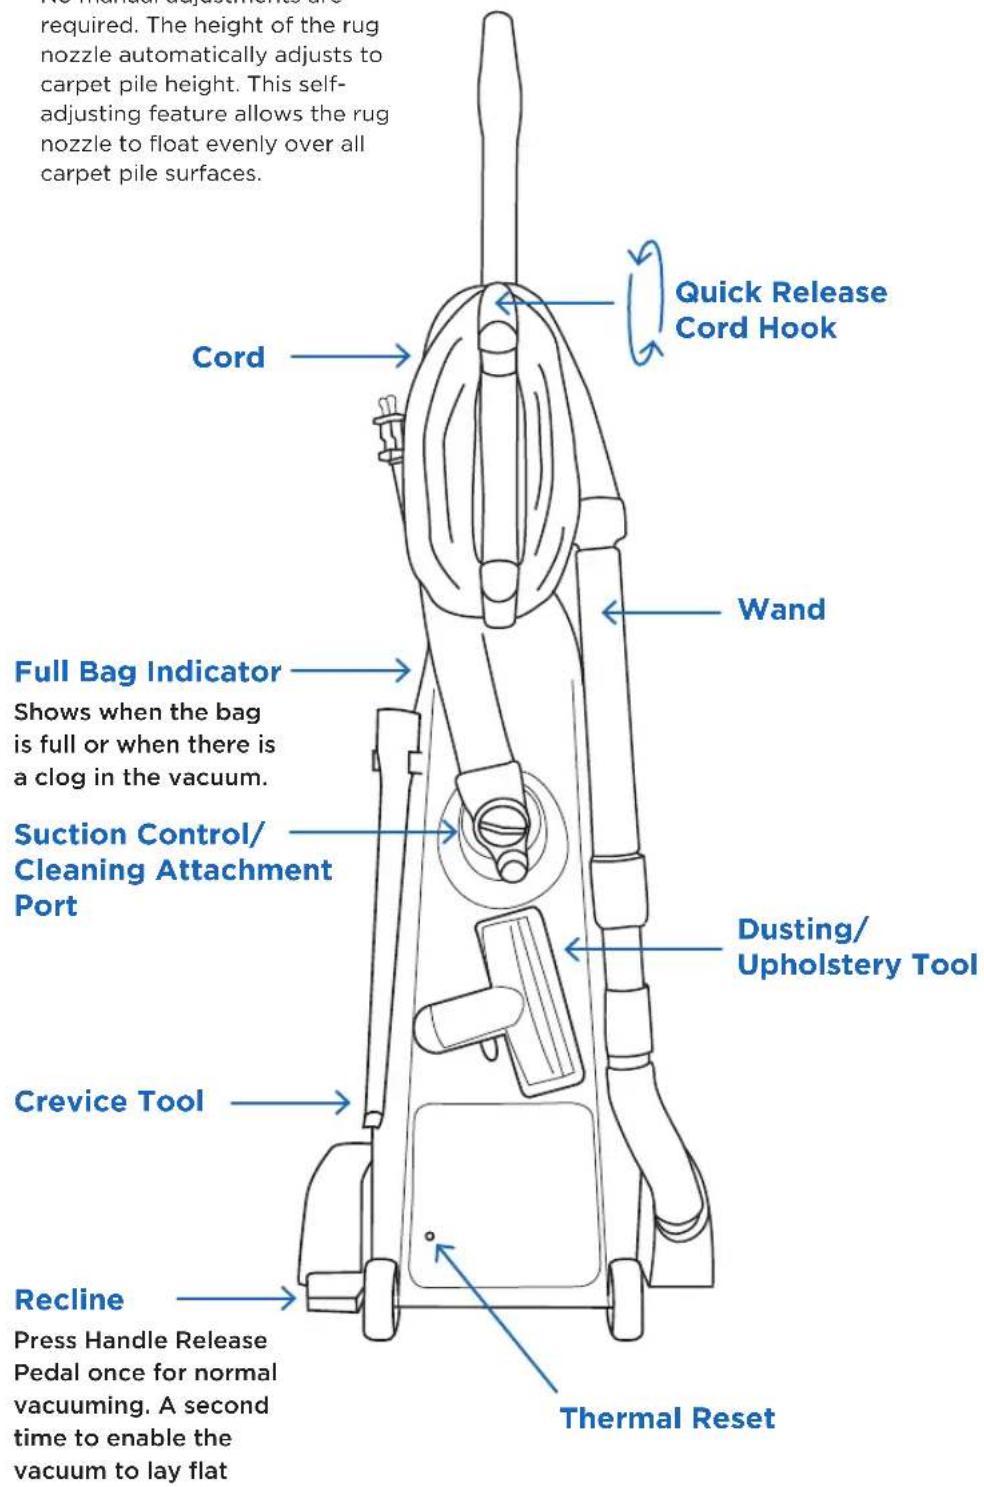
Your vacuum cleaner is designed with an automatic carpet height adjustment. No manual adjustments are required. The height of the rug nozzle automatically adjusts to carpet pile height. This self-adjusting feature allows the rug nozzle to float evenly over all carpet pile surfaces.
text_image
required. The height of the rug nozzle automatically adjusts to carpet pile height. This self- adjusting feature allows the rug nozzle to float evenly over all carpet pile surfaces. Cord Quick Release Cord Hook Wand Full Bag Indicator Shows when the bag is full or when there is a clog in the vacuum. Suction Control/ Cleaning Attachment Port Dusting/ Upholstery Tool Crevice Tool Recline Press Handle Release Pedal once for normal vacuuming. A second time to enable the vacuum to lay flat Thermal ResetCAUTION
The brush roll does not turn off. When using tools, running the vacuum in the same spot for a period of time could damage flooring. To protect the floor, place a piece of cardboard under the vacuum.
On / Off
01
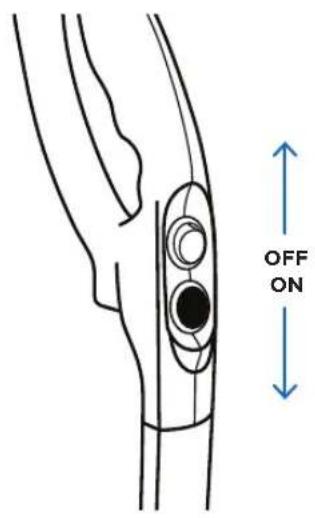
To start the vacuum cleaner, flip the "on / off" switch located on the handle to the "on" position.
02
To stop the vacuum cleaner, flip the "on / off" switch to the "off" position
03
Turn the vacuum cleaner off before unplugging from the electrical outlet.
text_image
OFF ONVacuuming Under Furniture
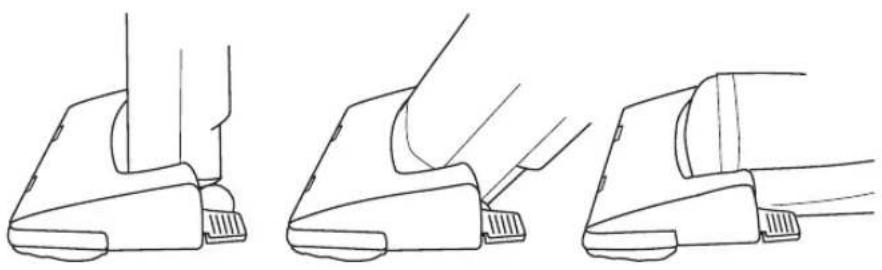
Your unit will lay flat on the floor for effective cleaning under beds and tables.
01
Press the foot pedal release once for normal vacuum cleaning.
02
Press the foot pedal release a second time to enable the vacuum to lay flat on the floor.
natural_image
Three line drawings of a mechanical device with a handle, showing different angles and motion directions (no text or symbols)Carrying The Vacuum
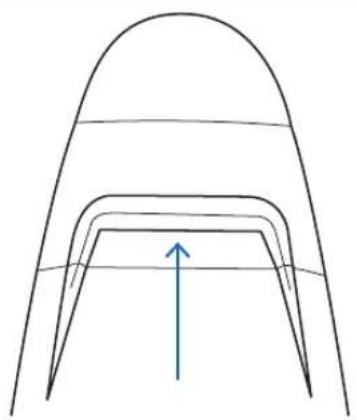
To safely transport your vacuum, especially when carrying the vacuum up and down stairs, use the carry handle.
natural_image
Simple line drawing of a curved structure with an upward arrow, no text or symbols presentAdjusting The Suction Power For Tool Cleaning
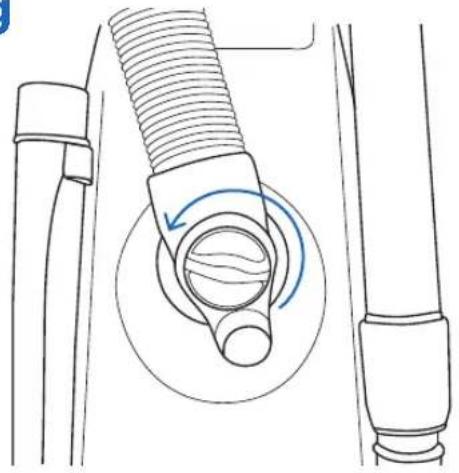
On the back of the vacuum, locate the suction control dial and turn it to the desired position. This reduces the suction power coming through the hose. Close the suction control dial when finished to restore full suction power.
natural_image
Technical line drawing of a mechanical component with threaded shaft and circular base, showing rotational motion (no text or symbols)Wand Cleaning
With the on-board cleaning tools and vacuum wand, your unit becomes a comprehensive cleaning system.
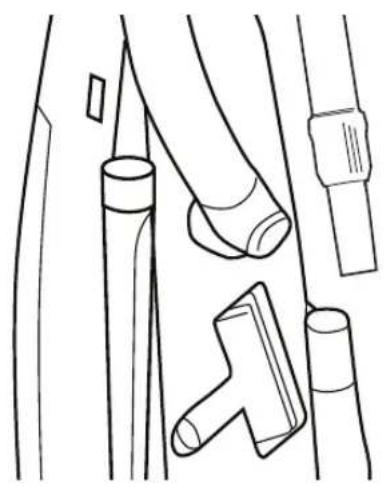
On-board tools include an upholstery tool, dusting brush, crevice tool, extension wand and stretch hose.
01
Remove the telescopic wand from the body of the vacuum.
02
Extend the wand by pushing the button forward and pulling the smaller wand out of the larger wand.
03
Attach any of the on-board tools to the end of the wand or if you do not need the wand, any tool can be connected directly onto the hose.
natural_image
Line drawing of mechanical components including rods, gears, and clamps (no text or symbols)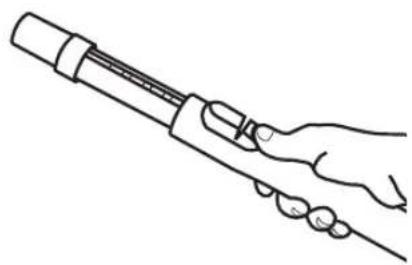
natural_image
Line drawing of a hand holding a cylindrical tool or spring (no text or symbols)Tool Cleaning
Your vacuum is equipped with a dusting brush, upholstery brush and crevice tool. Other tools are available at your authorized retailer.
Remove the cleaning wand from the vacuum Insert any of the tools onto the end of the wand.
Dusting Brush
Ideal for baseboards, shelves and blinds.
Upholstery Tool
Slide off the dusting brush to clean soft surfaces like upholstery.
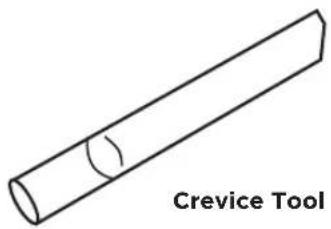
Crevice Tool
Ideal for tight places like between seat cushions or corners.
Bare Floor Tool\*
Natural bristles and microfiber gently remove dust from bare floors.

text_image
Wand with Dusting Brush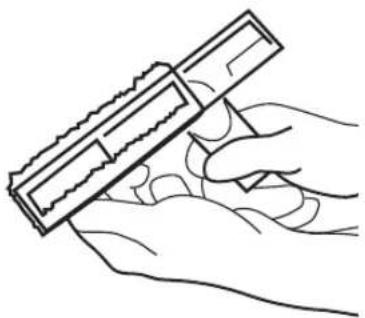
natural_image
Line drawing of a hand holding a tool or device with a serrated edge (no text or symbols)Dusting/Upholstery Tool
natural_image
Line drawing of a Crevice Tool with a cylindrical shaft and a curved cutout (no text or symbols on the tool itself)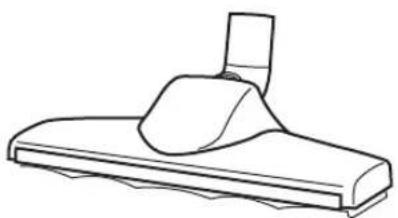
natural_image
Line drawing of a mechanical component or tool with a handle and base (no text or symbols)Bare Floor Tool*
SAFETY FIRST
UNPLUG VACUUM BEFORE PERFORMING ANY MAINTENANCE ON YOUR VACUUM.

Watch videos on basic maintenance
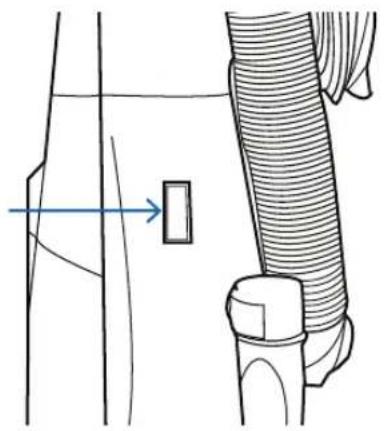
When to Change the Vacuum Bag/Full Bag Indicator Light
The full bag indicator light is designed to show when the bag is full or when there is a clog in the vacuum.
The system measures airflow and alerts the user when airflow is significantly reduced - most commonly from full bags and clogs.
Fine powders such as flour, drywall dust and ashes, can block bag pores, causing the light to illuminate. The vacuum bag should be changed.
The light could also come on during attachment cleaning.
natural_image
Technical line drawing showing a mechanical assembly with a rectangular component and a coiled cable (no text or symbols)NOTE: The vacuum bags are disposable and intended to only be used once.
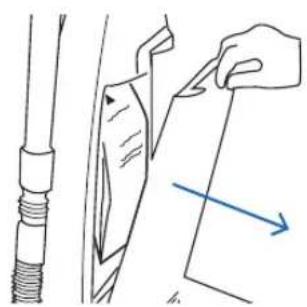
Replacing The Vacuum Bag
01
Open the bag compartment lid.
02
Grasp bag holder and pull the used bag off the bag holder. Attach the new bag onto the bag holder.
03
Tuck the bag corners into the vacuum before replacing the bag compartment lid.
natural_image
Illustration of a hand holding a tool over a mechanical component, with no visible text or symbols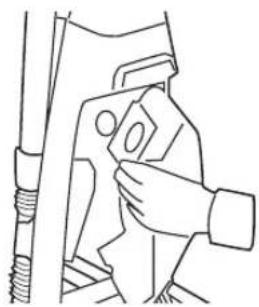
natural_image
Line drawing of a hand using a tool to adjust or install a mechanical component (no text or symbols present)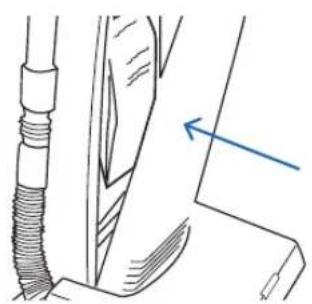
natural_image
Technical line drawing of a mechanical component with a blue arrow indicating direction (no text or symbols)When To Change The Filters
Replace the filters once a year or after using 12 vacuum bags, whichever comes first. If someone in your household is highly sensitive to airborne allergens, change the filters after every six vacuum bags.
Replacing The HEPA Post Filter
01
Open the bag compartment lid.
02
Locate the post filter on the inside base of the cover. Remove the used filter and discard. Press the new post filter into place.
03
Locate the secondary filter on the bottom of the bag compartment. Remove the foam filter and discard. Slide the new filter under the bag support
04
Close the bag compartment lid.
NOTE: Post filters cannot be washed.

natural_image
Technical line drawing of a mechanical component with a threaded rod and directional arrow (no text or symbols)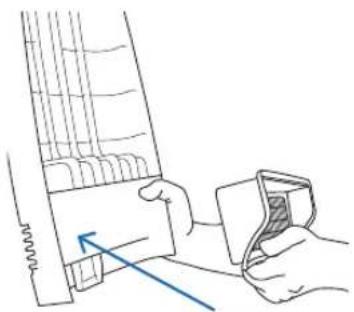
natural_image
Illustration of a hand holding a device with a blue arrow pointing to a component (no text or symbols present)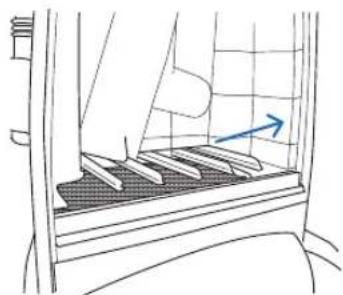
natural_image
Line drawing of a car interior showing a ladder and seat, with no text or symbols present.
natural_image
Technical line drawing of a mechanical component with a blue arrow indicating direction (no text or symbols)Removing And Reinstalling Bottom Plate
CAUTION: Disconnect the vacuum cleaner from the electrical outlet before removing the bottom plate.
01
Depress handle release pedal twice and place the vacuum cleaner in the low position.
02
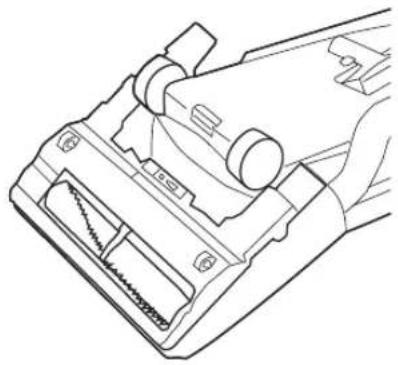
Turn vacuum cleaner over, exposing the underside.
03
Remove the screw at the bottom of the baseplate.
04
Press tabs inward on each side and pull bottom plate off.
05
Reinstall by placing lower edge of bottom plate along lower edge of nozzle. Snap plate into place. Place screw back into the baseplate and secure
natural_image
Line drawing of a mechanical device with handle and base components (no text or symbols)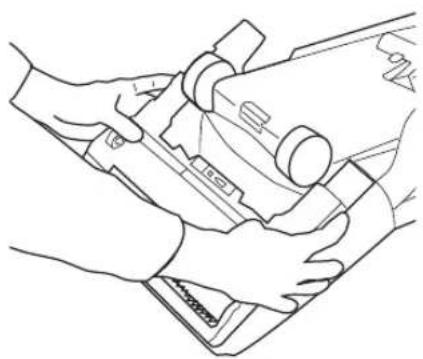
natural_image
Line drawing of hands operating a mechanical device (no text or symbols visible)
natural_image
Line drawing of hands holding a mechanical component (no text or symbols)Replacing The Agitator Belt
NOTE: To ensure maximum cleaning efficiency, the condition of the belt should be checked regularly. If belt is stretched, cracked or if excessive slipping is occurring, replace the belt.
01
Remove the bottom plate (see instructions).
02
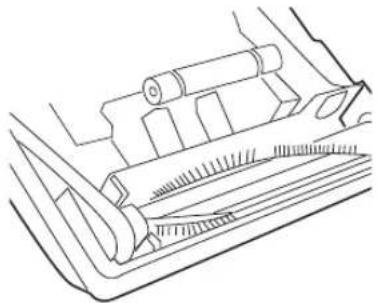
Remove brushroll and belt.
03
Loop the new belt around the motor drive shaft and brushroll pulley.
04
Reinstall the brushroll with fork facing down. The agitator should rotate freely.
05
Reinstall the bottom plate (see instructions).
natural_image
Technical line drawing of a mechanical assembly with rollers and a ruler (no text or symbols)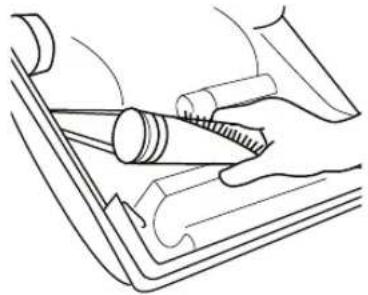
natural_image
Line drawing of a hand using a tool to cut a cylindrical component (no text or symbols)Removing Clogs
CAUTION: Disconnect the vacuum cleaner from the electrical outlet before cleaning nozzle housing.
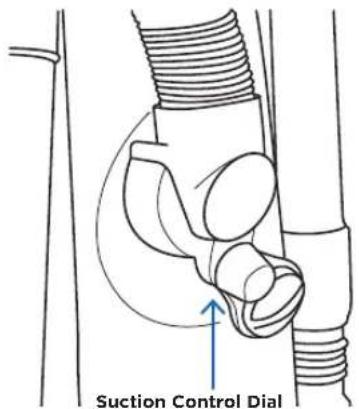
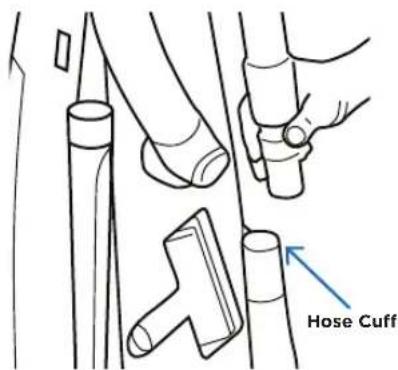
The nozzle hose, located on the back of the vacuum, carries the dirt from the nozzle to the vacuum bag. The hose also functions as the attachment cleaning hose. First check to see that a bag is installed or that the bag has not broken open.
text_image
Suction Control Dial01
Suction Control Dial - pull out and rotate open.
02
Hose cuff - at the nozzle inlet.
03
Nozzle inlet tube - remove the bottom plate to check for a clog.
text_image
Hose Cuff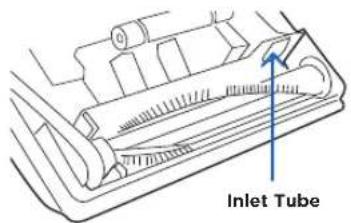
text_image
Inlet TubeThermal Reset
If the Thermal Motor Protection System shuts off your vacuum, follow these steps.
01
Unplug the vacuum.
02
Inspect the vacuum for a full bag condition or a hose clog and correct the problem.
03
Locate the Thermal Motor Protection Reset Button on the back of the vacuum. Press the button and resume vacuuming.
| PROBLEM CHECK | POINT POSSIBLE SOLUTION | |
| Vacuum won't turn on | Power cord not plugged in | Plug unit in firmly. |
| Blown fuse or tripped breaker | Check house fuse or breaker. Replace fuse/reset breaker. | |
| Needs Service Take to | an Authorized Retailer. | |
| Vacuum won't pick up or low suction | Vacuum bag full Instal | new bag. |
| Clogged filter Install new filter. | ||
| Hose clogged Remove obstacle. | ||
| Worn brushroll Replace brush strips. | ||
| Broken belt Replace belt. | ||
| Dust escaping from vacuum | Dust cover not installed correctly | Reinsert the dust cover and secure latch. |
| Filter not installed correctly | Review filter installation. | |
| Vacuum bag not installed correctly | Review bag installation. | |
Any other service should be performed by an Authorized Riccar Vacuum Retailer. To locate your nearest Authorized Retailer, visit our website at Riccar.com or call 888-674-2227.
Key Replacement Parts
- Genuine HEPA Media Vacuum Bags: RAH-6
• Genuine Filter Set: RVPF - Vacuum Belt: RS20-B2
For Best Performance
- Keep your vacuum and accessories clean and in good operating condition.
- Change the vacuum bag once a month or when the bag is 2/3 full. Change filters as recommended or at least annually to maximize cleaning performance.
- Always use Genuine Riccar bags, filters and parts, as other products may result in poor cleaning or filtration performance.
- Have your vacuum checked periodically by an Authorized Riccar Retailer.
- Store your vacuum carefully in a dry area.
- For optimum cleaning performance and safety, follow your owner's manual.
LEAVE A REVIEW
We want to hear from you!
Please let us know what you think of your new vacuum by leaving a product review on Riccar.com.

WARRANTY
Thank You for your purchase! Register Online Today.

Riccar.com/register-warranty
For Warranty Information visit

Riccar.com/warranty-information
INSTRUCTIONS DE SÉCURITÉ IMPORTANTES
LISEZ ET COMPRENEZ TOUTES LES INSTRUCTIONS AVANT D'UTILISER CET
natural_image
Simple line drawing of two electrical socket sockets with a bulb above (no text or symbols)AVERTISSEMENT!
natural_image
Technical line drawing of a mechanical component with an arrow indicating direction (no text or symbols)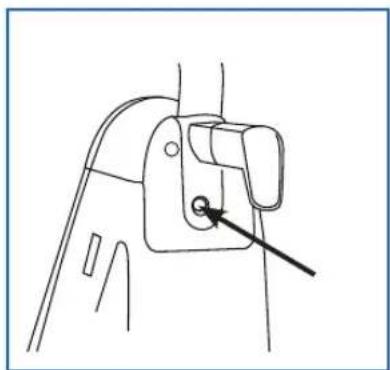
natural_image
Line drawing of a mechanical component with a pointer and arrow indicating direction (no text or symbols)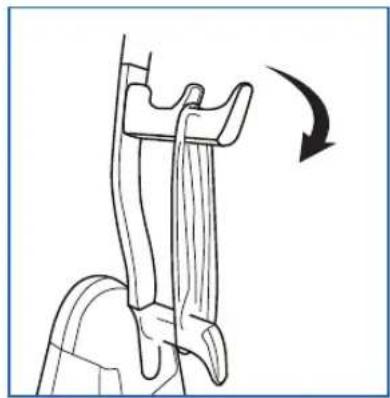
natural_image
Diagram of a mechanical component with an arrow indicating rotation (no text or symbols present)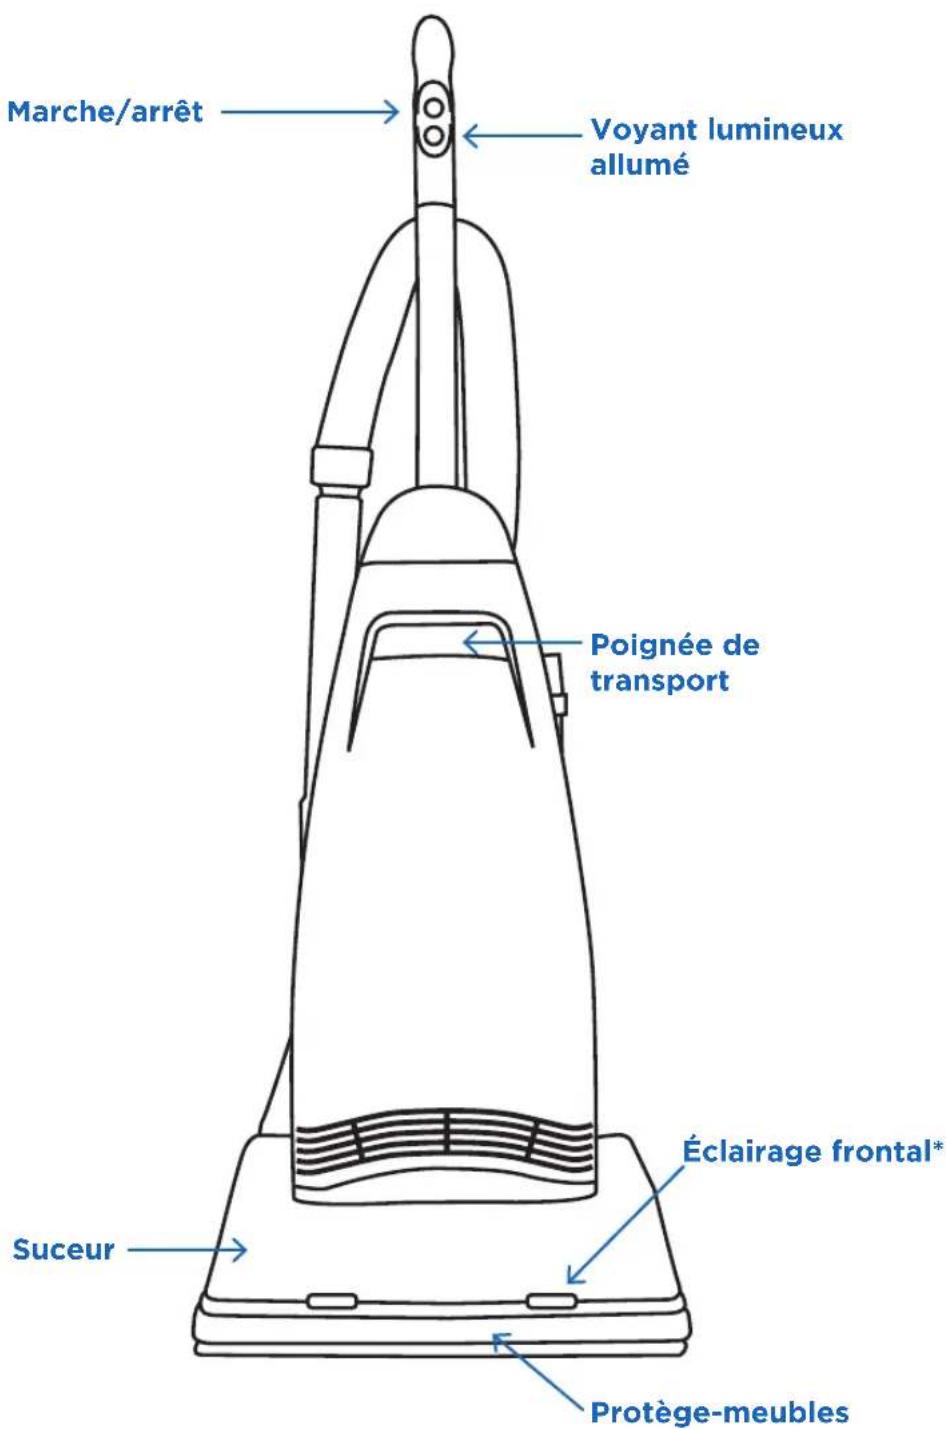
natural_image
Line drawing of a mechanical component or tool (no text or symbols)
text_image
de se me
natural_image
Line drawing of a mechanical component or tool (no text or symbols)natural_image
Simple line drawing of a curved structure with an upward arrow, no text or symbols presentnatural_image
Technical line drawing of a mechanical component with a threaded fastener and rotating knob (no text or symbols)natural_image
Line drawing of mechanical components including rods, gears, and clamps (no text or symbols)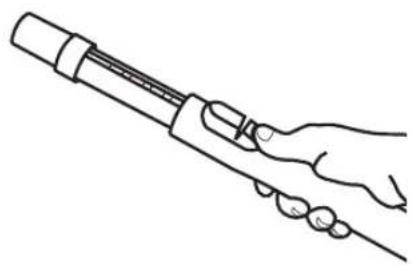
natural_image
Line drawing of a hand holding a pen or stylus (no text or symbols)natural_image
Line drawing of a hand holding a mechanical component (no text or symbols)natural_image
Simple line drawing of a Suceur plat with a cylindrical body and a small circular hole (no text or symbols)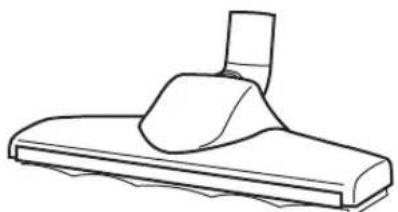
natural_image
Line drawing of a mechanical component or tool with a curved handle and base (no text or symbols)natural_image
Diagram showing a mechanical component with a rectangular element and a curved line, no text or symbols presentnatural_image
Illustration of a hand holding a tool interacting with a mechanical component (no text or symbols)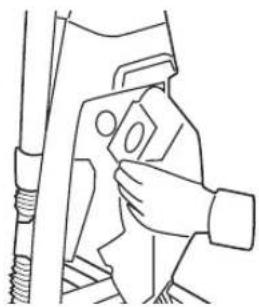
natural_image
Line drawing of a hand using a tool to adjust or install a mechanical component (no text or symbols present)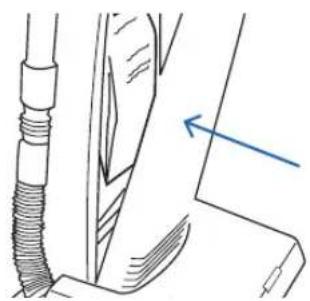
natural_image
Technical line drawing of a mechanical component with threaded end and angled edge (no text or symbols)natural_image
Technical line drawing of a mechanical component with a threaded rod and directional arrow (no text or symbols)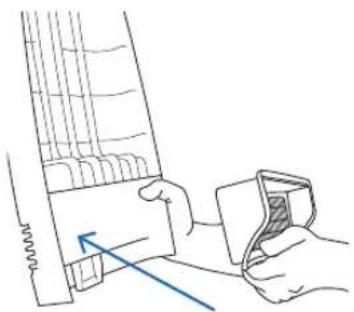
natural_image
Illustration of a hand holding a tool next to a mechanical component with a blue arrow indicating direction (no text or symbols)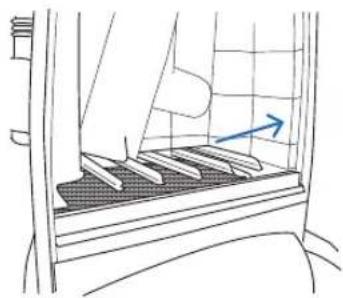
natural_image
Line drawing of a person climbing stairs with a blue arrow indicating direction (no text or symbols)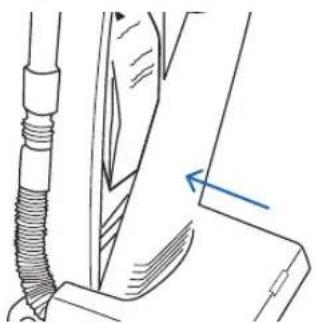
natural_image
Technical line drawing of a mechanical component with a blue arrow indicating direction (no text or symbols)natural_image
Technical line drawing of a mechanical clamp or bracket assembly (no text or symbols)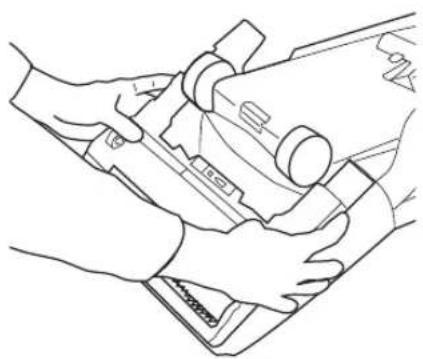
natural_image
Line drawing of hands operating a mechanical device (no text or symbols)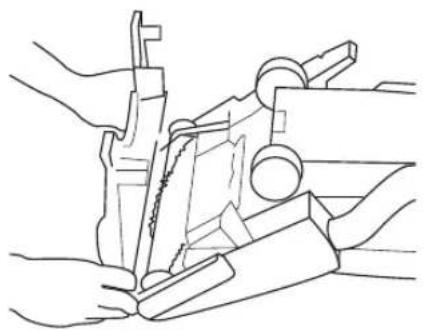
natural_image
Line drawing of hands holding a mechanical component (no text or symbols)natural_image
Technical line drawing of a mechanical assembly with rollers and a ruler (no text or symbols)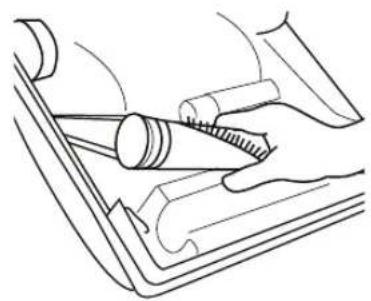
natural_image
Line drawing of a hand using a tool to cut or install a mechanical component (no text or symbols present)Enlever les sabots
Riccar.com/register-warranty
Riccar.com/warranty-information
natural_image
Line drawing of a cable and two electrical outlets (no text or symbols)¡ADVERTENCIA!
natural_image
Technical line drawing of a mechanical component with an arrow indicating direction (no text or symbols)
natural_image
Line drawing of a mechanical component with a pointer and arrow indicating direction (no text or symbols)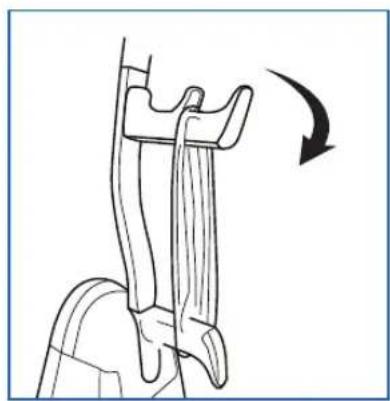
natural_image
Diagram of a mechanical component with an arrow indicating rotation (no text or symbols present)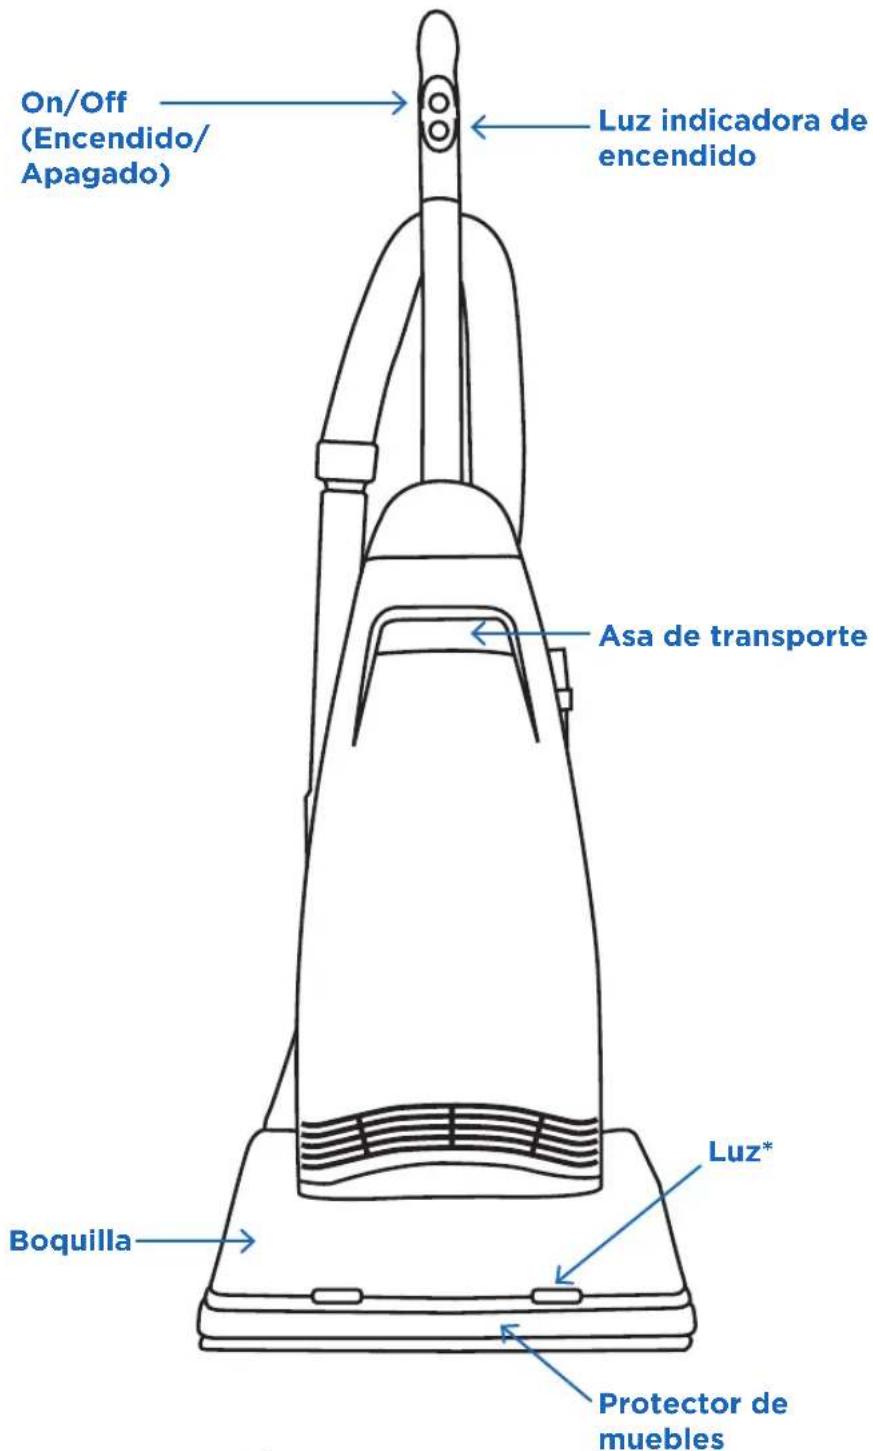
natural_image
Three line drawings of a mechanical device with a handle, shown from top to side (no text or symbols)natural_image
Simple line drawing of a curved structure with an upward arrow, no text or symbols presentnatural_image
Technical line drawing of a mechanical assembly with threaded component and rotating knob (no text or symbols)Limpieza de varilla
natural_image
Line drawing of mechanical components including rods, gears, and clamps (no text or symbols)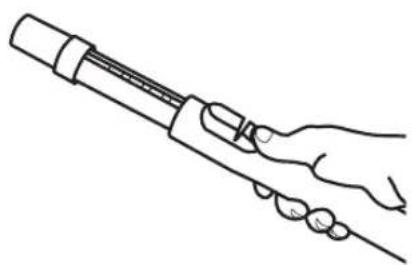
natural_image
Line drawing of a hand holding a cylindrical tool (no text or symbols)natural_image
Line drawing of a hand holding a mechanical component (no text or symbols)natural_image
Line drawing of a mechanical component or tool with a curved handle and base (no text or symbols)natural_image
Diagram showing a mechanical component with a rectangular element and directional arrow, no text or symbols presentnatural_image
Illustration of a hand holding a tool over a mechanical component, with no visible text or symbols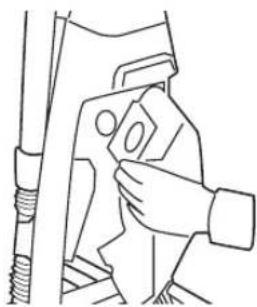
natural_image
Line drawing of a hand using a tool to adjust or install a mechanical component (no text or symbols present)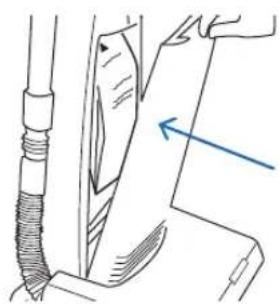
natural_image
Technical line drawing of a mechanical component with a blue arrow indicating direction (no text or symbols)natural_image
Technical line drawing of a mechanical component with no visible text or symbols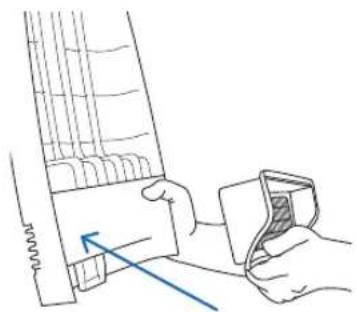
natural_image
Line drawing of a hand holding a device with a blue arrow pointing to a component (no text or symbols present)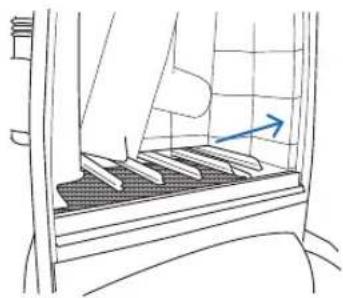
natural_image
Line drawing of a person climbing stairs with a blue arrow indicating direction (no text or symbols)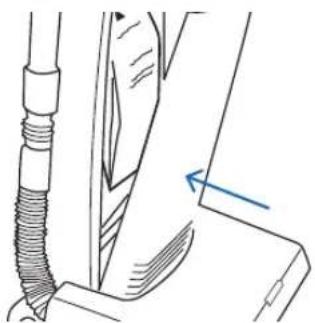
natural_image
Technical line drawing of a mechanical component with a blue arrow indicating direction (no text or symbols)natural_image
Technical line drawing of a mechanical clamp or bracket assembly (no text or symbols)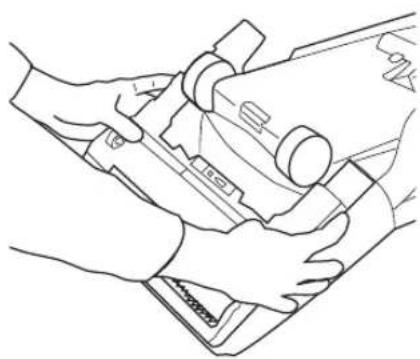
natural_image
Line drawing of hands operating a mechanical device with no visible text or symbols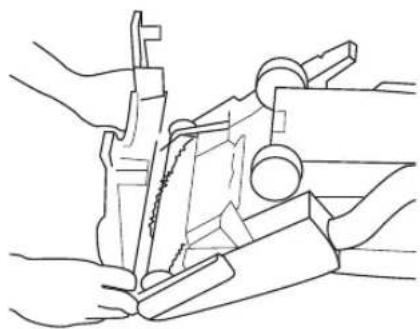
natural_image
Line drawing of hands operating a mechanical device with no visible text or symbolsnatural_image
Technical line drawing of a mechanical assembly with rollers and a tool (no text or symbols)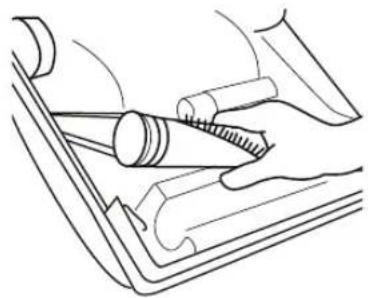
natural_image
Line drawing of a mechanical assembly with gears and shafts (no text or symbols)Riccar.com/register-warranty
Riccar.com/warranty-information
RICCAR®
RICCAR.COM
888-674-2227
1760 GILSINN LANE
FENTON, MO 63026