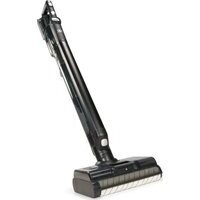
Multi-Clean Deluxe R70 - Vacuum Cleaner Riccar - Free user manual and instructions
Find the device manual for free Multi-Clean Deluxe R70 Riccar in PDF.


User questions about Multi-Clean Deluxe R70 Riccar
0 question about this device. Answer the ones you know or ask your own.
Ask a new question about this device
Download the instructions for your Vacuum Cleaner in PDF format for free! Find your manual Multi-Clean Deluxe R70 - Riccar and take your electronic device back in hand. On this page are published all the documents necessary for the use of your device. Multi-Clean Deluxe R70 by Riccar.
USER MANUAL Multi-Clean Deluxe R70 Riccar
text_image
RICCAR® Owner's Manual Riccar® Multi-Clean Deluxe Smart Mop and Vacuum R70RICCAR®
Owner's Manual
Riccar® Multi-Clean
Deluxe Smart Mop
and Vacuum
R70
Specifications....4
Safety Precautions....5-8
Getting to Know Your Vacuum 9
Assembly Instructions....10-11
Control Panel 12
Using Your Vacuum....13-23
Charging Your Vacuum....13
Smart Commands....14-15
Using Auto Mode....15
Battery Notifications....16
Clean Water Tank....17
Dirty Water Tank....18
Nozzle Water Spray 19
Self-Clean Mode....20-21
Using the Handheld Vacuum Cleaner....22
Using Your Attachments....23
Care & Maintenance 24-27
Dry Vacuum Accessory Package (Sold Separately).....28
Using the Dry Vacuum Accessory Package....29
Assembling the Accessory Package Base....30
Accessory Package Maintenance....31
Storage 32
Troubleshooting 33-34
Warranty 34
| Model | R70 |
| Battery Type | DC 21.6V, 5000mAh Li-ion battery |
| Charging Input | AC 100-240V, 50/60Hz |
| Charging Time | 5 hours |
| Wet Cleaning Runtime | 20 - 29 minutes |
| Dry Cleaning Runtime | 20 - 90 minutes |
| Clean Water Tank Capacity | 2.75 cups / .65 liters |
| Dirty Water Tank Capacity | 2.54 cups / .6 liters |
| Dust Cup Capacity | .85 cups / .2 liters |
| Weight | 11.3 lbs. (fully assembled)3.59 lbs. (handheld and battery only) |
| Rated Power | 500W |
| Suction Power | 200AW |
| Waterproof Rating | IPX8 |
IMPORTANT SAFETY INSTRUCTIONS
Before using this product, please read all the instructions and warnings in this user guide and on the product.
When using electrical appliances, always follow basic precautions to reduce the risk of fire, electric shock and injury.
IMPORTANT. Riccar cannot accept responsibility for damage caused when the appliance is not used according to the instructions or for uses other than those for which it was intended.
WARNING:
- Before connecting the product to the power supply, be sure to check whether the local voltage is consistent with the voltage marked on the power adapter.
- Before use, inspect the product. If the product, battery or adapter is damaged, do not use it.
- Follow the method described in this manual. DO NOT perform any maintenance operations other than the instructions in this manual. Use only Riccar recommended attachments.
- DO NOT allow children, or persons suffering from physical, sensory or intellectual disabilities, or persons without relevant experience and knowledge, to use the product unless they are supervised to ensure they can use this product safely.
- DO NOT allow this product to be used as a toy. Close attention is necessary when used around or near children.
- DO NOT touch the plug and any part of the product with wet hands.
- If the cables, plugs, batteries or parts are damaged, do not use, disassemble or replace any parts by yourself. Disassembly and replacement of parts by yourself may cause electric shock or fire, and Riccar is not responsible for this. Once damaged, it must be repaired or replaced by Riccar, its service agent, or qualified personnel designated by Riccar to avoid hazards.
- Use the original Riccar charger to charge this product.
- Use the original Riccar battery: other types of batteries may burst, causing personal injury or product damage.
- If the product does not operate in accordance with this manual, is severely impacted, falls from a height, is damaged, or falls into the water, please do not use it. Contact an authorized Riccar service center.
- Do not wash the floor nozzle assembly.
-
Use only Riccar genuine replacement parts and spare parts.
-
Do not pull or stress the cables. Please keep the cables away from heated surfaces. Do not place the cable in a closed door gap or pull it through sharp edges or corners. Keep the cables away from moving areas and places where they can be tripped. Don't press the cables with the product.
- Do not suck the water under the handheld vacuum cleaner.
- Do not use this vacuum cleaner to pick up flammable or explosive liquids such as gasoline or use this machine in places where these liquids or vapors may exist.
- Do not use this vacuum cleaner to pick up any burning or smoking objects, such as cigarette butts, matches or hot ash.
- Unplug when not used or before performing maintenance.
- Do not drag the cord or carry the cable to move the product, or use the cable as a handle.
- Use caution when cleaning stairs. Beware the machine may tip and cause personal injury.
- Turn off the machine before connecting any tools or accessories.
- Please read these instructions carefully and keep them safe.
- Before using the machine, please read the owner's manual carefully, and pay attention to the safety warning contents to avoid safety accidents caused by improper use. Electrical appliances must be switched off before cleaning or maintenance. This mark is the symbol of water suction power cleaning head.
- Electrical appliances must be switched off before cleaning or maintenance.
- This mark is the symbol of water suction power cleaning head.
- For optimal performance, use only Riccar cleaning solution in your machine. Other formulas or household cleaners may cause defects or damage to the machine or floor.
- Wet application not recommended for unsealed hard wood floors.
IMPORTANT SAFETY INSTRUCTIONS
-
Water/Solution may drip from bottom of nozzle after use and may create a puddle of liquid. Avoid damage to wood and laminate floor and to help avoid slip hazards, store the machine in the charger base after use.
-
Do not use without filters in place.
-
Keep the battery pack away from metal objects or surfaces such as paper clips, coins, keys, screws, metallic surfaces or other metal objects that can make a connection from one terminal to another. Shorting the battery terminals may cause burns or fire.
-
Charge only with Battery installed and on charging base. Improper charging may increase the risk of damage and fire.
-
Do not leave appliance when plugged in. Unplug from outlet when not in use and before servicing.
-
Do not use outdoors or on wet surfaces
-
Use only as described in this manual. Use only manufacturer's recommended attachments.
-
Do not use with damaged cord or plug. If the appliance is not working as it should, has been dropped, damaged, left outdoors, or dropped into water, return it to a service center.
-
Do not unplug by pulling on cord. To unplug, grasp the plug, not the cord.
-
Do not put any object into openings. Do not use with any opening blocked; keep free of dust, lint, hair, and anything that may reduce air flow.
-
Use extra care when cleaning on stairs.
-
Do not use to pick up flammable or combustible liquids, such as gasoline, or use in areas where they may be present.
-
Prevent unintentional starting. Ensure the switch is in the off-position before connecting to battery pack, picking up or carrying the appliance. Carrying the appliance with your finger on the switch or energizing appliance that have the switch on invites accidents.
-
Disconnect the battery pack from the appliance before making any adjustments, changing accessories, or storing appliance. Such preventive safety measures reduce the risk of starting the appliance accidentally.
-
Recharge only with the charger specified by the manufacturer. A charger that is suitable for one type of battery pack may create a risk of fire when used with another battery pack.
-
Use appliances only with specifically designated battery packs. Use of any other battery packs may create a risk of injury and fire.
-
When battery pack is not in use, keep it away from other metal objects, like paper clips, coins, keys, nails, screws or other small metal objects, that can make a connection from one terminal to another. Shorting the battery terminals together may cause burns or a fire.
-
Under abusive conditions, liquid may be ejected from the battery; avoid contact. If contact accidentally occurs, flush with water. If liquid contacts eyes, additionally seek medical help. Liquid ejected from the battery may cause irritation or burns.
-
Do not use a battery pack or appliance that is damaged or modified. Damaged or modified batteries may exhibit unpredictable behavior resulting in fire, explosion or risk of injury.
-
Do not expose a battery pack or appliance to fire or excessive temperature. Exposure to fire or temperature above 265^ F (130C) may cause an explosion.
-
Follow all charging instructions and do not charge the battery pack or appliance outside of the temperature range 41^ F (5C) to 104^ F (40C). Charging improperly or at temperatures outside of the specified range may damage the battery and increase the risk of fire.
-
Have service performed by a qualified repair person using only identical replacement parts. This will ensure that the safety of the product is maintained.
-
Do not modify or attempt to repair the appliance or the battery pack (as applicable) except as indicated in the instructions for use and care.
-
For use only with R70 model CR70-0001 battery and R70 charger model CR770-0003.
ADDITIONAL SAFETY PRECAUTIONS
- Before using this product, read this user guide carefully, and install the machine in accordance with the steps in the user guide, and keep it for future reference. This product is suitable for operation and use in a regular household environment, not for industrial and outdoor use.
- In the user guide, there may be slight differences between the product design and specification data and the actual product. Please refer to the actual product.
- This product is a rechargeable electric appliance. Do not allow the machine to run alone without being supervised.
- When charging, use the Riccar charger. Other types of chargers may cause the battery to malfunction or damage the battery and render it unusable.
- When cleaning, repairing or you won't use the product for a long time, the battery pack must be removed from the vacuum cleaner and stored in a place away from high temperature, fire, and flammable products.
- Do not pull or carry by cord, use cord as a handle, close a door on cord, or pull cord around sharp edges or corners. Do not run appliance over cord. Keep cord away from heated surfaces.
- Please do not use the stick vacuum cleaner or the handheld vacuum cleaner to pick up heat-generating objects such as carbon, cigarette butts; sharp objects such as broken glass; lime, cement, carbon powder, toner, toner, gypsum powder, flour and other ultra-fine substances; disinfectant, acid-base cleaning liquid, washing powder and other corrosive liquids; gasoline, alcohol, perfume, paint and other flammable and explosive materials, otherwise it may damage the machine or cause fire and personal injury and other accidents.
- This product is intended for indoor sealed hard floors, including waxed floors, rubber floors, marble floors, granite floors, seamless wood floors, solid wood floors and various ceramic tiles. Uneven surfaces may produce less than desirable benefits.
- Avoid exposure to heating appliances or prolonged exposure to the sun.
- Do not get the machine body wet, otherwise, fire and electric shock may occur due to a short circuit of the machine.
-
Don't allow people with behavior impairments or people with inexperience and common sense to play with it; don't point the airflow channels or moving parts to the eyes, long hair or loose clothing to avoid accidents.
-
Do not shake the machine. When turned on, do not lift or carry the machine up and down, nor tilt the machine to one side or flat on the floor to prevent wastewater from flowing into the electrical parts.
- Do not block the airpath at the inlet and outlet of the machine to prevent the machine from overheating.
- The machine body, wet nozzle, main body and base contain electrical parts. Do not clean by submerging or placing these parts under running water.
- After using the machine, clean and dry the dirty parts of the wastewater tank, suction inlet, air duct and shell surface. Store them in a ventilated and dry place. Moisture will affect the insulation and service life of the electrical appliances.
- Clean the wastewater tank after each use. Ensure the airpath is not blocked to avoid poor performance and motor overheating, which can affect the performance and life of the product. After use, place the unit out of walkways against a wall to avoid creating a trip hazard.
- Do not use in the wet application mode with the wastewater tank and/or the clean water tank not installed.
- Do not remove the window cover or brush roller when the machine is powered on or running. Personal injury can occur.
- If the charger wire or plug is damaged, and the machine fails to work normally due to its damage, do not disassemble the closed machine. Attempting to repair or alter performance of the machine can be dangerous. Contact your nearest authorized Riccar retailer for assistance.
- Unplug the charging socket when not in use.
- Precautions on cleaning solutions:
a. Do not use a large amount of cleaning solution.
b. Do not use solutions containing acid, alkali, foaming or cleaners harmful to the machine and environment. - Disposing of batteries:
a. Shut down/power off the product.
b. Remove the battery from the machine.
c. Dispose of discarded battery pack safely and properly. Do not throw it into fire, water or soil.
d. If the battery waste leaks and contacts the skin or clothing, wash thoroughly with clean water and seek medical attention.
ADDITIONAL SAFETY PRECAUTIONS
- The technology and data mentioned in the product manual are obtained by our company's laboratory or a designated third-party testing company. The company reserves the right of final interpretation.
- This machine contains batteries or recyclable e-waste. The rechargeable battery contains substances that may pollute the environment. When discarding the product, drop it off at an electronic hazardous waste collection facility.
- Turn off all controls before unplugging or removing the battery.
- Use caution when carrying the appliance. Do not carry the appliance with your finger over the ON switch to prevent unintentional starting.
- Do not modify or attempt to repair the battery or appliance except as indicated in the instructions.
- Store machine in dry place and avoid direct sunlight.
text_image
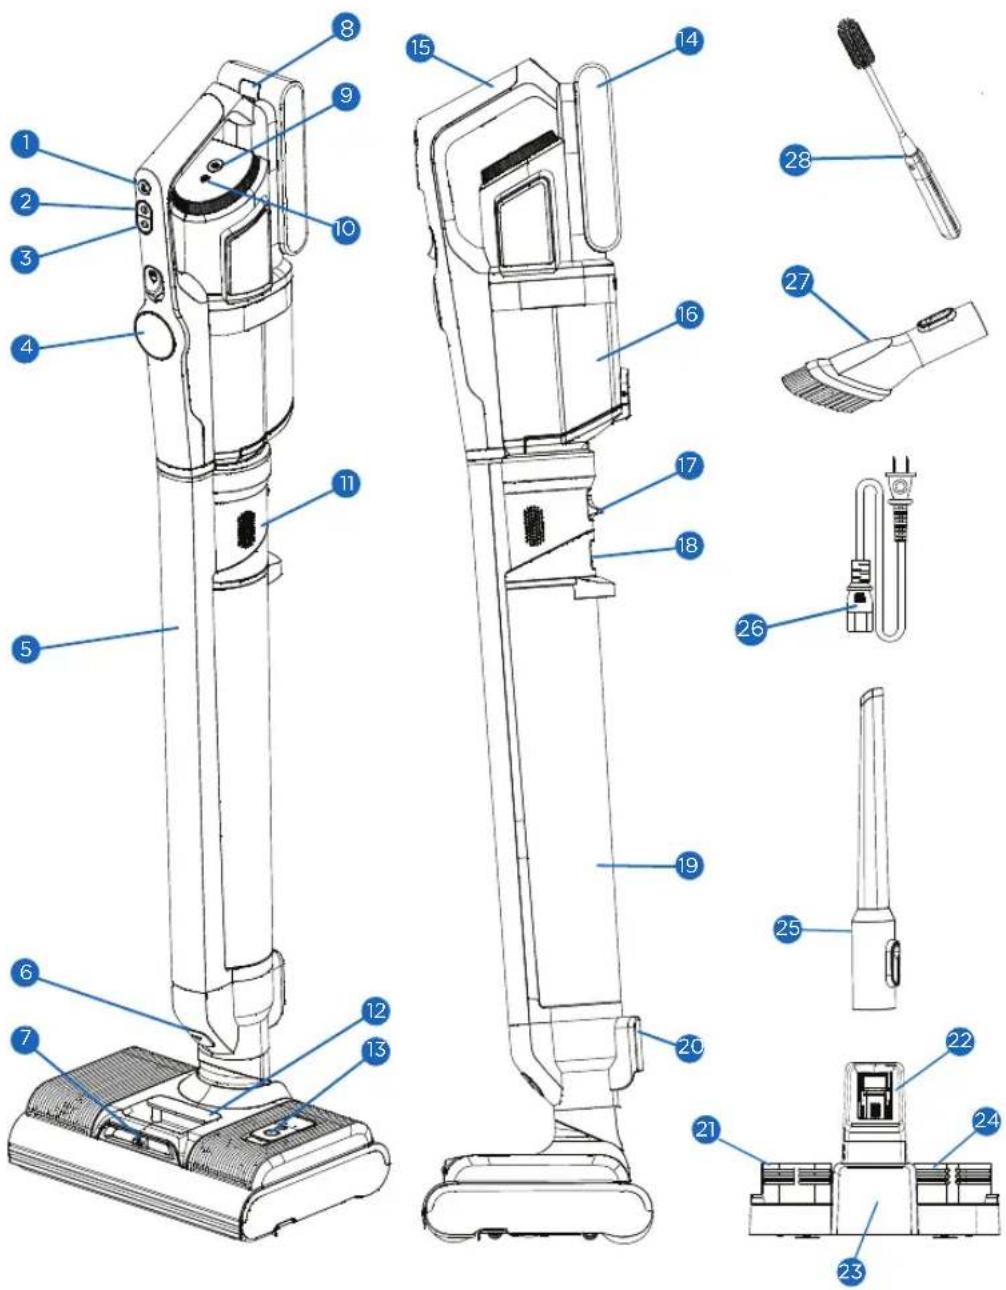
Technical diagram of a vacuum cleaner with numbered parts for identification and assembly reference.- Manual Water Spray Button
- On/Off Button
- Mode Button
- Display Screen
- Main Body
- Nozzle Release Button
- Clean Water Spray Point
- Battery Release Button
- Self-Clean Button
- Voice Control Button
- Speaker
- Clean Water Tank Release Handle
- Water Tank Fill Door
-
Battery
-
Handle
- Dust Cup
- Handheld Vacuum Release
- Dirty Water Tank Release
- Dirty Water Tank
- Charging Port
- Cleaning Solution Holder
- Base Charging Port
- Cleaning/Charging Base
- Accessory and Cleaning Brush Holder
- Flexible Crevice Tool
- Power Cord
- Dusting Brush
- Cleaning Brush
Vacuum Setup
01
Insert the main body assembly into the floor nozzle until it "clicks" into place.
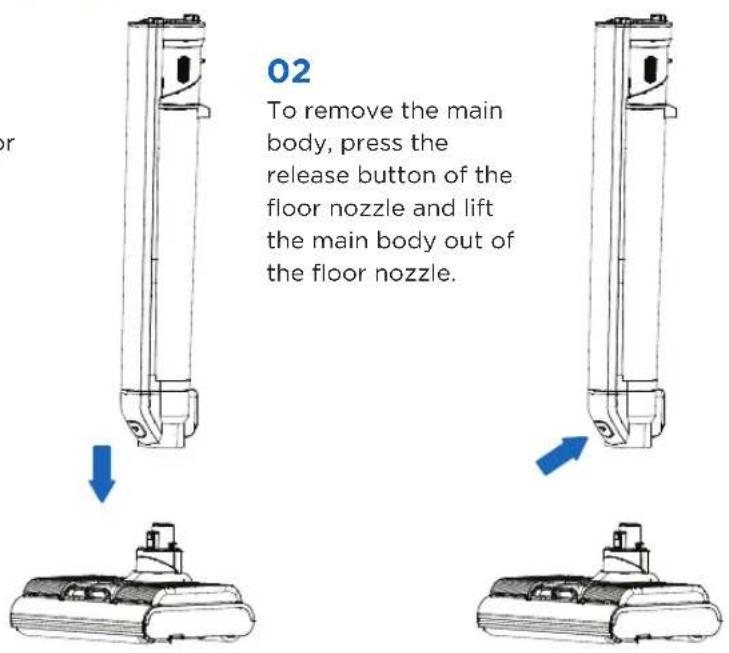
02
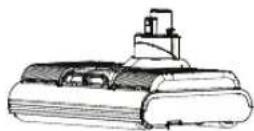
To remove the main body, press the release button of the floor nozzle and lift the main body out of the floor nozzle.
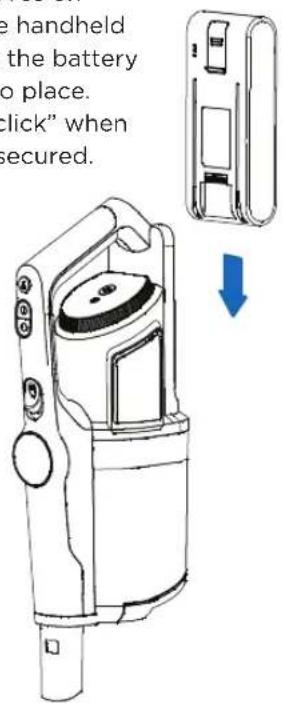
Battery Installation
01
Align the battery pack along the grooves on the back of the handheld vacuum. Press the battery pack firmly into place. You'll hear a "click" when the battery is secured.
text_image
e handheld the battery o place. click" when secured.02
To remove the battery, press the battery pack release button, and pull the battery out.

natural_image
Technical line drawing of a mechanical device with blue directional arrows indicating motion or force (no text or symbols)Body Setup
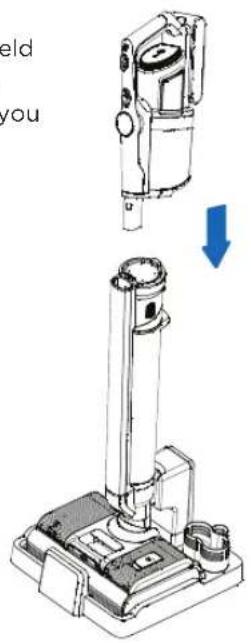
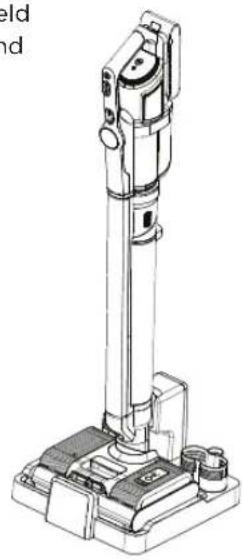
01
Insert the handheld vacuum into the main body until you hear a "click."
text_image
yeld youHandheld release button
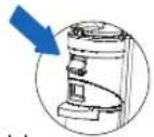
02
To remove the handheld unit, hold down the handheld release button and lift up.
natural_image
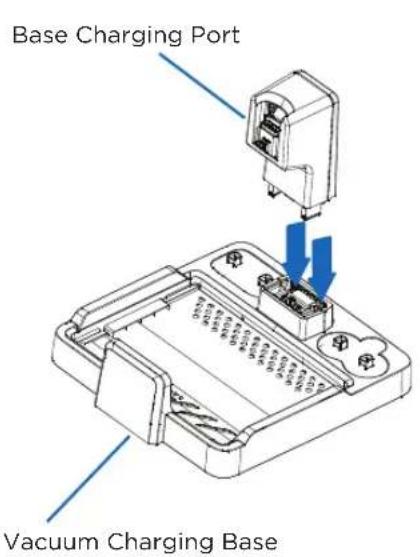
Technical line drawing of a vacuum cleaner device with mounting base and control panel (no text or symbols)Charging Base Set Up
Press the base charging port into the vacuum charging base as shown in the Figure 1. You will hear a "click" when it's secured in place.
text_image
Base Charging Port Vacuum Charging Base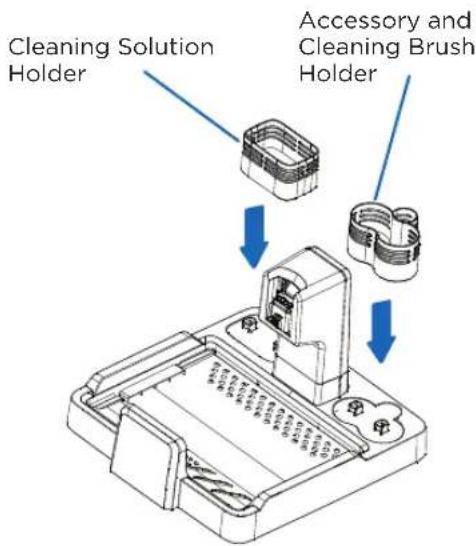
text_image
Cleaning Solution Holder Accessory and Cleaning Brush HolderFigure 1 Figure 2
Attach the cleaning solution holder and accessory holder to the charging base as shown in the Figure 2. You will hear a "click" when parts are secured in place.
PLEASE NOTE: Skip this step if you purchased the Dry Vacuum Accessory Package. See Assembling the accessory package base for instructions.
text_image
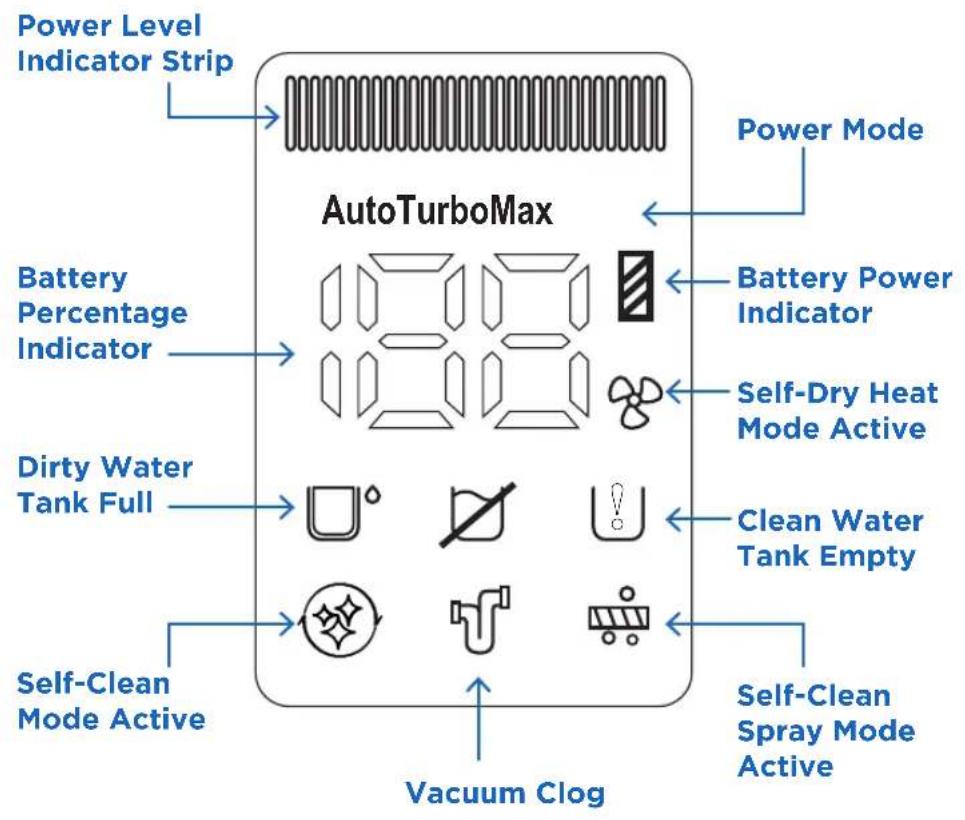
Power Level Indicator Strip AutoTurboMax Battery Percentage Indicator Battery Power Indicator Self-Dry Heat Mode Active Dirty Water Tank Full Clean Water Tank Empty Self-Clean Mode Active Vacuum Clog Self-Clean Spray Mode ActiveCharging the Vacuum
Connect the power cable to the power supply, and place the assembled vacuum onto the charging base to enter the charging mode.
NOTE
- Before the first use, please fully charge the battery pack; before the second charge, fully discharge the battery pack power to ensure the battery pack life.
- With prolonged storage, the battery pack must be charged once every three months.
- When not charging the machine, remove the power cable from the socket.
• Vacuum battery must be attached to handheld unit and machine fully assembled to charge.
01
With the vacuum in the upright position, align the vacuum charging port with the base charging port, and guide into place.
02
When ready to use, hold the vacuum handle and pull the machine directly up from the charging base.

natural_image
Technical illustration of a vacuum cleaner with a blue arrow indicating the component (no text or symbols present)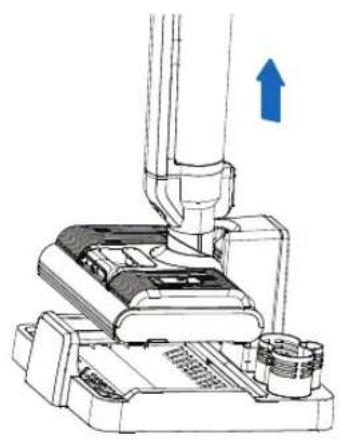
natural_image
Mechanical assembly diagram showing a component being inserted into a housing, with a blue arrow indicating direction (no text or symbols present)Smart Commands
The Riccar Multi-Clean Deluxe Smart Mop and Vacuum is equipped with smart commands. Your vacuum will vocalize reminders throughout cleaning, self-cleaning, and drying mode. Reminders are designed to enhance the cleaning process. Notifications are available in Chinese, English, French, German, Italian, Korean, Russian, and Spanish. Notifications can be muted. Your vacuum will chime when turned on.
Smart Commands Notifications
- Auto Mode: Vacuum is set to automatic suction mode mode.
- Max Mode: Vacuum is set to maximum suction mode.
- Auto water spray turned off: Auto spray is off and manual spray is required.
- Start auto water spray: Auto spray mode is starting.
- Please install the dirty water tank: Dirty water tank needs to be installed.
- Please clean tunnel and filters: Filter and tunnels need to be cleaned because of a clog.
- Please clean brushroll: Brushroll is stuck or jammed and needs to be cleaned.
- Start charging, please clean the dirty water tank to avoid odors: Vacuum is charging on base. Please ensure the dirty water tank is clean.
- English language set: English language has been selected and set. Will announce other languages if a different language is selected.
- Voice turned off: Smart Commands have been turned off and muted. Vacuum will no longer announce Smart Commands.
- Make sure there is water in the clean water tank: Check that the clean water is full. Refill if needed.
- Please refill the clean water tank: Clean water tank is too low and needs to be refilled.
- Dirty water tank full. Please clean the tank: Dirty water tank need to be emptied.
- Low battery, please charge the battery: Battery is getting low and needs to be recharged soon.
- Low battery, please charge first and then start cleaning: Battery is too low and needs to be recharged before cleaning.
- Shutting down: Battery charge is too low for cleaning and the vacuum shutting down. Charge the battery tor esume cleaning or self-clean mode.
- Self-cleaning started: Self-cleaning mode initiated.
- Start drying roller brush: Brushroll drying initiated.
Adjusting Smart Commands
01
Smart commands are turned on by default.
02
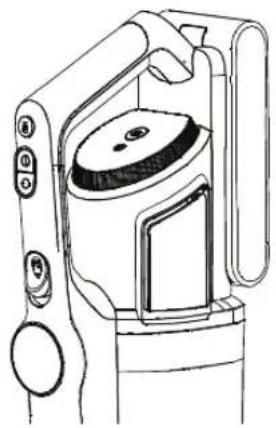
To turn smart commands on and off, press and hold the Voice Control Button until voice command says "voice turned off" or "voice turned on".
03
To Change the preferred language press the Voice Control Button.
natural_image
Technical line drawing of a mechanical device with no visible text or symbols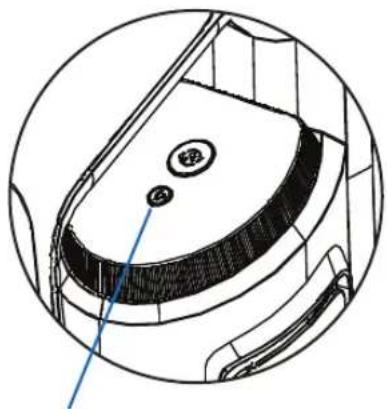
natural_image
Technical line drawing of a mechanical component with no visible text or symbolsVoice Control Button
NOTE
Smart Commands are not enabled while using the handheld vacuum (includes attachment cleaning). Smart Commands are focused on the wet cleaning mode.
Using Auto Mode
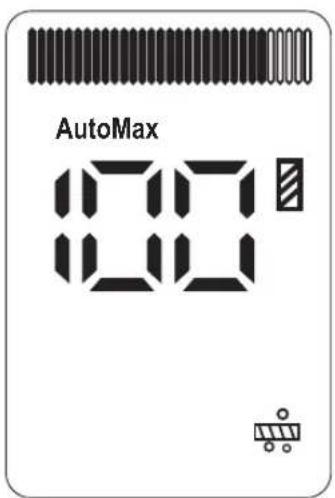
- Press the on/off button at the handle and the display screen will light up. The vacuum defaults to auto mode when powered on.
- Auto Mode will self-adjust the vacuum speed based on cleaning area.
- Press the speed button on the handle to switch to Max Mode. Pressing the speed button again will return it to Auto Mode.
- Press the on/off button to turn off the vacuum.
- The battery charge level must be over 20% to use in Max Mode.
text_image
AutoMax 100 100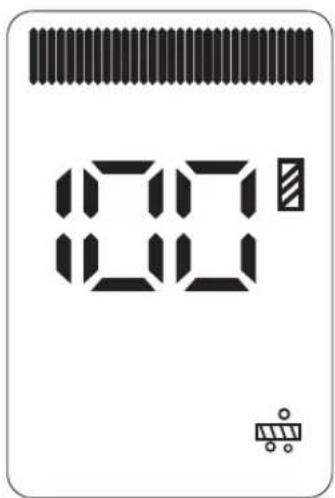
text_image
00 00Battery Notifications
- When using the bare floor cleaner, the voice command will notify that the battery is low. The voice command will say, "the battery power level is low, please charge it." When you receive this voice command, the battery power is low and it is recommended to place on the charging base. Once fully charged, you may use the cleaner again.
- If the voice command says, "the battery level is low, it will shut down soon, please charge it." The battery is about to run out and it will automatically shut down the machine. Place on charging base and charge it before use.
- When the vacuum cleaner is working, the battery level percentage is displayed on the screen.
• Vacuum will automatically charge when placed on the charging base.
| Battery Level Battery Indicator | |
| 75-100% Power Level Indicator Strip Full | |
| 50-75% Power Level Indicator Strip 3/4 Full | |
| 25-50% Power Level Indicator Strip 1/2 Full | |
| 1-25% Power Level Indicator Strip 1/4 Full | |
| Fully Discharged Blank Power Level Indicator Strip |
Removing Clean Water Tank
01
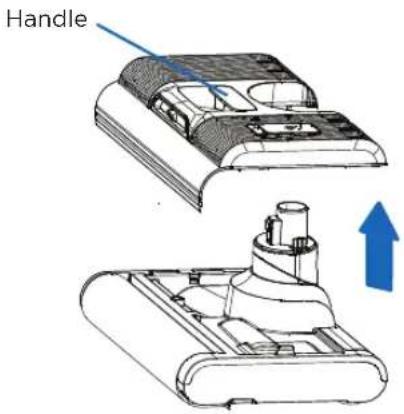
To remove the clean water tank, pull the handle up and remove the clean water tank from the vacuum base.
02
Place back in the original location and press down to secure the water tank in place.
text_image
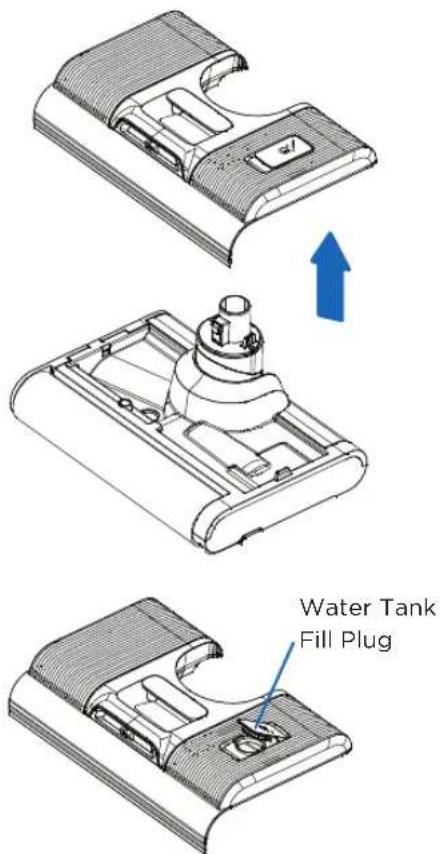
HandleFilling Clean Water Tank
01
Remove the clean water tank from the vacuum base.
02
Pull the clean water tank fill plug open on the top of the water tank. Add Riccar cleaning solution as directed on solution label.
03
Fill with water until the tank is full.
04
Secure the plug back in place on the water clean water tank.
Caution: To reduce the possibility of wood floor damage, follow the manufacturer's recommendations for cleaning. If using product on sealed wood floors, do not clean if the surface finish is worn, has separated joints or is not sealed.
text_image
Water Tank Fill PlugNOTE
- For optimal performance, use only Riccar Multi-Surface Cleaning Solution in your machine. Other formulas or household cleaners may cause defects or damage to the machine or floor.
- Wet application not recommended for unsealed hard wood floors.
- Water/Solution may drip from bottom of nozzle after use and may create a puddle of liquid. Avoid damage to wood and laminate floor and to help avoid slip hazards, store the machine in the charger base after use.
- Water will effectively clean floors, but please note, that if you've been using a cleaning solution and switch to water only, You may experience some streaking or cloudiness on the floor from existing cleaning solution residue. Streaking will subside after all residue is cleaned from the floors.
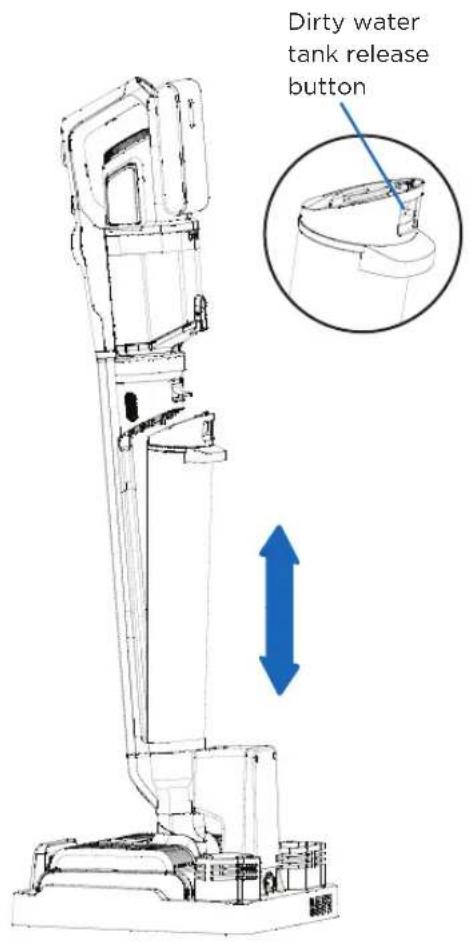
Dirty Water Tank
01
Ensure vacuum is in upright position and turned off.
02
To remove the dirty water tank, use one hand to support the body and the other hand to hold the handle of the wastewater tank.
03
Press the dirty water tank release button at the top of the tank and gently pull tank off the vacuum.
04
Reinstall the dirty water tank by inserting the bottom of the wastewater tank into the groove of the main body tray.
05
Press the dirty water tank to the main body. Push inward until you hear a "click" and the tank is secured in place.
text_image
Dirty water tank release buttonNOTE

Install and remove the dirty water tank along the arrow direction.
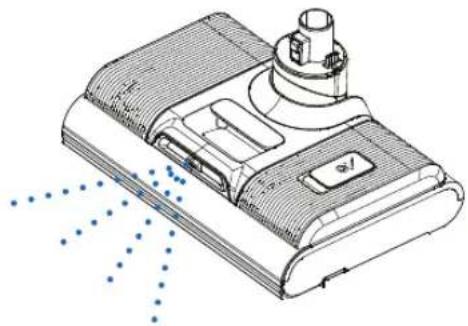
Nozzle Water Spray
01
Ensure the clean water tank is full and securely attached to the nozzle.
02
Power on the vacuum by selecting the on/off button. When the vacuum is powered on the nozzle spray function is active.
03
Recline the nozzle then press and hold the water spray button. Release the button once the desired amount of water has been sprayed. Use the vacuum to clean floor with sprayed water. until you've sprayed to turn off the internal water spray. The floor brush spray nozzle sprays a fan-shaped water flow. Press and release the water spray button as needed throughout floor cleaning.
natural_image
Technical line drawing of a device with no visible text, numbers, or symbolsNOTE
- The water spray button is located on top of the vacuum handle.
• Water sprays in a fan-shaped flow. - The water spray button cannot be used simultaneously with the on/off button or the speed button.
- Max mode is ideal when the floor is very dirty or shows water stains.
Suction Function When the Machine Lies Horizontally
When the machine is used lying flat, the power will automatically and intentionally drop to prevent water from entering the dust cup.
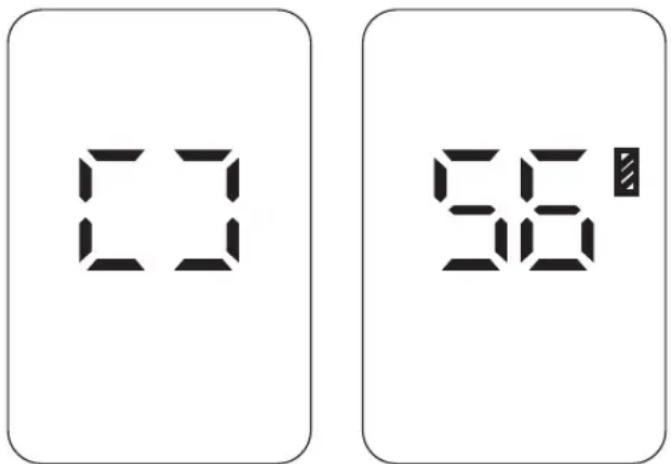
Self-Cleaning Mode
Your Smart Mop and Vacuum comes equipped with self-cleaning mode to clean brushrolls and flush remaining debris into the dirty water tank.
01
In the charging mode, press the self-cleaning button to enter the cleaning mode. After the self-cleaning, the machine enters the roller brush drying mode.
02
To end the self-cleaning process early, press the on/off button or speed control button. Your vacuum will return to charging mode, and turn the fan off after delaying 3 minutes..
NOTE
- Self-cleaning mode cleans the wet brushrolls and dirty water tank.
- Before starting cleaning mode, please empty the dirty water. Check that the machine is stable on the charging holder and that the power cable is plugged into the charging base and an electrical outlet. The clean water tank should be at least 1/2 full with water.
- After self-cleaning is complete, please empty and clean out the dirty water tank and filters.
- When the power is ≤ 10% , the cleaning mode and drying mode cannot be enabled, and it can be used only after charged for a period of time.
Brushroll Heat Drying (prevents brushrolls from odor buildup)
In the charging mode, press the speed button at the handle to enter the brushroll drying mode for three hours. During the drying process, the nozzle motor runs for two seconds at the interval of three minutes. The fan and PTC heating element work throughout the process. After drying is complete, the R70 will return to the charging mode. Press the speed button again to close brushroll drying mode early.
text_image
03 56°Water Shortage in the Clean Water Tank
- If the clean water tank is low or empty, the voice command or display screen will indicate a low water level.
- Turn off the machine, remove the clean water tank, and refill with water to the clean water tank.
- In the cleaning mode, the brushroll cleaning will stop if no water is detected in the clean water tank. Add water to the clean water tank, and empty the dirty water tank. Restart the self-cleaning mode.
Reminder that Dirty Water Tank is Full
- When the wet vacuum is powered on, and the dirty water tank is full, the machine will stop and send out a voice reminder. Clean the dirty water tank and reinstall to resume floor cleaning.
- In cleaning mode, if the dirty water tank is full, the machine will stop and send out a voice reminder. Empty the dirty water tank, and reinstall it.
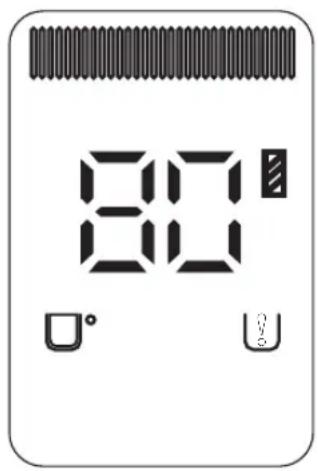
text_image
80 80 U° UCleaning the Dirty Water Tank
Remove the dirty water tank from the vacuum and remove the top cover/filter. Pull the top cover out from the dirty water tank and remove the plastic debris filter from the water tank. Clean any visible debris from the plastic debris filter. Remove sponge filter from top cover by gently pulling up on the rubber seal. Clean any visible debris and rinse. Reinsert the plastic filter filter into the water tank and place the sponse filter back into the top piece then reassemble the vacuum. (See Cleaning the Dirty Water Tank, for details.)
Brushroll Blockage
If the machine encounters a brushroll blockage when used in cleaning mode, the machine will shut down and send a voice reminder. Take out the brushrolls and clear away any the foreign material.
Cleaning the Wet Brushrolls
After removing the clean water tank, check if any tangled hair needs to be removed from the brushrolls. Remove the brushrolls and use scissors to cut any hair that may be wrapped around the brushrolls. Use the multi-functional cleaning brush to clean the vacuum nozzle and brushrolls if necessary.
Air Duct Blockages
- When using the wet nozzle or during cleaning mode, if the air duct is blocked, the vacuum will automatically stop and send out a voice reminder. Check and clean out the possible blockage. For example, inspect the following parts, "handheld dust cup", "wet nozzle" and "dirty water tank."
- If the handheld vacuum cleaner air duct is blocked while operating, the handheld vacuum cleaner will automatically stop. Clean out the dust cup and pleated filter.
Cleaning the Air Duct
Remove the dirty water tank. Remove the top cover and pull out the debris filter. Clean all parts, remove visible debris, and reassemble. Use the cleaning brush to release dirt, buildup, foreign matter and hair. Place the dirty water tank back on the main body. Remove the handheld dust cup and remove the filters, dump the dust and debris from the dust cup and clean all parts. Reassemble the dust cup and filters, and put back on the handheld vacuum cleaner. (See Cleaning and Maintenance Section for details)
Using the Handheld Vacuum Cleaner
Your vacuum comes with a dry handheld vacuum that can be used to clean dry messes. The handheld vacuum should never be used to clean wet messes. Your Smart Mop and Vacuum comes with two cleaning attachments.
01
Press the handheld vacuum release and remove the handheld vacuum cleaner.
02
Choose the preferred attachment and place on the handheld unit. It will click when securely attached to handheld vacuum.
03
Press the on/off button to light the display screen and turn the vacuum on. The vacuum will default to floor mode when turned on. Press the speed control button to switch to dry mode.
04
Press the handheld speed button to switch to higher suction power mode. It can be switched again by hitting the button. Dry mode has three suction power settings.
05
Select the on/off button to turn off the handheld vacuum cleaner and display screen is off.
IMPORTANT
• Vacuum should be turned off before placing or removing attachments. Connect the attachments to the handheld vacuum.
- Do not use to clean wet messes. Only use the handheld on dry messes. Absorbing water will damage the vacuum.
• Accessories are available from Authorized Riccar Retailers.
NOTE

If you purchased the Dry Vacuum Accessory Package please use dry cleaning mode instructions with attachments, wand, and dry floor nozzle. If the power level is less than 20%, the machine cannot be switched to carpet mode.
Attachments
Your Smart Mop and Vacuum is designed to function as a wet floor cleaner and handheld vacuum for dry messes. It can be used as a handheld vacuum utilizing attachments. All attachments will click when secured to the handheld vacuum. Press the button lock the release the attachments.
Flexible, Long Crevice Tool with LED Light
- Use to clean hard-to-reach places.
• Good for reaching small cracks and crevices in furniture, corners of the room or cabinets, lint traps, your car, and many other places. - Bright LED light at the end of the crevice tool illuminates dark areas during cleaning.
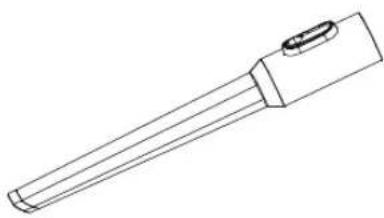
natural_image
Line drawing of a mechanical tool or device with a cylindrical end and handle (no text or symbols)Dusting Brush
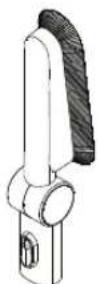
- Use to clean soft furnishings, upholstery, curtains, lamp shades, dusting hard surfaces, corners of the room.
• Use for quick clean ups, dusting, and spot cleaning.
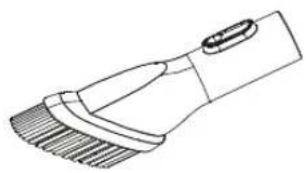
natural_image
Line drawing of a hairbrush with bristles and handle (no text or symbols)Cleaning the Dirty Water Tank
01
Turn off the Smart Mop. Press the dirty water tank release latch and remove the dirty water tank from the main body.
02
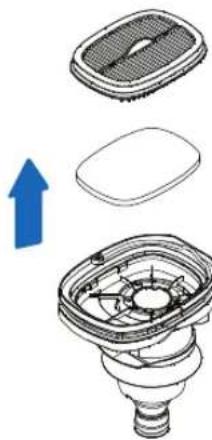
Remove the dirty water tank cover from the water tank by gently pulling upward.
03
Grasp the handle of the plastic debris filter and gently pull out of the dirty water tank.
04
Empty the dirty water tank and pour out any debris.
05
Remove all visible debris from the plastic debris filter and rinse clean..
06
To clean the sponge filter from the dirty water tank cover gently pull upward on the filter. Remove the filter sponge and rinse of any debris stuck to the filter.
07
Rinse all parts with clean water until all debris is removed.
08
Use the cleaning brush to remove any debris, dirt, or objects.
09
Allow all parts to completely dry before reinstalling. Reassemble the dirty water tank and place back on the main body.
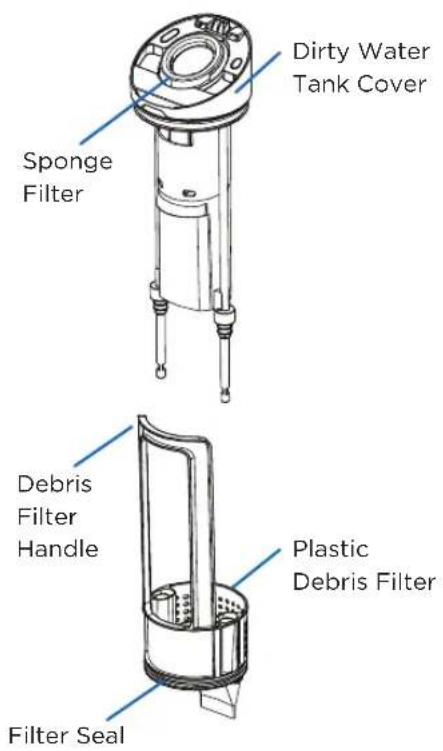
text_image
Dirty Water Tank Cover Sponge Filter Debris Filter Handle Plastic Debris Filter Filter Seal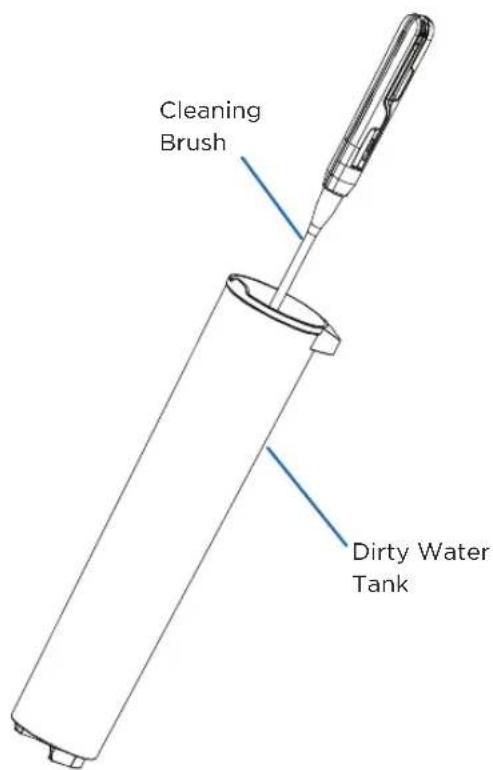
text_image
Cleaning Brush Dirty Water TankNOTE
- The dirty water tank must be cleaned out after the self-cleaning cycle is complete. Do not leave dirty water in the tank. Clean immediately after use.
- Cleaning immediately after use prevents odors.
- Do not fold or pinch the filter seal on the plastic debris filter.
Brushroll Maintenance
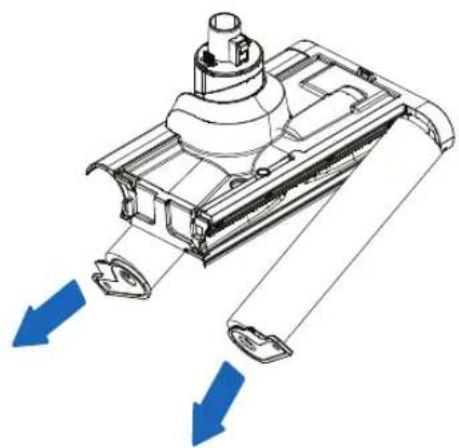
Removing Brushrolls
01
Turn the vacuum off. Detach the wet nozzle from the metal tube.
02
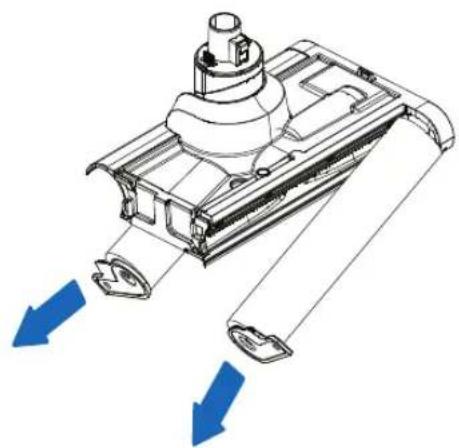
Remove the clean water tank from the nozzle. Gently rotate the end caps in the direction shown in Figure 1.
03
Pull the brushrolls out in the direction shown in Figure 2.
04
To reinstall the brushroll, insert the brushroll into the opening.
05
Push the brushroll inward until it is flush with the side of the nozzle and align with the brushroll holder. Rotate the end cap until you feel the slight locking, which indicates the brushroll is securely installed in place.
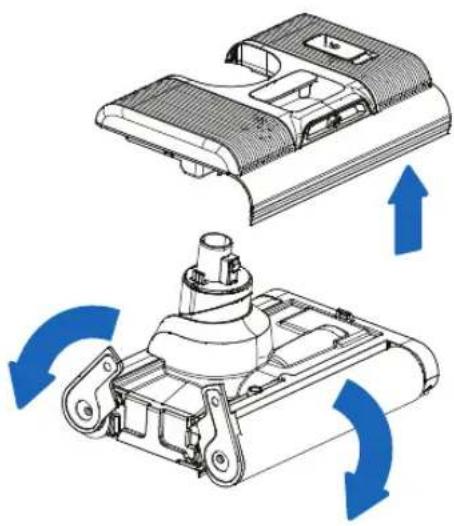
natural_image
Technical illustration of a mechanical device with blue directional arrows indicating rotation or movement (no text or symbols present)Figure 1
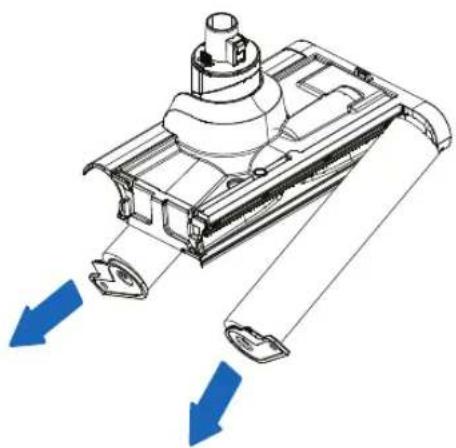
natural_image
Technical line drawing of a mechanical component with blue directional arrows indicating flow or movement (no text or symbols)Figure 2
Cleaning Wet Nozzle
01
Turn the vacuum off. Detach the wet nozzle from the main body. Remove the clean water tank.
02
After taking off the clean water tank, use the cleaning tool to clean the opening where the nozzle and main body connect.
03
Remove any clogs, dirt, hair, debris and/or scale from the opening and connection point.
04
If needed, follow the brushroll maintenance instructions to remove the brushroll. Gently cut off tangled hair from the brushroll. Wipe the machine and the dirty parts with a cloth and reinstall the brushrolls to the machine.
05
Sanitize and rinse the brush that was used to clean the machine
NOTE

Do not wash, soak or submerge the floor nozzle in water.
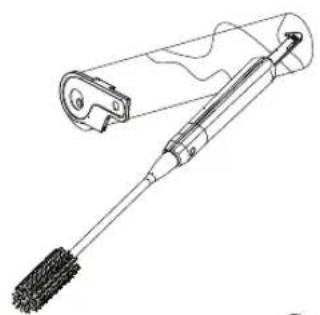
natural_image
Technical line drawing of a mechanical tool with a cylindrical component and textured base (no text or symbols)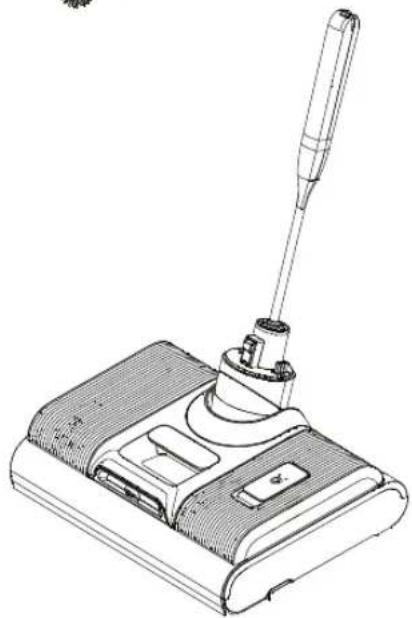
natural_image
Line drawing of a cleaning brush with a lever and handle (no text or symbols)Cleaning the Dust Cup
01
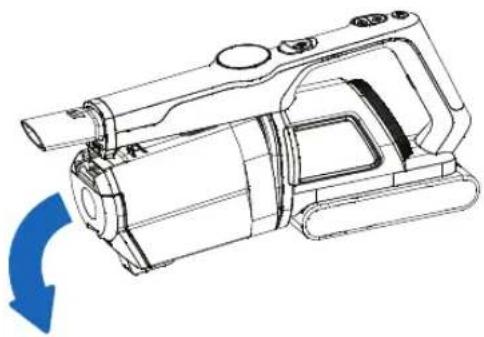
Make sure the vacuum is turned off. Remove the handheld vacuum from the main body by pressing the handheld vacuum release button on the back of the main body.
02
Press the dust cup release button on the bottom of the dust cup and removed from handheld unit.
03
Grab the metal handle attached to the filters and gently pull upward to remove the filters.
04
Dump any dust, dirt and debris into the trash.
05
Clean and remove any debris wrapped around cyclonic filter and pleated filters. Remove the cyclonic filter by turning counterclockwise; clean, align and reinsert with a clockwise turn until it stops (less than one-quarter turn).
06
Reassemble the dust cup assembly, and then reinstall it on the machine.
natural_image
Technical line drawing of a mechanical device with a blue circular arrow indicating rotational motion (no text or symbols)
natural_image
Technical line drawing of a mechanical component with an upward arrow indicating growth (no text or symbols present)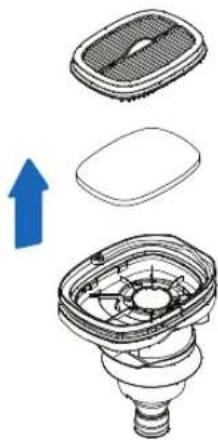
natural_image
Diagram of a mechanical component with an upward arrow indicating motion, showing internal structure without any text or symbols.NOTE
Vacuum can also be emptied by pressing the dust cup release latch at the bottom of the dust cup.
DRY VACUUM ACCESSORY PACKAGE (SOLD SEPARATELY)
The Multi-Clean Smart Mop and Vacuum has a deluxe accessory upgrade. It provides additional cleaning tools and allows you to convert the handheld unit into a stick vacuum. The Dry Vacuum Accessory Package can be purchased at an Authorized Riccar Retailer. Part number: R70AP
Dry Vacuum Accessory Package Includes:
natural_image
Technical line drawing of a mechanical device with cylindrical components and mounting base (no text or symbols)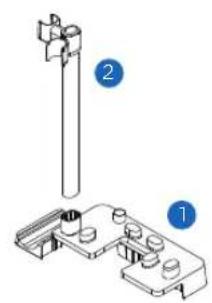
text_image
Technical diagram showing a mechanical assembly with labeled parts 1 and 2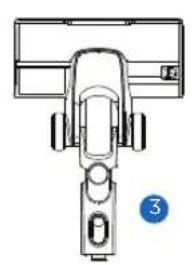
natural_image
Top-down diagram of a mechanical device with no visible text or symbols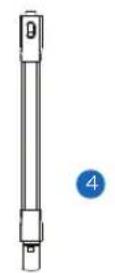
natural_image
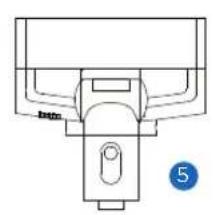
Pure mechanical component diagram without any text, numbers, or symbols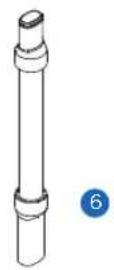
natural_image
Technical line drawing of a mechanical lever or bracket (no text or symbols)- Accessory Mount
- Vacuum Nozzle, Wand, and Hose Storage Mount
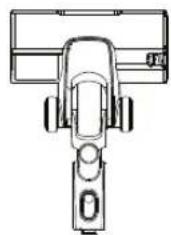
- Vacuum Nozzle
- Metal Wand
- Pet Fur & Upholstery Power Tool
- Flexible Cleaning Hose
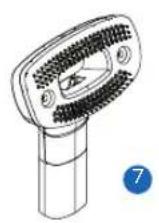
- Pet Grooming Tool
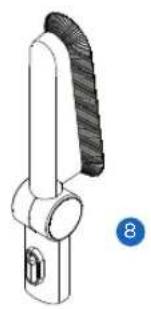
- Bendable Long Dusting Brush
Attachments
The Dry Vacuum Accessory Package enhances the cleaning experience and is designed to function as stick vacuum for dry messes. It can be used as a handheld vacuum or stick vacuum by utilizing attachments. All attachments will click when secured to the handheld vacuum or dry metal wand. Press the button lock the release the attachments. All attachments are intended for cleaning dry messes.
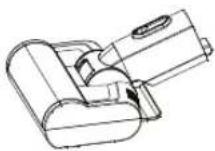
Pet Fur & Upholstery Power Tool
- Use to clean upholstery, mattresses, or stairs.
- Great for cleaning pet fur, dust, and dander from high traffic pet areas.
Dry Vacuum Nozzle
- Attach to the wand or directly to handheld vacuum.
- Tackle carpets, rugs, and hard floors with the expertly crafted vacuum nozzle.
- Bright LED headlights illuminate floors for vacuuming in dimly lit areas.
Vacuum Wand
- Convert to a stick vacuum by attaching vacuum nozzle and handheld vacuum to the wand to clean carpets, rugs, and hard floors.
- Extend reach to clean soft furnishings, upholstery, curtains, lamp shades, dusting hard surfaces, corners of the room.
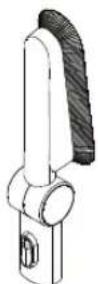
Bendable Long Dusting Brush
- Use to clean soft furnishings, upholstery, curtains, lamp shades, dusting hard surfaces, corners of the room.
- Easily clean fans and hard-to-reach areas by attaching to vacuum wand.
Flexible Clenaing Hose
• Vacuum hose is great for cleaning cars and places where you need flexibility.
- Reach behind spaces and use with preferred attachments.
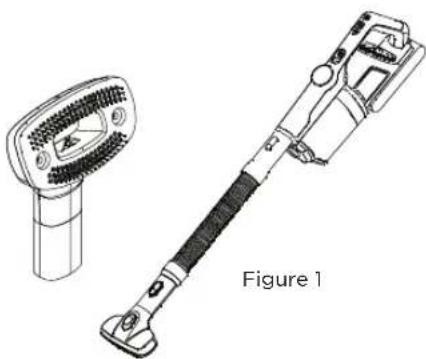
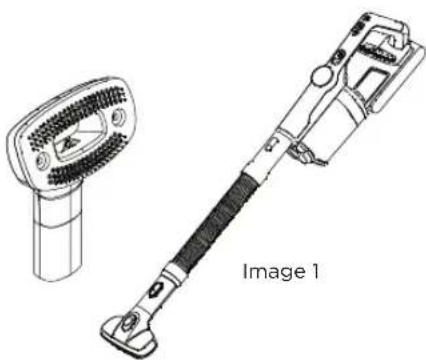
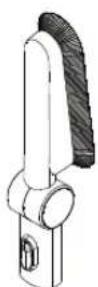
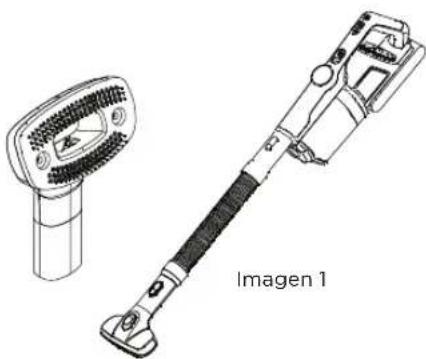
Pet Grooming Tool
- Brush cats and dogs without getting fur everywhere.
- MUST be used attached to the Flexible Cleaning Hose.
- DO NOT USE attached directly to the handheld unit.
- Attach pet grooming tool to the flexible hose. Connect the hose to handheld vacuum. Reference Figure 1 for proper configuration.
- Use on lowest suction power.
natural_image
Top-down schematic of a mechanical device with no visible text or symbols

natural_image
Technical line drawing of a handheld device with two views: one showing a fan-shaped device and the other a cylindrical device (no text or symbols)NOTE
R70AP is sold separately. Items sold as a bundled package. Attachments not included with the Multi-Clean Deluxe Smart Mop and Vacuum. All items intended for use with the Riccar R70. Please visit an Authorized Riccar Retailer for additional details.
The Dry Vacuum Accessory Package is designed to be used with the Riccar Deluxe Multi-Clean Smart Mop and Vacuum. R70AP does not include a power cord, base charging port or charging base.
Assembling Charging Base
• Find the charging base, power cord and base charging port that were included with the Multi-Clean Deluxe Smart Mop and Vacuum.
- You will not need the cleaning solution holder and accessory holder that were included in the R70 packaging.
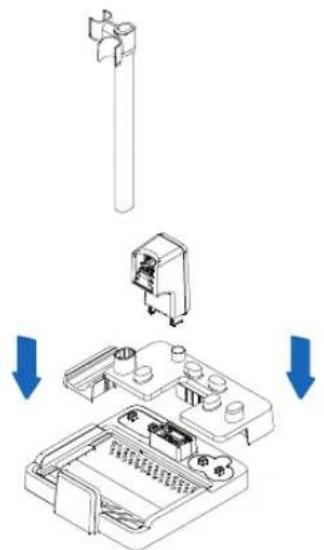
- Align the accessory mount to the charging base and gently press down until the mount is attached to the base. Reference Figure 1 for guidance.
- Attach the base charging port to the charging base until it clicks.
- Next find the metal tube and place it into the designated spot on the charging base until it's secure.
- Use the power cord that was included with the R70. Connect to the charging base.
text_image
Diagram showing a mechanical assembly with labeled components and directional arrows indicating assembly or disassembly.Figure 1
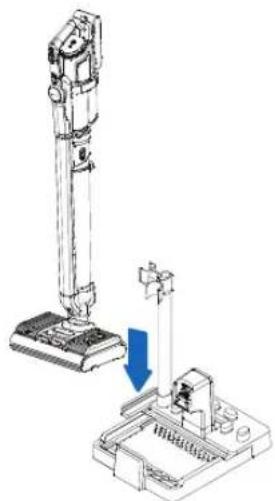
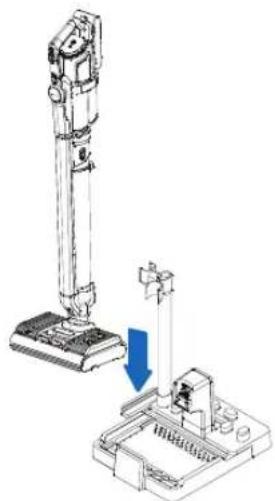
Charging Vacuum
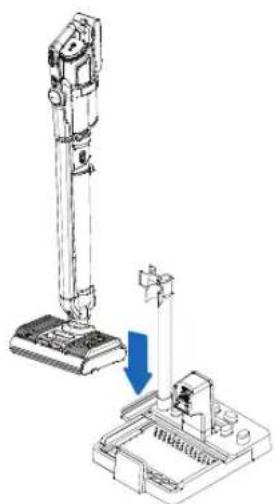
Place the assembled vacuum on the charging and follow standard charging instructions (reference Figure 2).
natural_image
Technical line drawing of a mechanical device with a downward arrow indicating motion or assembly (no text or symbols present)Figure 2
Attachment Storage
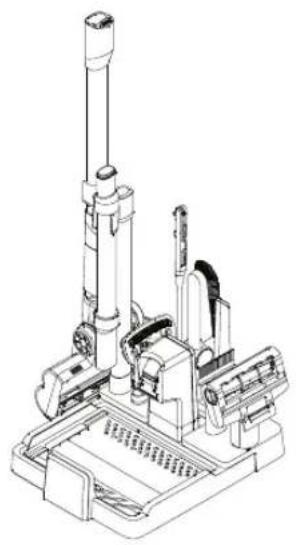
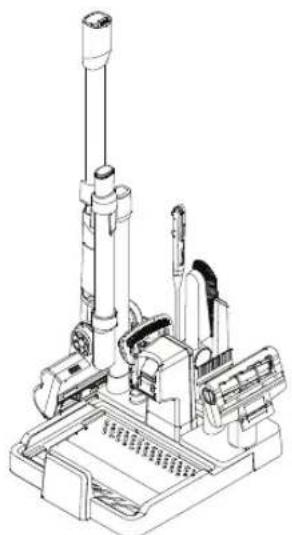
- Arrange attachments on the extended storage base (reference Figure 3).
• The crevice tool, dusting brush and cleaning tool that came with the R70 have storage spots on the extended base. - The dry nozzle and wand will need to be attached for tool storage.
natural_image
Technical line drawing of an industrial drilling rig with multiple pipes and support structures (no text or labels)Figure 3
Cleaning the Dry Nozzle Brushroll
Periodically check the brushroll for hair and debris. The brushroll will quit working if it is blocked or jammed. Clean brushroll every 4-5 uses to avoid blockage or jamming. Brushrolls will occasionally need to be replaced. Please visit and Authorized Riccar Retailer for additional details.
01
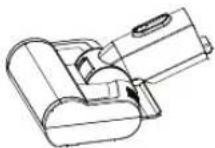
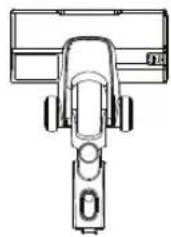
Turn off the vacuum. Detach the vacuum nozzle from the metal wand by pressing the vacuum head release button.
02
Press the brushroll release button and pull out the brushroll.
03
If brushroll is jammed, carefully use a pair of scissors or a sharp knife to remove any hair or debris tangles around the brushroll.
04
Insert the brushroll back into the vacuum head and secure into place.
Cleaning the Pet Fur and Upholstery Power Tool
01
Turn off the vacuum. Detach the power tool from the metal wand or handheld vacuum by pressing the vacuum head release button.
02
Twist the brushroll counter clockwise and gently pull the brushroll out of the power tool.
03
If brushroll is jammed, carefully use a pair of scissors or a sharp knife to remove any hair or debris tangles around the brushroll. Dispose of all debris.
04
Insert the brushroll back into the power tool and turn clockwise until the brushroll locks back into place.
Always clean vacuum parts after each use, clean the dirty water tank, dust cup, brushroll and/or any parts that were used. Replace parts in the following situations:
- If you remove the dust cup and find the dust in the pleated filter.
- If the filter sponge is seriously damaged.
- If the brushrolls are falling off and strong vibration and noise occur in use.
- Brushrolls, dry vacuum filters, and wet sponge filter will need to be replaced periodically. Replacement parts can be purchased from your Authorized Riccar Retailer.
To store the machine, place in a cool and dry place. Avoid direct sunlight and humidity.
If it is necessary to store the machine in the box, please be sure to clean the machine and dry all parts to prevent machine damage.
| PROBLEM CHECK POINT POSSIBLE SOLUTION | ||
| Doesn't start or stops during use | Insufficient battery and power distribution | Charge the machine |
| The on/off button is not pressed | Press the on/off button separately | |
| Severe entanglement of the brush | Clean the brushroll | |
| The dirty water tank is full | Empty and clean the dirty water tank | |
| The battery pack is not fully installed | Reinstall the battery pack | |
| The air duct is blocked Clean | the air duct and filter | |
| Low suction power | The air duct is blocked Clean | the air duct and filter |
| Pleated filter is missing Install | pleated filter | |
| Abnormal sound of the machine | The air duct is blocked Clean | the air duct and filter |
| Pleated filter is missing Install | pleated filter | |
| No water from the nozzle | No water in the water tank | Add water to the clean water tank |
| The water-spray button is not pressed | Press the water spray switch | |
| The clean water tank is not in place | Reinstall the clean water tank | |
| Spray water from the air outlet | HEPA media filter and dust cup are used without drying after cleaning | Pleated filter and dust cup are used after being cleaned and dried |
| No debris filter in the sewage tank | Garbage basket is installed in the sewage tank | |
| Soft rubber tube is folded under the debris filter | Reinstall the filter screen, ensuring the soft rubber tube is not folded | |
| Will not power on Will not charge | Display error codes F1 to F9 and Fb | Disconnect and reconnect charger power cord |
| Disconnect and reconnect battery | ||
| Disconnect and reconnect any connections such as the metal tube | ||
| Take to an Authorized Riccar Retailer | ||
Any other service should be performed by an Authorized Riccar Vacuum Retailer.
To locate your nearest Authorized Retailer, visit our website at Riccar.com or call
888-6RICCAR
Key Replacement Parts
• Dry Vacuum Accessory Package: R70AP
- Wet Brushroll Replacement Set: R70WBR
• Genuine Dry Filter Set: RF70
• Genuine Wet Sponge Filter: RF70-W
• Cleaning Solution: R70CS
• Dry Vacuum Brushroll Replacement: R70DBR
- Pet Fur & Upholstery Brushroll Replacement: R70PBR
For Best Performance
- Keep this vacuum and accessories clean and in good operating condition.
- Change filters as recommended or at least annually to maximize cleaning performance.
• Always use Genuine Riccar replacement parts. - Have your vacuum checked periodically by an Authorized Riccar Retailer.
- Store your vacuum carefully in a dry area and away from direct sunlight.
- For optimum cleaning performance and safety, follow your owner's manual. Change filters as recommended or at least annually to maximize cleaning performance.
• Always use Genuine Riccar replacement parts. - Have your vacuum checked periodically by an Authorized Riccar Retailer.
- Store your vacuum carefully in a dry area and away from direct sunlight.
- For optimum cleaning performance and safety, follow your owner's manual.
LEAVE A REVIEW
We want to hear from you!
Please let us know what you think of your new vacuum by leaving a product review on Riccar.com.

WARRANTY
Thank You for your purchase! Register Online Today.

Riccar.com/register-warranty
For Warranty Information visit

Riccar.com/warranty-information
Spécifications....36
text_image
Technical diagram of a vacuum cleaner with numbered parts for identification and assembly reference.natural_image
Line drawing of a mechanical device with labeled parts (no text or symbols)Réglage du corps
01
text_image
Technical diagram showing a mechanical device with labeled parts and an arrow indicating downward motion or assembly.natural_image
Technical line drawing of a vacuum cleaner device with mounting base and control panel (no text or symbols)Réglage de la station de charge
text_image
Technical diagram showing a device with labeled ports and a blue arrow indicating assembly or connection point.text_image
Technical diagram showing assembly steps of a device with labeled components and directional arrows indicating process flow.natural_image
Technical illustration of a vacuum cleaner with a blue arrow indicating the component (no text or symbols present)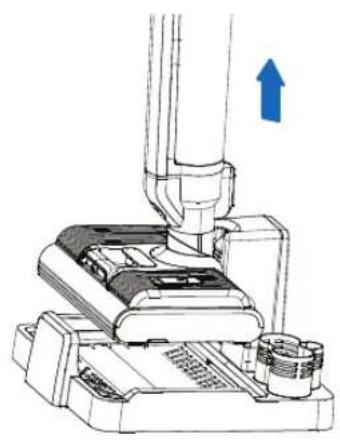
natural_image
Mechanical assembly diagram showing a component being inserted into a housing, with a blue arrow indicating direction (no text or symbols present)Commandes intelligentes
natural_image
Technical line drawing of a mechanical device with no visible text or symbols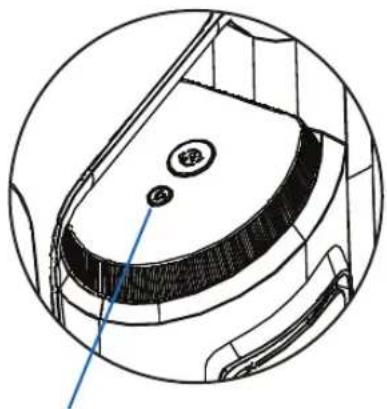
natural_image
Technical line drawing of a mechanical component with a circular base and central hub (no text or symbols)natural_image
Technical line drawing of a mechanical device with no visible text or symbolsREMARQUE
natural_image
Line drawing of a mechanical tool or device with a cylindrical end and handle (no text or symbols)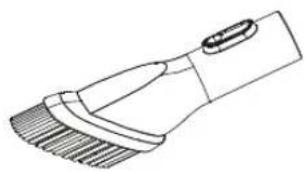
natural_image
Line drawing of a hairbrush with bristles and handle (no text or symbols)natural_image
Technical illustration of a mechanical device with blue directional arrows indicating rotation or movement (no text or symbols)Image 1
natural_image
Technical line drawing of a mechanical component with blue directional arrows indicating flow or movement (no text or symbols)Image 2
natural_image
Technical line drawing of a mechanical tool with a cylindrical component and textured base (no text or symbols)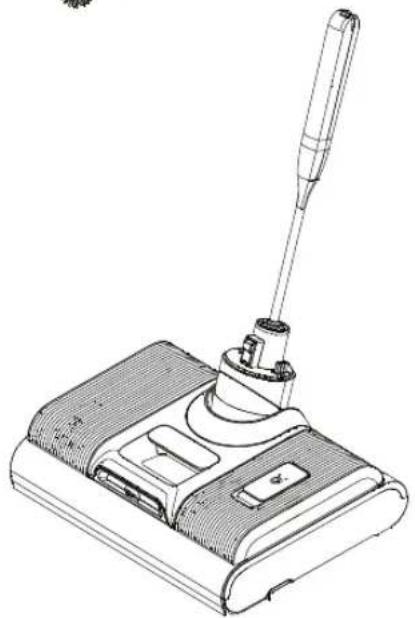
natural_image
Line drawing of a cleaning brush with a lever and handle (no text or symbols)natural_image
Technical line drawing of a mechanical device with a blue circular arrow indicating rotational motion (no text or symbols)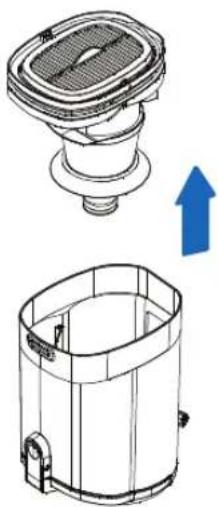
natural_image
Technical line drawing of a mechanical component with an upward arrow indicating growth (no text or symbols present)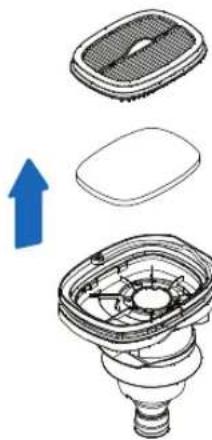
natural_image
Exploded view diagram of a mechanical component showing internal structure and assembly (no text or symbols)REMARQUE

natural_image
Top-down line drawing of a mechanical device with no visible text or symbols

natural_image
Technical line drawing of a handheld device with a fan and handle, labeled 'Image 1' (no text or symbols on the device itself)Assembler la station de charge
natural_image
Diagram showing a mechanical assembly with a vertical rod and internal components, no text or symbols presentImage 1
natural_image
Technical line drawing of a vacuum cleaner assembly with a downward arrow indicating motion (no text or symbols present)Image 2
natural_image
Technical line drawing of a mechanical device with cylindrical components and mounting base (no text or symbols)Image 3
Riccar.com/register-warranty
For Warranty Information visit

Riccar.com/warranty-information
text_image
Technical diagram of a vacuum cleaner with numbered parts for identification and assembly reference.natural_image
Technical line drawing of a vertical cylindrical mechanical component with mounting flanges (no text or symbols)02
natural_image
Technical line drawing of a vertical cylindrical mechanical component with mounting flanges (no text or symbols)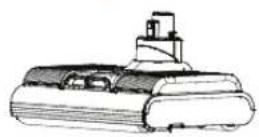
natural_image
Technical line drawing of a mechanical device with no visible text or symbolsnatural_image
Technical line drawing of a mechanical device with a vertical column and base mount (no text or symbols)02
natural_image
Technical line drawing of a vacuum cleaner device with mounting base (no text or symbols)text_image
Technical diagram showing a device with labeled ports and a blue arrow indicating assembly or operation.text_image
Technical diagram showing mechanical assembly with labeled components and directional arrows indicating process flowImagen 1 Imagen 2
natural_image
Technical illustration of a vacuum cleaner with a blue arrow indicating assembly or inspection (no text or symbols present)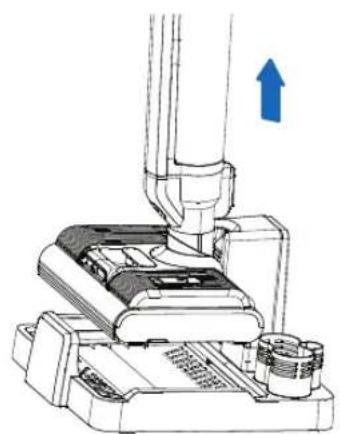
natural_image
Mechanical assembly diagram showing a component being inserted into a housing, with a blue arrow indicating direction (no text or symbols present)Comandos Inteligentes
natural_image
Technical line drawing of a mechanical device with no visible text or symbols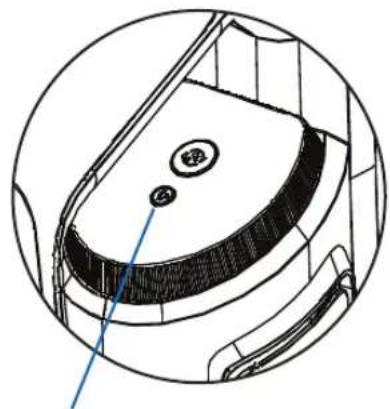
natural_image
Technical line drawing of a mechanical component with no visible text or symbolsnatural_image
Technical illustration of a battery pack assembly showing internal components and an upward arrow (no text or symbols)natural_image
Technical line drawing of a device with no visible text, numbers, or symbolsNOTA
natural_image
Line drawing of a mechanical tool or device with a cylindrical end and handle (no text or symbols)Cepillo para Polvo
natural_image
Line drawing of a cleaning brush with bristles and handle (no text or symbols)natural_image
Technical illustration of a mechanical device with blue directional arrows indicating rotation or movement (no text or symbols present)Imagen 1
natural_image
Technical line drawing of a mechanical component with blue directional arrows indicating flow or movement (no text or symbols)Imagen 2
natural_image
Technical line drawings of a cleaning brush and a vacuum cleaner (no text or symbols)natural_image
Technical line drawing of a mechanical device with a blue circular arrow indicating rotational motion (no text or symbols)04
natural_image
Technical line drawing of a mechanical component with an upward arrow indicating growth (no text or symbols present)
natural_image
Exploded view diagram of a mechanical component showing internal structure and assembly (no text or symbols)NOTA

- Brush cats and dogs without getting fur everywhere.
- MUST be used attached to the Flexible Cleaning Hose.
- DO NOT USE attached directly to the handheld unit.
- Attach pet grooming tool to the flexible hose. Connect the hose to handheld vacuum. Reference Figure 1 for proper configuration.
- Use on lowest suction power.
natural_image
Top-down schematic of a mechanical device with no visible text or symbols

natural_image
Technical line drawing of a handheld device with a fan and handle, labeled 'Imagen 1' (no other text or symbols)NOTA
natural_image
Diagram showing a mechanical assembly with a vertical rod and internal components, no text or symbols presentImagen 1
natural_image
Technical line drawing of a vacuum cleaner with a downward arrow indicating motion (no text or symbols)Imagen 2
natural_image
Technical line drawing of a mechanical device with cylindrical components and mounting base (no text or symbols)Imagen 3
Riccar.com/register-warranty
For Warranty Information visit

Riccar.com/warranty-information
RICCAR®
RICCAR.COM
888-674-2227
1760 GILSINN LANE
FENTON, MO 63026