USER MANUAL Digital Care UFESA
Important: No use aditives!
Important: Nao utilize aditives!
LIMPEZA E MANUTENÇÂO
1. Bloquear o ferro
WE WOULD LIKE TO THANK YOU FOR CHOOSING UFESA. WE WISH THE PRODUCT PERFORMS TO YOUR SATISFACTION AND PLEASURE.
WARNING
PLEASE READ THE INSTRUCTIONS FOR USE CAREFULLY PRIOR TO USING THE PRODUCT. STORE THESE IN A SAFE PLACE FOR FUTURE REFERENCE.
DESCRIPTION
- On-off / Steam level selection button
- Display
- Steam level selection button
- Soleplate
- Steam release button with sliding blocking device
- Iron pad
- Water tank
- Water tank release button
- Filling lid
- Level mark for maximum filling
- Locking button
- Unlocking button
- Water hose
- Mains cable and water hose storage compartments
SAFETY INSTRUCTIONS
The appliance must not be left unattended while it is connected to the supply mains.
Remove the plug from the socket before filling the appliance with water or before pouring out the remaining water after use.
The appliance must be used and placed on a flat, stable surface.
When placing the iron on its stand or on its heel, make sure that the surface on which the stand or heel is placed is stable.
The appliance should not be used if it has been dropped, if there are visible signs of damage or if it is leaking water. With the aim of avoiding dangerous situations, any work or repair that the appliance may need, e.g. replacing a faulty mains cable, must only be carried out by qualified personnel from an Authorized Technical Service Centre.
This appliance can be used by children aged from 8 years and above and persons with reduced physical, sensory or mental capabilities or lack of experience and knowledge if they have been given supervision or instruction concerning use of the appliance in a safe way and understand the hazards involved. Children shall not play with the appliance. Cleaning and user maintenance shall not be made by children without supervision.
Keep the appliance and its cord out of reach of children under 8 years of age when it is turned on or cooling down.
This appliance is designed only for household use up to 2000m above sea level.

CAUTION. Hot surface. Surface is liable to get hot during use.
IMPORTANT WARNINGS
Carefully read through the operating instructions for the appliance and safeguard them for future reference. This appliance has been designed exclusively for normal household use in home environment.
This appliance must be used only for the purposes for which it was designed, i.e. as an iron. Any other use will be considered improper and consequently dangerous. The manu
facturer will not be held responsible for any damage arising from misuse or improper use.
This appliance is to be connected and used in accordance with the information stated on its characteristics plate.
This appliance must be connected to an earthed socket. If it is absolutely necessary to use an extension cable, make sure that it is suitable for 16A and has a socket with an earth connection.
The appliance must never be placed directly under the tap to fill the water tank. The electrical plug must not be removed from the socket by pulling the cable. Never immerse the appliance in water or any other liquid.
Do not leave the appliance exposed to weather conditions (rain, sun, frost, etc.)
This appliance reaches high temperatures and produces steam during use, this could cause scalds or burns if not used properly.
Do not allow the power cable to come into contact with the soleplate when it is hot.
B&B Trends, S.L. disclaims all liability for damages that may occur to people, animals or objects, for the non-observance of these warnings.
BEFORE THE FIRST USE
Before using the steam station, please ensure you read the user manual and understand all parts and features of the steam station. Be sure to remove any packaging material and labels before using for the first time.
In the first use they can break off odours or fumes that sent quickly. Do not spray for the first time on clothes and there may be traces of dirt on the soleplate.
OPERATING INSTRUCTIONS
1. Filling the water tank
- Open the filler cap (9).
- Fill the water tank (7). Never fill the tank above the "max." level mark (10)!
- Close the filler cap.
- Once filled, press the steam release button (5).
Important: In case the tank runs out of water and the appliance continues to run for at least 2 minutes, the icon will flash and you will hear three beeps, after which the pump will stop running. Then refill the water tank and press the steam release button (5).
The icon will stop flashing.
Water to be used
The device is designed for use with tap water.
Important: Do not use additives!
If the water in your area is hard or semi-hard use mix tap water with distilled or demineralized water purchased in stores, in the ratio 2:1 and 1:1 respectively (distilled water: tap water). Check with your water supplier to determine the type of water in your area. Never use 100% distilled or demineralized, rain water, softened water, scented water, water from other appliances such as refrigerators, air conditioners, dryers or other types of home water preparation water.
2. Heating
- Unwind the water hose (13) and the mains cable (14). Plug mains cable into an earthed socket.
- Press the steam level selection button on the base (1) or on the handle of the iron (3) for several seconds to switch the appliance on, until a beep is heard. The indicator light of the button (3) will flash indicating that the appliance is heating up.
- When the iron is ready to use, the indicator light of the button (3) will remain permanently lit.
3. Ironing
This iron is suitable for all fabrics that can be ironed. Prevents clothes from being damaged due to an unsuitable temperature being selected.
Press the steam release button (5) for ironing with steam.
Important: During the first seconds of use the amount of steam will be lower and it will increase progressively. Drops of water may leak out while there is still air in the circuit.
Warning: Ironing with an excessive amount of steam may produce condensation of the hot water and dripping from the ironing board or through any other permeable surface.
Important: the iron is not designed to stand on its heel. Always rest it horizontally on the iron pad (6) during ironing pauses.
1. Ironing modes
Select the steam mode by pressing the steam level selection button on the base (1) or on the handle of the iron (3)
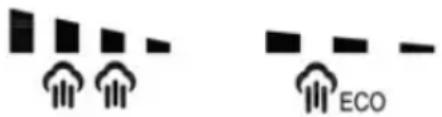
"ECO" mode: the steam is generated with short pulses, therefore you can save energy and water and still achieve good results when ironing most of your garments.
"MAX" mode: this mode is designed to remove stubborn wrinkles or to press in a sharp crease or pleat.
2. Vertical steam
This feature allows you to smooth out creases in garments or drapery in a similar manner to a garment steamer. The high steam pressure of the Steam Station can provide bursts of steam while holding the iron vertically. For best results, utilize on delicate or light fabrics. Only direct steam at hanging garments in a safe area and ensure you always refer to garment manufacturer recommendations.
WARNING: Do NOT direct the steam onto a garment that is being worn or at people or animals.
Can be used to remove creases from hanging clothes, curtains, etc.
- Select "MAX" mode pressing the steam level selection button on the base (1) or on the handle of the iron (3).
- Hold the iron in an upright position 15cm away from the garment to be steamed.
- Press the steam release button (5) repeatedly with pauses of at least 5 seconds.
4. Auto switch off
For your safety and to save energy, the appliance switches off automatically when it has not been used for 10 minutes. Six beeps will be heard, indicator light (1) will flash and icon will be shown on the display.
To switch the steam station back on, press the steam release button (5) again. A beep will be heard.
CLEANING & MAINTENANCE
1. Iron lock
The easy carry locker attached to the base unit can be used to transport the steam Station with ease. To do so, lift it in an upward motion until it clicks into position. Before using the Steam Station, the easy carry handle must be locked back into position against the base unit; press and hold the handle release button and carefully lower it back to place.
2. Cleaning the appliance
Turn off the Steam Station and unplug at the power outlet. Empty the water tank.
Regularly clean the ceramic soleplate with a damp, non-metallic washing pad. Wipe the exterior of the Steam Station with a soft cloth.
Do NOT use abrasive cleaners, detergent or other chemicals to clean the Steam Station.
Regularly clean your appliance for properly maintenance.
Attention! Burn risk!
To keep the soleplate smooth, you should avoid contact with hard metal objects. Never use a scouring pad, or chemicals to clean the soleplate.
3. Descaling process
It is recommended to perform the descending process approximately every two weeks. Proceed as follows:
- Make sure that the water tank is full up to its maximum level.
- Lean the iron horizontally on a water container.
- Press the steam level selection button (3) and steam release button (5) together for several seconds. A long beep will be heard and icon will be shown on the display.
- Keep the steam release button (5) pressed by means of its sliding blocking device.
Warning: boiling water and steam will be released through the soleplate, carrying limescale and/or deposits that may be inside.
- Wait until the water container is empty. Then, press the steam level selection button (3) and steam release button (5) together again for several seconds. A beep will be heard and icon will be removed from the display.
TROUBLESHOOTING GUIDE
| PROBLEM POSSIBLE CAUSE | SOLUTION | |
| Unit fails to heat up and steam. Power indicator light does not illuminate. | Unit is not plugged in. Plug into | electrical outlet. |
| Water runs out of the holes in the soleplate. | Water has condensed in the pipes because you are using for the first time or you have not used it for some time. | Press the steam trigger away from your ironing board until the iron produ-ces steam. |
| The soleplate is not hot enough. | Wait until the iron solepla-te is hot enough |
| Brown streaks come through the holes in the soleplate and stain the linen. | You are using chemical des-caling agents or additives in the water for ironing. | Never add this type of pro-duct in the water tank or in the steam chamber. |
| There is no steam or there is little steam. | The water tank is empty. Fill the water tank. |
| The soleplate is not hot enough. | Wait until the iron solepla-te is hot enough |
PRODUCT DISPOSAL
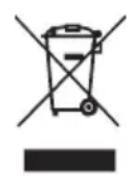
This product complies with European Directive 2012/19/EU on electrical and electronic devices, known as WEEE (Waste Electrical and Electronic Equipment), provides the legal framework applicable in the European Union for the disposal and reuse of waste electronic and electrical devices. Do not dispose of this product in the bin, instead going to the electrical and electronic waste collection
centre closest to your home.
NOUS VOUS REMERCIONS D'AVOIR ACHETÉ UN PRODUIT UFESA. NOUS ESPÉRONS QUE LE PRODUIT REPONDRA À VOS ATTENTES.
AVERTISSEMENT
VEUILLEZ LIRE ATTENTIVEMENT LES INSTRUCTIONS D'UTILISATION AVANT D'UTILISER LE PRODUIT. VEUILLEZ CONSERVER CES INSTRUCTIONS DANS UN ENDROIT SÜR POUR UN USAGE ULTERIEUR.
DESCRIPTION
Aulial alall pblily jlll idle
1
alall 1e i aiei taiyagll sl gall j naybiill ayinipnni y aiaill ayinee pluynj Juiil qiydi lyie ni sall sall
3
y
iill sall gie
a 1
eaoa y aoei 1
j 5 (5) j (3) j
(5)j(2)
g 1
5
a
gaoJg jbcilusu
a a a a a a a a a a a a a a a a a a a a a a a a a a a
(5)
:
e 100
- · = 18 .
jill jil jil jil jil jil jil jil jil jil jil jil jil jil jil jil jil jil jil jil jil jil jil jil jil jil jil jil jil jil jil jil jil jil jil jil jil jil jil jil jil jil jil jil jil jil jil jil jil jil jil jili
jll 4y jaii jaii jai i jaii jaii jaii jaii jaii jaii jaii jaii jaii jaii jaii jaii jaii jaii jaii jaii jaii jaii jaii jaii jaii jaii jaii jaii jaii jaii jaii jaii jaii jaii jaii jaii jaii jaii
aal aaiaae aee
y
a 1
(3)slgal j1 (1) 1
15 15 2
5 5 (5) jj j j j j j j j j
4
$$
j i 2 0 0 0 \text {e} \left[ \right.\begin{array}{l l l l l l l l l l}\text {i}&\text {i}&\text {i}&\text {i}&\text {i}&\text {i}&\text {i}&\text {i}&\text {i}&\text {i}\\text {i}&\text {i}&\text {i}&\text {i}&\text {i}&\text {i}&\text {i}&\text {i}&\text {i}&\text {i}\\text {i}&\text {i}&\text {i}&\text {i}&\text {i}&\text {i}&\text {j i}&\text {j i}&\text {j i}&\text {j i}\\text {j i}&\text {j i}&\text {j i}&\text {j i}&\text {j i}&\text {j i}&\text {j i}&\text {j i}&\text {j i}&\text {j i}\\text {j i}&\text {j i}&\text {j i}&\text {j i}&\text {j i}&\text {j i}&\text {j i}&\text {j i}&\text {j i}&\text {j i}\end{array}]
$$
$$
\therefore \mathrm {d} \text {小 区} \mathrm {c} \mathrm {s} \mathrm {g} \mathrm {i} \mathrm {n} \mathrm {u} \mathrm {s} \mathrm {l} \mathrm {c} \mathrm {f}
$$
$$
\cdot \text {d i s t i n g} \left. \right| \text {e l l} \text {i} \text {i} \text {i} \text {i} \text {i} \text {i} \text {i} \text {i} \text {i} \text {i} \text {i} \text {i} \text {i} \text {i} \text {i} \text {i} \text {i} \text {i} \text {i} \text {i} \text {1 0 0 0 0 0 0 0 0 0 0 0 0 0 0 0 0 0 0 0 0 0 0 0 0 0 0 0 0 0 0 0 0 0 0 0 0 0 0 0 0 0 0 0 0 0 0 0 0 0 0 1}
$$

aagcui
g y gall jiall plssu li jagll iiaa. 5yraa lgl e gaii jgll ayin jayll chalj scl jdy
S = S_ ACD
Jie 1
1
(9) S ACD = S COD + S_ DCE
!(1)!《gaiyJUJI》sggaaaoaaleg jzjzly.(V)olbljzslol.
.
.(0)
eaw g jorj oogw . jil 1 2a d 1d jao jg jao wg jz jz jz jz jz jz jz jz
olol joljol jol jol jol jol jol jol jol jol jol jol jol jol jol jol jol jol jol jol jol jol jol jol jol jol jol jol jol jol jol jol jol jol jol jol jol jol jol jol jol jol jol jol jol jol jol jol jol jol jol jol
. 000000000000000000000000000000000000000
#
sL 1.UFESA J
J 1
aiall clll jglcll jlgll aiaa jaaal no aaal all j! s1lc
. jaiw g w h w 1e 2000 jg jll p d iil jy j
j b w l j n j d lgl a c ie g l y b s lal all jol all g oall g . jw g jaiwa qall jol all yd j g w
o jal c lao xie jl g 1j g 1j 1j 1j 1j 1j 1j 1j 1j 1j 1j
J 1 J 1 J 1 J 1 J 1 J 1 J 1 J 1 J 1 J 1 J 1 J 1 J 1 J 1 J 1 J 1 J 1 J 1 J 1 J 1 J 1 J 1 J 1 J 1 J 1 J 1 J 1 J 1 J 1 J 1 J 1 J 1 J 1 J 1 J
B&B TRENDS, SL. guarantees compliance of this product, for the use for which it is, during the period established by the legislation in force in the country of sale. In the case of breakdown during the term of this warranty, users are entitled to repair or else the replacement of the product at no charge if the former is unavailable, unless one of these options proves impossible to fulfil or is disproportionate. In this case, you can then opt for a reduction in price or cancellation of the sale, which must be dealt with directly with the sales vendor. This also covers replacement of spare parts provided that the product has been used according to the recommendations specified in this manual for both cases, and has not been tampered with by any third party that is not authorised by B & B TRENDS, SL. The warranty will not cover any parts subject to wear and tear. This warranty does not affect your rights as a consumer in accordance with the provisions in Directive 1999/44/EC for member states of the European Union.
USE OF WARRANTY
Customers must contact a B&B TRENDS, SL., authorised Technical Service for repair of the product. Since any tampering of the same by anyone not authorised by B&B TRENDS, SL., or the careless or improper use of the same shall render this warranty null and void.
You must keep the purchase invoice, receipt or delivery docket in order to exercise your warranty rights.
For technical service and after-sales care outside the Spanish territory, please submit your query to the point of sale where you purchased the item.
BON DE GARANTIE