Piccadilly - Turntable GPO - Free user manual and instructions
Find the device manual for free Piccadilly GPO in PDF.


User questions about Piccadilly GPO
0 question about this device. Answer the ones you know or ask your own.
Ask a new question about this device
Download the instructions for your Turntable in PDF format for free! Find your manual Piccadilly - GPO and take your electronic device back in hand. On this page are published all the documents necessary for the use of your device. Piccadilly by GPO.
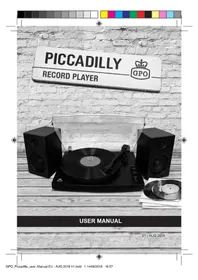
USER MANUAL Piccadilly GPO
natural_image
Black-and-white photo of a vintage CD/TV machine with two speakers and a vinyl record, placed on a wooden surface against a brick wall (no visible text or symbols)USER MANUAL
V1 | AUG 2018

natural_image
Color bar with grayscale gradient and a central crosshair symbol (no text or labels)

natural_image
Simple black square with two horizontal lines and the number '2' in the top right corner, no text or symbols present.
Content
English 5
German 21
French 37
Dutch 53
Spanish 69
Italian 85


text_image
GPO_Piccadilly_user_Manual EU - AUG 2018 V1.indd 4 14/08/2018 16:57
text_image
English 5 GPO_Piccadilly_user_Manual EU - AUG 2018 V1.indd 5 14/08/2018 16:57WARNINGS
• To reduce the risk of electric shock, do not expose this appliance to rain or moisture.
• To reduce the risk of electric shock, do not open the cabinet. No user serviceable parts are inside. Refer servicing to qualified personnel.
- Caution: Do not expose this appliance to dripping or splashing liquids. Do not put objects filled with liquid, such as vases on or near the appliance.
- Caution: To turn this appliance off completely, the POWER cord must be unplugged from the wall outlet. The power cord must be easily accessible at all times.
IMPORTANT SAFETY INSTRUCTIONS
1) Read these instructions.
2) Keep these instructions.
3) Heed all warnings.
4) Follow all instructions.
5) Do not use this apparatus near water.
6) Clean only with dry cloth.
7) Do not block any ventilation openings. Install in accordance with the manufacturer's instructions.
8) Do not install near any heat sources such as radiators, heat registers, stoves or other apparatus (including amplifi-ers) that produce heat.
9) Protect the POWER cord from being walked on or pinched particularly at plugs, convenience receptacles, and the point where they exit from the apparatus.
10) Only use attachments/accessories specified by the manufacturer.
11) Use only with the cart, stand, tripod, bracket, or table specified by the manufacturer, or sold with the apparatus. When a cart is used, use caution when moving the cart/apparatus combination to avoid injury from tip-over.
12) Unplug this apparatus during lightning storms or when unused for long periods of time.
13) Refer all servicing to qualified service personnel. Servicing is required when the apparatus has been damaged in any way, such as POWER-supply cord or plug is damaged, liquid has been spilled or objects have fallen into the apparatus, the apparatus has been exposed to rain or moisture, does not operate normally or has been dropped.


COMPONENT IDENTIFICATIONS
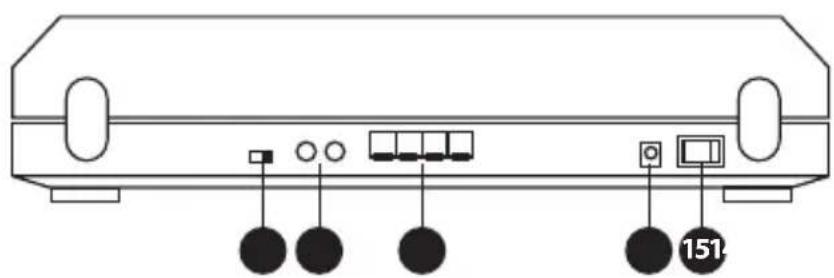
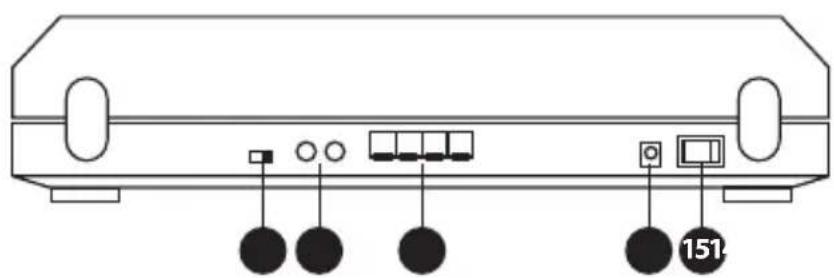
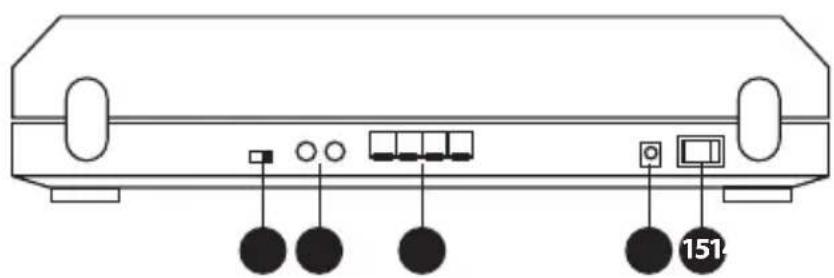
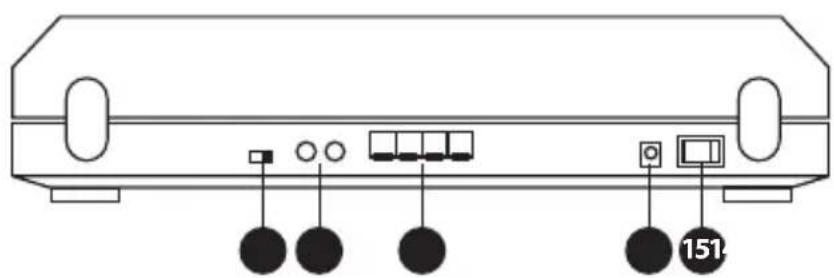
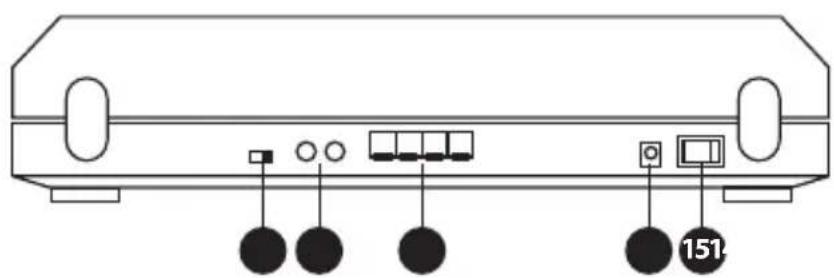
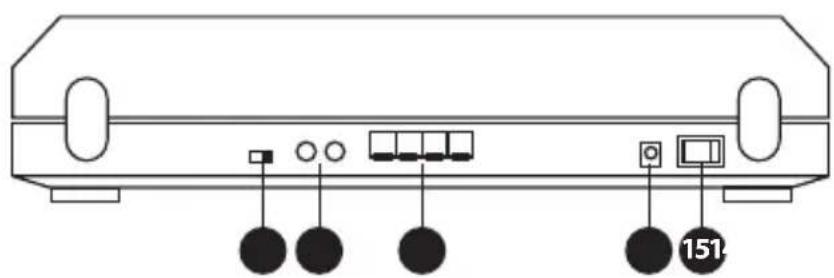
- Rotating shaft 9. 3.5Mm earphone jack
- 45-Rpm adapter 10. Cartridge & stylus (needle)
- Tone arm 11. Auto stop control switch
- Tone arm lever 12. Auto rca output
- Tone arm lock & rest 13. L&r speaker output terminals
- Function knob 14. Dc jack
- Pitch knob 15. Power switch
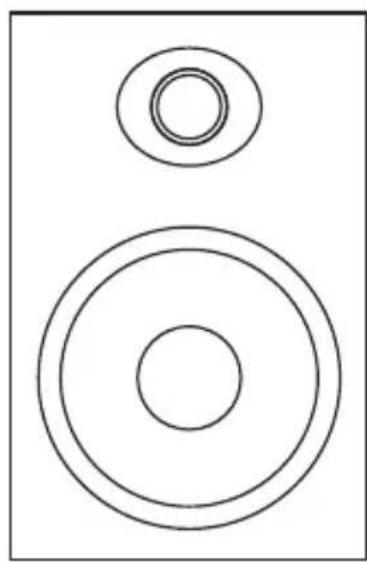
- Volume knob 16. Speaker audio input jack

natural_image
Color calibration bar with grayscale and RGB color swatches, no text or symbols present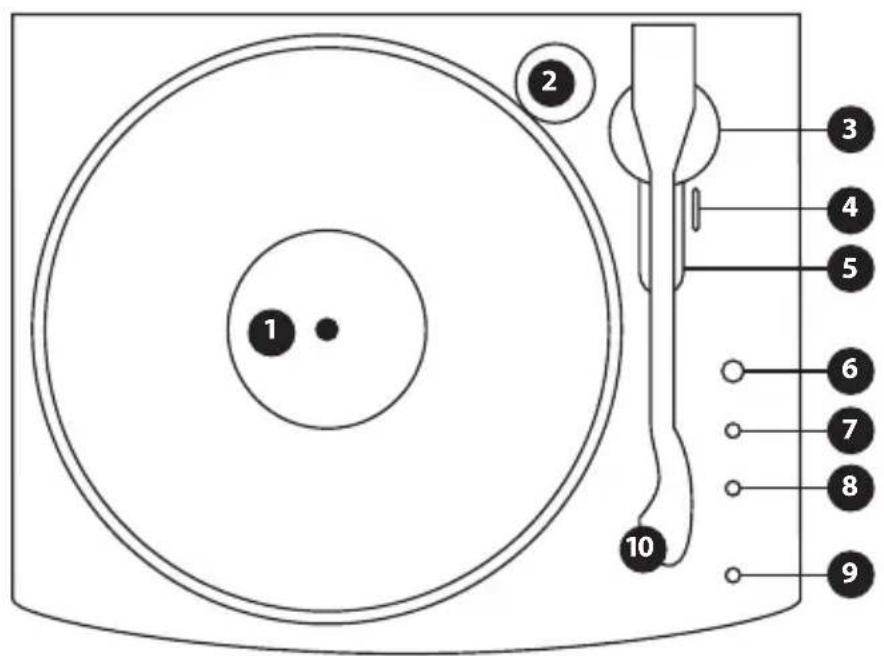
text_image
1 2 3 4 5 6 7 8 9 10
text_image
Diagram of a device rear panel with labeled ports and indicators, including a 151-pin terminal.
natural_image
Simple line drawing of two concentric circles, no text or symbols present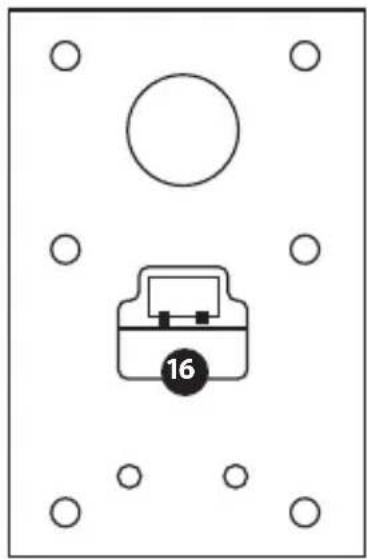
natural_image
Simple diagram of a device with a circular top and labeled component '16' (no text or symbols beyond the number)
natural_image
Abstract geometric shape with a black square and intersecting lines (no text or symbols)UNPACKING YOUR TURNTABLE
- Carefully remove the turntable and accessories from the box.
- Place the turntable on a flat, level surface and carefully open the lid.
- Remove the white protective Stylus Cover by gently pulling it away from the TONE ARM (3) as shown below.
- Carefully remove the twist-tie from the TONE ARM (3).
- Release the TONE ARM LOCK (5) by holding the TONE ARM (3) to the TONE ARM REST and pushing the TONE ARM LOCK (5) to the right.
- NOTE:
- Please do not discard the white protective stylus cover, as it can protect the stylus when the turntable is not in use or is being moved.
- Felt protector pad should be left on the turntable for added protection to vinyl.
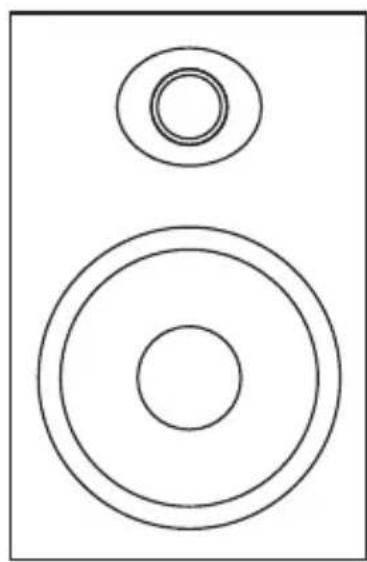
- Please connect the L&R SPEAKERs correctly before use.
SPEAKER
- Please connect the speaker to the unit before use.
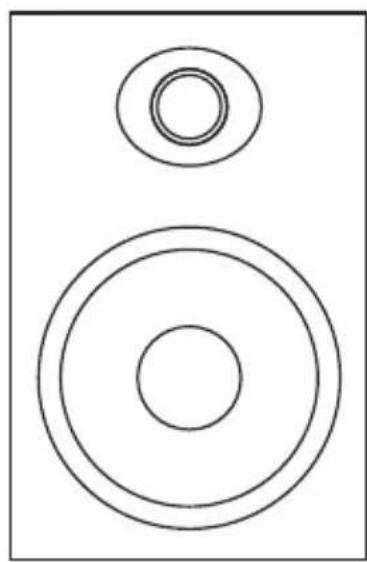
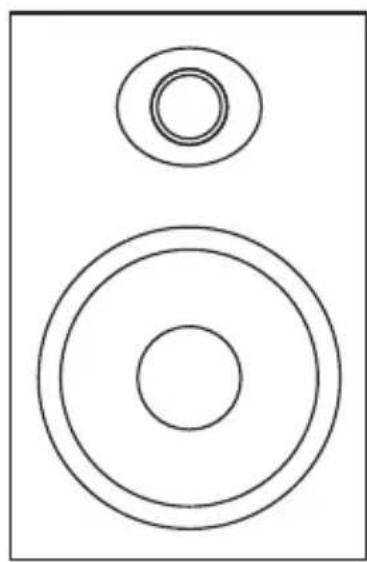
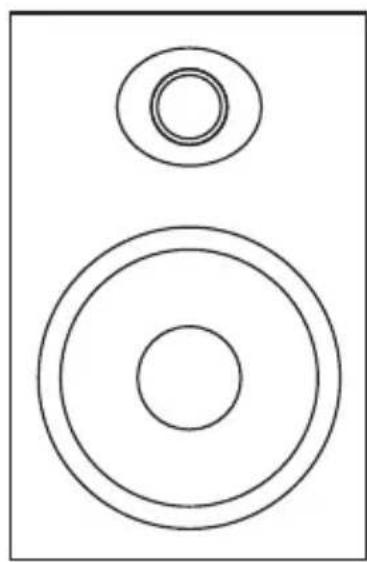
- Use the included Red & Black speaker line to connect the turntable to the Speaker. Simply plug the Red & Black ends of the speaker line into the corresponding Red & Black L&R SPEAKER OUTPUT terminals on the rear of the player. Then connect the other Red & Black ends of the speaker line into the Red & Black SPEAKER AUDIO INPUT JACK(16) on the rear of the Speakers
POWER
- Plug the supplied AC 100V\~240V, 50/60Hz to DC 12V power adapter into the DC 12V INPUT (14) located on the rear of the turntable.
- Insert the wall plug of the power adapter into an electrical wall outlet.
- Press the POWER BUTTON to the ON location on the rear of the turntable.
NOTE: When the turntable player powers on, the power indicator light on the top of the turntable, INDICATOR LIGHT (9), turns on.
VOLUME
The Speaker Volume is also controlled by the POWER/VOLUME KNOB (8).
- To Increase the Volume: Turn the POWER/VOLUME KNOB (8) clockwise.
- To Decrease the Volume: Turn the POWER/VOLUME KNOB (8) counterclockwise.
NOTE: Please connect the L&R SPEAKER correctly before use. Adjust the volume to a comfortable position to reduce interference from the outside world.


PLAYING A RECORD
- Turn the FUNCTION KNOB (6) to the correct speed for your record (33, 45, or 78 RPM).
- Place the record on the turntable, being careful to place the spindle directly in the record hole.
We have included a 45-RPM ADAPTER (2) to use when playing 45-RPM records. Just pull the adapter from its convenient storage space next to the rear of the TONE ARM and place it over the spindle. Felt protector pad also included.
- Turn the VOLUME KNOB (8) to adjust the sound to the right level.
- Unlock the TONEARM LOCK (5) by gently pushing the Lock to right and the TONE ARM (3) will be ready for playing.
- You can turn the PITCH KNOB (7) left or right to adjust the turntable speed when the turntable is playing.
CAUTION: Always lock the TONE ARM (3) in place using the TONE ARM LOCK&REST (5) when the player is not in use or the turntable is being moved. Failure to do so can cause damage to the cartridge or stylus.
-
Raise the TONE ARM (3) by slowly lifting the TONE ARM LEVER (4).
-
Using your finger to move the TONE ARM (3) over the portion of the record you want to hear. The record automatically begins spinning once the TONE ARM (3) is over the record surface.
-
Lower the TONE ARM (3) using the TONE ARM LEVER (4) until the STYLUS (10) touches the record and begins playing your music. Make sure the TONE ARM LEVER (4) is completely down.
-
Adjust the Volume to the desired level by turning the VOLUME KNOB (8).
-
When finished listening, use the TONE ARM LEVER (4) to raise the TONEARM (3) and then place it back on the TONE ARM LOCK & REST (5). The record will automatically stop spinning.
-
If finished using the turntable, be sure to lock the TONE ARM LOCK & REST (5).
BLUETOOTH RECEIVER FUNCTION
-
When FUNCTION KNOB (6) is set to BT, the power light will turn blue and start flashing and it starts to connect the Bluetooth equipment. When the Bluetooth connects successfully, the power light will stop flashing.
-
When the FUNCTION KNOB (6) is turned to 33 & 45 & 78, the Turntable play function will turn on and the Bluetooth function will turn off.
AUTO STOP
The AUTO STOP feature allows the turntable to automatically stop playing when the
STYLUS (15) reaches the end of the record.
- To turn the AUTO STOP feature ON: Set the AUTO STOP CONTROL SWITCH (11) to AUTO.
- To turn the AUTO STOP feature OFF: Set the AUTO STOP CONTROL SWITCH (11) to MANUAL.
NOTE: When using the MANUAL setting, once the record is finished, the player will continue to spin until you raise the TONE ARM (3) and move it back to the TONE ARM LOCK & REST (5) which stops the spinning.
CONNECTING EXTERNAL SPEAKERS
Use the included Red & White RCA Cables to connect the turntable to an External Speaker or Stereo system. Simply plug the Red & White ends of the RCA Cable into the corresponding Red & White AUDIO OUTPUT JACKS (12) on the rear of the player. Then connect the other Red & White ends of the RCA Cable into the corresponding Red & White Audio Input Jacks on your External Speakers or Stereo system. The speaker requires a pre-AMP inside it.
HEADPHONES
To use headphones with this player, connect any headphone with a 3.5mm jack into the input on the 3.5mm HEADPHONE JACK (9) located on the rear of the player.
- NOTE: When headphones are plugged in, no sound will be heard from the built-in speakers.
REMOVING THE STYLUS (NEEDLE)
natural_image
Close-up of a black mechanical component with white spherical parts, no visible text or symbolsFIG 3a
natural_image
Close-up of a robotic arm gripping a white object, no visible text or symbolsFIG 3b
natural_image
Close-up of a mechanical component with a metallic bracket and a curved handle (no visible text or symbols)FIG 4a
NOTE: If not done correctly, separating the STYLUS from the ceramic CARTRIDGE can cause damage to the CARTRIDGE. If needed, please seek assistance from an experienced individual.
- Lock the TONE ARM (3) on the TONE ARM LOCK & REST (5) by pushing the TONE ARM LOCK to the left
- Remove the white protective Stylus Cover (if necessary).
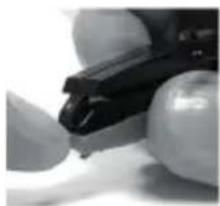
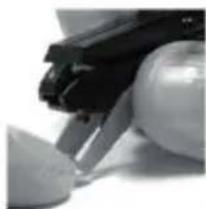
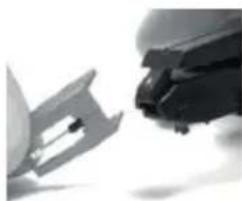
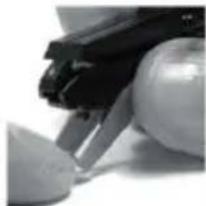
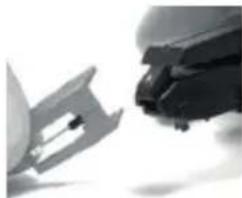
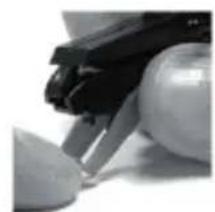
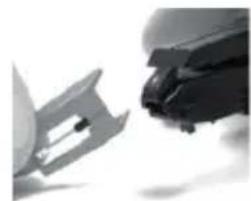
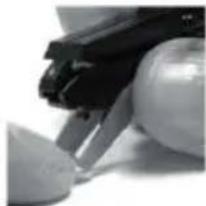
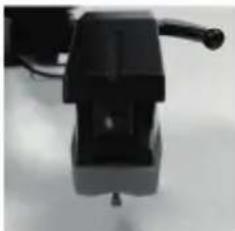
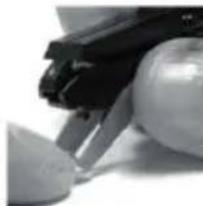
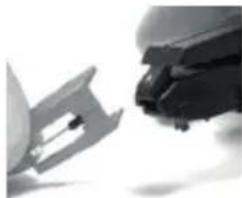
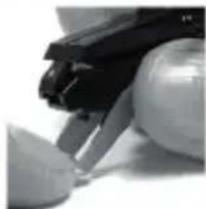
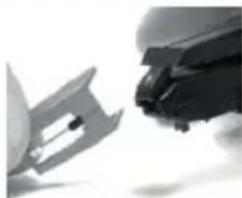
- Hold the bottom of the CARTRIDGE with your thumb & index finger, as shown below in Fig. 3a. With your other thumb carefully push down on the top edge of the Red Stylus Assembly (Red piece includes the needle) until the Stylus Assembly separates from the CARTRIDGE as shown in Fig 3b.
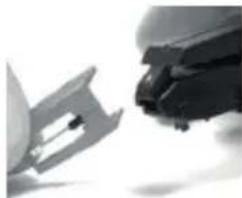
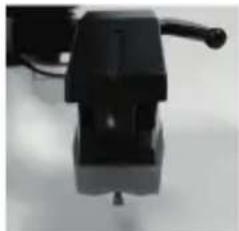
- Carefully remove the entire Stylus Assembly from the Cartridge by pulling the Stylus Assembly away from the CARTRIDGE (FIG 4a).


INSTALLING A NEW STYLUS (NEEDLE)
natural_image
Close-up of a mechanical component with no visible text or symbolsFIG 5a
natural_image
Close-up of a hand holding a black object, possibly a pen or tool, with no visible text or symbols.FIG 6a
natural_image
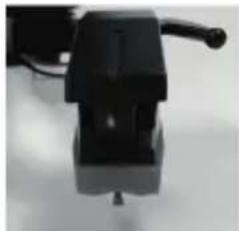
Close-up of a black mechanical component with a curved handle and central shaft (no visible text or symbols)FIG 7a
NOTE: Do not directly touch the STYLUS (NEEDLE) (10) during installation, or you may cause permanent damage to the STYLUS (10).
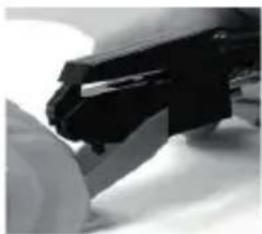
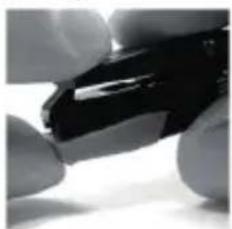
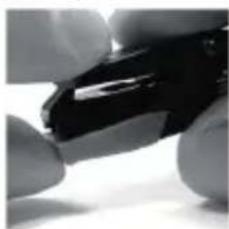
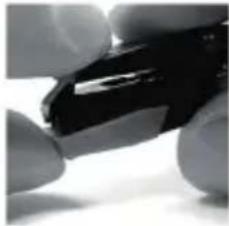
- Hold the front tip of the Stylus Assembly with your thumb and index fingers and insert the rear edge of the Stylus Assembly on the CARTRIDGE as shown in Fig 5a.
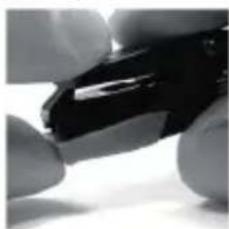
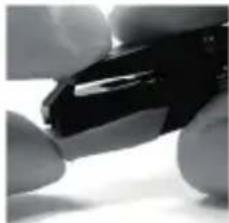
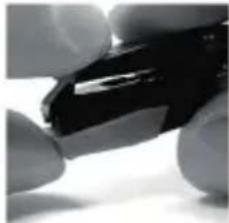
- While applying gentle pressure on the top of the TONE ARM (3) with your index finger, carefully push the Stylus Assembly upwards until you hear a click and the Stylus Assembly locks into place (Fig 6a).
- The new STYLUS (10) is now ready to use.
A CORRECTLY POSITIONED STYLUS
- With normal use, a STYLUS (10) should last for about 50-60 hours of record play. It is recommended the STYLUS (10) be replaced as soon as you notice a deterioration of the sound quality.
- Use of a worn-out STYLUS (10) may damage records.
- Playing 78 RPM records will cause the STYLUS (10) to wear out much faster than 33 or 45 RPM records.
TROUBLE SHOOTING
- Check to confirm the FUNCTION SWITCH KNOB (6) is correctly set for the record being played (33, 45, or 78 RPM).
RECORDS KEEP SKIPPING
- Carefully look at the surface of the record under a strong light to see if there are any significant scratches or other damage to the record which will cause it to skip.
- Make sure the turntable is on flat at level surface.
- Clean the record with a proper record cleaning brush to remove build-up of dust & dirt in the grooves of the record.
- Choose a different record after examining it to be sure the record is clean to see if you're get the same result.
- Check to make sure the STYLUS (15) is in the correct middle position.
NO SOUND
- Make sure the white protective Stylus Cover has been removed from the cartridge.
- Increase the volume by turning the POWER/VOLUME KNOB (8) clockwise as it may be set too low.
- Confirming there is nothing plugged into the 3.5mm HEADPHONE JACK (9) on the top of the player.
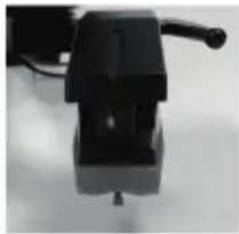
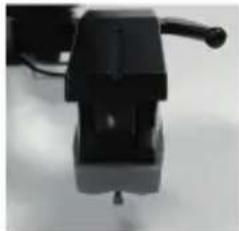
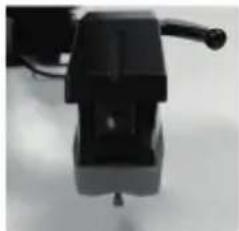
- Check the position of the STYLUS (10) to insure it has not shifted out of its proper middle position (See Fig. 7a on page 9).

natural_image
Color palette bar with grayscale swatches and a central crosshair symbol (no text or labels)NO POWER
- Make sure the AC 100V\~240V, 50/60Hz to DC 12V power adapter is securely connected to the DC 12V INPUT (14) on the rear of the turntable as well as the wall outlet.
- Make sure the electrical outlet is working by plugging in another device.



natural_image
Color palette bar with grayscale shades and a central crosshair symbol (no text or labels)

natural_image
Abstract geometric shape with a black square and intersecting lines (no text or symbols)
text_image
GPO_Piccadilly_user_Manual EU - AUG 2018 V1.indd 20 14/08/2018 16:57
text_image
German 21 GPO_Piccadilly_user_Manual EU - AUG 2018 V1.indd 21 14/08/2018 16:57WARNHINWEISE
natural_image
Color palette bar with grayscale shades and a central crosshair symbol (no text or labels)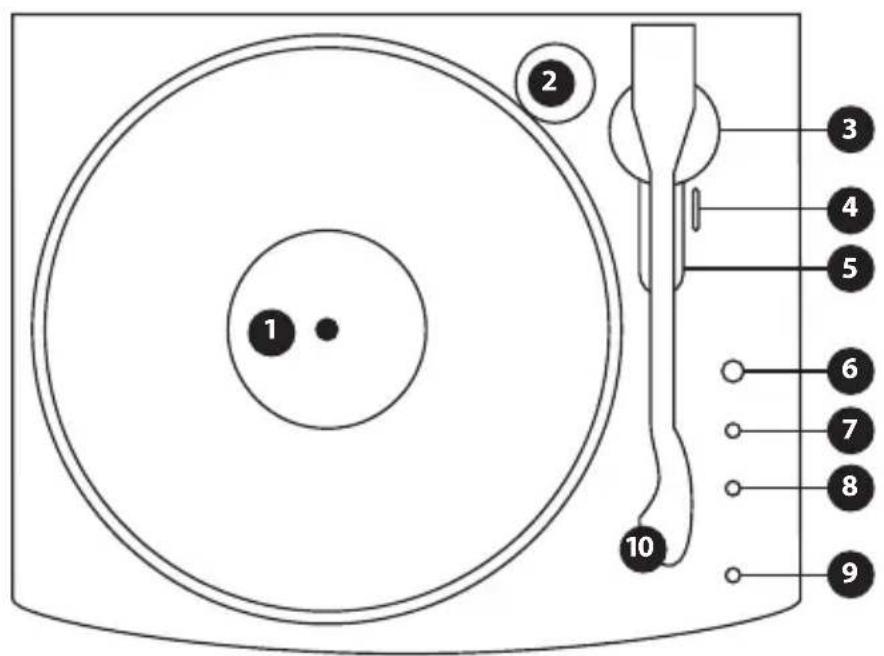
text_image
1 2 3 4 5 6 7 8 9 10
text_image
Diagram of a device rear panel with labeled ports and indicators, including a 151-pin terminal.
natural_image
Simple line drawing of two concentric circles, no text or symbols present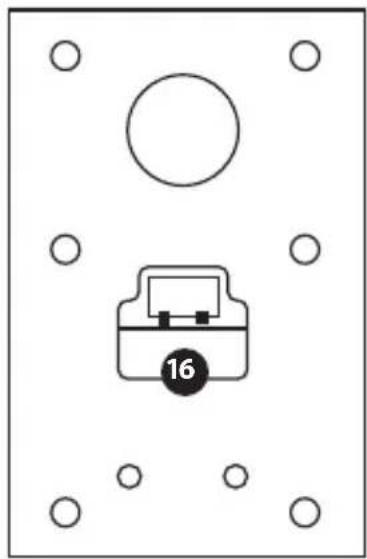
natural_image
Simple diagram of a device with a circular top and labeled component '16' (no text or symbols beyond the number)natural_image
Close-up of a black mechanical component with white spherical parts, no visible text or symbolsFIG 3a
natural_image
Close-up of a robotic arm gripping a white object, possibly a mechanical or robotic component (no visible text or symbols)FIG 3b
natural_image
Close-up of mechanical components and a tool (no visible text or symbols)FIG 4a
natural_image
Close-up of a black mechanical component with a white cylindrical part attached (no visible text or symbols)FIG 5a
natural_image
Close-up of a hand holding a black object, possibly a small electronic component or tool (no visible text or symbols)FIG 6a
natural_image
Close-up of a black mechanical component with a handle and central shaft (no visible text or symbols)FIG 7a
natural_image
Color palette bar with grayscale shades and a central crosshair symbol (no text or labels)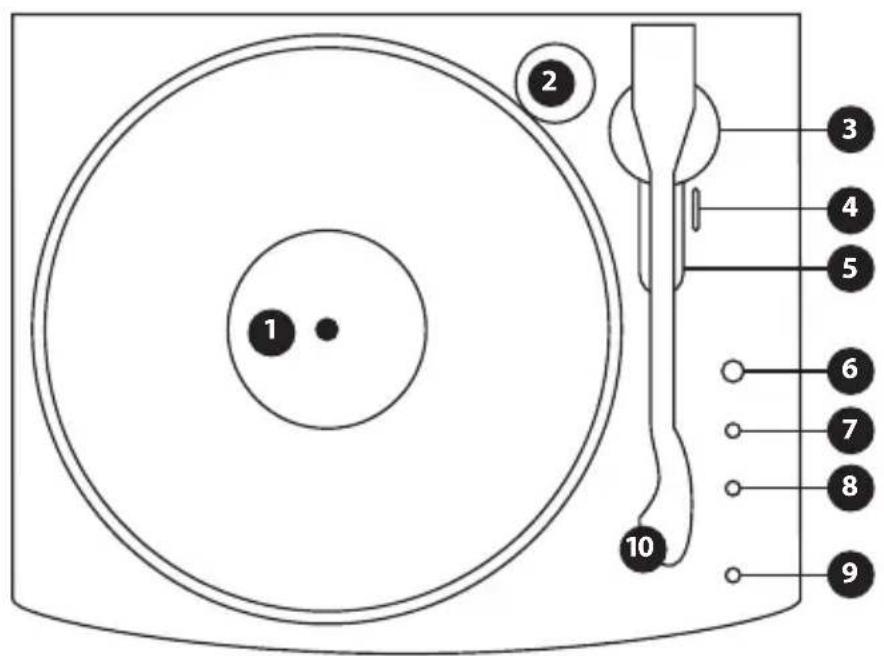
text_image
1 2 3 4 5 6 7 8 9 10
text_image
Diagram of a device rear panel with labeled ports and indicators, including a 151-pin terminal.
natural_image
Simple line drawing of two concentric circles, no text or symbols present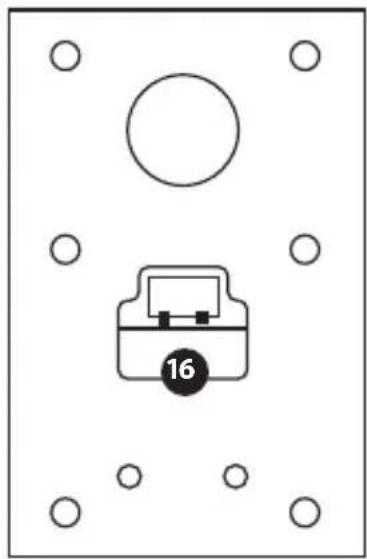
natural_image
Simple diagram of a device with a circular top and labeled component '16' (no text or symbols beyond the number)
text_image
41DÉBALLAGE DE LA PLATINE
natural_image
Close-up of a hand holding a small black object with a white spherical object nearby (no visible text or symbols)FIG 3a
natural_image
Close-up of a robotic arm joint (no visible text or symbols)FIG 3b
natural_image
Close-up of a mechanical component with a curved bracket and a textured surface (no visible text or symbols)FIG 4a
natural_image
Close-up of a mechanical component with no visible text or symbolsFIG 5a
natural_image
Close-up of a hand holding a black object, possibly a pen or tool, with no visible text or symbols.FIG 6a
natural_image
Close-up of a black mechanical component with a curved handle and central shaft (no visible text or symbols)FIG 7a
IL N'Y A PAS DE COURANT
natural_image
Color calibration bar with grayscale and RGB color swatches, no text or symbols present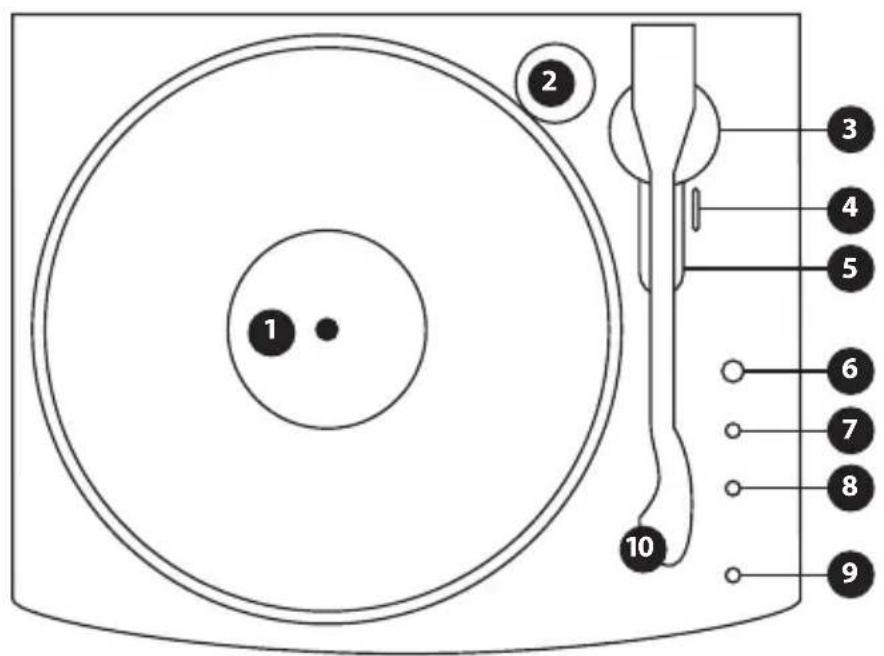
text_image
1 2 3 4 5 6 7 8 9 10
text_image
Diagram of a device rear panel with labeled ports and indicators, including a 151-pin terminal.

natural_image
Simple line drawing of two concentric circles, no text or symbols present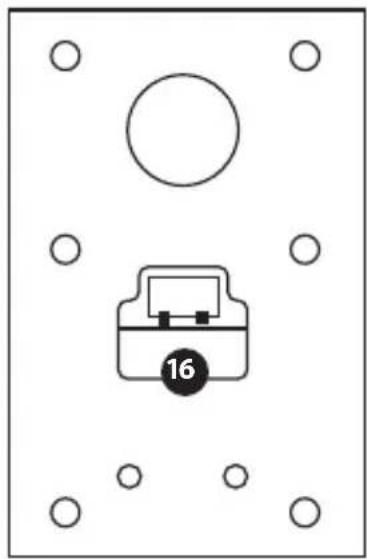
natural_image
Simple diagram of a device with a circular top and labeled component '16' (no text or symbols beyond the number)UW DRAAITAFEL UITPAKKEN
natural_image
Close-up of a black mechanical component with white spherical parts, no visible text or symbolsFIG 3a
natural_image
Close-up of a mechanical component with black and white parts, no visible text or symbolsFIG 3b
natural_image
Close-up of mechanical components and a tool (no visible text or symbols)FIG 4a
natural_image
Close-up of a robotic arm gripping a white object (no visible text or symbols)FIG 5a
natural_image
Close-up of hands holding a small object, possibly a pen or tool, with no visible text or symbols.FIG 6a
natural_image
Close-up of a black mechanical component with a handle and central shaft (no visible text or symbols)FIG 7a
natural_image
Color palette bar with grayscale swatches and a central crosshair symbol (no text or labels)GEEN VOEDING
natural_image
Color palette bar with grayscale shades and a central crosshair symbol (no text or labels)

text_image
67
text_image
GPO_Piccadilly_user_Manual EU - AUG 2018 V1.indd 68 14/08/2018 16:57
text_image
Spanish 69 GPO_Piccadilly_user_Manual EU - AUG 2018 V1.indd 69 14/08/2018 16:57CAUCIÓN
natural_image
Color calibration bar with grayscale gradient and a central crosshair symbol (no text or labels)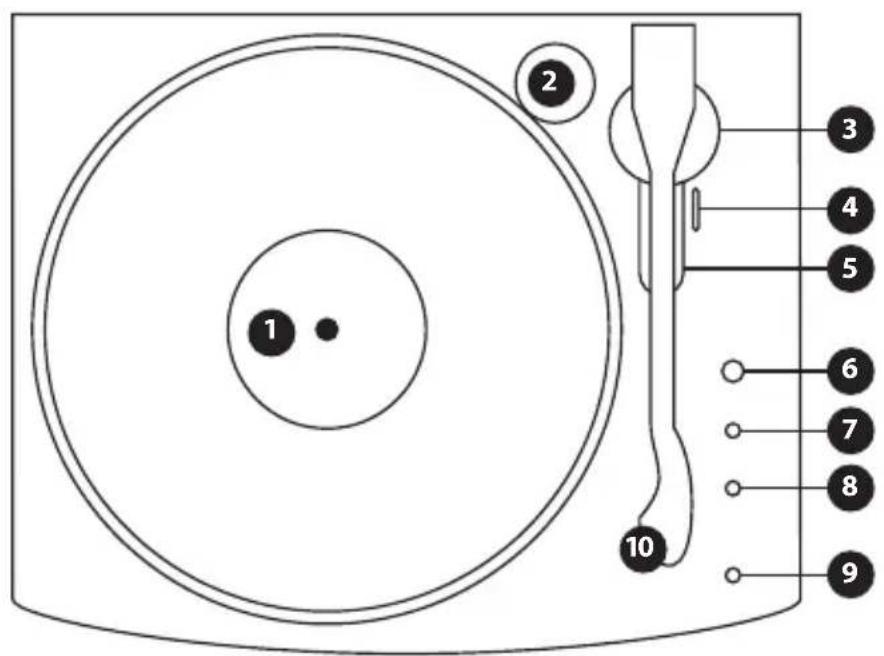
text_image
1 2 3 4 5 6 7 8 9 10
text_image
Diagram of a device rear panel with labeled ports and indicators, including a 151-pin terminal.
natural_image
Simple line drawing of two concentric circles, no text or symbols present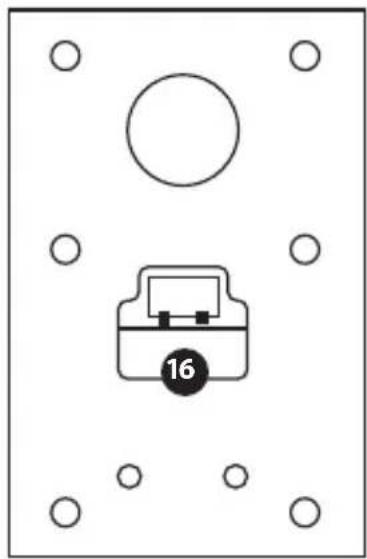
natural_image
Simple diagram of a device with a circular top and labeled component '16' (no text or symbols beyond the number)DESEMBALAJE DEL TOCADISCOS
natural_image
Close-up of a black mechanical component with white spherical parts, possibly a tool or tool, against a plain background (no text or symbols visible)FIG 3a
natural_image
Close-up of a mechanical component with black and white parts, no visible text or symbolsFIG 3b
natural_image
Close-up of mechanical components and a tool (no visible text or symbols)FIG 4a
natural_image
Close-up of a mechanical component with no visible text or symbolsFIG 5a
natural_image
Close-up of a hand holding a black object, possibly a pen or tool, with no visible text or symbols.FIG 6a
natural_image
Close-up of a black mechanical component with a curved handle and central shaft (no visible text or symbols)FIG 7a
natural_image
Color palette bar with grayscale shades and a central crosshair symbol (no text or labels)NO HAY CORRIENTE
natural_image
Color palette bar with grayscale shades and a central crosshair symbol (no text or labels)

text_image
83
text_image
GPO_Piccadilly_user_Manual EU - AUG 2018 V1.indd 84 14/08/2018 16:57
text_image
Italian 85 GPO_Piccadilly_user_Manual EU - AUG 2018 V1.indd 85 14/08/2018 16:57AVVERTENZE
natural_image
Color calibration bar with grayscale and RGB color swatches, no text or symbols present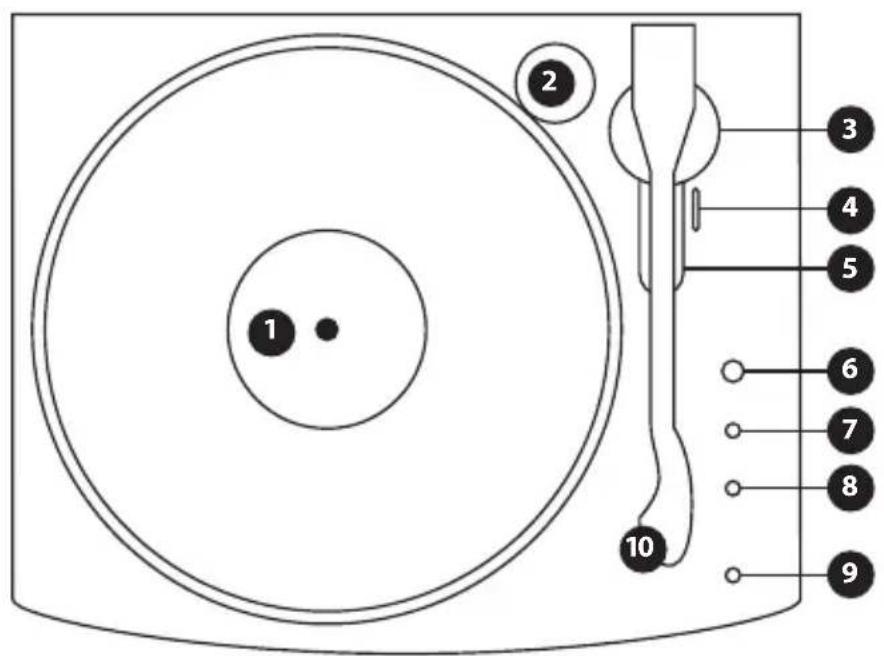
text_image
1 2 3 4 5 6 7 8 9 10
text_image
Diagram of a device rear panel with labeled ports and indicators, including a 151-pin terminal.
natural_image
Simple line drawing of two concentric circles, no text or symbols present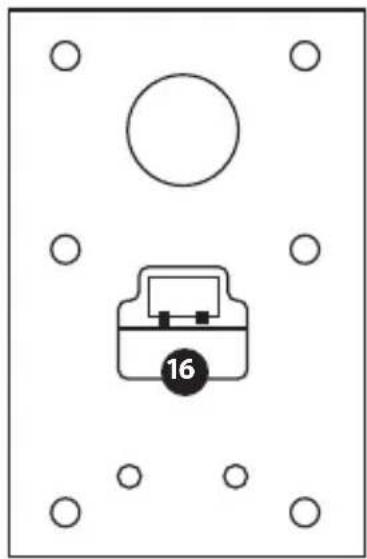
natural_image
Simple diagram of a device with a circular top and labeled component '16' (no text or symbols beyond the number)DISIMBALLAGGIO DEL GIRADISCHI
natural_image
Close-up of a mechanical component with metallic parts and spherical elements (no visible text or symbols)FIG 3a
natural_image
Close-up of a robotic arm with black and white components, no visible text or symbolsFIG 3b
natural_image
Close-up of a mechanical component with a metallic bracket and a dark textured part, possibly a tool or bracket (no visible text or symbols)FIG 4a
natural_image
Close-up of a robotic arm gripping a white object (no visible text or symbols)FIG 5a
natural_image
Close-up of a hand holding a dark, glossy object (no visible text or symbols)FIG 6a
natural_image
Close-up of a black mechanical component with a curved handle and central shaft (no visible text or symbols)FIG 7a
natural_image
Color palette bar with grayscale swatches and a central crosshair symbol (no text or labels)natural_image
Color palette bar with grayscale shades and a central crosshair symbol (no text or labels)

text_image
99EN
Hereby ProtelX, declares that this equipment (GPO Piccadilly) is in compliance with the essential requirements and other relevant provisions of Directive, you can access a copy of this certificate on www.gporetro.com/Certificate-of-Conformity
DE
ProTelX Ltd, Unit 6, Park 17 Industrial Estate, Moss Lane, Whitefield, Manchester, M45 8FJ UK