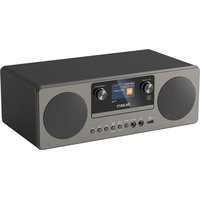
Humboldt - Radio Majority - Free user manual and instructions
Find the device manual for free Humboldt Majority in PDF.


User questions about Humboldt Majority
0 question about this device. Answer the ones you know or ask your own.
Ask a new question about this device
Download the instructions for your Radio in PDF format for free! Find your manual Humboldt - Majority and take your electronic device back in hand. On this page are published all the documents necessary for the use of your device. Humboldt by Majority.
USER MANUAL Humboldt Majority
natural_image
Exterior view of a black electronic device with two speakers and a digital display showing audio, radio, and speaker icons (no readable text or symbols beyond branding)Controls And Functions....3
Remote control....5
What's in the Box? 6
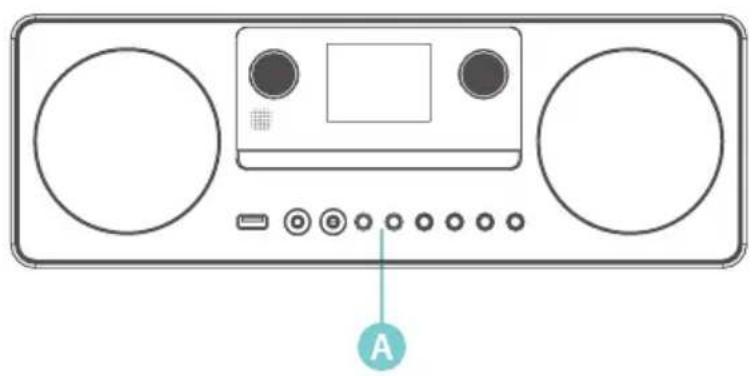
Box Contents 6
Battery Replacement for the Remote Control 7
Remote control operation range....7
Instructions Guide....7
Connecting to the mains socket 8
Network Connection 8
Getting Started....9
Internet Radio 15
Podcasts ....17
Spotify Connect....18
DAB- Operations....18
FM Operation....21
CD and MP3 Operation....23
USB Operation....25
Bluetooth Operation....26
Aux Input 27
NetRemote 27
Using headphones 28
Sleep Setting 28
Setting the Alarm....29
Cancelling the Alarm 29
Specifications and Warranty....30
Specification 30
Support....31
Warranty....31
Safety Information 32
SAFETY PRECAUTIONS....32
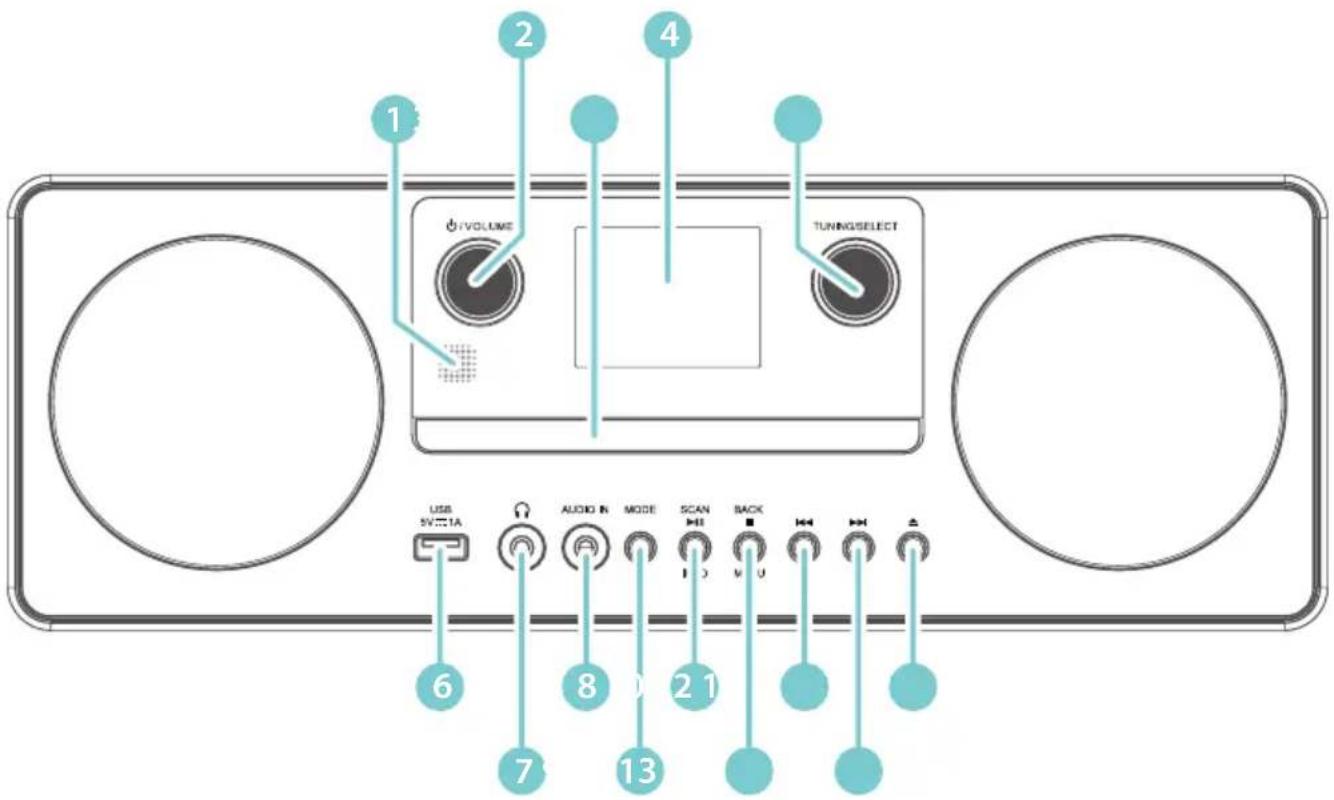
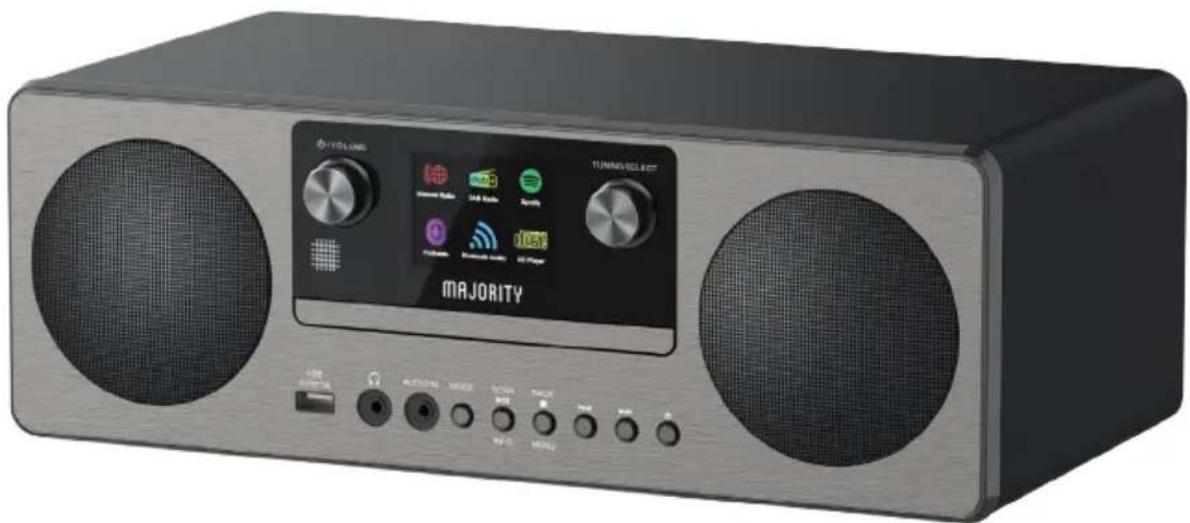
Front View
text_image
1 2 3 4 VOLUME TUNINGSELECT USB 5V 1A AUDIO IN MODE SCAN BACK 6 7 8 13 2 1- Remote Control Sensor
- ⏻/VOLUME Dial
- CD door
- Display
- TUNING/SELECT Dial
- USB connection
-
Earphone Jack
-
AUDIO IN Jack
- MODE Button
- SCAN/▶II /INFO Button
- BACK/ ■ /MENU Button
- Button
- ▶▶ Button
- ▲ Button
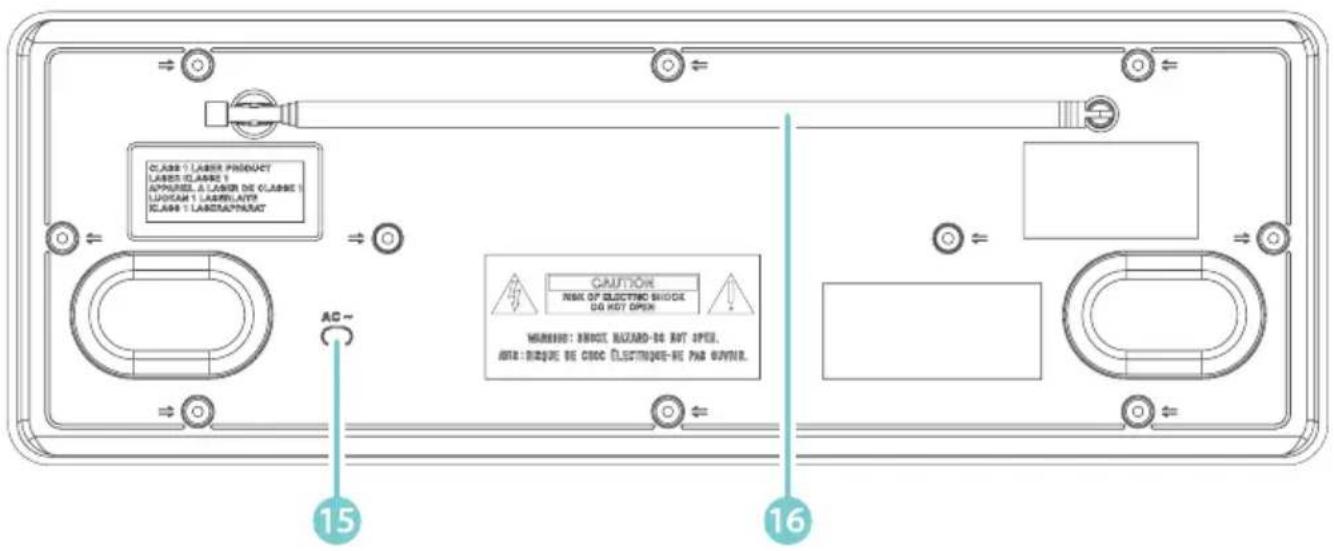
Rear view
text_image
CLASS 1 LABER PRODUCT LABES CLASS 1 APPROISE A LABER DE CLASS 1 LUCRAM 1 LABR/LATRY CLASS 1 LABR/LATRY AC ~ CAUTION RISK OF ELECTRIC SHOCK DO NOT OPEN WARNING: DIRECT RAZARD-DO NOT OPEN. ANTI: DIQUIS DE CROC ELECTRONICS-RE PAR OUTFER. 15 16- DAB/FM Antenna15. Mains Connection Cable
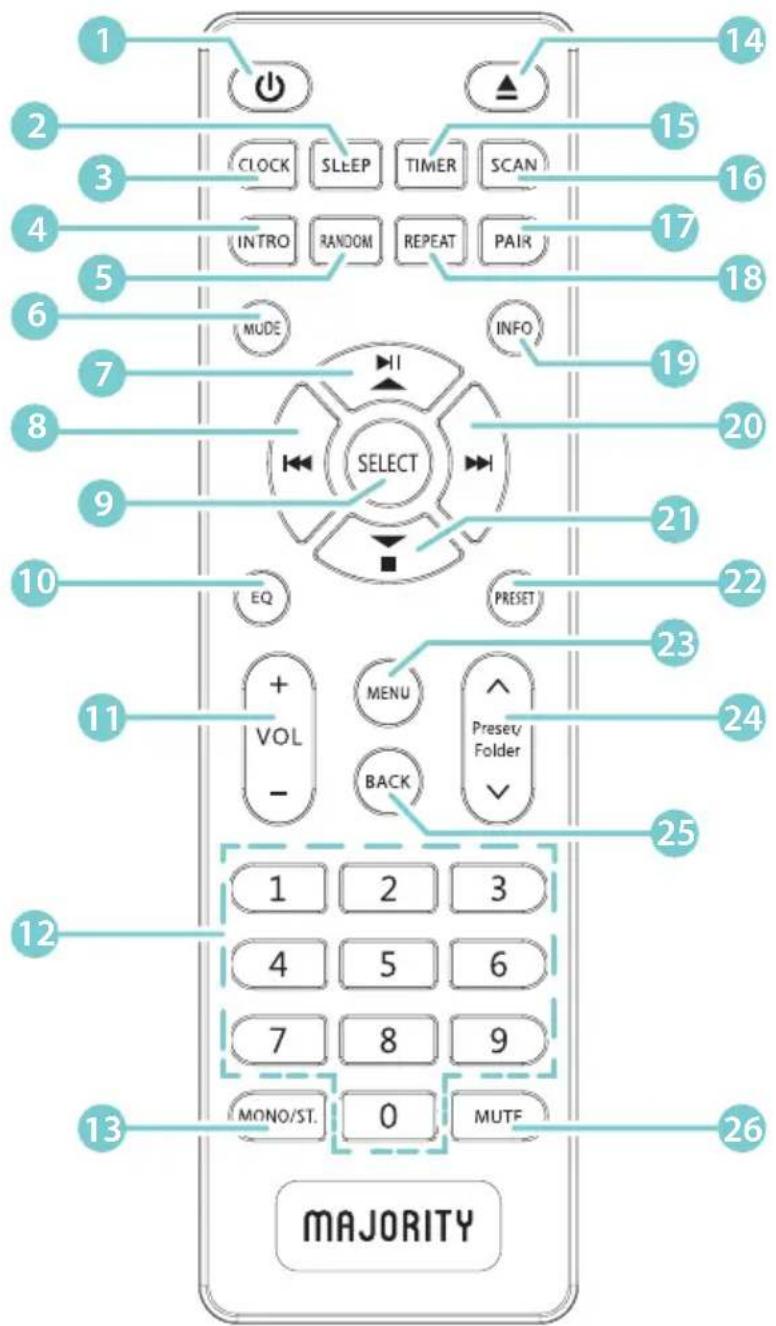
Remote control
- ⏻ Button
- SLEEP Button
- CLOCK Button
- INTRO Button
- RANDOM Button
- MODE Button
- ▶II ▲ Button
- Button
- SELECT Button
- EQ Button
- VOL +/- Buttons
- Number Buttons
- MONO/ST. Button
- ▲Button
- TIMER button
- SCAN Button
- PAIR button
- REPEAT Button
- INFO Button
- ▶▶ Button
- ▼ ■ Button
- PRESET Button
- MENU Button
- PRESET/FOLDER
^/▼ Buttons - BACK Button
- MUTE Button
text_image
1 2 3 4 5 6 7 8 9 10 11 12 13 CLOCK SLEEP TIMER SCAN INTRO RANDOM REPEAT PAIR Mude INFO SELECT EQ PRESET VOL - MENU BACK Preset Folder 1 2 3 4 5 6 7 8 9 MONO/ST. 0 MUTF majority 14 15 16 17 18 19 20 21 22 23 24 25Box Contents
natural_image
Front view of a portable electronic device with two circular tops and a central control panel (no text or symbols visible)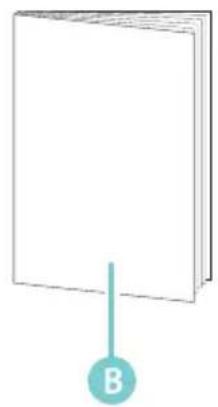
natural_image
Simple line drawing of a blank rectangular book with a small circular label labeled 'B' at the bottom (no text or symbols on the book itself)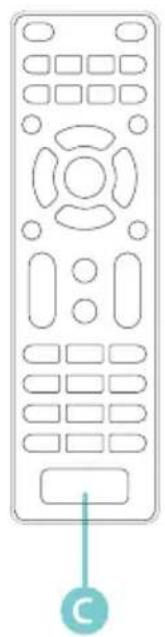
natural_image
Line drawing of a remote control with buttons and a labeled button (no text or symbols beyond the label)A. Humboldt unit
B. Instruction Manual
C. Remote
Battery Replacement for the Remote Control
-
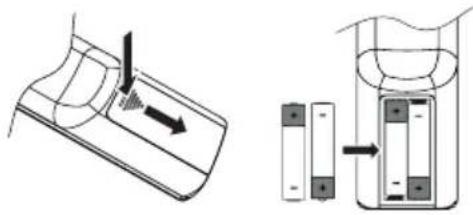
Press down the battery cover at "and push the battery cover outwards in the direction of the arrow.
-
Insert 2 x AAA 1.5V batteries (not included). Make sure to match the (+) and (-) ends of the battery with the (+) and (-) ends indicated in the battery compartment.
-
Close the cover.
text_image
Diagram illustrating battery charging process with labeled components and directional arrows
Handling the Battery
Improper or incorrect use of batteries may cause corrosion or battery leakage, which could cause fire, personal injury or damage to property.
Only use the battery type indicated in this manual.
Do not dispose of the used battery as domestic waste. Dispose of it in accordance with local regulations.
Remove the battery from the remote control when not in use for a long period of time, as corrosion or battery leakage may occur and result in physical injury, and/or property damage, and/or fire.
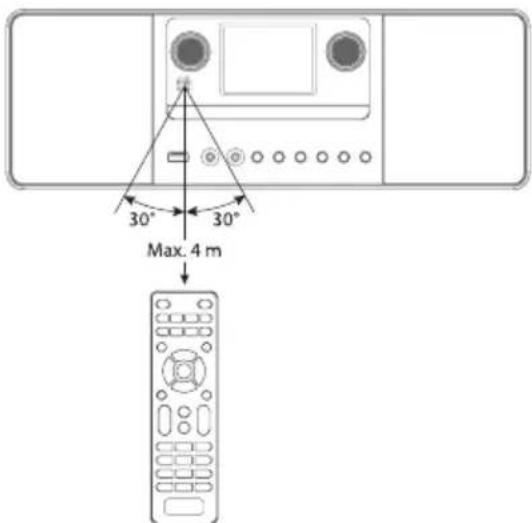
Remote control operation range
The remote control sensor on the front unit is sensitive to the remote control's commands up to a maximum of 4 metres away and within a maximum of 60^ arc. Note that the operating distance may vary depending on the brightness of the room.
text_image
30° 30° Max. 4 mConnecting to the mains socket
Unwind the mains cable to its full length. Connect the mains plug to the mains socket. The unit is now connected and ready to use

Be sure to connect the power cord to an AC outlet that supplies the correct voltage.
Hold the power plug when plugging it into an outlet or unplugging it. Never pull or yank on the power cord.
To switch the unit off completely, unplug the mains cable from the mains socket.
Network Connection
This product only supports wireless network connection for network access and does not support wired LAN connection.
Wireless Network
- To begin with, check the control lamps (LINK/ACT), of your router light up.
- To connect with your wireless network, proceed with the operations described under section'
Getting Started'.
It is recommended running through the setup wizard in the System Settings section.

This unit cannot be connected to a standalone modem directly. A router, or a modem connected to a router has to be used.
Note: Please follow the instructions/specifications of your internet service provider, telecommunication carrier and router user manual.
Getting Started

This instruction manual explains the basic instruction for operating this unit. Unless otherwise stated, all operations described are based on remote control use.
Powering ON/OFF
Press the ⏻/VOLUME dial on the unit or ⏻ button on the remote to turn On/Off the unit.
Selecting Modes
Press the MODE button on the unit or remote control to access the MODE Menu. Turn the TUNING/SELECT dial on the unit or press the ◀◀ / ▶▶ buttons on the remote control to select between Internet Radio, Podcast, Spotify, Music Player, DAB Radio, FM Radio, Bluetooth Audio, and AUX In, press the TUNING/SELECT dial on the unit or SELECT button on the remote control to Enter.

When the unit is idle for approximately 15 minutes, it will automatically switch to standby. To switch the unit off completely, remove the mains plug from the main socket. Please turn the unit off completely to save energy when not in use.
Adjusting the Volume
- Turn the ⏻/VOLUME dial on the unit or press the VOL +/- buttons on the remote control to adjust the volume.
- Press the MUTE button to turn the sound off. To resume to sound listening, press once again the MUTE button then turn the ⏻/VOLUME dial on the unit, or simply press the VOL +/- buttons on the remote control to increase/decrease the volume.
Navigating the Menu
- Press MENU button on the unit or remote control to access the menu.
- Turn the TUNING/SELECT dial on the unit or press ▶II▲/▼■ buttons on the remote to select your choice.
- Press the TUNING/SELECT dial on the unit or SELECT button on the remote control to confirm your selection.
Initial Set-up
At first time use, the display screen will show 'Welcome screen' followed by 'Language menu'.
To select desired language, turn the TUNING/ SELECT dial on the unit or press the ▶|| ▲/▼ ■ buttons on the remote control to scroll through the list until you find the one you prefer.
Press the TUNING/SELECT dial on the unit or SELECT button on the remote to confirm the language you would like to choose.
Privacy notice
Please visit the following page on a PC or mobile device.
www.frontiersmart.com/privacy
Once the language is selected, the privacy policy page will appear. Please visit the website mentioned on the page for the details of the privacy policy.
Finally, press the TUNING/SELECT dial on the unit or SELECT buttons on the remote control to proceed to the next step as per the followings:
- To launch the initial Setup wizard, turn the TUNING/ SELECT dial on the unit or ◀◀ / ▶▶ buttons on the remote control to select YES, to confirm your selection press the TUNNIG/SELECT dial on the unit or SELECT button on the remote control to confirm.
- Select the time format. Choose the clock time format as per your preferences, either to 12 or 24 hours. Once selected, press the TUNING/SELECT dial on the unit, or the SELECT button on the remote control to move to next step.
Select which source (DAB/FM/NETWORK/NO UPDATE) the unit uses as a source to obtain and update the time and date.
If "Update from Network" is selected, you can proceed to the next step.
Select time Zone, to ensure that the time is displayed correctly.
Select the "Daylight savings" as [ON] or [OFF].
- Specify whether the product should remain connected to the internet when on Standby. To do this turn the TUNING/SELECT dial on the unit or press the ◀ / ▶I buttons on the remote. Select [YES], press the TUNING/SELECT dial on the unit, or press the SELECT button on the remote to confirm.
- Humboldt, will now scan for your wireless network; this may take a few seconds, then a list of all the wireless networks will appear on the screen. Select the WLAN network you know and whether to use WPS (Push Button/Pin) or Skip WPS to enter the password using the displayed keyboard.
Connecting using the WPS button on your router
Connecting using the WPS (Wi-Fi Protected Setup) button on your router is a quick and easy way to connect your radio without having to type in a password. Select one of the following connection methods:
Push WPS Button
- Press buttons▶II ▲/▼ ■ to select the option Push Button. Press SELECT button to confirm.
- A message will be displayed on the screen, telling you to press the WPS button on your router which you need to then press.
Note: Refer to your router user manual to identify the WPS button, if in doubt. - Press the SELECT button to confirm. Humboldt will now connect to your router. This may take a few seconds.
Pin (code number)
- Press▶II ▲/▼ ■ button to select PIN. Press SELECT button to confirm. The radio will generate an 8-digit code number, which will be displayed on radio's screen.
- Refer to your router user manual to follow the WPS instructions, when using a pin code number. Enter this code number into the wireless router to connect with Humboldt.
- Press SELECT button to continue.
Connecting using your wireless network password
When using a router with no WPS, connect Humboldt to your wireless network using a password. Select SKIP WPS to go to password screen.
- Typing password. Press▶▶▲/▼ ■ / ◀◀ / ▶▶ buttons to select letter/number of your password. Press SELECT button to enter the selected letter/number.
- Once the password has been entered, press▶▶ ▲/▼ ■ / ◀◀ / ➞️ buttons, to confirm by selecting OK on the right hand-side of the screen. It takes a few seconds to connect with your network.
- Press SELECT button to exit the setup.

Settings can be changed at any time in Menu-System Settings - Network - Network wizard
System Settings
Press the MENU button on unit or remote control to display the menu. Turn TUNING/SELECT dial on unit or ▶II ▲/▼ ■ buttons on remote control to select System settings, then press TUNING/SELECT dial on unit or SELECT button on remote to confirm.
Equaliser
This system supports a variety of equalizers and sound effects.
- Press the EQ button to access Equaliser menu.
-
While in 'System Settings', Press▶II ▲/▼ ■ buttons to select Equaliser, then press the SELECT button to confirm
-
The display will show: FLAT > CLASSIC > ROCK > POP > JAZZ
- Press ▶II ▲/▼ ■ buttons to select EQ mode and then press the SELECT button to confirm.
Streaming audio quality
- While in System Settings', Press▶| | ▲/▼ ■ button to select 'Streaming audio quality'. Press the SELECT button to confirm.
- Press▶II ▲/▼ ■ button to select Low quality/ Normal quality/ High quality. Press the SELECT button to confirm the setting
Network
- While in 'System Settings', press ▶II ▲/▼ ■ to select Network. Press the SELECT button to confirm.
- Press▶II ▲/▼ ■ buttons to select from the following settings, press the SELECT button to confirm
| Network wizard SSID – select the desire wireless network. Rescan – Scan for available networks. Manual config – select wireless network with DHCP enable/disable. | |
| PBC Wlan setup | Select WPS on the unit and press the WPS button on the modem device that you wish to connect with. Press TUNING/SELECT dial on unit or SELECT button on remote control to continue. |
| View settings Display the setting on the unit. | |
| Manual settings Select wireless network with DHCP enable/disable. | |
| NetRemote PIN Setup | To define a PIN number to be entered before being able to connect to the unit remotely over a network |
| Network profile View the connected network. | |
| Clear network settings | To delete the connected network memory in Network profile. |
| Keep network connected | To define whether remains connected to its network in Standby mode and when not in Network radio mode. |
- Press the BACK button on the unit or remote control to cancel the setting and return back to the previous menu.
Time/Date
The Time/Date can be automatically set once it has been connected to the Internet, DAB or FM radio station with time/date information. You may also adjust the Time/Date manually.
Press CLOCK button on remote control can access Set Time/Date menu to adjust Time/Date, Alternatively,
- In System Settings, press ▶II ▲/▼ ■ buttons to select Time/Date and press the SELECT button to confirm. Press ▶II ▲/▼ ■ buttons to select Set Time/Date and press the SELECT button to confirm.
- The date digits will flash on the display.
- Press ▶II ▲/▼ ■ buttons to adjust the day and then press the SELECT button to confirm.
- Repeat above Step (2) to set the Month/Year/Hour/Minute.
- The date and time settings are now complete.
For the other settings under Time/Date, press ▶II ▲/▼■ buttons to select from the following options and then press the SELECT button to confirm.
| Auto update DAB/FM | /Network/No update |
| Set format 12 / 24 hour format. | |
| Set timezone Select a time zone. (Only available when Auto update from Network is on.) | |
| Daylight savings Select daylight savings. (Only available when Auto update from Network is on.) | |
| Standby Clock Analog Clock/ Digital Clock | |

The default auto time update setting is "Update from Network". If you would like to manually set the time, it is recommended to turn the Auto update function off.
Inactive Standby
Use the Inactive Standby to turn off the unit after a certain time in play mode.
- While in System settings, press ▶II▲/▼ ■ buttons to select Inactive Standby and press SELECT button to confirm.
- Press ▶II ▲/▼ ■ buttons to select between Off, 2 hours, 4 hours, 5 hours and 6 hours. Press SELECT button to confirm.
Language
- While in System settings, press ▶||▲/▼ ■ buttons to select Language and then press the SELECT button to confirm.
- Press ▶|| ▲/▼ ■ buttons to change the display language of your choice.
- Press the SELECT button to confirm.
Factory Reset
Factory reset would be recommended when experiencing issues with radio reception, moving houses, moving to a different part of the country, when the Humboldt may pick up the local and national DAB stations in that area, therefore previously tuned channels may no longer be available.
- To access the Factory reset, press MENU – go to 'System settings'.
- While in 'System settings', press▶II ▲/▼ ■ buttons to select Factory Reset. Press the SELECT button to confirm.
- Press ◀◀ /▶◀ buttons to select [Yes]. Press the SELECT button to confirm or select [No] to cancel.

After the system reset, all the tuned stations, Internet, DAB & FM preset stations will be erased.
Software update
- To access Software update page, press MENU to go to System settings.
- While on System settings, press ▶II ▲/▼■ buttons to select Software update and then press the SELECT button to confirm.
- Press ▶II ▲/▼ ■ buttons to select "Auto-check setting" or "Check now", and then press the SELECT button to confirm.

Before downloading software, ensure that the radio is plugged into a stable mains power connection. Interrupting the mains supply during software download can lead to functional disturbances and/or damage to the unit!
Setup wizard
The setup wizard is available in the system settings section; you can run through this to configure settings for date/time and network. Once this has finished, your radio is ready to use.
Info
- To access Info page, press MENU to go to System settings.
- While on System settings, press ▶||▲/▼■ buttons to select Info and then press the SELECT button to confirm.
- The software version, Spotify version, Radio ID and Friendly name will show on the display.
Privacy policy
- To see the Privacy policy page, press MENU to go to System settings - Privacy policy.
- After Factory reset, you need to accept the Privacy policy again.
Backlight
- To access Backlight page, press MENU to go to System settings.
- While on System settings, press ▶II ▲/▼■ buttons to select Backlight and then press the SELECT button to confirm.
- For the other settings under Backlight, press ▶II ▲/▼ ■ buttons to select the following options and then press the SELECT button to confirm.
| Operation Mode High / Medium / Low | |
| Standby Mode Timeout: Off/ 10 sec/ 30 sec/ 60 secStandby Level: High/ Medium/ Low/ Off |

If Timeout set Off, the display brightness at standby will keep as operation mode.
Internet Radio
To listen to internet radio your radio must be connected to the internet. Try to position your radio as close as possible to your router to get the best connection speeds. When Internet Radio mode is selected, the radio connects with the Frontier Silicon Internet radio portal to download a list of stations. Once a station is selected, the radio will connect directly to that station.

Internet radio
Press MODE button on unit or remote control to access Mode Menu. Turn the TUNING/SELECT dial on unit or press ◀/▶▶ buttons on remote control to select Internet radio mode, then press TUNING/ SELECT dial on unit or SELECT button on remote control to confirm.
While on Internet Radio, press the MENU button on the unit or remote control to access the menu. You can choose between: Last listened, Station list, System settings and Main menu.
Press ▶II ▲/▼ ■ buttons to select and press the SELECT button to confirm.
When internet radio is restarted, the last listened stations is automatically selected. To return to [Station List], press BACK button.
Last listened
- Press ▶|| ▲/▼ ■ buttons to select the history of stations that you have listened to before.
- Press the SELECT button to confirm.
Station List
If it is the first time listen Internet radio, the radio will be in [Station List].
Press ▶II ▲/▼ ■ buttons to select from the following options, and then press the SELECT button to confirm.
| "Countries" | You can search specifically for stations from your country. Within this scope, it will display local radio. |
| Search You can search | stations using various keywords. The name and a description of your selected station will show on the display. |
| Location You can select | for stations from a list of countries available |
| Popular Select station | from a list of the most popular internet stations from around the world. |
| Discover Select stations | from various categories in the menu: Country, Genre or Language. |
Press the BACK button on the unit to move back a menu level.
Preset Stations
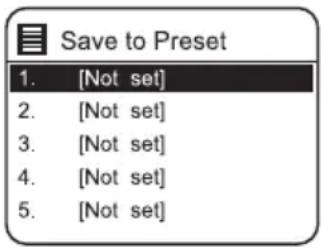
- To store an Internet Radio station, press and hold the PRESET button on the unit, or remote control until the display shows the "Save to Preset".
- Select one of the 30 presets to store the radio station. Use the ▶|| ▲/▼ ■ buttons to select the preset number of your choice.
- Press the SELECT button to confirm.
Note: The preset Internet radio stations are stored in the radio and cannot be accessed from other radios.
text_image
Save to Preset 1. [Not set] 2. [Not set] 3. [Not set] 4. [Not set] 5. [Not set]Recalling a Stored Station
- To select a preset, press the PRESET button on the unit or remote control, and then press the ▶||▲/▼■ buttons to select one of the listed preset stations.
- Press the SELECT button to confirm the selection.
Alternatively, on remote control,
- Press Preset ↗/√ buttons to switch through the preset stations.
- Or press the number keys (0-9) on remote control can switch to preset station 1-10 directly
- If there no station be saved, it will show Preset empty.

Operation of Preset and Recall stations are same for Internet Radio/Podcasts, DAB and FM.
Internet Radio Display Modes
Every time you press the INFO button on the unit or remote control, the display will show the following display modes:
Channel Info/Description- Language/Location - Bit rate/Sound format/Sampling rate - Playback buffer - Date
Podcasts
To listen to Podcasts your radio must be connected to the internet. Try to position your radio as close as possible to your router to get the best connection speeds.
Press MODE button on unit or remote control to access Menu. Turn the TUNING/SELECT dial on unit or press ◀◀/▶◀ buttons on remote control to select Podcasts mode, then press TUNING/SELECT dial on unit or SELECT button on remote control to confirm.

Podcasts
Last listened
- Press ▶II ▲ / ▼ ■ buttons to select [Last listened], then press SELECT button to confirm.
- Press ▶II ▲ / ▼ ■ buttons to select the history of stations that you have listened to before and press SELECT button to confirm.
Station List
While on Podcasts mode, press MENU button to access the menu. Press the ▶II ▲ /▼ ■ buttons to select [Podcast list] and press the SELECT button to confirm.
If you switch off and then switch the radio back on, the last listened statins are automatically selected. To return to [Podcast list], press BACK button.
If it is the first time listen Podcasts radio, the radio will be in [Podcast list].
Press the ▶II ▲ / ▼ ■ buttons to select from the following options, and then press the SELECT button to confirm.
| "Countries" | You can search specifically for stations from your country. Within this scope, it will display local radio stations in your location. |
| Search You can search | stations using various keywords. The name and a description of your selected station will show on the display. |
| Location You can select | ect for stations from a list of countries available |
| Discover Select stations | ns from various categories in the menu: Country, Genre or Language. |
Saving and Recalling Preset Station
- Refer to "Preset Stations" and "Recalling a Stored Station" under Internet Radio for instruction.
Spotify Connect
Use your phone, tablet or computer as a remote control for Spotify.
Go to spotify.com/connect to learn how.

Spotify®
Licenses
The Spotify Software is subject to third party licenses found here:
https://www.spotify.com/connect/third-party-licenses
DAB- Operations
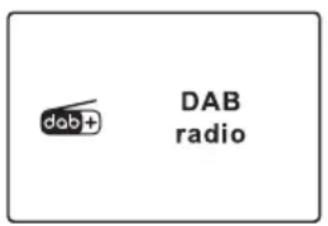
Press MODE button on unit or remote control to access Mode Menu. Turn the TUNING/SELECT dial on unit or press ◀◀ / ▶▶I buttons on remote control to select DAB Radio mode.
Press TUNING/SELECT dial on unit or SELECT button on remote control to confirm. The unit will enter DAB mode and perform the auto scan.
While scanning, the display will show "Scanning..." together with a slide bar that indicates the progress of the scan and the amount of stations that have been found so far. Once the scan has been completed, the unit will select the first alphanumerically found station.
To explore the radio stations found after completing the scan, press ▶|| ▲/▼ ■ buttons to select then press the SELECT button to confirm.
text_image
dab+ DAB radio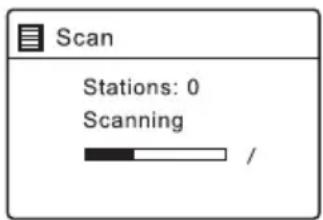
text_image
Scan Stations: 0 Scanning /Station List
- While on DAB mode, press the MENU button to access DAB menu.
- Press ▶|| ▲/▼ ■ buttons to select Station list and then press the SELECT button to confirm.
- A list of DAB stations will show on the display.
Auto Scan
- Press the SCAN/▶II button on unit or SCAN button on remote control to activate auto scan.
Alternatively,
- Press the MENU button, and then press ▶II ▲/▼ ■ buttons to select Scan. Press the SELECT button to confirm.
- The display will show "Scanning..." and a progress slide bar.
- All the stations that have been found will be stored automatically. To explore and listen to all available stations, press▶II ▲/▼ ■ buttons to select and the press the SELECT button to confirm.
Manual Tuning
Extend the aerial fully and simply process manual tuning by following the steps below. This can help you when aligning your aerial or when adding stations that were missed while auto tuning.
- Press MENU button to display the menu.
- Press ▶II ▲/▼ ■ buttons to select Manual tune, and press the SELECT button to confirm.
- The display will show the multiplex 5A to 13F.
- Press ▶|| ▲/▼ ■ buttons to select the channel, and press the SELECT button to confirm.
- To listen to any stations found, return to the now playing screen and press ▶II ▲/▼ ■ buttons to select the required station from the station list and press SELECT button to confirm.
By pressing INFO button, you can view the available modes on your radio screen:
DLS (Dynamic Label Segment)
This is a scrolling message giving real-time information, e.g. song titles, news headlines, etc.
Programme Type
This describes the "style" or "genre" of the programme that is being broadcast.
Ensemble Name/Frequency
This display the name of the multiplex that contains the station you are listening to and the frequency. A multiplex is a collection of radio stations that are bundled and transmitted on one frequency. There are national and local multiplexes. Local ones contain stations that are specific to that area.
Signal Error/ Signal Strength
The error is shown as a number. If the number is 0, it means the signal received is error free and the signal strength is strong. If the error rate is high, it is recommended to reposition the radio aerial or reposition the unit. The display will show a slide bar to indicate the signal strength, the stronger the signal, the longer the bar will be from left to right.
Bit Rate / Codec / Channels
The display will show the digital audio bit rate being received with additional information about the audio codec and channel configuration.
Date
This displays the current date provided automatically by the broadcaster.
Prune Invalid
You may remove all unavailable stations from the list by following these steps.
- While on DAB mode, press the MENU button and press ▶II ▲/▼ ■ buttons to select Prune invalid and the press SELECT button to confirm.
- Press ◀◀ / ▶▶ buttons to select [YES] and press the SELECT button to confirm. Or select [NO] to cancel.
DRC (Dynamic Range Compression)
If you are listening to music with high dynamic range in a noisy environment, you may wish to compress the audio dynamic range.
- While on DAB mode, press the MENU button and press ▶II ▲/▼ ■ buttons to select DRC and press the SELECT button to confirm.
- Press ▶II ▲/▼ ■ buttons to select DRC high/low/off and press the SELECT button to confirm the setting.
Station Order
You may wish to arrange the station listing order.
- While on DAB mode, press the MENU button and press ▶II ▲/▼ ■ buttons to select Station order and press the SELECT button to confirm.
- Press ▶II ▲/▼ ■ buttons to select Alphanumeric/Ensemble and press the SELECT button to confirm the setting.
Saving and Recalling Preset Station
- Refer to "Preset Stations" and "Recalling a Stored Station" under Internet Radio section for instruction.
FM Operation
Press MODE button on unit or remote control to access Mode Menu. Turn the TUNING/SELECT dial on unit or press ◀◀ / ▶▶ buttons on remote control to select FM Radio mode, then press TUNING/SELECT dial on unit or SELECT button on remote control to confirm. The display will show the frequency.

FM radio
Auto Scan
- Press the SCAN/▶II button on unit or SCAN button on remote control to start searching for a station. Once a station has been found, the scanning will stop automatically.
Alternatively, - Press and hold ▶II ▲/▼ ■ buttons to start searching for a staion.

The search may not stop at a station with a very weak signal
Manual Tuning
To search for FM stations manually, turn the TUNING/SELECT dial on unit or press ◀◀/▶◀ buttons on remote control repeatedly until your desired frequency is reached.

With FM radio, it may be necessary to fine tune each station by turning the TUNING/SELECT dial on unit or pressing ◀ /▶▶ buttons on remote control repeatedly. Each press will adjust the frequency by 0.05 MHz. If reception is still poor, adjust the position of the aerial or try moving the radio to another location.
FM Display Modes
Every time you press the INFO button on the unit or remote control, the display will show the following display modes: Radio Text – Programme Type – Frequency – Date
RDS Radio Text
This is a scrolling message information about the current programme.
Programme Type
This describes the "Style" or "Genre" of music that is being broadcast.
Station Name / Frequency
When an RDS station is received, the name of that station will be displayed, or if not the frequency will be displayed.
Date
This displays the current date provided automatically by the broadcaster.
Scan Setting
- Press the MENU button to access FM menu.
- Press ▶II ▲/▼ ■ buttons to select Scan setting and then press the SELECT button to confirm.
- Press ◀◀ /▶◀ buttons to select [Yes] to receive strong signal only and then press the SELECT button to confirm.
Audio Setting
- Press the MENU button to access the main menu.
- Press ▶II ▲/▼ ■ buttons to select Audio setting and press the SELECT button to confirm.
- Press ◀◀ /▶◀ buttons to select [Yes] to listen in mono only or [NO] to let the unit select Stereo or Mono automatically.
- Press the SELECT button to confirm.
Alternatively, press the MONO/ST. button on the remote control to toggle between the Mono only or Mono/Stereo selection.
Saving and Recalling Preset Station
- Refer to "Preset Stations" and "Recalling a Stored Station" under Internet Radio section for instruction.
CD and MP3 Operation
Compatible Disc Types
| Disc Types Disc Logo Recorded Content | |||
| CD-R (CD Recordable - Audio/MP3) AUDIO/MP3 |  | ||
| CD-RW (CD-Rewritable - Audio/MP3) AUDIO/MP3 |  | ||
| AUDIO-CD (Compact Disc Digital Audio) AUDIO |  | ||

- Some recorded files may not be able to be played due to the type and format of disc or condition of the recording.
- If you are having trouble playing a certain disc, it is recommended to use USB input instead for best MP3 playback.
- Do not insert 8 cm CDs into the CD tray, they may jam in the unit. 8 cm CDs are NOT supported.
Press MODE button on unit or remote control to access Mode Menu. Turn the TUNING/SELECT dial on unit or press ◀◀ / ▶▶ buttons on remote control to select CD mode, then press TUNING/SELECT dial on unit or SELECT button on remote control to confirm.
Playback
- Press ▲ button to open the disc tray.
- Place the disc onto the CD tray with the label side up, and then press the ▲ button to close the tray.

- Do not insert 8 cm discs into the unit, only use 12 cm discs.

- If there is no disc or the disc can't be read, "No disc" will show on the display.
-
If in stop mode, please press ▶ the button to start playing the disc.
-
The unit will read the disc and the first track on the CD will automatically start to play.
-
Press▶II to pause the playback, the time elapsed indicator will flash. To resume playback, press▶II again.
- Press ■ to stop the disc playing.
To Skip Search or Search and Play
- Press ◀ button to skip to beginning of the current track.
- Press ▶ button to skip forward to the next track.
- Press and hold ◀◀/▶◀ on the remote control to search for the position that you intend to start playing. Release to resume normal playback.
Repeat Playback
Press the REPEAT button repeatedly to choose a function.
- Audio CD
- While playing a CD, press the REPEAT button once on the remote control. The display will show "☐". The unit will play the current track repeatedly.
- Press the REPEAT button twice. The display will show "☐". The unit will play all tracks in the CD repeatedly.
- Press the REPEAT button once more again to switch off the REPEAT function.
- MP3 CD
- While playing a MP3-CD, press the REPEAT button once on the remote control. The display will show "The unit will play the current track repeatedly.
- Press the REPEAT button twice. The display will show " ☑". The unit will play all tracks in the folder repeatedly.
- Press the REPEAT button the third time. The display will show "♀". The unit will play all tracks in the MP3 CD repeatedly.
- Press the REPEAT button once more again to switch off the REPEAT function.
Random Playback
All tracks on the disc can be played in a random order.
- While playing a CD, press the RANDOM button on the remote control. The display will show "×". All tracks will be played randomly.
- Press ▶ button to skip to the next random track.
- After all the tracks have played once, the unit will stop playback automatically.
- To cancel random playback, press the RANDOM button.
Programme Play
You can programme up to 20 tracks to play in any desired order.
- Make sure there is a disc inserted and is not playing (stopped).
- Press the PRESET button to enter the programme mode. The display will show "P01T01".
- Press ◀◀ /▶▶ to select the desired track number.
- Press the SELECT button to store.
-
- Repeat steps 3-4 to programme more tracks.
-
- Once this is completed, press the button to start programme play.
- Press ■ once to clear programme.

Opening and closing the CD tray will cancel the program and erase the memory.
Intro Playback
While playback, if you would like to listen to the introduction of each track, press the INTRO button on the remote control. The first 10 seconds of each track will be played.
USB Operation
To play unprotected audio files stored on a connected USB mass storage device via the device, press MODE button on unit or remote control to access Mode Menu. Turn the TUNING/SELECT dial on unit or press ◀◀ / ▶▶ buttons on remote control to select USB mode, then press TUNING/SELECT dial on unit or SELECT button on remote control to confirm.
Press the ▶II ▲/▼ ■ buttons to select and press SELECT button to confirm a song file.

- The player supports the USB music file format of MP3.
- The unit can support USB flash with up to 128GB of memory.
-
The unit may not be compatible with all USB devices; this is not indication of a problem with the unit.
-
Press SCAN/ ▶II button on unit or ▶II/ ▲button on remote control to play/pause music or
- Press ◀◀ /▶◀ buttons on unit or remote control to skip to the previous/next track.
Repeat Mode
Press REPEAT button on remote control repeatedly to turn mode on/off.
Shuffle Mode
Press RANDOM button on remote control repeatedly to turn mode on/off.
Charge your device
You can charge your device through the USB socket on this unit with a USB cable (not supplied).

- The maximum current for USB charging is 1A.
- All devices for USB charging are not guaranteed.
- USB charging is not supported under Music Player mode.
Bluetooth Operation
The unit has a Bluetooth function that can receive a signal within 8 metres. Pair the unit with a Bluetooth device (example mobile phone) to listen to music:
- Press MODE button on unit or remote control to access Menu. Turn the TUNING/SELECT dial on unit or press ◀ /▶▶ buttons on remote control to select Bluetooth Audio mode, then press TUNING/SELECT dial on unit or SELECT button on remote control to confirm.
- If the unit is not paired with any Bluetooth device, the Bluetooth logo will flash, indicating that the unit is in pairing mode.
- Activate your Bluetooth device and select the search mode.
- "Majority Humboldt" will appear on your Bluetooth device list.
- Select "Majority Humboldt" and enter "0000" for the password if necessary. Once connected the Bluetooth logo on the screen will stop flashing. Your device is now paired with the unit.
- Press PAIR button on remote control can disconnect existing Bluetooth connection, with other Bluetooth devices able to locate and make connection with the unit.
- To disconnect the Bluetooth function, switch to another function on the unit or disable the function from your Bluetooth device.

Bluetooth Audio
Playing Music via Bluetooth
You may need to adjust the volume on your radio and Bluetooth device.
Press the SCAN/▶▶ button on unit or ▶▶▶ button on remote control to play/pause music or Press ◀◀/▶◀ buttons on unit or remote control to skip to the previous/next track.

-The operational range between the unit and the device is approximately 8 metres.
-If the signal strength is weak, your Bluetooth receiver may disconnect, but it will re-enter pairing mode automatically.
-For better signal reception, remove any obstacles between the unit and the Bluetooth device.
-Compatibility with all devices and media types is not guaranteed.
-Some mobile phones with the Bluetooth function may connect and disconnect as you make and end calls. This is not an indication of a problem with your unit.
Aux Input
Connecting via AUX with an external audio device (example MP3 Player)
- Connect the external device to the Analog Audio Input on the device through suitable AUX cable (not included).
- Press MODE button on unit or remote control to access Mode Menu. Turn the TUNING/SELECT dial on unit or press ◀/▶I buttons on remote control to select AUX In mode, then press TUNING/ SELECT dial on unit or SELECT button on remote control to confirm.
- Turn the ⏻/VOLUME dial on the unit or press the VOL +/- buttons on the remote control to adjust the volume control for your desired sound output level. Set the desired volume on the radio and the external audio device if necessary.
- In AUX mode, operate your audio device directly for playback features.

When connecting the external audio device, refer to the owner's manual of the external device.
NetRemote
To activate NetRemote feature, you will need to have a smartphone or tablet with IOS or Android operational system. By downloading the assisted app you will be able to view and operate all modes such as: Internet radio, Podcasts, Spotify, Music Player, DAB, FM, Bluetooth and AUX In on the radio.
UNDOK app can be downloaded via Google Play or Apple Store on your phone or tablet. Before using the UNDOK app, make sure the device and the smartphone or tablet are connected to the same WiFi network. Launch the app
The app initializes and scans the devices available in the same network. Tap the device to establish NetRemote connection.
Once the smartphone or tablet accessed the device, they will automatically connect the next time when using the UNDOK app, if connected to same WI-FI network.
Note: Be aware that if there is another smartphone or tablet with the UNDOK app, within the same network with access to the unit; the original connection will be cut off.
UNDOK app may ask you to insert a PIN code to access the Humboldt. The default PIN is 1234. To change the default PIN for security, please refer to System Settings section: Network - NetRemote PIN Setup. Select your desired mode in the main page. You may then control the selected mode on your smartphone or tablet and on the device simultaneously.
Using headphones
Do not listen to music at high volume when using headphones. Doing so can cause permanent hearing impairment. Turn the tuner volume level to the lowest before using headphones.
Only use headphones with a 3.5 mm jack plug.
Insert the headphone connector in the headphone socket in front of the unit.

Long-term exposure to loud music may cause hearing damage. It is best to avoid extreme volume when using earphones, especially for extended periods of time.
Sleep Setting
This function allows you to program the unit to turn to standby mode by itself after a set period of time.
- To activate the sleep function, press the SLEEP button on remote control repeatedly. The time will change in the below sequence on every press:
Sleep OFF → 15 minutes → 30 minutes → 45 minutes → 60 minutes → 90 minutes → 120 minutes
- When your desired sleep time appears on the unit display, release the button. The sleep function will be activated in just two seconds. "#will appear on the display.
The remaining time until switching to Standby Mode, is also displayed next to the symbol “#” on the unit screen.
- When the sleep timer counts down to zero, the unit will turn to standby mode. To turn the sleep function off while the sleep timer is still counting down, press the SLEEP button repeatedly to select "SLEEP OFF".

Alternatively,
- Press the MENU button on the remote control to display the function main menu. Press ▶II ▲/▼ ■ buttons to select Main menu, and then press the SELECT button to confirm.
- Press ▶||▲/▼■ buttons to select Sleep, and then press the SELECT button to confirm.
- Press ▶||▲/▼■ buttons to select sleep timer, and then press the SELECT button to confirm.
Setting the Alarm
- Press TIMER button on the remote control, the display shows "Alarm (1 or 2): Off [hh:mm]".
- Press ▶II ▲/▼ ■ buttons to select the Alarm number (1 or 2) and then press the SELECT button to start the setting of the following parameters.
Press ▶II ▲/▼ ■ buttons to select then press the SELECT button to confirm
| Enable Off/ Daily/ Once/ Weekends/ Weekdays | |
| Time (Alarm On time) | |
| Mode Buzz/ Internet radio/ DAB/ FM /CD /USB | |
| Preset Last Listened/ (Preset station) | |
| Volume 0-32 | |
| Save Save and confirm the alarm setting | |
- Finally, select "Save" and press the SELECT button to save the alarm setting. The display will show Alarm Saved. When the alarm is set, the alarm icon will appear on the display.
- To turn off the alarm when it sounds, press the ⏻/VOLUME dial on unit or ⏻ button on remote control, or ALARM button on remote control
Cancelling the Alarm
- Press TIMER button on the remote control, the display shows "Alarm (1 or 2): On [hh:mm]".
- Press the ▶||▲/▼ ■ buttons to select the Alarm number (1 or 2) and then press SELECT button to start the setting of the timer.
- Press the ▶II▲/▼ ■ buttons to select "Enable" then press the SELECT button to confirm.
- Press the ▶II▲/▼ ■ buttons to select "Off" then press the SELECT button to confirm.
- Finally, select "Save" and press the SELECT button to save the setting.
- Alternatively, during Standby mode, press the TIMER button on remote control repeatedly can turn the saved Alarm 1/2 on/off sequentially.

If no button is pressed within approx. 30 seconds, the unit exits timer setting mode automatically.
Specification
| Brand Majority | |
| Model Humboldt | |
| System Section | |
| Power Supply AC100-240V ~ 50/60Hz | |
| Power Consumption 28W | |
| Working Environment - Temperature | 0 ~ 35 °C |
| Net Weight ~2.7kgs | |
| Unit Dimension (W) × (D) × (H) | 350 x 191 x 120mm |
| Radio Frequency FM 87.50 – 108.00 MHzDAB 174.928 - 239.200 MHz | |
How to activate wireless network port:
- Connect the unit with the power supply
- Switch to wireless mode (e.g. Internet)
How to deactivate wireless network port:
- Go to Main menu - System settings - Network - Keep network connected. Select No and then press SELECT button to keep network disconnected
| Bluetooth version | Version V4.2(only support BR+EDR) | |
| Maximum transmitted power 5 dBm | ||
| Frequency band 2402 - 2480 MHz | ||
| Wifi Maximum | transmitted power 15 dBm | |
| Frequency band 2412 - 2472 MHz |
Standby power consumption:
WiFi off: < 1.00 W (standard standby mode)
WiFi on: < 2.00 W (network standby mode)
Note:
● The equipment will enter network standby mode after approx. 15 minutes. FM is exceptional.
- In Internet radio, Podcasts, Spotify, CD, USB, DAB radio, Bluetooth Audio, AUX In mode, the unit will automatically go to Standby mode after 15 minutes, if it has no audio playback. Press Standby button to resume.
- The product may have noise (1KHz signal) in the presence of strong electromagnetic fields, in case of malfunction due to these strong electromagnetic fields, user need to wait till resume normal operation without intervene."
Support
Thank you for purchase of Majority Humboldt.
Please follow the guidance of the manual to set up your device and enjoy its fantastic features.
If you require further assistance with your new device, please contact our support team on the Majority website:
https://www.majority.co.uk/support
Warranty
Register your product at www.majority.co.uk within 30 days of purchase to activate your extended warranty. Terms and conditions applies
SAFETY PRECAUTIONS
- Read all the instructions carefully before using the unit and keep them for future reference.
- Check that the voltage marked on the rating label matches your mains voltage.
- The unit must be placed on a flat stable surface and should not be subjected to vibrations.
- Do not place the unit on sloped or unstable surfaces as the unit may fall off or tip over.
- The mains socket must be located near the unit and should be easily accessible.
- Avoid extreme degrees of temperature, either hot or cold. Place the unit well away from heat sources such as radiators or gas/electric fires. Avoid exposure to direct sunlight and other sources of heat.
- Never place any type of candle or naked flame on the top of or near the unit.
- To reduce the risk of fire, electric shock or product damage, do not expose this unit to rain, moisture, dripping or splashing. No objects filled with liquids, such as vases, should be placed on the unit.
- If you spill any liquid into the unit, it can cause serious damage. Switch it off at the mains immediately. Withdraw the mains plug and consult your dealer.
- To prevent the risk of electric shock or fire hazard due to overheating, ensure that curtains and other materials do not obstruct the ventilation vents.
- Do not install or place this unit in a boSELECTcase, built-in cabinet or in another confined space, ensure that a minimum of 10cm should be kept around the apparatus for ventilation.
Safety
- Always disconnect the unit from the mains supply before connecting/disconnecting other devices or moving the unit.
- Unplug the unit from the mains socket during a lightning storm.
- This unit will become warm when used for a long period of time. This is normal and does not indicate a problem with the unit.
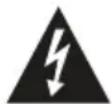
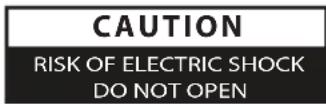

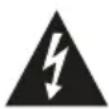
The lightning flash with arrowhead symbol, within an equilateral triangle, is intended to alert the user to the presence of uninsulated “dangerous voltage” within the unit’s enclosure that may be of sufficient magnitude to constitute a risk of electric shock.

The exclamation point within an equilateral triangle is intended to alert the user to the presence of important operating and maintenance (servicing) instructions in the manual accompanying the unit.
Mains Cable
Make sure the unit is not resting on top of the mains cable, as the weight of the unit may damage the mains cable and create a safety hazard.
If the mains cable is damaged it must be replaced by the manufacturer, its service agent, or similarly qualified persons in order to avoid a hazard.
Interference
Do not place the unit on or near appliances which may cause electromagnetic interference. If you do, it may adversely affect the operating performance of the unit, and cause a distorted sound.
Supervision
Children should be supervised to ensure that they do not play with the unit.
Never let anyone especially children push anything into the holes, slots or any other openings in the case - this could result in a fatal electric shock.
Service/Maintenance
To reduce the risk of electric shock, do not remove screws. The unit does not contain any user serviceable parts. Leave all maintenance work to qualified personnel.
Do not open any fixed covers as this may expose dangerous voltages.
Ensure to unplug the unit from the mains socket before cleaning.
Do not use any type of abrasive pad or abrasive cleaning solutions as these may damage the unit's surface.
Do not use liquids to clean the unit.

The symbol indicates DC voltage

The symbol indicates AC voltage

The symbol indicates class II equipment

For indoor use only
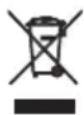
RECYCLING This product bears the selective sorting symbol for Waste electrical and electronic equipment (WEEE). This means that this product must be handled pursuant to European directive 2012/19/EU in order to be recycled or dismantled to minimize its impact on the environment. User has the choice to give his product to a competent recycling organization or to the retailer when he buys a new electrical or electronic equipment.
- The mains plug of power cord is used as the disconnect device, The socket-outlet shall be installed near the equipment and shall be easily accessible.
- CAUTION
Risk of explosion if battery is replaced by an incorrect type
- Warning
To avoid replacement of a battery with an incorrect type
Don't disposal of a battery into fire or a hot oven, or mechanically crushing or cutting of a Battery.
Don't leaving a battery in an extremely high temperature surrounding environment
To avoid battery subjected to extremely low air pressure.
Under the environment with radio-frequency disturbance, the product may malfunction and could self-recover when the interference disappear.
Keep these instructions.
Instructions are all available for download at www.majority.co.uk

IMPORTANT: Please read all instructions carefully before use and keep for future reference
MAJORITY
Humboldt
Internet Radio DAB+ CD Player Music System
natural_image
Exterior view of a modern audio amplifier device with dual speakers and control knobs (no readable text or symbols)natural_image
Front view of a portable electronic device with two circular tops and a central control panel, labeled 'A' at the bottom (no text or symbols on the device itself)
natural_image
Simple line drawing of a blank rectangular book with a small circular label labeled 'B' at the bottom (no text or symbols on the book itself)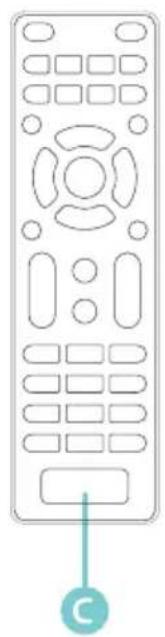
natural_image
Line drawing of a remote control with buttons and a labeled button (no text or symbols beyond the label)text_image
Diagram illustrating battery charging process with arrow indicating direction and battery stack diagram showing charge distributionnatural_image
Exterior view of a modern audio amplifier device with dual speakers and control knobs (no readable text or symbols)Spotify Connect....18
Opération DAB....18
natural_image
Front view of a portable electronic device with two circular tops and a central control panel, labeled 'A' at the bottom (no text or symbols on the device itself)
natural_image
Simple line drawing of a blank rectangular book with a small circular label labeled 'B' at the bottom (no text or symbols on the book itself)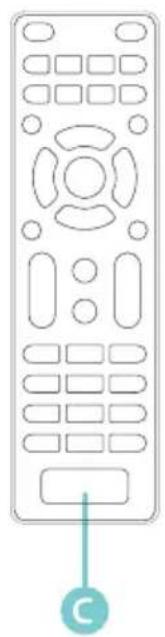
natural_image
Line drawing of a remote control with buttons and a labeled button (no text or symbols beyond the label)natural_image
Diagram of a mechanical component with a cutting tool and directional arrow (no text or symbols)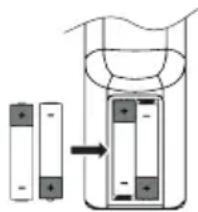
text_image
Diagram illustrating battery charging process with battery and liquid level setupnatural_image
Exterior view of a modern audio amplifier device with dual speakers and control knobs (no readable text or symbols)natural_image
Front view of a portable electronic device with two circular tops and a central control panel, labeled 'A' at the bottom (no text or symbols on the device itself)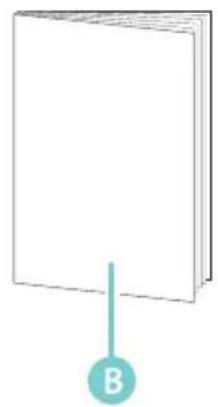
natural_image
Simple line drawing of a blank rectangular book with a small labeled icon (B) at the bottom, no text or symbols present.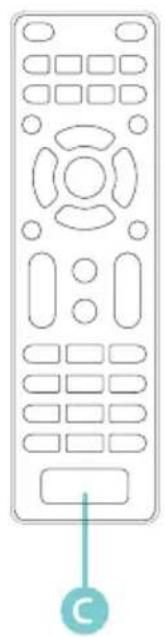
natural_image
Line drawing of a remote control with buttons and a labeled button (no text or symbols beyond the label)natural_image
Diagram of a mechanical component with a cutting tool and directional arrow (no text or symbols)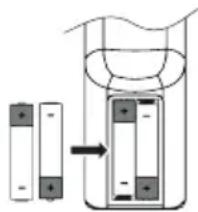
text_image
Diagram illustrating battery charging process with battery and liquid level setupIntervallo operativo del telecomando
natural_image
Exterior view of a modern audio amplifier device with dual speakers and control knobs (no readable text or symbols)natural_image
Front view of a portable electronic device with two circular tops and a central control panel, labeled 'A' at the bottom (no text or symbols on the device itself)
natural_image
Simple line drawing of a blank rectangular book with a small letter B below it (no text or symbols on the book itself)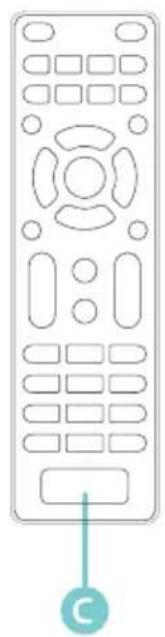
natural_image
Line drawing of a remote control with buttons and ports (no text or symbols)text_image
Diagram illustrating battery charging process with labeled components and directional arrowsEU Declaration of Conformity
I hereby declare that the product:
Product Name: Internet Radio DAB+ CD Player Music System
Model number: Humboldt
Brand: Majority
SKU code: 1000002823
Satisfies all the technical regulations applicable to the product within the scope of Council Directives
2014/35/EU and 2014/30/EU, 2009/125/EC, 2012/19/EU, 2014/53/EU, 2011/65/EU, 1907/2006.
2014/35/EU (LVD Directive)
EN62368-1:2014+A11:2017
2014/30/EU (EMC Directive)
EN55032:2015+A11:2020, Class B, EN IEC 61000-3-2:
2019, EN61000-3-3:2013 +A1:2019, EN55035:2017+
A11:2020, EN 301 489-1 V2.2.3 (2019-11), EN 301489-
17 V3.2.4 (2020-09)
2009/125/EC (ERP Directive)
EN55032:2015+A11:2020, Class B, EN IEC 61000-3-2:
2019, EN61000-3-3:2013 +A1:2019, EN55035:2017+A11:
2020, EN 301 489-1 V2.2.3 (2019-11), EN 301489-17
V3.2.4 (2020-09), EN 303 345-1 V1.1.1 (2019-06), EN 303
1907/2006 (REACH Directive)
All essential test suites have been carried out.
This declaration is issued under the sole responsibility of iZilla Ltd.
Point of Contact: Eddie Latham I Founder
Signed: E.Latham
Date: 10-Jan-2023
UK: iZilla Ltd, Newton House, 2 Pioneer Court, Histon, Cambridge, CB24 9PT, UK
EU RP: AR Experts, P.O. Box 5047, 3620 AA Breukelen, The Netherlands
US: Izilla Ltd, C/0 A.N. Deringer, Inc., 19520 Wilmington Ave, Rancho Dominguez, CA, 90220
Majority is owned and operated by iZilla Ltd. Registered in England with Company No: 08520738