
Eversden - Radio Majority - Free user manual and instructions
Find the device manual for free Eversden Majority in PDF.


| Product Type | Portable Radio with DAB+/DAB and FM |
| Brand | Majority |
| Model | Eversden |
| Dimensions (approx.) | 200 x 120 x 80 mm |
| Weight (approx.) | 500 g |
| Power Supply | 5V DC via included adapter or 4 x AA batteries (not included) |
| Radio Bands | DAB+/DAB (Band III), FM (87.5-108 MHz) |
| Bluetooth | Yes, version 5.0 for wireless streaming |
| Display | LCD screen with backlight |
| Speaker | Mono speaker, 3W output |
| Audio Outputs | 3.5mm headphone jack, auxiliary input |
| USB Port | USB-A for charging external devices (5V/1A) |
| Clock and Alarm | Dual alarm with snooze, sleep timer |
| Presets | 20 DAB and 20 FM presets |
| Remote Control | Included |
| Cleaning | Wipe with a soft, dry cloth. Do not use liquids or abrasives. |
| Safety | Do not expose to water or excessive heat. Keep away from children under 3 years. |
| Spare Parts | Available from manufacturer; consult user manual for ordering |
| Repairability | User manual includes basic troubleshooting. Professional repair recommended for internal faults. |
| Warranty | 2 years limited warranty |
Frequently Asked Questions - Eversden Majority
User questions about Eversden Majority
0 question about this device. Answer the ones you know or ask your own.
Ask a new question about this device
Download the instructions for your Radio in PDF format for free! Find your manual Eversden - Majority and take your electronic device back in hand. On this page are published all the documents necessary for the use of your device. Eversden by Majority.
USER MANUAL Eversden Majority
What's In the Box? 7
Box Contents 7
Instructions Guide......8
Basic Operation 8
DAB/DAB+ Radio....9
DAB/DAB+ Radio Settings....10
Station Info for DAB/DAB+ Radio....11
DAB/DAB+/FM Radio Presets 12
FM Radio 13
FM Radio Settings....14
Station Info for FM Radio....15
Bluetooth....16
Clock & Date....17
Setting Alarm 1/Alarm 2....19
Sleep Timer....20
Additional Options....21
Internal Rechargeable Battery 22
Troubleshooting 23
Support....23
Specifications and Warranty 24
Specifications 24
Warranty....24
Safety Information 25
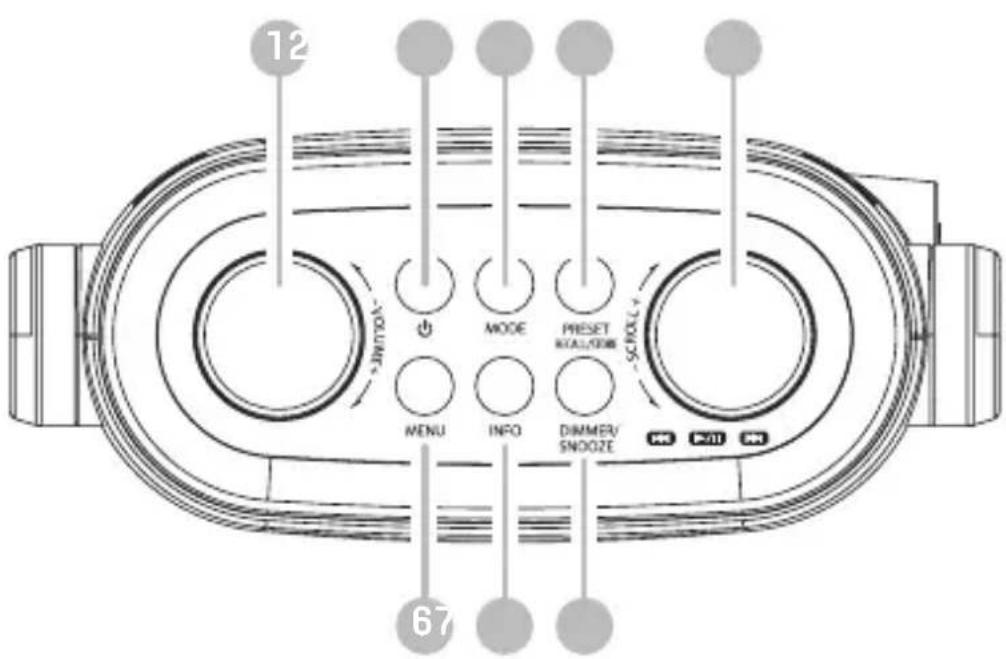
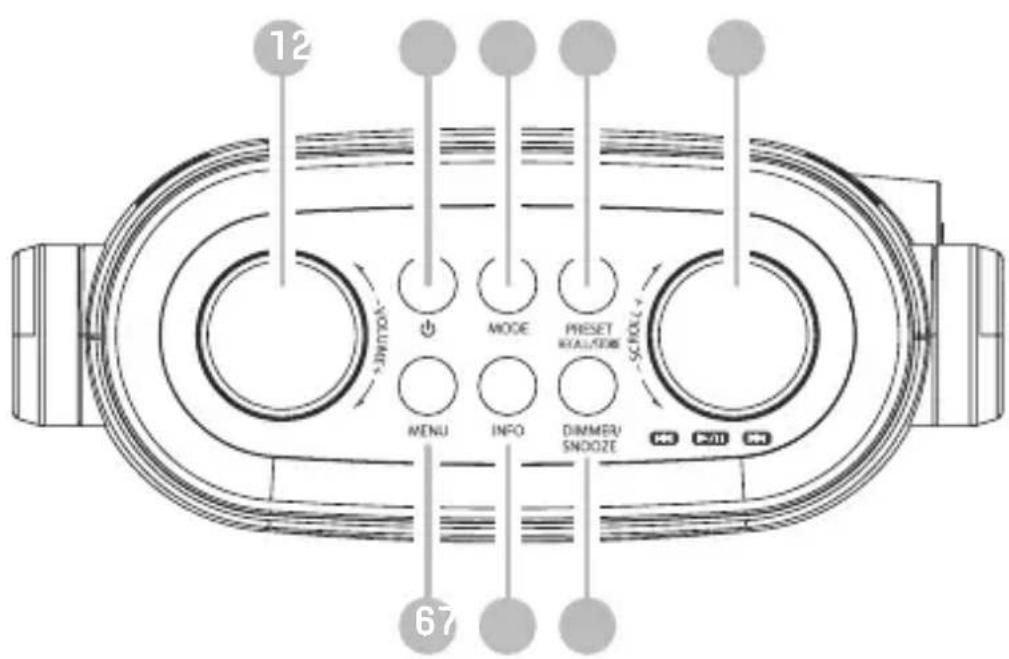
Top View
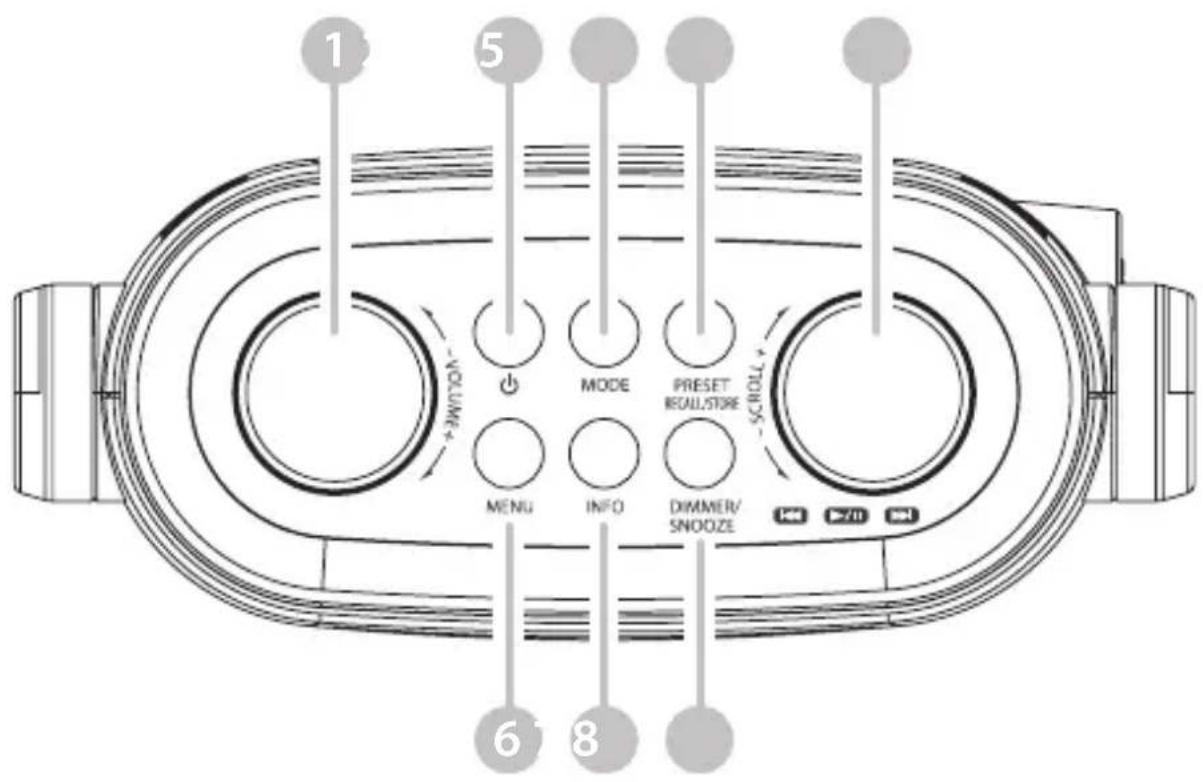
- Volume dial
- Power button
- Mode button
- Preset - Recall and Store button
-
Scroll/Select/Scan and Bluetooth settings dial
-
Menu button
- Info button
- Dimmer/Snooze button
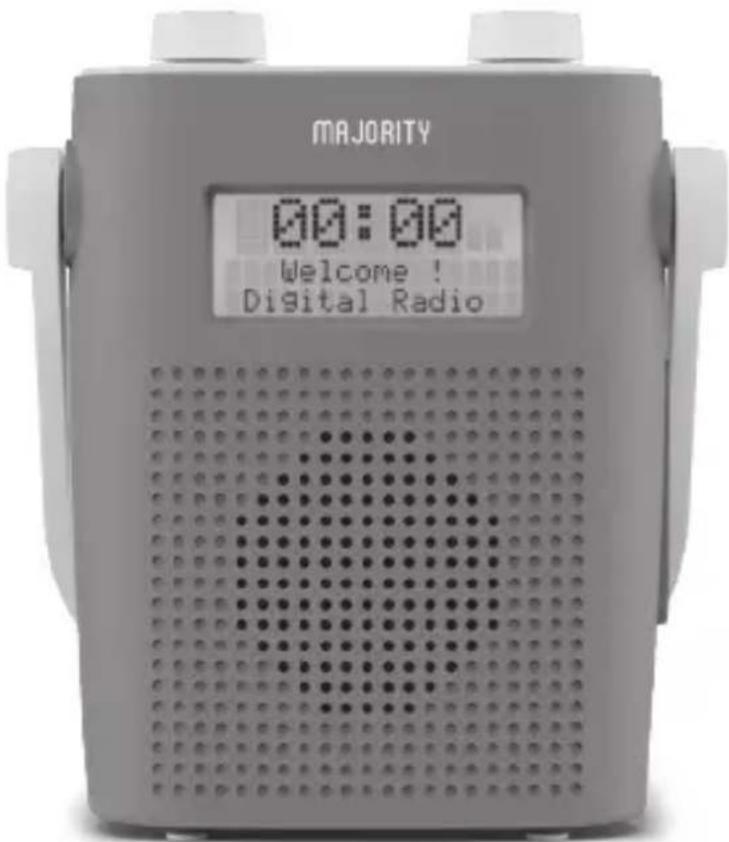
Front view
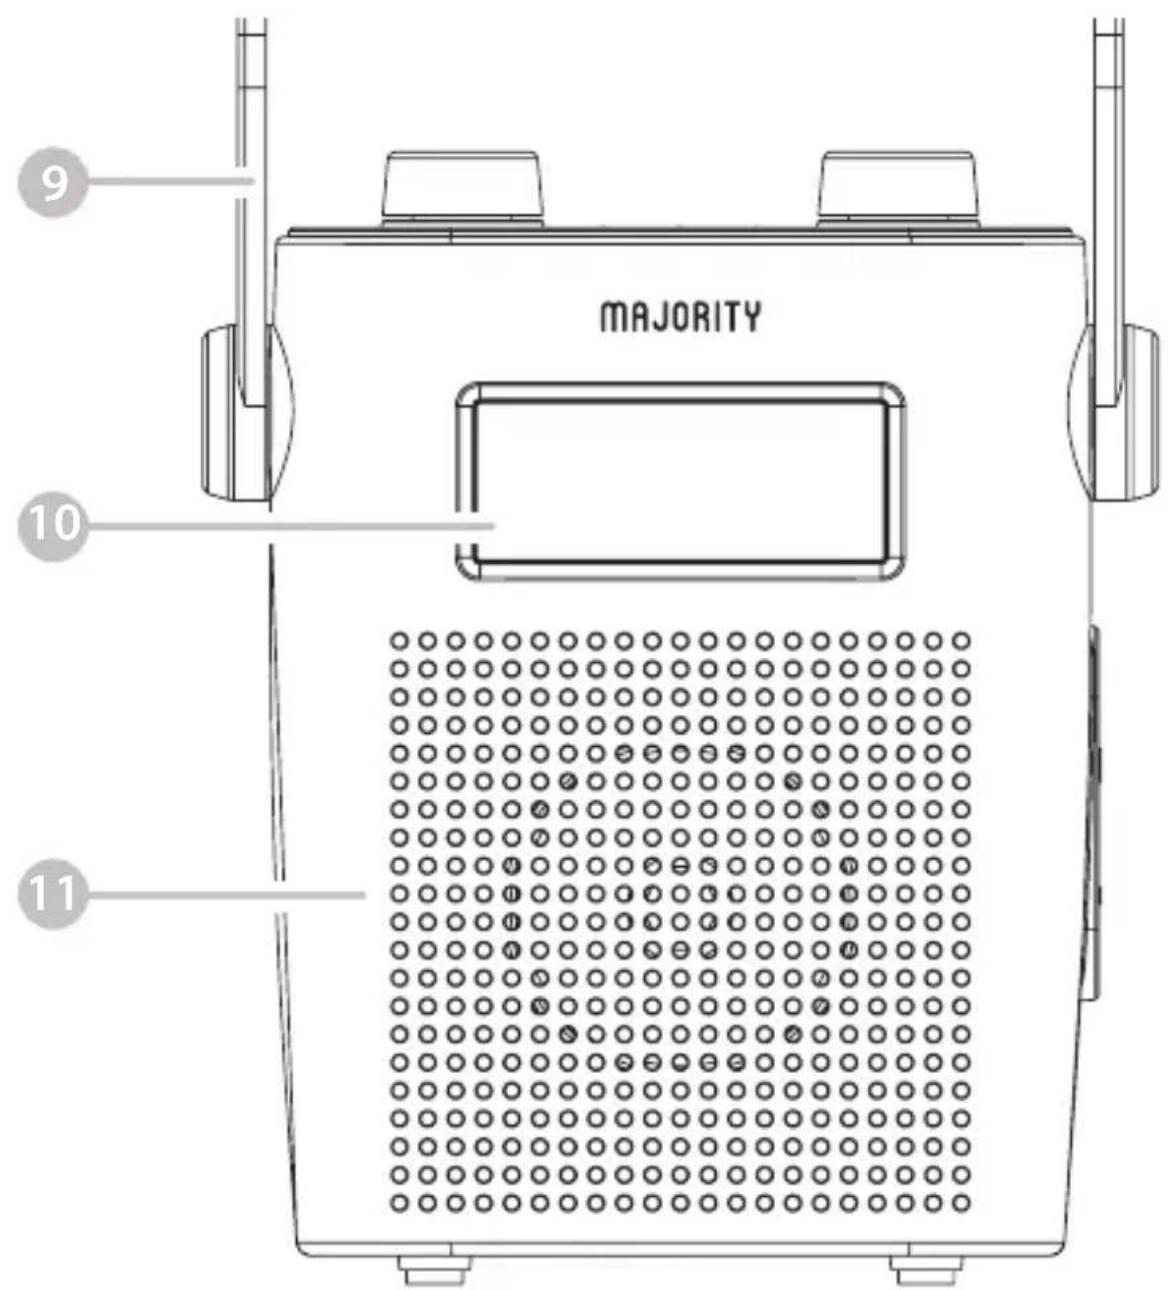
- Hanging strap (built-in antenna)
- Display screen
- Speaker
Side View
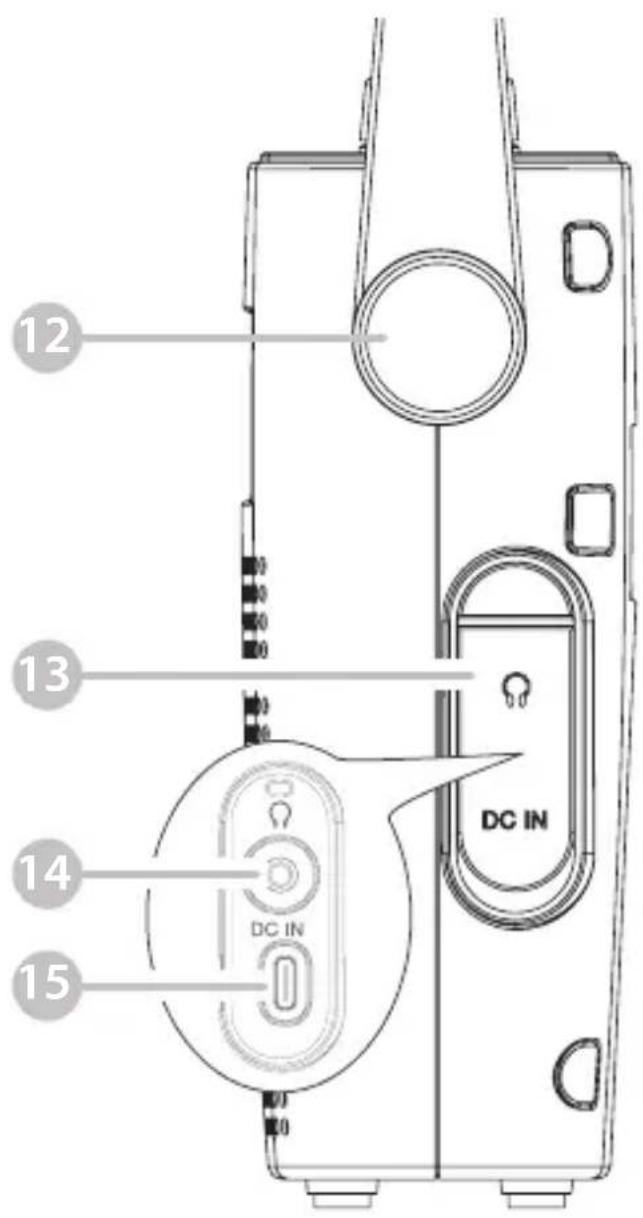
- Securing dial
-
Socket cover
-
Headphone jack
- DC IN port(USB-C Power Port)
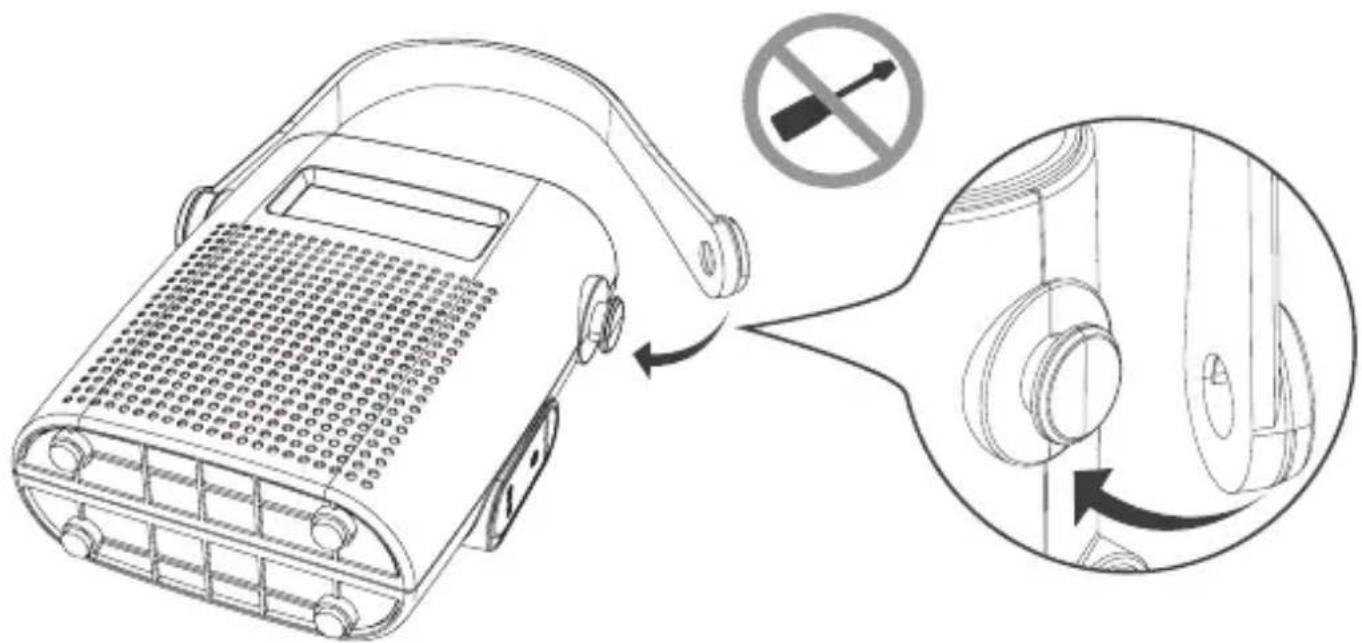
Hanging Strap
The hanging strap has a built-in antenna to supply good signal to the radio.
The strap can be removed from the right side of the unit via the securing dial (Ref.12) to allow you to hang the radio from your shower. The left side securing dial is nondetachable.
To remove the strap from the securing dial on the radio, pull the strap slowly from one side of the securing dial. To place the strap back on to the radio, fit the hole of the strap over the head of the securing dial on the radio.
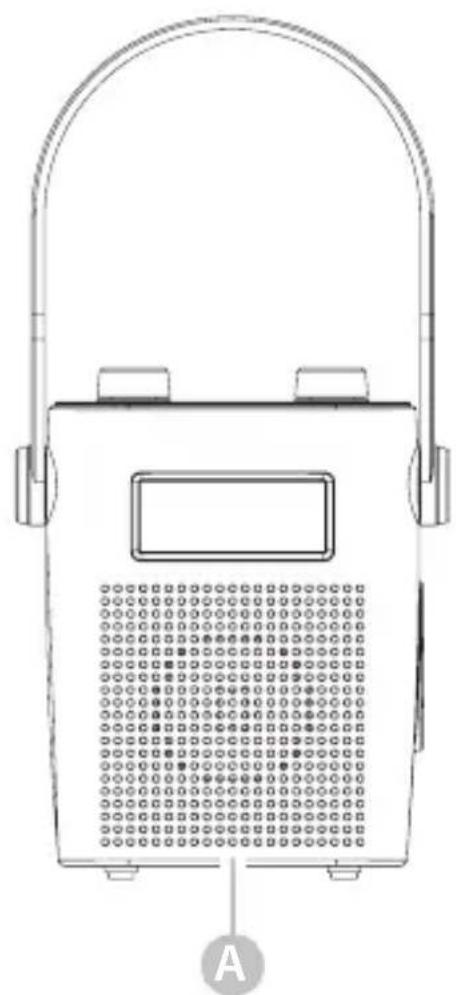
Box Contents
natural_image
Line drawing of a portable electronic device with arched handle and perforated base (no text or symbols)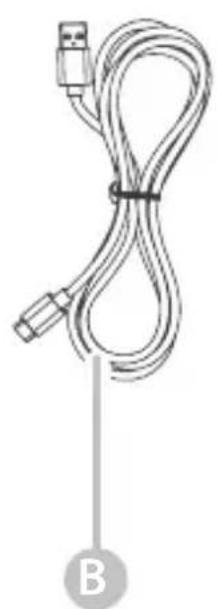
natural_image
Coiled cable with USB port and connector, labeled B (no text or symbols on the cable itself)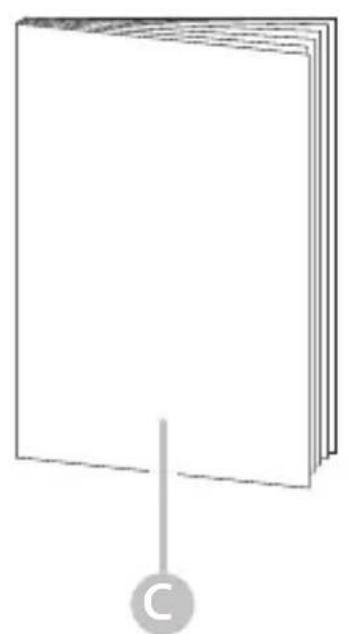
natural_image
Simple line drawing of a closed book with a bookmark symbol below (no text or symbols on the book itself)A. Majority Eversden
B. USB-C power cable
C. Instructions Guide
Basic Operation
Please note that the instructions within this manual will refer to the radio button number e.g (Ref.*number*) in accordance to the diagrams on pages 3-5.
Starting up your radio
Plug the power connector into the system via the "DC IN" port (Ref.15) to charge the radio. Please ensure that the radio is not exposed to water when it is being charged via mains power. Charge the radio for approximately 5-6 hours to fully charge the internal battery for approx 15 hours of portable charge. Remove from mains power when using the radio portably and in the shower. For more information on charging, please see additional guidance on page 22.
Ensure the handle (Ref.9) is extended above the unit as this will enable you to get the best signal possible before scanning. Once charged, remove the power cable from the unit and switch the radio on by pressing the Power button (Ref.2).
When switched on for the first time, the radio will display a “Welcome to Digital Radio” screen, followed by going to DAB/DAB+ mode to perform an automatic scan for available stations. The screen will show “Scanning...” as it searches for available stations and will play the first available station once the scan is complete. To change the language of the device, refer to page 21 of the manual to switch between English and German.
To place the radio into standby mode, press the Power button (Ref.2).
Please note that the radio will reset to default volume when switched off/on.
DAB/DAB+ Radio
Press the Mode button (Ref.3) to switch to DAB/DAB+ radio mode. The radio should already have scanned for available stations during set up.
Ensure that the radio handle (Ref.9) is extended above the radio for the best signal to be received.
If the radio has not automatically scanned for available stations or you would like to rescan for available stations, press the Menu button (Ref.6) to open DAB settings and select the option for "Full Scan" with the Scroll/Select dial (Ref.5). This would be advisable if you are having trouble listening to particular stations or functionality issues.
Once you have chosen to scan, the radio will display “Scanning...” as it starts scanning for available stations with good signal. Once the scan is complete, the first radio station with good signal will begin to play.
To browse through all of the stations that have been stored in DAB/DAB+ mode, scroll through the station list by twisting the Scroll/Select dial (Ref.5). Once you have found your desired station, press down the Scroll/Select dial to confirm your choice. Your chosen station should then begin to play.
DAB/DAB+ Radio Settings
On DAB/DAB+ mode, press the Menu button (Ref.6) on the radio to open DAB radio settings. The following options will be available to scroll through:
Full Scan
Select this option to initiate a scan for available DAB/DAB+ stations. Once selected, the screen will display “Scanning...” as it scans for stations with good signal. Once the scan is complete, the first available station will begin to play.
Manual Tune
Select this option to manually tune the radio and scroll through stations by multiplex and frequency with the Scroll/Select dial. Once the chosen multiplex and frequency displays, select it to play by pressing down the Scroll/Select dial. Once a station is selected, the radio will then display the signal strength of that station selected - if the signal is poor, the station will not play.
Prune
The prune option allows you to remove all unavailable stations from the station list so that only available stations will display. Select the Prune option, and the screen will display "Prune?" followed by Yes or No. To select prune, use the Scroll/Select dial to highlight "
System
View system setting options from page 15-21 of the manual.
Station Info for DAB/DAB+ Radio
When listening to a DAB/DAB+ radio station with good signal, press the Info button (Ref.7) repeatedly to display different programme information provided by the broadcaster.
DLS (Dynamic Label Segment) - Scrolling message that the broadcaster may include with their transmissions such as programme details.
Signal Strength - The display will show a bar to indicate the signal strength of the station.
Programme Type - Displays the style or genre of the programme being broadcast. Multiplex name - Displays the multiplex name that the station is being transmitted from.
Channel number/frequency - This displays the channel number/frequency of the present station.
Signal error - Displays the stability and quality of signal reception.
Bit rate - Shows the data rate at which the signal is being transmitted.
Battery status - Displays the battery life percentage of the radio.
Time - Displays the time automatically
Date - Displays the date automatically
DAB/DAB+/FM Radio Presets
How to preset a chosen DAB/DAB+ station
Up to 10 stations can be preset for easy navigation. To store a station as a preset, you must be listening to the station at the time and then perform the following:
Press and hold the Preset Recall/Store button (Ref.4) for 2-3 seconds until "Save to P*X*" displays on the screen. Release your finger from the Preset button.
Twist the Scroll/Select dial (Ref.5) to scroll through the 10 preset numbers available with the "P *X*" changing as you scroll through. Once on the chosen number you wish to save the station to, press down the Scroll/Select dial to select the preset number. The display will then show "Preset X Stored" to signify the saved preset station.
Follow the same guidance to set up to 10 preset DAB stations. To delete a stored preset station, simply save another station in that preset number.
How to recall a preset radio station
To recall and listen to one of your preset stations, press and release the Preset Recall/Store button (Ref.4) and "Preset Recall" will display on the screen. Do not hold down the button as the Preset Store settings will open.
Twist the Scroll/Select dial (Ref.5) to scroll through the preset stations available. Once on the chosen preset number you wish to play, press down the dial to select your choice and the station will begin to play.
FM Radio
Press the Mode button (Ref.3) to switch to FM radio mode. The first time that FM mode is selected, the FM frequency "87.50MHz" will be displayed on the screen.
Ensure that the radio handle (Ref.9) is extended above the radio for the best signal to be received.
To begin searching for available FM stations, an auto scan will need to be initiated. To begin scanning for available stations, press down the Scroll/Select/Scan dial (Ref.5) and the radio will display "Scanning...." as it scans quickly up the bandwidth for available stations.
To scan quickly down the bandwidth, twist the Scroll/Select/Scan dial anti-clockwise and press down the dial. To scan quickly up the bandwidth, twist the Scroll/Select/Scan dial clockwise and press down the dial. Once a station with good signal has been found, the scanning will stop automatically.
How to tune a specific frequency manually
To tune the radio to a specific frequency slowly, scroll up the frequency bandwidth by turning the Scroll/Select/Scan dial clockwise. To tune the radio slowly down the frequency bandwidth, turn the Scroll/Select/Scan dial anti-clockwise.
FM Radio Settings
When on FM mode, press the Menu button (Ref.6) on the radio to open FM radio settings. Once pressed, the following options will be available to scroll through with the Scroll/Select dial (Ref.5): Scan setting, Audio setting and System. One of these options can then be selected to open further setting options.
Scan setting
Select this option to decide whether the autoscan option will scan for all available stations or for strong stations only. Use the Scroll/Select dial to scroll between two options: "Strong stations only" or "All stations". Select your chosen option by pressing down the Scroll/Select dial.
Audio setting
The radio will automatically switch between stereo and mono mode, but you can switch this function manually which is useful when receiving poor signal reception. Once “Audio setting” is selected, the radio will display “Stereo allowed” or “Forced mono”. Select your chosen setting by pressing down the Scroll/Select dial.
System
View system setting options from page 15-21 of the manual.
Station Info for FM Radio
When listening to a FM radio station with good signal, press the Info button (Ref.7) repeatedly to display different programme information provided by the broadcaster.
Programme Type - Displays the style or genre of the programme being broadcast.
Frequency - Displays the station transmission frequency.
Audio Type - Displays the audio type of the station you are listening to. This will either be Stereo or Mono.
Battery status - Displays the battery life percentage of the radio.
Time - Displays the time automatically
Date - Displays the date automatically
Bluetooth
Press the Mode button (Ref.3) to switch to Bluetooth mode.
On the Bluetooth device that you wish to connect to the radio, go to Bluetooth settings. The radio should display as 'Majority Eversden' at this stage. Select the radio to connect via Bluetooth. Once connected successfully, "Bluetooth Connected" will display on the display screen of the radio.
Begin playing your chosen media from your Bluetooth device and it will begin to play through the radio. You can control the Bluetooth media via the radio by using the Scroll/Select dial (Ref.5). Twist the dial clockwise and anti-clockwise to scroll through songs and press down the dial to Play/Pause.
Clock & Date
Once the radio has been put into DAB mode, the time and date should automatically set. If this does not happen or you wish to alter the time and date, press the Menu button (Ref.6) to open menu settings.
Once menu settings open, scroll to the "System" option with the Scroll/Select dial (Ref.5) and select it by pressing down the dial. Once on "System" options, select the option for 'Time/Date' to open the following options:
Set Time/Date
Once this option is selected, "Set Time" will display and the hour digit will flash on the display screen. You can now alter the time hour by using the Scroll/Select dial to increase or decrease the hour. Once on the chosen time hour, select it by pressing down the Scroll/Select dial. The time minutes digit will now begin flashing and should be set with the same process.
Once the time is set, the "Set Date" settings will now open and the date day unit will begin flashing. You can alter the date day unit by using the Scroll/Select dial to increase or decrease the unit and select the unit by pressing down the Scroll/Select dial to confirm. The date month will then display and should be followed with the same process, and the same for the date year. Once finished, the screen will display "Time Saved".
Auto Update
Select for the radio time and date to be updated automatically from one of the following: "Update from DAB", "Update from FM", "No Update", or "Update from Any".
Set 12/24 hour
Select this option to choose between the clock display showing a 12 or 24 hour clock. Once this option is selected, scroll between "Set 12 hour" or "Set 24 hour" with the Scroll/Select dial and select an option by pressing down the dial.
Set date format
Select this option to choose the preferred date format you wish to be displayed on the radio. Choose between "DD-MM-YYY" or "MM-DD-YYYY" by scrolling between them with the Scroll/Select dial and select an option by pressing down the dial.
Setting Alarm 1/Alarm 2
Please ensure that the radio is being mains powered when setting the alarm.
Press the Menu button (Ref.6) to open menu settings. Once menu settings open, scroll to the "System" option with the Scroll/Select dial (Ref.5) and select it by pressing down the dial. Once on System options, select the option for 'Alarm' to begin setting the alarm(s):
- Once the 'Alarm' option has been selected, "Alarm 1" will display on the screen. Use the Scroll/Select dial to scroll to the "Alarm 2" option. Select the alarm you wish to set by pressing down the Scroll/Select dial.
- Once selected, "Alarm X Setup" will display on the screen. Press down the Scroll/Select dial to confirm set up.
- "Alarm X Wizard On Time" will now display and the hour unit of the clock will begin flashing. Use the Scroll/Select dial to scroll up or down the alarm clock hour and select the alarm hour by pressing down the dial. Repeat the same process for the minutes.
- The "Duration" will now display on the screen, which indicates the length of time that the alarm will sound before switching off automatically. Choose between 15, 30, 45, 60, 90 and 120 minutes and select by pressing down the Scroll/Select dial.
- The "Source" will now display, which indicates the alarm tone that you would like to choose from. The options are Buzzer, DAB or FM radio. Select your chosen alarm tone with the Scroll/Select dial. If DAB or FM radio is selected, you will then have to select whether you would like to choose the last station listened to or one of your preset stations as the alarm tone.
- Now choose when you would like the alarm to sound. Using the Scroll/Select dial, scroll through the following options for the alarm frequency: Daily, Once, Weekdays, Weekends. Select an option by pressing down the dial.
Sleep Timer
A sleep timer enables you to programme the radio to switch off after a selected period of time from activation.
Press the Menu button (Ref.6) to open menu settings. Once menu settings open, scroll to the "System" option with the Scroll/Select dial (Ref.5) and select it by pressing down the dial. Once on System options, select the option for 'Sleep' to begin setting a sleep timer.
Once the Sleep settings are selected, the screen will display "Set sleep time: Sleep Off" to signify that the sleep timer is currently switched off.
To begin scrolling through the available sleep timer lengths, twist the Scroll/Select dial to scroll through the available options: Sleep Off, 10, 20, 30, 60, 70, 80 or 90 (minutes). Once the preferred sleep timer length displays, select it by pressing down the Scroll/Select dial.
Once the sleep timer has been set, the display will show "SX" with X representing the first unit of the sleep timer e.g 60 minutes will display "S6".
To cancel the sleep timer, simply go back to 'Sleep' settings and scroll through to the option for "Sleep Off" and select the option with the Scroll/Select dial.
Additional Options
Press the Menu button (Ref.6) to open menu settings. Once menu settings open, scroll to the "System" option with the Scroll/Select dial (Ref.5) and select it by pressing down the dial. Once on System options, the remaining options will display. Other settings in the 'System' option are available on pages 15-21.
Language
Scroll through to the option for 'Language' and select it with the Scroll/Select dial. Once selected, scroll through the available languages with the dial and select your chosen language by pressing down the dial.
Factory Reset
To reset your radio and erase all setting and preset options, perform a factory reset. This would also be advisable if you are having any functionality issues with your radio. On the “System” settings option, scroll through to the option for ‘Factory Reset’ and select it with the Scroll/Select dial. Once selected, the screen will display “Factory Reset? No Yes”. Use the Scroll/Select dial to highlight “
SW Version
Select to view the software version of the radio.
On the "System" settings option, scroll through to the option for 'SW Version' and select it with the Scroll/Select dial. Once selected, the screen will display the software version.
Internal Rechargeable Battery
Charging
The unit will charge when it is switched off or in working mode if it is connected and powered by the mains. Please ensure that the radio is not exposed to water when it is being charged via mains power.
To charge the unit, lift the socket cover from the radio (Ref.13) and place the DC in power cable into the radio DC in socket (Ref.15)
From low charge, the radio will take approximately 5-6 hours for a full charge. When the radio is charging, you can view the charging percentage when it is in working mode. In working mode, press the 'Info' button (Ref.7) repeatedly until the word "Charging" displays with the percentage of charge. When the unit is on 100%, it would be advisable to remove from power to save the internal battery.
Play Time
The Eversden has an internal rechargeable battery with a playtime of approximately 15 hours from a full charge. This will allow you to take the radio on the go and use it portably in the shower with its waterproof covering.
Save the internal battery life of the unit by switching the radio off entirely when it is not in use. Do this by pressing down the power button (Ref.2).
If you encounter an issue with your radio, please refer to the following checklist.
| Observation Potential Cause/Solution | |
| No power/function Please ensure that the unit is fully charged via the mains cable. Once charging, check the charging percentage of the radio by selecting the Info button. | |
| No sound Ensure that the radio is tuned in and available stations have been scanned. If no stations are available, perform a rescan or a reset of the unit.When a station is playing, ensure that the volume dial is switched up. | |
| Functional disturbance Switch off and unplug the unit. Leave it for 2 minutes and switch it on again. Perform a factory reset and rescan for stations. | |
| Functionality issues with the radio Perform a factory reset via the Menu button on the radio. Restart the radio and allow it to set back up again. | |
| Distorted/Muffled Sound After prolonged use in the shower the unit may begin to produce distorted/muffled sound. This is due to water inside the speaker restricting movement. To fix this, simply shake any water out of the speaker grill. | |
Support
If you require further assistance with your new Radio, please contact our support team on the Majority website: www.majority.co.uk/support
Specifications
| Power Supply USB-C, 5V 2A | --- |
| Mode: FM: 87.5MHz - 108 MHz | DAB: 174 - 240 MHzBluetooth |
| Battery: 3000mA Lithium battery | |
| Dimensions 13.6 x 5.7 x 16.2 cm | |
| Weight ~0.5kg |
Warranty
Register your product at www.majority.co.uk within 30 days of purchase to activate your extended warranty.
Terms and conditions applies
- Read these instructions.
- Keep these instructions. Instructions are also available for download at www.majority.co.uk
- Heed all Warnings
- Follow all instructions
- Do not clean the apparatus near or with water
- Do not block any ventilation openings. Install in accordance with the manufacturer's instructions
- Do not install near any heat sources such as radiators, heat registers, stoves, or other apparatus (including amplifiers) that produce heat.
- Protect the power from being walked on or pinched particularly at plugs, convenience receptacles, and the point where they exit from the apparatus.
- Only use attachments/accessories specified by the manufacturer.
- Unplug this apparatus during light storms or when unused for long periods of time.
- Refer all servicing to qualified service personnel. Servicing is required when the apparatus has been damaged in a way, such as power-supply cord or plug is damaged, liquid has been spilled or objects have fallen into the apparatus, the apparatus has been exposed to the rain or moisture, does not operate normally or has been dropped.
- No naked flame sources, such as lit candles, should be placed on the apparatus.
- Dispose of used electrical products and batteries safely according to your local authority and regulations.
ADDITIONAL WARNINGS
The apparatus shall not be exposed to dripping or splashing and no objects filled with liquid, such as vases, shall be places on the apparatus.
Main plug is used to disconnect device and it should remain readily operable during intended use. In order to disconnect the apparatus from the main mains completely, the mains plug should be disconnected from the main socket outlet completely.
Battery shall not be exposed to excessive heat such as sunshine, fire or the like.
RECYCLING ELECTRICAL PRODUCTS
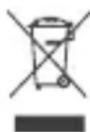
You should now recycle your waste electrical goods and in doing so help the environment. This symbol means an electrical product should not be disposed of with normal household waste.
Please ensure it is taken to a suitable facility for disposal when finished with.
IMPORTANT: Please read all instructions carefully before use and keep for future reference.

Risk of electric shock. Do not open

Read all instructions carefully before use and keep for future reference

When servicing, use only identical replacement parts
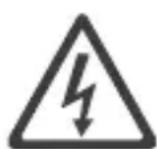
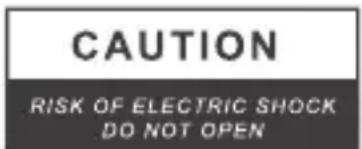

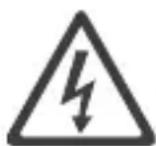
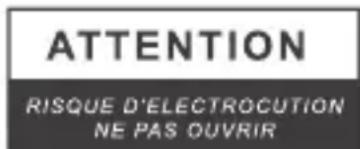


IMPORTANT: Please read all instructions carefully before use and keep for future reference
MAJORITY
EVERSDEN
Bluetooth DAB Radio
natural_image
Technical line drawing of a portable electronic device with a grid-patterned front panel, connected to a cable and a rectangular box (no text or symbols)www.majority.co.uk/support
Technische Daten
| Netztei | USB-C, 5V ---2A |
| Modi | FM: 87,5 MHz - 108 MHzDAB: 174 - 240 MHzBluetooth |
| Batterie | 3000-mA-Lithiumbatterie |
| Abmessungen | 13,6 x 5,7 x 16,2 cm |
| Gewicht | ~0,5 kg |
Garantie
Batterie interne rechargeable....22
Dépannage 23
natural_image
Line drawings of a portable electronic device with a grid-patterned front panel, connected to a cable and a rectangular box (no text or symbols)A. Majority Eversden
B. USB-C
C. Manuel d'utilisation
Vue du dessus
Batterie interne rechargeable
Recharge
www.majority.co.uk/support
Caractéristiques
RISQUE D'ELECTROCUTION NE PAS OUVRIR

CAUTION
RISK OF ELECTRIC SHOCK DO NOT OPEN


natural_image
Line drawings of a portable electronic device with a back panel, cable, and open book (no text or symbols)www.majority.co.uk/support
Specifiche tecniche
| Alimentazione | USB-C, 5V = 2A |
| Modalità: | Radio FM: 87,5MHz - 108MHzRadio digitale DAB: 174 - 240MHzBluetooth |
| Batteria: | Batteria al litio da 3000 mA |
| Dimensioni | 13,6 x 5,7 x 16,2 cm |
| Pesc | ~ 0,5 kg |
Garanzia
natural_image
Warning symbol: white exclamation mark inside a triangle (no text or numbers)natural_image
Line drawings of a portable electronic device with a speaker, cable, and open book (no text or symbols)A. Majority Eversden
B. USB-C
C. Manual de instrucciones
Vista superior
www.majority.co.uk/support
Especificaciones
EU Declaration of Conformity
I hereby declare that the product:
Product Name: Portable Bluetooth DAB Radio
Model number: Eversden
Brand: Majority
SKU code: EDN-DAB-GRY UK
Satisfies all the technical regulations applicable to the product within the scope of Council Directives
2014/35/EU and 2014/30/EU, 2009/125/EC, 2012/19/EU, 2014/53/EU, 2011/65/EU, 1907/2006.
2014/35/EU (LVD Directive)
EN IEC 62368-1:2020+A11:2020
2014/30/EU (EMC Directive)
EN 55032:2015+A1:2020 Class B, EN IEC 61000-3-2:
2019+A1:2021, EN 61000-3-3:2013+A1:2019+A2:
2021, EN 55035:2017+A11:2020, EN 301489-1 V2.2.3
(2019-11), EN 301489-17 V3.2.4 (2020-09)
2009/125/EC (ERP Directive)
1907/2006 (REACH Directive)
All essential test suites have been carried out.
This declaration is issued under the sole responsibility of iZilla Ltd.
Point of Contact: Eddie Latham I Founder
Signed: E. Latham
Date: 20.12.2022
UK: iZilla Ltd, Newton House, 2 Pioneer Court, Histon, Cambridge, CB24 9PT, UK
EU RP: AR Experts, P.O. Box 5047, 3620 AA Breukelen, The Netherlands
US: Izilla Ltd, C/0 A.N. Deringer, Inc., 19520 Wilmington Ave, Rancho Dominguez, CA, 90220
Majority is owned and operated by iZilla Ltd. Registered in England with Company No: 08520738
MAJORITY
www.majority.co.uk
- What's In the Box? 7
- Instructions Guide......8
- Troubleshooting 23
- Specifications and Warranty 24
- Safety Information 25
- Top View
- Front view
- Side View
- Hanging Strap
- Box Contents
- Basic Operation
- Starting up your radio
- DAB/DAB+ Radio
- DAB/DAB+ Radio Settings
- Full Scan
- Manual Tune
- Prune
- System
- Station Info for DAB/DAB+ Radio
- DAB/DAB+/FM Radio Presets
- How to preset a chosen DAB/DAB+ station
- FM Radio
- How to tune a specific frequency manually
- FM Radio Settings
- Scan setting
- Audio setting
- Station Info for FM Radio
- Bluetooth
- Clock & Date
- Set Time/Date
- Auto Update
- Set 12/24 hour
- Set date format
- Setting Alarm 1/Alarm 2
- Sleep Timer
- Additional Options
- Language
- Factory Reset
- SW Version
- Internal Rechargeable Battery
- Charging
- Play Time
- Support
- Warranty
- ADDITIONAL WARNINGS
- RECYCLING ELECTRICAL PRODUCTS
- MAJORITY
- EVERSDEN
- Garantie
- Vue du dessus
- Batterie interne rechargeable
- Recharge
- CAUTION
- Garanzia
- Vista superior
- EU Declaration of Conformity
Brand : Majority
Model : Eversden
Category : Radio