FreeStereo Twins - Earphones HAMA - Free user manual and instructions
Find the device manual for free FreeStereo Twins HAMA in PDF.

User questions about FreeStereo Twins HAMA
0 question about this device. Answer the ones you know or ask your own.
Ask a new question about this device
Download the instructions for your Earphones in PDF format for free! Find your manual FreeStereo Twins - HAMA and take your electronic device back in hand. On this page are published all the documents necessary for the use of your device. FreeStereo Twins by HAMA.
USER MANUAL FreeStereo Twins HAMA
Operating Instructions
Bedienungsanleitung
Mode d'emploi
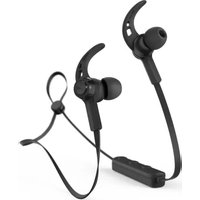
Controls and Displays
- Microphone
- Volume Control (-)
- Status LED
- Volume Control (+)
- Multi-Function Key
- Ear Hook
- Ear pads
- Charging contacts
- Status LED of charging box
- Charging Socket
Thank you for choosing a Hama product.
Take your time and read the following instructions and information completely. Please keep these instructions in a safe place for future reference. If you sell the device, please pass these operating instructions on to the new owner.
1. Explanation of Warning Symbols and Notes

Warning
This symbol is used to indicate safety instructions or to draw your attention to specific hazards and risks.

Note
This symbol is used to indicate additional information or important notes.
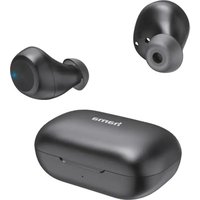
2. Package Contents
• 1 x FreeStereo Twins Bluetooth headset
- 1 x USB charging Cable
- 1 x Charging box
- 4 x Ear pads
3 x Ear Hook
- T hese operating instructions
3. Safety Notes
- T he product is intended for private, non-commercial use only.
- Protect the product from dirt, moisture and overheating, and only use it in a dry environment.
- D o not allow yourself to be distracted by the product, for example when driving a vehicle or operating sports equipment. Always pay attention to the surrounding traffic and your environment.
D o not drop the product and do not expose it to any major shocks. - Do not operate the product outside the power limits given in the specifications.
- Do not open the device or continue to operate it if it becomes damaged.
- Since the battery is integrated and cannot be removed, you will need to dispose of the product as a whole. Do this in compliance with the legal requirements.
- D ispose of packaging material immediately according to locally applicable regulation.
- D o not modify the product in any way. Doing so voids the warranty.

Warning - Rechargeable battery
- O nly use suitable charging devices or USB connections for charging.
- A s a rule, do not charge devices or USB connections that are defective and do not try to repair them yourself.
- D o not overcharge the product or allow the battery to completely discharge.
- A void storing, charging or using batteries in extreme temperatures.
- We suggest to fully charge the item for at least one time in two months

Warning - Loud volume
- Using this product limits your perception of ambient noise. For this reason, do not operate any vehicles or machines while using this product.
- Always keep the volume at a reasonable level. Loud volumes, even over short periods, can cause hearing loss.
4. Getting Started
- T he two headsets and the charging box are equipped with a rechargeable battery. The battery must be fully charged before using the device for the first time.
- Y ou can charge the headsets directly using the charging box, or charge the battery of the charging box. This allows you to charge the headset batteries while on the go, without an external power supply. In other words, the charging box is used as mobile power storage.

Note
Use only the supplied USB charging cable!
4.1 Charging the headsets
- E nsure that the headsets are switched off before charging them.
- P lace both headsets in the charging box.
- C harging of the headsets will start automatically if the battery of the charging box still has sufficient charge.
- I f not, begin charging by connecting the included USB charging cable to the charging terminal (10) and to the USB connection of a suitable USB charger. Please refer to the operating instructions for the USB charger used.
- T he status LEDs (3) of the headsets emit a constant red light during charging.
- I t takes about one hour to charge a headset battery.
- W hen a headset's battery is fully charged, the light emitted by the status LED (3) of the headset goes out.
- Y ou can now remove the headset.
4.2 Charging the charging box
- Begin charging by connecting the included USB charging cable to the charging terminal (10) and to the USB connection of a suitable USB charger. Please refer to the operating instructions for the USB charger used.
- T he status LED of the charging box (9) emits a constant red lig during charging.
- C harging the battery fully may take up to 2 hours.
- W hen the battery is fully charged, the status LED (9) goes out.
- D disconnect all cable and mains connections after use.

Note
- If the headset batteries and the charging box battery are empty, the headset batteries will be recharged first. After that, the battery of the charging box will be charged (lights emitted by the status LEDs (3) of the headsets go out; status LED (9) of the charging box continues to emit a red light).
- A charging box battery that has been fully charged allows you to completely charge both headsets about four times.
5. Operation
5.1 Switching the headset on/off
- Turn On:
With the device off, press and hold the multifunction button (5) for 6 seconds until you hear a voice say "Power on". The status LED (3) initially emits blue flashes of light and then a red flash of light.
- Turn Off:
With the device on, press and hold the multifunction button (5) for 4 seconds until you hear a voice say "Power off". The status
LED (3) will light up in red briefly before the device turns off.
The first time the device is turned on, pairing is automatically started - see 5.2 Bluetooth pairing - Headsets.
5.2. Bluetooth pairing - Headsets
- First the two headsets must connect to one another.
- Ensure that both headsets are switched off.
- P re s s and hold the multifunction button (5) on both headsets for approximately eight seconds until the status LEDs (3) begin to alternate between a red and blue light.
- T he headsets automatically pair with one another within about ten seconds. After that, you can connect the headsets to a terminal device.
- I f the two headsets cannot set up a connection within two minutes, they will automatically switch off.

Note
- O nce the headsets have correctly paired with one another, one headset will automatically be guided by the headset that was switched on/paired first.
- T herefore, when connecting the headsets to terminal devices in future, you merely have to switch on both headsets and put one of the headsets into pairing mode. The other headset is automatically connected.
5.3. Bluetooth pairing with terminal device
- T he headsets and the terminal device should be no further than one metre apart. The smaller the distance, the better.
- E nsure that both headsets are switched on and paired with one another.

Note - Pairing
- Make sure that your Bluetooth-capable terminal device is on and Bluetooth is activated.
-
F or more information, please refer to the operating instructions of your terminal device.
-
O pen the Bluetooth settings on your terminal device and wait until FreeStereo Twins appears in the list of Bluetooth devices found.
- S elect FreeStereo Twins and wait until the headsets are listed a connected in the Bluetooth settings on your terminal device.

Note - Bluetooth password
Some terminal devices require a password in order to connect to another Bluetooth device.
- If your terminal device requests a password to establish the connection, enter 0000.

Note
If pairing was successful, the status LEDs (3) emit blue flashes of light every five seconds.
- Y ou can now use the headsets.
5.4. Automatic Bluetooth connection (after successful pairing)

Note
- Make sure that your Bluetooth-capable terminal device is on and Bluetooth is activated.
-
F or more information, please refer to the operating instructions of your terminal device.
-
E nsure that the headsets are switched on.
- Y ou can also switch just one of the headsets on. This headset will automatically connect to the terminal device after successful pairing. If the other headset is likewise switched on, it connects to the headset that was switched on first and so is likewise automatically paired with the terminal device.
- A fter the headset and terminal device have been paired, a connection is established automatically.
- Y ou can now use the headset/headsets.

Note
- I f pairing was successful, the status LEDs (3) emit blue flashes of light every five seconds.
- I f pairing was not successful, the status LEDs (3) emit a flash of light once every five seconds, and you will have to perform pairing again.
- I t may be necessary to change the settings on your terminal device to enable it to automatically connect to the paired headset.

Note - Connection impaired
After the headset and terminal device have been paired, a connection is established automatically. If the Bluetooth connection is not established automatically, check the following:
- G o to the Bluetooth settings on your terminal device and check whether FreeStereo Twins are connected. If not, repeat the steps listed under 5.3 Bluetooth pairing with terminal device.
- Check whether obstacles are impairing the range. If so, move the devices closer together.
- The performance can also be affected by a weak battery.
5.5. Audio playback

Note
- NOTE that support for certain key functions may vary depending on your terminal device.
- F or more information, please refer to the operating instructions of your terminal device.
-
F unctions can still be controlled directly via the terminal device.
-
Set the volume on your terminal device to a low level.
- S tart audio playback on the connected terminal device.
- Press the volume control (+) (4) to increase the volume.
- Press the volume control (-) (2) to reduce the volume.
- Press and hold the volume control (+) (4) to skip to the next track
- P ress and hold the volume control (-) (2) to skip to the previous track.
5.6. Hands-free function

Note
- NOTE that support for certain key functions may vary depending on your terminal device.
- F or more information, please refer to the operating instructions of your terminal device.
- F unctions can still be controlled directly via the terminal device.
Making a call
D ial the number directly on your terminal device to make a call.
Accepting calls
- Press the multifunction button (5) once to answer an incoming call.
Ending a call
- D uring a call, press the multifunction button (5) once to end the call.
Redial
- B riefly press the multifunction button (5) twice to call the last number.

Note - Call quality
To increase the call quality, make sure that you are near the headsets with your mobile phone during the call.
5.7. Volume control and mute function
- Press the volume control (-) (2) to reduce the volume.
- Press the volume control (+) (4) to increase the volume.
5.8. Disconnecting the headset
- S witch the headset off.
- D isconnect the headset via the Bluetooth settings on your terminal device.
5.9. Battery level
- T o save energy, the headset automatically switches off if it is not connected to a device for a certain time.
- W hen the headset's battery level is low, a voice says "Low battery please charge" every 60 seconds, and the status LED (3) emits a red flash of light three times.
- C harge the headset as described in 4. Getting Started.
- Press the volume control (-) (2) twice to find out the current battery level.
| Available talk time | Language information | Status-LED (2) |
| >3,75 h | " | Battery higheds |
| 3,75 h - 0,75 h | " Battery medium" Blue 3x flashing | |
| <0,75 h | " | Battery low" Rot 3x flashin |

Note
- P lease note that the two headsets can have different battery levels. You should therefore check the battery levels of the headsets separately.
- H otherwise, the talk and standby times may vary when used with different mobile phones or other compatible Bluetooth devices, usage settings, usage styles and environments.
5.10. Reset/factory setting
Resetting to the factory default settings can solve some problems and malfunctions.
- P re s s and hold the multifunction button (5) and the volume control (-) (2) for approximately eight seconds to reset the headset to factory settings.
- N o t e that the headset must not be paired with an end terminal during the reset process.
6. Care and Maintenance
Only clean this product with a slightly damp, lint-free cloth and do not use aggressive cleaning agents. Make sure that water does not get into the product.
7. Warranty Disclaimer
Hama GmbH & Co KG assumes no liability and provides no warranty for damage resulting from improper installation/mounting, improper use of the product or from failure to observe the operating instructions and/or safety notes.
8. Service and Support
Please contact Hama Product Consulting if you have any questions about this product.
Hotline: +49 9091 502-115 (German/English)
Further support information can be found here:
www.hama.com
9. Technical Data
| Bluetooth Headset | |
| Bluetooth technology Bluetooth V4.1 | |
| Supported profiles A2DP, AVRCP, HSP, HFP | |
| Range < 10 m | |
| Charging box battery | |
| Input 5V 340mA | --- |
| Output 4,65V 340mA | --- |
| Battery type Li-ion 3,7V/420mAh | |
| Charging time ~ 2h | |
| Battery for each headset | |
| Battery type Li-ion 3,7V/40mAh | |
| Charging time ~ 1h | |
10. Recycling Information
Note on environmental protection:
After the implementation of the European Directive 2012/19/EU and 2006/66/EU in the national legal system, the following applies: Electric and electronic devices as well as batteries must not be disposed of with household waste. Consumers are obliged by law to
return electrical and electronic devices as well as batteries at the end of their service lives to the public collecting points set up for this purpose or point of sale. Details to this are defined by the national law of the respective country. This symbol on the product, the instruction manual or the package indicates that a product is subject to these regulations. By recycling, reusing the materials or other forms of utilising old devices/Batteries, you are making an important contribution to protecting our environment.
11. Declaration of Conformity
Hereby, Hama GmbH & Co KG declares that the radio equipment type [00173858] is in compliance with Directive 2014/53/EU. The full text of the EU declaration
of conformity is available at the following internet address: www.hama.com->00173858->Downloads.
Frequency band(s) 2402 - 2480MHz
Maximum radio-frequency power transmitted
< 10mW EIRP
"The Bluetooth® word mark and logos are registered trademarks owned by the Bluetooth SIG, Inc. and any use of such marks by Hama GmbH & Co KG is under license. Other trademarks and tradenames are those of their respective owners."
All listed brands are trademarks of the corresponding companies. Errors and omissions excepted, and subject to technical changes. Our general terms of delivery and payment are applied.