GP528AC - Water pump Vonroc - Free user manual and instructions
Find the device manual for free GP528AC Vonroc in PDF.

| Type of product | Automatic water pump |
| Brand | Vonroc |
| Model | GP528AC |
| Supply voltage | 230 V ~ 50 Hz |
| Power consumption | 1000 W |
| Maximum flow rate | 3500 l/h |
| Maximum pressure | 4.4 bar |
| Maximum pumping height | 44 m |
| Maximum self-priming suction height | 8 m |
| Maximum particle size | 1 mm (clean water) |
| Maximum water temperature | 35 °C |
| Protection class | IPX4 |
| Pressure connection | Internal thread G1" |
| Suction connection | Internal thread G1" |
| Recommended hose inner diameter | 25, 32 or 38 mm |
| Cable length | 1.2 m |
| Weight | 7.24 kg |
| Sound pressure level (LpA) | 66.2 dB(A) (K=2.66 dB(A)) |
| Sound power level (LwA) | 78.1 dB(A) (K=2.66 dB(A)) |
| Dry run protection | Yes (with reset) |
| Pressure gauge | Yes |
| Built-in check valve | Yes |
| Maintenance and cleaning | Clean the housing with a soft, slightly damp cloth and a soapy solution. Do not use solvents. Drain completely before storing in freezing weather. |
| Safety | Connect to a socket protected by a 30 mA residual current device. Do not use in a swimming pool if people are in the water. Do not pump corrosive, flammable substances, salt water, waste water, grease or oil. Water pH between 6.5 and 8.5. |
| Spare parts and repairability | If the cable is damaged, have it replaced by a professional. Contact the manufacturer for spare parts. |
| General information | Legal warranty against defects in parts and workmanship. Do not dispose of with household waste, recycle in accordance with the WEEE directive. |
Frequently Asked Questions - GP528AC Vonroc
User questions about GP528AC Vonroc
0 question about this device. Answer the ones you know or ask your own.
Ask a new question about this device
Download the instructions for your Water pump in PDF format for free! Find your manual GP528AC - Vonroc and take your electronic device back in hand. On this page are published all the documents necessary for the use of your device. GP528AC by Vonroc.
USER MANUAL GP528AC Vonroc
natural_image
Pure electrical circuit lines without any symbolsEN Original Instructions 08
natural_image
Close-up of a metallic industrial pump or motor with labeled component 6 (no text or symbols beyond label)E2
natural_image
Close-up of a metallic industrial pump with water flow indicator (no text or symbols visible)VONROC
natural_image
Two-step industrial machine operation diagram showing hand operating a pump and tubing (no text or symbols)1. SAFETY INSTRUCTIONS
Read the enclosed safety warnings, the additional safety warnings and the instructions. Failure to follow the safety warnings and the instructions may result in electric shock, fire and/or serious injury. Save the safety warnings and the instructions for future reference.
The following symbols are used in the user manual or on the product:

Read the user manual.

Denotes risk of personal injury, loss of life or damage to the tool in case of nonobservance of the instructions in this manual.

Indicates electrical shock hazard.

Protect the appliance against frost.

Max depth.

GP527AC: The guaranteed sound power level LWA = 77 dB(A)

GP528AC: The guaranteed sound power level LWA = 81 dB(A)

Do not dispose of the product in unsuitable containers.

The product is in accordance with the applicable safety standards in the European directives.
SAFETY NOTES
THIS APPLIANCE CAN BE USED BY CHILDREN AGED FROM 8 YEARS AND ABOVE AND PERSONS WITH REDUCED PHYSICAL, SENSORY OR MENTAL CAPABILITIES OR LACK OF EXPERIENCE AND KNOWLEDGE IF THEY HAVE BEEN GIVEN SUPERVISION OR INSTRUCTION CONCERNING USE OF THE APPLIANCE IN A SAFE WAY AND UNDERSTAND THE HAZARDS INVOLVED. CHILDREN SHALL NOT PLAY WITH THE APPLIANCE. CLEANING AND USER MAIN- TENANCE SHALL NOT BE MADE BY CHILDREN WITHOUT SUPERVISION. IF THE SUPPLY CORD IS DAMAGED, IT MUST BE REPLACED BY THE MANUFACTURER, ITS SERVICE AGENT OR SIMILARLY QUALIFIED PERSON
IN ORDER TO AVOID A HAZARD. THE PLUG MUST BE REMOVED FROM THE SOCKETOUTLET BEFORE CLEANING OR MAINTAINING THE APPLIANCE.
Please read these instructions carefully and thoroughly before using this appliance and keep them for future reference. It is very important that you understand how to use this appliance safely so please take the time to familiarise yourself with the requirements as outlined in these instructions.
- If you are in any doubt what so ever about using this appliance, we strongly recommend that you employ the services of a suitably qualified person.
- Electrical connection must be protected by a residual current device (RCD) at the power socket with a nominal trip current of 30mA (max).
- Keep children and pets well away from the work area and never allow children to use this appliance or touch the extension cord at any time. When not in use, keep this appliance stored in a safe place out of reach of children.
- Never leave the appliance unattended when in use.
- Never pull the appliance by its power cord. Carry it using the carry handle.
- Do not allow the power cord to lay on or across sharp objects that might pierce the outer insulation. Carry out a visual inspection of the power cord before use and if it is damaged, have it replaced by a specialist service centre. Do not use the appliance if the cord is damaged.
- Keep the power cord away from heat, frost, oil, solvents or any sharp objects or edges.
- Electrical connections e.g. extension cable, must be protected from moisture at all times.
- Check that the power rating on your appliance corresponds with the power rating at you mains supply. The supply voltage must be 230VAC.
- Never run this appliance dry - out of the water. If the appliance overheats, the thermal cut-out will switch it off. If this happens wait 5 minutes before using the appliance again.
- Only switch the power back on with dry hands.
- Never use this appliance in a pond or swimming pool while people are present in the water!
- Do not use the pump for drinking water.
-
Corrosive, flammable or explosive substances, grease, oil, salt water and sewage must not be conveyed by the pump.
-
The pH of water must between 6.5 and 8.5.
- The temperature of the liquid conveyed may not exceed 35 °C.
Electrical safety
When using electric machines always observe the safety regulations applicable in your country to reduce the risk of fire, electric shock and personal injury. Read the following safety instructions and also the enclosed safety instructions.

Always check that the power supply corresponds to the voltage on the rating plate.
Connecting to the power supply
Check that the power supply and plug used in accordance with your machine. Have a look at the rating plate on the machine. Any changes should always be carried out by a qualified electrician.

ing! This machine must be earthed. If not properly earthed this machine can cause an electrical shock. Be sure that the power supply outlet is earthed. If there is any doubt, have it checked by a qualified electrician.

ing! Avoid contact with the terminals on the plug when installing (removing) the plug to (from) the power supply outlet. Contact will cause a severe electrical shock.
Replacing cables or plugs
If the supply cord is damaged, it must be replaced by the manufacturer, its service agent or similarly qualified persons in order to avoid a hazard. Immediately throw away old cables or plugs when they have been replaced by new ones. It is dangerous to insert the plug of a loose cable in the wall outlet.
Using extension cables
Only use an approved extension cable suitable for the power input of the machine. The minimum conductor size is 1.5 mm^2 . When using a cable reel always unwind the reel completely.
2. MACHINE INFORMATION
The automatic pump is intended for private use for household water supply and irrigation of gardens, it is not intended for commercial use. Explosive, corrosive, flammable substances, sewage, salt water, grease and oil must not be conveyed by the pump.
It is solely intended for pumping clear and rain water. The particle sizes of the solids in the water must not exceed the maximum particle size specified in the technical data.
This pump is not designed for continuous operation (e.g. as a swimming pool or pond circulation pump).
TECHNICAL SPECIFICATIONS
| Model No. GP527AC GP528AC | ||
| Pump housing Plastic | Stainless steel | |
| Voltage 230 VAC / 50Hz | ||
| Input power 800W 1000W | ||
| Max. flow rate (Fig. C) 3300l/h 3500l/h | ||
| Max. pressure 4 bar 4.4 bar | ||
| Max. pumping height (Fig. C) 40m 44m | ||
| Max. self-priming suction height | 8m | |
| Max. particle size | 1 mm (clean water) | |
| Switch-on pressure | 1.5-2.5 bar | |
| Default switch-on pressure | 1.5 bar | |
| Dry run protection | Yes | |
| Pressure gauge | Yes | |
| Backflow preventer (pressure switch) | Yes | |
| Max. water temperature | 35°C | |
| Protection | IPX4 | |
| Pressure connection (switch) | G1" external thread | |
| Suction connection | G1" internal thread | |
| Recommended inner hose diameter (suction hose) | 25mm, 32mm, 38mm | |
| Cable length | 1.2m | |
| Weight 6.86 kg 7.24 kg | ||
| Sound pressure level L_PA | 62.6 dB(A)K = 2.22dB(A) | 66.2 dB(A)K = 2.66dB(A) |
| Sound power level L_WA | 74.5 dB(A)K = 2.22dB(A) | 78.1 dB(A)K = 2.66dB(A) |
DESCRIPTION
The numbers in the text refer to the diagrams on page 2-7.
- ON/OFF switch
- Drain plug
- Water inlet (pump)
- Filling plug
- Water outlet (pump)
- Carry handle
- Suction hose (not included)
- Water inlet (pressure switch)
- Water outlet (pressure switch)
- Pressure gauge
- Reset button
- LED-power
- LED-failure
- LED-on
-
Pressure setting screw
-
Foot valve / backflow preventer (not included)
3. ASSEMBLY

Before carrying out any work on the pump, disconnect the mains plug from the power supply.
Mounting the handle (Fig. D)
- Put the handle (7) on the pump, as shown on figure D.
- Mount the handle (7) by tightening the two screws.
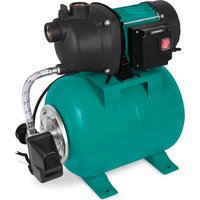
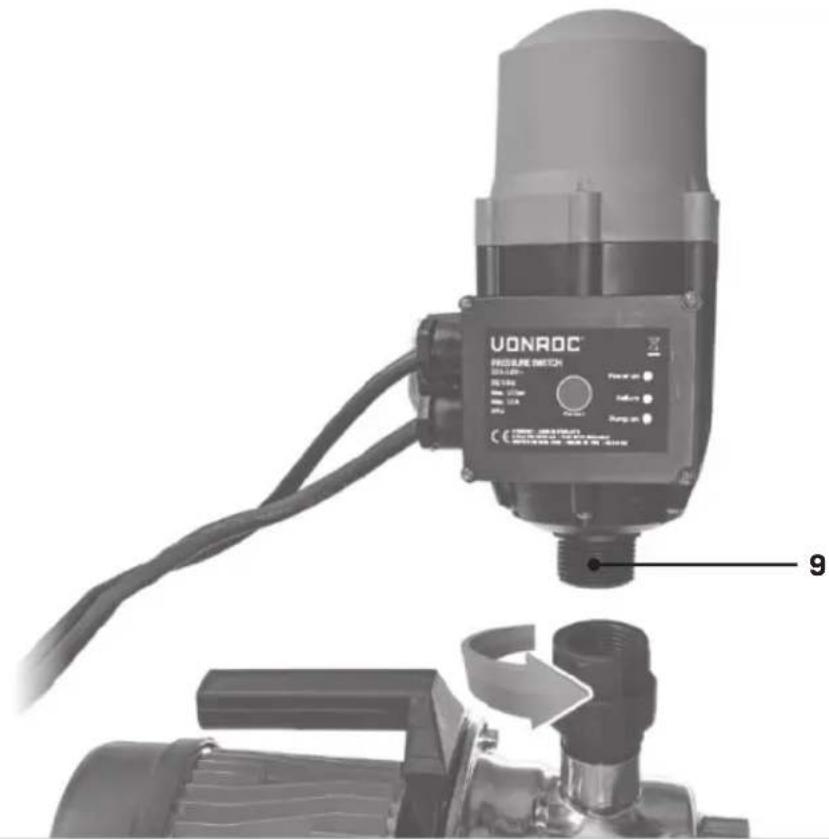
Installing the pressure switch (Fig. E)
- Screw the coupling into the pump outlet (6), as shown on figure E1.
- Screw the water inlet (9) connection into the coupling, as shown on figure E2.
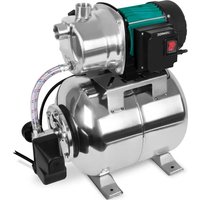
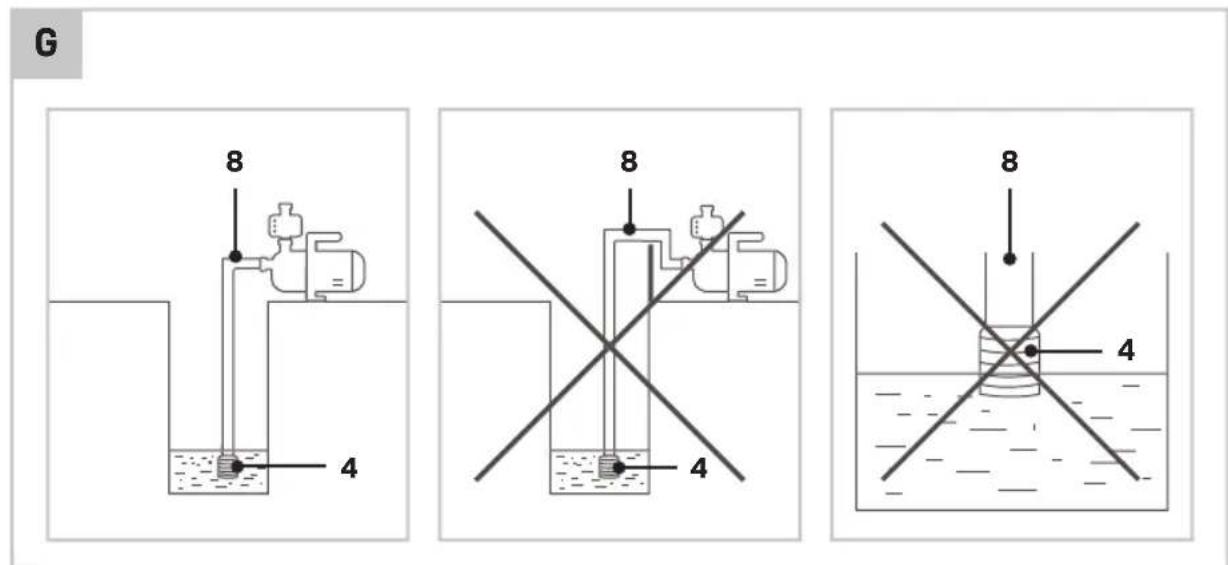
Installing the pump (Fig. G)
The pump should be installed in ventilated and dry environment. It could be installed outside, provided having proper covering to prevent rain and wind. Make sure the pump is placed on the horizontal and stable ground. Always put up the garden pump at a point higher than the water surface, as shown on figure G.
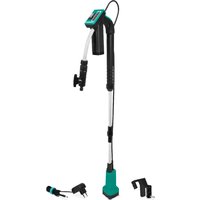
Attaching the suction hose (Fig. A, F, G)

Don't use any hose connection system fittings or standard water hoses on the suction side! A suction hose (8) set with suitable coupling (G1" external thread) and foot valve (4) must be used. The foot valve (4) prevents the return flow of the water at the end of the pumping process.

25mm, 32mm or 38mm (inner diameter) suction hose (8) must be used to achieve maximum flow rate.

The suction hose (8) should be as short as possible.
- Remove the protection cap from the water inlet connection.
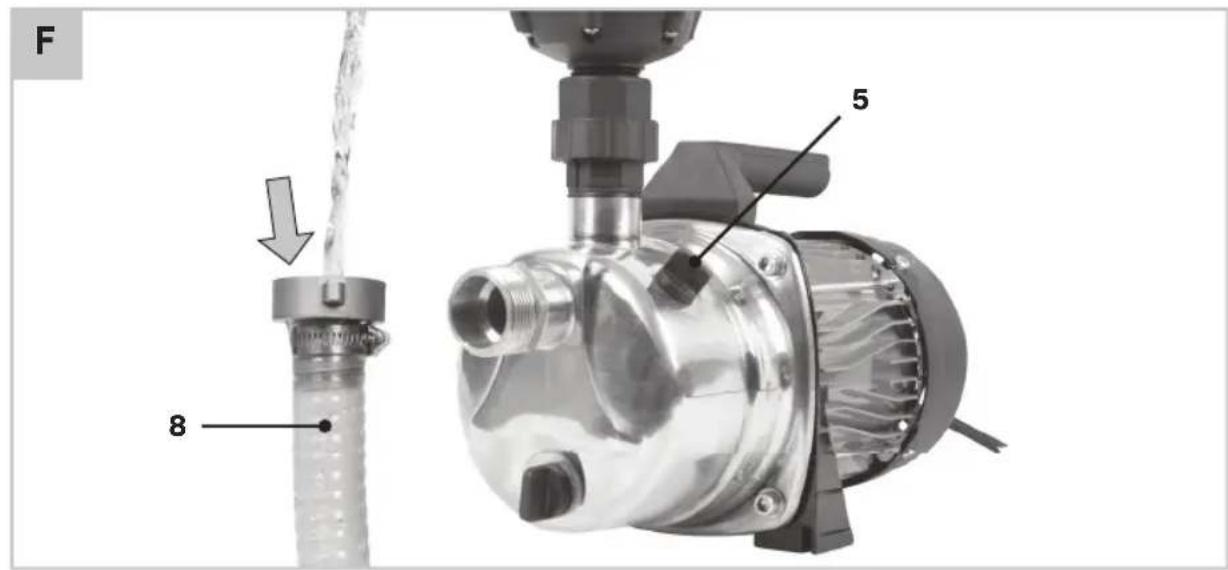
- Fill suction hose (8) with clean tap water, as shown on figure F.
- Apply thread seal tape (Teflon tape) to the threaded suction hose coupling.
- Screw the suction hose coupling airthight into the water inlet (3).
- The foot valve (4) must be placed vertically and at least 30 cm from the water bottom to prevent the suction of sand and stones, as shown on figure G.
Attaching the outlet hose (Fig. B)

The larger the hose and hose connector diameter, the greater the flow.

The lower the delivery height, the greater the flow.
- Decide which hose diameter and hose connection system fittings you are going to use.
- Apply thread seal tape (Teflon tape) to the water outlet (10) connection.
- Screw the coupling (not included) on the water outlet (10).
- Connect the hose (not included) to the coupling.
- Check that the hose has no kinks in it.
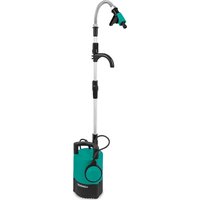
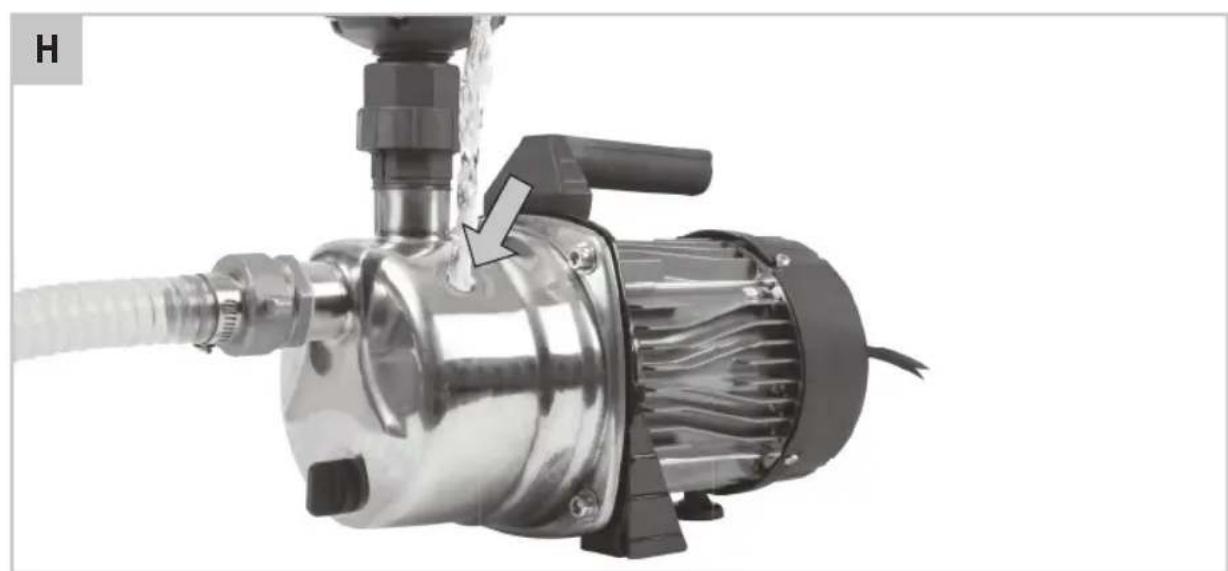
Filling the pump with water (Fig. A, H)
- Unscrew and remove the filling plug (5).
- Fill the pump with clean tap water, as shown on figure H. Do not overfill the pump.
- Place the filling plug (5) back, do not overtighten.
4. OPERATION

Never use this pump in a pond or swimming pool while people are present in the water!

Only switch the power on or off with dry hands.

Never run this pump before the pump and the suction hose (8) is filled with water.

Clean the foot valve (not included) and pre-filter (not included) at regular intervals, and check it for damage. Otherwise, its function can be impaired.
Switching on/off (Fig. A)
- Check that the ON/OFF switch (1) of the pump is in the 'O' position before connecting the pressure switch to the power supply.
- Move the ON/OFF switch (1) of the pump into the position 'I' to switch the pump on.
- With the pressure switch you can automatically control the operation of a garden pump. Open the connected tap or spray gun to start the pump. When you start the pump, there will be a lot of air in the water first. This is not a defect of your pump, but serves to remove air from the pump. It may take several minutes for the air to escape when the pump is used for the first time.
- When you close the connected tap or the spray gun, the pump automatically stops pumping.
- Move the ON/OFF switch (1) of the pump into the position 'O' to switch the pump off.
The pressure switch has 3 LED indicators (13, 14, 15) which indicate the status of the pressure switch:
| LED indicators | Operating status |
| LED-power (13) | The pressure switch is connected to the power supply. The pressure switch is ready for use. |
| LED-failure (14) | The pump is running dry without water. The dry-run safety is activated. Use the pump's operating manual to find the cause of the failure and correct it. Then restart the pump by pressing the reset button (12) on the pressure switch. |
| LED-on (15) | The pump is operating. |
Reading the pressure (Fig. B)
The pipe pressure can be read on the pressure gauge (11). The black scale indicates the pressure in bar.
Setting the switch-on pressure (Fig. A, B)
The default switch-on pressure is 1.5 bar. The switch-on pressure can be adjusted to a value between 1.5 bar to 2.5 bar.
It is possible to set the switch-on pressure by using the pressure setting screw (16). Every 360° turn decreases or increases the switch-on pressure for approx. 0.2 bar.
- By turning clockwise, the pressure will be increased.
- By turning anti-clockwise, the pressure will be decreased.
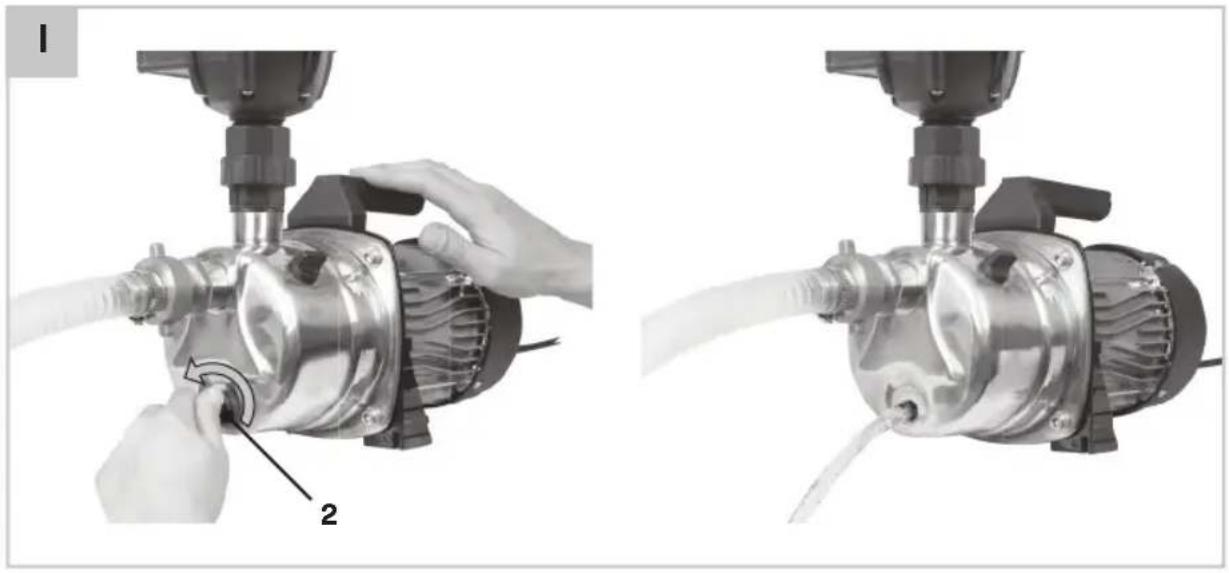
Finish operation (Fig. A, I)

Do not touch the pump unless its power has been cut off for at least 5 minutes.

When there is the risk of frost or if you do not use your pump for a long time, please properly store your pump.
- Check that the ON/OFF switch (1) is in the 'O' position.
- Remove the mains plug from the mains.
- Unscrew and remove the drain plug (2). Let the water drain.
- Pull up the suction hose (be aware, it is full of water).
- Unscrew the suction hose (8) from the water
inlet (3).
- Remove the filter and foot valve (4), then rinse with clear water. Make sure that there is no water left in the suction hose (8).
- Remove the water hose from the water outlet (10). Unscrew the coupling from the water outlet (10).
- Place the drain plug (2) back, do not overtighten.
- Clean and store the device (see 'Maintenance')
5. MAINTENANCE

Before cleaning and maintenance, always switch off the machine and remove the mains plug from the mains.
Clean the machine casings regularly with a soft cloth, preferably after each use. Remove very persistent dirt using a soft cloth moistened with soap-suds. Do not use any solvents such as gasoline, alcohol, ammonia, etc. Chemicals such as these will damage the synthetic components.
If the appliance appears to be blocked, switch off the power at the mains, remove the plug from the socket and check the appliance for blockages. Clean suction hose, foot valve, pre-filter and pump.
STORAGE AND FROST POTECTION
The garden pump and accessories that are not completely drained can be destroyed by frost. Completely drain the garden pump and accessories and protect them against frost. Keep this appliance in well-ventilated dry premises with temperature not going below +5°C. When not in use, keep this appliance stored in a safe place out of reach of children.
TROUBLE SHOOTING GUIDE
| Problem Cause | Remedy | |
| Pump does not start | No mains supply | Check mains supply |
| Pump not switched on | Switch on pump | |
| LED-failure is on | Press the reset button | |
| Not enough pump pressure | Check that the pump pressure is 0.8bar higher than the starting pressure of the switch. | |
| The switch-on pressure is set too low | By turning the pressure setting screw clockwise, the switch-on pressure will be increased. | |
| The dry-run safety is activated, because the the switch-on pressure is set too high | By turning the pressure setting screw anti-clockwise, the switch-on pressure will be reduced. | |
| Pump is active but no water is being delivered (after being started for more than 5 minutes) | The pump is not fully filled with water | Re-fill the pump with water and check the suction hose foot valve |
| Air in the suction hose | Check sealing of various joints of the suction hose | |
| Water level is too low | Adjust installation height of the pump (< 8 m) | |
| Suction hose, foot valve, pre-filter or pump is blocked | Clean suction hose, foot valve, pre-filter or pump | |
| Pump does not stop or start and stop constantly | The switch-on pressure is set too high | By turning the pressure setting screw anti-clockwise, the switch-on pressure will be reduced. |
| Insufficient pressure | Incorrect pump typeThe suction hose is too long or with too many bends, suction hose diameter is not selected as requiredSuction hose, foot valve, pre-filter or pump is blockedThe outlet hose is incorrectly or incorrectly installed | Select suitable pump25mm, 32mm or 38mm (inner diameter) suction hose must be used to achieve maximum flow rate. Make the suction hose shorterClean suction hose, foot valve, pre-filter or pumpCheck the outlet hose and connections. The larger the diameter of the hose and the hose connection, the greater the flow. The lower the delivery height, the greater the flow. |
| Pump will not start or stops during use.Pump switched off after short operating periods | Thermal overload safety switch has activatedPower has trippedWater too hot | Disconnect from the power supply, leave for 5 minutes and clean suction hose, foot valve, pre-filter or pumpCheck fuses and electrical connectionsEnsure that the water temperature has not exceeded the maximum of 35°C |
ENVIRONMENT

Faulty and/or discarded electrical or electronic apparatus have to be collected at the appropriate recycling locations.
Only for EC countries
Do not dispose of power tools into domestic waste. According to the European Guideline 2012/19/EU for Waste Electrical and Electronic Equipment and its implementation into national right, power tools that are no longer usable must be collected separately and disposed of in an environmentally friendly way.
WARRANTY
VONROC products are developed to the highest quality standards and are guaranteed free of defects in both materials and workmanship for the period lawfully stipulated starting from the date of original purchase. Should the product develop any failure during this period due to defective material and/or workmanship then contact VONROC directly.
The following circumstances are excluded from this guarantee:
- Repairs and or alterations have been made or attempted to the machine by unauthorized service centers;
- Normal wear and tear;
- The tool has been abused, misused or improperly maintained;
- Non-original spare parts have been used.
This constitutes the sole warranty made by company either expressed or implied. There are no other warranties expressed or implied which extend beyond the face hereof, herein, including the implied warranties of merchantability and fitness for a particular purpose. In no event shall VONROC be liable for any incidental or consequential damages. The dealers remedies shall be limited to repair or replacement of nonconforming units or parts.
The product and the user manual are subject to change. Specifications can be changed without further notice.
VEILIGHEIDSWAARSCHUWINGEN
DIT APPARAAT MAG WORDEN GEBRUIKT DOOR KINDEREN VANAF 8 JAAR EN DOOR PERSONEN MET VERMINDERDE LICHAMELIJKE, ZINTUIGLIJKE OF GEESTELIJKE VERMOGENS, OF MET EEN GE- BREK AAN ERVARING EN KENNIS, MITS ZIJ ONDER TOEZICHT STAAN OF GEINSTRUEERD ZIJN BETREF- FENDE HET VEILIG GEBRUIK VAN HET APPARAAT EN ZICH BEWUST ZIJN VAN DE ERMEE VERBON- DEN RISICO'S. KINDEREN MOGEN NIET MET HET APPARAAT SPELEN. REINIGING EN GEBRUIKERSON- DERHOUD MOGEN NIET DOOR KINDEREN ZONDER
TOEZICHT WORDEN UITGEVOERD. OM GEVAARLIJKE SITUATIES TE VOORKOMEN MOET HET NETSNOER DOOR DE FABRIKANT, ZIJN SERVICEMEDEWERKERS OF ANDERE GEKWALIFICEERDE PERSONEN WORDEN VERVANGEN ALS HET IS BESCHADIGD. DE STEKKER MOET UIT HET STOPCONTACT WORDEN GETROKKEN VOORDAT U HET APPARAAT REINIGT OF ONDERHOUD UITVOERT.
OPSLAG EN BESCHERMING TEGEN VORST
Measured sound power level: 74.5 dB(A)
Guaranteed sound power level: 77 dB(A)
GP528AC:
Measured sound power level: 78.1 dB(A)
Guaranteed sound power level: 81 dB(A)
(IT) Dichiariamo, sotto la nostra responsabilità, che questo prodotto è conforme alle normative e ai regolamenti seguenti: è conforme alla Direttiva 2011/65/UE del Parlamento Europeo e del Consiglio dell'8 giugno 2011 sulla limitazione dell'uso di determinate sostanze pericolose nelle apparecchiature elettriche ed elettroniche.
(SV) Vi garanterar på eget ansvar att denna produkt upp fyller och följer följande standarder och bestämmelser: uppfyller direktiv 2011/65/EU från Europeiska parlamentet och EG-rådet från den 8 juni 2011 om begränsningen av användning av farliga substanser i elektrisk och elektronisk utrustning.
(DA) Vi erklærer under eget ansvar, at dette produkt er i overensstemmelse med følgende standarder og bestemmelser: er i overensstemmelse med direktiv 2011/65/EU fra Europa-Parlamentet og Rådet af 8. juni 2011 om begrænsning af anvendelsen af visse farlige stoffer i elektrisk og elektronisk udstyr.
(PL) Deklarujemy na własną odpowiedzialność, że ten produkt spełnia wymogi zawarte w następujących normach i przepisach: jest zgodny z Dyrektywą 2011/65/UE Parlamentu Europejskiego i Rady z dnia 8 czerwca 2011 r. w sprawie ograniczenia stosowania niektórych niebezpiecznych substancji w sprzęcie elektrycznym i elektronicznym.
(RO) Declarăm prin aceasta cu răspunderea deplină că produsul acesta este în conformitate cu următoarele standarde sau directive: este în conformitate cu Directiva 2011/65/UE a Parlamentului European și a Consiliului din 8 iunie 2011 cu privire la interzicerea utilizării anumitor substanțe periculoase la echipamentele electrice și electronice.
Conformity assessment method to Annex V Directive 2000/14/EC amended by 2005/88/EC.
The notified body involved: TÜV SÜD Industrie Service GmbH, Certification Body of the Notified Body 0036
EN 60335-1, EN 60335-2-41, EN 62233, EN 55014-1, EN55014-2, EN 61000-3-2, EN61000-3-3, 2006/42/EC,
2014/30/EU, 2011/65/EU, (EU)2015/863, 2012/19/EU, 2000/14/EC, 2005/88/EC
Zwolle, 01-12-2021 H.G.FRosberg CEO

VONROC • Lingenstraat 6 • 8028 PM Zwolle • The Netherlands

VONROC®
BUILD YOUR FUTURE
©2021 VONROC
WWW.VONROC.COM
2112-17