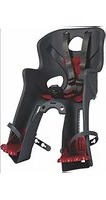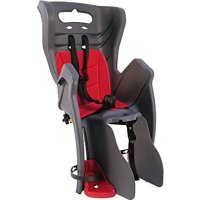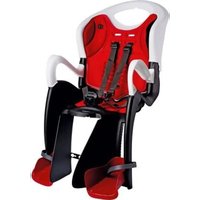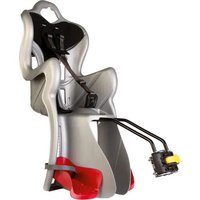
B-One - Child bike seat Bellelli - Free user manual and instructions
Find the device manual for free B-One Bellelli in PDF.


User questions about B-One Bellelli
0 question about this device. Answer the ones you know or ask your own.
Ask a new question about this device
Download the instructions for your Child bike seat in PDF format for free! Find your manual B-One - Bellelli and take your electronic device back in hand. On this page are published all the documents necessary for the use of your device. B-One by Bellelli.
USER MANUAL B-One Bellelli
text_image
b belielli beet of EN 14344 find more about us: www.beielli.com Standard New Standard 14344 26"-28" PAP MAX 22 Kg B-taxi Caschi/Helmets Windbreak B-bip EN 14344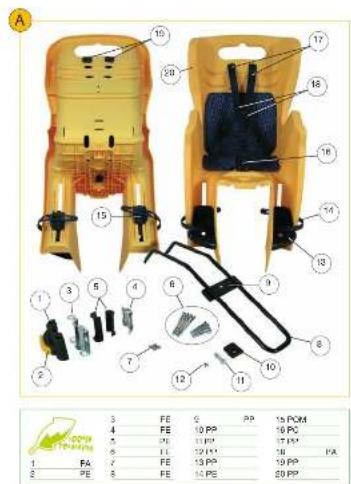
text_image
A 10 17 20 18 16 14 13 12 11 9 8 7 6 5 4 3 1 2 3 5 6 7 8 9 10 11 12 13 PCM 14 PC 15 PC 16 PC 17 PC 18 PA 19 PP 20 PP 21 PP 22 PP 23 PP 24 PP 25 PP 26 PP 27 PP 28 PP 29 PP 30 PP 31 PP 32 PP 33 PP 34 PP 35 PP 36 PP 37 PP 38 PP 39 PP 40 PP 41 PP 42 PP 43 PP 44 PP 45 PP 46 PP 47 PP 48 PP 49 PP 50 PP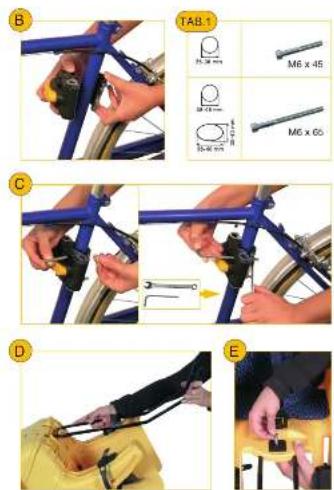
text_image
B TAB 1 M6 x 45 M6 x 65 C D E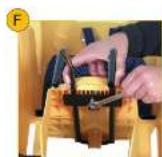
ONLY FOR TIGER SEAT

X


!
WASHING
INSTRUCTIONS
图图


text_image
STANDB03ISFOXST04
IT 2
EN 6
FR 10
DE 14
ES 18
PT 22
NL 26
DA 30
SV 34
CS 38
PL 42
SK 46
SL 50
HU 54
FI 58
NO 62
RO 66
RU 70
TR 74
SR 78
AR 82
HE 86

Read the instructions carefully before using this child seat. Keep them in a safe place for future reference.
Before using the product, consult the highway code for the country of use.
NOTICE
Do not add any extra loads to the child seat. For transporting any other loads, use other supports, such as for example, a front parcel rack.
All modifications to the child seat and supports are prohibited. The manufacturer or retailer will not be held responsible for any damage caused by modifications.
When a child is using the seat, the bike may handle differently from normal conditions, especially in terms of balance, steering and brakes.
Never leave the bike parked with the child unattended in the child seat.
Do not use the child seat if any part of the seat and/or bike is broken or missing. Contact the manufacturer or dealer to order spare parts for the seat.
Replace it completely after an accident even when there is no visible damage.
GENERAL INFORMATION
Rear child seat for children weighing a maximum of 22 kg; periodically check that the child does not weigh more than this.
Only use with children able to remain seated on their own for a long time without requiring support (1 to 7 years of age approx.).
Use on bikes that have 26"-28" diameter wheels that can support additional loads of at least 25 kg. Refer to the bike manual or retailer.
Support bracket for circular section frames (from 25 to 46 mm.) and a wide range of oval section frames. Read Table 1 carefully.
Seat equipped with mounting system comprising support fork and welded post.
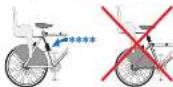
Check that the distance between the symbol indicating the barycentre on the external sides of the child seat and the axis of the wheel is less than 10 cm to avoid tipping.
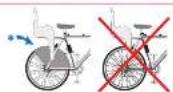
Do not mount the child seat so that it leans forwards. Lean it slightly backwards in order to hold the child in more effectively.
Mount the child seat facing front.
Do not use the child seat on motorcycles, racing bikes or bikes with suspensions.
Check that none of the child's or cyclist's limbs or clothing risk being caught in the moving parts of the bike or the child seat.
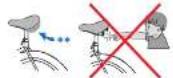
Check that the child cannot poke his/her fingers into the springs on the back of the bike saddle. Use a saddle cover or a saddle with internal springs.
Check that the child cannot poke his/her fingers or feet into the spokes on the bike wheel.
We recommend the use of a wheel guard.
Always fasten the child in using the straps and the ties on the foot rests.
Check that the child is always wrapped up warmly enough, more than the cyclist and that he/she is protected in the event of rain.
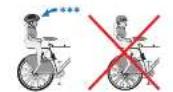
It is mandatory for the child to use an approved helmet suitable for his/her head size.
Never carry two children at the same time.
The cyclist must be at least 16 years old.
Always fasten all the straps, even when there is no child being carried.
Check that the straps do not reach the wheels or other moving parts on the bike, both with
and without child on board.
Never leave the child seat in the sun: the heated plastic could burn the child.
Remove the child seat from the bike each time the latter must be transported on the outside of a vehicle (e.g. on a car roof, on a towed trailer or behind a motorhome).
Periodically check the bike: tyres, brakes, lights, etc.
Periodically wash the child seat with soap and water. Do not use aggressive substances.
MOUNTING THE CHILD SEAT
!!! Do not carry out mounting operations with the child in the seat.
Make sure you have all the components before proceeding with assembly (fig. A).
Mounting the support bracket
Take the back rack off the bike if it interferes with mounting the seat.
Mount the support bracket on the bicycle frame as illustrated in fig. B.
!!! Warning: mount the brace on the bicycle frame and not on the pipe under the bicycle saddle.
!!! Warning: check that the brake and gear cables do not interfere with the bracket (1).
Choose the best screws (6) for your frame (see Table 1). (If the screws that come with the seat are too short, longer ones [M6x80, for instance] can be found in a hardware store).
Slip the screws (6) into their holes.
Tighten the nuts slightly and evenly (7) (fig. C).
The support bracket must be free to slide along the tube: it will be tightened once the seat is in the correct position (see fixing the child seat to the bike).
Fixing the support fork to the child seat
Turn the seat over.
Position the U-bend of the support fork (9) under the flap (fig. D). Place the tool in its slot.
Line up the hole on the welded post (9) with the hole in the seat.
Slip the bolt (11) through the plate (10), the holes in the child seat, and the welded bracket (fig. E).
Fully tighten the nut (12) (fig. F).
Fixing the child seat to the bike
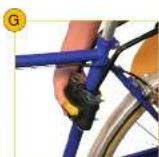
Hold down the yellow button on the bracket (2). Insert the support fork (8) into the upper part of the bracket (1) (fig. G).
!!! Warning: once inserted, make sure that the yellow button pops out (2). If it doesn't the fork (8) is not inserted correctly: repeat the operation.
Check that the child seat does not interfere with pedals, brakes, gears and other moving parts on the bike.
Leave enough room for the child's legs.
Line the child seat up with the bike's axis.
Fully tighten the screws (6) on the bracket after having found the best position for the seat.
!!! Warning: periodically check that the screws are tight. They may loosen with use.
Taking the child seat off the bike
Hold down the yellow button (2) on the bracket and pull up the support fork (8) up and off (fig. G).

Installing the foot rests
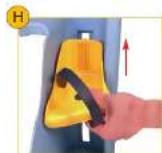
Take the left foot rest (13) (marked SX on the back).
Push it into the vertical slot on the left leg.
Push up as far as possible (fig. H).
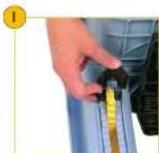
Take the blocking lever (15) for the left foot rest (marked SX on the back).
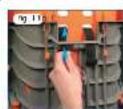
Push the blocking lever into the hole behind the rest. Insert from the outside and push right in (fig. 1).
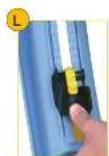
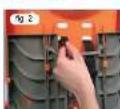
Close the blocking lever by pushing downwards until you hear a click (fig. L).
Repeat the same operations for the right foot rest (marked DX).
ADJUSTING THE CHILD SEAT
Before using the seat, check to make sure that the safety belt and foot rest positions are fitted to your child's size.
The safety belt must be positioned just above the child's shoulders.
The child should be able to completely rest his or her feet on the foot rests.
!!! Do not adjust the safety belts or the foot rests while the child is in the seat.
Adjusting the safety belts
To move the safety belts from one position to another:
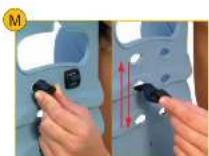
Take the plastic buckle from behind the seat back.
Slip the safety belt (17) and buckle (19) out of the opening in the backrest.
Insert the safety belt and buckle into the opening in the back at the desired height (fig. M).
Repeat the same operation for the other safety belt.
Adjusting the foot rests
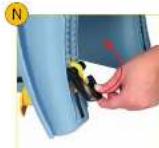
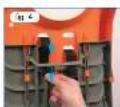
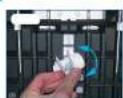
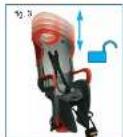
Turn the blocking lever behind the bracket upward (fig. N).
Move the foot rest upward or downward to the desired position.
Close the blocking lever by pushing downwards until you hear a click.
FINAL CHECK
Push the bicycle for several meters by hand, checking to make sure that no moving parts touch the child seat, that none of the safety belts stick out around the wheel, and that the bicycle brakes and pedals still work properly.
PLACING THE CHILD IN THE SEAT
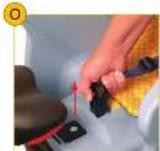
Press the button on the large central buckle (16) until you hear a click showing that the hook has been released (fig. O).
Pull upwards to extract the buckle.
Seat the child.
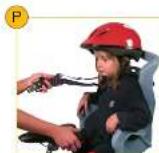
Pull the safety belts down over the child's head (fig. P).
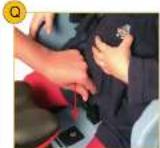
Fasten the large central buckle to the opening nearest the child (fig. Q). Push the buckle all the way into the opening until you hear a click.
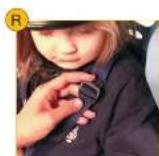
Adjust the belt holders (18) on the safety belt so that the belt will adhere to the child's body (fig. R).
Place the child's feet in the foot rests.
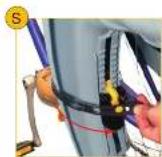
Close the lace (14) and fasten it to the pin on the back of the foot rest (fig. S).
REMOVING THE CHILD FROM THE SEAT
Loosen the laces restraining the child's feet.
Press the button on the large central buckle until you hear a click showing that the hook has been released.
Pull upwards to extract the buckle.
Pull the safety belts up over the child's head.
GUARANTEE
The conditions of the guarantee can be seen on our web site: www.bellelli.com.

.הכלההוּרָהוּרָהוּרָהוּרָהוּרָהוּרָהוּרָהוּרָהוּרָהוּרָהוּרָהוּרָהוּרָהוּרָהוּרָה:הכלההוּרָהוּרָהוּרָהוּרָהוּרָהוּרָהוּרָהוּרָהוּרָהוּרָהוּרָהוּרָהוּרָהוּר (8)