V300 - Vacuum packaging machines AddLiving - Free user manual and instructions
Find the device manual for free V300 AddLiving in PDF.


User questions about V300 AddLiving
0 question about this device. Answer the ones you know or ask your own.
Ask a new question about this device
Download the instructions for your Vacuum packaging machines in PDF format for free! Find your manual V300 - AddLiving and take your electronic device back in hand. On this page are published all the documents necessary for the use of your device. V300 by AddLiving.
USER MANUAL V300 AddLiving
natural_image
Line drawing of a printer front panel with no text or symbolsVakuumierer
Modell: V300
DE / AT / CH
Fragen und Service
Lieber Kunde,
natural_image
Line drawing of a printer with an inset showing a close-up of its internal components (no text or symbols)natural_image
Two line drawings of a printer with arrows indicating process, showing the same device and its paper being inserted (no text or symbols present)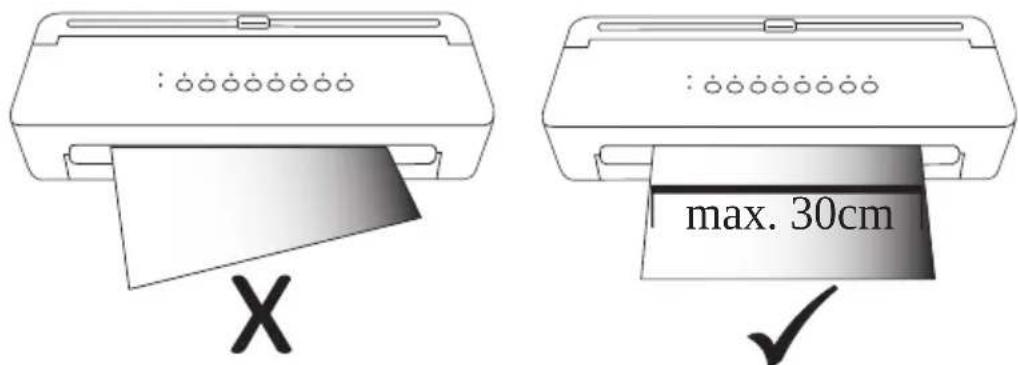
text_image
max. 30cm
natural_image
Illustration of a printer with a hand pressing a print sheet, showing the process as an inset image (no text or symbols present)natural_image
Diagram showing a printer with circular ports and a blank cover, both with downward arrows indicating compression or disassembly (no text or symbols present)natural_image
Line drawing of a printer with a hand gesture indicating the right-hand rule (no text or symbols present)text_image
Connectornatural_image
Diagram showing two steps of a printer presser with handles and buttons, no text or symbols present
text_image
QR code image containing encoded data, no visible human-readable textHersteller
GO Europe GmbH
Zum Kraftwerk 1
45527 Hattingen
AddLiving
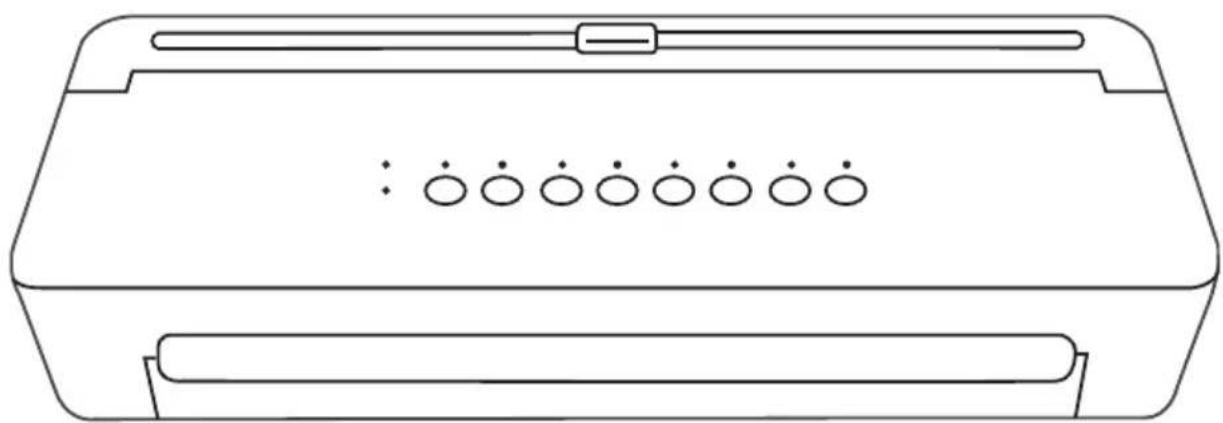
natural_image
Line drawing of a printer front panel with no text or symbolsVacuum sealer
Model: V300
EN
Warranty
Dear customer, We are delighted that you have chosen this equipment. In the case of a defect, please return the device together with the receipt and original packing material to the point of sale.
Intended use
The vacuum sealer is used to vacuum pack food or seal plastic bags. Any other use is considered improper use. Unauthorised modifications or conversions that are not described in these operating instructions are not permitted and will result in damage to this product. Proper installation and observance of and compliance with the instructions in this operating manual are prerequisites for the intended use of the product.
Content
Warranty....13
Intended use....13
Important safety instructions....14
Notes on use 15
Scope of delivery 15
Installation site 15
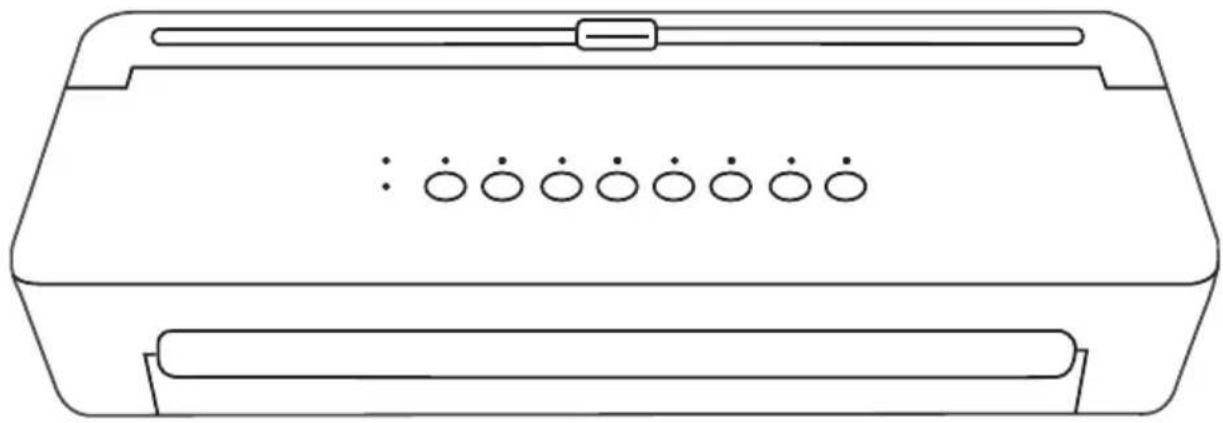
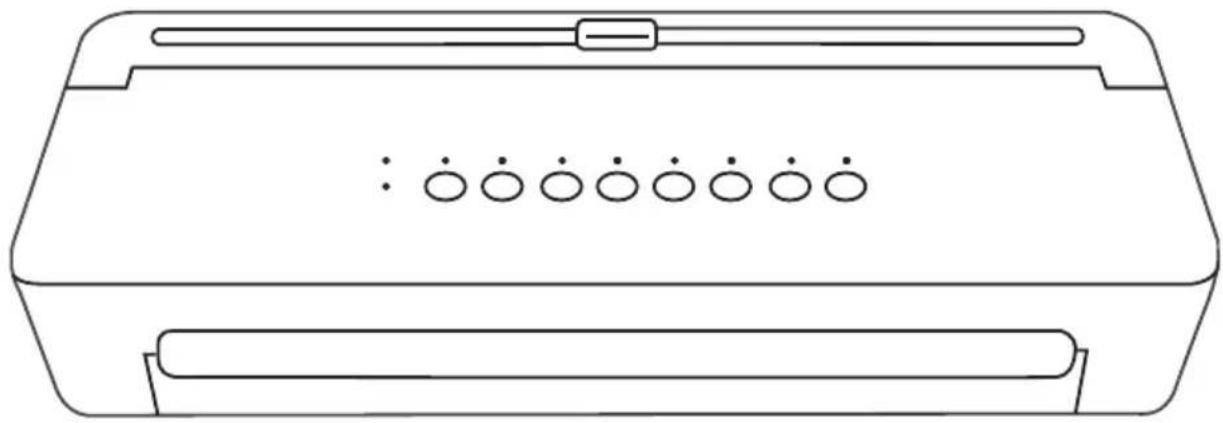
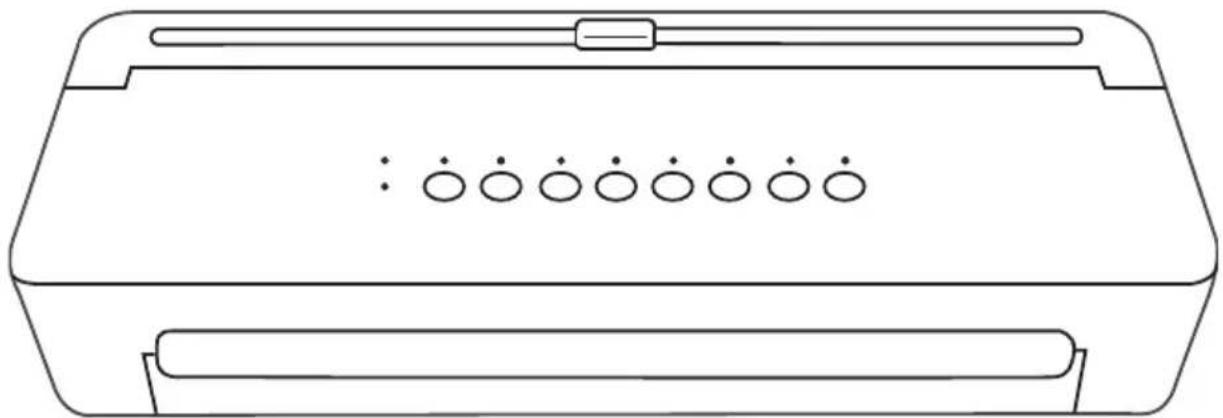
Product overview 16
Detailed view of collection container .....17
Detailed view of the control panel....17
Functions 17
Status displays....18
Commissioning....18
Vacuuming and sealing 18
Sealing without vacuuming....19
Manual vacuuming and sealing 20
Cutting the vacuum bag . . . . . . . . . . . . . . . . . . . . . . . . . . . . . . . . . . . . . . . . . . . . . . . . . . . . . . . . . . . . . . 20
Vacuum external containers (with vacuum hose)....20
Remove, clean and insert the collection container....21
Cleaning 22
Troubleshooting 22
Notes on disposal....23
Technical data. 24
Technical changes 24
Declaration of Conformity....24
Manufacturer 24
Important safety instructions


Warning! Choking hazard due to small parts, packaging and protective film! Keep children away from the product and its packaging!

Warning! There is a risk of electric shock!
Never open or repair the appliance yourself. Never touch bare contacts with with metal objects. Never operate the product with wet hands. Do not operate the product if it is damaged.


Warning! Do not touch the heating element or the sealing seam directly after use to avoid burns.

Warning! If the product exhibits unusual characteristics such as noise, odour or smoke, disconnect the power supply immediately.
Notes on use

Before connecting and using the product, please read these operating instructions and keep them for future reference.
Protect the product from direct sunlight, naked flames, heat sources and moisture.
Do not store the product at extreme temperatures or in a humid environment, as this may affect its service life.
Prevent the ingress of dust and moisture.
Do not cover the product during operation.
The product is not intended for commercial use and should only be used indoors in accordance with the instructions.
Only operate the product from a professionally installed socket. Observe the information under Technical data.
The device is not suitable for continuous operation. The overheating protection function switches on automatically after 20 consecutive processes. The device cannot be used for 5 minutes. Open the device to prevent overheating.
Do not leave the device unattended during operation.
Only use vacuum bags that are suitable for vacuum sealers.
When you are not using the device, disconnect it from the power supply to prevent accidental operation.
Scope of delivery
1 Vacuum sealer V300
1 Mains cable
1 Operating instructions
1 Vacuum hose
5 Vacuum bag (20x30 cm)
Installation site
Place the device on a stable, level surface near a power socket.
Product overview
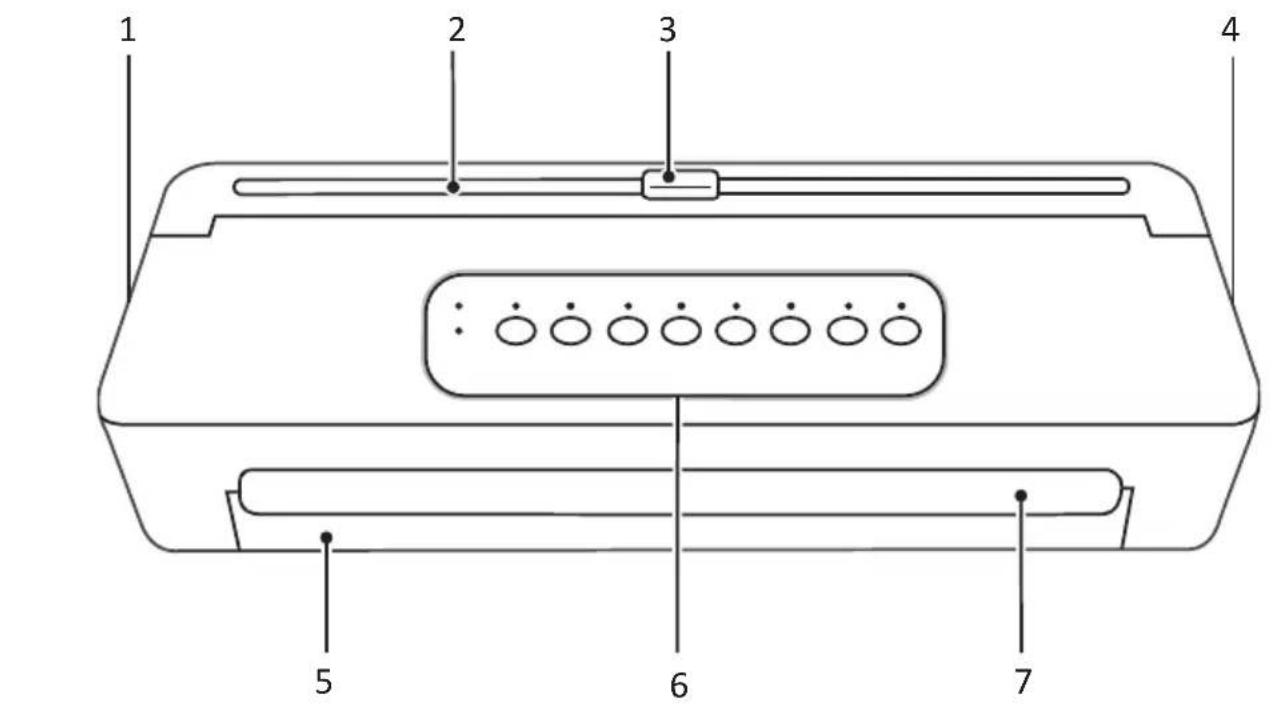
text_image
1 2 3 4 5 6 7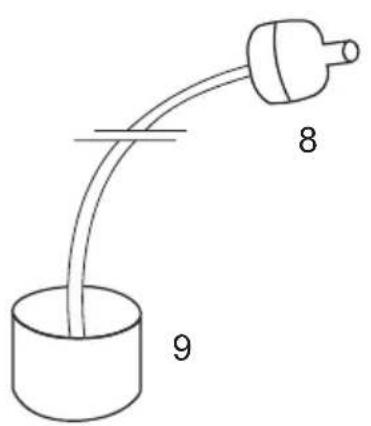
text_image
8 91 Grid connection 230 V 6 Control panel
2 Cutting bar 7 Vacuum bag insert
3 Cutting knife 8 Device connection
4 Connection for vacuum hose 9 Container connection
5 Collection container (removable)
Detailed view of collection container
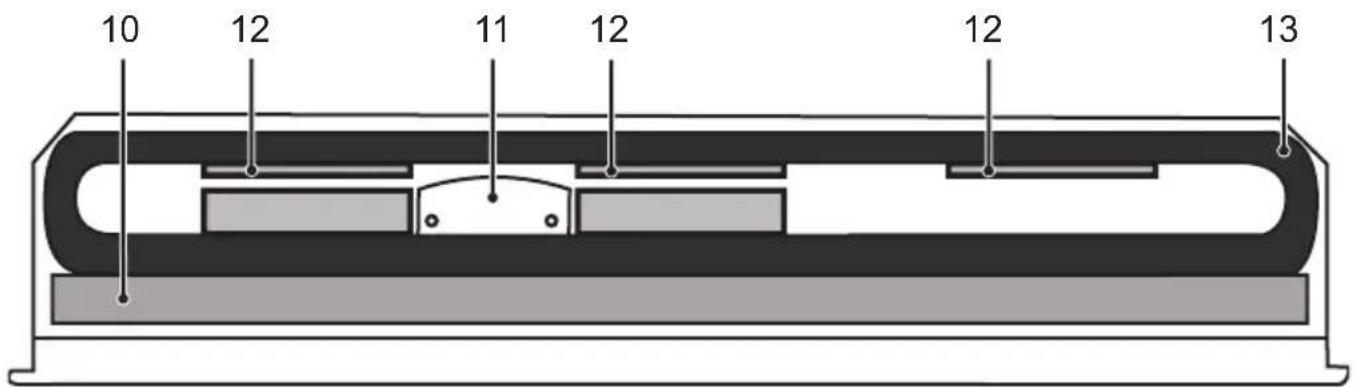
text_image
10 12 11 12 12 1310 Gasket 12 Vacuum bag stop
11 Fill level sensor 13 Sealing foam
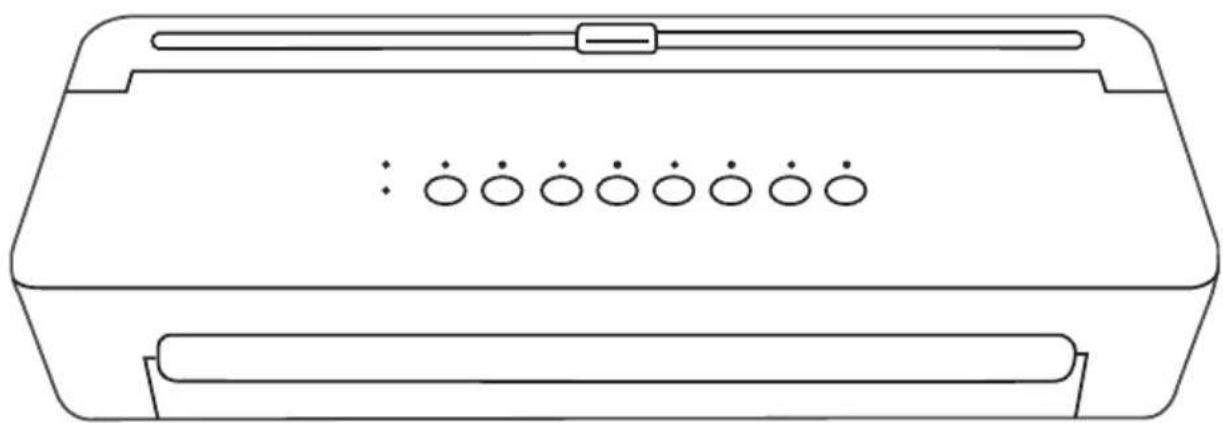
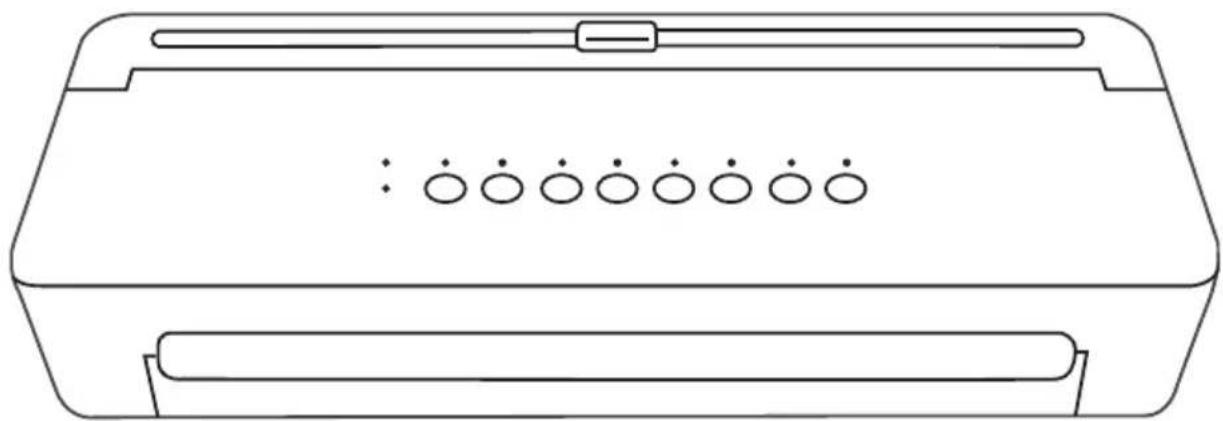
Detailed view of the control panel
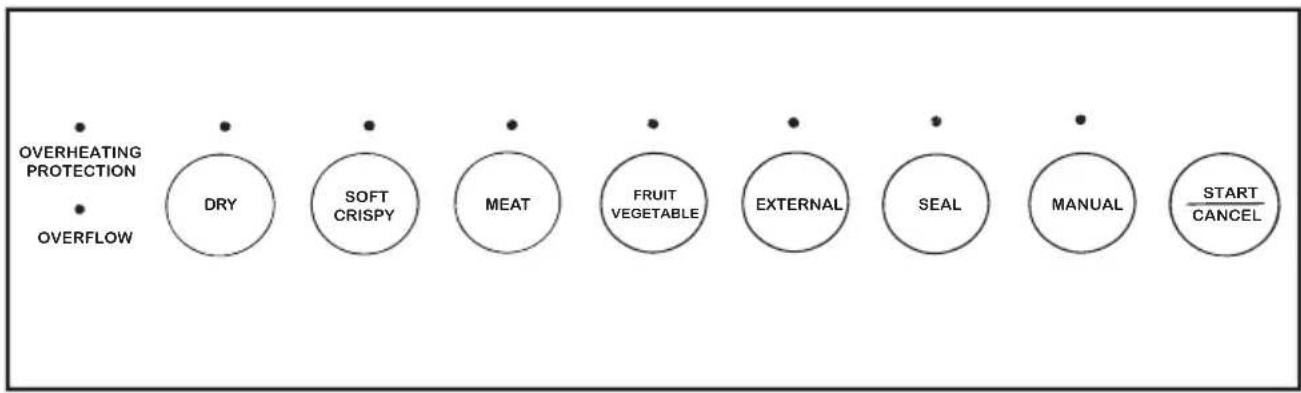
flowchart
graph LR
    A["OVERHEATING PROTECTION"] --> B["DRY"]
    B --> C["SOFT CRISPY"]
    C --> D["MEAT"]
    D --> E["FRUIT VEGETABLE"]
    E --> F["EXTERNAL"]
    F --> G["SEAL"]
    G --> H["MANUAL"]
    H --> I["START CANCEL"]
Functions
Vacuuming and sealing
DRY: Use this function for dry or hard food.
SOFT CRISPY: Use this function for sensitive foods.
MEAT: Use this function for different types of meat.
FRUIT VEGETABLE: Use this function for fruit and vegetables.
SEAL: Use this function for sealing. There is no vacuum sealing.
MANUAL: Manual vacuuming and sealing.
START / CANCEL: Start or cancel the process.
Vacuum external containers with vacuum hose (EXTERNAL)
Use this accessory to vacuum seal liquid foods, such as soups, sauces, etc. A suitable container (not included in the scope of delivery) must be used to utilise this function.
Status displays
Overheating protection (Overheating Protection)
Allow the device to cool down.
Collection container full (Overflow)
Empty the collection container.
Commissioning
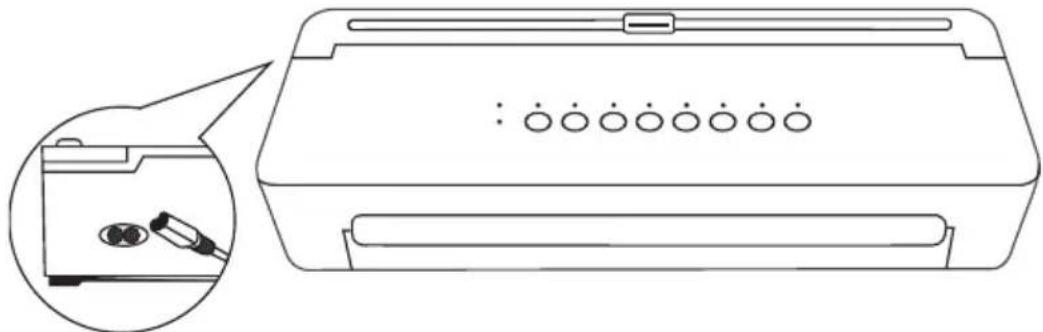
1 Insert the mains plug with the device connection into the mains connection (1).
natural_image
Line drawing of a printer with an inset showing a close-up of its internal components (no text or symbols)2 Connect the mains plug to a properly installed socket.
The LED indicators start to light up in sequence from left to right. The device is in standby mode.
Vacuuming and sealing
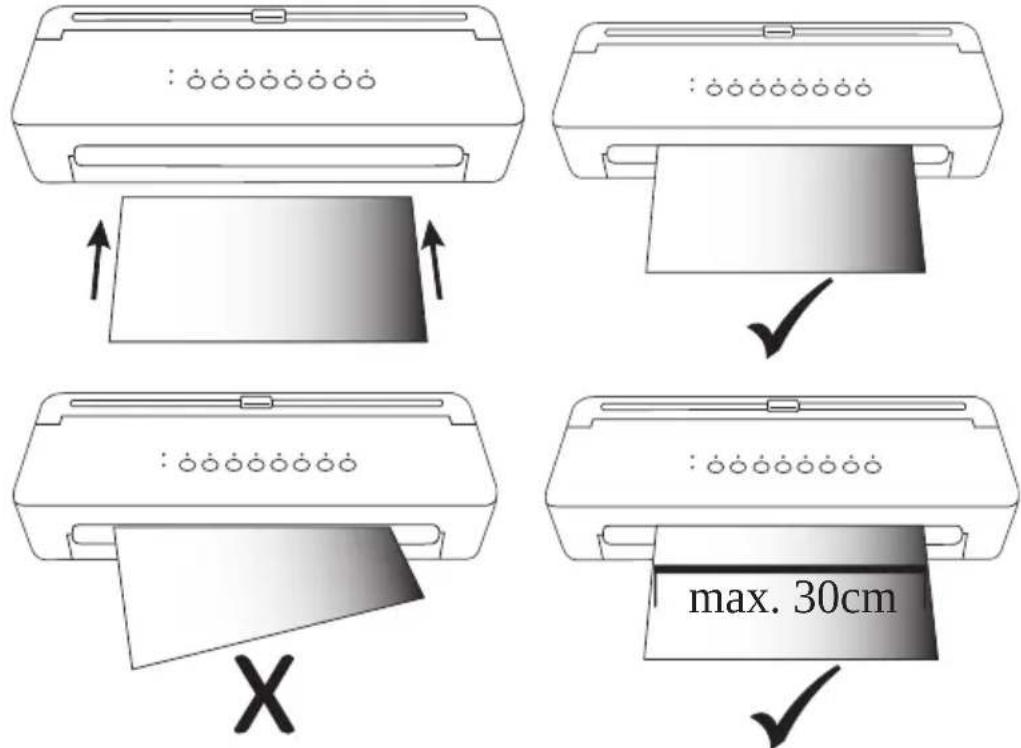
1 Slide the vacuum bag into the vacuum bag insert (7) up to the vacuum bag stop (12).
text_image
max. 30cm
Note: Make sure that the vacuum bag is inserted straight, flat and crease-free.

Note: Sharp, fermented, rotten items are not suitable for vacuuming. This may cause leaks in the vacuum bag or it may inflate.
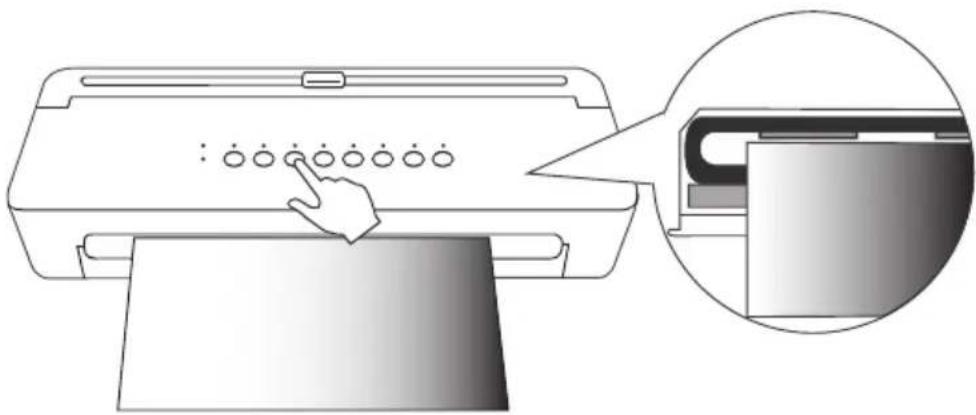
2 Depending on the nature of the food, press the button with the desired function DRY, SOFT CRISPY, MEAT or FRUIT VEGETABLE.
3 Press START.
4 The vacuuming process starts and the corresponding LED flashes.
natural_image
Illustration of a printer printing process with a hand pointing at the print (no text or symbols present)5 When the process is complete, the device stops automatically.
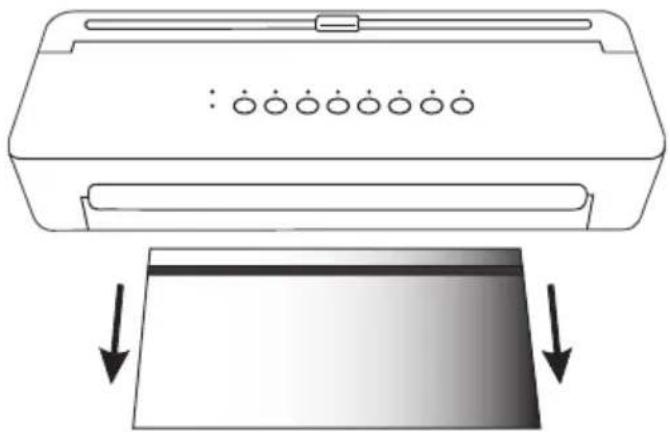
6 Remove the bag.

Caution! Do not touch the heating element or the sealing seam to avoid burns!
natural_image
Diagram showing a printer with circular ports and a blank cover, both with downward arrows indicating compression or disassembly (no text or symbols present)Sealing without vacuuming
1 Slide the vacuum bag into the vacuum bag insert (7) up to the vacuum bag stop (12).
2 Press SEAL.
3 Press START.
4 The sealing process starts and the corresponding LED flashes.
5 When the process is complete, the device stops automatically.
6 Remove the bag.

Caution! Do not touch the heating element or the sealing seam to avoid burns!
Manual vacuuming and sealing
1 Press MANUAL once briefly. The display lights up and starts to flash.
2 Press and hold MANUAL to start vacuuming.
3 Release MANUAL to end the vacuuming process.
4 Press SEAL to seal the vacuum bag.
5 The sealing process starts and the corresponding LED flashes.
6 When the process is complete, the device stops automatically.
7 Remove the bag.

Caution! Do not touch the heating element or the sealing seam to avoid burns!
Cutting the vacuum bag
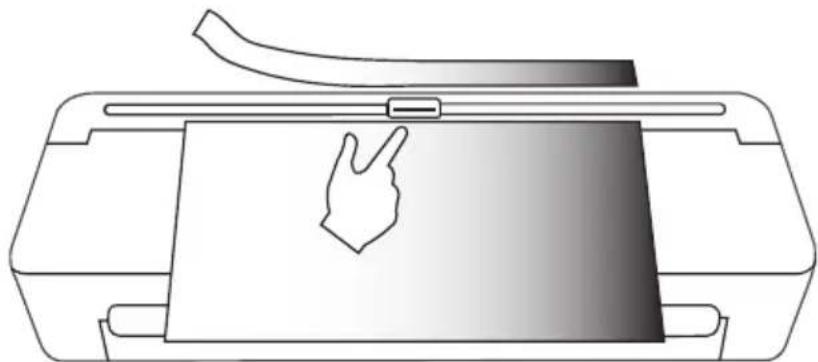
1 Move the cutting blade (3) to the left or right end of the cutting rail (2) and fold the cutting rail upwards.
2 Place the vacuum bag as far as desired under the cutting rail and fold it down.
3 Hold the cutting bar down and slide the cutter to the other end to cut the vacuum bag.
natural_image
Line drawing of a printer with a hand gesture inside, no text or symbols presentVacuum external containers (with vacuum hose)

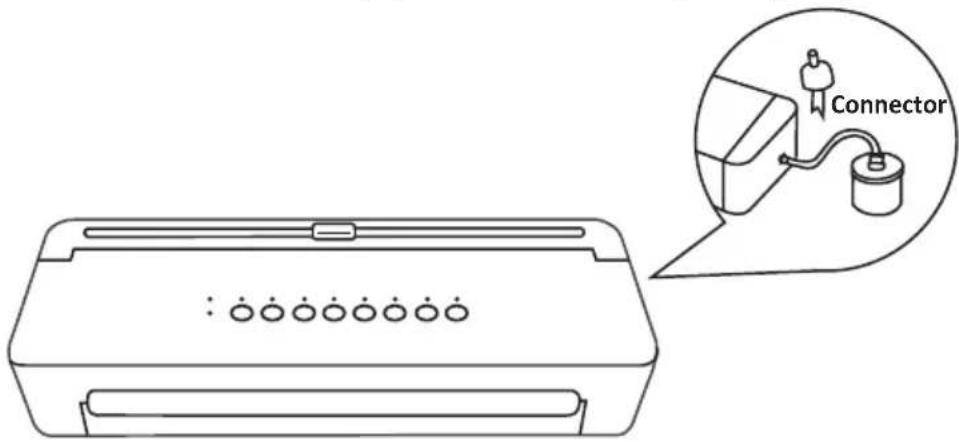
Note: Only vacuum external containers with the vacuum hose included in the scope of delivery.
1 Prepare a container suitable for vacuum sealers. Make sure that the container is completely closed and that no air can enter.
2 Plug the device connection of the vacuum hose (8) into the connection (4) on the device.
3 Place the container connection (9) on the suction opening of your container.
text_image
Diagram showing a printer with pinout and an inset image of a connector connected to a cylindrical device.4 Press EXTERNAL.
5 Press START. The vacuuming process starts and the corresponding LED flashes.
The maximum vacuuming time is 5 minutes. If the air is not completely extracted, you can press START again.
6 Press CANCEL to end the process before the end of the vacuuming time.
7 When the process is complete, the device stops automatically.
8 Remove the vacuum hose once the process is complete.

Note: The vacuum hose can only vacuum seal. There is no sealing. Remove the vacuum hose from the device after each use.
Remove, clean and insert the collection container
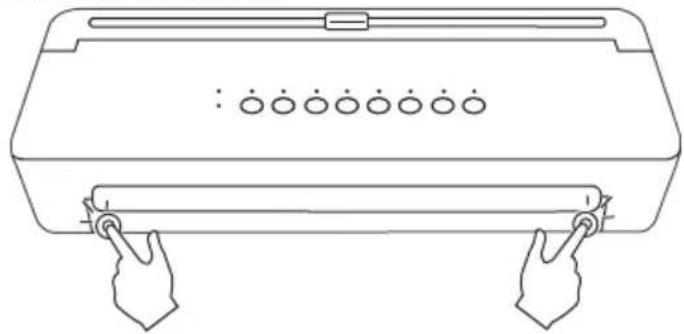
1 Simultaneously press the two markings on the front of the collection container (5) and carefully pull out the container.
natural_image
Line drawing of a device with two hands holding buttons and a tray (no text or symbols)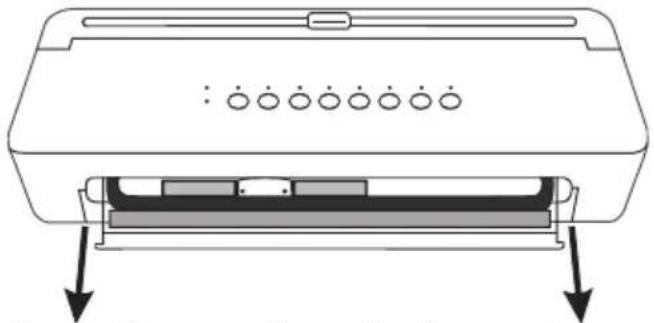
natural_image
Diagram of a printer or scanner with a base panel and two downward arrows indicating compression or disassembly (no text or symbols present)
Note: If both markings on the collection container are not pressed at the same time, it will get stuck in the device. In this case, DO NOT remove the collection container to avoid damaging it. Press the loose side back in and try again.
2 Clean the collection container thoroughly and dry it well.

Make sure that the level sensor (11) can be moved easily after cleaning the collection container.
3 Insert the collection container into the device.
4 Press the two markings at the same time until the collection container clicks into place.
Cleaning
Clean the inside and outside of the device with a soft, slightly damp, lint-free cloth. Only use gentle cleaning agents.

Note: Do not clean the device under running water.
Troubleshooting
Malfunction Solution
The device does not start Check
that the mains plugs are plugged in correctly.
Check whether the collection container is inserted.
The device does not vacuum or seal / does not seal properly
Check whether the vacuum bag is too full. There should be a distance of at least 70 mm or more between the food in the bag and the bag opening.
Check whether the vacuum bag is leaking or not inserted correctly.
Check that the vacuum hose is connected correctly if you want to vacuum over it.
Check whether the level sensor in the collection container can move freely.
Check whether the vacuum bag is damaged or whether there is liquid on the sealing seam.
The collection container is jammed and cannot be removed
In this case, DO NOT remove the collection container to avoid damaging it. Push back the loose side and try again.
Notes on disposal

Find out about the possibilities of taking back used appliances free of charge from your dealer.

Packaging materials must be disposed of according to local regulations.

The packaging is made of environmentally friendly materials that you can dispose of at local recycling points. Advice on the options with which to dispose of your old device can be obtained from your municipal or local administration offices.

Observe the identification on the packaging materials during the waste sorting process; they are identified by abbreviations (b) and numbers (a) which have the following significance: 1–7: plastic/20–22: paper and cardboard/80–98: composite materials.

The adjacent symbol indicates laws dictate that electrical and electronic apparatus no longer required must be disposed of separate from domestic waste. Dispose of your device at a collection point provided by your local public waste authority. Packaging materials must be disposed of according to local regulations.
Technical data
Input voltage: 220-240VAC 50-60Hz
Power: 90W
Working width: max. 300mm
Weight: 1600 g
Dimensions (W x H x D): 414 x 75 x 145 mm

The EU-wide glass-fork symbol identifies materials that are suitable for food contact.
Technical changes
These operating instructions are for information purposes only. Its contents are not the subject of a contract. All data given are only nominal values. The equipment and options described may vary depending on the country-specific requirements.
Declaration of Conformity
We, GO Europe GmbH, Zum Kraftwerk 1, 45527 Hattingen, DEUTSCHLAND, declare in sole responsibility, that the product complies with the EU Directives: 2014/53/EU and 2011/65/EU. The full EU Declaration of Conformity is available online at the following website or by scanning the QR code:

The CE Mark on the device confirms conformity. The Declaration of Conformity can be read online at http://productip.com/?f=2a1561

text_image
QR code image containing encoded data, no visible human-readable textManufacturer
GO Europe GmbH
Zum Kraftwerk 1
45527 Hattingen
Germany
AddLiving
natural_image
Line drawing of a printer front panel with no text or symbolsVacuümsealer
Model: V300
NL
Garantie
natural_image
Line drawing of a printer with an inset showing a printer's internal components (no text or symbols)natural_image
Illustration of a printer with a hand pressing a paper to press, showing the process as indicated by the magnified inset (no text or symbols present)natural_image
Diagram showing a printer with circular ports and a blank cover, both with downward arrows indicating compression or disassembly (no text or symbols present)natural_image
Line drawing of a printer with a hand gesture indicating press or action (no text or symbols)Vacuüm externe containers (met vacüümslang)

text_image
Diagram showing a printer with pinout and an inset image of a connector connected to a cylindrical device.4 Druk op EXTERNAL.
natural_image
Line drawing of a device with two hands holding buttons and a tray (no text or symbols)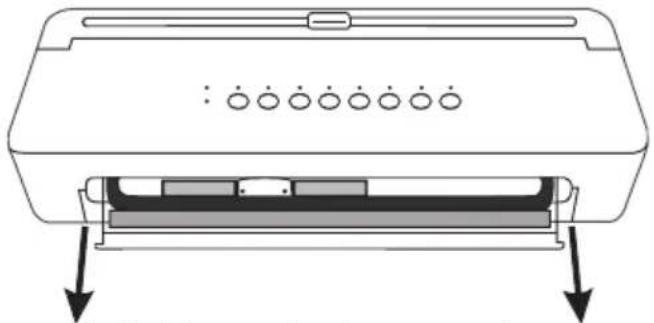
natural_image
Diagram of a printer or scanner with a base panel and two downward arrows indicating compression or disassembly (no text or symbols present)
text_image
QR code image containing encoded data, no visible human-readable textFabrikant
GO Europe GmbH
Zum Kraftwerk 1
45527 Hattingen
Duitsland
AddLiving
natural_image
Line drawing of a printer front panel with no text or symbolsSelladora al vacío
Modelo: V300
ES
Garantía
natural_image
Line drawing of a printer with an inset showing a printer's internal components (no text or symbols)natural_image
Illustration of a printer with a hand pressing a print sheet, showing the process as an inset image (no text or symbols present)natural_image
Diagram showing a printer with circular ports and an open lid, both with downward arrows indicating compression or disassembly (no text or symbols present)Sellado sin aspirar
natural_image
Line drawing of a printer with a hand gesture indicating press (no text or symbols)text_image
Diagram showing a printer with pinout and an icon of a connector connected to a cylindrical device, illustrating the connection or setup.4 Pulse EXTERNAL.
natural_image
Line drawing of a rectangular electronic device with four buttons and a handle, no text or symbols present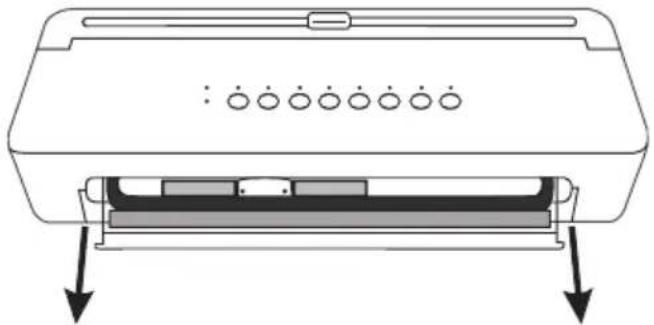
natural_image
Diagram of a printer front panel with arrows indicating compression or disassembly (no text or symbols)
text_image
QR code image containing encoded data, no visible human-readable textFabricante
GO Europe GmbH
Zum Kraftwerk 1
45527 Hattingen
Alemania
AddLiving
natural_image
Line drawing of a printer front panel with no text or symbolsMachine sous vide
Modèle : V300
FR
Garantie
natural_image
Line drawing of a printer with an inset showing a printer's internal components (no text or symbols)natural_image
Two line drawings of a printer with arrows indicating process, showing the same device's paper being inserted (no text or symbols present)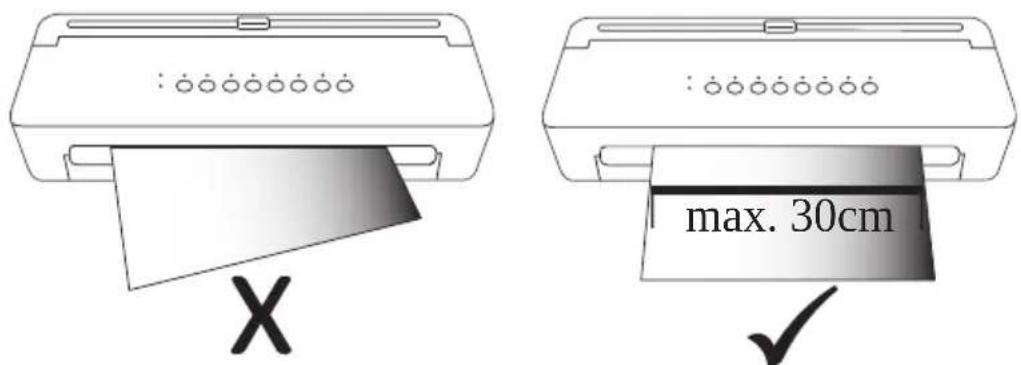
text_image
max. 30cm
text_image
Diagram showing printer printing process with hand cursor clicking number of five circles, alongside close-up of printer imagenatural_image
Diagram showing a printer with circular ports and a blank cover, both with downward arrows indicating compression or disassembly (no text or symbols present)natural_image
Line drawing of a printer with a hand gesture overlay (no text or symbols)text_image
Diagram showing a printer with pinout and an inset diagram illustrating a connector connected to a cylindrical device.natural_image
Diagram showing two steps of a printer presser with handles and buttons, no text or symbols present
Modifications techniques
text_image
QR code image containing encoded data, no visible human-readable textFabricant
GO Europe GmbH
Zum Kraftwerk 1
45527 Hattingen
Allemagne
AddLiving
natural_image
Line drawing of a printer front panel with no text or symbolsnatural_image
Line drawing of a printer with an inset showing a printer's internal components (no text or symbols)natural_image
Two line drawings of a printer with arrows indicating printing process (no text or symbols)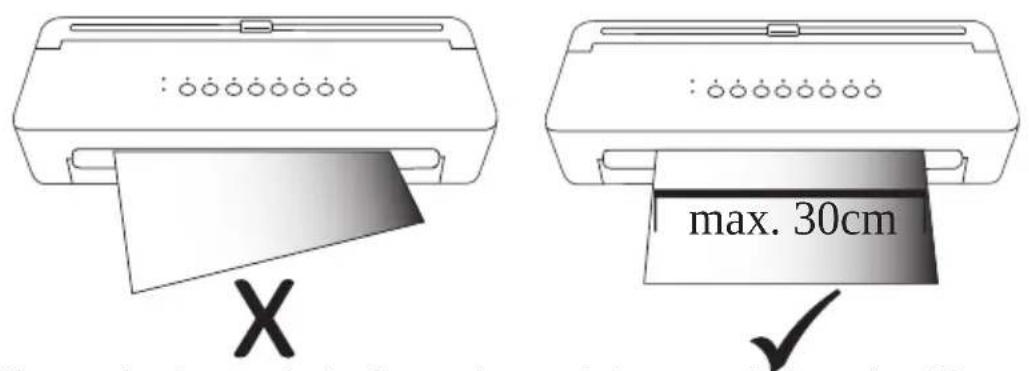
text_image
max. 30cm
natural_image
Illustration of a printer printing paper with a hand pointing at the print (no text or symbols present)natural_image
Diagram showing a printer with circular ports and a blank cover, both with downward arrows indicating compression or disassembly (no text or symbols present)natural_image
Line drawing of a printer with a hand gesture inside, no text or symbols presenttext_image
Connector4 Premere EXTERNAL.
natural_image
Diagram showing two steps of a printer presser with handles and buttons, no text or symbols present
text_image
QR code image containing encoded data, no visible human-readable textProduttore
GO Europe GmbH
Zum Kraftwerk 1
45527 Hattingen
Germania
AddLiving
natural_image
Line drawing of a printer front panel with no text or symbolsΣφραγιστής κενού
Μοντέλο: V300
GR
Εγγύηση
natural_image
Line drawing of a printer with an inset showing a printer's internal components (no text or symbols)natural_image
Illustration of a printer with a hand pressing a print sheet, showing the process as an inset image (no text or symbols present)natural_image
Diagram showing a printer with circular ports and an open tray, both with downward arrows indicating compression or disassembly (no text or symbols present)natural_image
Line drawing of a printer with a hand gesture pointing at the cover (no text or symbols)text_image
Connectornatural_image
Diagram showing two steps of a printer presser with handles and buttons, no text or symbols present