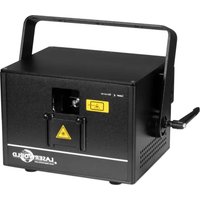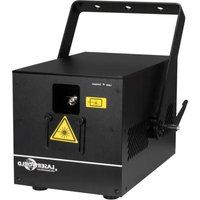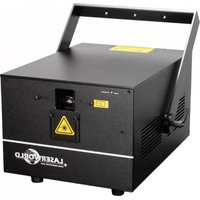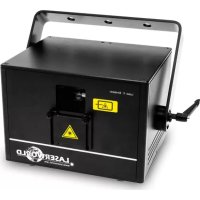
BeamBar 10B MK3 - Laser projector Laserworld - Free user manual and instructions
Find the device manual for free BeamBar 10B MK3 Laserworld in PDF.


User questions about BeamBar 10B MK3 Laserworld
0 question about this device. Answer the ones you know or ask your own.
Ask a new question about this device
Download the instructions for your Laser projector in PDF format for free! Find your manual BeamBar 10B MK3 - Laserworld and take your electronic device back in hand. On this page are published all the documents necessary for the use of your device. BeamBar 10B MK3 by Laserworld.
USER MANUAL BeamBar 10B MK3 Laserworld
Please spend a few minutes to read this manual fully before operating this laser!
natural_image
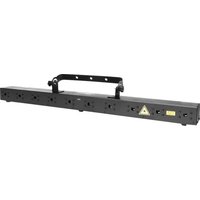
Exterior view of a black industrial laser beam with mounting holes and a handle (no visible text or symbols)English
Deutsch
Français
02/2023
Manual / Anleitung / Manuel: BeamBar Series MK3 Manual / Anleitung / Manuel: BeamBar Series MK3
Legal notice:
Thank you for purchasing this Laserworld product. Due to continual product developments and technical improvements, Laserworld (Switzerland) AG reserves the right to make modifications to its products. This manual and its content have been made with due care but Laserworld (Switzerland) AG cannot however, take any responsibility for any errors, omissions or any resulting damages forthwith. The brands and product names mentioned in this manual are trade marks or registered trade marks of their respective owners.
Attention: This device is a show laser device for commercial use. This device is not a laser pointer, not suitable for pointing purposes and must not be used as a laser pointer.
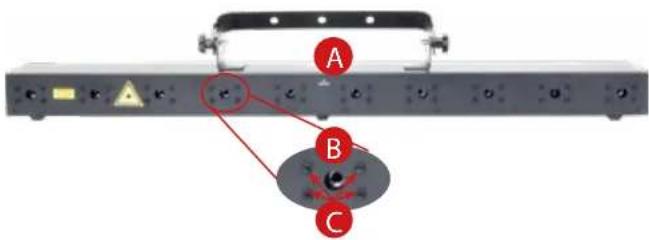
Front Panel | Frontplatte | Panneau frontal
text_image
A B CA. Emission led | LED: Laseremission | LED témoin - émission laser
B. Laser aperture | Laseraustrittsfenster | Ouverture laser
C. Fine-positioning adjustment screws | Justierschrauben | Vis de réglage du positionnement
Manual / Anleitung / Manuel: BeamBar Series MK3
text_image
Diagram of a computer monitor front panel with labeled ports and buttons, numbered 1 to 12 for identification.- Power In | Netzanschluss | Arrivée électrique
- Power Out | Strom-Weiterleitung | Recopie électrique
- Mounting holes for single bracket | Befestigungslöcher für die Einzelmontagebügel zur Flachmontage | Trous de montage pour support simple
- „Settings“ Display | „Settings“ Anzelge | Afficheur „Settings“
- Key switch | Schlüsselschalter | Interrupteur à clé
- Interlock In | Interlock Eingang | Entrée interlock
- Interlock Thru | Interlock Ausgang | Sortie Interlock
- DMX In | DMX Eingang | Entrée DMX
- DMX Out | DMX Ausgang | Sortie DMX
- Microphone | Mikrofon | Microphone
- Mounting holes for single bracket | Befestigungslöcher für die Einzelmontagebügel zur Flachmontage | Trous de montage pour support simple
- Loop for safety cord | Öse für Sicherheitsfangsell | Point d'accroche pour élingue de sécurité
Manual: BeamBar Series MK3
Content:
- Product and package contents 6
- Preliminary warning notices 6
- Initial operations, safety instructions 6
- Working on the device 7
- Service notes 7
- General Operation 8
Final statement 10
Technical data 28
Manual: BeamBar Series MK3 Manual: BeamBar Series MK3
1. Product and package contents
Please check if all listed parts are included and undamaged. Included in delivery: Laser system, 2 x single brackets, power cable, key, interlock bridge plug, manual
2. Preliminary warning notices
- Please use this device only according to these operating instructions.
- Do not use the device if there are any visible damages on housing, connector panels, power supplies or power cords.
- This device must not be permanently connected to mains. Disconnect it from mains or use the power button to switch if off if not in use.
-
Never look directly into the light source of a laser projector. Danger of damage to the eyes or even blindness in extreme circumstances!
-
Do not operate the device at high humidity or in the rain or in dusty environments.
-
Protect device against dripping or splashing water. Do not place any liquid filled containers near to this device.
Any warranty claims are void if the warranty label is removed or tampered with in any way.
3. Initial operations, safety instructions
- Make sure to use correct voltage; see information on device & in this manual.
- Make sure that the device is not connected to mains during installation.
- Installation has to be done by technical experienced and qualified persons according to safety regulations of the respective country.
- Always ensure that maximum permissible exposure (MPE) is not exceeded in areas accessible to the public or members of staff.
- In some countries an additional inspection by technical control institutes could be necessary.
- Connect an easily accessible inter-lock connector or circuit breaker to the projector.
-
The power supply should be easily accessible.
-
When installing the laser mount it with a minimum distance of 15 cm from walls and objects.
- For safe setup e.g. on walls or ceilings please use a safety cord. The safety cord should be able to withstand tenfold the weight of the device. Please follow the accident prevention regulations of professional associations and/or comparable regulations for accident prevention.
- If the device has been exposed to great temperature changes, do not switch it on immediately. Condensation (or any moisture/water formed) may damage this device.
- Never use dimmer, RC or other electronically switched sockets. Whenever possible, do not use the laser projector together with large appliances (especially fog machines) on the same mains!
- Ensure sufficient ventilation and do not
place the device on any warm or heat radiating surface. Especially the ventilation openings must not be covered!
- Ensure that device does not get overheated. Make sure that the device is not exposed to spotlights (especially moving
heads). Heat of spotlights could overheat laser in a little while and leads to a degradation of performance.
- This unit is intended for indoor use only.
4. Working on the device
- This product has no user serviceable parts inside and should only be maintained and serviced by a qualified engineer.
- Be sure that the mains plug is not connected to the power supply while installing the device.
- Take off all reflecting things like rings, watches, etc. before starting to work with or at the projector.
- Only use non-reflecting tools to work on device.
- Wear protective clothing (like goggles, gloves etc.) according to laser power and wavelength of the laser.
5. Service notes
- Moisture and heat can reduce lifetime of the laser system dramatically and expires any warranty claim.
- Quick on/off switching of this device will reduce durability of the laser diode dramatically.
-
Avoid sharp knocks and shocks to this device an endure sufficient protection during transportation. Look after your Laserworld product.
• To increase durability of your laser, protect device against overheating: -
Always ensure sufficient ventilation.
- Do not face spotlights (especially moving heads) to the device.
- Check temperature after approx. 30 minutes with each new installation. If necessary Install the projector at a place with different temperatures.
- Keep the device dry. Protect it from moisture, rain and damp.
- Switch off device when it is not nee-
ded. Diodes are switched on and can wear out even if there is no visible laser output.
- Please ensure the fans and heatsinks are clear from dust and debris otherwise the risk of overheating may occur. If the unit or air inlets appear to be blocked, please contact a qualified service engineer to maintain and service the product.
• Always place the laser behind fog machines and hazers - Avoid direct exposure of the laser to moisture
- Clean the exit window with glass cleaner from time to time
- Removal of the warranty label as well as damages to the device caused by improper handling, neglect of the safety instructions and service notes will void the warranty.
Manual: BeamBar Series MK3 Manual: BeamBar Series MK3
6. General Operation
1. Power
Connect the power cord to the device and to the mains. Make sure that your device is provided with the correct voltage. Wrong voltage could lead to irreparable damages. Please find the correct voltage data in the synoptical table at the end of this manual. Make sure that the device is not directed to people or inflammable objects during installation. To start the device, connect the interlock bridge, insert the key and switch it on, and switch the device on. The "Emission - Laser on" LED at the front side of the device begins to light up when the device is ready for use.
2. Key Switch
There is a key switch at the back of the laser system. Please plug the key to the switch and turn it on. The laser device only runs when the key is inserted and switched on. Prevent misusel Unplug the key when the laser is unattended to prevent misuse of the system.
3. Modes / Functions
The different operation modes can be selected via the four buttons next to the „Settings" display. „Menu" exits the current menu item and moves one level higher; „Enter" confirms a selection or navigates to the selected menu item; "Up" / "Down" allows for stepping through the current menu or to make a selection.
The BeamBar uses 13 DMX channels, so make sure that the next device uses an address that doesn't overlap with this range.
3.1. SOUND-TO-LIGHT / AUTO
Sound-to-light operation allows to playback the integrated patterns to the beat of music or any noises.
Select "ShPd" by navigating with the "Menu" button and confirm with "Enter":
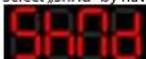
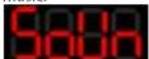
Standard selection is „SoUn“, which means that beam will be triggered with the beat of music:
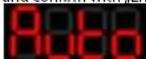
Auto operation allows to random playback the internal patterns. They are played back according to the internal system settings.
You can select "Auto" while "SoUn" is selected by navigating with the "Up" / "Down" buttons and confirm with "Enter":
Microphone Sensitivity Settings
The sensitivity of the built-in microphone for the control of the sound-to-light operation can be adjusted in the "SEnS" menu.
Select "SEnS" by navigating with the "Menu" button and confirm with "Enter":
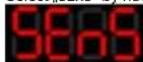
The sensitivity can be adjusted between 1 and 100. Standard value is 50. Use the „Up" / "Down" button to change the selection and confirm with „Enter".
3.2. MASTER-SLAVE
This laser is Master-Slave capable. This means that the Master laser system can hand on a control signal to one or more Slave lasers, so all do the same. Master-Slave only works with lasers of the same product series of the same product generation.
A: Link lasers with DMX cable
To use Master-Slave operation, link the Master with the Slave lasers with DMX cables. Make sure to use the „DMIX out” port on the Master and the „DMX in” on the Slave lasers. If several Slave lasers are used, link the first one to the Master laser and daisy-chain the control signal from the first Slave laser to the second etc..
B: Activate Master Laser
The Master laser needs to be set as control source.
Select "SLPId" by navigating with the "Menu" button and confirm with "Enter":
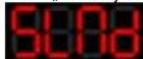
Use the „Up“ / „Down“ buttons to navigate to „NAST“ and confirm with „Enter“:
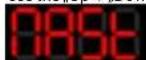
C: Activate Slave lasers
Select "SLPId" by navigating with the "Menu" button and confirm with "Enter":
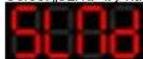
Use the „Up“ / „Down“ buttons to navigate to „SLAu“ and confirm with „Enter“:

D: Set Sound-to-Light or Auto mode on Master laser
To use the Master-Slave operation: set the Master to either Sound-to-Light or Auto mode (3.1.).
Manual: BeamBar Series MK3 Manual: BeamBar Series MK3
E: Establish link to Slave lasers
The Slave units must be set to DMX („Addr“) mode and must be assigned address A001 (see 3.3. DMX 512)
3.3. DMX 512
The DMX mode requires a DMX controller or a Master laser (see 3.2. Master-Slave operation) to be connected to the laser.
To switch to DMX mode, select „Addr“ by navigating with the „Menu“ button and confirm with „Enter“;
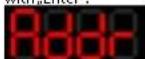
The submenu for setting the DMX address loads:
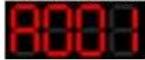
Press „Enter“ and the „Up“ / „Down“ buttons to set the desired DMX address and confirm with „Enter“.
DMX Control Chart
| Channel Value Function | ||
| 1 0-49 laser off | ||
| 50-99 sound mode | ||
| 100-149 automatic mode | ||
| 150-199 DMX mode (Channel 2 --> Channel 3 valid) | ||
| 200-255 DMX mode (Channel 4 --> Channel 13 valid) | ||
| 2 0-255 program / effect selection | ||
| 3 0-255 Speed (slow to fast, 21 levels) | ||
| Each of the following channels corresponds with one laser output (from left to right, front view) | ||
| 4 0-255 brightness adjustment | (weak to bright) | |
| 5 0-255 brightness adjustment | (weak to bright) | |
| 6 0-255 brightness adjustment | (weak to bright) | |
| 7 0-255 brightness adjustment | (weak to bright) | |
| 8 0-255 brightness adjustment | (weak to bright) | |
| 9 0-255 brightness adjustment | (weak to bright) | |
| 10 0-255 brightness adjustment | (weak to bright) | |
| 11 0-255 brightness adjustment | (weak to bright) | |
| 12 0-255 brightness adjustment | (weak to bright) | |
| 13 0-255 brightness adjustment | (weak to bright) | |
Final statement
Laserworld products are tested and product packaging is inspected before leaving our warehouse.
Users must to follow the local safety regulations and warnings within this manual and adhere to any regulations within its place of use. Damages through inappropriate use will void any liability or warranty of our products.
Due to continual product developments, please check for the latest update of this product manual at www.laserworld.com. If you do have any further questions, then please contact your dealer/place of purchase or use our contact section on our website.
For service issues, please contact your dealer/place of purchase and ensure only genuine Laserworld spare parts are used in any service repairs.
Errors and Omissions excepted and products are subject to change.
Lasenworld (Switzerland) AG
Kreuzlingerstrasse 5
8574 Lengwil
SWITZERLAND
Registered office:
8574 Lengwil-Oberhofen / Switzerland
Company number: CH-440.3.020.548-6
Commercial Registry Kanton Thurgau
CEO: Martin Werner
VAT no. (Switzerland): 683 180
UID (Switzerland): CHE-113.954.889
VAT no. (Germany): DE 258030001
WEEE-Reg.-No. (Germany): DE 90759352
www.laserworld.com
info@laserworld.com
representative according to EMVG:
tarm laser technologies
tlt GmbH & Co. KG
Lindenallee 27
D-44625 Herne

representative according to EMVG:
tarm laser technologies
tlt GmbH & Co. KG
Lindenallee 27
D-44625 Herne


Manuel: BeamBar Series MK3 Manuel: BeamBar Series MK3
Table des matières: