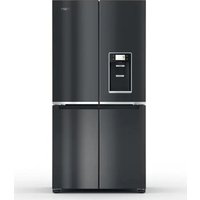
WQ9I FO2BX EF - Fridge WHIRLPOOL - Free user manual and instructions
Find the device manual for free WQ9I FO2BX EF WHIRLPOOL in PDF.


User questions about WQ9I FO2BX EF WHIRLPOOL
0 question about this device. Answer the ones you know or ask your own.
Ask a new question about this device
Download the instructions for your Fridge in PDF format for free! Find your manual WQ9I FO2BX EF - WHIRLPOOL and take your electronic device back in hand. On this page are published all the documents necessary for the use of your device. WQ9I FO2BX EF by WHIRLPOOL.
USER MANUAL WQ9I FO2BX EF WHIRLPOOL
| Whirlpool Corporation ARTWORK PROOF Whirlpool CORPORATION | ||||
| Category: Refrigeration Part No: / | Scale: 1:1 Description: Quick Guide WP LCD | Die Size: 215.9mm X 279.4mm Tolerance: ± 1.0 mm | Date: Aug 2023 Smart No: 810F950029941 | |
| Color: Black Text: Multi Language Content Font: Arial Calibri Size: 5/6/7/8/9 pt 5/6/7 pt | ||||
| Material: 100gsm offset paper. Ink: Solid black on white background Liner: N/A Copy Position: #3 Packaging: Inside bag | ||||
| THIS DRAWING IS THE PROPERTY OF WHIRLPOOL CORP. IT CONTAINS CONFIDENTIAL INFORMATION BELONGING TO AND/OR ENTRUSTED TO WHIRLPOOL. IT IS DISCLOSED IN CONFIDENCE AND SHALL NOT BE HELD, REPRODUCED, DISCLOSED OR USED EXCEPT IN A MANNER AND FOR A PURPOSE EXPRESSLY PERMITTED BY WHIRLPOOL IN WRITING. VENDORS SHALL NOT REVISE ANY PHYSICAL, DIMENSIONAL, OR PERFORMANCE CHARACTERISTICS UNLESS AUTHORIZED IN WRITING BY WHIRLPOOL'S LITERATURE GROUP. WHIRLPOOL'S TEST SPECIFICATIONS, IF ANY, ARE NOT INTENDED TO ASSUME ANY RESPONSIBILITY FOR SUBSEQUENT PROBLEMS WITH OR CAUSED BY THE PART, COMPONENT, OR ASSEMBLY PROVIDED BY THE SUPPLIER, AND DO NOT RELIEVE THE SUPPLIER OF ITS OBLIGATIONS INCLUDING, BUT NOT LIMITED TO, THE NEED TO PERFORM ITS OWN. TESTING, INSPECTION AND ONGOING QUALITY CONTROL, AND ASSURING FITNESS FOR USE. ANY WHIRLPOOL RECOMMENDED TEST AND ITS OUTCOME DO NOT IN ANYWAY LIMIT OR CHANGE THE WARRANTY CONTAINED IN WHIRLPOOL'S PURCHASE ORDER OR SUPPLY AGREEMENT. | ||||
natural_image
Line drawing of a double door with a refrigerator and control panel (no text or symbols)English 3
Italiano 9
Français 16
Polski 23
Nederlands 30
Svenska 37
Dansk 43
Norsk 49
Português 55
Español 62
Eesti keeles 69
Latviešu 75
Lietuvių k. 81
Suomi 87
Română 94
Български 101
Slovak 108
Ελληνικά 115
Česky 122
Magyar 128
This printed book is intended as a quick start guide only. The complete instructions for use is available on https://
docs.whirlpool.eu/
GETTING STARTED
INSTALLATION CHECKLIST
√ Electrical Power
■ Plug refrigerator into a earthed socket.
√ Doors
If doors need to be removed during installation, see the "Remove and Replace Refrigerator Doors" and "Remove and Replace Freezer Door Fronts" sections.
■ Doors seal completely.
■ Refrigerator is level. Adjust leveling feet so they are snug against the floor.
■ Doors are even across the top. (Use door alignment feature if necessary.)
UNPACK THE REFRIGERATOR
Refrigerator Delivery
A minimum door opening of 838 mm (33") is required. If door opening is 914 mm (36") or less, then removal of doors, drawer and hinges is required.
Cart the refrigerator from the side for all door openings.
When Moving Your Refrigerator:
Your refrigerator is heavy. When moving the refrigerator for cleaning or service, be sure to cover the floor with
cardboard or hardboard to avoid floor damage. Always pull the refrigerator straight out when moving it. Do not wiggle on "walk" the refrigerator when trying to move it, as floor damage could occur.
Remove the Packaging
■Remove tape and glue residues from surfaces before turning on the refrigerator. Rub a small amount of liquid dish detergent over the adhesive with your fingers. Wipe with warm water and dry.
■Do not use sharp instruments, rubbing alcohol, flammable fluids, or abrasive cleaners to remove tape or glue. These products can damage the surface of your refrigerator.
■Dispose of/recycle all packaging materials.
REMOVE AND REPLACE REFRIGERATOR
DOORS
This operation has to be performed by qualified person. Make sure the appliance is not near a heat source and that the four feet are stable and resting on the floor, adjusting them as required, and check that the appliance is perfectly level using a spirit level. Wait at least two hours before switching the appliance on, to ensure that the refrigerant circuit is fully efficient.
To guarantee adequate ventilation, leave a space on both sides and above the appliance. The distance between the rear of the appliance and the wall behind the appliance should be 50 mm, to avoid access to hot surfaces. A reduction of this space will increase the Energy consumption of product.
IMPORTANT: If refrigerator was previously installed and you are moving it out of the home, turn refrigerator control off before you begin removing the doors. Gather required tools and read all instructions before removing doors.
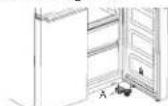
A. Bottom hinge
REFRIGERATOR LEVELLING
- Move refrigerator to its final location.
- Using hand, rotate brake feet. Tum them counterclockwise until rollers are off floor and both brake feet are snug against the floor. This keeps the refrigerator from rolling forward when opening doors.
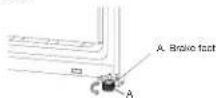
IMPORTANT: If you need to make further adjustments involving the brake feet, you must turn both brake feet the same amount to keep the refrigerator level.
- Use a level to make sure refrigerator is level from side to side and front to back.
WATER FILTER INSTALLATION
- Locate the water filter compartment in the lower left-hand side of the refrigerator compartment. Push on the right side of the filter door to open.
■ Align the arrow on the water filter cap with the cutout notch in the filter housing and insert filter.
■ Once the filter is inserted, turn the filter clockwise 90° (1/4 tum) until it locks into the housing.
■ Push water filter door closed to latch.
■ Flush 3 gallons (11.4 L) of water through the water system to clear air from the water line and to keep the dispenser from dripping and/or avoiding decreased dispenser flow.
NOTE: If the filter is not installed correctly, water may dispense at a lower flow rate and there will be slower ice production. Improper filter installation may also cause the water filter housing to leak.
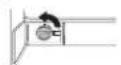
Fig. 1
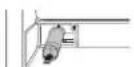
Fig.3
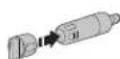
Fig.2
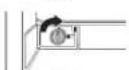
Fig.4
REFRIGERATOR CONNECTIVITY FEATURE
(ON SOME MODEL)
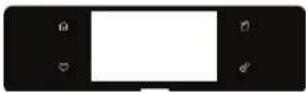

Wi-Fi connectivity allows your Smart Refrigerator to connect to the Internet and interact with the Whirlpool® app from your smartphone or mobile device. This connection opens up several Smart option to you - option intended to save you valuable time and energy. Refer to the "troubleshooting-Connected Models" section of this Use and Care Guide, check any connection instructions for your specific router, and refer to mobile app instructions.
NOTE: Requires Wi-Fi and account creation. App features and functionality subject to change. Subject to Terms of Service available in the mobile app. Data rates may apply.
CONNECT THE WATER SUPPLY
Read all directions before you begin.
IMPORTANT:
■ Plumbing must be installed in accordance with the International Plumbing Code and any local codes and ordinances.
■ Install tubing only in areas where temperatures will remain above freezing.
NOTE: To allow sufficient water flow to the refrigerator, a minimum 1/2" (12.7 mm) size household supply line is recommended.
Connect to Water Line
IMPORTANT: If you have turned the refrigerator on before the water was connected, turn off the ice maker.
-
Unplug refrigerator or disconnect power.
-
Turn off main water supply. Turn on nearest faucet long enough to reduce water pressure in the water line.
-
Use a 3/4-14" shut-off valve or equivalent. The refrigerator is provided with a household supply line with the installation kit that connects to the shut-off valve and to the refrigerator.
NOTE: Appliance is equipped with a water installation kit. To assure proper connection to your water supply, use proper sealing material in the connection. Check if connection is sealed properly after some hours of operation.
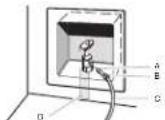
A. Bottom Hinge
B. Nut
C. Copper tubing (to refrigerator)
D. Household supply fire
(1/2"[12.7 nm] minimum)
- Now you are ready to connect the copper tubing to the shut-off valve. Use 1/4" (6.35 mm) O.D. (outside diameter) soft copper tubing to connect the shut-off valve and the refrigerator.
■ Ensure that you have the proper length needed for the job. Be sure both ends of the copper tubing are cut square.
Slip compression sleeve and compression nut onto copper tubing as shown. Insert end of tubing into outlet end squarely as far as it will go. Screw compression nut onto outlet end with adjustable wrench. Do not overtighten.
NOTE: Always drain the water line before making the final connection to the inlet of the water valve to avoid possible water valve malfunction.
- Place the free end of the tubing into a container or sink and turn on main water supply to flush out tubing until water is clear. Turn off shut-off valve on the water pipe.
- Bend the copper tubing to meet the water line inlet, located on the back of the refrigerator cabinet as shown. Leave a coil of copper tubing to allow the refrigerator to be pulled out of the cabinet or away from the wall for service.
Connect to Refrigerator
Follow the connection instructions specific to your model.
- Remove plastic cap from water valve inlet port. Attach the copper tubing to the valve inlet using a compression nut and sleeve as shown. Tighten the compression nut. Do not overtighten. Confirm copper tubing is secure by pulling on copper tubing.
- Create a service loop with the copper tubing. Avoid kinks when coiling the copper tubing. Secure copper tubing to refrigerator cabinet with a "P" clamp.
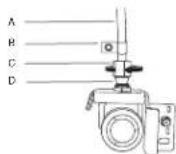
A. Copper Tubing
B. 'P' clamp
C. Compression nut
D. Compression sleeve
- Turn on water supply to refrigerator and check for leaks. Correct any leaks.
- If ice is desired, turn on the ice maker.
Note: Allow 24 hours to produce the first batch of ice. Discard the first three batches of ice produced. Allow three days to completely fill the ice storage bin.
REFRIGERATOR CARE
All of the Refrigerator, Freezer and Multi Temperature sections defrost automatically. However, clean all the sections about once a month to avoid build-up of odours. Wipe up spills immediately.
Exterior Cleaning
Fingerprint-Resistant Stainless
IMPORTANT:
■Avoid exposing stainless steel appliances to caustic or corrosive elements such as high-salt, high-moisture, or high-humidity environments. Damage due to exposure to these elements is not covered under the warranty.
DO USE DO NOT USE
| √ Soft, clean cloth | ✗ Abrasive cloths✗ Paper towels or newsprint✗ Steel-wool pads |
| √Warm, soapy water with a mild detergent | ✗ Abrasive powders or liquids✗ Window sprays✗ Ammonia✗ Acidic or vinegar-based cleaners✗ Oven cleaners✗ Flammable fluids |
NOTES:
If unintentional contact does occur, clean plastic part with a sponge and mild detergent in warm water. Dry thoroughly with a soft cloth.
Just because a cleaner is a liquid does not mean it is non-abrasive. Many liquid cleansers formulated to be gentle on tile and smooth surfaces still damage stainless steel.
■Citric acid permanently discolours stainless steel.
■To avoid damaging the finish of your stainless steel refrigerator:
Do not allow these substances to remain on the finish:
✗ Mustard Citrus-based sauces
✗ Tomato juice Citrus-based products
× Marinara sauce
Interior Cleaning
- Unplug refrigerator or disconnect power.
- Hand wash, rinse, and dry removable parts and interior surfaces thoroughly. Use a clean sponge or soft cloth and a mild detergent in warm water.
NOTE: Do not use abrasive or harsh cleaners such as window sprays, scouring cleansers, flammable fluids, cleaning waxes, concentrated detergents, bleaches, or cleansers containing petroleum products on plastic parts, interior and door liners, or gaskets.
- Plug in refrigerator or reconnect power.
Condenser
This refrigerator has skin condenser on both sides of refrigerator. It is normal to feel warm on the sides.
sale service information
web site (User manual)
www.whirlpool.eu/register
www.whirlpool.eu
AFTER-SALES SERVICE
BEFORE CALLING THE AFTER-SALES SERVICE
- See if you can solve the problem by yourself with the help of the suggestions given in the TROUBLESHOOTING.
- Switch the appliance off and back on again to see if the fault persists.
IF AFTER THE ABOVE CHECKS THE FAULT STILL OCCURS, GET IN TOUCH WITH THE NEAREST AFTER-SALES SERVICE
To receive assistance, call the number shown on the warranty booklet or follow the instructions on the website
When contacting our Client After sales service, always specify: a brief description of the fault;
■ the type and exact model of the appliance;
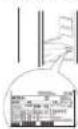
■ the service number (number after the word Service on the rating plate). The service number is also indicated on the guarantee booklet;
SERVICE 0000 000 00000
11 100 100 100
■ your full address;
■ your telephone number.
If any repairs are required, please contact an authorised aftersales service (to guarantee that original spare parts will be used and repairs carried out correctly).
Proper Disposal of Your Old Refrigerator
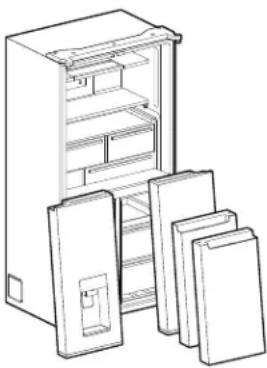
DANGER : Risk of child entrapment. Before you throw away your old refrigerator or freezer:
■ Take off the doors.
■ Leave the shelves in place so that children cannot easily climb inside.
WARNING
Suffocation Hazard
Remove doors from your old refrigerator.
Failure to do so can result in death or brain damage.
natural_image
Line drawing of a refrigerator with open doors and stacked sheets (no text or symbols)IMPORTANT: Child entrapment and suffocation are not problems of the past. Scrapped or abandoned refrigerators are still dangerous—even if they will sit for “just a few days.” If you are getting rid of your old refrigerator, please follow these instructions to help avoid accidents.
Important information to know about disposal of refrigerants:
Dispose of refrigerator in accordance with Federal and Local regulations. Refrigerants must be evacuated by a licensed, EPA certified refrigerant technician in accordance with established procedures.
No Freezer Burn Feature
This feature minimizes moisture migration from frozen food. This feature will sub-cool the freezer compartment prior to defrost in order to reduce temperature variation. This feature will be enabled for a maximum of 2 hours prior to defrost.
Fast Cool
The Fast Cool feature assists with periods of high refrigerator use, full grocery loads, or temporarily warm room temperatures. This feature will be enabled for approximately 2 hours. The duration varies for different models. When turning on the Fast cool, the refrigerator compartment temperature will cool down faster than normal settings.
■To enable Fast Cool navigate to the Fast Cool section under Special Functions.
■When enabled, the Fast Cool icon shall be displayed on the clock screen, and shall show how much time is remaining before Fast Freeze is disabled.
■Pressing the icon shall navigate to the Fast Cool screen where you can disable the feature.
■To disable Fast Cool, navigate to the Fast Cool section under Special Functions. Adjusting the Refrigerator temperature shall automatically turn off the Fast Cool feature.
NOTE: Setting the refrigerator to a colder temperature may make some foods, such as ice cream, harder.
Fast Freeze
The Fast Freeze feature increases the cooling for approximately 50 hours. The duration varies for different models. When turning on the Fast Freeze, the freezer compartment temperature will cool down faster than normal settings.
To enable Fast Freeze, navigate to the Fast Freeze section under Special Functions.
When enabled, the Fast Freeze icon shall be displayed on the clock screen, and shall show how much time is remaining before Fast Freeze is disabled. Pressing the icon shall navigate to the Fast Freeze screen where you can disable the feature.
To disable Fast Freeze, navigate to the Fast Freeze section under Special Functions. Adjusting the Freezer temperature shall automatically turn off the Fast Freeze feature.
NOTE: Setting the freezer to a colder temperature may make some foods, such as ice cream, harder.
Holiday Mode
While in Holiday mode, the Refrigerator compartment will run more efficiently in order to save energy while you are away. Adjusting the Refrigerator temperature shall automatically turn off the Holiday Mode feature. By selecting this function the temperature of the fresh food compartment will automatically be set to a colder temperature. This feature is not applicable to the Freezer and variable temperature compartments. A door ajar alert shall automatically turn off the Holiday Mode feature.
IMPORTANT: When Holiday Mode is enabled, water and ice dispensing are disabled.
NOTE: The user can choose to turn off cooling by putting the refrigerator in Demo mode.
See the "Using the Controls" section for more information.
Demo Mode
To Enter Demo Mode, go to the Info section under Settings and select Demo. The user will be asked to confirm entry into Demo Mode. Once in Demo, the HMI will start to display marketing videos.
WARNING: While in Demo Mode, the product will not cool.
To Exit Demo Mode, touch the Screen to stop the video playing. The user will then be given the option to Try the Product or Watch the Video.
The User shall then Select Try the Product, after which the screen shall navigate to the Home Screen. The user should then navigate the Info section under Settings and select Demo.
The user will be asked to confirm exit from Demo Mode. The User Interface shall then navigate back to the Home Screen.
USING THE CONTROLS
(ON SOME MODEL)
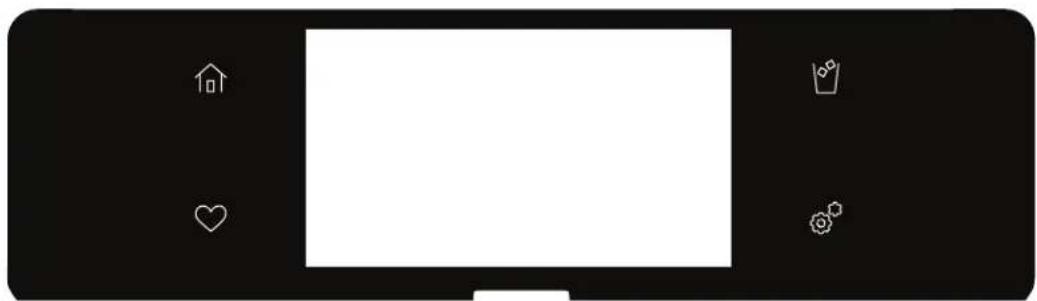
This manual covers several models. Your model may have some or all of the items listed.
natural_image
Black and white illustration of a computer monitor with icons for home, heart, crown, and gear (no text or symbols)| Keypad | Feature | Instructions |
Tools | Refrigerator Use Functions | Enables you to personalize the audible tones and refrigeration operation to suit your needs. See the “Tools” and “More Modes” sections. |
| Home[5Y84] | Home Screen | If pressed once, it enables the user to return to the Home screen. The Home screen will time out after 2 minutes and display the Clock. |
| Favorites[60H6] | Favorites | The Favorites key allows the user to save the water amount that they use on a frequent basis. The user can also access the their Favorites saved based on time of day. |
Ice | Ice Function | Toggle between crushed ice and cubed ice. |
Note: The user may notice brighter areas of the LCD backlight toward the bottom of the LCD User Interface. This is normal, and shall only be visible during the first 30 seconds of the product start up.
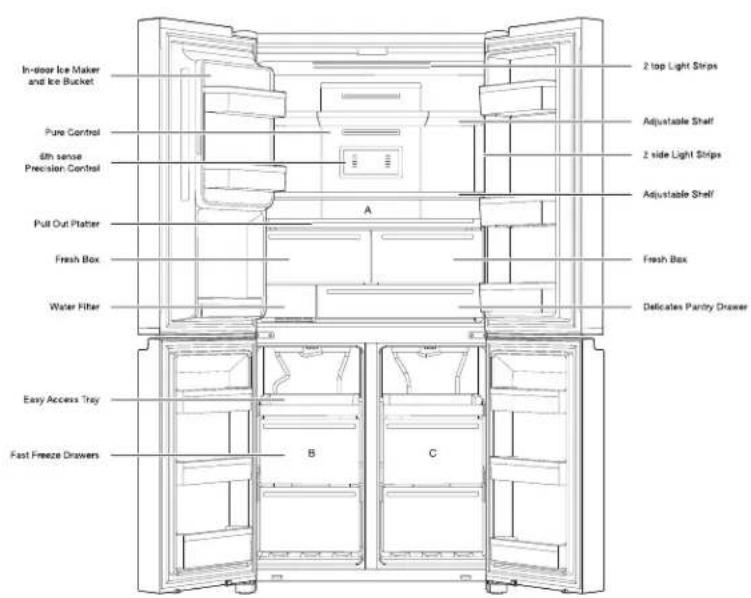
PARTS AND FEATURES
text_image
In-door Ice Maker and Ice Bucket Pure Control 6th sense Precision Control Pull Out Platter Fresh Box Water Filter Easy Access Tray Fast Freeze Drawers A B C 2 top Light Strips Adjustable Shelf 2 side Light Strips Adjustable Shelf Fresh Box Delicates Pantry DrawerA. Refrigerator
B. Freezer
C. Convertible Space
text_image
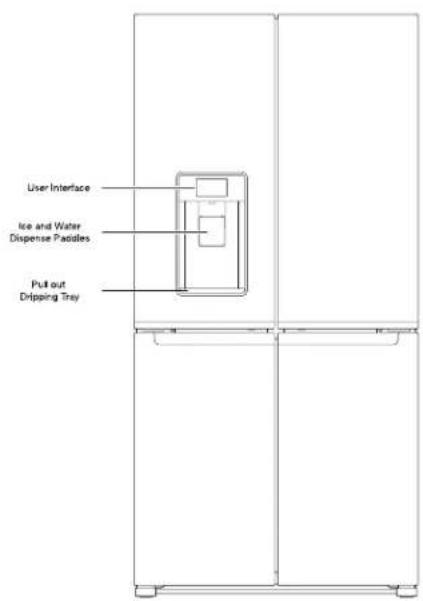
User Interface Ice and Water Dispense Paddles Pull out Dripping TrayNOTE:
The automatic closing of the left door of the fridge is to be considered normal behavior.
NOTE:
The drawers, baskets and shelves shall remain in the position like the above picture. This is the best condition for energy consumption. This refrigerating appliance is not intended to be used as a built-in appliance.
When you first install your refrigerator, make sure that the controls are still set to the recommended set points. The factory recommended set points are 3°C for the refrigerator and -18°C for the freezer.
All the LED lights in the refrigerator compartment are energy efficiency class G. Load limits are determined by baskets, flaps, drawers, shelves etc. Make sure that these components can still close easily after loading.
SAFETY INSTRUCTIONS
IMPORTANT TO BE READ AND OBSERVED
Before using the appliance, read these safety instructions. Keep them nearby for future reference. These instructions and the appliance itself provide important safety warnings, to be observed at all times. The manufacturer declines any liability for failure to observe these safety instructions, for inappropriate use of the appliance or incorrect setting of controls.
⚠️Very young children (0-3 years) should be kept away from the appliance. Young children (3-8 years) should be kept away from the appliance unless continuously supervised. Children from 8 years old and above and persons with reduced physical, sensory or mental capabilities or lack of experience and knowledge can use this appliance only if they are supervised or have been given instructions on safe use and understand the hazards involved. Children must not play with the appliance. Cleaning and user maintenance must not be carried out by children without supervision. Children aged from 3 to 8 years are allowed to load and unload refrigerating appliances.
PERMITTED USE
⚠️ CAUTION: The appliance is not intended to be operated by means of an external switching device, such as a timer, or separate remote controlled system.
This appliance is intended to be used in household and similar applications such as: staff kitchen areas in shops, offices and other working environments; farm houses; by clients in hotels, motels, bed & breakfast and other residential environments.
This appliance is not for professional use. Do not use the appliance outdoors.
The bulb used inside the appliance is specifically designed for domestic appliances and is not suitable for general room lighting within the home (EC Regulation 244/2009).
The appliance is designed for operation in places where the ambient temperature comes within the following ranges, according to the climatic class given on the rating plate. The appliance may not work properly if it is left for a long time at a temperature outside the specified range.
Climatic Class Amb. T. (°C)
SN: From 10 to 32 °C; N: From 16 to 32 °C
ST: From 16 to 38 °C; T: From 16 to 43 °C
This appliance does not contain CFCs. The refrigerant circuit contains R600a (HC). Appliances with Isobutane (R600a): isobutane is a natural gas without environmental impact, but is flammable. Therefore, make sure the refrigerant circuit pipes are not damaged, especially when emptying the refrigerant circuit.
⚠ WARNING: Do not damage the appliance refrigerant circuit pipes.
WARNING: Keep ventilation openings, in the appliance enclosure or in the built-in structure, clear of obstruction.
⚠ WARNING: Do not use mechanical, electric or chemical means other than those recommended by the Manufacturer to speed up the defrost process.
⚠ WARNING: Do not use or place electrical devices inside the appliance compartments if they are not of the type expressly authorized by the Manufacturer.
⚠ WARNING: Ice makers and/or water dispensers not directly connected to the water supply must be filled with potable water only.
WARNING: Automatic ice-makers and/or water dispensers must be connected to a water supply that delivers potable water only, with mains water pressure between 0.14Mpa and 1.0Mpa (1.4 bar and 10 bar).
⚠ WARNING: Use the new hose-sets supplied with the appliance, and the old hose-sets should not be reused.
⚠️ Do not store explosive substances such as aerosol cans with a flammable propellant in this appliance.
⚠️ Do not swallow the contents (non-toxic) of the ice packs (provided with some models). Do not eat ice cubes or ice lollies immediately after taking them out of the freezer since they may cause cold burns.
⚠ For products designed to use an air filter inside an accessible fan cover, the filter must always be in position when the refrigerator is in function.
⚠ Do not store glass containers with liquids in the freezer compartment since they may break. Do not obstruct the fan (if included) with food items. After placing the food check that the door of the compartments closes properly, especially the freezer door.
⚠ Damaged gaskets must be replaced as soon as possible.
⚠ Use the refrigerator compartment only for storing fresh food and the freezer compartment only for storing frozen food, freezing fresh food and making ice cubes.
Avoid storing unwrapped food in direct contact with internal surfaces of the fresh food or freezer compartments. Appliances could have special compartments(Fresh Food Compartment, Zero Degree Box, etc.). Unless specified in the specific booklet of product, they can be removed, maintaining equivalent performances.
Avoid a direct contact between the fresh food and the food that is already frozen. To optimize the freezing speed, drawers can be removed and the food can be placed directly on the bottom or top of the compartment.
Warning: Risk of fire/flammable materials. The most appropriate compartments of the appliance where specific types of food are to be stored, taking into account different temperature distribution in different compartments in the appliance, are as follows:
- Refrigerator compartment: Store tropical fruit,
cans, drinks, eggs, sauces, pickles, butter, jam, cheese, milk, dairy food, yoghurt. You may also store cold cuts, desserts, meat and fish, cheesecake, fresh pasta, sour cream, pudding and cream cheese.
Fruit & vegetable drawer at the bottom of the refrigerator compartment: Store vegetables and fruits (excluding tropical fruits).
Chiller compartment: Only store meat and fish in the coldest drawer
- Freezer compartment:
is suitable for freezing foodstuffs from ambient temperature and for storing frozen food as the temperature is evenly distributed throughout the entire compartment. Purchased frozen food has the storage expiration date stated on the packaging. This date takes into account the type of food being stored and therefore this date should be respected. Fresh food should be stored for the following time periods: 1-3 months for cheese, shellfish, ice cream, ham/sausage, milk, fresh liquids; 4 months for steak or chops (beef, lamb, pork); 6 months for butter or margarine, poultry (chicken, turkey); 8-12 months for fruits (except citrus), roast meat (beef, pork, lamb), vegetables. Expiration dates on the packaging of foods must be respected. Please store foodstuffs according to above paragraphs for best preservation over the longest period, to avoid food waste.
To avoid food contamination, please observe the following:
- Opening the door for long periods can cause a significant increase of the temperature in the compartments of the appliance.
- Regularly clean surfaces that may come into contact with food and accessible drainage systems.
– Clean water tanks if they have not been used for 48 h; flush the water system connected to a water supply if water has not been drawn for 5 days.
- Store raw meat and fish in suitable containers in the refrigerator, so that it does not come into contact with or drip onto other food.
theln
shouldstorage
+10°C: store white wine
+4°C: store vegetables and fruits (excluding tropical fruits)
0°C: only store meat and fish
All set points below zero: store frozen foodstuff as for freezer cavity
-Two-star frozen food compartments are suitable for storing pre-frozen food, storing or making ice cream and ice cubes.
- Do not freeze fresh food in one, two or three-star compartments.
- If the refrigerating appliance is left empty for long periods, switch off, defrost, clean, dry, and leave the door open to prevent mould developing inside the appliance.
INSTALLATION
The appliance must be handled and installed by two or more persons - risk of injury. Use protective gloves to unpack and install - risk of cuts.
⚠️ Installation, including water supply (if any) and electrical connections, and repairs must be carried out by a qualified technician. Do not repair or replace any part of the appliance unless specifically stated in the user manual. Keep children away from the installation site.
After unpacking the appliance, make sure that it has not been damaged during transport. In the event of problems, contact the dealer or your nearest After-sales Service. Once installed, packaging waste (plastic, styrofoam parts etc.) must be stored out of reach of children - risk of suffocation. The appliance must be disconnected from the power supply before any installation operation - risk of electric shock. During installation, make sure the appliance does not damage the power cable - risk of fire or electric shock. Only activate the appliance when the installation has been completed.
⚠️ Be careful not to damage the floors (e.g. parquet) when moving the appliance. Install the appliance on a floor or support strong enough to take its weight and in a place suitable for its size and use. Make sure the appliance is not near a heat source and that the four feet are stable and resting on the floor, adjusting them as required, and check that the appliance is perfectly level using a spirit level. Wait at least two hours before switching the appliance on, to ensure that the refrigerant circuit is fully efficient.
⚠ WARNING: When positioning the appliance, ensure the supply cord is not trapped or damaged.
⚠ WARNING: To avoid a hazard due to instability, positioning or fixing of the appliance must be done in accordance with the manufacturer instructions. It is forbidden to place the refrigerator in such way that the metal hose of gas stove, metal gas or water pipes, or electrical wires are in contact with the refrigerator back wall (condenser coil).
Convertible To guarantee adequate ventilation, leave a be aspace followed sides and above the appliance. The distance between the rear of the appliance and the wall behind the appliance should be 50mm, to avoid access to hot surfaces. A reduction of this space will increase the Energy consumption of product.
⚠️ If it is necessary to replace the doors, please contact the Technical Assistance Center.
⚠ An 'Approved' single check valve or some other no less effective backflow prevention device providing backflow prevention protection to at least fluid category two shall be fitted at the point of connection(s) between the water supply and the fitting or appliance.
FOR AUSTRALIA ONLY: A backflow device Water-Mark approved (not included, responsibility of the plumbing) is required to be installed upstream in accordance with the WaterMark certification and in accordance to AS/NZS 3500.1.2 and complying with AS/NZS 2845.1.
ELECTRICAL WARNINGS
⚠ It must be possible to disconnect the appliance from the power supply by unplugging it if plug is accessible, or by a m pole switch installed upstream of the socket in accord with the wiring rules and the appliance must be earthed conformity with national electrical safety standards.
⚠ Do not use extension leads, multiple sockets or adapters. The electrical components must not be accessible to the user after installation. Do not use the appliance when you are wet or barefoot. Do not operate this appliance if it has a damaged power cable or plug, if it is not working properly, or if it has been damaged or dropped.
⚠️ If the supply cord is damaged, it must be replaced with an identical one by the manufacturer, its service agent or similarly qualified persons in order to avoid a hazard-risk of electric shock.
⚠ WARNING: Do not locate multiple portable socket-outlets or portable power supplies at the rear of the appliance.
CLEANING AND MAINTENANCE
⚠ WARNING: Ensure that the appliance is switched off and disconnected from the power supply before performing any maintenance operation; never use steam cleaning equipment - risk of electric shock.
⚠ Do not use abrasive or harsh cleaners such as window sprays, scouring cleansers, flammable fluids, cleaning waxes, concentrated detergents, bleaches or cleansers containing petroleum products on plastic parts, interior and door liners or gaskets. Do not use paper towels, scouring pads, or other harsh cleaning tools.
DISPOSAL OF PACKAGING MATERIALS
The packaging material is 100% recyclable and is marked with the recycle symbol.
The various parts of the packaging must therefore be disposed of responsibly and in full compliance with local authority regulations governing waste disposal.
DISPOSAL OF HOUSEHOLD APPLIANCES
This appliance is manufactured with recyclable or reusable materials. Dispose of it in accordance with local waste disposal regulations. For further information on the treatment, recovery and recycling of household electrical appliances, contact your local authority, the collection service for household waste or the store where you purchased the appliance. This appliance is marked in compliance with European Directive 2012/19/EU, Waste Electrical and Electronic Equipment (WEEE). By ensuring this product is disposed of correctly, you will help prevent negative consequences for the environment and human health. The symbol ☒ on the product or on the accompanying documentation indicates that it should not be treated as domestic waste but must be taken to an appropriate collection center for the recycling of electrical and electronic equipment.
ENERGY SAVING TIPS
Install the appliance in a dry, well ventilated room far away from any heat source (eg. radiator, cooker, etc.) and in a place not exposed directly to the sun. If required, use an insulating plate. To guarantee adequate ventilation follow installation instructions.
Insufficient ventilation at the back of the product increases energy consumption and decreases cooling efficiency. Frequent door opening might cause an increase in Energy Consumption. The internal temperature of the appliance and the Energy Consumption may be affected also by the ambient temperature, as well as location of the appliance. Temperature setting should take into consideration these factors.
Reduce door opening to a minimum.
When thawing frozen food, place in the refrigerator. The low temperature tbf of the frozen products cools the food in the refrigerator. Allow warm food and drinks to cool down before placing in the appliance.
Positioning of the shelves in the refrigerator has no impact on the efficient usage of energy. Food should be placed on the shelves in such way to ensure proper air circulation (food should not touch each other and distance between food and rear wall should be kept).
You can increase storage capacity of frozen food by removing baskets and, if present, Stop Frost shelf.
Do not worry about noises coming from the compressor which are described as normal noises in this product's Quick Guide.
FROZEN COMPARTMENT
| Product | Storage period (-12°C) | Recommended Storage period (-18°C) | Storage period (-22°C) |
| Butter or margarine | 1 month | 6 months | 9 months |
| Fish | 1 month | 1-3 months | 6 months |
| Fruits (except citrus) & Vegetables | 1 month | 8-12 months | 12 months |
| Meat- Ham- sausage Roasts (beef-pork- lamb) Steaks or chops (beef-lamb-pork) | 1 month | 2 months 8-12 months 4 months | 12 months |
| Milk, Fresh fluid, Cheese, Ice cream or sherbet | 1 month | 1-3 months | 5 months |
| Poultry (chicken-turkey) | 1 month | 5-7 month | 9 months |
UNFROZEN COMPARTMENT
| Product | Storage period (0-3°C) | Recommended Storage period (3-6°C) | Storage period 6-8°C |
| cans, drinks, eggs, sauces, pickles, butter, jam | 3-4 weeks | 3-4 weeks | 3-4 weeks |
| Tropical fruit | Not recommended | 2-4 weeks | 3-4 weeks |
| cheese, milk, dairy food, deli food, yoghurt | 2-5 days | 2-5 days | 2-5 days |
| Cold cuts, desserts, meat and fish and home-cooked food | 3-5 days | 1-2 days | Not recommended |
| Store vegetables and fruits (excluding tropical fruits and citrus) | 15 days | 10-12 days | 4-7 days |
NOTE: Flexi freezer Please refer to applicable instruction of "FROZEN COMPARTMENT" and "UNFROZEN COMPARTMENT". This table is only suitable for European Union countries.
The model information can be retrieved using the QR Code indicated on the energy label. The label also includes the model identifier that can be used to consult the https://eprel.ec.europa.eu database portal.
natural_image
Line drawing of a refrigerator with multiple doors and shelves (no text or symbols)natural_image
Black and white illustration of a computer monitor with icons for home, heart, crown, and gear (no text or symbols)natural_image
Line drawing of a refrigerator with multiple doors and shelves (no text or symbols)natural_image
Black-and-white illustration of a computer monitor with icons for home, heart, crown, and gear (no text or symbols)| Produit | Période de stockage 0-3 °C | Période de stockage recommandée (3-6 °C) | Période de stockage 6-8 °C |
| cans, drinks, eggs, sauces, pickles, butter, jam | 3-4 semaines | 3-4 semaines | 3-4 semaines |
| Tropical fruit | Non recommandé | 2-4 semaines | 3-4 semaines |
| cheese, milk, dairy food, deli food, yoghurt | 2-5 jours | 2-5 jours | 2-5 jours |
| Cold cuts, desserts, meat and fish and home-cooked food | 3-5 jours | 1-2 jours | Non recommandé |
| Store vegetables and fruits (excluding tropical fruits and citrus) | 15 jours | 10-12 jours | 4-7 jours |
natural_image
Line drawing of a refrigerator with doors and shelves, no text or symbols presentnatural_image
Black rectangular device with white buttons and icons (no text or symbols)text_image
In-door Ice Macker and Ice Bucket Pure Control 6th sense Precision Control Pull Our Platter Fresh Box Water Filter Discharge Platty Drawers Easy Access Tray Fast Freeze Drawers A B C 2 top Light Strips Adjustable Shap 2 side Light Strips Adjustable Shap Fresh Boxtext_image
User Interface Ice and Water Disperse Paddles Pull out Dripping TrayUWAGA:
natural_image
Line drawing of a refrigerator with doors and shelves, no text or symbols presentnatural_image
Black and white illustration of a computer monitor with icons for home, heart, crown, and gear (no text or symbols)WAARSCHUWINGEN M.B.T. ELEKTRICITEIT
natural_image
Line drawing of an open refrigerator with multiple doors beside it (no text or symbols)natural_image
Black and white illustration of a computer monitor with icons for home, heart, crown, and gear (no text or symbols)text_image
In-door Ice Maker and Ice Bucket Pure Control 6th sense Precision Control Pull Out Plateer Fresh Box Water Filter Delete Party Drawers A B C 2 top Light Strips Adjustable Shell 2 side Light Strips Adjustable Shell Fresh Box Easy Access Tray Fast Freezer DrawersA. Ky
B. Frys
C. Konvertibelt utrymme
text_image
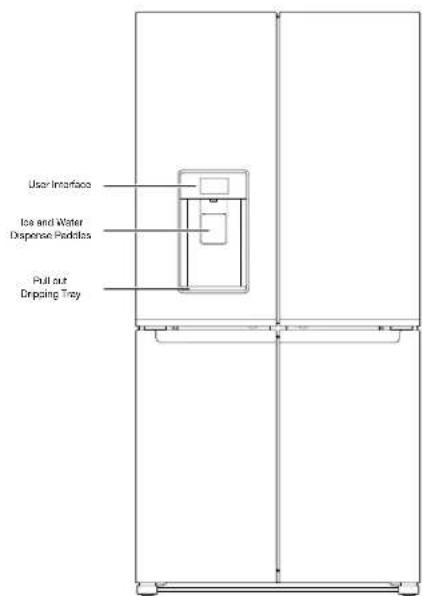
User Interface Ice and Water Dispense Paddles Pull out Drippling TrayNOTERA:
natural_image
Line drawing of an open refrigerator with multiple doors beside it (no text or symbols)natural_image
Black and white illustration of a computer monitor with icons for home, heart, crown, and gear (no text or symbols)text_image
In door ice Mover and ice Bucket Pure Control 6th sense Preciseon Control Pull Out Plaster Fresh Box Watts Hirt Celesteo Plurry Drawer Easy Access Tray Fast Freeze Driwre A B C 2 top Light Strips Adjustable Shelf 2 side Light Strips Adjustable Shelf Fresh BoxA. Kolesk
B. Fryser
C. Indstilleligt område
BEMAERK:
text_image
User Interface Ice and Water Dispense Paddles Pull out Dipping TrayBEMRK:
PAKKE UT KJ∅LESKAPET
FJERNE OG SETTE PÅ PLASS KJ∅LESKAPSD∅RENE
INNJUSTERING AV KJ∅LESKAPET
natural_image
Line drawing of a refrigerator with open doors and stacked sheets (no text or symbols)natural_image
Black and white illustration of a computer monitor with icons for home, heart, crown, and gear (no text or symbols)Tastatur Trekk Bruksanvisning
RENGJ∅RING OG VÉDLIKEHOLD
natural_image
Line drawing of a refrigerator with multiple doors and shelves (no text or symbols)natural_image
Black rectangular device with white display screen and control buttons (no text or symbols)natural_image
Line drawing of an open refrigerator with multiple doors beside it (no text or symbols)natural_image
Black rectangular device with white icons on both sides, no text or symbols presentX Tsiltrusepöhised tooted
Sisepindade puhastamine
natural_image
Line drawing of a refrigerator with open doors and stacked boxes (no text or symbols)natural_image
Black and white illustration of a computer monitor with icons for home, heart, crown, and gear (no text or symbols)Klaviatuur Tunnusjoon Juhised
text_image
FIRE RUM CNCMÄRGE:
natural_image
Line drawing of a refrigerator with doors placed beside it (no text or symbols)natural_image
Black and white graphic of a computer monitor with icons for home, heart, crown, and gear (no text or symbols)natural_image
Line drawing of an open refrigerator with multiple doors beside it (no text or symbols)natural_image
Black and white illustration of a computer monitor with icons for home, heart, crown, and gear (no text or symbols)JÄÄHDYTYSEN HUOLTO / APPLIANCE
natural_image
Line drawing of a refrigerator with open doors and stacked boxes (no text or symbols)natural_image
Black and white illustration of a computer monitor with icons for home, heart, crown, and gear (no text or symbols)https://docs.whirlpool.eu/
NOTIUNI DE BAZA
LISTA DE VERIFICARE LA INSTALARE
√ Energie electrică
natural_image
Line drawing of a refrigerator with open doors and stacked boxes (no text or symbols)natural_image
Black and white illustration of a device with icons for home, heart, crown, and gear (no text or symbols)https://docs.whirlpool.eu/
ПЪРВИ СТЪПКИ
СПИСЪК ЗА ИЗВЪРШВАНЕ НА ПРОВЕРКА НА ИНСТАЛИРАНЕТО
√ Електрозахранване
natural_image
Line drawing of a refrigerator with multiple doors and shelves (no text or symbols)natural_image
Black and white digital device interface with icons for home, garden, and heart (no text or symbols on screen)[Non-Text]
[Non-Text]
[Non-Text]
natural_image
Line drawing of a refrigerator with multiple doors and shelves (no text or symbols)natural_image
Black and white illustration of a computer monitor with icons for home, heart, crown, and gear (no text or symbols)Klávesnica Funkcia Pokyny
https://docs.whirlpool.eu/
ΕΝΑΡΞΗ ΧΡΗΣΗΣ