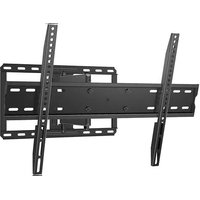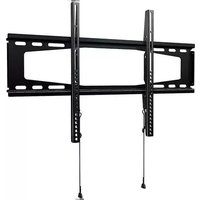
QLL23 - Wall mount Secura - Free user manual and instructions
Find the device manual for free QLL23 Secura in PDF.



User questions about QLL23 Secura
0 question about this device. Answer the ones you know or ask your own.
Ask a new question about this device
Download the instructions for your Wall mount in PDF format for free! Find your manual QLL23 - Secura and take your electronic device back in hand. On this page are published all the documents necessary for the use of your device. QLL23 by Secura.
USER MANUAL QLL23 Secura
natural_image
Technical illustration of a metal frame structure with vertical supports and mounting holes (no text or symbols)QLL23 INSTRUCTION MANUAL
We'll Make It Stress-Free
If you have any questions along the way, just give us a call.
1-800-359-5520. We're ready to help!
IMPORTANT SAFETY INSTRUCTIONS – SAVE THESE INSTRUCTIONS – PLEASE READ ENTIRE MANUAL PRIOR TO USE
Before getting started, let's make sure this mount is perfect for you!
Translations start page on 14
1
Does your TV weigh more than 100 lbs. (45.3 kg) including accessories?

No — Perfect!
Yes—This mount is NOT compatible. Visit secura-av.com or call 1-800-359-5520 (UK: 0800-056-2853) to find a compatible mount.
2
What is your wall made of?
Drywall with wood studs?
DO NOT install into drywall alone
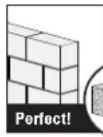
Solid concrete or concrete block?

Unsure?
Call Customer Service:
1-800-339-5520
(UK: 0800-056-2853)
3
Do you have all the tools needed?
Pencil
Level
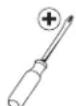
Screw
driver
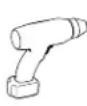
Electric
Drill
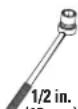
Socket Wrench
vrench
Wood Stud Install

Stud
Finder
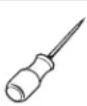
Awl
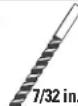
(5.5 mm)
Wood
Drill Bit
Concrete Install
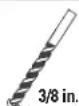
(10 mm)
Masonry
Drill Bit
Hammer
4
Ready to begin?
Please read through these instructions completely to be sure you're comfortable with this easy install process. Also check your TV owner's manual to see if there are any special requirements for mounting your TV.
If you do not understand these instructions or have doubts about the safety of the installation, assembly or use of this product, contact Customer Service at 1-800-359-5520 (UK: 0800-056-2853).
CAUTION: Avoid potential personal injuries and property damage!
● This product is designed for use in wood stud, solid concrete, and concrete block walls - DO NOT install into drywall alone
● The wall must be capable of supporting five times the weight of the TV and mount combined
- Do not use this product for any purpose not explicitly specified by manufacturer
● Manufacturer is not responsible for damage or injury caused by incorrect assembly or use
Dimensions
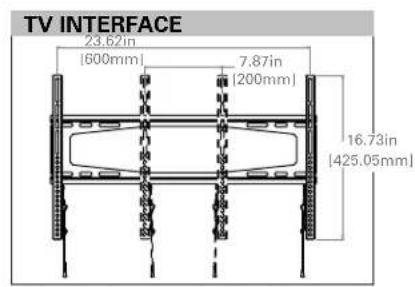
text_image
TV INTERFACE 23.62in [600mm] 7.87in [200mm] 16.73in [425.05mm]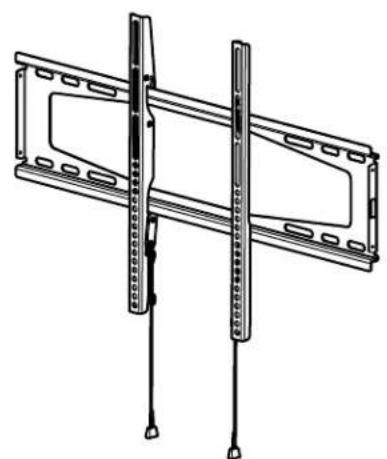
natural_image
Technical line drawing of a mechanical assembly with two vertical supports and mounting holes (no text or symbols)
text_image
WALL PLATE 27.27in [692.7mm] 5.00in [127mm] 17.31in 25.31in [439.74mm] [642.94mm] 27.27in 4.73in [120] [692.7mm] 7.00in [177.80mm]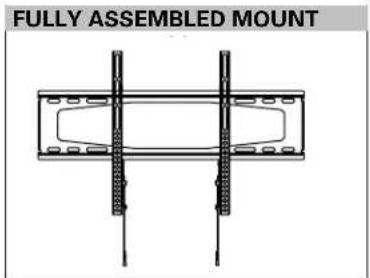
natural_image
Technical diagram of a fully assembled mounting bracket with vertical and horizontal components (no text or symbols)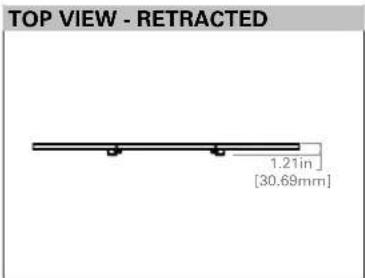
text_image
TOP VIEW - RETRACTED 1.21in [30.69mm]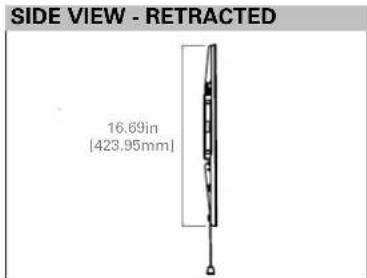
text_image
SIDE VIEW - RETRACTED 16.69in [423.95mm]Parts and Hardware
⚠ WARNING: This product contains small items that could be a choking hazard if swallowed. Before starting assembly, verify all parts are included and undamaged. If any parts are missing or damaged, do not return the damaged item to your dealer; contact Customer Service. Never use damaged parts!

NOTE: Not all hardware included will be used.
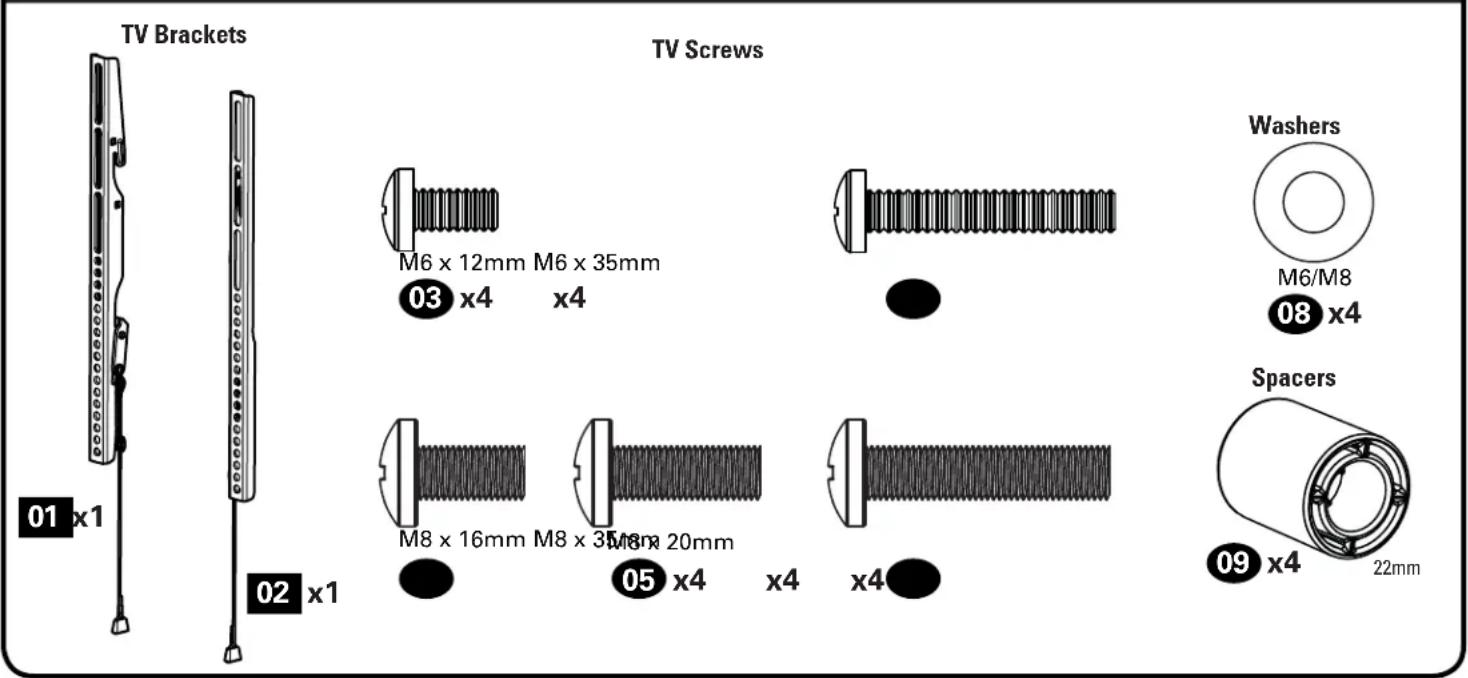
Parts and Hardware for STEP 1
text_image
TV Brackets TV Screws 01 x1 02 x1 M6 x 12mm M6 x 35mm 03 x4 x4 M8 x 16mm M8 x 35mm 20mm 05 x4 x4 x4 Washers M6/M8 08 x4 Spacers 09 x4 22mmParts and Hardware for STEP 2
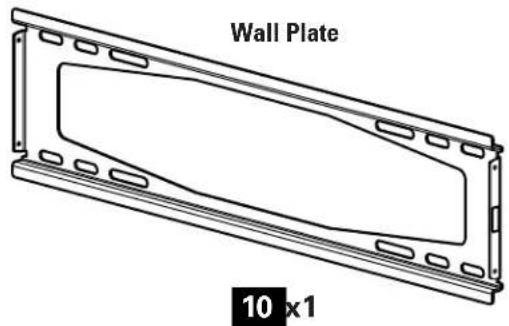
text_image
Wall Plate 10 x1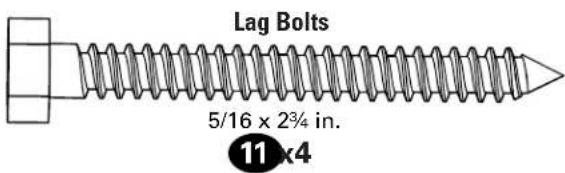
text_image
Lag Bolts 5/16 x 2¾ in. 11 x4Lag Bolt Washers

5/16 in.
12 x4
For concrete installations ONLY
CAUTION: Do not use in drywall or wood Concrete Anchors
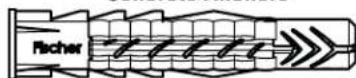
Fischer UX 10 x 60R
13 x4
STEP 1 Attach Brackets to TV
1.1 Select TV Screw Diameter
Hand thread screws into the threaded inserts on the back of your TV to determine which screw diameter (M6 or M8) to use.
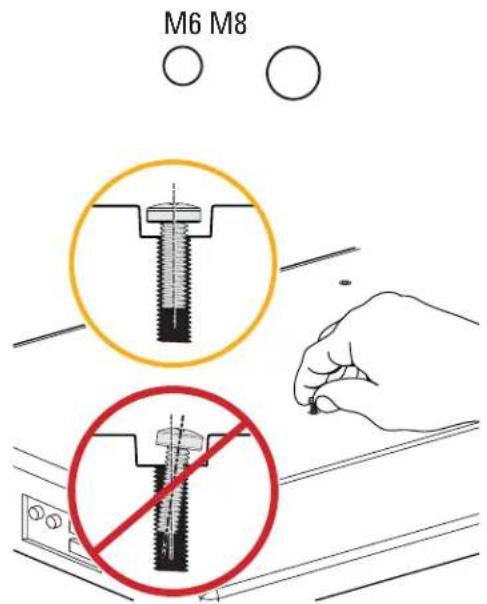
text_image
M6 M81.2 Select TV Screw Length
If your TV has a flat back, AND you want your TV closer to the wall, use the shorter screws (a).
Use the spacers and longer screws (b) to accommodate:
• Round/irregular back TVs
• TVs with inset mounting holes
• Extra space needed for cables
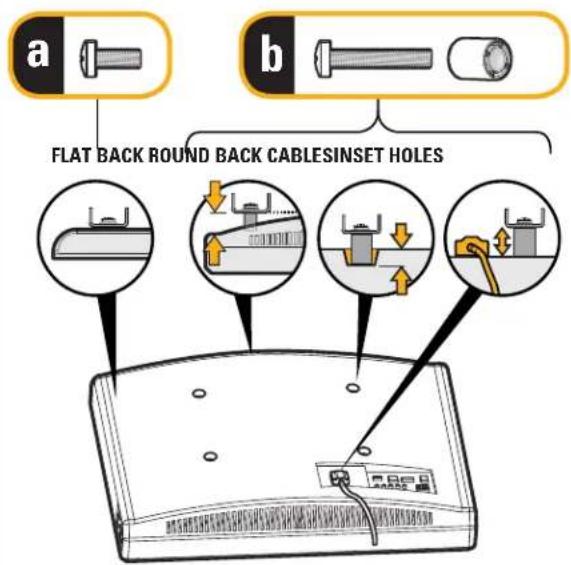
text_image
a b FLAT BACK ROUND BACK CABLESINSET HOLESStandard configurations are shown. For special applications, or if you are uncertain about your hardware selection, contact Customer Service at 1-877-689-1665.
CAUTION:
Verify adequate thread engagement with your screw/washer/spacer combination AND TV bracket (STEP 1.3).
- Too short will not hold the TV.
- Too long will damage the TV.
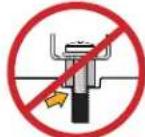
Too Short
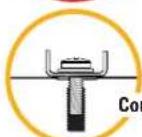
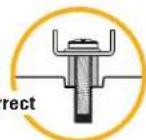
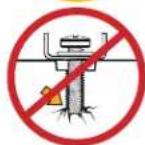
Too Long
1.3 Attach TV Brackets
Ensure that your brackets are level and centered as much as possible on the back of the TV. Install using the screw/washer/spacer combination (a) or (b) you selected for your TV.
CAUTION: Avoid potential personal injuries and property damage! DO NOT use power tools for this step. Tighten the screws only enough to secure the TV bracket to the TV. DO NOT overtighten the screws.
IMPORTANT: Ensure TV bracket is securely fastened before moving on to the next step.
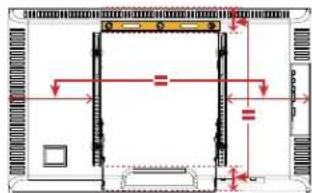
text_image
Technical diagram showing a rectangular frame with dimension annotations and directional arrows, likely representing a mechanical or architectural component.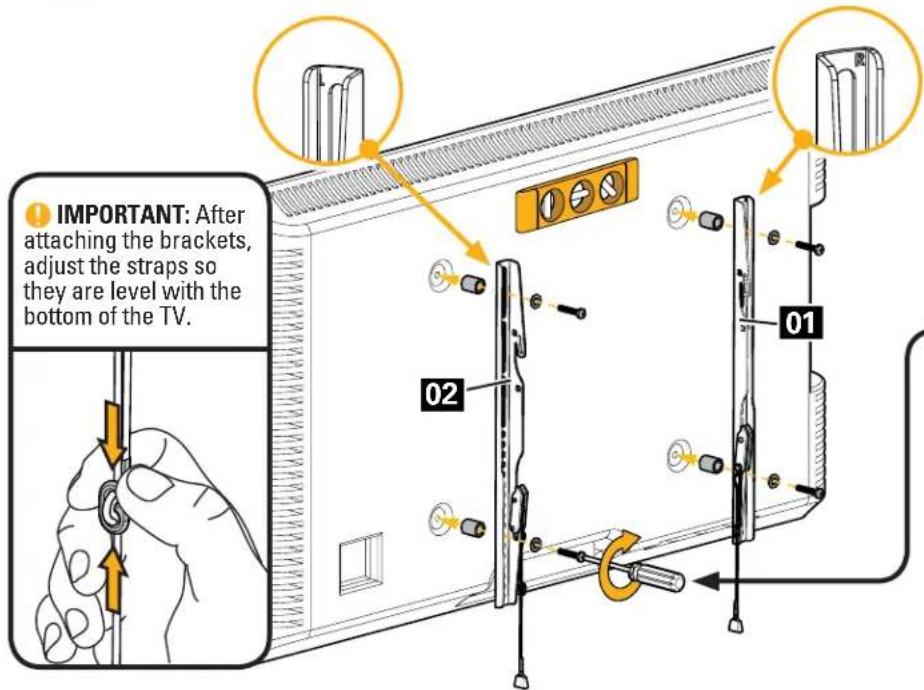
text_image
IMPORTANT: After attaching the brackets, adjust the straps so they are level with the bottom of the TV. 01 02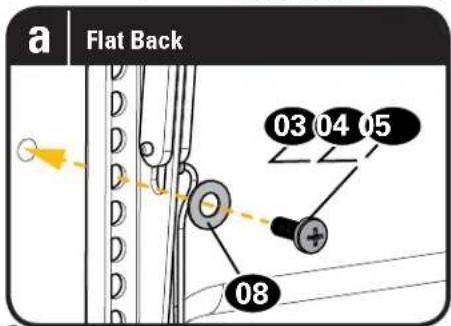
text_image
a | Flat Back 03 04 05 08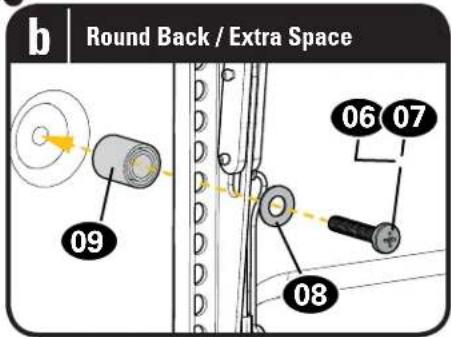
text_image
b | Round Back / Extra Space 09 06 07 08STEP 2A Attach Wall Plate
Wood Stud Option
CAUTION: Avoid potential personal injury or property damage!
-
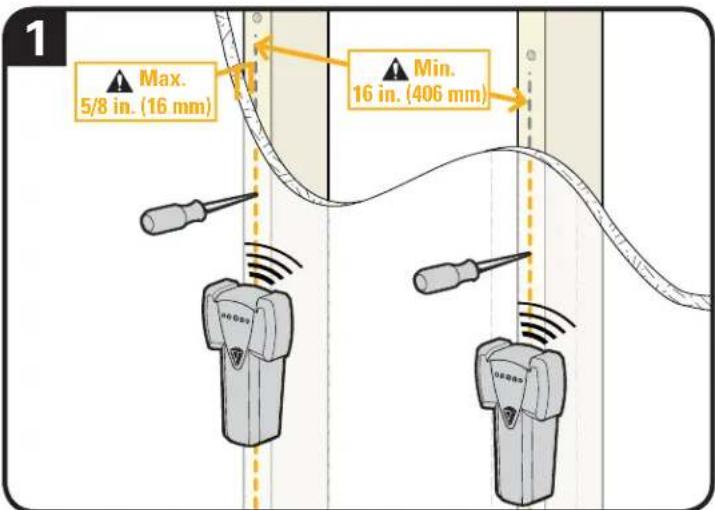
Drywall covering the wall must not exceed 5/8 in. (16 mm)
• Minimum wood stud size: common 2 x 4 in. (51 x 102 mm) nominal 1½ x 3½ in. (38 x 89 mm)
• Stud center must be verified
• Minimum horizontal space between fasteners: 16 in. (406 mm) -
Locate your studs. Verify and mark the center of the stud by finding the stud edges using an awl, a thin nail, or an edge to edge stud finder.
- Position the wall plate 10 at your desired height and line up the holes with your stud center line and level the wall plate 10 and mark the holes.
text_image
1 Max. 5/8 in. (16 mm) Min. 16 in. (406 mm)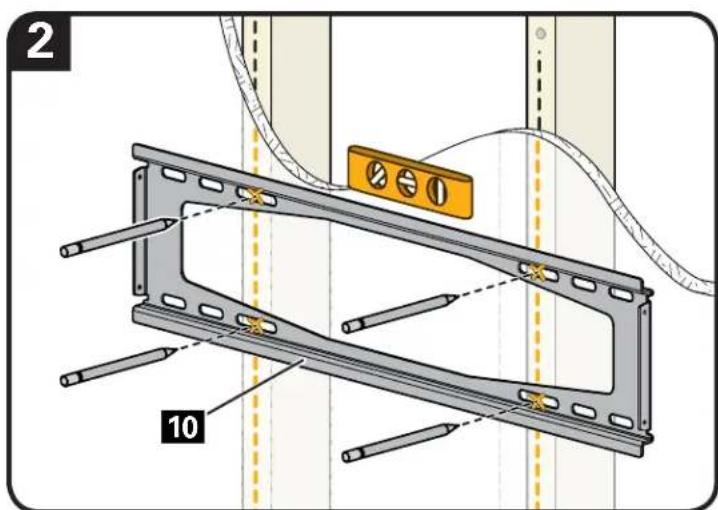
text_image
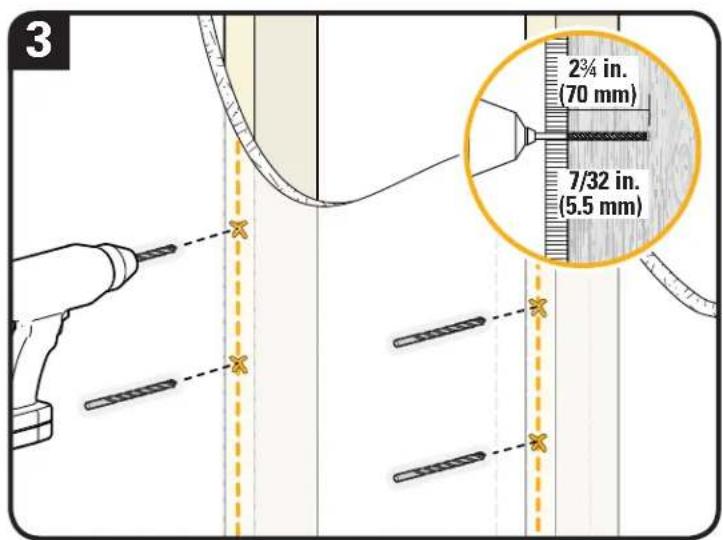
2 10- Drill pilot holes using a 7/32 in. (5.5 mm) diameter drill bit.
IMPORTANT: Be sure to drill into the center of the studs.
IMPORTANT: Pilot holes must be drilled to a depth of 2 34 in. (70 mm).
- Install wall plate 10 using four lag bolts 11 and four washers 12. Tighten the lag bolts only until they are pulled firmly against the wall plate.
CAUTION: Improper use could reduce the holding power of the lag bolt. DO NOT over-tighten the lag bolts.
CAUTION: Avoid potential personal injury or property damage! All lag bolts MUST BE firmly tightened to prevent unwanted movement of the wall plate 10. Ensure the wall plate is securely fastened to the wall before continuing on to the next step.
text_image
3 2¾ in. (70 mm) 7/32 in. (5.5 mm)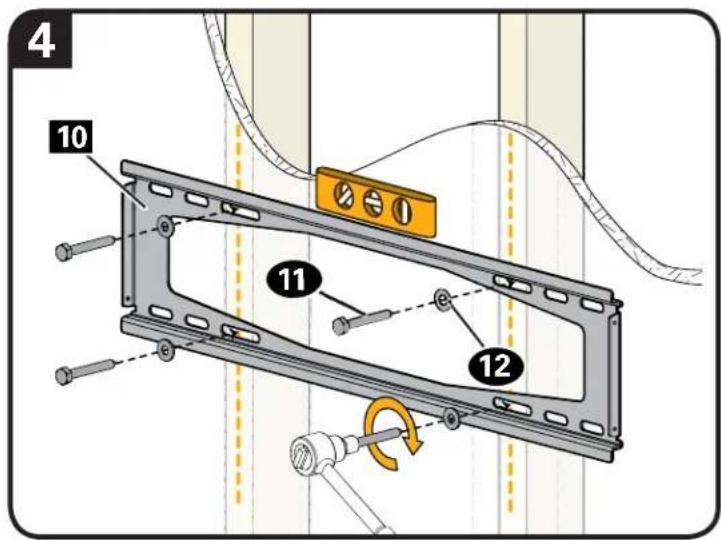
text_image
4 10 11 12STEP 2B Attach Wall Plate
Solid Concrete or Concrete Block Option
CAUTION: Avoid potential personal injury or property damage!
-
Mount the wall plate 10 directly onto the concrete surface
• Minimum solid concrete thickness: 8 in. (203 mm)
• Minimum concrete block size: 8 x 8 x 16 in. (203 x 203 x 406 mm)
• Minimum horizontal space between fasteners: 16 in. (406 mm) -
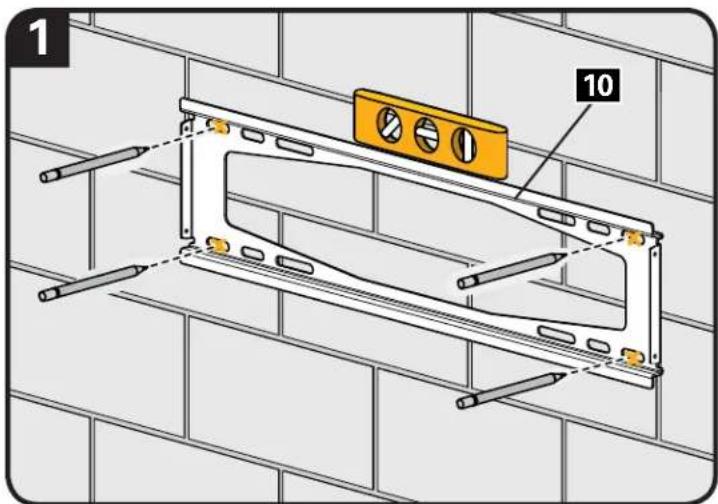
Position the wall plate 10 on the wall at your desired height. Level the wall plate and mark the four hole locations.
- Drill four pilot holes using a 3/8 in. (10 mm) diameter masonry drill bit.
IMPORTANT: Pilot holes must be drilled to a depth of 3 in. (75 mm). Never drill into the mortar between blocks.
text_image
1 10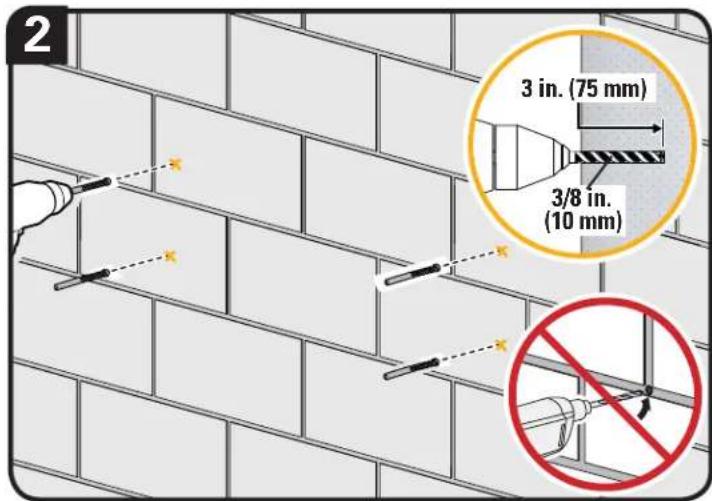
text_image
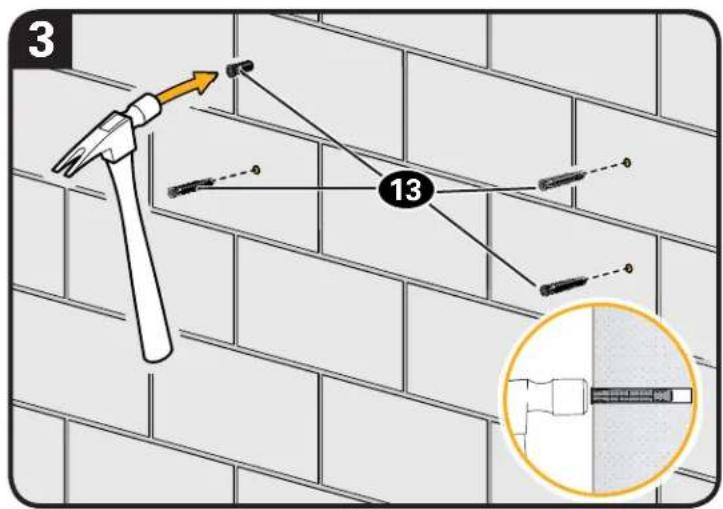
2 3 in. (75 mm) 3/8 in. (10 mm)- Insert four anchors 13.
CAUTION: Be sure the anchors are seated flush with the concrete surface.
- Install wall plate 10 using four lag bolts 11 and washers 12. Tighten the lag bolts only until they are pulled firmly against the wall plate.
CAUTION: Improper use could reduce the holding power of the lag bolt. DO NOT over-tighten the lag bolts.
text_image
3 13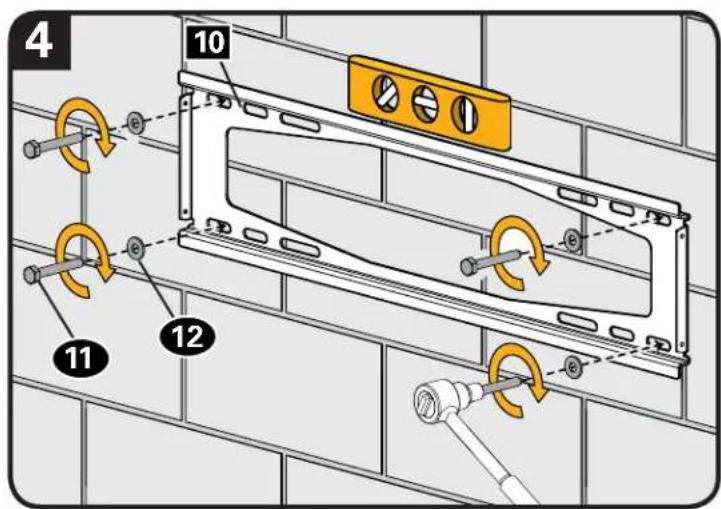
text_image
4 10 11 12STEP 3 Attach TV to Wall Plate
Install the TV / Bracket assembly by fitting the top hooks of the mounting brackets 01 and 02 over the top edge of the wall plate 10.
Swing the mounting brackets 01 and 02 down until the spring loaded locking tabs slip over and fully engage the bottom edge of the wall plate 10. You will hear an audible "CLICK".

HEAVY! You may need assistance with this step.
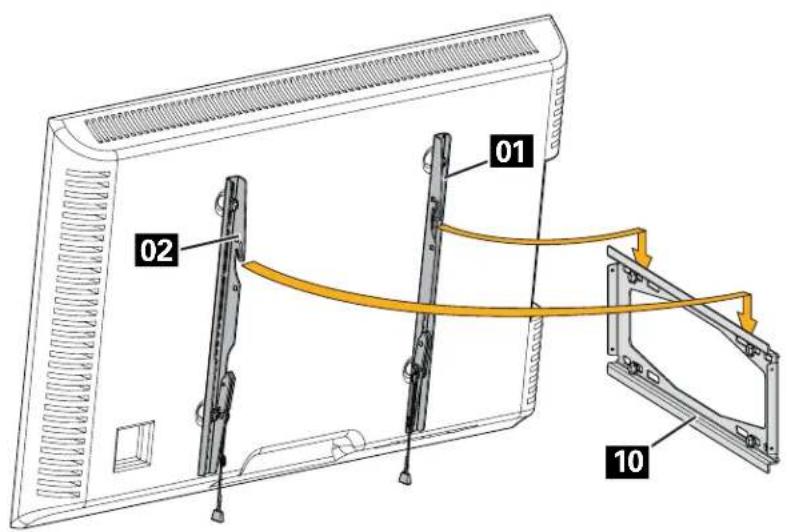
text_image
01 02 10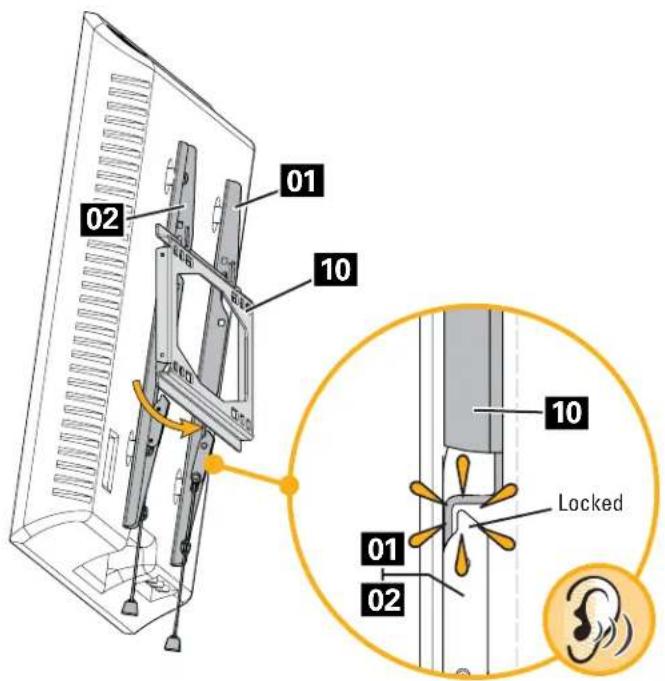
text_image
01 02 10 10 Locked 01 02Adjustments
LATERAL SHIFT
Slowly slide the TV along wall plate 10.
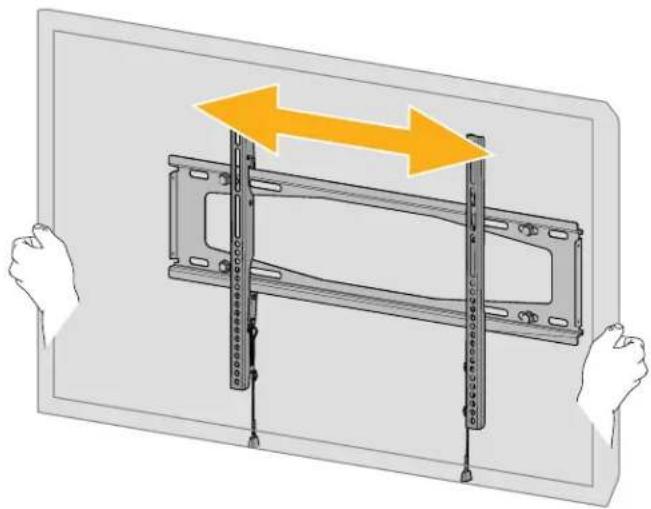
natural_image
Illustration of a monitor frame with two hands holding it, showing a yellow double-headed arrow indicating vertical motion (no text or symbols)
REMOVING THE TV
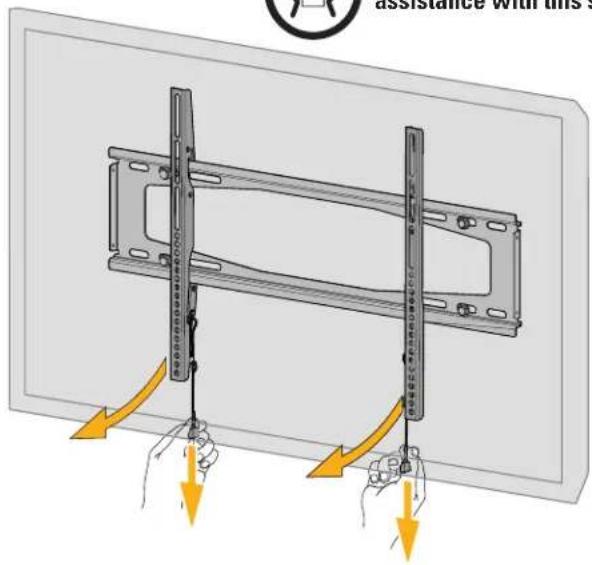
Pull and hold release cords down while pulling the bottom of the TV out, and then lift the TV up and out away from the wall.

HEAVY! You may need assistance with this step.
text_image
assistance with the cESPAÑOL
Thank you for choosing Secura! Please take a moment to let us know how we did:

Email us: info@secura-av.com

Call us: 1-800-359-5520
UK: 0800 056 2853
Milestone AV Technologies and its affiliated corporations and subsidiaries (collectively, "Milestone"), intend to make this manual accurate and complete. However, Milestone makes no claim that the information contained herein covers all details, conditions, or variations. Nor does it provide for every possible contingency in connection with the installation or use of this product. The information contained in this document is subject to change without notice or obligation of any kind. Milestone makes no representation of warranty, expressed or implied, regarding the information contained herein. Milestone assumes no responsibility for accuracy, completeness or sufficiency of the information contained in this document.
©2016 Milestone AV Technologies. All rights reserved. Secura is a brand of Milestone.
All other brand names or marks are used for identification purposes and are trademarks of their respective owners.
Milestone AV Technologies • 6436 City West Parkway • Eden Prairie, MN 55344 USA 6901-002555 00