QLF425B2 - Wall mount Secura - Free user manual and instructions
Find the device manual for free QLF425B2 Secura in PDF.
| Product Type | TV Wall Mount |
| Brand | Secura |
| Model | QLF425B2 |
| Maximum Load Capacity | 54.4 kg (120 lb) |
| Material | Steel |
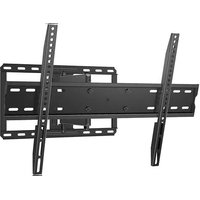
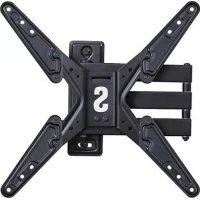
| Tilt Function | Yes, with tension adjustment (knobs and M4 hex key) |
| Side Shift Function | Yes (for wood studs only) |
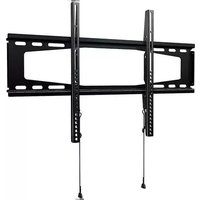
| Wall Mounting Type | Wood studs, solid concrete, or concrete blocks |
| Maximum Drywall Thickness | 1.5 cm (5/8 in) |
| Minimum Wood Stud Size | 5.1 x 10.2 cm (2x4 in) nominal |
| Minimum Solid Concrete Thickness | 20.3 cm (8 in) |
| Minimum Concrete Block Dimension | 20.3 x 20.3 x 40.6 cm (8 x 8 x 16 in) |
| Required Tools | Drill, level, M4 hex key, socket wrench (not supplied) |
| Package Contents | Wall plate, arm, mounting brackets, screws, spacers, lag bolts, washers |
| Additional Kit Required for Concrete | Kit #CMKI (not included, contact customer service) |
| Maintenance | Clean with a soft, dry cloth. Do not use abrasive products. |
| Safety | Do not exceed the maximum load. Ensure the wall supports 5 times the total weight. Follow installation instructions. |
| Warranty | Not specified in the manual. Contact customer service for more information. |
Frequently Asked Questions - QLF425B2 Secura
User questions about QLF425B2 Secura
0 question about this device. Answer the ones you know or ask your own.
Ask a new question about this device
Download the instructions for your Wall mount in PDF format for free! Find your manual QLF425B2 - Secura and take your electronic device back in hand. On this page are published all the documents necessary for the use of your device. QLF425B2 by Secura.
USER MANUAL QLF425B2 Secura
Want to watch a video that shows how easy this DIY project will be?
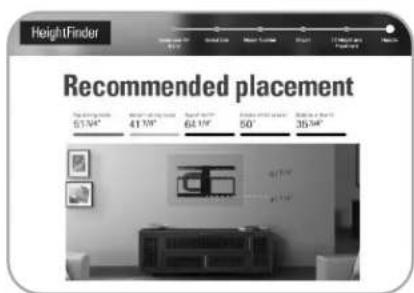
Get it right the first time. HeightFinder™ shows you where to drill.

Our install experts are standing by to help.
Watch it now at: san.us/3020

Check it out at: san.us/3021

Call us at:
US: +1 (800) 359-5520
EMEA: +31 (0) 495 580 852
UK: +44 (0) 800 056 2853
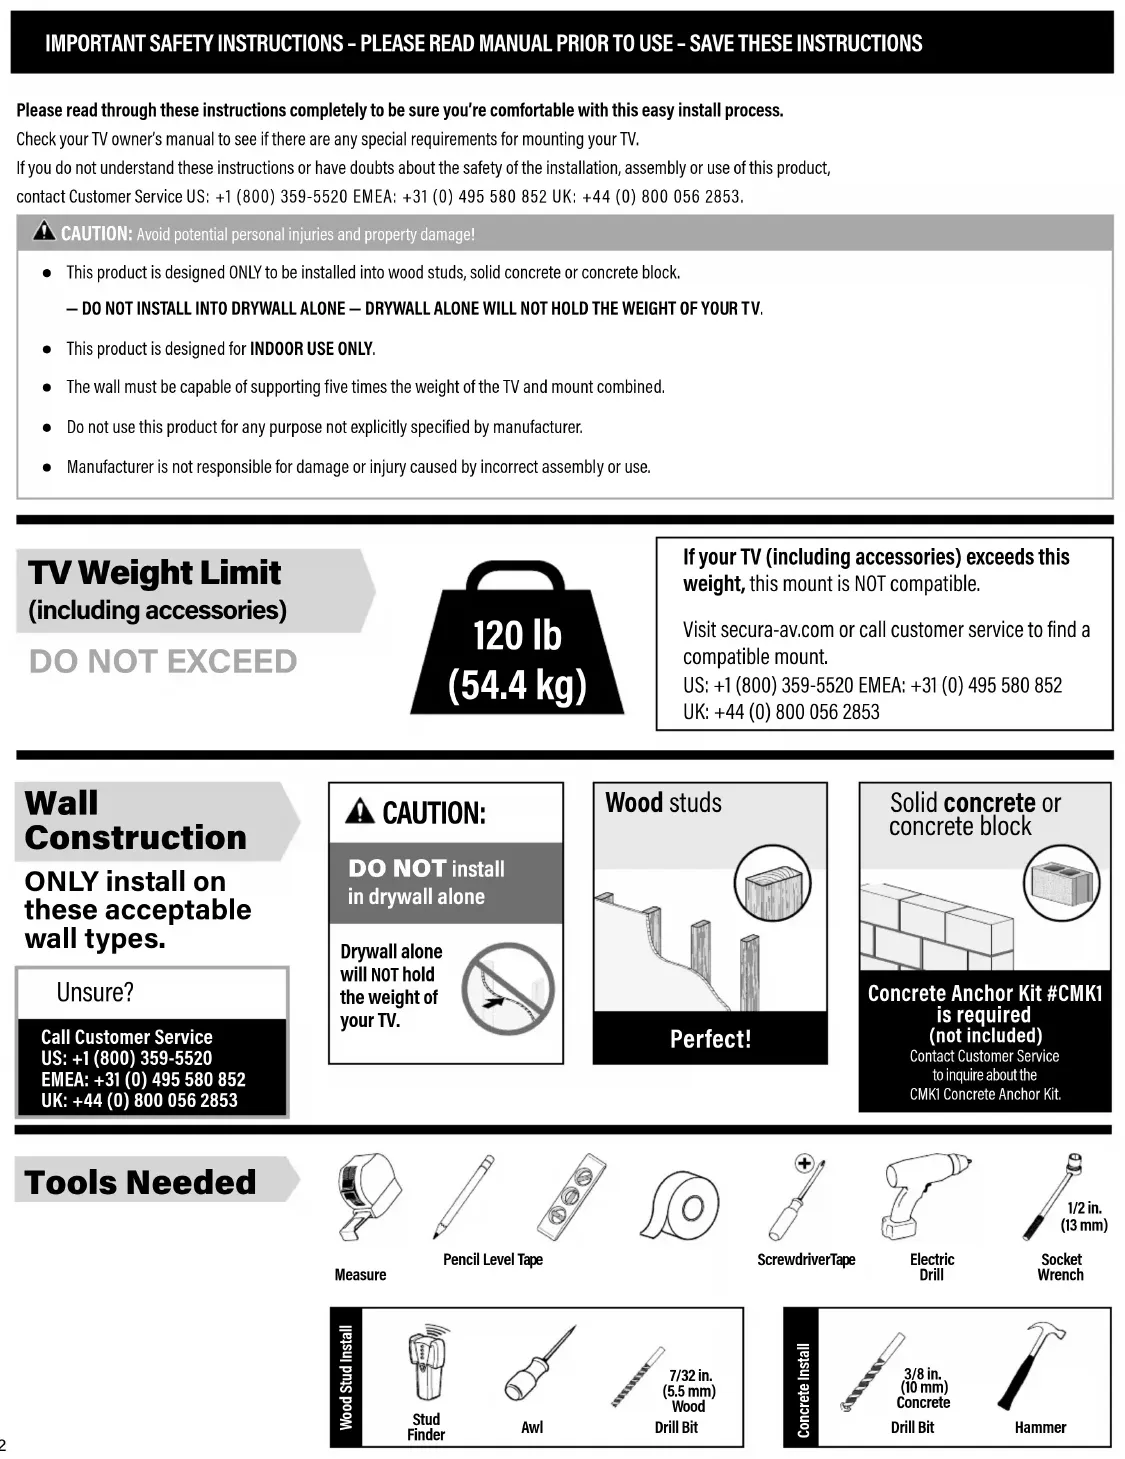
IMPORTANT SAFETY INSTRUCTIONS - PLEASE READ MANUAL PRIOR TO USE - SAVE THESE INSTRUCTIONS
Please read through these instructions completely to be sure you're comfortable with this easy install process.
Check your TV owner's manual to see if there are any special requirements for mounting your TV.
If you do not understand these instructions or have doubts about the safety of the installation, assembly or use of this product,
contact Customer Service US: +1 (800) 359-5520 EMEA: +31 (0) 495 580 852 UK: +44 (0) 800 056 2853.
CAUTION: Avoid potential personal injuries and property damage!
- This product is designed ONLY to be installed into wood studs, solid concrete or concrete block.
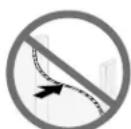
- DO NOT INSTALL INTO DRYWALL ALONE - DRYWALL ALONE WILL NOT HOLD THE WEIGHT OF YOUR TV.
This product is designed for INDOOR USE ONLY. - The wall must be capable of supporting five times the weight of the TV and mount combined.
- Do not use this product for any purpose not explicitly specified by manufacturer.
Manufacturer is not responsible for damage or injury caused by incorrect assembly or use.
TV Weight Limit
(including accessories)
DO NOT EXCEED
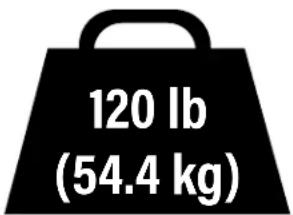
If your TV (including accessories) exceeds this weight, this mount is NOT compatible.
Visit secura-av.com or call customer service to find a compatible mount.
US: +1 (800) 359-5520 EMEA: +31 (0) 495 580 852
UK: +44 (0) 800 056 2853
Wall Construction
ONLY install on these acceptable wall types.
Unsure?
Call Customer Service
US: +1 (800) 359-5520
EMEA: +31 (0) 495 580 852
UK: +44 (0) 800 056 2853
CAUTION:
DO NOT install in drywall alone
Drywall alone will NOT hold the weight of your TV.
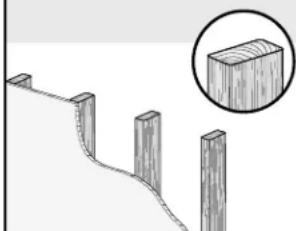
Wood studs
Perfect!
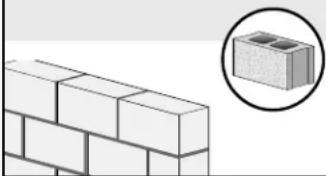
Solid concrete or concrete block
Concrete Anchor Kit #CMK1 is required (not included)
Contact Customer Service to inquire about the
CMK1 Concrete Anchor Kit.
Tools Needed
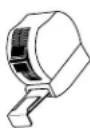
Measure
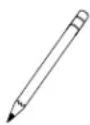
Pencil Level Tape
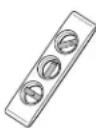

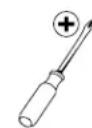
ScrewdriverTape
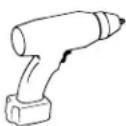
Electric Drill
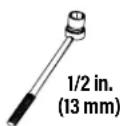
Socket Wrench
Wood Stud Install
Stud Finder
Awl

Drill Bit
Concrete Install
Drill Bit

Hammer
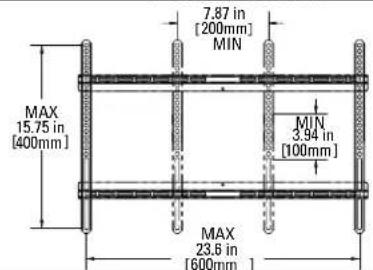
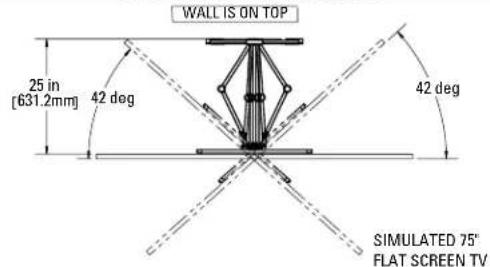
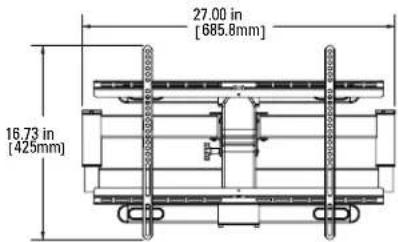
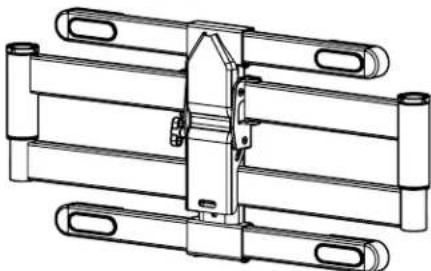
Dimensions
TV INTERFACE
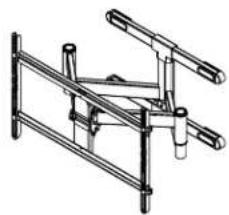
3-D
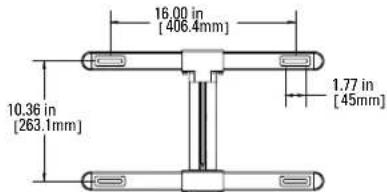
WALL PLATE
TOP VIEW-EXTENDED
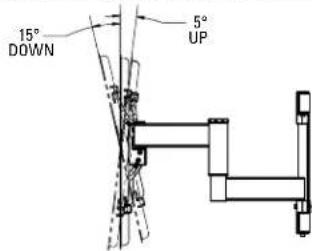
SIDE VIEW - EXTENDED
WALLISONRIGHT
FULLY ASSEMBLED MOUNT
TOP VIEW - RETRACTED
WALL IS ON TOP

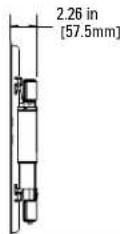
SIDE VIEW RETRACTED
WALL IS ON RIGHT
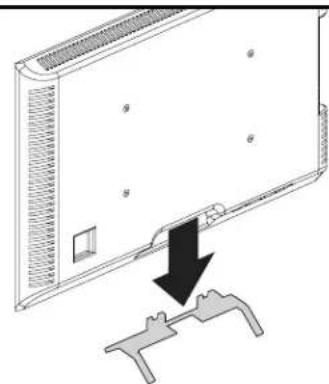
BEFORE YOU BEGIN
Remove the stand
from your TV — if attached.
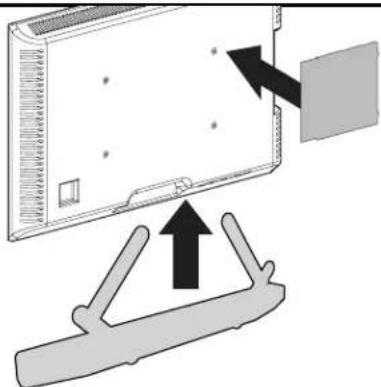
Install any accessories
you may have purchased, if they require TV removal prior to assembly. The TV is removable for future accessory purchases.
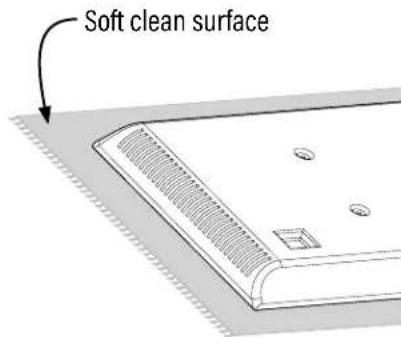
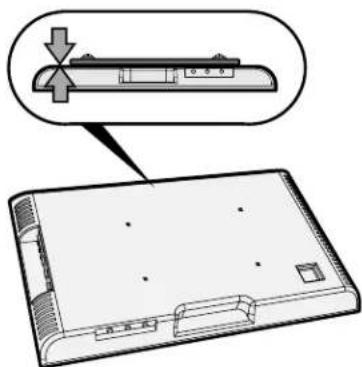
Protect the face
of your TV when laying it down for installation.
Supplied Parts and Hardware
WARNING: This product contains small items that could be a choking hazard if swallowed. Before starting assembly, verify all parts are included and undamaged. If any parts are missing or damaged, do not return the damaged item to your dealer; contact Customer Service. Never use damaged parts!

NOTE: Not all hardware included will be used.
STEP1 Parts and Hardware

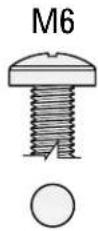
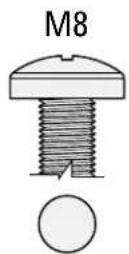
TV Screws
(qty. 4 each) [Only one size fits your TV]
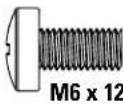
M6

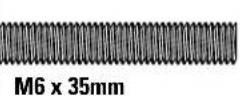

M8
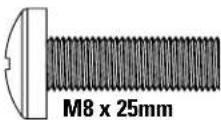
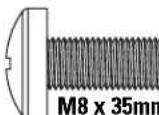
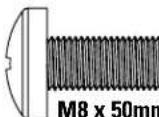
M8 x 50mm

Washer (qty. 4)
M6/M8

Spacers
(qty. 4 each)
[If needed]
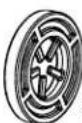
2.5mm
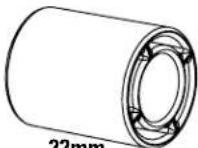
22mm

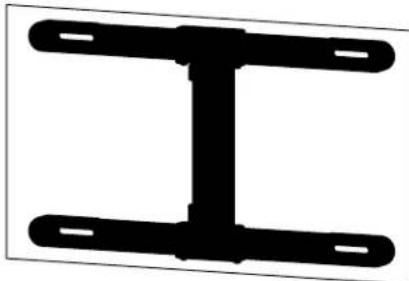
TV Bracket Vertical

(qty.2)

TV Bracket Horizontal

(qty.2)

M4×20mm
TV Interface Screw

(qty. 4)
STEP 2 Parts and Hardware

Drilling Template
(qty.1)

Arm Assembly
(qty.1)
Lag Bolt

(qty.4)
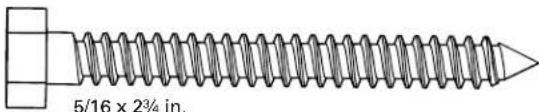
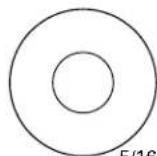
Lag Bolt Washer

(qty.4)
STEP 2B: Concrete Anchor Kit CMKI [NOT INCLUDED]
Contact Customer Service to inquire about the CMK1 Concrete Anchor Kit.
Concrete Anchor
![Secura QLF425B2 - STEP 2B: Concrete Anchor Kit CMKI [NOT INCLUDED] - 1](/content/2026/04/594733/images/ea51806f077fc3a8f1fd08e7e5633f17b743ce57aadc1435bd9871d335063172.jpg)
(qty.4)
![Secura QLF425B2 - STEP 2B: Concrete Anchor Kit CMKI [NOT INCLUDED] - 2](/content/2026/04/594733/images/e600b2f4fa558beb654780f47027245468ef3a373a4c6b40592b37e4d3105a74.jpg)
Fischer UX10 x 60R Anchor
STEP 3 Hardware
Locking Screw

(qty.1)

M5×8mm
Additional Hardware
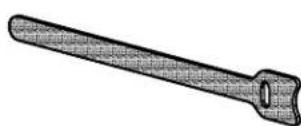
Cable Tie

(qty.4)
Hex Key
M4

(qty.1)
STEP1 Attach TV Bracket to TV
1.1 Select TV Screw Diameter
Only one screw size fits your TV.

NOTE: If your TV
included inset spacers or adapters, use them UNDER the mount hardware.
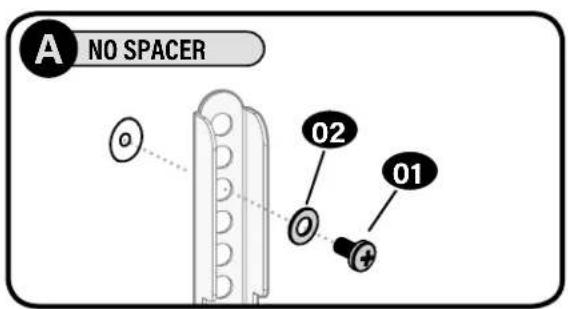
1.2 Select TV Screw Length and Spacers

NO SPACER SPAOER NEEDE
B
- Flat Back TV
[TV brackets lay flat on your TV]
-
Flat Back TV with extra space needed [for deep inset holes or cable interference]
-
Rounded or Irregular Back TV [TV brackets NOT resting flat on your TV]
Use short TV screws 01. Spacers 03 not needed.

Use long TV screws and spacers to create extra space between the TV and TV bracket.


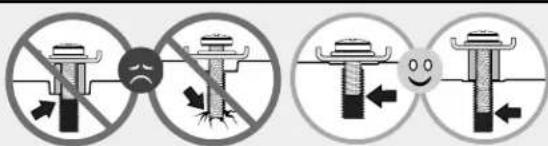
CAUTION: Verify adequate thread engagement with your screw 01, washer 02, spacer 03 combination AND TV bracket 04.
- Too short will not hold your TV. - Too long will damage your TV.
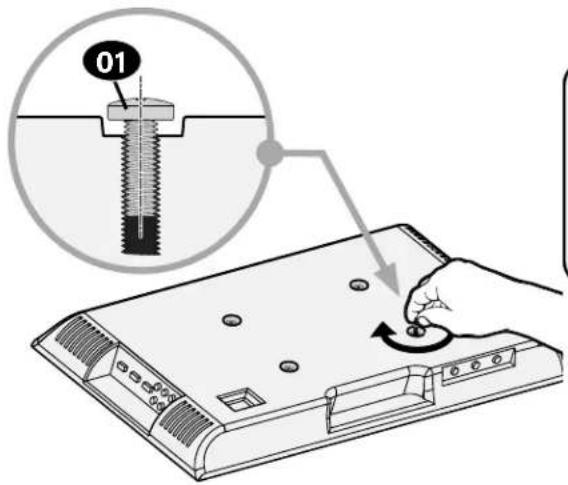
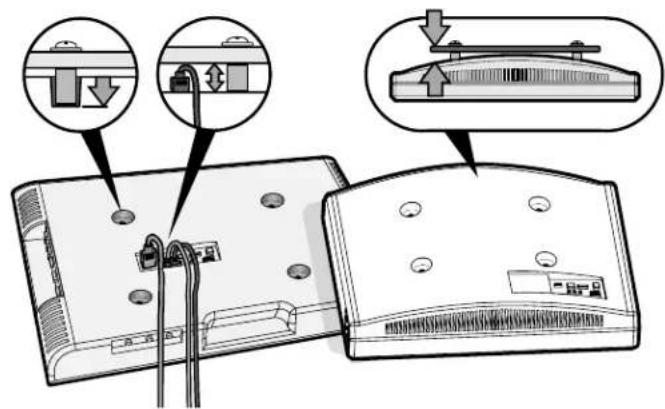
1.3 Attach Vertical TV Brackets to Your TV
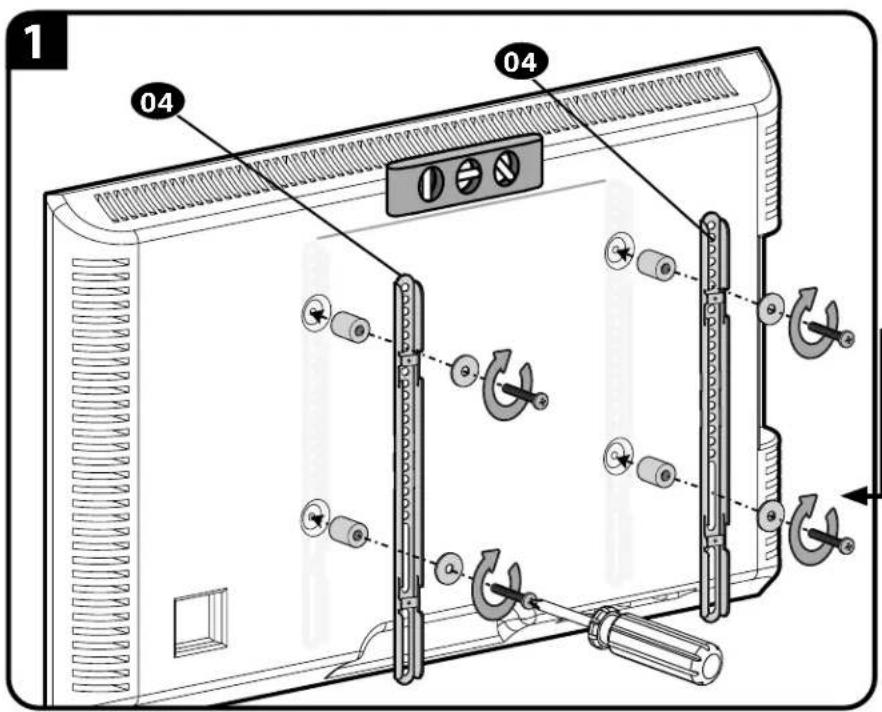

CAUTION: Avoid possible personal injury and property damage.
DO NOT use power tools for this step. Tighten the screws 01 with adequate force to secure
the TV brackets 04. DODOT over-tighten them.
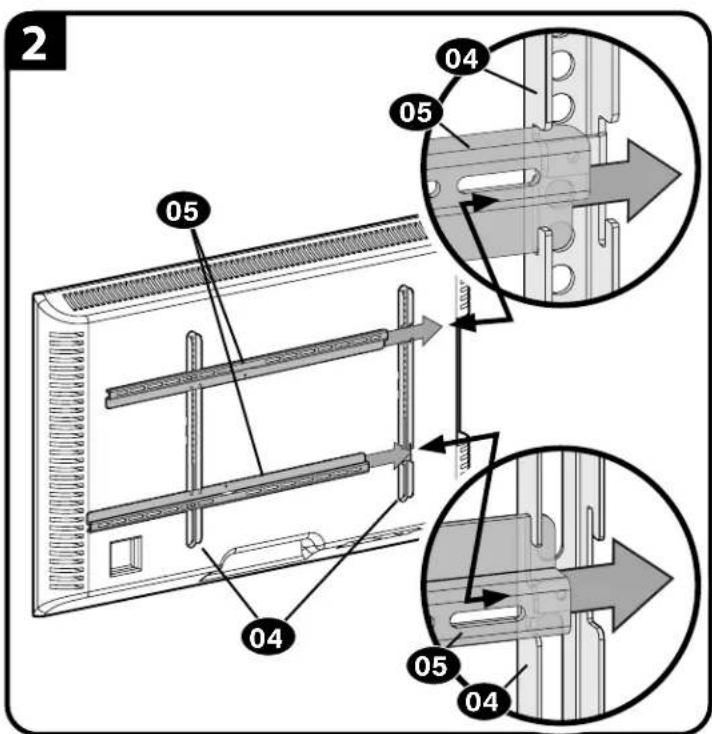
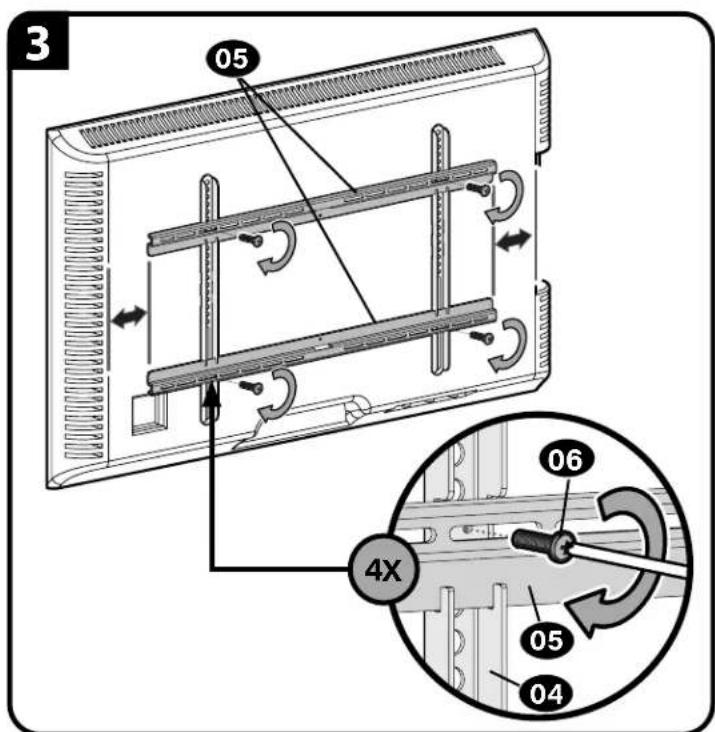
CAUTION: Avoid possible personal injury and property damage.
DO NOT use power tools for this step. Tighten the screws 06 with adequate
force to secure the TV brackets 05 . DO NOT over-tighten them.
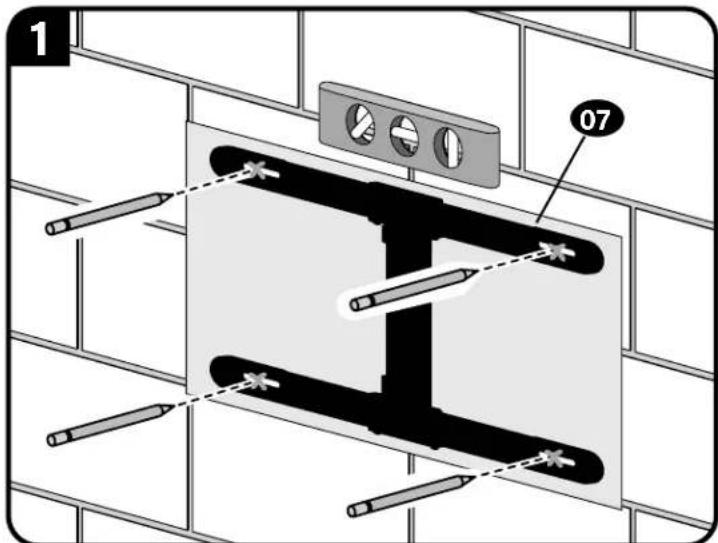
STEP 2A Attach Wall Plate

Wood Stud Installation
CAUTION: Avoid potential personal injury or property damage!
- Drywall covering the wall must not exceed 5/8 in. (16 mm)
Minimum wood stud size: nominal 2 x 4 in. (51 x 102 mm) actual 112 × 312 in. (38 x 89 mm)
Minimum horizontal space between lag screws: 16 in. (406 mm)
Stud center must be verified
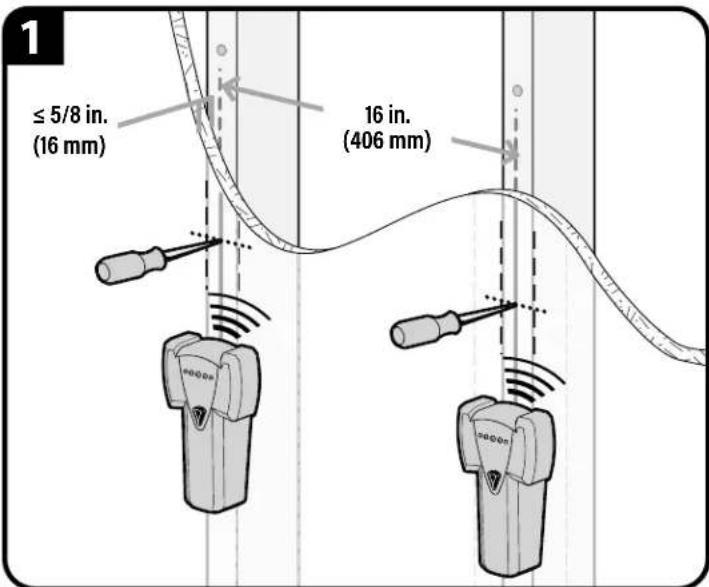
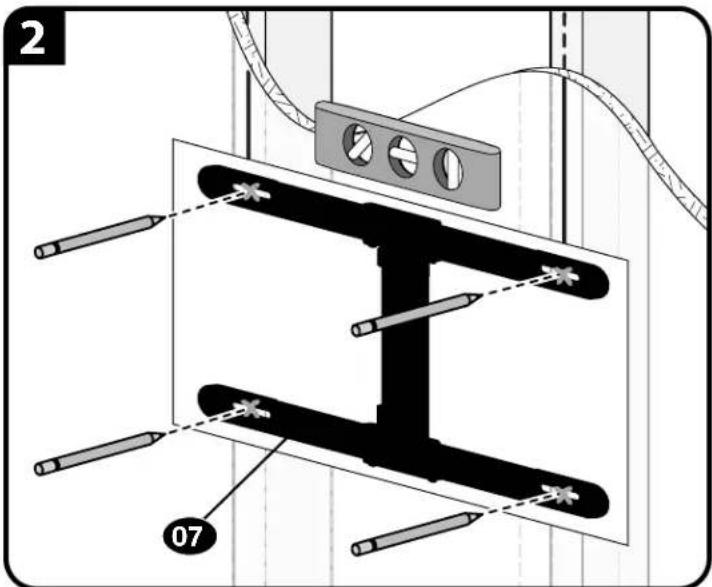
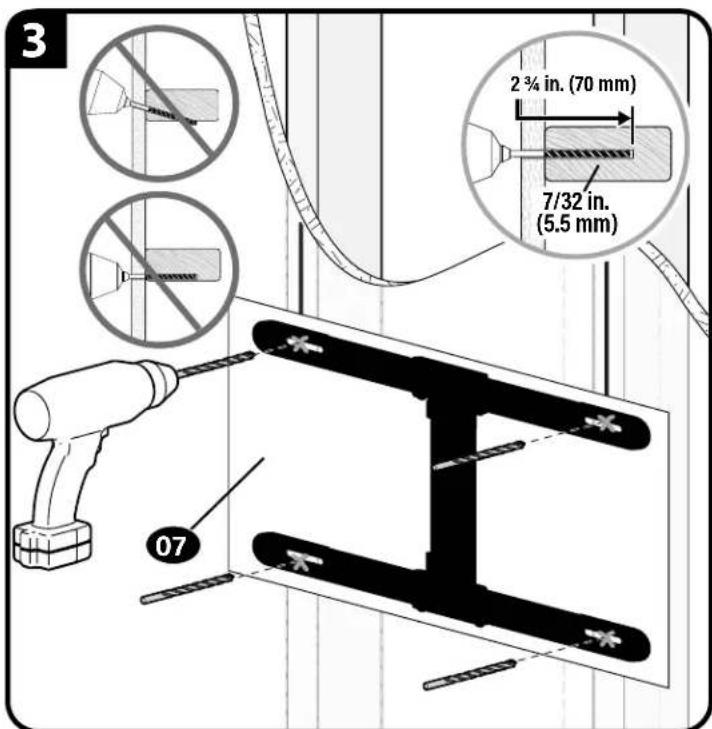
1 important: Drill into the center of the stud.
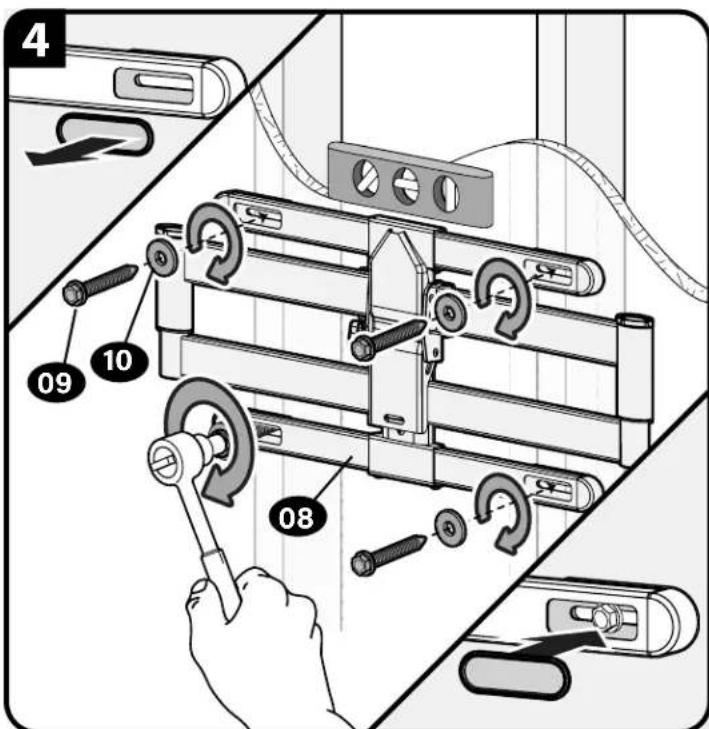
Tighten the lag screws 09 only until the washers 10 are pulled snug against the wall plate 08.
CAUTION: Improper use could reduce the holding power of the lag screw.
DO NOT over-tighten the lag screws 09
Go to STEP 3 on PAGE 9.
STEP 2B Attach Wall Plate

Solid Concrete or Concrete Block Installation
CAUTION: Avoid potential personal injury or property damage!
- Mount arm assembly directly onto concrete surface (no wall covering)
Minimum solid concrete thickness: 8 in. (203 mm)
Minimum concrete block size: 8 × 8 × 16 in. (203 x 203 x 406 mm)
Concrete Anchor Kit CMK1 is not included Contact
Customer Service to inquire about the CMK1 Concrete Anchor Kit.
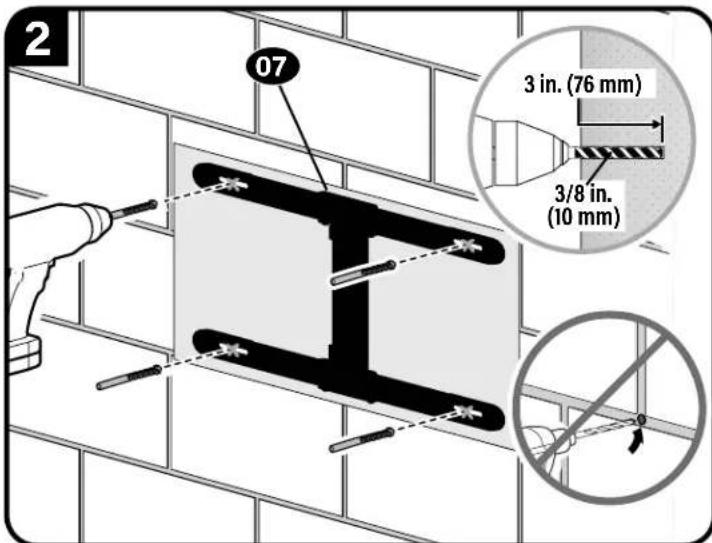
CAUTION: Never drill into the mortar between blocks.
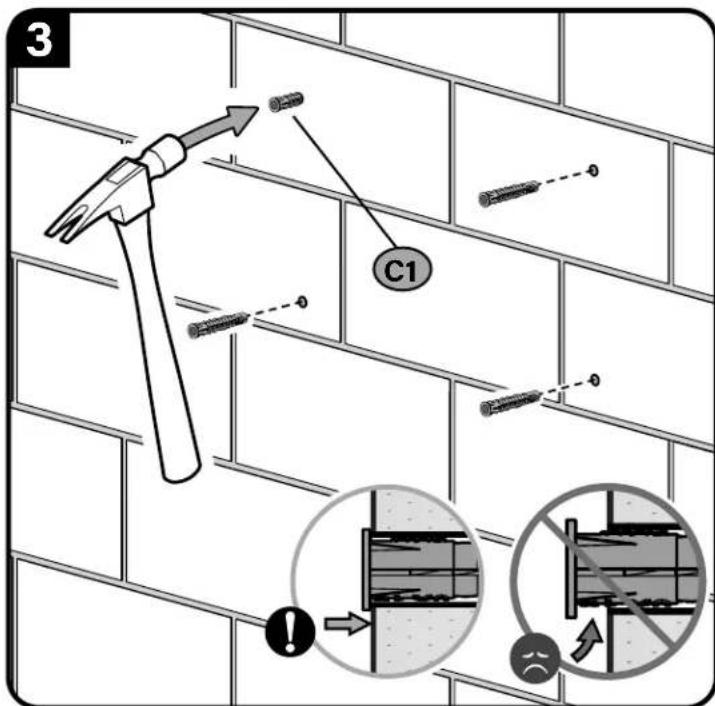
* Contact Customer Service to inquire about Concrete Anchor Kit CMK1 and anchors (C1).
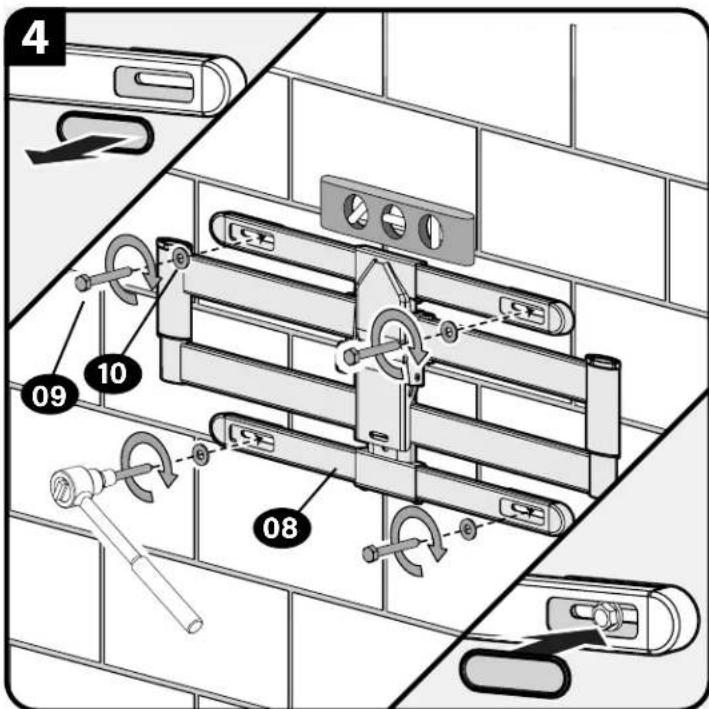
Tighten the lag screws 09 only until the washers 10 are pulled snug against the wall plate 08.
CAUTION: Improper use could reduce the holding power of the lag screw. DO NOT over-tighten the lag screws 09.
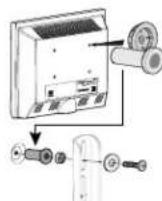
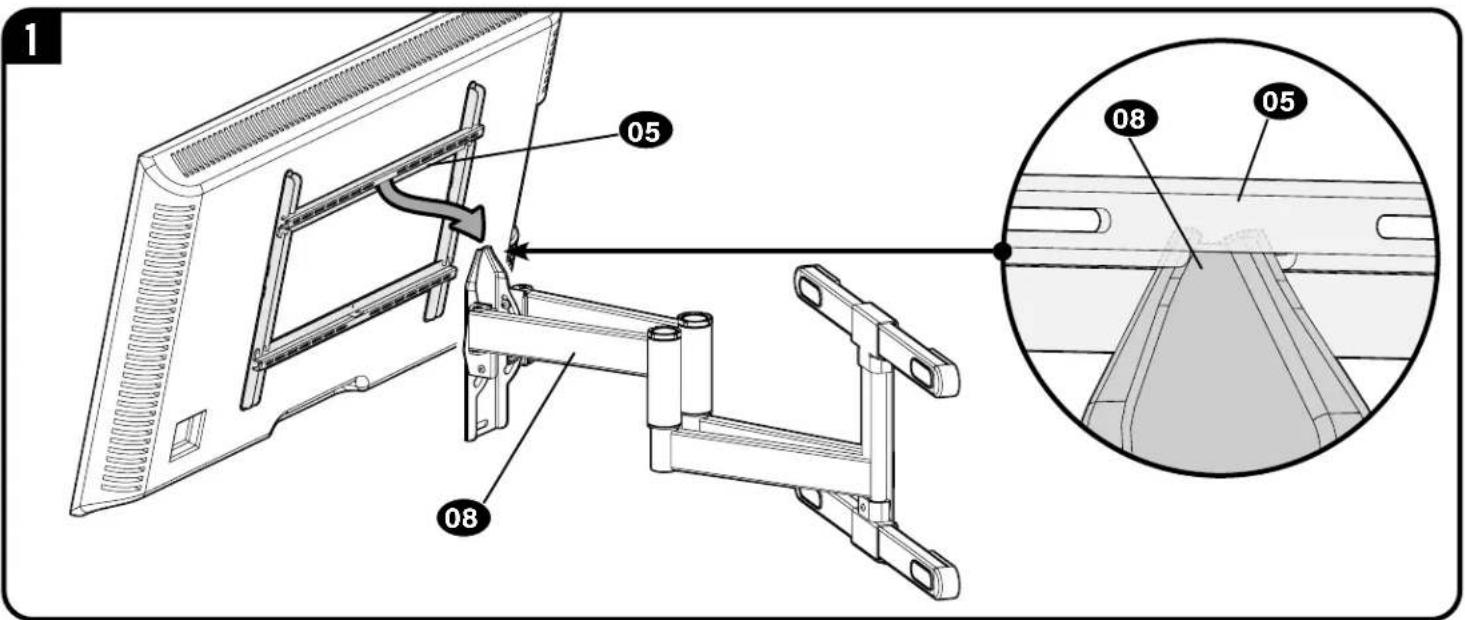
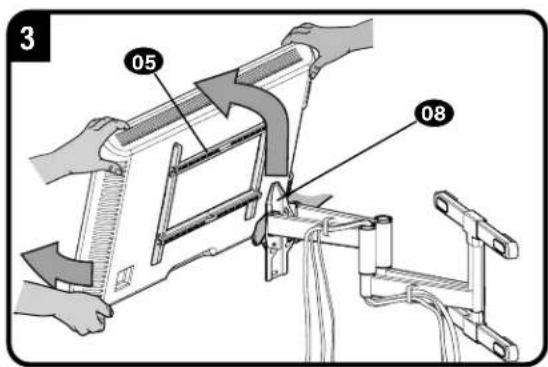
STEP 3 Attach TV to Arm Assembly
HEAVY! You may need assistance with this step.

Stud centers not lining up where you wanted to locate your TV?
Before you mount your TV, see PAGE 11 for side-to-side adjustment.
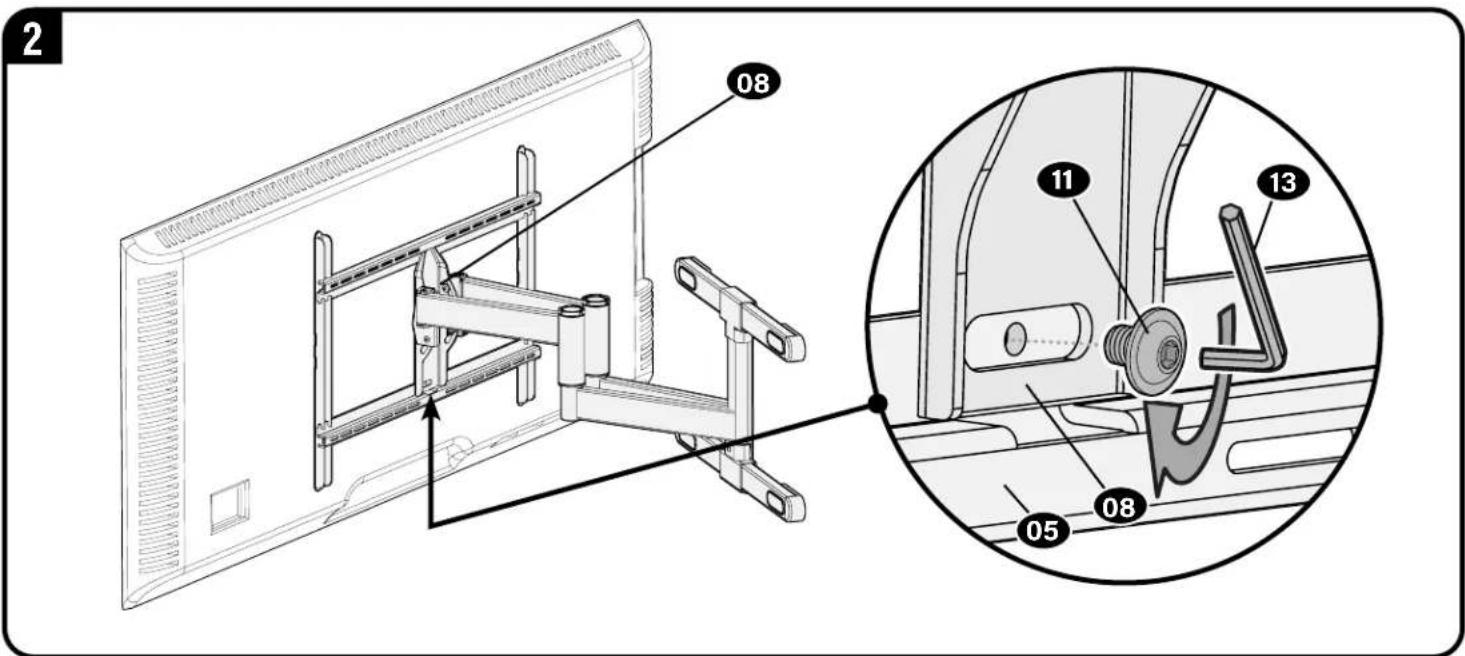
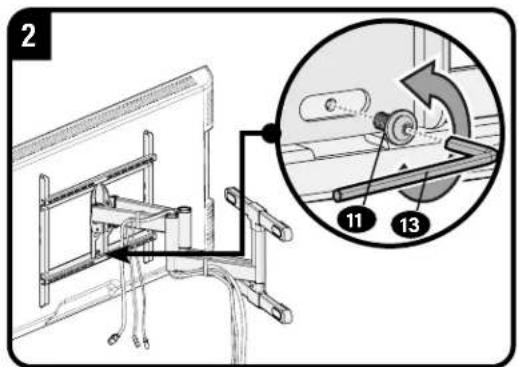
To adjust the leveling of your TV, loosen the locking screw 11 level your TV, then tighten the locking screw 11
CAUTION: Avoid potential personal injury or property damage! Locking screw must be installed to secure the TV to the arm assembly 08
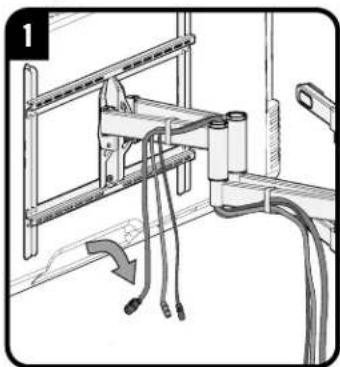
Manage Cables
IMPORTANT: Fully extend the arms 08 before routing cables.

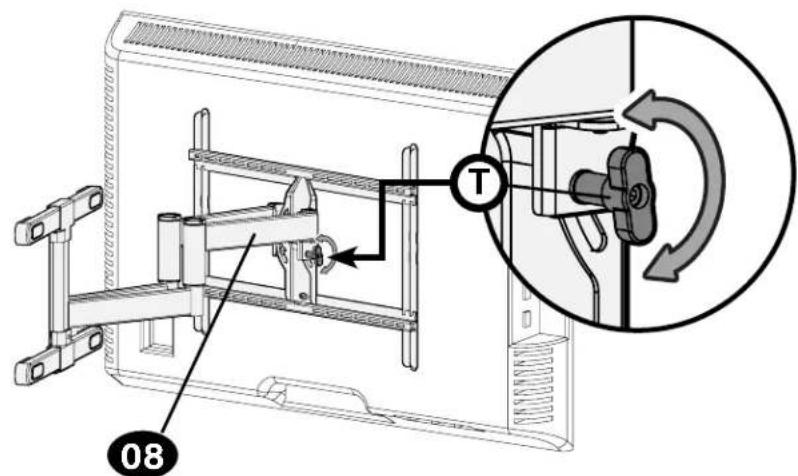
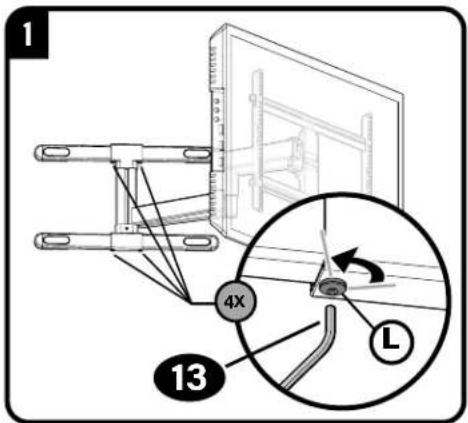
TV Adjustments

TILT ADJUSTMENT
Your TV should adjust easily when moved, then stay in place.
If your TV is too loose or too tight, adjust the side tension knob by hand.
NOTE: Once your TV is in place, tighten the side tension knob to prevent unwanted movement.
NOTE: Additional tension can be applied using the M4 hex key 13
LEVEL ADJUSTMENT
CAUTION: Avoid possible personal injury or property damage.
Always make sure the locking screw is tight so that the TV is securely attached to the arm assembly 08.
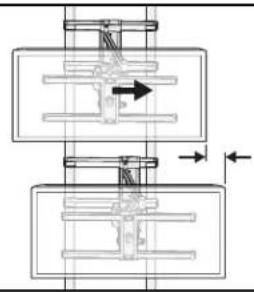
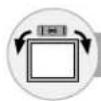
SIDE-TO-SIDE SHIFT
For Wood Stud ONLY

HEAVY! You may need assistance with this step.
CAUTION:DO NOT Adjust for concrete installs
IMPORTANT:REMOVE YOUR TV before adjusting.
Only LOOSEN screws to adjust -DO NOT REMOVE.
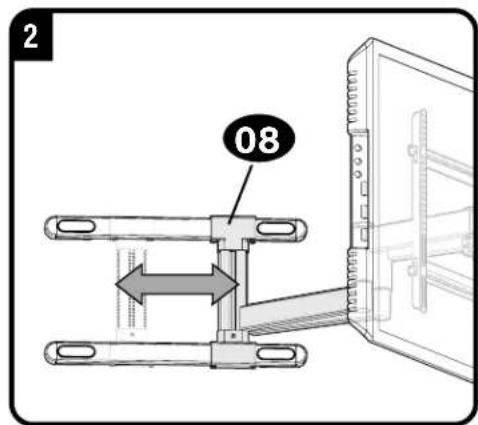
Slide arm 08 to the desired position.
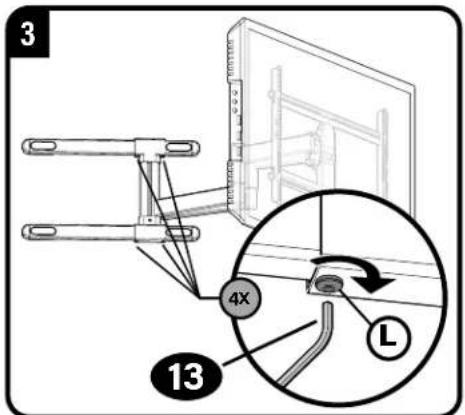
Securely tighten screws L when finished adjusting arm.
CAUTION: Avoid potential personal injury or property damage! Always make sure locking screws are tightened so the TV is securely fastened to the arm assembly 08.
REMOVING THE TV

HEAVY! You may need assistance with this step.
booitr machine (heart) Home
(1out) Flannel

YCTaHOBNTe Bce npHaDnEKnHcTn, KOtOpbIe Tpe6yETcA YCTaHOBHTb Ha BaW TeENBu3Op.
IpounTaTe Bce pykoBocTbA no yctahOBKe pinnadJeXHcTe n npOBepBe, Tpe6yeTcN YC7AHTAHABINBATb nx DO kpenneHn TeLeBn30pa.
3aunntte NOBepxHoctb 3KpaHa CBOero TeneBu30pa, KOrda KnaTeE ro Ha 3KaPn dnn MOHTaJa.
Noct
CTP. 4

PPEYPRKENHEHIEBcOCTABM3dEJIaEbMeNKeHaeTANIO,KOtOBeMOyBbBaBbYdyuIbe pnpnOprnTaBHaHIM.PepeCcbpokoiy6eDmuTeCbTOBcDEtaIaMMoTcBAHmHHeNoBpexDeHb.EcikKaAra-NdoTeAbToCTCYTETBYAM
NoBpeKdHa, He Bo3Bpaaiate H3deneH dnepy; oBpaTteCb B cHTp 0cnykuaHn KInHeTob. He nOJb3yIe NOBpeKdHbIe Detanl!
PIMMEYAHNE. PmMOHTaKe HcN0JIb3yIOrTa He Bce BkIOuOeHHBte B KOMNIeKt NoCTABKn KpENeKHe 3IeMEnTeB.
IIAT 2B: Heo6xOIMM HAp6p KpeIeKa #CMK1 (He BxOIMT B KOMPNEKT NocTABKn). IIO3BOHnTE B CEHTP O6CnykmbHaN KInHeTOB.
LWAT1
KpenneHne KpOHNTeHa Ka TeJIeBu3Opy
CTP.5
1.1 BbI6Op dAmAeTpa BnHTOB TneTeBn3opa
IaBaWeroTeNEBnOpaIOxOAnr BHTbTb TOnbKO OndHoro pa3Mpe. PIMMEyAHMe,McNoB3yTe KOMnEeKThbE BTyNK DaI TeNEBnOporC nIOcko 3aHeN CTHeKoN.
1.2 BbI6Op dIIMHb BHTOB dIa TeneBn3opa H npKlaDOK

B3I IPOKJIADOK
TeneBn3Op c nnocko TcHko [TeNEBn3MOHHbke KPOHtewHbI pNOCK npnIeratoK TeneBn3Opy]
MnOJIb3yIe KOpOTKHe BHTbI DJI TRe TEeBn3Opa 01, PnoKHaJKn 03 He HkyXHb.

IPOKIAJIKNHEOXBIDMbI
TeBn3Op cnnckoTcHKn, KOra Tpe6yetcDononHntebHo npocpaHCTBO [ecn nPmHHeTOr rny6KMe yctahOBouhIbe OTBepTHN HmHMeOTc NmEeXO tpyTHX Ka6e]
- TeneBn30p co cTeHKo NcKpMbneHHo Hnn He npBaBnHbHO fOpMbI [TeneBn30nHbIe KPOHtEhHi HE npneraIOT K TeNEBn3Opy nnocko]
mnoBte pnnHbme BHTb pyra TeneBn3opa 01 H POKNAdK 03 Dn C0dHaHn DOONHtBnHO nPOCTBaMEXyTeNEBn3OpM mTeneBn3OHbHM KPOHUHTeHOM.
BHMMAHIEy6d8eBnHcno3oabnnBnTTOCnHcnaepe3b60nHnpaBnHoroCOTAHmBAHnTOCBtYkAML-CnIuKOMkopOTKape36BaHeJeepWHTENeBIOp-CluKOMdnHHHpaPe36BaNoepDHTENeBIOp
1.3 MoTtak TeneBnHOHOro KpoHtTeHa
A BHMMAHME! Co6nIaIe OTOPOXHOCT Bo 366xHHe NIOyEHN TpAM H NOBPEXHEH MMyuecTaBa! He IcNoJIb3yIe 3NEKTPOHCTpyMeHTbI Dn DaHHoro Waara. 3aTARHBAIte BnHTbI 01 cynmcm He 6oNBWM, CMO DCtatoHNO dnn KpenPENHTE NTeBUNHOHORO KPOHUIEHa 04 K TeneBUNOpY. He 3aTARHBAIte BnHTbI CMNUKOM CMHbHO.
BHNMAHNE!C6nDnAteOCTOPOXHOCTBO36EXAHNE NOYEHNA TpAMN NOBPEXHEH NMYeCEBA!He HcINoB3yTe 3NEKTPOHCTpyMeHTbI DnDAHHORU Wara.3aTARHBAITE BNTbI 06c yCNiEM He 6OBbHM,CH2NOCTOATOHO DN KPNENHNI TENEUB3HOHORO KPOHUHTHa 05KTENEBHOpry.He 3aTARHBAITE BNTbI CIMUKOM CmHo
WAR2A
YcTaHOBka Ha DepeBHHbIe CToiKN
CTP.7
BHMMHNE! Co6nOaIte OTOPOXHOCTb BO 1366ekaHne noJyEHNA TpaBM HIN NOBpeKdEHH MMyueCTBA!
ToIHHaTHnCOkapToHa, noKpbIbIaIeIero CTHe, He DoJIHka npeBbIaIb 1,5 cm (5/8 dIOHa). MIMHMAhblbIpa3MeP depeBaHHo cTOHKn: o6uui 5,1 x 10,2 cm (2 x 4 dIOHa); HOMHhAblbHI 3,8 x 8,9 cm (1 1/2 x 3 1/2 dIOHa).
MHHMaHbHOe rOpHTaHbHO e npocTaHCTBO Mekdy KpeIeHMAm: 40,6 cm (16 dOIMOB). HeoXoHMo npoBepHb paCtOHaMe MeKdy cHtpAMc TcEck
BHUMAHVE! Co6HIOaIte octopoxHOCTb IIN ppeoTbpaeHH BO3MOXhIX TpABM INI NOBpeXeHH IMyueCTBa! HenpaBnBHe ICN0s3OBaHne MOxET yMeHBuNTb npOCHc coEINHEH H 60nta 09. 3aTARMaBte 60ntb 09 ToJIbKO Do TEX nop, noka Wau6bl 10 He 6dyT NoTDAHByK C tHeBOH OINACTMHe 08. HE 3aTARMaBte 60ntbl 09.
IpeeiHnE K WAIY 3 Ha CTP.9.
UAR2B

YcTaHOBKa Ha CTeHy n3 MOHOnTHOro 6eToHa nn6eTOHHbIX 6nOKOB
CTP.8
A BHIMAHHE! Co6nnoaite octopoknoctb BO 136eKahne nolueHn TpaBm mnn nobpeckd HmmyuetcBA!
- YctahOBtHe HACTeHHyIO INaCTHHy 08 HeNOCpeDCTBeHHo Ha 6eToHHyIO NoBepxHOCTb. - MmHmAlbHa TOnUmma 6eToHHO CTHeHb:20,3cm (8dIOIMOB).
MHHMaHbHbHpa3Mepe6ToHoro 6noka:20,3x20,3x40,6cm(8x8x16moMmOB).
Heo6xOIM Ha6op KpeNexa #CMK1 (He BxOHT B KomnIeKT NoCTABKN). Nt3BOHInTe B CEHTp 06CJyKBAHIN KMIeHTOB.
BHUMAHVE! Co6HnOaIte octopoxHOCTb IIN ppeoTbpaeHHB3MOXhIX TpABM INN NOBpeXeHHNIMyueCTBa! HenpaBnBHOe NcONb3OBaHne MOKET yMeHBnTb npouHOCT coeHNHeHH 60NTa 09.3aTARNAIte 60NTb 09 ToIbKO Do TEX NOP, noka Wai6b 10 He 6dyT NoTAYHbK C tEHOBO nnactHe 08. HE 3aTARNAIte 60NTb 09.
PpKpEnnne TeBn3opa K HacteHno nnaTneWAT 3
CTP.9

BbBwB BEC! Ha 3om ware Bam MoXeT noHaO6ntbca nOmoBb.
Ipeed yctaHOBKO teneBnOpa cm. CTP. 11 dny perynpOBka n3 cToPOHb B cToPOHy.
Tc6bBbipOBHbTBENB3Op,0a6bte BnHT perynpoBKN ypoBn11,BbipOBHnTEBn3Op n3aTnHt BnHT perynpoBKn ypoBn11
BHUMAHWE!C6noJaiTeOcTOPOXHooCTbHO36eKAAHMeNoUeyHMeTpaBMMNoBpeKdHMeIMyUeCTBa!Heo6xOJMO BBePHyTB cToOpNbe HHTb11,YtO6b3aKpeNtB TeneBn3Op Ha 08
PpoknadaKa6eene
CTP.10

BAXHO! BbTnHtme 0aTHry 08 Do ee noJIHO rYdINHeHMe, YTObIcOCTABHTb DOcTaOHTbH3 Zanac dIMHb KabeJe H npTeDpTBpaNTbIX HAITKeHMe BO BpeM DInKHeHMe 0aTHr.
PerynipobKn
CTP.10

HAKTOH
Bau TeneBnOOP DOnKHe NtMHeHbT NOnKHeHMeNHe PnNepMeEeHMe, a 3aTeoocBaTaBcH a MeCte. BpaaiTepepyaTOpbHaTaeKHeHpN HAKNoHE T, yTo6bYbeHNHTb HmYMeHbNTb Ytol HAKnHOA TeneBnOpa.
PIMMEAHHE. EOMBb He c6bpaetcpeynpnoabHaknO npnpocMTpeK3 paoHHbIX nooKeHHM, moKHO 3aTAYbpeyIaTOb HAIKEHNN PnHAKNOE T,UTb6bipnpedotpntbHexeKanatbHoe
nepemcunneHn.

PIMMEUAHNE. PnHneOxOAnMOCTM MoKHO T3aTMyTb peRyIATOpb i NOMoIeBIO WeCTHrpAHHOr KNOH4 13

BbIPABHBAHNE
BHUMAHNE! Co6nnae octopoknoctb BO 36ekHne noyehma TpaBM MM nobpeKdHMAyueCTBa! Bcerda cneute 3a TEM, yTO6b CTOnOpHb BNHT 6bl 3aTHyT, YTO6b TeNeBnOp 6bl HAdEHHZAKpenenHa 7tahre B cope 08.

CDBNF TELEBN3OPA BJEBO NIN BNPABO TOIbKO dny KOHCTpykcu n cdepeBaHHbIM KapkaCOM
TOIbKO dR KOHctpyKcui c DepeBHHbIM Kapkacom. HE perynipyTe nnoJKeHne WtAHn HcHTpa Dn 6eToHHbX KOHCTpyKcui.
A BHIMAHHE! CHINMITE TENEBUN3Op. Ocna6bTe, Ho He BBnOpaHbAaTe CTOnOpHBie BnHTbI CDbNtBe TaTHy 8 HnyHoe nnonoKeHne, 3aTnHite CTOnOpHBie BNHTbI L
BHHMAHWE! Co6nDaaTe octopokxocbBo n36ekHHe NOnyehn TpaBM uHIN NOBpeKdEHH MMyueCTBa! Bcerda CneDITE 3a TEM, YTO6bl CTOnOpHb BNHT 6bl 3aTAYT, YTO6bl TEeBn3Op 6bl HnadeKHO 3akpenenHa hTaHRe B cOpe 08.

CHATNE TEJEBN3OPA
TAXKJIbI! Ha 3OM ware BAM MOKET noHApO6ntbCn noMoUb.
Thank you for choosing Secura! Please take a moment to let us know how we did:
Legrand AV Inc.
6436 City West Parkway
Eden Prairie, MN 55344 USA
US: +1 (800) 359-5520
Legrand AV Netherlands B.V.
Franklinstraße 14
6003 DK Weert Netherlands
UK: +44 (0) 800 056 2853
EMEA: +31 (0) 495 580 852
Authorized Representative for the UK
Starline Holding Technology Ltd.
Unit C Island Road
Reading RG2 ORP UK
leg t t o i t t t t t t t t t t t t t t t t t t t t t t t t t t t t t t t t t t t t t t t t t t t t t t t t t t 0
©2021 Legrand AV Inc. All rights reserved. Secura is a brand of Legrand. Secura, the Secura logo, and MountFinder are trademarks of Legrand. All other brand names or marks are used for identification purposes and are trademarks of their respective owners.