
IAN 331465 - Automatic pasta machine SILVERCREST - Free user manual and instructions
Find the device manual for free IAN 331465 SILVERCREST in PDF.

| Product type | Automatic pasta machine |
| Brand | SilverCrest |
| Model | IAN 331465 |
| Dimensions (L × W × H) | 33 × 21 × 28 cm |
| Weight | Approx. 5.5 kg |
| Power supply | 220-240 V~, 50/60 Hz |
| Power | Not specified (estimated 200-300 W) |
| Container capacity | Approx. 2 liters |
| Extrusion pressure | 1000 kg |
| Supply cable length | 80 cm |
| Number of shape discs | 8 (fine spaghetti, macaroni/campanelle, triangular, thick spaghetti, lasagne/ravioli, linguine, fettucine, pappardelle) |
| Automatic programs | 1 cup flour (9 min), 2 cups flour (12 min), kneading only (3 min), extrusion only (5 min), pause |
| Materials | Plastic, stainless steel (hook, shaft) |
| Cleaning | Removable parts dishwasher safe (except housing) |
| Safety | Automatic shutdown if lid open, overheat protection |
| Warranty | 3 years |
| Included accessories | 2 measuring cups (flour and liquid), ravioli mold, pasta cutter/cleaning tool, recipe book |
| Intended use | Private household, not for commercial use |
| Certifications | CE, TÜV GS, LFGB (food contact) |
Frequently Asked Questions - IAN 331465 SILVERCREST
User questions about IAN 331465 SILVERCREST
0 question about this device. Answer the ones you know or ask your own.
Ask a new question about this device
Download the instructions for your Automatic pasta machine in PDF format for free! Find your manual IAN 331465 - SILVERCREST and take your electronic device back in hand. On this page are published all the documents necessary for the use of your device. IAN 331465 by SILVERCREST.
USER MANUAL IAN 331465 SILVERCREST
Operation and safety notes
NL BE
PASTAMAKER
Before reading, unfold both pages containing illustrations and familiarise yourself with all functions of the device.
FR BE
GB/IE Operation and safety notes Page 19
List of pictograms used
Introduction
Intended use Page 20
Parts description.. Page 20
Technical data.. Page 21
Delivery contents.. Page 21
Safety notes.. Page 21
General safety information.. Page 21
Device specific safety notes.. Page 22
Before first use.. Page 24
Disassembling the product
Assembly
Selecting a shaping disk.. Page 25
Initial use
Switching on/off.. Page 26
Measuring out ingredients.. Page 26
Making pasta. Page 26
Processing left-over dough. Page 27
Program list.. Page 27
Filled pasta/using the accessory for ravioli
Cleaning and care.. Page 28
Storage
Troubleshooting
Disposal
Warranty/Service centre
Declaration of conformity
| List of pictograms used | |||
| Observe warnings and safety notes! Food safe LFGB | |||
| i | Read the instructions! | Warning! Danger of electric shock! | |
| V~ | Volts, alternating current EU compliant | CE | |
| Hz | Hertz (frequency) | Disposition of the packaging and product in an environmentally-friendly manner! | |
| W | Watts (effective power) | 36 | 3-year warranty |
| Safety notes Instructions for use | TUV SUD certified TÜV RHINELAND GS certified | ||
Pasta Maker
Introduction

We congratulate you on the purchase of your new product. You have chosen a high quality product. The instructions for
use are part of the product. They contain important information concerning safety, use and disposal.
Before using the product, please familiarise yourself with all of the safety information and instructions for use. Only use the product as described and for the specified applications. If you pass the product on to anyone else, please ensure that you also pass on all the documentation with it.
- Intended use
The pasta machine is solely intended for making pasta. This device is not intended for commercial use in kitchens for employees, in shops, offices, or other commercial areas, and is not intended for
customers of hotels, motels and other residences, or bed-and-breakfast inns, but only for domestic household use. Any other use or modification of the device is considered improper and is fundamentally prohibited. We assume no liability for damage due to improper use or incorrect operation. Any claims for damages arising from improper use, improper repairs, tampering, or the use of spare parts which are not approved, are excluded. This user bears all risk.
- Parts description
1 Mixing chamber
2 Housing
2a LC display
2bON/OFF button
2c Knead button
2d Automatic buttons
2e Press out button
2f Pause button
3 Mains cable with mains plug
4 Lid
4d Release button
5 Mixing paddle
6 Front panel
7 Auger
8 Pressing tube
9 Shaping disk holder
10]Drawer
11 Measuring cup for liquids
12 Measuring cup for flour
13 Ravioli shaper
14 Dough scraper/cleaning tool
15 Fixing screws
16 Shaping disks (8 parts, see chapter „Selecting shaping disks")
17 Pressing tube seal
Technical data
Rated voltage: 220-240V~
Rated frequency: 50 / 60Hz
Rated output: 260 W
Capacity: approx. 2 litres
Contact pressure: 1000kg
Cable length: 80cm
Dimensions: 33 × 21 × 28 cm (L × W × H)
Delivery contents
1 Pasta maker
8 Shaping disks
1 Measuring cup for flour
1 Measuring cup for liquids
1 Ravioli shaper
1 Dough scraper / cleaning tool
1 Mains cable with mains plug
1 Set of operating instructions
1 Recipebooklet

Safety notes
- General safety information
This device must not be used by children. Keep the device and its connection cable away from children.
SUFFOCATION HAZARD!
Keep packaging film away from children!
ELECTRICAL DEVICES ARE
NOT TOYS! Therefore use and store the device out of the reach of children. Children are not aware of the dangers associated with handling electric appliances. Do not allow the mains cable 3 to dangle, to prevent it from being pulled on.
This device may be used by persons with reduced physical, sensory or mental capacities, or lacking experience and/or knowledge, so long as they are supervised or instructed regarding the safe use of the device and understand the associated risks. Do not allow children to play with the device.
DANGER OF ELECTRIC
SHOCK! Never immerse the
device in water and do not use outdoors, as it must not be exposed to rain or other moisture!
Always unplug when the device is not in use and before cleaning or in the event of malfunction!
DANGER OF ELECTRIC
SHOCK! In the event the device falls into water, first unplug it from the mains, then remove it from the water! Do not operate the device after this until it has been inspected by an approved service point. This also applies if the mains cable or the device becomes damaged or the device has been dropped!
DANGER OF ELECTRIC
SHOCK! Make sure that the mains cable 3 and the device are never placed on hot surfaces or near sources of heat. Lay the mains cable 3 in such a way that it does not come into contact with hot or sharp-edged objects!
DANGER OF ELECTRIC
SHOCK! Never kink the mains cable 3 and do not wrap it around the device, as these could cause a cable rupture!
DANGER OF ELECTRIC
SHOCK! Do not use the device whilst standing on a wet floor or
if your hands are or the device is wet!
DANGER OF ELECTRIC
SHOCK! Never open the device and never attempt to get inside it using metal objects!
Repairs may only be performed by approved specialist workshops. Improperly repaired devices may be dangerous for the user.
Only connect the device to a properly installed safety socket with a suitable mains voltage (see chapter "Technical data").
To prevent accidents, do not leave the device unattended while it is operating.
Devicespecific safety notes
Do not use the device on unstable or sloping surfaces.
- Do not remove the mains cable 3 from the plug before processing is complete. If you have to pause processing, remove the mains cable 3 from the plug before carrying out further processes.
It is recommended to rest the machine for at least 20 minutes after four cycles in a row, so that the motor can cool down.
If you want to use the device without interruption, clean the shaping disk 16 last used after each use with the cleaning tool 14 included. To make cleaning easier, do not immediately submerge the shaping disk 16 in water.
Do not bend the mains cable using force, do not pull on it, do not bundle it up or twist it and do not place it under heavy objects.
Do not put metal objects or flammable substances in the mixing chamber.
Separate the device from the power supply when the device is not in use.
The device is not intended for use with an external time switch or a separate telecontrol system.
Immediately remove the mains plug from the socket if you see smoke.
Do not unplug by pulling the mains cable 3; always hold by the plug.
Keep the mains plug clean.
Do not place objects on top of the device!
Do not move the device while it is operating.
The device should always be unplugged from the mains when it is not supervised, and prior to assembly, dismantling or cleaning.
Before substituting fixtures or additional parts that move during operation, the device must be switched off and unplugged from the mains.
- Keep the device in a dry and well-ventilated location after use.
FOOD SAFE! This product has no adverse effect on taste or smell.
■ ATTENTION: FIRE HAZARD
To prevent overheating, never cover the device.
■ ATTENTION: DANGER OF CUTS Moving mechanical parts with high rotational speed! Prevent injuries. Avoid touching any parts while the device is in operation. Keep hands, hair, clothing, dough scraper 14 and other utensils away from moving parts during operation. Do not touch moving parts, in particular while the device is connected to the mains. Do not put your fingers or any objects into the device while it is running. Risk of serious injury!
Do not open the lid, do not unscrew the shaping disk holder to open the product, and do
not touch the mixing paddle 5 with your hands while the device is operating. This could cause serious injuries.
If parts get stuck, disconnect the mains plug from the mains socket. Then attempt to remove the ingredients which are impeding the mixing paddle 5.
If maintenance is required, please contact the service point.
Before each use, please check the mains cable 3, the plug, the mixing chamber 1, the mixing paddle 5 and the other removable parts for damage. If you find damage, please contact the service address for a replacement.
To prevent hazards, ensure that all elements have been fixed in the correct place before you connect the product to the power supply.
Do not use the microwave or other sources of heat to disinfect the product. This could cause deformation and defects.
Do not clean the product with steel wool, scouring agents or corrosive liquids.
Do not expose this device to sunlight for prolonged periods. This could cause decolouration.
Do not heat any parts of this product.
Before first use
To prevent hazards, make sure that the device is complete and the device, mains plug and mains cable 3 are in good condition after unpacking to rule out possible damage. The device is packaged to protect it from transport damage.
- Carefully remove the device from the retail packaging.
Remove all parts of the packaging and remove the protective film from the display.
Thoroughly clean the device and all accessories as specified in chapter „Cleaning and care". To do so, you will first have to disassemble the device. Follow the instructions in the chapter „Disassembling the product".
After it has been thoroughly cleaned and re-assembled (see chapter "Assembly"), set up the pasta machine in the vicinity of a safety socket. Make sure it is easily accessible.
Furniture nowadays is coated with a variety of varnishes and plastics, and is treated with the most diverse of care products. It is therefore impossible to rule out that some of these substances may contain components which would attack and soften the rubber feet of the housing 2. If necessary, place an anti-slip pad under the pasta machine.
Place the device on a suitable surface.
Connect the mains cable 3 with the socket on the back of the device.
Connect the device to the safety socket.
Disassembling the product
Make sure that the device is switched off and unplug the mains plug from the socket before disassembling.
Remove the lid 4 from the housing 2 by operating the release catch 4 and then pulling
the lid 4 upwards using the handle (detectable mark).
Turn the shaping disc holder 9 anticlockwise and remove it from the pressing tube 8. If a shaping disc 16 is installed on the device, this must also be removed.
Unscrew both fixing screws by turning them anticlockwise at the same time, until the front panel can be removed from the housing without difficulty.
Pull the pressing tube 8 including the auger 7 out of the mixing chamber 1.
Push the auger 7 out of the pressing tube 8.
Pull the mixing chamber 1 including the mixing paddle 5 forward to remove from the housing 2. The mixing paddle 5 releases automatically from the socket.
Remove the drawer 10 from the housing 2 for cleaning.
Assembly
Make sure that the device is switched off and unplug the mains plug from the socket before assembling.
If you had previously removed the drawre-insert this into the housing 2 with the unused shaping disks 16.
Push the mixing chamber loosely into the housing 2 (see fig. A). The two guide pins at the upper outer edge of the mixing chamber 1 should not yet lock into the corresponding sockets on the housing 2.
Insert the mixing paddle 5 into the mixing chamber 1 from above.
Insert the mixing paddle 5 into the guide in the back of the housing 2 (see Fig. B+C) and now push the mixing chamber 1 and the mixing paddle 5 into the housing 2 at the same time as far as they will go.
From the front, insert the pressing tube 8 into the opening with the help of the corresponding socket (see fig. D).
Insert the auger into the pressing tube (see fig. E) until it completely disappears.
Fit the front panel 6 onto the housing 2 and lock it in place by turning the fixing screws 15 clockwise (see fig. F).
Choose the desired shaping disc 16. The small nib on the back of the shaping disc 16 must be inserted into the silver opening at the end of the pressure roller.
Now fix the shaping disc to the pressing out tube on the front (if necessary, hold fast with one hand).
Screw the shaping disk holder 9 tight in a clockwise direction (see fig. F).
Note: Do not screw the shaping too tight. If you do, it will be very difficult to unscrew after you have finished making pasta (due to contact pressure).
- Attach the lid 4 by inserting the two teeth into the sockets on the housing 2. Press the lid 4 down until you hear it click. Assembly is now complete (see fig. G).
- Selecting a shaping disk
The following 8 shaping disks 16 are included in the delivery contents (see fig. H):
16a thin spaghetti
16b macaroni - made up of 2 parts
16c triangular
16d thick spaghetti
16e lasagne / ravioli - made up of 2 parts
16f linguine
16g fettuccine
16h pappardelle
Make sure that the shaping disk holder 9 is well fastened so that it doesn't have a negative effect on your pasta production.
When using the shapes "lasagne / ravioli" and "macaroni", make sure that you have inserted the shaping disks 16 correctly. We recommend first holding the shaping disk 16 and the relevant insert with one hand and screwing tight the shaping disk holder 9 with the other.
The length of time it takes to press out pasta depends on the shaping disk 16 used. Due to the small opening, it can take up to 3 minutes
for thin pastas, e.g. thin spaghetti, to be pressed out.
ATTENTION: During operation, the shaping disk can only be changed after the pasta machine has been switched off.
- Initial use
Connect the mains cable 3 with the socket on the back of the device.
Connect the device to the safety socket.
Note: When connecting to the power supply, the device will beep and the LC display 2a will flash briefly.
- Switching on/off
Press the ON/OFF button2b. "ON" will appear in the LC display 2a and the device will enter standby mode.
Note: If you press the ON/OFF button 2b during operation, the device will stop and will enter standby mode.
Measuring out ingredients
Reference table for the proportions of liquid and flour:
| Measuring cup for flour 12 | Measuring cup for liquids 11 | ||
| Flour Water | Mixture of | thin, liquid vegetable juice with/ without water | Egg / water mix- ture |
| 2 cups (430g) | 160 ml | 60 ml | (2 medium eggs topped up with water) |
| 1 cup (215g) | 80 ml 80 | ml 90 ml | (1 medium egg topped up with water) |
Note: The flour quantities given refer to a level cup. Use the dough scraper 14 to smooth out the flour.
Note: The eggs must be mixed and whisked with the liquid before use.
Note: One cup of flour makes about 250g of pasta.
ATTENTION! Do not exceed the product's capacity!
Make sure that you strictly conform to the recommended proportions of flour and water.
Disturbances due to use which diverges from the handbook lead to the loss of the warranty claim.
Making pasta
ATTENTION! Do not use pureed vegetables, just thin juice. Only use the opening on the left hand side of the lid 4 to pour in liquid ingredients.
Open the lid 4 (see fig.1).
Measure out the flour required using the measuring cup for flour 12.
Note: The flour quantities given refer to a level cup. Use the dough scraper 14 to smooth out the flour.
Pour the flour into the mixing chamber 1 (see fig. J).
Put the lid 4 in its place in the housing 2.
Measure out the liquid required using the measuring cup for liquids [11]. To do so, place the measuring cup for liquids [11] on the table and read horizontally from the front.
Insert the plug into a suitable socket and press the ON/OFF button 2b.
Press the automatic button 2d which corresponds to the quantity of flour (1 or 2 cups of flour) or alternatively first press "mix" and then "press out". Pour the right quantity of liquid (according to the proportions of flour and liquid in the
reference table) through the left side of the lid once the mixing paddle 5 has started to move (see Fig. K). The LC display 2a shows the remaining total manufacturing time. The device stops automatically and shows "OFF" when it has finished pressing out pasta. The total process is dependent on the respective programme selected (see Fig. L).
□ You can use the included dough scraper 14 or similar kitchen utensils to cut the pasta.
- Processing left-over dough
If there is left-over dough in the mixing chamber 1 when the automatic pasta making process has finished, first switch the device off.
Open the lid and, with your fingers, push the dough towards the opening of the pressing tube 8 inside the mixing chamber 1.
Close the lid 4 again.
Turn the product on and push the pressing out button 2e to press out the remaining dough. This function takes 5 minutes. This process can be repeated multiple times. With sticky doughs and semolina dough, it is particularly likely that there will be dough left in the mixing chamber 1.
ATTENTION! Only use this function when water and flour have been well mixed. It could otherwise lead to malfunctions which would have a negative impact on the device's lifespan.
Tips
Before they are added to the mixing chamber 1 liquids must first be mixed together and whisked in the measuring cup for liquids [11].
- Do not add any non-liquid ingredients except flour during processing (eggs must be mixed with water before use).
Only pour vegetable juice and the egg / water mixture through the opening in the left of the lid 4 and never directly into the mixing chamber
- Do not pour the egg mixture directly onto the flour.
- Add eggs or juice to make pasta with different aromas.
- Dust the pastas with a little flour when they have come out. This gives them more bite and stops them from sticking together so easily.
Program list
Automatic function „1 cup flour"
In standby-mode, press the automatic button 2d "1 cup flour" to select to make pasta using one cup of flour. The buzzer will sound and a digital countdown from 9:00'' minutes of processing time will show in the LC display 2a. The device will knead anticlockwise for 2 minutes then pause for 5 seconds. After this, the automatic pressing out function starts. The device automatically continues alternating between kneading and pressing out until the end of the programme. At the end of the processing time, OFF will appear on the display 2a. If all of the dough has already been pressed out before the end of the 9 minutes, the device can be switched off. If there is still dough left in the mixing chamber after the 9 minutes have passed, follow the instructions in the chapter Processing left-over dough".
Automatic function „2 cups flour"
In standby-mode, press the automatic button 2d "2 cups flour" to select to make pasta using two cups of flour. The buzzer will sound and a digital countdown from 12:00'' minutes of processing time will show in the LC display[2a]. The device will knead anticlockwise for 2 minutes then pause for 5 seconds. After this, the automatic pressing out function starts. The device automatically continues alternating between kneading and pressing out until the end of the programme. At the end of the processing time, OFF will appear on the LC display. If all of the dough has already been pressed out before the end of the 12 minutes, the device can be switched off. If there is still dough left in the mixing chamber after the 12 minutes have passed, follow the instructions in the chapter Processing left-over dough".
Knead function
In standby mode, press the knead button 2c to select the knead function. The buzzer will sound and a digital countdown from 3:00'' minutes of processing time will show in the LC display2a: The dough will be kneaded anticlockwise for 3 minutes, then the process will end and "OFF" will appear in the display.
Press out function
In standby mode, push the press out button 2e to select the press out function. The buzzer will sound and a digital countdown from 5:00'' minutes of processing time will show in the LC display 2a:
The press out function starts automatically and at the end of the processing time, "OFF" will appear in the LC display 2a. If all of the dough has already been pressed out before the end of the 5 minutes, the device can be switched off. If there is still dough left in the mixing chamber after the 5 minutes have passed, follow the instructions in the chapter "Processing left-over dough".
Pause function
Note: A noise will sound when the pause button 2f is pressed.
Press the pause button 2f whilst a selected programme is running. The device stops automatically.
Pressing the pause button 2f again causes the device to continue with the original programme.
The pause button can be used during all programmes.
The maximum running time of the pause function is 1 hour.
Note: The pause function is cancelled when the lid 4 is opened. When the lid 4 is opened, the device switches off automatically and must be re-started.
Protection function
The device can only be switched on and operated when the lid 4 is closed.
- Filled pasta / using the accessory for ravioli
The machine is equipped with accessories for making filled pasta. To make filled pasta, you must first make lasagne sheets.
Place the lasagne sheets you made on a chopping board and cut out filled pasta shapes using the ravioli shaper [13] (see figs. M and N).
Place the resulting dough shape directly on the ravioli shaper 13 and add your desired filling (see fig. O).
Close the ravioli shaper 13 and press it tightly together (see fig. P).
Remove the completed filled pasta (see fig. Q).
- Cleaning and care
Always unplug the mains plug before cleaning!
Never immerse the product in water. This poses a risk of electric shock!
Do not use caustic cleaners and abrasives or scouring pads, as this may cause damage the device beyond repair.
Do not clean the product with steel wool, scouring agents or corrosive liquids.
Clean the product after each use.
Clean the shaping disks roughly with the cleaning pens on the sides of the dough scraper. With these, you can also get into the holes and crevices of the shaping disks.
Clean all removable parts, including the mixing chamber, by hand. Use warm water, washing-up liquid and a soft cleaning cloth.
The following parts are also dishwasher safe:
-Lid 4
1
- Mixing chamber
5
- Mixing paddle
8
- Pressing tubes
]
-Auger
- Measuring cup for flour
12
- Measuring cup for liquids
11
- Shaping disks
16
-Ravioli shaper
13
Clean the housing 2 with a slightly damp, soft cloth. You can also use a mild washing-up liquid to remove stubborn dirt.
Remove the white sealing ring 17 to clean the pressing tube 8. This stops dirt remaining between the walls.
Note: The shaping disks are easier to clean when the dough has hardened.
Storage
When the pasta machine has been cleaned, proceed as follows:
If necessary, unplug the mains plug from the safety socket.
Store the pasta machine in a dry place.
- Troubleshooting
| Problem Cause Solution | ||
| The pasta machine has no power. | The plug is not inserted or has poor contact. | Clean the plug with a dry cloth and / or insert this into the socket (again). |
| The pasta machine is not pressing out any pasta or „E1“ appears in the LC display 2a. | Not enough liquid | Press the ON / OFF button 2b to switch off the device. Pour in small quantities of liquid through the opening in the lid 4 and press the ON / OFF button 2b to turn the device back on again. Press the knead button 2c and allow the mixture to be kneaded to the desired consistency. Then press the ON / OFF button 2b to switch it off, and then again to switch it on again, then push the press out button 2e and check whether pasta is being produced. |
| Too much liquid | Press the ON/OFF button2b to switch off the device. Remove the dough from the mixing chamber1, pick it into small pieces, put it back into the mixing chamber1, add a little flour and then press the knead button2c. Then press the ON/OFF button2b to switch it off, and then again to switch it on again, then push the press out button2e and check whether pasta is being produced. | |
| The pastas have ridges or cracks. | Due to the mixing at the beginning and the pressing out at the end, the pastas have more ridges or cracks. | Add whisked eggs and the pastas will become supple. |
| If you have enough time, you could break the pastas apart to the size of small peanuts and put them back into the mixing chamber1. Then press the knead button2c and press the dough out again. The more frequently you repeat this, the softer and firmer the pastas will become. | ||
| The shaping disks16are difficult to clean. | The dough is moist. Allow the | dough to dry in the shaping disks16and use the cleaning tool14. |
| The pastas break when they come out. | Not enough liquid Please add | liquid strictly as specified in the instructions (see chapter "Measuring out ingredients"). |
In the event of malfunctions not specified here, please contact our Customer Service Department. Our customer service representatives will gladly assist you. The service address is listed with our warranty terms.
Disposal
The packaging is made entirely of recyclable materials, which you may dispose of at local recycling facilities.
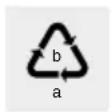
Observe the marking of the packaging materials for waste separation, which are marked with abbreviations (a) and numbers (b) with following meaning: 1-7: plastics / 20-22: paper and fibreboard / 80-98: composite materials.

The product and packaging materials are recyclable, dispose of it separately for better waste treatment. The Triman logo is valid in France only.
Contact your local refuse disposal authority for more details of how to dispose of your worn-out product.

To help protect the environment, please dispose of the product properly when it has reached the end of its useful life and not in the household waste. Information on collection points and their opening hours can be obtained from your local authority.
Warranty/Service centre
Dear customer,
our products are subject to strict quality control. If this device does not work properly despite these controls, we do apologise and we ask that you contact our customer service centre as specified below. Please feel free to phone us on the service hotline specified. Without limiting your legal rights, warranty claims are subject to
the following:
- Warranty claims must be filed within a period of max. 3 years from the date of purchase. Our warranty services are limited to correcting defects in material and manufacture, or replacement of the device. Our warranty service is free of charge to you.
- Warranty claims must always be filed immediately upon discovery.
- Warranty claims will not be accepted after the warranty period has expired.
- Please keep your receipt as proof of purchase.
Not covered by warranty:
- improper or incorrect care
- failure to observe the safety precautions applicable to the device
- use of force
- changes not performed by an authorised service centre
- damage due to return in packaging not safe for transport (the sales packaging of this product is not suitable for separate shipping)
- inflicted damage due to e.g. impact, shock, drops
- failure to observe the instructions for use
normal wear and tear - unauthorised attempts at repair
You may request the instructions for use in PDF format from our Customer Service Department.
Hotline:
Tel.: 00800-83300000
Email: support.lidl@ksr-group.com
Please have your receipt and item number (e.g. IAN 331465_1907) ready as your proof of purchase when enquiring about the product.
Declaration of conformity
This product fulfils the requirements of the applicable European and national directives. This is confirmed by the CE mark. The relevant declarations are held by the manufacturer.


www.tuy.com
ID 1419065236

Legendede sptogrammes
Introduction
Chere cliente, cher client,