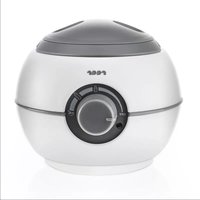
FoodBall 33030 - Bottle warmer Reer - Free user manual and instructions
Find the device manual for free FoodBall 33030 Reer in PDF.


User questions about FoodBall 33030 Reer
0 question about this device. Answer the ones you know or ask your own.
Ask a new question about this device
Download the instructions for your Bottle warmer in PDF format for free! Find your manual FoodBall 33030 - Reer and take your electronic device back in hand. On this page are published all the documents necessary for the use of your device. FoodBall 33030 by Reer.
USER MANUAL FoodBall 33030 Reer
natural_image
Illustration of a stylized spherical device with a curved cable and labeled 'reer' (no text or symbols beyond the label)
FoodBall Baby food warmer
Instruction manual // Art. no.: 33030

Technical specification.... 12 Cleaning.... 18
General safety instructions 12-13 Descaling 18
Safety instructions on first use 13 Environmental protection 18
Deliverables and unit description 14 Warranty 19
Before first use 15-17
FR
natural_image
Three black-and-white icons depicting people engaging in different activities: a trash bin, a recycling symbol, and a trash table (no text or labels)Garantie
FoodBall Baby food warmer

Congratulations on the purchase of your new beer baby food warmer. We are confident that you will enjoy the quality of our product for a long time.
Please take a few minutes to read through the safety instructions carefully. You will only be able to use the reer baby food warmer with confidence if all of the points mentioned here are observed. Please keep the instruction manual in a safe place for future reference.
Technical specification
| Operating voltage: 220-240 V, 50/60 Hz | |
| Output: 150 W | |
General safety instructions
! Read the instruction manual before using the equipment! It contains important instructions on how to start and operate the product.
! These safety instructions must be observed!
! Please keep the instruction manual in a safe place for future reference. Ensure the manual is passed on to third parties with the unit.
! This equipment is intended only for use indoors. Do not use outdoors.
! Please use the article only for its intended purpose.
! This equipment is not intended for use by persons (including children) with reduced physical, sensory or mental capabilities, or lack of experience or knowledge, unless they are supervised whilst using it or have been shown how to use it correctly by a person responsible for their safety.
! Repairs may only be made by our Customer Service engineers or authorised dealers. Do not open the equipment or repair it, as proper functioning cannot be guaranteed in such case. Non-compliance voids the warranty. If you have any questions about the use of our equipment, please contact your dealer.
! The power cord of this device must not be replaced. Dispose of the device if the cord is damaged.
! Do not submerge the device, its power cord or plug in water or other liquids.
! The cleaning and maintenance of the device must not be done by children, unless they are 8 years or older and are supervised.
! Children must not play with the appliance.
! The device and its connections cable should be kept away from children under the age of 3.
Safety instructions on first use
! Remove all packaging before first use.
! Before every use, check the equipment for any obvious damage. If you detect any damage, do not use this equipment.
! Never submerge the device in water or other liquids, and do not clean it in the dishwasher. Instead, clean and wipe it with a cloth soaked in water and a cleaning agent.
! Never operate the device without water; never move the device while it is in operation.
! Check - especially when travelling abroad - that the local mains voltage matches the voltage specified on the units and/or mains adapters.
! While the equipment is not in use, always pull out the mains plug so that it cannot be switched on unintentionally.
! Secure the power lead and ensure that it cannot be accidentally pulled causing the unit to fall on the floor. Do not allow the power lead to come into contact with hot surfaces.
! Always use the equipment on a flat, heat-resistant surface.
! Clean the food container before first use.

Deliverables and unit description

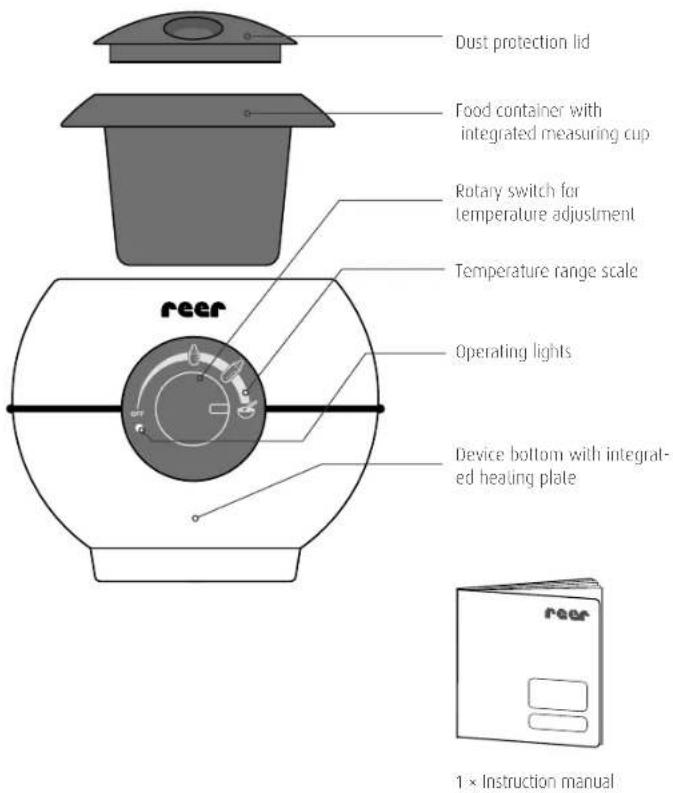
By heating water with the device, you can quickly, reliably and automatically warm up milk and baby food. The water is heated with a heating plate at the bottom of the device, providing the heat for food that needs to be warm.
text_image
Dust protection lid Food container with integrated measuring cup Rotary switch for temperature adjustment Temperature range scale Operating lights Device bottom with integrated heating plate 1 × Instruction manualSymbols:
| OFF | Device is switched oil |
| Warming small feeding bottles | |
| Warming big feeding bottles | |
| Warming baby food in a glass or a food container | |
| Function for maintaining heat |
Before first use
With the device, you can reliably and comfortably warm up standard and wide-neck bottles and baby food bottles. The water is heated with a heating plate at the bottom of the device, providing the heat for food that needs to be warm.
Always keep the device on a dry and level surface. Make sure that there is enough water in the device when warming food in it. When a bottle or other container is placed in the device, the internal water container must be filled with water up until about 1 cm from the edge.
1. Warming feeding bottles
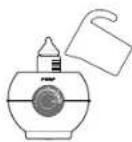
To let vapour escape the bottle, remove the spill protection between the bottle and the teat. Place the baby
bottle in the device and fill the water container up with warm water until it reaches approximately 1 cm from the edge of the container.
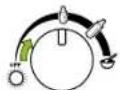
Set the rotary switch on the front side of the device to the desired temperature range for . The orange operating light turns on. This signals that the device is in operation and switches on and off whenever the heating is on or off.
The warming time depends on the temperature of the water, the ambient temperature, the size of the bottle and its material. To speed up the procedure, we recommend using warm tap water. The warming time for a bottle is about 6–10 minutes, depending on the factors mentioned above, as well as on the initial temperature of the baby food.
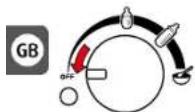
Remove the bottle from the baby food warmer and, as the warming operation is over, turn the rotary switch for the temperature setting back to the OFF position. Remove the device's plug from its power source and pour the water out of the baby food warmer.
Caution: Hot! Please let it cool down for some time.
Caution: Before you give the bottle to the child, always check the temperature of its contents first. Shake or touch the bottle to let the heat distribute evenly. The baby food must not be hotter than 37 °C (i.e. body temperature). Check the temperature by putting a couple of drops on the inside of your wrist. The milk should feel warm, but not hot.
2. Warming premade food in a feeding bottle
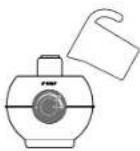
Before warming, remove the label from the food bottle, so that it does not detach during warming and slick to the water container of the baby food warmer. Unscrew the lid of the food bottle before putting it in the device.
Place the bottle in the device and fill the water container with warm water until it reaches approximately 1 cm from the edge of the container.
Alternatively, you can use the food container for warming the baby food.

Put 90 ml of water in the baby food warmer. To do this, you can use the food cup with an integrated measuring cup. Then put the baby food in the food container (max. 190 g) and place it without the storage lid in the baby food warmer.
Caution: Do not use more than 90 ml of water for warming; otherwise, the water will spill over when using the container.
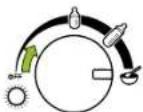
Move the rotary switch on the front side to the mark. The operating light is on.
We recommend stirring the food occasionally to let the heat distribute evenly.

The warming time can be extended or shortened depending on the contents and the amount thereof, on the type of food container used as well as on the initial water temperature and the ambient temperature. The warming time
for baby food is about 6–8 minutes, depending on the factors mentioned above, as well as on the initial temperature of the baby food.
Remove the glass or food container from the baby food warmer and, as the warming operation is over, turn the rotary switch for temperature setting back to the OFF position.
Remove the device's plug from its power source and pour the water out of the baby food warmer.
Caution: Hot! Please let it cool down for some time.
Caution: Before you give the baby food to your child, always check the temperature of its contents first. The baby food must not be hotter than 37 °C (i.e. body temperature). Thus, always check the temperature.
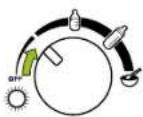
3. Function for maintaining heat
You can also keep already-heated baby food warm; to do this, simply leave the bottle in the device after warming and set the rotary switch in the position for keeping the food warm (see Figure).
Caution: For microbiological reasons (germ formation), you should keep baby food warm for no more than 1 hour.
Cleaning

Cleaning the device: Always disconnect it from the mains and ensure that the equipment is cold before cleaning it. Do not submerge the device in water. Do not use any scouring pads, scouring agents or solvents for cleaning; they might damage the equipment and its surfaces.
You can readily clean the food container in the dishwasher.
For hygienic reasons and in order to keep lime deposits to a minimum, we recommend fully removing the water from the baby food warmer and drying it off with a towel after every use.
Descaling
The baby food warmer must be descaled regularly, at least every 4 weeks (more frequently in areas with very hard water) in order to guarantee proper functioning of the equipment. A heating plate that appears different from the outside with lime deposits or burnt-in milk residue does not constitute grounds for complaint.
The warranty does not cover any damage occurring due to this.
The heating plate of your baby food warmer may be cleaned with traditional descaling products based on citric acid, e.g. using a reer fast bio-decalcifier sachet.
Repeat the process in case of stubborn lime deposits. Please do not use chemical additives during operation or cleaning.
Environmental protection
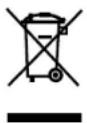
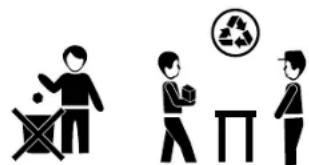
At the end of its life, this product must not be disposed of as normal domestic waste, but should be recycled at a collection point for electrical appliances. Please see the relevant symbol on the product, in the user manual and packaging. Materials can be recycled as specified. An important contribution to the protection of the environment can
be made by reusing the unit, re-
cycling its components or otherwise reusing old appliances.
Please contact your local council to find out more about an appropriate disposal centre.
natural_image
Three black-and-white icons depicting people engaging in different activities: a trash bin, recycling symbol, and a table (no text or labels)Warranty
Please retain your receipt, the user manual and part number. Warranty claims or claims from promises of guarantee must be processed by the dealer. The technical specification, instructions and characteristics of the product described herein have been compiled to the best of our knowledge and belief and are correct at the time of printing. Any instructions provided by reer should be correct and authoritative.
Nevertheless, reer does not accept liability for potential errors in this document and reserves the right to make changes to the product design and/or specifications without prior notice.
Reproduction and disclosure of information contained in this copyright-protected document, in any form or by any means - graphical, electronic or mechanical by photocopying, recording on tape or storage in a data retrieval system (even in part), require prior written consent from peer.

natural_image
Three black-and-white icons depicting people engaging in different activities: a trash bin, recycling symbol, and a table (no text or labels)Garantie
natural_image
Three black-and-white icons depicting people engaging in different activities: a trash bin, recycling symbol, and a trash table (no text or labels)Garanzia
natural_image
Three black-and-white pictograms showing people engaging in different activities: a trash bin, a recycling symbol, and a table (no text or labels)Garantía
natural_image
Three black-and-white pictograms showing people engaging in different activities: a trash bin, a recycling symbol, and a table (no text or labels)Garantie
natural_image
Illustration of a spherical device with a curved cable and labeled 'reer' (no other text or symbols)reer GmbH
Muehlstr. 41 • 71229 Leonberg • Germany
www.reer.de
CE
Rev. 013617