
KS 2403/40 - Saw ATIKA - Free user manual and instructions
Find the device manual for free KS 2403/40 ATIKA in PDF.

| Product type | Electric chainsaw |
| Brand | ATIKA |
| Model | KS 2403/40 |
| Motor power | 2400 W (S6 – 40%) |
| Supply voltage | 230-240 V ~ 50 Hz |
| Chain speed | 13 m/s |
| Oil tank capacity | 120 ml |
| Guide bar length | 460 mm (16") |
| Cutting length | 400 mm |
| Weight | Approx. 4.6 kg |
| Guaranteed sound power level | 107 dB(A) |
| Hand-arm vibrations (rear/front) | 5.68 m/s² / 4.69 m/s² |
| Protection class | II (double insulation) |
| Chain type | Oregon 91PJ 056X |
| Chain pitch | 9.525 mm (3/8") |
| Drive link thickness | 1.3 mm (.050") |
| Main functions | Wood cutting, tree felling, limbing |
| Safety | Chain brake, start lock, hand guard |
| Maintenance and cleaning | Automatic lubrication, regular cleaning of guide bar and chain |
| Spare parts | Guide bar, chain, sprocket, cover, oil tank available |
| Warranty | Refer to enclosed warranty statement |
Frequently Asked Questions - KS 2403/40 ATIKA
User questions about KS 2403/40 ATIKA
0 question about this device. Answer the ones you know or ask your own.
Ask a new question about this device
Download the instructions for your Saw in PDF format for free! Find your manual KS 2403/40 - ATIKA and take your electronic device back in hand. On this page are published all the documents necessary for the use of your device. KS 2403/40 by ATIKA.
USER MANUAL KS 2403/40 ATIKA
natural_image
Icon of a person using a laptop inside a black circle (no text or symbols)Original instructions
Notice originale
natural_image
Oregon Double Guard 91 chain saw with visible teeth and mounting bracket (no text or symbols on the device itself)
① Keep the operating instructions in a safe place for future use.
① Pass the operating instruction to all persons who work with the machine.

You may not start to operate the machine until you have read these operating instructions, observed all the instructions given and installed the machine as described!

This machine must not be operated / used by children, persons with restricted physical, sensory or mental abilities or a lack of experience and/or know-how or by persons who are not familiar with the instructions. Local regulations may stipulate an age restriction for the user.
Extent of delivery
After unpacking, check the contents of the box
▶ That it is complete
▶ Check for possible transport damage
Report any damage or missing items to your dealer or the manufacturer immediately. Complaints made at a later date will not be acknowledged.


- 1 chain saw
• 1 guide bar - 1 saw chain
• 1 guide bar cover
• 1 operating manual
• 1 assembly and operating instruction
• 1 warranty declaration
The following parts are not included in the scope of delivery. These accessories are available from your dealer or manufacturer.
Contents
| Extent of delivery | 15 |
| Operating times | 15 |
| EC Declaration of Conformity | 16 |
| Symbols on the chain saw | 16 |
| Symbols operating manual | 17 |
| Normal intended use | 17 |
| Residual risks | 17 |
| Safety instructions | 17 |
| - Safety instructions for chain saws | 17 |
| - Causes and operator prevention of kickback | 18 |
| - More safety warnings | 18 |
| Vibrations | 19 |
| Description of device / spare parts | 19 |
| Assembly | 19 |
| Before the first start-up | 19 |
| - Chain lubrication (Oil-automatic) | 19 |
| Start-up | 20 |
| - Electric supply | 20 |
| - Mounting of the extension cable | 20 |
| - Switching on / off | 20 |
| - Chain brake | 20 |
| - Saw chain | 20 |
| - Chain lubrication | 21 |
| Working instructions | 21 |
| - Before starting to work | 21 |
| - Notes on tree care and cutting | 21 |
| - During work | 21 |
| Saw techniques | 22 |
| - Additional advices for sawing timber under tension / Release | 22 |
| - Additional advices for chopping down trees | 23 |
| Maintenance and cleaning | 23 |
| - Maintenance | 23 |
| - Cleaning | 24 |
| Transport | 24 |
| Storage | 24 |
| Guarantee | 24 |
| Mögliche Störungen | 25 |
| Technical data | 26 |
Operating times
Before initiating the device please observe the provisions pertaining to corresponding laws (regional provisions) for the noise control.
EC Declaration of Conformity
No. (S-No.): 26177
according to EC directive: 2006/42/EG
We,
Altrad Lescha Atika GmbH
Josef-Drexler-Str. 8, 89331 Burgau - Germany
herewith declare under our sole responsibility that the product
Kettensäge (Chain saw) type KS 2403/40
Serial number.: 000001 - 020000
is conform with the above mentioned EC directives as well as with the provisions of the guidelines below: 2000/14/EC, 2014/30/EU and 2011/65/EC.
Conformity assessment procedure: 2000/14/EC – Appendix V
Measured sound power level L_WA 104,2 dB (A). Guaranteed sound power level L_WA 107 dB (A).
Following harmonized standards have been applied:
EN 60745-1:2009/A11:2010, EN 60745-2-13:2009/A1:2010 EN 55014-1:2017, EN 55014-2:2015 EN 61000-3-2:2014; EN 61000-3-11:2000
Duly authorised person for the compilation of technical documents:
Altrad Lescha Atika GmbH - Technical department Josef-Drexler-Str. 8 – 89331 Burgau - Germany
i.A.
Burgau, 28.05.2019
Engineering design management
Symbols on the chain saw
Memorise the meaning of the symbols to be able to operate the device more safely and to protect yourself and other from possible injuries.

Warning! This chain saw may cause serious injury.

Carefully read operator's manual and the safety instructions before starting the machine and observe the instructions when operating.
Switch off the motor and disconnect the mains plug before performing cleaning, maintenance or repair work.
Wear safety glasses.

Wear hearing protection.

Wear protective gloves.

Wear safety shoes.

Wear cut-proof protective clothing.

Always hold the chain saw with both hands when working with it.
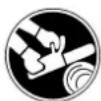
Risk by kickback! Do not saw with the guide bar tip.

Do not expose to rain. Protect against humidity
Danger – objects may be thrown out at high speed.
Keep bystanders as well as pets and domestic animals away from the danger zone.

Chain brake OFF.
Chain brake disabled - OFF

Chain brake ON.
Chain brake enabled - ON
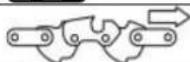
Mind the running direction of the chain links

Reduce the chain tension

Increase the chain tension
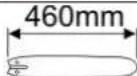
Length of the guide bar.

Max. cutting length
Guaranteed sound power level LWA 107 dB (A), measured according to regulation 2000/14/EC

Machine of the protection class II (double insulated)

This product complies with European regulations specifically applicable to it.

Electrical devices do not go into the domestic rubbish. Give devices, accessories and packaging to an ecofriendly recycling.
According to the European Directive 2012/19/EU on electrical and electronic scrap, electrical devices that are no longer serviceable must be separately collected and brought to a facility for an environmentally compatible recycling.
Symbols operating manual
| Threatened hazard or hazardous situation. Not observing this instruction can lead to injuries or cause damage to property. | ||
| Important information on proper handling. Not observing this instruction can lead to faults. | ||
| User information. This information helps you to use all the functions optimally. | ||
| Assembly, operation and servicing. Here you are explained exactly what to do. | ||
| Important notes for environmentally compatible conduct. Failure to observe these instructions may lead to environmental damage. | ||
| Please refer to the attached assembly and operating instruction sheet for references to figure numbers in the text. | 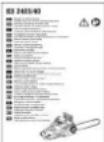 | |
Normal intended use
• The chain saw is suitable for
sawing of trunks, perches, wood trusses, boards etc. and can be used for transverse or longitudinal cuts.
Chopping down of trees.
- Do not use the chain saw for sawing of building materials and synthetic materials.
- The chain saw is only suitable for the private use in the house and hobby garden.
- The chain saw is not suitable for forestry works (chopping and cutting off of perches in the forest). The necessary safety of the operator is not guaranteed by the cable joint.
- The intended usage also includes compliance with the operating, servicing and repair conditions prescribed by the manufacturer and following the safety instructions included in the instructions.
- Any other use is deemed not to be use as prescribed. The manufacturer is not liable for any type of damage resulting from this: the user bears the sole risk.
Residual risks
Even if used properly, residual risks can exist even if the relevant safety regulations are complied with due to the design determined by the intended purpose.
Residual risks can be minimised if the "Safety instructions" and the "Normal intended use" as well as the whole of the operating instructions are observed.
Observing these instructions, and taking proper care, will reduce the risk of personal injury or damage to the equipment.
- Risk of backstrokes when touching the guide bar tip with a hard object.
- Risk of injuries of fingers and hands by the tool (saw chain).
- Injury by catapulted work piece parts.
-
Electric shock.
-
Touching live parts of opened electrical components.
- Impairment of hearing when working on the machine for longer periods of time without ear protection.
- Risk of fire.
In addition, in spite of all the precautionary measures taken, non-obvious residual risks can still exist.
Safety instructions
! WARNING
Read all safety warnings and all instructions. Failure to follow the warnings and instructions may result in electric shock, fire and/or serious injury.
Keep the instructions in a safe place for future use.
Chain saw safety warnings:
- Keep all parts of the body away from the saw chain when the chain saw is operating. Before you start the chain saw, make sure the saw chain is not contacting anything. A moment of inattention while operating chain saws may cause entanglement of your clothing or body with the saw chain.
- Always hold the chain saw with your right hand on the rear handle and your left hand on the front handle. Holding the chain saw with a reversed hand configuration increases the risk of personal injury and should never be done.
- Hold the power tool on the insulated handle surfaces as the saw chain may come into contact with the unit's mains supply cable. A contact of the saw chain with a live conductor may apply hazardous voltage to metallic parts of the unit and cause electric shock.
- Wear safety glasses and hearing protection. Further protective equipment for head, hands, legs and feet is recommended. Adequate protective clothing will reduce personal injury by flying debris or accidental contact with the saw chain.
- Do not operate a chain saw in a tree. Operation of a chain saw while up in a tree may result in personal injury.
- Always keep proper footing and operate the chain saw only when standing on fixed, secure and level surface. Slippery or unstable surfaces such as ladders may cause a loss of balance or control of the chain saw.
- When cutting a limb that is under tension be alert for spring back. When the tension in the wood fibres is released the spring loaded limb may strike the operator and/or throw the chain saw out of control.
- Use extreme caution when cutting brush and saplings. The slender material may catch the saw chain and be whipped toward you or pull you off balance.
- Carry the chain saw by the front handle with the chain saw switched off and away from your body. When transporting or storing the chain saw always fit the guide bar cover. Proper handling of the chain saw will reduce the likelihood of accidental contact with the moving saw chain.
- Follow instructions for lubricating, chain tensioning and changing accessories. Improperly tensioned or lubricated chain may either break or increase the chance for kickback.
- Keep handles dry, clean and free from oil and grease. Greasy, oily handles are slippery causing loss of control.
- Cut wood only. Do not use chain saw for purposes not entended. For example: do not use chain saw for cutting plastic, masonry or non-wood building materials. Use of the chain saw for operations different than intended could result in a hazardous situation.
Causes and operator prevention of kickback:
Kickback may occur when the nose or tip of the guide bar touches an object, or when the wood closes in and pinches the saw chain in the cut.
Tip contact in some cases may cause a sudden reverse reaction, kicking the guide bar up and back towards the operator.
Pinching the saw chain along the top of the guide bar may push the guide bar rapidly back towards the operator.
Either of these reactions may cause you to lose control of the saw which could result in serious personal injury. Do not rely exclusively upon the safety devices built into your saw. As a chain saw user, you should take several steps to keep your cutting jobs free from accident of injury.
Kickback is the result of tool misuse and/or incorrect operating procedures or conditions and can be avoided by taking proper precautions as given below:
- Maintain a firm grip, with thumbs and fingers encircling the chain saw handles, with both hands on the saw and position your body and arm to allow you to resist kickback forces. Kickback forces can be controlled by the operator, if proper precautions are taken. Do not let go of the chain saw.
- Do not overreach and do not cut above shoulder height. This helps prevent unintended tip contact and enables better control of the chain saw in unexpected situations.
- Only use replacement bars and chains specified by the manufacturer. Incorrect replacement bars and chains may cause chain breakage and/or kickback.
- Follow the manufacturer's sharpening and maintenance instructions for the saw chain. Decreasing the depth gauge height can lead to increased kickback.
More safety warnings
„Personal safety“
- Primary users
Persons working for the first time with the chain saw must obtain a practical instruction on the use of the chain saw and the operator protection equipment by an experienced operating person. Primary users shall first of all practice cutting of round timber on a sawhorse or a rack.
- Minors are not allowed to work with the chain saw.
- This device is not intended to be used by persons (including children) with restricted physical, sensory or mental abilities or a lack of experience and/or know-how unless they are supervised by a person responsible for their safety or they have been instructed by such a person on the use of the device.
- Children must be supervised to make sure that they do not play with the device.
- The chain saw shall only be operated by persons with sufficient experience.
- Give or lend the chain saw only to persons who are familiar with the chain saw and its operation. Give always the operating instruction to take with them.
- The operator is responsible for accidents or risks which occur to other persons or their properties.
- Wear suitable protective equipment when working:
– Hairnet in case of long hair - Visor
– Cut-proof trousers and gloves
More safety warnings
„Power tool use and care“
- Switch off the device, wait until the saw chain has stopped and remove the battery:
— Contact of chain saw with soil, stones, nails or other foreign substances
→ Check immediately chain and guide bar.
- Carrying out repair work.
- Performing maintenance and cleaning work.
- Eliminating faults.
- Transport.
- Clamping again the chain.
- Chain change.
— Leaving of machine (also for short-term interruption).
- Check the machine for possible damage:
- Before further use of the machine the safety devices must be checked carefully for their proper and intended function. Only operate the machine with complete and correctly attached safety equipment and do not alter anything on the machine that could impair the safety.
- Check whether movable parts function perfectly and do not stick or whether parts are damaged. All parts must be correctly installed and fulfil all conditions to ensure perfect operation of the machine.
- Damaged safety devices and parts must be properly repaired or exchanged by a recognized, specialist workshop; insofar as nothing else is stated in the instructions for use.
— Damaged or illegible safety labels have to be replaced.
- Store unused devices in a dry, locked place.
Do not carry out repair operations on the machine other than those described in section "Maintenance" but contact the manufacturer or authorized customer service centers.
⚠ Use only original spare. Accidents can arise for the user through the use of other spare parts. The manufacturer is not liable for any damage or injury resulting from such action.
Refer to the enclosed brochure "General safety instructions" for additional safety notices.
Vibrations
Hand arm vibration rear a_h = 5.68 m/s^2
Hand arm vibration front a_v = 4.69 m/s^2
Measuring uncertainty 1.5 m/s ^4
The indicated vibration emission level has been measured according to a standardised test method and can be used to compare power tools.
It can also be used for an initial estimate of the vibration exposure.
The actual vibration emission level during the use of the machine may differ from that indicated in the operating instructions or indicated by the manufacturer.
This may be caused by the following factors to be minded before and during the use:
– Proper use of the machine
– Correct cutting or machining of material
– Proper condition of the machine for use
– Use of the correct and sharp cutting tool
- Handles and optional anti-vibration handles properly mounted on the machine body
When you feel uncomfortable or notice discoloration of skin on your hands during the use of the machine, stop working immediately. Observe sufficient break times to rest. Failure to have sufficient break times may result in a hand-arm vibration syndrome.
The extent of exposure depending on the type of work or machine use should be estimated and appropriate breaks taken. In this way, the extent of exposure can be considerably reduced over the entire work time. Minimise the risk caused by vibrations. Maintain this machine according to the instructions in the manual. If you intend to use this machine frequently, contact your local authorised dealer and purchase anti-vibration accessories if required. Avoid the use of this machine at temperatures under 10^ C. Create a work schedule in order to minimise vibration exposure.
1 Description of device / spare parts
| Pos. | Denomination Order-No. | |
| 1 | Guide bar (sword) | 364864 |
| 2 | Saw chain 91PJ 56X | 364863 |
| 3 | Fastening screw | ✕ |
| 4 | Chain tension ring | ✕ |
| 5 | Cover | 364866 |
| 6 | Chain tensioner | 364872 |
| 7 | Seal Oil flow canal | 364867 |
| 8 | Chain wheel | 362923 |
| 9 | On/Off switch | 364868 |
| 10 | Rear handle | ✕ |
| 11 | Trip switch | ✕ |
| 12 | Front handle | ✕ |
| 13 | Front hand guard (chain brake) | ✕ |
| 14 | Claw stopper | ✕ |
| 15 | Oil tank cap | 364865 |
| 16 | Guide bar cover (scabbard) | 362921 |
| 17 | Safety label | 364869 |
| 18 | Saw chain oil 100 ml (without pic.) | 362928 |
| 19 | Cable strain relief | ✕ |
Assembly
i Observe the enclosed mounting sheet!
Connect the chain saw to the power supply system only after having finished the complete assembly
Risk of injury!
Wear protective gloves when assembling.
Installing the guide bar and the saw chain
Put the chain saw downward on an even face.
2 Remove the cover (5) by loosening the fastening screw (3).
3 Insert the saw chain (2) into the circular guide slot of the guide bar (1).
⚠️ Attend to the correct running direction of the chain links.
4 Put on the guide bar (1). The guide bar retainer (A) must reach into the slot of the guide rail.
When assembling, pay attention that the chain links are lying correctly within the guide slot and on the chain wheel (8).
5 Remount the cover (5).
Clamping the saw chain as described in section „Clamping of saw chain”.
Before the first start-up
Chain lubrication (oil-automatic)
The chain saw is not delivered filled with saw chain adhering oil
Never operate the chain saw without lubrication. Any use without chain saw oil may result in damage of the saw chain and guide bar.
The durability and cutting power of the chain depends on the optimal lubrication. During operation the saw chain is automatically wetted with oil.
Charging the oil tank
Put the chain saw on a suitable base.
6 Unscrew the oil tank lock (15).
Fill the oil tank with bio-degradable chain saw adhering oil (app. 120 ml) (order no. 362928).
7 The fill level can be seen on the inspection window. For easier filling use a funnel
When filling observe that no dirt reaches the oil tank
Screw on the oil tank lock (15) again
Never use recycled oil or used oil. The guarantee expires when using oil which is not allowed for such devices.
Start-up
i Mains connection
- Compare the voltage given on the machine model plate e.g. 230 V with the mains voltage and connect the saw to the relevant and properly earthed plug.
Use a shockproof plug, mains voltage 230 V with residual current circuit breaker (FI switch 30 mA). - Only use connection cables with sufficient diameters.
- In case of disadvantageous power system conditions short-term voltage reductions can occur during the starting process of the device which can influence other devices (e.g. jittering of a lamp). No failures are expected when the house service connection has a continuous current-carrying capacity greater than 100 A per phase.
i Fuse protection: 16 A time-lag

Mounting of the extension cable
10 In order to prevent an unintended loosening of the connection assembly put the extension cable as noose through the opening on the rear handhold and put it over the cable mounting (19).
Switching On / Off
Make sure before each startup that the switch lock, the On/Off switch and the chain and motor brake are working properly
Do not use any device where the switch cannot be switched on and off. Damaged switches must be repaired or replaced immediately by the customer service.
Securely support the chain saw when switching it on and hold it with both hands. Chain and guide bar must stand free.
9 Release the chain brake.
Push the front hand guard (13) towards the front handle.

Chain brake OFF.
The chain saw is ready for operation.
Switching on
The device is equipped with a safety circuitry preventing inadvertent switching on.
11 Push and hold trip switch (11). Than push the On/Off switch (9). Now, you can release the trip switch.
Switching off
11 Release On/Off switch (9).
Chain brake
The chain brake is a protective mechanism which in case of a stroke back chain saw is initiated via the front hand protection or after releasing the on/off switch. The saw chain stops immediately (< 0.1 sec.).
Checking the chain brake
Check the chain brake's proper function before each work start.
Start the engine.
Hold the chain saw with both hands.
8 Use the back of your hand to press against the front hand guard (13).

⚠ The chain saw must stop immediately.
It is not allowed to use this chain saw without properly working chain brake. Please contact the manufacturer or the customer service point.
Saw chain
Before checking/clamping the saw chain
- switch off the device
- apply the chain brake.
- pull out main plug
- in order to avoid injuries wear protective gloves.
Check the saw chain tension before
→ start of work
→ after the first steps
→ during sawing regularly all 10 minutes
Only with a correct clamped saw chain and a sufficient lubrication you can influence the durability.
i Please observe the following:
- a new saw chain must be reclamped more often until it has elongated.
- in case of heating of chain to operating temperature it expands and needs to be reclamped.
After finishing the sawing works release tension of saw chain as in case of cooling too high tensions would emerge in the saw chain. - if chain flackers or comes out of the guide clamp it again immediately.
Clamping of saw chain
2 Loosen the fastening screw (3) 1 - 2 revolutions anticlockwise.
12 Turn the chain tension ring (4) clockwise until the correct chain tension is reached.
The fastening screw (3) turns with it; possibly it must be released again during the clamping process.
13 The saw chain is correctly clamped when it can be lifted in the centre of the guide bar by appr. 3 – 4 mm.
12 Turn the chain tension ring (4) anti-clockwise when the saw chain is clamped to much.
Check whether the chain links are positioned correctly in the guide slot of the guide bar.
Refasten the fastening screw with the hand.
Chain lubrication

Never operate the chain saw without functioning chain lubrication.
Check the function of the automatic chain lubrication by switching on the chain saw and holding it with the pike in direction of a carton or paper on the ground.

Checking of the oil automatic

Do not get in contact with the ground with the chain. Keep a safe distance of 20 cm.
If an increasing oil track is caused when checking it the oil automatic works faultless.
If there is no oil track despite full oil tank

Clean the oil flow canal (G) and the upper chain clamping boring (H).
i Pay attention during assembly that the seal (7) for the oil flow channel has been inserted.
If this is not successful please contact the customer service.
Working instructions

Before starting any work ensure the following
The "safety instructions"
▶ following additional working instructions
Carry out the following checks before the initiation and regularly during the working process. Observe the relevant sections in the operating instruction manual:
Before starting to work
- Is the chain saw assembled completely and properly?
- Is the chain saw in good and safe condition?
- Only use a suited guide bar/saw chain combination as described under “Technical data”. Incorrect combinations increase the risk of kickbacks.
- Is the oil tank filled (chain lubrication)?
- Check the oil level on a regular basis. Top up saw chain oil without delay to prevent the saw chain from running dry.
- Is saw chain clamped correctly?
Observe the points in paragraph "Clamping saw chain".
■ Is saw chain sharpened correctly?
Use only well sharpened saw chains as edgeless saw chains increase not only the risk of backstrokes but also charge the motor.
- Is chain brake released and works properly?
Observe the points in paragraph "Checking the chain brake".
- Are the handles clean and dry – free of oil and resin?
-
Do you wear the required protective equipment?
■ Before starting your work make sure that: -
no other persons, children or animals stay within the working area,
— you can always step back without any barriers, - your standing area is free from foreign objects, brushwood and branches,
– you have always a secure standing position.
■ Take environmental influences into consideration:
- Do not work on snow, ice or recently peeled wood – slip hazard.
- Do not work under insufficient light conditions (e.g. fog, rain, snow flurry or twilight). You cannot see any more details within the falling area – risk of accident.
- Do not use the chain saw near inflammable liquids or gases - Risk of fire.
- Did you read and understand all advices
Notes on tree care and cutting
Observe the national regulations or the tree protection ordinances of the cities or towns regarding chopping down trees.
Gently shaping and pruning as well as chopping down of trees in the garden are allowed year-round.

However, to protect animals and breeding birds, pruning and chopping down of trees are prohibited from 01 March to 30 September.
When is the right time for tree care measures?
Observe the right time when pruning to prevent harming your trees unnecessarily.
Recommendations for pruning:
End of winter (January - March): Removing branches in the fine branch area promotes strong new shoots and is relatively gentle on the trees.
Spring till start of summer (April - June): During the growth phase, the development of new shoots is favoured by moderate pruning.
→ Trimming (cutting of dead wood) can always be done.
Observe also the weather conditions:
Spring pruning should not be done at freezing temperatures, since the cuts produced heal very poorly. In addition, branches break off easily at freezing temperatures. A good day for cutting is therefore a dry day without frost.
Do not cut either during heavy rain; the moisture will promote the growth of fungi and pests.
Simply ask a specialist who can tell you about the right time for tree care and provide you with useful tips.
While working

Saw backstroke
What is saw backstroke?
16 Saw backstroke is the sudden strike upwards or backwards of the running chain saw in direction of the operator.
This happens when
- the guide bar tip gets in contact with the sawing material (unintended) or other hard objects.
— the saw chain is jammed at the guide bar tip.
The chain saw reacts uncontrolled and frequently causes heavy injuries of the operator.
How to avoid saw backstroke?
⚠️ Carry out lateral cuts, diagonal cuts and longitudinal cuts with increased attention because here the claw stopper is not put on.
■ 14 Always hold the chain saw firmly with both hands.
■ 15 For better control saw with the lower edge of the guide bar. Hold the chain saw as close as possible to the horizontal position when contacting wood.
■ 16 Never saw with the guide bar tip.
■ 17 Sawing with the upper guide bar edge may cause a saw backstroke if the saw gets jammed or hits a hard object in the wood.
■ Start cutting only with running saw chain.
■ Only work with correctly sharpened and clamped saw chain.
■ 18 Use claw stopper (14) as lever.
■ Never work above height of shoulders.
■ Never cut through several perches at the same time. When releasing make sure that no other perch is touched.
■ If possible use a sawhorse when cutting to length.
■ Stab cuts shall only be carried out by instructed personal.
General conduct when sawing
- 14 Never saw with only one hand. Hold the chain saw always firmly with both hands, left hand on the front handhold (12) and right hand on the rear handhold (10).
- 14 Hold the chain saw slightly on the right of the own body.
- Avoid abnormal posture. Provide a safe standing position and keep at any time the balance.
- When switching on the chain saw must be supported and held safely. Chain and guide bar must stand free.
-
Start cutting only when the saw chain has reached the full number of revolutions.
■ Never work -
with stretched arms
- on hardly accessible places
- above shoulder height
- standing on a ladder, a staging or a tree.
■ Activate the chain brake when moving to a tree.
■ Before leaving the chain saw (work break) bring it in a safe condition (cover the guide bar, apply the chain brake) and put it on a place where nobody is endangered. Secure the chain saw against unauthorized access.
- Never work alone. Keep acoustic and visual contact to other persons at all times to allow immediate first aid in emergency cases.
- Immediately stop the engine at imminent danger or in emergency cases.
■ Never leave the saw running unattended.
- Immediately stop working when you feel unwell (e.g. headache, dizziness, nausea, etc.). Otherwise there is an increased risk of accidents.
■ Make breaks when sawing so that the engine can cool down.
- Do not place a hot chain saw in dry grass or onto inflammable objects.
- Never get in contact with the running saw with metallic fences or the ground.
■ Make sure that the wood is free of foreign object (stones, nails etc).
Saw techniques
- 15 Avoid saw backstroke by a correct guiding of the saw.
Note: „Causes and operator prevention of kickback“
■ Make sure that the wood cannot turn when sawing. - Saw splintered wood with care. There is risk of injury by wood pieces carried away.
■ 18 Use the claw stopper (15) for fixing the chain saw on the wood. Use the claw stopper when sawing as lever. - Do not use the chain saw for lifting or moving of wood.
- Let the chain saw work by producing a light leverage pressure over the claw stopper. When sawing do not press with strength.
- When sawing thicker perches or trunks set back the claw stopper (15) on a deeper point. For setting back release the claw stopper from the wood and place it again in a deeper position. Do not remove the saw here out of the cut.
- Be careful at the end of a sawing cut. As far as the saw leaves the wood the force of weight changes. There is risk of accident for legs and feet.
- Remove the chain saw only with running saw chain out of the cut.
- If the saw chain gets jammed in the wood, stop it immediately. Use a wedge to free the guide bar.
- Never put the trunk for sawing on the ground. Support the trunk in such manner that the cut does not close and the saw chain jams. Use a safe base (e.g. sawhorse). Avoid contact to ground with the guide bar tip or saw chain.
■ Adapt shorter trunks before sawing and clamp them firmly. - Avoid cutting of thin bosk and lumber. The chain saw is not suitable for those works.
- Carry out longitudinal cuts with special care as the claw stopper is not used. Avoid saw backstroke by guiding the saw with a small angle.
- 19 When removing branches from chopped down trees, leave the larger branches that support the trunk in place. Cut off the smaller branches as shown.
⚠️Branches under tension should be cut from the bottom to the top to prevent the saw from getting jammed.
- 20 When working at a slope take always the position above or on the side of the trunk or the lying sawing material respectively. Pay attention to rolling trunks.
Additional advices for sawing timber under tension/release
If perches, trees or wood under tension become free of tension by sawing extreme caution is demanded. The sawing material can react completely uncontrolled and result in heavy injuries or death.
⚠️ Such works shall only be carried out by instructed specialists.
⚠ For all works set always first of all on the pressure side ① the releasing cut and then the dividing cut ② - otherwise the chain saw can jam or strike back.
21 Upper side of wood under tensile stress
Place one cut (one third of the diameter of the trunk) from the bottom up.
② Then place a second cut on the same point from top which cuts through the trunk.
22 Underside of wood under tensile stress
1 Place one cut (one third of the diameter of the trunk) from top to bottom.
② Then place a second cut on the same point from bottom which cuts through the trunk.
23 Strong trunks and strong tension
Place one cut (one third of the diameter of the trunk) from bottom up.
② Then place a second cut with distance to the first cut from top which cuts through the trunk.
24 Cutting off of perches
⇒ For horizontal branches without being top heavy
The branch section falls down in a controlled manner without tipping over.
① Set the first cut from below, approx. one third of the branch diameter.
② The second cut is made on the same level as the first cut or moved further toward the inside (negative breaking step).
③ Remove the remaining branch section.
Additional advices for chopping down trees
⚠️ Such works shall only be carried out by instructed specialists.
- Pay attention to the length of the guide bar. Only those trees are allowed to be cut which have a trunk diameter which is smaller than the length of the guide bar.
■ 25 Safeguard the dangerous zone (D) before cutting.
Make sure that there are no persons or animals in the fall area. Danger to life!
■ 25 Make sure that the working area around the trunk is free of risk to stumble and that you have an escape route (F) which is free of obstacles.
■ 26/27 Before cutting the tree down decide on the felling direction (C). Before chopping the tree decide on the chopping direction. Consider in this case the balance point of the treetop, neighbour trees, slope direction, state of health of the tree and the wind direction. On this side the kerf is cut in.
- Remove interfering branches, scrub and obstacles from the working area at the trunk and make sure that you have a safe standing position.
- Thoroughly clean the trunk foot – sand, stones and other foreign objects make the saw chain edgeless or may damage it.
- Consider the state of health of the tree – be careful with trunks with damages or deadwood (droughty, rotten or dead wood).
28 Chopping a tree
Cut a kerf with the saw of approximately one third of the tree diameter into the trunk. First of all place the horizontal cut and then as secondly a cut from top in an angle of 45^ .
→ Shout the warning "Caution" or "Tree is falling" before starting the fell cut.
Now saw on the opposite side of the trunk a horizontal chopping cut. This cut should be placed a bit higher (appr. 4 cm) than the horizontal cut of the kerf.
By no means cut through the trunk. Appr. 1/10 of the trunk diameter must remain. If the tree starts falling ahead of time pull out the chain saw immediately out of the cut and step back or to the side.
→ Push a key into the horizontal chopping cut in order to make the tree falling.
Pay attention, when tree starts falling, to perches or twigs falling down.
Maintenance and cleaning
Before each maintenance and cleaning work
- switch off device
— wait for stop of chain saw
— pull out main plug
Further maintenance and cleaning works than described in this chapter shall only be carried out by the manufacturer or companies named by the manufacturer.
For maintaining and cleaning, removed security devices must unconditionally be mounted properly and proved again.
Use only original parts. Other parts can result in unexpected damages and injuries. The manufacturer is not liable for any damage or injury resulting from such action.
Maintenance
In order to avoid possible injuries wear gloves.
To guarantee a long and reliable usage of the chain saw carry out the following maintenance works regularly.
Check the chain saw for
→ loose or damaged saw chain
wear, especially chain, guide bar and chain wheel
→ worn or damaged components
→ correct assembly and faultless covers and protective devices.
Necessary repair works or maintenance have to be carried out before using the chain saw.
Saw chain and guide bar
Saw chain and guide bar are exposed to a great extent of wearing. Replace the saw chain and the guide bar without any delay if their proper function is no longer ensured.
Installing the guide bar and the saw chain".

Sharpening of saw chain

You can only work safely and well with a sharp and clean saw chain. Damaged or incorrectly sharpened saw chains increase the risk of kickbacks.
The saw chain has to be sharpened if
■ instead of wood shavings only saw dust is ejected
- you have to press the power pruner through the wood during cutting
① For sharpening a saw chain some expertise is necessary. The saw chain must be regrinded in a specialised shop.
You can also sharpen your saw chain yourself by using our electric sharpener KSG 220 A (article-no.: 302360).
| Saw chain type | Oregon 91PJ 056X |
| Depth limiter distance T | 0.64 mm (.025") |
| Sharpening angle α | 30° |
| Breast angleβ | 60° |
| Clearing angle | 90° |
Chain wheel
The demand of the chain wheel (8) is particularly great. Check regularly the teeth of the chain wheel for wear or damages.

A worn or damaged chain wheel reduces the durability of the saw chain and should therefore immediately be exchanged by the customer service.
Cleaning
Clean the chain saw carefully after each application so that the faultless function is kept.

Clean the case with a soft brush or a dry cloth.
⚠️ Water, solvents and polishing agents shall not be applied.
⚠️ Check that the ventilation slots for the motor cooling are free (risk of overheating).
If heavily contaminated, clean the device using a commercial chain cleaner.
Remove all adhering substances with a brush from the chain wheel (8) and guide bar retainers (A).

Clean the oil flow canal (G) with a clean cloth or a brush.
Pay attention during assembly that the seal (7) for the oil flow channel has been inserted.

Cleaning of guide bar
Regularly inspect and clean

the oil discharge opening (H) of the guide rail and the chain tensioner (6)
Remove any burr using a flat file and emery paper.

Turn round the guide bar (1) after each chain exchange/sharpening to avoid single-side wearing
Transport
Remove mains plug before each transport.

Transport the chain only with the chain protection put
When transporting the product within a car put it in the boot or on a separate loading area. Secure the chain saw against tipping over.
Storage
- Store machines that are not in use in a dry locked place protected against frost and outside the reach of children and unauthorized persons.
Before a longer period of storage carry out the following to extend the power pruner's service life and ensure an easy operation:
→ thoroughly clean the device
→ Remove the oil from the oil tank.
: Some chain oils tend to encrustations after a longer period. For this reason the oil system should be flushed before a longer storing with a chain saw cleaner. Fill the cleaner up to the middle (appr. 50 ml) into the oil tank. Close the tank. Switch on the chain saw without assembled guide bar and chain until the complete cleaner has left the oil opening of the chain saw.
Put the saw chain for a short time into an oil bath and enwrap it afterwards in an oil paper.
Put the chain guard in place..
Guarantee
Please observe the enclosed terms of guarantee.
Possible faults
Before each maintenance and cleaning work
- switch off device
— wait for stop of chain saw - pull out main plug
After each fault clearance, put into operation and recheck all security installations.
| Fault | Possible cause | Removal |
| Chain saw does not initiate after switching on | → Chain brake→ no power→ Extension cable damaged→ Main plug, motor or switch defect | → Release chain brake→ Check power supply, power outlet, fuse protection→ Check extension cable, exchange defect cable immediately→ Have motor or switch checked by an approved electrician or replaced by original spare parts. |
| Chain saw works with interruptions | → external loose connection→ internal loose connection→ Circuit closer/breaker defect | → Check power supply, power outlet, fuse protection→ Check extension cable, exchange defect cable immediately→ Please contact the after sales service→ Please contact the after sales service |
| Chain saw picks, vibrates or does not saw correctly | → Chain edgeless→ Chain worn→ Chain tension→ Chain not assembled correctly (teeth face to wrong direction) | → Chain must be regrinded or exchanged→ Exchange chain→ Check and adjust chain tension→ Assemble chain again |
| Chain saw does not work with full power | → Extension cable too long or diameter too small→ Power outlet to far away from main connection | → Use extension cable with sufficient diameter→ Use power outlet which is nearer within the working area |
| Saw chain gets hot | → no oil in the tank→ oil flow canal blocked→ chain tension too high→ Chain edgeless | → Refill oil (Section “Chain lubrication”)→ Clean oil flow canal→ Adjust chain tension→ Chain must be regrinded or exchanged |
| no saw chain lubrication | → no oil in the tank→ oil flow canal blocked | → Refill oil (Section “Chain lubrication”)→ Clean oil flow canal |
In case of further faults or inquiries please contact your local dealer.
Technical data
| Type / model | KS 2403/40 |
| Year of construction | see last page |
| Motor rating P_1 | 2400 W |
| Mains voltage / Mains frequency | 230-240 V ~ 50Hz |
| No-load speed no 7000 min | -1 |
| Saw chain speed 13 m/s | |
| Oil tank volume 120 ml | |
| Protection class II / | ☐ |
| Saw chain | 91PJ 056X (Oregon) |
| Pitch / drive link thickness | 9.525 mm (3/8") / 1.3 mm (.050") |
| Guide bar | 16" (460 mm) |
| usable guide bar length (cutting length) | 400 mm |
| Measured sound power level L_WA (according to regulation 2000/14/EC) | 104.2 dB (A) |
| Guaranteed sound power level L_WA (according to regulation 2000/14/EC) | 107 dB (A) |
| Measuring uncertainty K_WA | 2.53 dB (A) |
| Sound pressure level L_PA (according to regulation 2000/14/EC) | 95.5 dB (A) |
| Measuring uncertainty K_PA | 3.0 dB (A) |
| Hand – arm – vibration front / rear a_w | 5.68 m/s ^2 / 4.69 m/s ^2 |
| Measuring uncertainty K | 1.5 m/s ^2 |
| Weight (with saw chain and guide bar) | ca. 4.6 kg |
i.A. G. Koppenstein
Conformity assessment procedure 2000/14/UE – Appendix V
Kedjebroms lossad - OFF

Chain brake ON.


- Extent of delivery
- Operating times
- EC Declaration of Conformity
- Symbols on the chain saw
- Normal intended use
- Residual risks
- Safety instructions
- ! WARNING
- Chain saw safety warnings:
- Causes and operator prevention of kickback:
- More safety warnings
- „Personal safety“
- - Primary users
- „Power tool use and care“
- Vibrations
- Assembly
- Before the first start-up
- Chain lubrication (oil-automatic)
- Start-up
- i Mains connection
- Mounting of the extension cable
- Switching On / Off
- Switching on
- Switching off
- Chain brake
- Checking the chain brake
- Saw chain
- Clamping of saw chain
- Chain lubrication
- Checking of the oil automatic
- Working instructions
- Before starting to work
- Notes on tree care and cutting
- When is the right time for tree care measures?
- While working
- Saw backstroke
- How to avoid saw backstroke?
- General conduct when sawing
- Saw techniques
- Additional advices for sawing timber under tension/release
- Upper side of wood under tensile stress
- Underside of wood under tensile stress
- Strong trunks and strong tension
- Cutting off of perches
- Additional advices for chopping down trees
- ⚠️ Such works shall only be carried out by instructed specialists.
- Chopping a tree
- Maintenance and cleaning
- Maintenance
- In order to avoid possible injuries wear gloves.
- Saw chain and guide bar
- Sharpening of saw chain
- Chain wheel
- Cleaning
- Cleaning of guide bar
- Transport
- Remove mains plug before each transport.
- Transport the chain only with the chain protection put
- Storage
- Guarantee
- Possible faults
- Before each maintenance and cleaning work
Brand : ATIKA
Model : KS 2403/40
Category : Saw