AIR PURE COMPACT - Air purifier Create - Free user manual and instructions
Find the device manual for free AIR PURE COMPACT Create in PDF.

| Product type | Air purifier |
| Brand | Create |
| Model | AIR PURE COMPACT |
| Power supply | DC12V, 2.5A |
| Filter type | Effective HEPA filter + HESA (decomposition of harmful gases) |
| Sterilization | UV lamp (240-280 nm) |
| Sensors | Intelligent air quality detection, temperature, humidity |
| Fan speeds | Low, medium, high |
| Operating modes | Auto, night, timer (1h to 8h) |
| Wireless charging | Yes (compatible with Android and iPhone) |
| Bluetooth | Yes (name: SM-222B) – music playback and volume control |
| Built-in speakers | 2 × 10 W RMS |
| USB port | 5V / 2.1A |
| Display | LED color: air quality (blue, purple, red) and PM2.5 |
| Routine maintenance | Wipe the surface with a soft, dry cloth |
| Filter replacement | Every 4 to 6 months (alert at 600 hours) |
| Spare parts | Replacement HEPA filter |
| Repairability | Repair by retailer or manufacturer (do not open yourself) |
| Recommended use | Indoor – offices, bedrooms, small living rooms |
| Safety | Do not insert objects, do not put fingers, unplug before maintenance |
Frequently Asked Questions - AIR PURE COMPACT Create
User questions about AIR PURE COMPACT Create
0 question about this device. Answer the ones you know or ask your own.
Ask a new question about this device
Download the instructions for your Air purifier in PDF format for free! Find your manual AIR PURE COMPACT - Create and take your electronic device back in hand. On this page are published all the documents necessary for the use of your device. AIR PURE COMPACT by Create.
USER MANUAL AIR PURE COMPACT Create
natural_image
Line drawing of a camera with a circular lens and small square button (no text or symbols)Security instructions 6
Parts list 7
About the air purifier 8
Control panel 8
Use and maintenance 9
Wireless charging 11
Change the hepa filter 11
Cleaning and maintenance 11
Problems and solutions 12
PORTUGUÊS
Thank you very much for choosing our product. Before using the appliance, read these instructions carefully for its correct use.
The included safety precautions reduce the risk of electric shock, injury, or even death if strictly followed. Please keep this manual in a safe place for future reference, together with the completed product warranty card, the original product packaging and proof of purchase. If possible, pass these instructions on to the next owner of the appliance. Always follow basic safety precautions and accident prevention rules when using an appliance. We decline all responsibility derived from the non-compliance of these instructions by customers.
SECURITY INSTRUCTIONS
When using any electrical appliance, basic safety precautions should always be observed.
- Danger: Do not allow water or any other liquid or flammable detergent to enter the product to avoid safety problems such as electric shock or fire.
- Do not insert hard objects into the air inlet and outlet to avoid product damage.
- Do not extend your fingers into the air outlet and air inlet during product operation to avoid injury.
- Please use this product in places where children do not have access to it.
- Warning: Before connecting the product power plug to the power supply, please confirm whether the connected power supply is consistent with the input power supply parameters of the product identification.
- If the power cord is damaged, in order to avoid danger, it must be replaced by professionals from the maintenance department designated by the manufacturer or similar departments.
- If the plug, power cord or product itself is damaged, do not use this product and repair it in time.
- This product is not designed for people (including children) who are physically unsound, feel or mentally handicapped or lack relevant experience and knowledge. They can't use it, unless someone responsible for their safety directs and supervises their use of the product.
- Do not block the air inlet and outlet of the product and keep the surrounding air unobstructed.
-
During maintenance, always unplug the power plug.
-
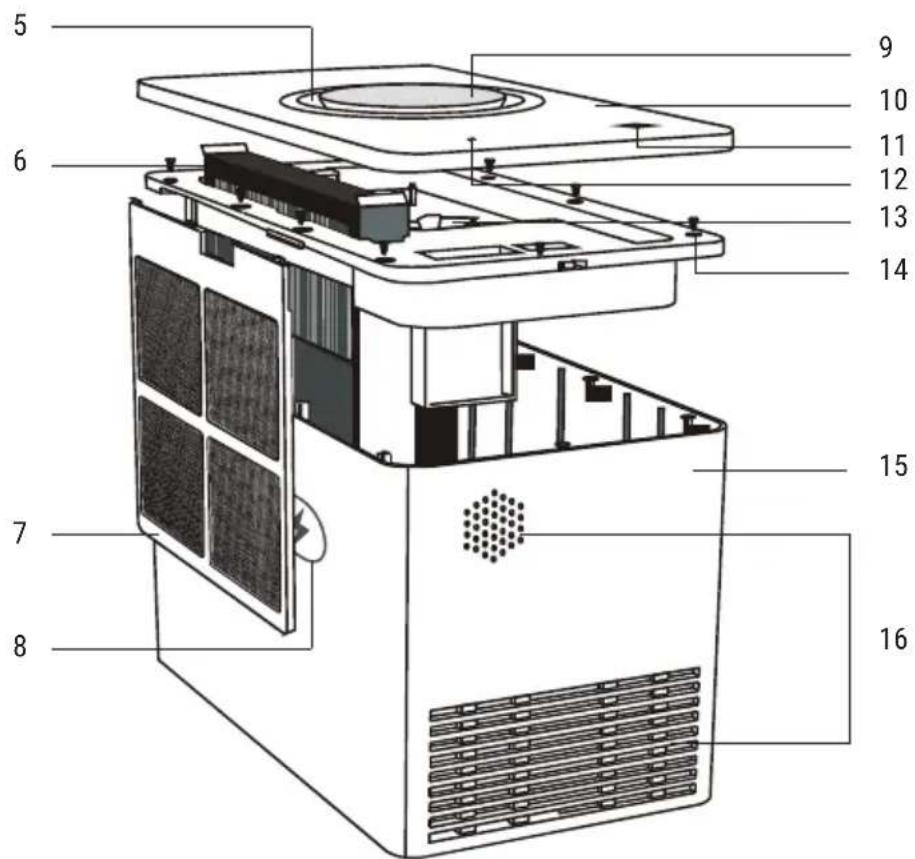
Left and right speakers (RMS = 2x10W)
- DC stand (DC12V input jack)
- Laser dust sensor
- Rear panel air inlet window
- Clean air outlet and air quality display
- HEPA Efficient Filter
- Primary filter
- Wireless charging transmission
- LED display and control panel
- Front panel
- USB charging jack (5V / 2.1A)
- Panel air detection window
- UV Sterilization Light
- Main part fixing screw
- Purifier's housing
- Side air inlet window
The air purifier adopts efficient HEPA \ HESA filter and UV sterilization technology, and adopts intelligent sensors to detect ambient air quality and temperature and humidity. This air purifier is used for indoor air purification. With it, you can breathe cleaner air and ensure environmental comfort. This air purifier has the following functional configurations:
Efficient hepa, hesa filter system
- HESA effectively kills harmful microorganisms (such as mold, hepatitis virus, bird flu virus, influenza virus, etc.), decomposes harmful gases such as benzene, toluene, formaldehyde, hydrocarbons, halogenated hydrocarbons, etc. in the environment, secondhand smoke or irritant gases, and eliminates off-flavor (eliminating off-flavor from chemical reactions such as respirators and sweat).
- The HEPA filter screen can remove more than 99.9% of fine particles (PM 2.5), bacteria, smog, mold, spores, mites, etc., and can filter environmental toxic substances to the maximum extent and inhibit the growth of microorganisms and bacteria.
Intelligent air quality sensing system
• Real-time monitoring and showing air quality. Based on that, purification efficiency can be adjusted on time and you could enjoy the fresh air at any time.
Large-power air outlet engine and UV sterilization
- The large-power air outlet engine ensures higher air volume and UV led generates ultraviolet with the wave length from 240 nm to 280 nm, which can destroy the DNA structure and RNA structure of bacteria and virus and kill growth cell and regrowth cell to reach the sterilization effect.
Place of use
- Suitable for study, bedroom and small living room.
CONTROL PANEL
Function control and display: The operation and control of each function of the product is regulated by the touch function key. When the key is touched, the product sends out a beep-ing response and displays the current setting or operation status through each corresponding icon in the display screen. The corresponding icon is described as follows:
- UV sterilization
- Wind speed key
- On / off key
- Timing key
- Automatic key (composite humidity display)
- Sleep key
- Clean air outlet and air quality status color display window
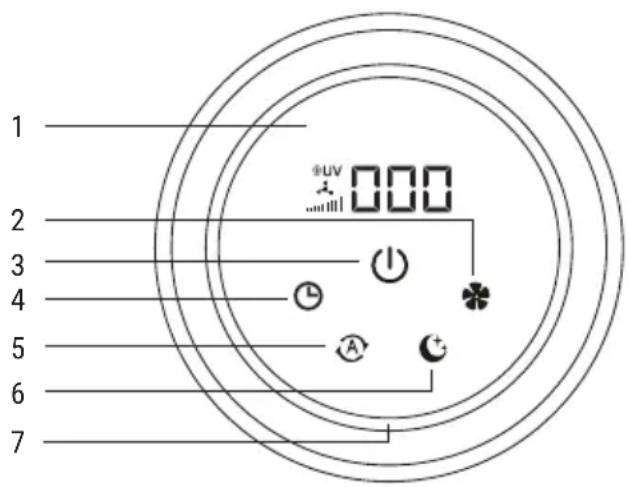
| After plugging it in, press this key to turn it on / off and the automatic operation mode and ambient temperature display will be the default. | |
 | When the product is running, press this key to adjust the running wind speed and adjust it in low, medium and high speed cycles. The LED screen displays the wind speed icon at the same time, indicating the current operating wind speed status. |
 | Press the timing key for the first time to select 1h, 2h, - 8h timing mode or 0h to cancel timing. When a certain timing state is selected, the timing icon of the display screen flashes three times slowly and then it is always on, which means the timing is effective. The second press will be timed to view, the third press will reschedule the operation. |
| [7KX] | Press the automatic key to enter the automatic operation mode, and the system automatically adjusts the wind speed according to the detected ambient air quality to effectively purify the polluted air. (Repeat in Low Speed Mode) |
 | Press the sleep key to enter the mute and rest screen operation mode, and press the power button once to resume the normal operation mode. |
 | Press the power button for a long time and you will hear a beep to turn on or off the Bluetooth function.After the Bluetooth pairing connection with the mobile phone (Bluetooth name SM - 222B ) is successful, the mobile phone music can be played and the sound volume can be adjusted. Press the wind speed button for a long time to search Bluetooth function again. |
 | UV sterilization icon display. |
 | Running wind speed icon display. |
 | PM 2.5 Icon Display: (0-15) Good-Blue; (16-35) Medium-Purple; (36-75) Unqualified-Red; (76-999) more than moderately polluted - Red flashing. |
USE AND MAINTENANCE
natural_image
Line drawing of a hand pressing a button on a device (no text or symbols)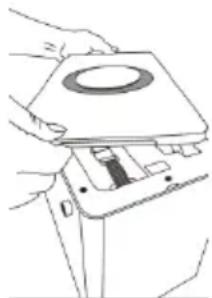
natural_image
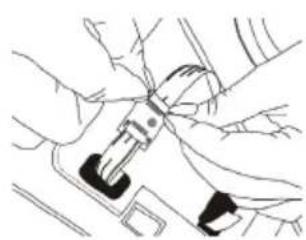
Line drawing of a hand holding a device with a circular top and internal components (no text or symbols)- Unplug the air purifier and place it on a table. Pull the front panel from the side notches and carefully remove it. You have to release the three grip tabs that are located under the front panel.
Note: The USB corner must be opened first, and the operation must not be done with too much force, otherwise it will damage the internal connection.
- Then rotate the product 90 degrees to leave the front panel facing up, now the front panel is open and you can see the FFC lineup attached to the panel.
natural_image
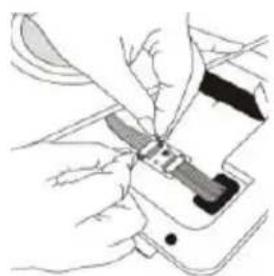
Illustration of hands using a tool to adjust or install a device on a smartphone (no text or symbols visible)- Gently move the loosened panel to the side of the purifier body, then gently separate the FFC cable buckle panel from the main body with your fingers and hold the panel open.
natural_image
Line drawing of a hand holding a device with a close-up view of internal components (no text or symbols)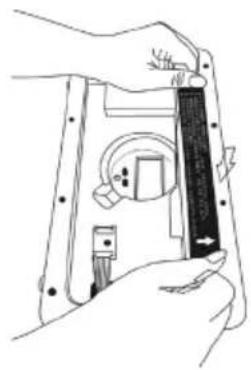
natural_image
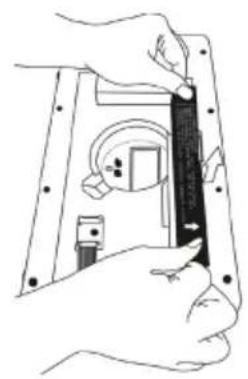
Line drawing of a hand holding a device with a black clip and circular components (no text or symbols)- Take out the HEPA filter screen directly by pulling up with both hands, to put it back, please note the direction of the arrow on the label on the filter screen.
natural_image
Line drawing of hands using a tool to interact with a device (no text or symbols visible)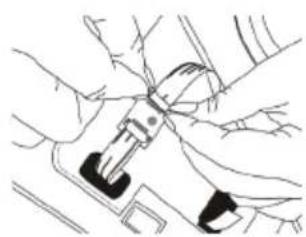
natural_image
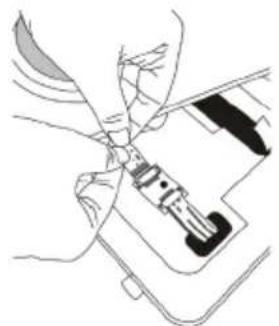
Line drawing of hands using a tool to adjust or install a component (no text or symbols visible)- Align the panel you just removed with the FFC cable and press the button.

natural_image
Line drawing of two hands holding a rectangular device with a circular lens (no text or symbols)- Align the top position of the main part of the base with the panel first, then gently press down and check that the panel and the main part are installed successfully after hearing a click.
- Reset the power adapter (DC12V/2.5A) and press the boot key in the middle of the panel after hearing two beeps.
- This product is a mobile phone wireless charging accessory product and supports Android and iPhone mobile phone wireless charging.
Note: When using, please lay the wireless receiving position of the back shell of the mobile phone on the launch plane of the product, and slightly move the mobile phone until the mobile phone automatically displays the charging icon.
CHANGE THE HEPA FILTER
- Tip: Please pull out power supply before changing.
- The system automatically memorizes the 600-hour countdown when the machine is powered on for the first time. When the filter screen expires, the display screen will show "600" every time you use it. The buzzer will sound 5 times while flashing 5 times slowly to remind the user that the filter screen needs to be replaced.
- Initialize the filter after its replacement: Press the auto key for 3 seconds in standby mode, and the display will flash “600” slowly, then press the timing key for 3 seconds and the display will show “000”. After the buzzer sounds, the system will start automatically, that is, the filter screen will be replaced successfully.
- The system recollects another 600 - hour countdown. (Please kindly note that when you replace the filter, you can refer to the maintenance of filter.)
ATTENTION: To protect our environment, please replace filter after service time is up.
- Please pay attention: If you replace the filter earlier than service time expiration but without setting 600-hour memory countdown function, the system will ignore the new filter's service time, instead of it, the system will continue to count down service time based on the previous filter.
- The shell life of filter is about 4-6 months.
- When replacing the filter, please purchase replacement filters through a formal channel.
- Due to environmental pollution is not the same in each region, we advise every month to check the filter at least once. For healthy purpose, please replace it immediately when filter is dirty.
CLEANING AND MAINTENANCE
- Daily cleaning focus on the surface of the air purifier as well as the air inlet and outlet.
- When cleaning, use soft dry cloth to wipe dust.
- When using a wet cloth, it needs to be wrung out before using it to clean the air purifier. Don't leave any water-based stains on product.
WARNING: Pull out the plugs before cleaning the surface of the air purifier.
- Do not put the air purifier into water and any other liquid. Water or liquids can not sprinkle on the air purifier directly.
- Do not use corrosive or flammable cleaners to clean any parts of the air purifier.
| PROBLEM REASON SOLUTION | ||
| Air purifier does not switch on. | Power plug is not inserted properly. | Please check power supply is correct. Or check if the plug connects with the power properly. |
| Others. | Send the purifier back to distributor or original factory for maintenance. | |
| The blower does not work. | Internal parts are loose or there is poor contact. | Send the purifier back to distributor or original factory for maintenance. Do not repair it by yourself. |
| The wind speed slows down under same working mode. | The filter is too dirty, there is wind resistance. | Replace the filter. |
| Change the speed mode to "automatic". | Under automatic mode, wind speed is adjusted by itself according to surrounding air quality. Different speed will give out under this mode. | |
| Weird sound. | Too much dust gathers on filter. Replace filter. | |
| Obstruction inside air flue. | Take the obstruction out from the air flue or send the air purifier back to the distributor fpr handling. | |
| Unable to connect Bluetooth. | Check if Bluetooth setting is correct. | Check Bluetooth setting or connect Bluetooth again. |
| USB support mobile charging, unworkable. | Your mobile phone is not the right type to use this function. The mobile phone is placed on the wrong place. | Check your mobile phone type. Check the receiver and put the mobile phone on the right place |
In compliance with Directives: 2012/19/EU and 2015/863/EU on the restriction of the use of dangerous substances in electric and electronic equipment as well as their waste disposal. The symbol with the crossed dustbin shown on the package indicates that the product at the end of its service life shall be collected as separate waste. Therefore, any products that have reached the end of their useful life must be given to waste disposal centres specialising in separate collection of waste electrical and electronic equipment, or given back to the retailer at the time of purchasing new similar equipment, on a one for one basis. The adequate separate collection for the subsequent start-up of the equipment sent to be recycled, treated and disposed of in an environmentally compatible way contributes to preventing possible negative effects on the environment and health and optimises the recycling and reuse of components making up the apparatus. Abusive disposal of the product by the user involves application of the administrative sanctions according to the laws.
natural_image
Line drawing of a hand pressing a button on a device (no text or symbols)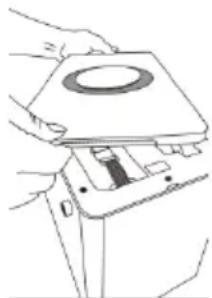
natural_image
Line drawing of hands holding a device with a circular component and internal components (no text or symbols)natural_image
Illustration of hands using a tool to adjust or install a device (no text or symbols visible)natural_image
Illustration of hands installing or adjusting a device component (no text or symbols visible)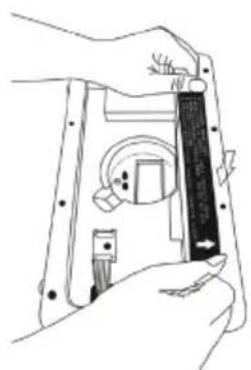
natural_image
Line drawing of a hand holding a device with a black clip and circular components (no text or symbols)natural_image
Line drawing of hands using a tool to interact with a device (no text or symbols visible)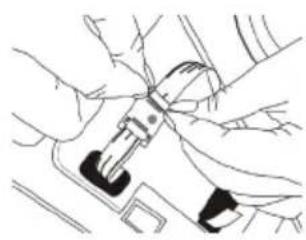
natural_image
Line drawing of hands using a buckle buckle (no text or symbols)natural_image
Line drawing of two hands holding a rectangular device with a circular lens (no text or symbols)natural_image
Line drawing of a hand pressing a button on a device (no text or symbols)
natural_image
Line drawing of hands installing or adjusting a mechanical component with a circular top (no text or symbols)natural_image
Illustration of hands using a handheld device to interact with a smartphone (no text or symbols visible)natural_image
Line drawing of a hand holding a device with a circular inset showing internal components (no text or symbols)
natural_image
Line drawing of a hand holding a device with a ruler inserted, showing internal components (no text or symbols)natural_image
Line drawing of hands connecting a mechanical component to a car (no text or symbols)
natural_image
Line drawing of hands using a buckle switch (no text or symbols)natural_image
Line drawing of two hands holding a rectangular device with a circular lens (no text or symbols)natural_image
Line drawing of a hand pressing a button on a device (no text or symbols)
natural_image
Line drawing of hands holding a device with a circular component and internal components (no text or symbols)natural_image
Illustration of hands using a handheld device to interact with a smartphone (no text or symbols visible)natural_image
Line drawing of a hand holding a device with a circular inset showing internal components (no text or symbols)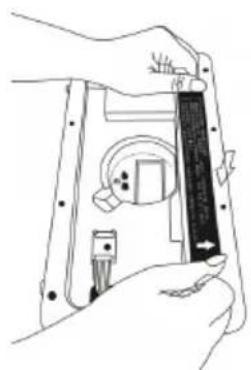
natural_image
Line drawing of a hand holding a device with a ruler and a small component inside (no text or symbols)natural_image
Line drawing of hands connecting a mechanical component to a car (no text or symbols)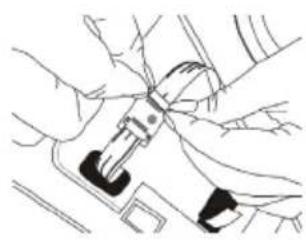
natural_image
Line drawing of hands using a buckle switch (no text or symbols)natural_image
Line drawing of two hands holding a rectangular device with a circular lens (no text or symbols)natural_image
Line drawing of a hand pressing a button on a device (no text or symbols)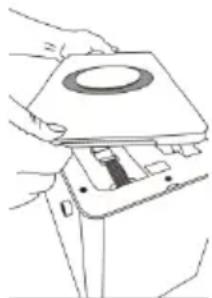
natural_image
Line drawing of hands installing or adjusting a mechanical component with a circular top (no text or symbols)natural_image
Illustration of hands using a handheld device to interact with a smartphone (no text or symbols visible)natural_image
Line drawing of a hand holding a device with a circular inset showing internal components (no text or symbols)
natural_image
Line drawing of a hand holding a device with a ruler and a small component inside (no text or symbols)natural_image
Line drawing of hands connecting a mechanical component to a car (no text or symbols)
natural_image
Line drawing of hands using a buckle switch (no text or symbols)natural_image
Line drawing of two hands holding a rectangular device with a circular lens (no text or symbols)natural_image
Line drawing of a hand pressing a button on a device (no text or symbols)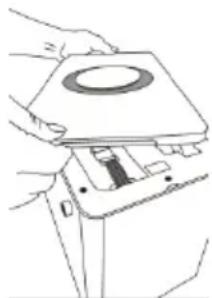
natural_image
Line drawing of hands installing or adjusting a mechanical component with a circular top (no text or symbols)natural_image
Illustration of hands using a handheld device to interact with a smartphone (no text or symbols visible)natural_image
Line drawing of a hand holding a device with a circular inset showing internal components (no text or symbols)
natural_image
Line drawing of a hand holding a device with a ruler and a small component inside (no text or symbols)natural_image
Line drawing of hands connecting a mechanical component to a car (no text or symbols)
natural_image
Line drawing of hands using a buckle switch (no text or symbols)natural_image
Line drawing of two hands holding a rectangular device with a circular lens (no text or symbols)WECHSELN SIE DEN HEPA-FILTER
natural_image
Line drawing of a hand pressing a button on a device (no text or symbols)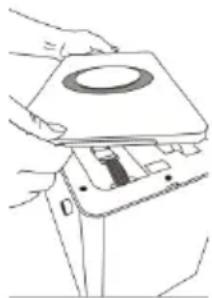
natural_image
Line drawing of hands installing or adjusting a mechanical component with a circular top (no text or symbols)natural_image
Illustration of a hand using a tool to cut a device into a mobile phone (no text or symbols visible)natural_image
Illustration of hands holding a device with a magnified view of internal components (no text or symbols)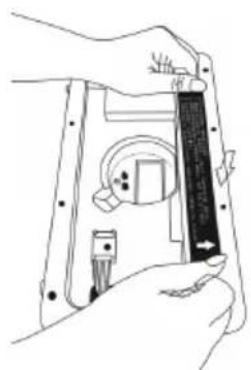
natural_image
Line drawing of a hand holding a device with a black rectangular component, no text or symbols presentnatural_image
Line drawing of hands using a tool to interact with a device (no text or symbols visible)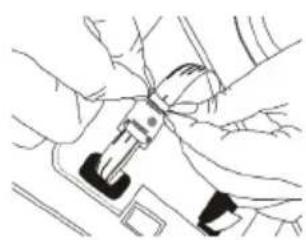
natural_image
Line drawing of hands using a buckle switch (no text or symbols)natural_image
Line drawing of two hands holding a rectangular device with a circular lens (no text or symbols)natural_image
Illustration of a hand pressing a button on a device with a circular dial and pointer (no text or symbols)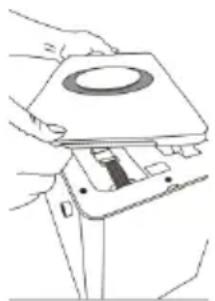
natural_image
Line drawing of hands assembling a mechanical component with a circular top (no text or symbols)natural_image
Illustration of a hand using a tool to adjust or install a device (no text or symbols visible)natural_image
Illustration of hands holding a device with a magnified view of internal components (no text or symbols)
natural_image
Line drawing of a hand holding a device with a ruler and a small component, no text or symbols presentnatural_image
Line drawing of hands using a tool to adjust or install a mechanical component (no text or symbols visible)