306643 - Weather Station Brandson - Free user manual and instructions
Find the device manual for free 306643 Brandson in PDF.


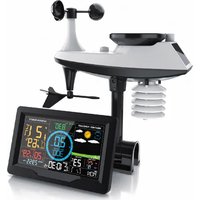
| Product type | Connected weather station with outdoor sensor |
| Brand | Brandson |
| Model | 306643 |
| Main unit power supply | 3 AAA 1.5 V batteries or 5 V/1 A mains adapter (included) |
| Outdoor sensor power supply | 2 AAA 1.5 V batteries |
| Temperature range | -9.9 °C to 50 °C |
| Temperature accuracy | ±1 °C |
| Humidity range | 1% to 99% |
| Atmospheric pressure range | 900 to 1050 hPa |
| Station frequency | 2412-2472 MHz (Wi-Fi) |
| Outdoor sensor frequency | 433.92 MHz |
| Sensor protection rating | IPX4 (protected against water splashes) |
| Display | Backlit LCD screen (permanently on with adapter) |
| Main functions | Indoor/outdoor temperature, humidity, pressure, 12h weather forecast, moon phases, clock (12/24h), alarm (3 alarms), snooze, trend, indoor climate assessment, Wi-Fi connection and Tuya Smart app |
| Dimensions (approx.) | 200 x 150 x 50 mm |
| Weight (approx.) | 300 g |
| Care and cleaning | Wipe with a soft, dry cloth. Do not use harsh chemicals. |
| Safety | Do not expose the main unit to moisture. Keep out of reach of children. Do not open or modify the device. |
| Spare parts and repairability | No user-serviceable parts. In case of failure, contact customer service. |
| General information | Connected weather station compatible with Tuya Smart app. Wireless outdoor sensor (433 MHz). |
Frequently Asked Questions - 306643 Brandson
User questions about 306643 Brandson
0 question about this device. Answer the ones you know or ask your own.
Ask a new question about this device
Download the instructions for your Weather Station in PDF format for free! Find your manual 306643 - Brandson and take your electronic device back in hand. On this page are published all the documents necessary for the use of your device. 306643 by Brandson.
USER MANUAL 306643 Brandson
ENG: Current drivers, user manuals and other relevant documents for this product can be found on our homepage.
natural_image
Abstract black-and-white geometric pattern with concentric circular lines and radial symmetry (no text or symbols)natural_image
Simple line drawing of a battery with two black segments (no text or symbols)natural_image
Simple line drawing of a house with the number 3 inside (no text or symbols)Temperaturalarm
Trendanzeige
Temperatureinheit

Thank you for purchasing a Brandon product. Please read the following operating instructions carefully so that you can enjoy your purchased appliance for a long time. Before using the delivered goods, please check that they are complete, free of defects and undamaged.
1. Scope of delivery
- Weather station + outdoor sensor
- Power supply unit
- Operating instructions
2. Technical data
| Power supply | Main unit: 3x 1.5V AAA batteries or alternatively 1x DC 5V, 1A hollow plug power supply unit (5.5 mm/2.5 mm) / Polarity: - ---(o--- + Sensor: 2x 1.5V AAA battery |
| Temperature range -9.9°C to 50°C | |
| Tolerance range | +-1°C |
| Transmission power (EIRP) | Weather station: 15.83 dBmSensor: - 2.76 dBm |
| Frequency range | Weather station: 2412-2472 MHzSensor: 433.92MHz |
| Air humidity 1%-99% | |
| Air pressure 900-1050hPa | |
| Protection class Outdoor sensor | IPX4 |
| Features | Alarm function (alarm clock)Indoor and outdoor temperatureHumidity displayAir pressure displayWeather forecast pictogramSnooze function12/24-hour displayMoon phase displayAPP support |

3. Additional information on this device
When using the appliance for the first time, check the integrity of the product and its components as well as its function. Do not use this device if it is damaged. Do not expose the base station to moisture or direct sunlight. The outdoor sensor is splash-proof and should not be exposed to continuous and direct rain. An ideal location would therefore be under a roof and in the shade.
Before using the product, make sure that the available mains voltage corresponds to the operating voltage specified on the rating plate.
Before using the product, make sure that no cables are damaged.
The appliance must be plugged into an easily accessible socket so that it can be unplugged in the event of an emergency.
This product is only suitable for use with the mains adapter supplied.
It is not suitable for medical purposes or for public information and is intended for private use only.

Attention!
Keep the batteries and the appliance out of the reach of children. Batteries contain acids that are harmful to health. Weak batteries should be replaced as soon as possible to prevent leakage! Never use new and old batteries or batteries of different types at the same time. Never throw batteries into a fire and do not short-circuit them. Never charge the batteries or take them apart. There is a risk of explosion!
4. Product details
Control elements
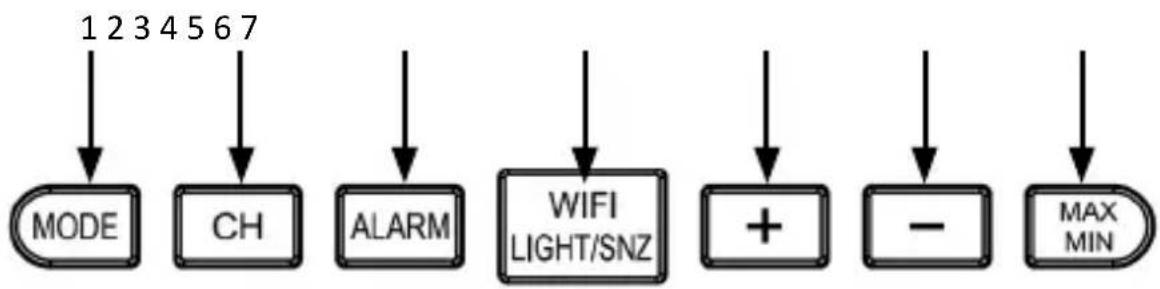
flowchart
graph TD
    A["MODE"] --> B["CH"]
    B --> C["ALARM"]
    C --> D["WIFI LIGHT/SNZ"]
    D --> E["+"]
    E --> F["-"]
    F --> G["MAX_MIN"]
| No. Button | |
| 1 "MODE" button | |
| 2 "CH" button (Channel) | |
| 3 "ALARM" button | |
| 4 "WIFI/LIGHT/SNOOZE" button | |
| 5 "+" button | |
| 6 "-" button | |
| 7 "Max/Min" button | |
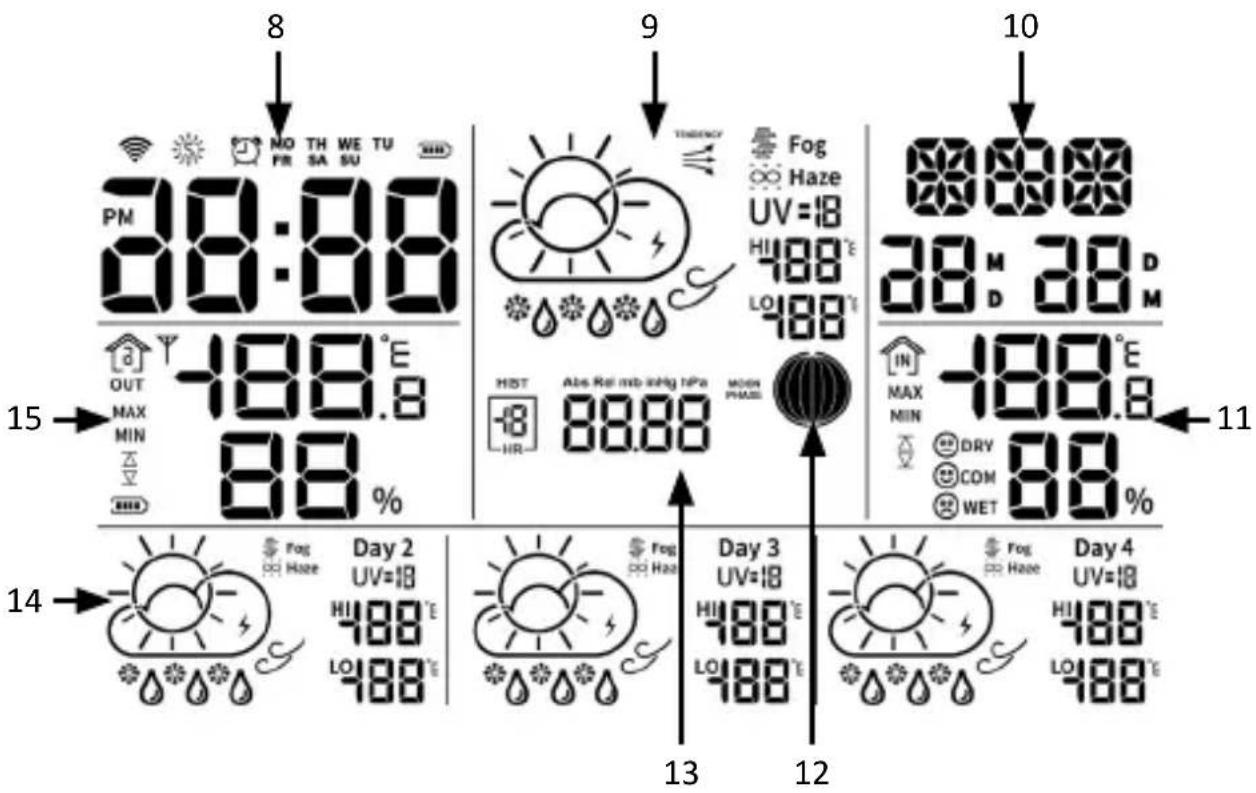
| No. Button | |
| 8 Time / Alarm | |
| 9 Weather forecast pictogram (current day) / trend display | |
| 10 Date display | |
| 11 Indoor temperature | |
| 12 Moon phase display | |
| 13 Air pressure display | |
| 14 Weather forecast pictogram for the next 3 days | |
| 15 Outdoor temperature |
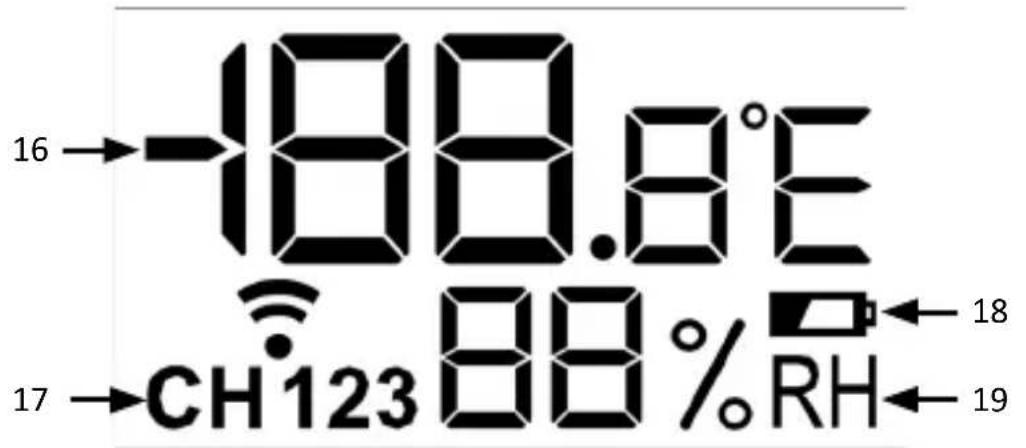
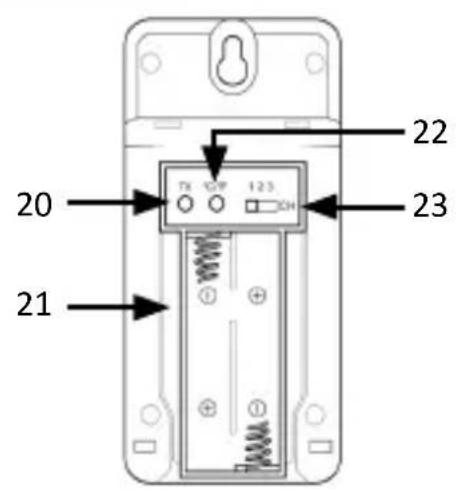
| No. Button | |
| 16 Temperature | |
| 17 Channel display | |
| 18 Battery icon | |
| 19 Humidity | |
| 20 "TX" button | |
| 21 Battery compartment | |
| 22 "°C/°F" button | |
| 23 "Channel" switch |
5. Start-up
Remove the product from the packaging and remove all packaging material. Open the battery compartment of the outdoor sensor and insert 2x 1.5V AAA batteries. Then open the battery compartment on the back of the main unit and insert 3x 1.5V AAA batteries. Alternatively, you can use the supplied 5V / 1A hollow plug power supply unit for operation. To do this, plug the power supply unit into a properly connected socket and connect it to the hollow plug connection on the main unit.

Note: If you want to use the device with batteries, the display light is not permanently switched on. The display illumination is only permanently switched on when the device is operated with the enclosed mains adapter.
The weather station then attempts to connect to the outdoor sensor. Make sure that both devices are within range of each other. The connection symbol „“ flashes in the „Outdoor temperature display“ of the main unit. Then press the „TX“ button in the battery compartment of the outdoor sensor to establish the connection. If the main unit is unable to establish a connection to the outdoor sensor within 3 minutes, the search is cancelled. The connection symbol stops flashing and the temperature display shows „-._°C“ and „-._%“ on the display.
In most cases, the connection cannot be established due to certain factors, such as reinforced walls or too great a distance between the sensor and the main unit. In this case, position the sensor and the main unit closer to each other. To restart detection, press and hold the „CH“ button on the back of the main unit for approx. 3 seconds until the connection symbol flashes on the display. Then press the „TX“ button in the battery compartment of the outdoor sensor to establish the connection.
6. Time signal
The time signal is received by the weather station when you connect the weather station to the Internet via the app.
Alternatively, you have the option of setting the time manually. You can find out more about this in the „Basic settings“ section.
7. Display
Time display:
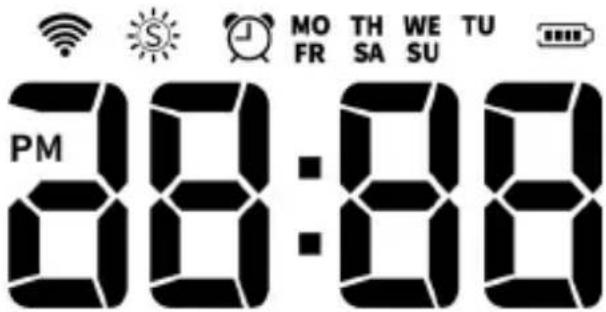
The time can be displayed either in the 12 or 24 hour display.
Date and day:
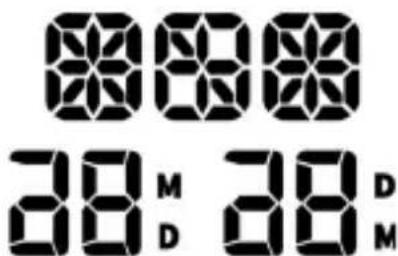
The weather station has a date and weekday display. The date is displayed in the left-hand section and the day of the week in the right-hand section.
Moon phases:
MOON PHASE

natural_image
Abstract black-and-white geometric pattern resembling a sphere with radial lines (no text or symbols)The current moon phase is shown on the weather station display as follows:
The part of the moon that is not illuminated is shown dark on the display.
Barometric pressure display
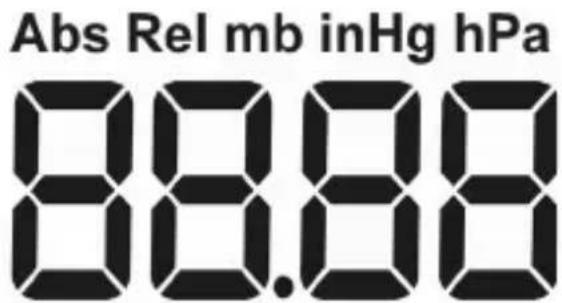
The current air pressure is displayed. To change the display unit, press and hold the „-“ button for about 3 seconds.
Trend display:
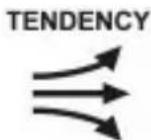
The trend display changes hourly, rising or falling, if the air pressure changes by at least 2 hPa (=0.06 inHg) during the measurement period.
Weather forecast:
The weather station calculates a weather forecast for around 12 hours based on the air pressure development. Of course, this forecast cannot be compared with satellites or high-performance computers. The forecast only shows an approximate indication of the current development. The calculated weather forecast only refers to the pictogram, the additional information is determined from the Internet with a successful Internet connection.
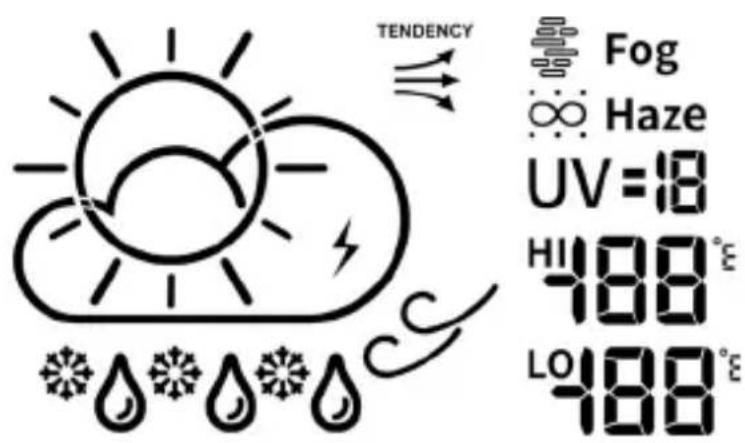
A further 3 days are shown at the bottom of the display. (Only available with an internet connection via the app)
Interior temperature display:
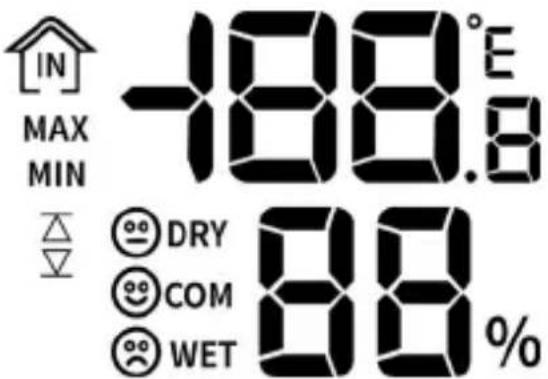
The indoor temperature is measured by the base station and displayed with an accuracy of up to a tenth of a degree. The set temperature unit appears to the right of the measured value. The temperature unit can be changed between °C and °F. To do this, press the °C / °F button on the back of the weather station.
Humidity:
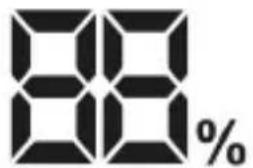
This display shows the current humidity to which the weather station is exposed.
Indoor climate assessment:

DRY
The indoor climate is assessed on the basis of humidity and temperature.

COM
DRY Humidity below 40%
COMFORT Humidity is between 40% and 70%. The temperature is between 20°C and 28°C (68°F and 82.4°F).

WET
WET Humidity above 70%
Low battery level:
natural_image
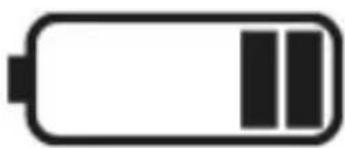
Simple line drawing of a battery with two black segments (no text or symbols)If the battery symbol appears, the inserted batteries are empty and should be replaced with new ones as soon as possible. This applies to both the outdoor sensor and the base station.
Outdoor temperature display:

The outdoor temperature is measured by the outdoor sensor and displayed with an accuracy of up to a tenth of a degree. The set temperature unit appears to the right of the measured value. The temperature unit can be changed between °C and °F. To do this, press the „-“ button on the back of the weather station.
Channel display
natural_image
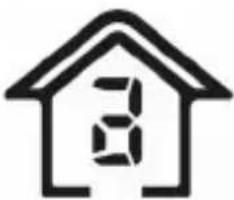
Simple line drawing of a house with the number 3 inside (no text or symbols)The weather station receives the signal from the outdoor sensor automatically after all settings have been made. You can switch between the different channels using the „CH“ button. The channels of the outdoor sensor can be selected directly on the device using a switch.
1, 2, 3: Channel of the outdoor sensor
8. Basic settings

Note: Pressing the „WIFI/LIGHT/SNOOZE“ button switches on the backlight. Please note that the base station does not respond to 2 buttons at the same time. We therefore recommend that you only press one button at a time.
Press and hold the „MODE“ button for about 3 seconds to adjust the basic settings. You can use the „+“ and „-“ buttons to adjust the values accordingly.
Briefly press the „MODE“ button in the time settings to confirm the entry and move on to the next option. In this way, you can change and adjust the following settings in the following order:
- Year
- Month
- Day
• 12 or 24 hour display
• Hour - minute
8.1 Alarm setting
The weather station can save up to 3 alarm settings, which can be switched on and off separately.
Set alarm
Press the „ALARM“ button to display the alarm time. There are various alarm settings above the alarm time. Select the desired alarm time (1, 2 or 3) and then press and hold the „ALARM“ button for approx. 3 seconds to access the alarm settings. Use the „+“ and „-“ buttons to make the desired settings. Then press the „ALARM“ button again to save the set alarm. You can adjust these settings with Alarm 1, Alarm 2 and Alarm 3.
Activate alarm
Press the „ALARM“ button in clock mode. Alarm 1 is displayed. Press the „+“ or „-“ button to switch the alarm on or off. If the corresponding alarm symbol flashes, the alarm is deactivated. If the alarm symbol lights up continuously, this means that the alarm is activated.
Switch off the alarm
When the alarm is activated at the set time, the backlight switches on automatically. The alarm tone is now active for 2 minutes before it is automatically switched off. To switch off the alarm, press any button.
To set the alarm to snooze mode, press the „WIFI/LIGHT/SNOOZE“ button while the alarm is sounding. The alarm symbol for the corresponding alarm will start to flash and the alarm will sound again in 5 minutes.
9. Stored data
Maximum and minimum temperatures
The device records the highest and lowest temperature and humidity of the day, which are automatically deleted and re-recorded every day from 0:00.
Press the „MIN/MAX“ button once to display the highest temperature and humidity, „MAX“ appears in the display. Press the button again to display the lowest temperature and humidity. MIN“ appears on the display. Press again to return to the standard display.
Press the „MIN/MAX“ button for approx. 5 seconds to reset the minimum and maximum values. The temperature displays „--.-“ for about 3 seconds and then returns to the current temperature display.
If the maximum or minimum values are displayed and no operation is performed for 10 seconds, the appliance returns to the current temperature display.
10. Additional settings (app)
The weather station can connect to the Internet via WIFI and can also be controlled via an app.
Note: The WIFI function is only used when the weather station is powered by the power adapter. Please make sure that your phone is properly connected to a 2.4G network or a 2.4/5G hybrid network and do not connect to a wireless network that only supports 5G and enable Bluetooth.
- Please download the „Tuya Smart“ app from the App Store, install it and register.
- Press and hold the „WIFI/SNOOZE/LIGHT“ button for 3 seconds to enter the WIFI distribution mode, the lower point of the WIFI signal() starts to flash in the time display.
- Open the „Tuya Smart“ app, click on the „+“ button in the top right-hand corner and select „Add device“.
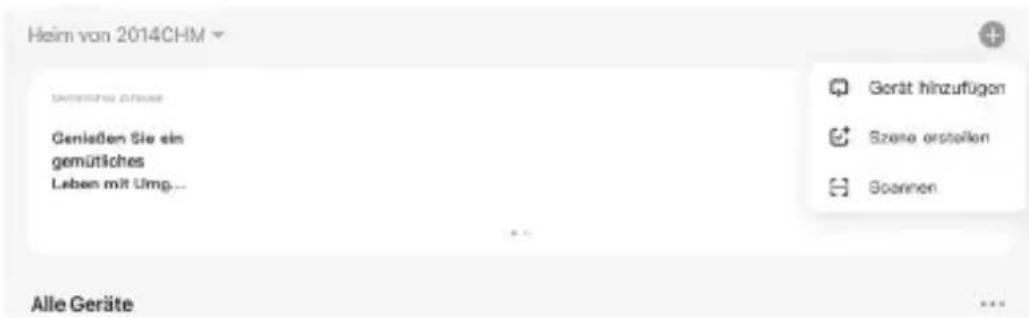
- After adding the device and entering the WIFI pairing module, „Manual entry“ appears. Select „Set up now“ and allow the app to use your local network.
- The app recognises the network automatically. Enter the WIFI password and click on „Next“. Finally, click on „Done“ in the top right-hand corner to complete the pairing process.
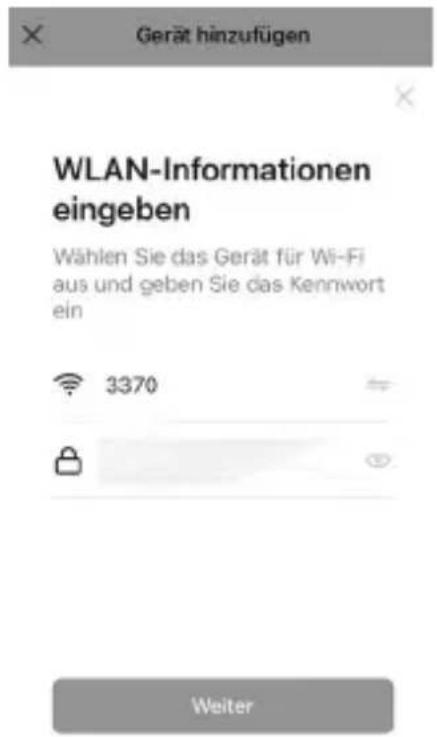
- After connecting to the network, the weather station will automatically set the local time and date.
10.1 App settings
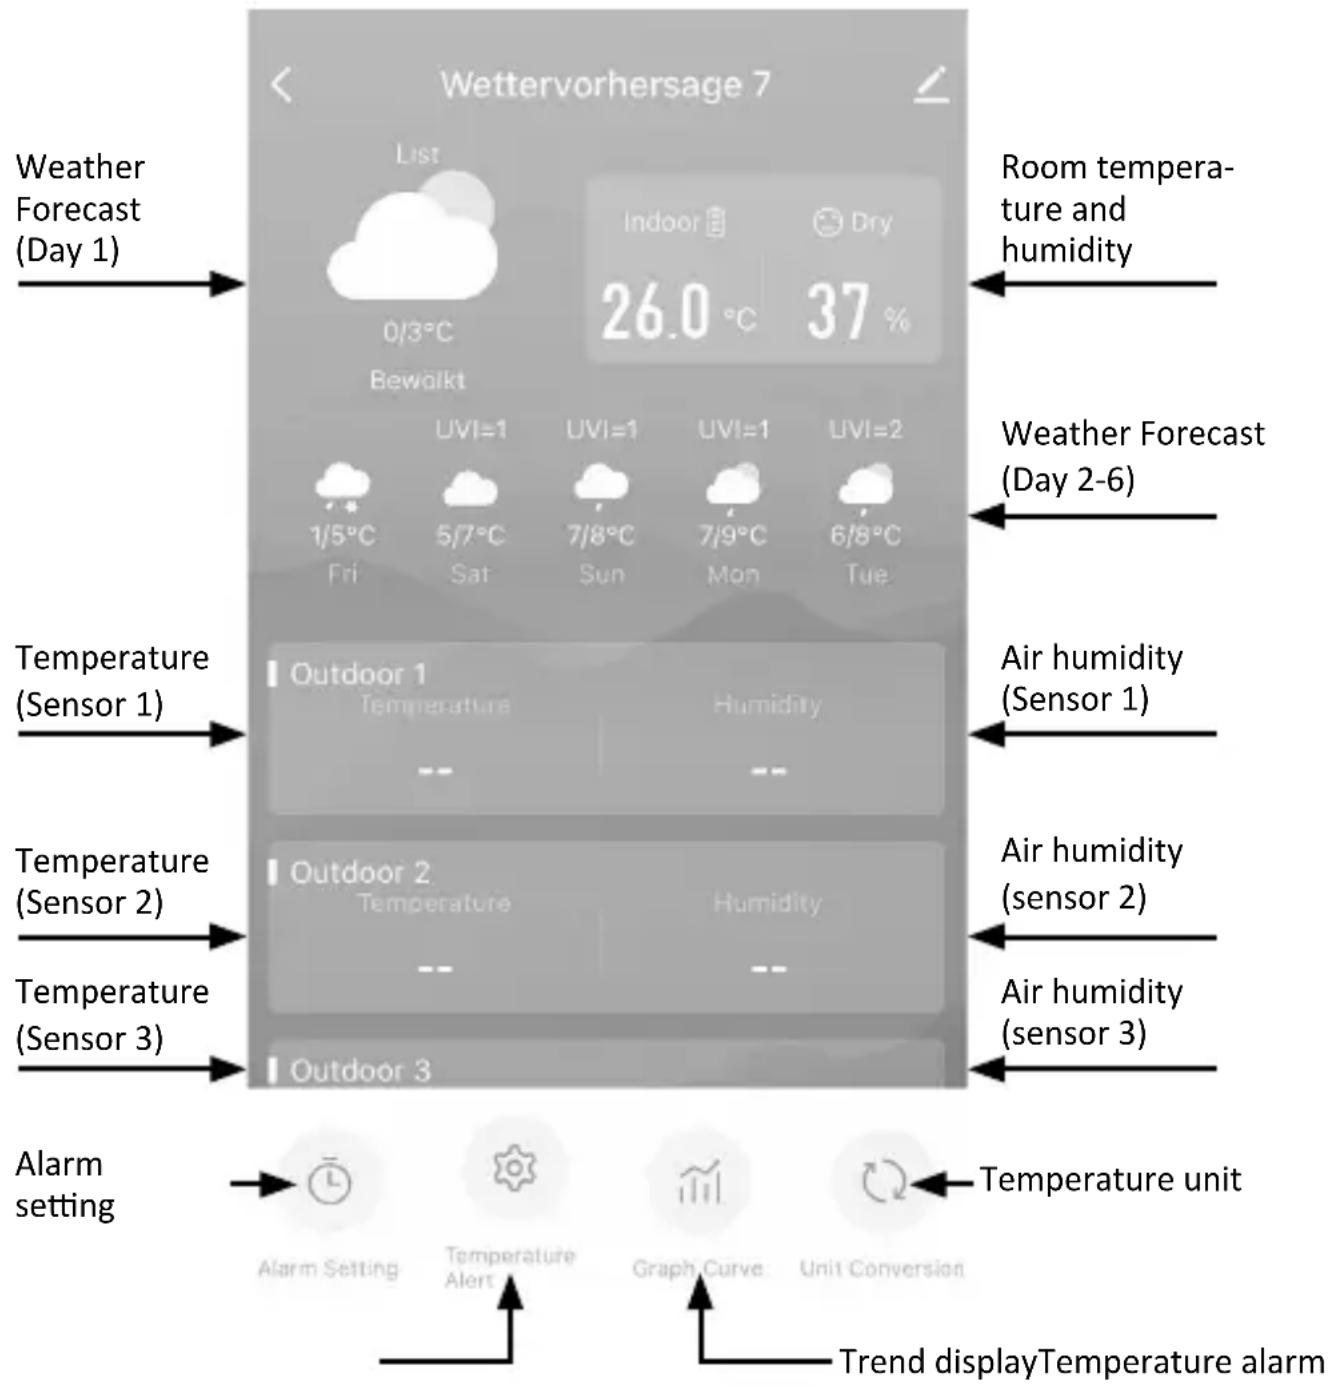
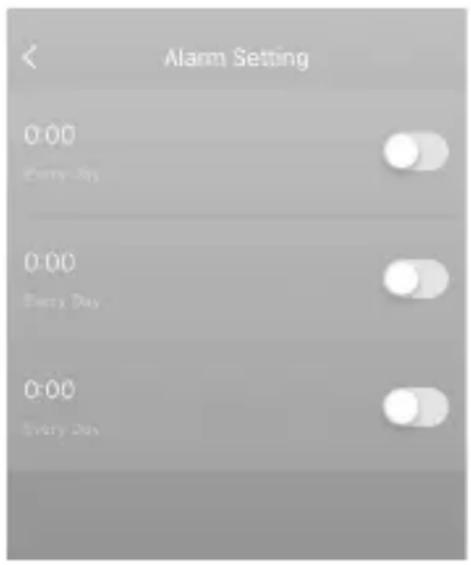
Alarm settings
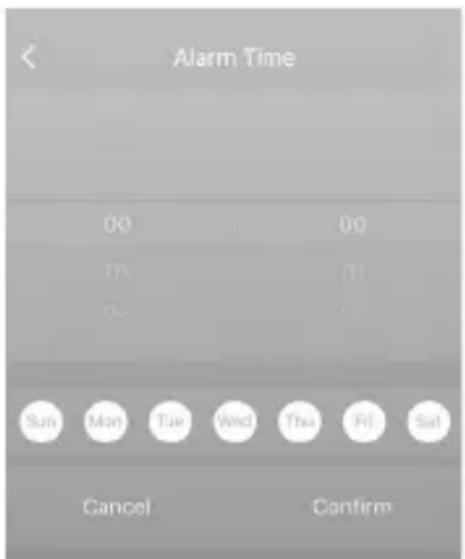
You can make the alarm settings in the “ALARM SETTINGS” menu item. You have 3 different alarm times that you can customise.
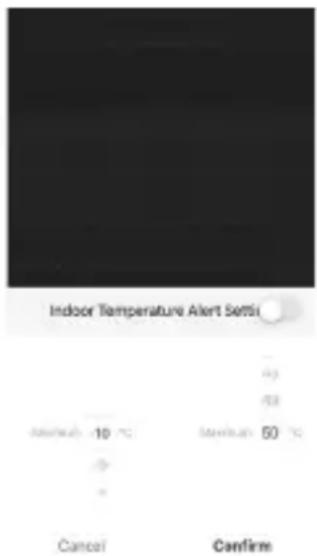
Temperature alarm
You can set temperature alarms in this menu item. You have the option of setting an alarm for the indoor temperature and 3 separate alarms for the outdoor temperature.
![Temperature Alert Temperature Alert [10] - Temperature Alert | Sell - 5 Outdoor Temperature - 1 Alert Setting Outdoor Temperature - 2 Alert Setting Outdoor Temperature - 3 Alert Setting](/content/2026/04/683607/images/3e7315ebc45eed809805807fb7fb0deeb089647a75c6239a4185e928a7a5f1ac.jpg)
Trend display
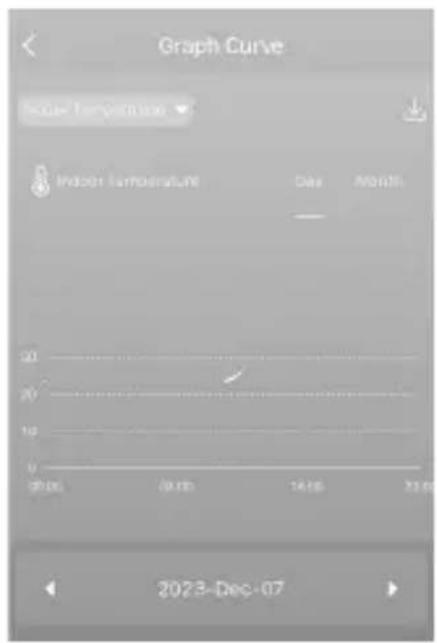
You can view the temperature and humidity trends in the “GRAPH CURVE” menu item.
Temperature unit
You can set the displayed temperature unit in the "Unit Conversion" menu item.


11. Safety instructions and disclaimer
Never attempt to open the appliance to carry out repairs or modifications. Avoid contact with the mains voltage. Do not short-circuit the product. The device is not waterproof, please only use it in dry conditions. Protect it from high humidity, water and snow. Keep the device away from high temperatures. Do not expose the device to sudden temperature changes or strong vibrations, as this could damage the electronic parts. Check the device for damage before use. The appliance should not be used if it has been knocked or damaged in any other way. Please observe the national regulations and restrictions. Do not use the device for purposes other than those described in the instructions. This product is not a toy. Keep it out of the reach of children or mentally impaired persons. Any repair or modification to the appliance that is not carried out by the original supplier will invalidate the warranty or guarantee. The appliance may only be used by persons who have read and understood these instructions. The device specifications may change without prior notice.

12. Disposal instructions
According to the European WEEE Directive, electrical and electronic devices may not be disposed of with household waste. Their components must be recycled or disposed of separately, as toxic and hazardous components can cause lasting damage to the environment if disposed of incorrectly. As a consumer, you are obliged under the Electrical and Electronic Equipment Act (ElektroG) to return electrical and electronic equipment free of charge at the end of its life to the manufacturer, the point of sale or to public collection centres set up for this purpose. Details are regulated by the respective state law. The symbol on the product, the operating instructions and/or the packaging refers to these regulations. By separating, recycling and disposing of old appliances in this way, you are making an important contribution to protecting our environment. For information on authorised collection points in your area, please contact your local city or municipal administration.

13. Notes on battery disposal
In connection with the sale of batteries or the delivery of devices containing batteries, the supplier is obliged to inform the customer of the following: The customer is legally obliged to return used batteries as the end user. The customer can return used batteries that the supplier carries or has carried as new batteries free of charge to the supplier's dispatch warehouse (dispatch address). The symbols shown on the batteries have the following meaning: Pb = battery contains more than 0.004 per cent lead by mass, Cd = battery contains more than 0.002 per cent cadmium by mass, Hg = battery contains more than 0.0005 per cent mercury by mass.

The crossed-out dustbin symbol means that the battery must not be disposed of with household waste.
WEEE Directive 2012/19/EU WEEE Register No.: DE 67896761
Hereby, WD Plus GmbH declares that the device 306643 is in compliance with the essential requirements and other relevant provisions of Directive 2014/53/EU. A complete declaration of conformity can be obtained from: WD Plus GmbH, Wohlenbergstraße 16, 30179 Hannover, Germany, https://model.ganzeinfach.de/306643.
natural_image
Abstract black-and-white geometric pattern resembling a sphere with radial lines (no text or symbols)natural_image
Simple line drawing of a battery with two black segments (no text or symbols)natural_image
Simple line drawing of a house with the number 3 inside (no text or symbols beyond the number)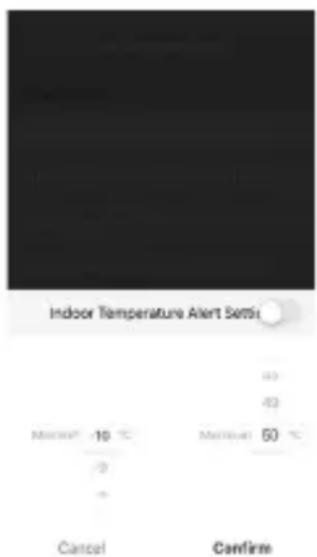

natural_image
Abstract geometric pattern with concentric black and white lines forming a spherical shape (no text or symbols)natural_image
Simple line drawing of a battery with two black segments (no text or symbols)natural_image
Simple line drawing of a house with the number 3 inside (no text or symbols)Allarme temperatura

natural_image
Simple line drawing of a battery with two black segments (no text or symbols)natural_image
Simple line drawing of a house with the number 3 inside (no text or symbols beyond the numeral)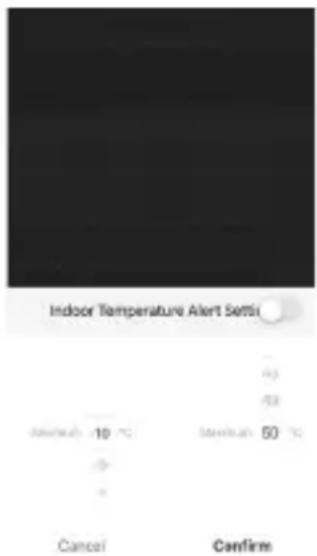

MO-FR 9:30am - 18pm CET

brandson-equipment.de

- Temperaturalarm
- Trendanzeige
- Temperatureinheit
- Scope of delivery
- Technical data
- Additional information on this device
- Attention!
- Product details
- Control elements
- Start-up
- Time signal
- Display
- Barometric pressure display
- Trend display:
- Weather forecast:
- Interior temperature display:
- Humidity:
- Indoor climate assessment:
- Low battery level:
- Outdoor temperature display:
- Channel display
- Basic settings
- Alarm setting
- Set alarm
- Activate alarm
- Switch off the alarm
- Stored data
- Maximum and minimum temperatures
- Additional settings (app)
- Alarm settings
- Temperature alarm
- Trend display
- Temperature unit
- Safety instructions and disclaimer
- Disposal instructions
- Notes on battery disposal
- Allarme temperatura
Brand : Brandson
Model : 306643
Category : Weather Station