
301519 - Weather Station Brandson - Free user manual and instructions
Find the device manual for free 301519 Brandson in PDF.


| Product Type | Weather Station |
| Brand | Brandson |
| Model | 301519 |
| Dimensions (main unit) | 150 x 100 x 30 mm |
| Weight (main unit) | 250 g |
| Power Supply | 2 x AAA batteries (main unit) + 2 x AAA batteries (outdoor sensor) |
| Display Type | LCD screen with backlight |
| Indoor Temperature Range | -10°C to 50°C (14°F to 122°F) |
| Outdoor Temperature Range | -40°C to 60°C (-40°F to 140°F) |
| Humidity Range | 20% to 95% RH |
| Barometric Pressure Range | 600 to 1100 hPa |
| Wireless Range (outdoor sensor) | Up to 100 meters (open area) |
| Transmission Frequency | 433 MHz |
| Weather Forecast | Sunny, partly cloudy, cloudy, rainy, stormy |
| Clock Function | Radio-controlled time (DCF-77) or manual setting |
| Alarm Function | Daily alarm with snooze |
| Moon Phase Display | Yes |
| Mounting Options | Table stand or wall mount |
| Maintenance & Cleaning | Wipe with a soft, dry cloth. Avoid water and solvents. |
| Safety Information | Keep away from direct sunlight, heat sources, and moisture. Use only specified batteries. |
| Spare Parts & Repairability | Standard AAA batteries. No user-serviceable parts. Contact Brandson support for repairs. |
| General Information | Includes main unit, outdoor sensor, and user manual |
Frequently Asked Questions - 301519 Brandson
User questions about 301519 Brandson
0 question about this device. Answer the ones you know or ask your own.
Ask a new question about this device
Download the instructions for your Weather Station in PDF format for free! Find your manual 301519 - Brandson and take your electronic device back in hand. On this page are published all the documents necessary for the use of your device. 301519 by Brandson.
USER MANUAL 301519 Brandson
BRANDSON - EQUIPMENT -
User Manual

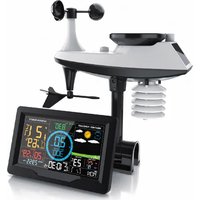
Weather Station incl. Hygrometer/Barometer
Thank you for having chosen this Brandon product and for placing your trust in our company. Please read this manual carefully before installation to ensure your long-term enjoyment of this product. For future reference, please keep this manual.
1 Scope of supply
- Weather station
- External sensor
- User manual
2 Technical specifications
| Power supply • Main unit: 3x 1.5 AA battery• Sensor unit: 2x 1.5 AA battery |
| Frequency 433 Mhz |
| Functions • Time display• Date display (incl. weekday)• Barometric pressure display• Moon phase display• Humidity display• Indoor and outdoor temperature• Trend display• Weather forecast• Sunrise and sunset time• Alarm function/snooze function• Tides display |
3 Product details

| No. | Function Function | |
| 1 | Sunrise/Sunset | Sunrise and sunset time |
| 2 | Tides display Displays the tides | |
| 3 | Moon phase Displays the current phase of the moon | |
| 4 | Outside temperature Displays the outdoor temperature and humidity | |
| 5 | Indoor temperature Displays the indoor temperature and humidity | |
| 6 | Date display Displays the date, day and month | |
| 7 | Time Displays the time and alarm time | |
| 8 | Barometric pressure trend Displays the trend of the barometric pressure | |
| 9 | Overview of the barometric pressure | Displays a summary of the barometric pressure |
| 10 | Weather forecast Displays the weather forecast and trend | |
| 11 | LIGHT/SNZ Turn on back light or activate snooze mode | |
| 12 | Mode "MODE" button | |
| 13 + Wave | "Wave+" button | |
| 14 -Wave | "Wave-" button | |
| 15 CH | "CH" button | |
| 16 History | "HISTORY" button | |
| 17 City | "CITY" button |
4 Trends
| Display Trend | |
 | Persistent |
 | Increasing |
 | Decreasing |
5 Initial use
Take the device out of the package and remove all the packaging material.
Insert two 1.5 AA batteries into the sensor unit and three 1.5 V AA batteries into the main unit. Make sure the polarity of the contacts is correct. Then close the battery covers of the devices.
Note: Due to the low battery voltage of only 1.2V, the functioning of the weather station cannot be guaranteed with all types of rechargeable batteries. Malfunctions or shortened battery life is also possible. We recommend using 1.5V batteries.
6 Assembly
Before assembly, make sure the transmission between the sensor unit and the main unit is not disrupted or affected by interfering signals or large obstacles. Before assembly, make sure there is sufficient signal strength at the installation sites of the devices.
Position the sensor unit in such a way that it is protected against direct exposure to sunlight or rain.
If you wish to mount the sensor unit to a wall, make sure there are no electrical, water or gas lines, etc. present at the installation place.
Mount the sensor unit onto a wall using the recess on the rear side. Alternatively, you can place the sensor unit at a location that is protected against direct exposure to sunlight and rain. Subsequently, place the main unit with the stand on a flat surface.
The red LED on the front side of the sensor unit lights up as soon as the signal is successfully received.
If the weather station does not receive any signal within 7 minutes, place the main unit and sensor unit closer to each another and press the “CH +” and the “CH -” button in order to change the channels. Alternatively, press and hold the “CH” button until an arrow appears in the display. Now the weather station connects through all 3 channels.
7 Setting the time and date manually
To manually set the time, keep the "MODE" button on the rear side of the main unit pressed.
You can make the desired settings using the "Wave +" and "Wave -" buttons. Confirm your setting by pressing the "MODE" button.
Make the following settings one after the other:
- 12/24 Hours
- Temperature setting (°C or °F)
- Time zone
- Hours
- Minutes
- Year
- Month
- Day
| Display Meaning | |
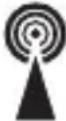 always on always on | "DST" signal synchronised |
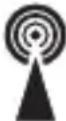 blinking blinking | "DST" signal is active |
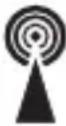 off off | "DST" signal is inactive |
- Country (GE = Germany, EN = England, FR = France, IT = Italy, SP = Spain)
Alternatively, the weather station will attempt to receive a "DST" signal to synchronise the time and date.
If no signal is received, press the "Wave +" and "Wave -" buttons simultaneously to start the search for a "DST" signal manually.
8 Sunrise and sunset display
Press the “CITY” button on the rear side of the weather station. This will bring you to Cities setting. Using “Wave +” and “Wave -” buttons you can select your desired city out of more than 100 different cities worldwide.
To add a town or place manually, hold down the "CITY" button until the display starts blinking. Now you can enter the abbreviation of the city using the "Wave +" and "Wave -" buttons. Confirm the entry by pressing the "CITY" button. If the abbreviation is set, you must subsequently set the time zone. Confirm the time zone by using the "CITY" button, too
After that, you must set the longitude and latitude of your desired city.
When you complete these settings, the sunrise and sunset time of the entered values will be displayed.
9 Moon phase
The main station has a "moon phase" function.
The current moon phase is shown automatically on the display of the weather station.
10 Alarm function
Press the "MODE" button to set the alarm time. As soon as the alarm time is displayed, press the "MODE" button until the alarm time starts to blink. First set the hour. You can set the desired alarm time using the "Wave +" and "Wave -" buttons. Subsequently, set the minutes. Also use the "Wave +" and "Wave -" buttons for this purpose. Press the "MODE" button. The alarm time is shown on the display. Now, press the "Wave +"-button to turn on the alarm.
Press the “MODE” button. The alarm time is shown on the display. Press the “Wave +” button in the alarm display to turn the alarm on or off. This is illustrated by a “bell” symbol.
Press the "LIGHT/SNZ" button on the rear side of the weather station to activate the snooze mode. The alarm will sound again after approx. 5 minutes.
11 Display backlight
Press the "LIGHT/SNZ" button on the rear side of the weather station to activate the backlight of the weather station display.
12 Barometric pressure
The barometric pressure is indicated in mb/hPa or in HG. Using the "HISTORY" button on the rear side, you can look back up to 12 hours to see the barometric pressure at a certain time.
13 Weather forecast
The provisional weather forecast can be found in the top left area of the screen. The weather forecast is shown in symbols (sunny, slightly overcast, overcast, rainy, snow). This symbol changes depending on the weather. The trend is shown with arrows. An explanation for the trend can be found in the chapter "4 Trend".
Note: The weather forecast is calculated by evaluating the barometric pressure fluctuations and may deviate from the actual weather.
14 Maximum and minimum daily values
Press the "Wave +" -button when the weather station is in standard mode to display the maximum and minimum daily values. A "MAX" or "MIN" symbol appears on the display of the outdoor and indoor temperature. If none of these symbols illuminate, the current temperature and humidity will be displayed. Keep the "Wave +" button pressed to reset the stored values.
15 Temperature and frost alarm
Press the "Wave -" button and keep it pressed to reach the Temperature Settings. The maximum temperature is +70°C and the minimum temperature is -50°C.
Press the “Wave +” and “Wave -”-button to set the maximum temperature of the temperature alarm which must not be exceeded. Confirm it with the “MODE” button.
Press the “Wave +” and “Wave -” button to set the minimum temperature value which must not be exceeded. Confirm your entry again by pressing the “MODE” button.
If the frost alarm ➤ turned on, a “snowflake symbol” will appear on the outdoor temperature display. The frost alarm will sound at -1^ to +3^ .
For the temperature alarm, TEMPE is the “TEMP ALERT” symbol must appear on the display of the outdoor temperature. The alarm will sound at the previously set values. If you have activated the frost alarm as well as the temperature alarm, both symbols will appear on the display. You can end the alarm sounds by pressing a button on the weather station.
16 Safety instructions and liability disclaimer
Never try to open the device to carry out repairs or conversions. Avoid contact with mains voltages. Do not short-circuit the product. The device is not certified for use in the open air; only use it in dry conditions. Protect it from high humidity, water and snow. Keep it away from high temperatures. Do not subject the device to sudden changes in temperature or heavy vibration as this might damage electronic components. Examine the device for damage before using it. The unit should not be used if it has received an impact or has been damaged in any other way. Please observe national regulations and restrictions. Do not use the device for purposes other than those described in the instructions. This product is not a toy. Keep it out of the reach of children or mentally impaired persons. Any repair or alteration to the device not carried out by the original supplier, will invalidate the warranty or guarantee. The product may only be used by persons who have read and understood these instructions. The device specifications may change without any separate prior notice to this effect.
17 Disposal instructions
Electrical and electronic devices may only be disposed of in accordance with the European WEEE Directive and not with household rubbish. Components must be disposed of or recycled separately as dangerous, toxic elements can inflict sustained damage on the environment if they are disposed of incorrectly. As a consumer, you are bound by the Electrical and Electronic Devices Act (ElektroG) to return electrical and electronic goods free of charge at the end of their useful life to the manufacturer, the place of purchase or to specially set up, public collection points. The details in each case are governed by national law. The symbol on the product, the operating instructions and/or the packaging refers to these regulations. By separating materials in this way, recycling and disposing of old devices, you are making an important contribution towards protecting our environment.

WEEE guideline: 2012/19/EU WEEE register number: DE 94495668
WD Plus GmbH, herewith declares that this product 301519/20170209FZ002 conforms to the principle requirements and other relevant stipulations of Directive 1999/5/EG. The complete Declaration of Conformity can be obtained from: WD Plus GmbH, Wohlenbergstraße 16, 30179 Hanover
Countries, cities and abbreviations
| Country City/Abbreviation | |
| Australia (AU) • Canberra (CBR) | Melbourne (MEL)Sydney (SYD) |
| Austria (AT) • Bregenz (BRE) | Graz (GRZ)Innsbruck (INN)Linz (INZ)Salzburg (SLZ)Vienna (WIE)Villach (VIL)Wels (WEL) |
| Belgium (BE) • Antwerp (ANT) | Bruges (BRG)Brussels (BRU)Libramont (LIB)Liege (LIE) |
| Bosnia & Herzegovina (BA) • Sarajevo (SAR) | |
| Croatia • Split (SPL) | Zagreb (ZAG) |
| Czech Republic (CZ) • Brünn (BRN) | Prague (PRG) |
| Denmark (DK) • Aalborg (ALB) | Copenhagen (KOB)Odense (ODE) |
| Finland (FL) • Helsinki (HEL) | |
| France (FR) • Ajaccio | BiarritzBordeauxBrestCherbourg-Octeville |
| France (FR) • Ajaccio (AJA) | • Biarritz (BIA)• Bordeaux (BOR)• Brest (BRE)• Cherbourg-Octeville (CHE)• Clermont-Ferrand (CHE)• Dijon (DIJ)• Lille (LIL)• Lyon (LYO)• Marseilles (MRS)• Metz (MET)• Nantes (NAN)• Nice (NICE)• Orleans (ORL)• Paris (PAR)• Peripignan (PER)• Rouen (ROU)• Strasbourg (STR)• Toulouse (TOU) |
| Germany (DE) • Berlin (BER) | • Bremen (BRE)• Cologne (KOE)• Dortmund (DOR)• Dresden (DRE)• Düsseldorf (DUS)• Erfurt (ERF)• Frankfurt (FRA)• Freiburg (FRE)• Hamburg (HAM)• Hanover (HAN)• Hof (HOF)• Kaiserslautern (KAL)• Kassel (KAS)• Kiel (KIE)• Leipzig (LEI) |
| Germany (DE) • Magdeburg (MAG) | München (MUN)Nürnberg (NUR)Osnabrück (OSN)Passau (PAS)Regensburg (REG)Rostock (ROS)Saarbrücken (SAA)Stuttgart (STU)Ulm (ULM)Würzburg (WUR) |
| Greece (GR) • Athen (AHN) | |
| Hungary (HU) • Budapest (BUD) | |
| Ireland (IE) • Dublin (DUB) | |
| Italy • Ancona (ANC) | Bari (BAR)Bozen (BOZ)Cagliari (CAG)Foggia (FOG)Genua (GEN)Lecce (LEC)Messina (MES)Mailand (MIL)Neapel (NAP)Palermo (PAL)Parma (PAR)Perugla (PER)Rom (ROM)San Remo (SRE)Triest (TRI)Turin (TOR)Venedig (VEN)Verona (VER) |
| Liechtenstein (LI) • Vaduz (VDZ) | |
| Luxembourg (LU) • Luxemburg (LUX) | |
| Monaco (MC) • Monte Carlo (MCM) | |
| Netherlands (NL) • Amsterdam (AMS) | • Arnherm (ARN)• Eindhoven (EIN)• Groningen (GRO)• Rotterdam (ROT)• Den Haag (DHA) |
| New Zealand (NZ) • Wellington (WLG) | |
| Norway (NO) • Bergen (BGN) | • Lillehammer (LIL)• Oslo (OSL) |
| Poland (PL) • Krakau (KRA) | • Warschau (WAR)• Poznan (POZ)• Gdask (GDA) |
| Portugal (PT) • Faro (FAR) | • Lissabon (LIS)• Port (POR) |
| Russia (RU) • St. Petersburg (PET) | |
| Serbia (RS) • Belgrad (BEO) | |
| Slovakia (SK) • Bratislava (BRV) | • Kosice (KOS) |
| Slovenia (SI) • Ljubliana (LUB) | |
| Spain (ES) • Alicante (ALI) | Andorra (AND)Badajoz (BAD)Barcelona (BAR)Bilbao (BIL)Cordoba (COR)Ibiza (IBZ)La Coruna (LCO)Las Palmas (LPA)Leon (LEO)Madrid (MAD)Malaga (MAL)Palma De Mallorca (PAL)Sevilla (SEV)Valencia (VAL)Zaragoza (ZAR) |
| Sweden (SE) • Gothenburg (GOT) | Karlstad (KAR)Stockholm (STO) |
| Switzerland (CH) • Basel (BAS) | Bern (BRN)Chur (CHU)Genève (GEN)Lugano (LUG)St. Gallen (SGL)Zurich (ZUR) |
| United Kingdom (GB) • Aberdeen (ABD) | Belfast (BEL)Birmingham (BIR)Cardiff (CAR)Glasgow (GLW)London (LON)Manchester (MAN)Plymouth (PLY) |
| United Kingdom (GB) • Newcastle (NEC) | |
| United States (US) • Los Angeles (LAX)• New York (NYC)• Washington (WAS) | |
Notes
BRANDSON
- EQUIPMENT -
WD Plus GmbH
- BRANDSON - EQUIPMENT -
- Scope of supply
- Technical specifications
- Trends
- Initial use
- Assembly
- Setting the time and date manually
- Sunrise and sunset display
- Moon phase
- Alarm function
- Display backlight
- Barometric pressure
- Weather forecast
- Maximum and minimum daily values
- Temperature and frost alarm
- Safety instructions and liability disclaimer
- Disposal instructions
Brand : Brandson
Model : 301519
Category : Weather Station