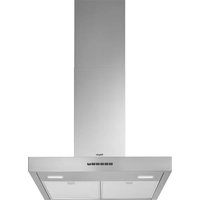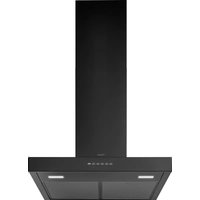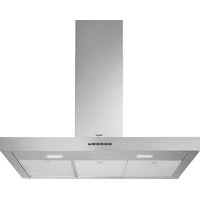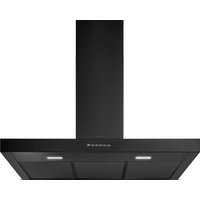
DSG861MAT - Basket Pelgrim - Free user manual and instructions
Find the device manual for free DSG861MAT Pelgrim in PDF.


User questions about DSG861MAT Pelgrim
0 question about this device. Answer the ones you know or ask your own.
Ask a new question about this device
Download the instructions for your Basket in PDF format for free! Find your manual DSG861MAT - Pelgrim and take your electronic device back in hand. On this page are published all the documents necessary for the use of your device. DSG861MAT by Pelgrim.
USER MANUAL DSG861MAT Pelgrim
Instructions for use
Cooker hood
Mounting the cooker hood
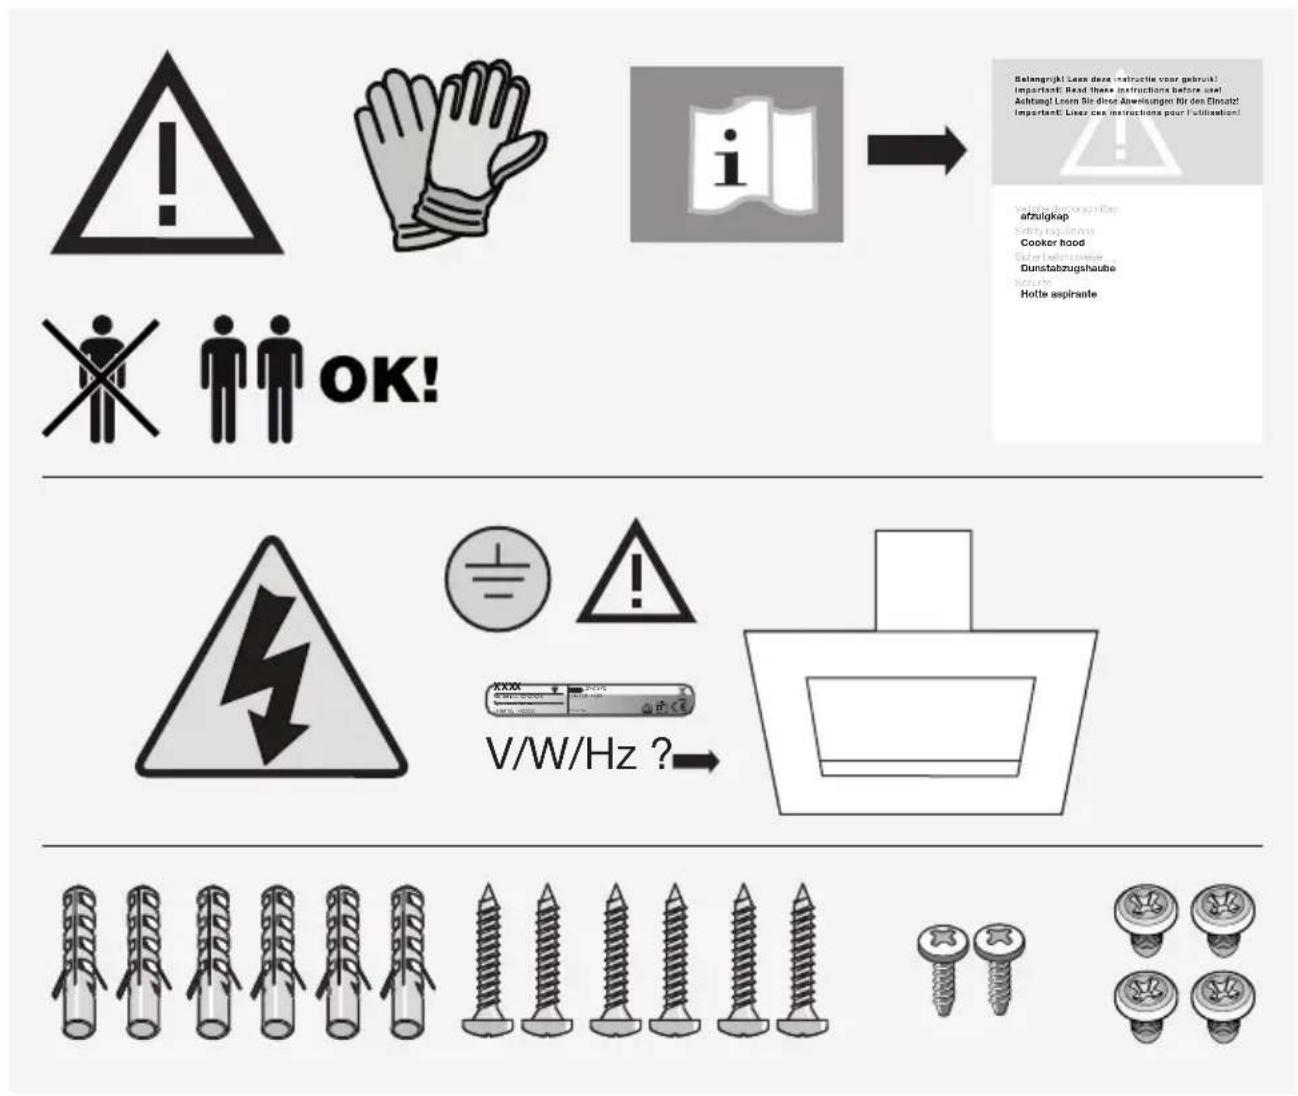
Gebruikte pictogrammen - Pictogrammes utilisés
natural_image
Diagram of a mechanical assembly with layered components and directional arrows (no text or symbols)text_image
Diagram illustrating a shopping cart moving through a ramp onto a building, with directional arrows indicating movement.
natural_image
Illustration showing a hand inserting a card into a box, with a magnified inset showing the same card being inserted (no text or symbols present)natural_image
Diagram showing a hand pressing down on a mechanical component with an arrow indicating rotation (no text or symbols)De werking:
text_image
Prohibition sign with crossed-out trash bin and no text, likely indicating no waste or dischargenatural_image
Diagram of a mechanical assembly with layered components and directional arrows (no text or symbols)text_image
Diagram illustrating a shopping cart moving through a ramp onto a building, with directional arrows indicating movement and actions.
natural_image
Illustration showing a hand inserting a device into a box, with an inset close-up of the device being inserted (no text or symbols present)natural_image
Illustration of a hand pressing down on a mechanical component with an arrow indicating rotation (no text or symbols)Le fonctionnement :
text_image
Prohibition sign with crossed-out trash bin and no text or symbolsnatural_image
Diagram of a mechanical assembly with layered components and directional arrows (no text or symbols)text_image
Diagram illustrating a shopping cart moving through a ramp onto a building, with directional arrows indicating movement.
natural_image
Illustration showing a hand inserting a device into a box, with an inset close-up of the device being held by a finger (no text or symbols present)natural_image
Diagram showing a hand pressing down on a mechanical component with an arrow indicating rotation (no text or symbols)Funktionsweise:
text_image
Prohibition sign with crossed-out trash bin and no text or symbols| Description | 4 | ||
| Introduction | 4 | ||
| Extraction | systems | 5 | |
| Controls | 6 |
Maintenance
| Cleaning | 8 | |
| Grease | filter | |
| Carbon | filter | |
| Lighting | 10 | |
Installation
| General | 11 | |
| Electrical connection | 1 | |
| Mounting the canopy hood 12 |
Environmental aspects
| Disposal of the appliance and packaging | 13 |
Installation
| Mounting the canopy hood | 14 |
Introduction
Congratulations on choosing this Pelgrim cooker hood. This product is designed with simple operation and optimum comfort in mind.
The cooker hood works silently and extracts at maximum efficiency. With this hood, cooking odours are a thing of the past.

First read the separate safety instructions before using the appliance!
Read this user manual thoroughly before you first use the appliance, and store the manual safely for future use.
You can find the most recent version of the instructions for use on our website.
Description
text_image
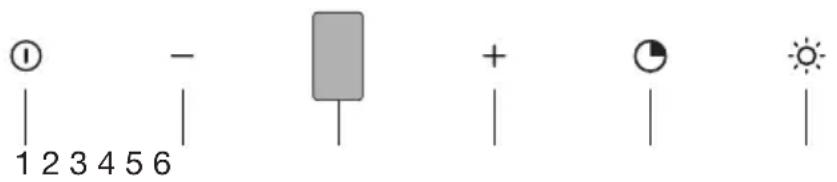
① 1 2 3 4 5 6 - + - - - + -- On/off key: switching on extraction capacity 1 and switching off.
- Key ‘-’: decrease the extraction capacity.
- Display: shows the extraction capacity and the saturation indicator.
- Key ‘+’: increase the extraction capacity.
- Timer key: switch the timer function on and off.
- Lighting key: switch the lighting on and off.
Extraction systems
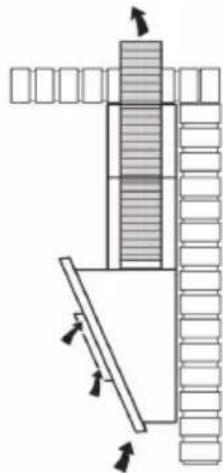
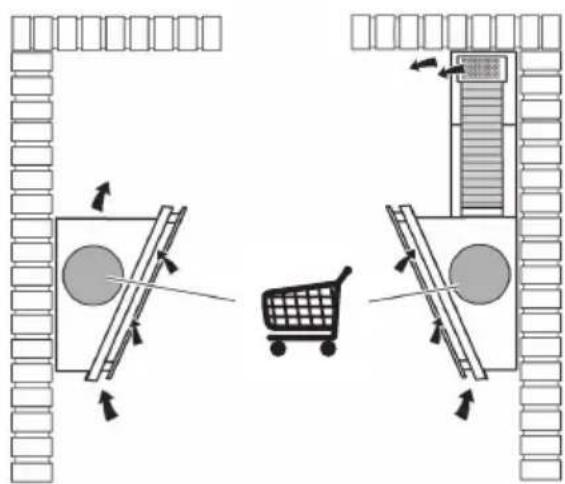
Depending on the type, the cooker hoods can be connected in one of two ways:
- To a duct. To a duct, the cooking vapours extracted by suction are carried outside, once the grease particles have been filtered. This is the best method.
natural_image
Diagram of a mechanical assembly with layered components and directional arrows (no text or symbols)- Recirculation hood. As a recirculation hood, the grease particles and the smell in the extracted vapours are filtered. The air that has been sucked in is not carried outside but recirculates in the kitchen. In this case you must have a carbon filter fitted.
text_image
Diagram illustrating a shopping cart moving through a ramp onto a building, with directional arrows indicating movement.
Attention! The carbon filter needs to be ordered separately.
Controls
Switching the extraction on and off
① 1. Touch the on/off key. The extractor hood is switched on with extraction capacity 1.
+ - 2. Touch the ‘+’ key to increase the extraction capacity. Touch the ‘-’ key to reduce the extraction capacity.
① 3. Touch the on/off key. The extraction is switched off.
Switching on the intensive setting
+ 1. Touch the ‘+’ key several times until extraction capacity 4 appears in the display. The intensive setting remains on for 6 minutes. After this period, extraction capacity 3 is activated.
① — 2. Touch the on/off key or the ‘-’ key to stop the intensive setting prematurely.
Timer function
With the timer function, the extraction capacity can be automatically switched off after 15 minutes. The timer function cannot be used with the intensive setting.
-
Touch the timer key. The selected extraction capacity flashes on the display. The extraction capacity switches off automatically after 15 minutes. The lighting is not switched off.
-
Touch the timer key again to switch off the timer function prematurely.

The extraction capacity can be changed during the timer function.
Switching the lighting on and off
- Touch the lighting key. The lighting comes on.
- Touch the lighting key again. The lighting goes off.
Clean Air function
The extraction switches on automatically every hour for 10 minutes with the selected extraction capacity. This function works for 24 hours.

- Switch off the extractor hood.
- Touch and hold the lighting button for two seconds. The extractor hood is switched on with extraction capacity 1. 'C' flashes in the display. After 10 minutes, the extractor hood switches off and 'C' remains visible in the display. After 50 minutes the extractor hood is switched on again. This process repeats itself for 24 hours.
— 3. Touch the ‘-’ key to switch off the Clean Air function prematurely.
Grease filter cleaning indication
After 30 operating hours, the extraction capacity flashes alternately with 'F' in the display. If this indication appears, the grease filter must be cleaned.
— To reset the cleaning indicator, touch and hold the ‘-’ key for three seconds when the extractor hood is switched on. ‘E’ appears in the display; the reset has been completed.
Carbon filter cleaning indication
After 120 operating hours, the extraction capacity flashes alternately with 'C/F' in the display. If this indication appears, the installed carbon filter must be cleaned or replaced.
— To reset the cleaning indicator, touch and hold the ‘-’ key for three seconds when the extractor hood is switched on. ‘E’ appears in the display; the reset has been completed.
Cleaning

Attention! Before performing any maintenance operation, isolate the hood from the electrical supply by unplugging the appliance or switching off your household's master switch. The cooker hood should be cleaned regularly (at least as frequently as the grease filters are cleaned) both internally and externally. Do not use abrasive products.
Do not use alcohol!
Attention! Failure to comply with the basic recommendations for cleaning the cooker hood and cleaning/replacing the filters may lead to a fire. Therefore, we recommend that you observe these instructions. The manufacturer declines all responsibility for any damage to the motor or any fire damage linked to inappropriate maintenance or failure to observe the above safety recommendations.
Cooker hood
Clean the cooker hood with soapy water and a soft cloth. Then wipe with clean water to rinse. Do not apply aggressive cleaning agents such as caustic soda. The paintwork on the cooker hood will remain shiny if it is periodically rubbed with wax.

Stainless steel canopy hoods
Do not use any sort of scourer. Treat with a stainless steel care product and polish with the structure of the stainless steel.
Metal grease filters
Metal grease filters should be cleaned once a month (or when indicated by the filter saturation indication system, if present on your model), using a neutral cleaning agent, preferably by hand or in the dishwasher on a short, low-temperature program. Place the grease filters with the openings facing downwards in the dishwasher so the water can drain out of the filter. Aluminum-colored and black grease filters become dull as a result of dishwasher cleaning agents. This is normal and does not effect the working.
Glass panels
Glass panels can best be cleaned by hand with soapsuds.
Grease filter
Removing the grease filter
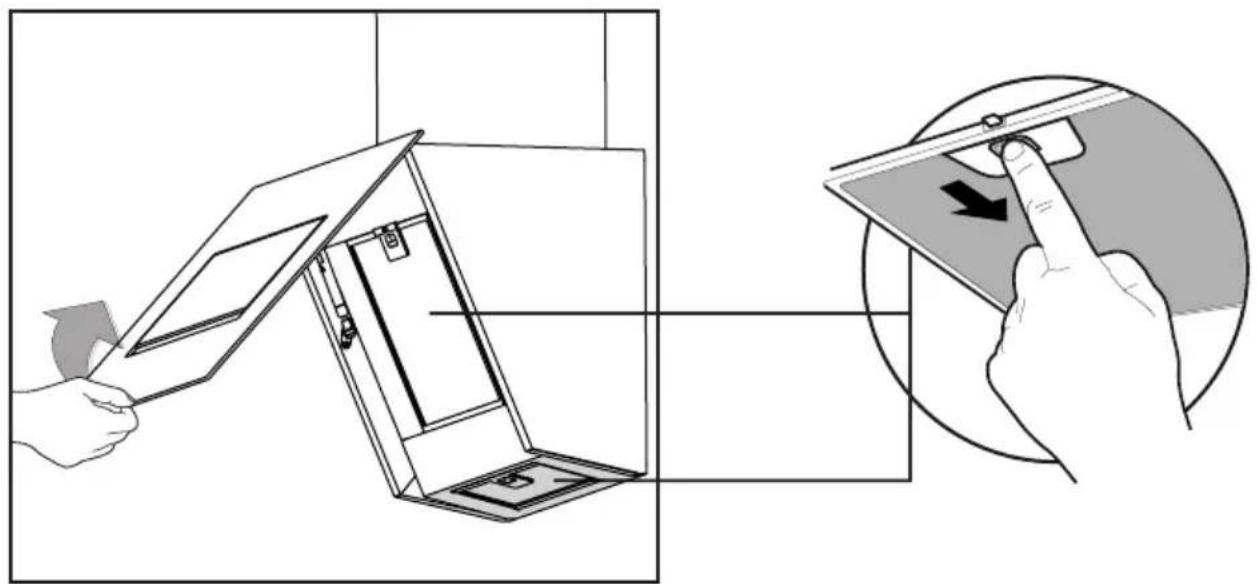
Push the front panel upwards. Press the catch of the grease filter, and move the grease filter towards you to disengage.
natural_image
Illustration showing a hand inserting a device into a box, with a magnified view of the device being inserted (no text or symbols present)When replacing, make sure that the positioning lugs on the back fit properly into the recesses before you snap the filter (on the side of the handle).
Carbon filter
Replacing the carbon filter
The carbon filter must always be used if the cooker hood is not ducted.
Note:
- The regenerable activated carbon filter can be washed by hand or in the dishwasher at a maximum temperature of 65^ C. The washing cycle must be done without other dishes and without dishwasher detergent. Do not use any cleaning agents!
- Remove excess water. Be careful to avoid damaging the filter. Let the filter dry in the oven for at least 1 hour at a maximum
temperature of 80 °C. After a maximum of 3 years (or when the filter is damaged or no longer works properly), the filter will need to be replaced.
- It is important that the grease filters and the regenerable activated carbon filter are properly dried before installation.
Carbon filter
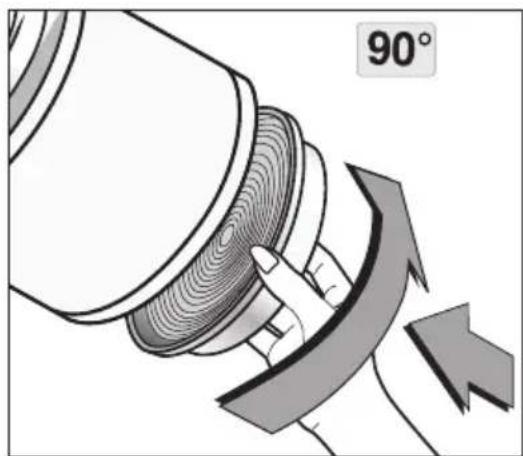
Position the activated carbon filter
- Open the front panel and remove the grease filter.
- Centre the carbon filter on the motor frame and turn it to mount it to the motor frame.
natural_image
Illustration of a hand pressing down on a mechanical component with an arrow indicating rotation (no text or symbols)The functioning:
- More noise is produced when a carbon filter is used than when the cooker hood is used with an exhaust vent.
- A carbon filter functions optimally at a lower motor speed. For this reason, avoid the intensive speed setting.
- Dispose of the old carbon filter properly, with non-recyclable waste.
Lighting

This hood is fitted with a light system. This light system has to be replaced by an authorized technician. Do not attempt to replace it by yourself.
The lamp in this household appliance is only suitable for illumination of this appliance. The lamp is not suitable for household room illumination.
General
This appliance should be connected to the power supply by a recognized fitter who is familiar with, and works according to the correct safety regulations. This appliance meets the European requirements.
Important that you know:
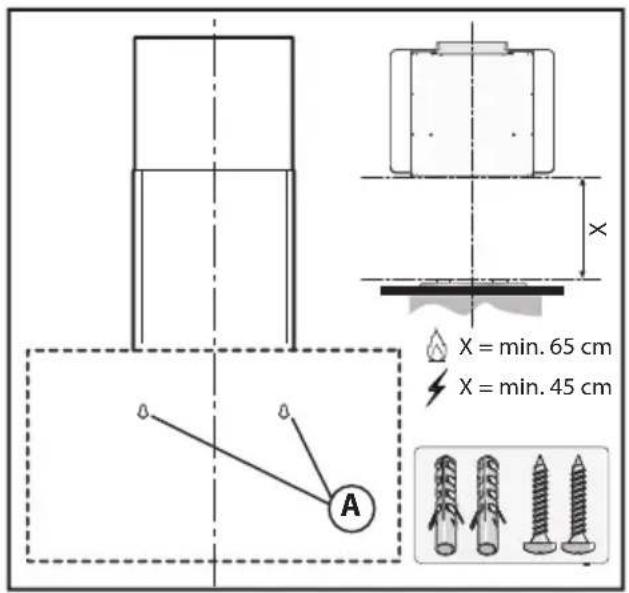
- The minimum distance between the supporting surface for the cooking vessels on the gashob and the lowest part of the range hood must be not less than 65 cm. For use with an electric, ceramic or induction hob, this distance must be at least 45 cm.
- If the cooker hood is to be fitted to an existing duct no other appliances, such as a geyser or heater, may be connected to that same duct.
- Consider local regulations with respect to the ventilation of gas appliances.
- The shorter the duct, and the fewer the bends in it, the better the cooker hood will work.
- Before you start drilling check that there are no installation cables present.
- The connecting pipe for the cooker hood has a diameter of 120, 125 or 150 mm. It is best to equip the exhaust pipe with the largest diameter.
- The installation material supplied with this range hood is designed for fixing to reinforced concrete or masonry walls. For some types of walls you may need special plugs and screws.
Electrical connection
This appliance is a Class I appliance and must be earthed.
Make sure the supply voltage ratings correspond with those stated on the appliance data plate. The connection to the mains is carried out as follows:
BROWN = phase L
BLUE = phase N
GREEN/YELLOW = Earth
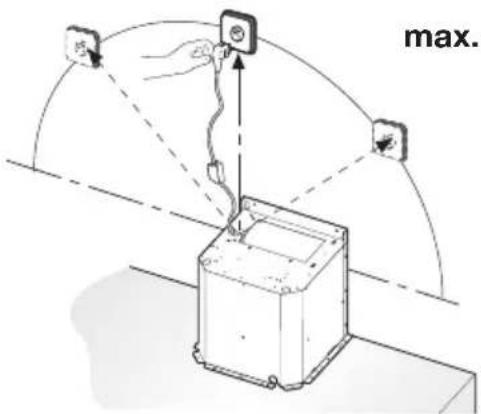
This canopy hood has been provided with a power plug. When installing the hood, make sure that this plug remains accessible. We recommend installing the wall socket out of view, behind the chimney cover.

Attention:
If you want to make a fixed connection, ensure that a multi-pole switch with a distance between contacts of 3 mm is installed in the supply cable.

Warning! Before re-connecting the hood circuit to the mains supply and checking the efficient function, always check that the mains cable is correctly assembled.
The hood is provided with a special power cable; if the cable is damaged, request a new one from Technical Service.
text_image
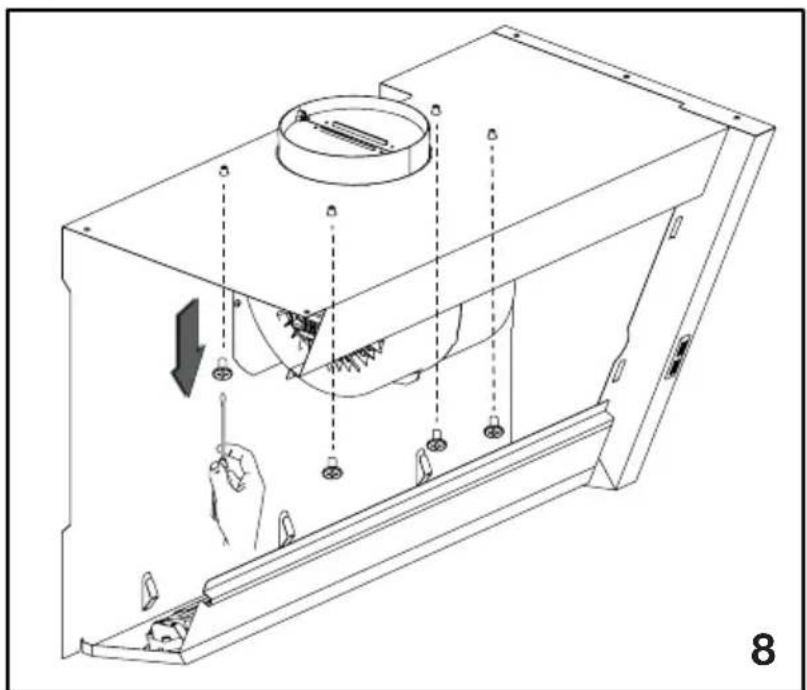
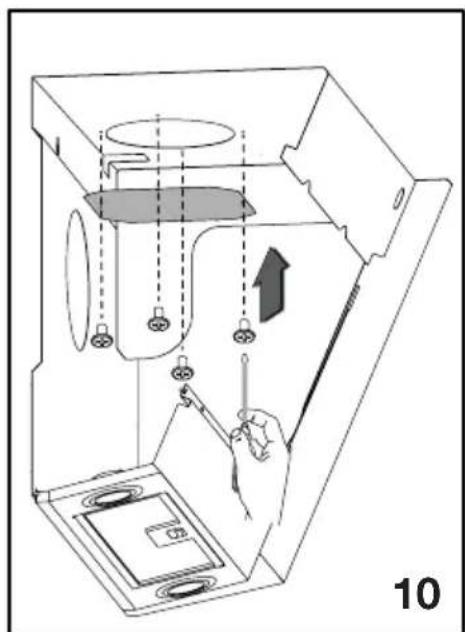
max.Mounting the cooker hood
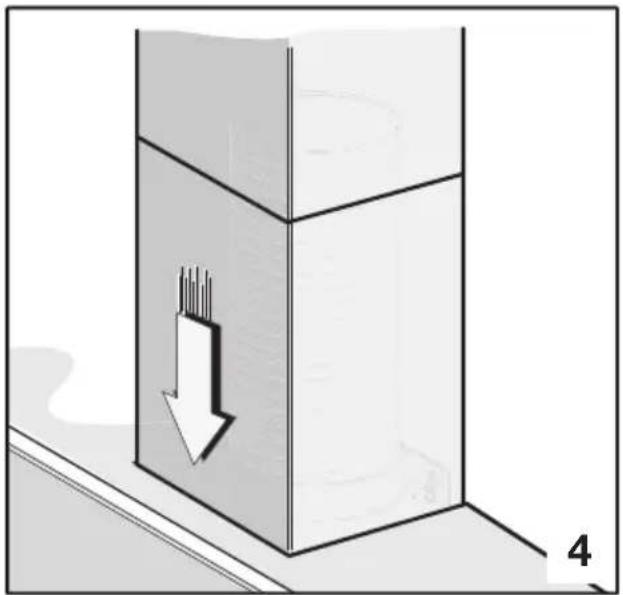
The last pages of this manual show the steps for mounting the cooker hood.
Disposal of the appliance and packaging
This product is made from sustainable materials. However, the appliance must be disposed of responsibly at the end of its useful life. The government can provide you with information about this.
The appliance packaging can be recycled. The following materials have been used:
- cardboard;
• polyethylene foil (PE);
• CFC-free polystyrene (hard PS foam).
Dispose of these materials responsibly in accordance with legal provisions.
text_image
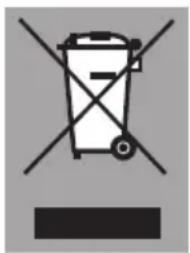
Prohibition symbol for a trash bin with crossed-out lanes and a blank rectangular baseThe product has a pictogram of a crossed-out waste container. This indicates that household appliances must be disposed of separately. This means that the appliance may not be processed via the regular waste flow at the end of its useful life. You should take it to a special municipal waste depot or a sales outlet that offers to do this for you.
Collecting household equipment separately prevents harm to the environment and public health. The materials used in manufacturing this appliance can be recycled, which provides considerable savings in energy and raw materials.
CE
Declaration of conformity
We hereby declare that our products comply with the relevant European directives, standards and regulations as well as all requirements referred to in the standards.
text_image
Belangrijk! Lass deze instructie voor gebruikt! Important: Read these instructions before uit Aktung! Leen Sie direkt Anwirkungen für den Einsatz! Important: Lass des instructions pour la timelstand! Verzaherbarzücks arzulgkap Holly horgungen Cooker hood Aus der Rohte Dunstahzugshaube Sachan Hotte aspirante OK! V/W/Hz? ###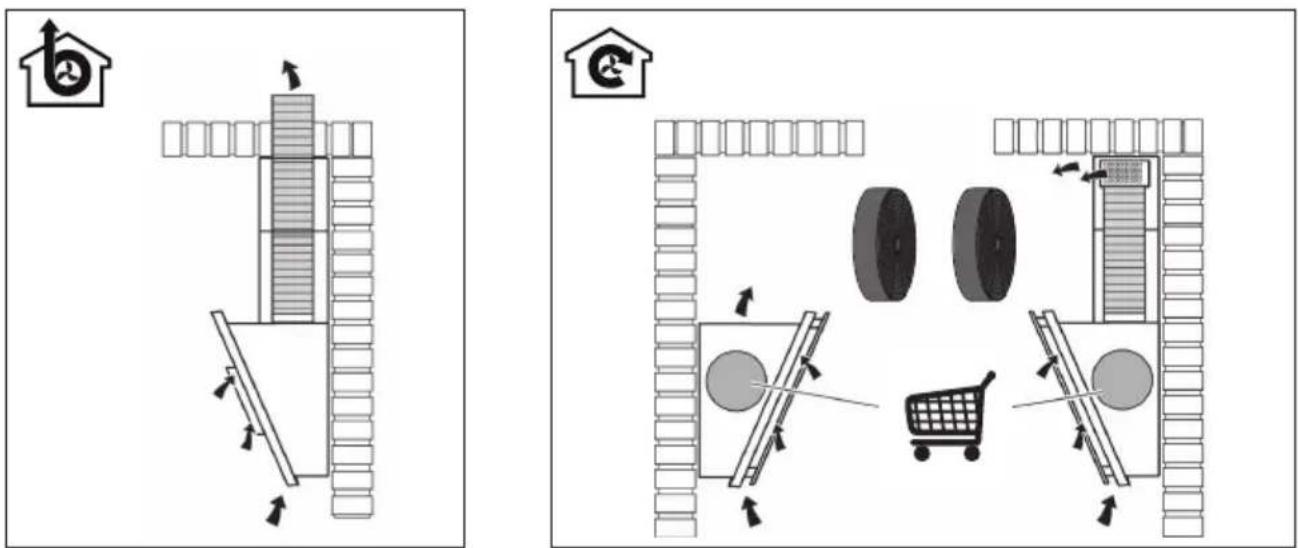
text_image
Diagram illustrating a warehouse or storage system with labeled components and directional arrows, including a recycling symbol and shopping cart.
text_image
X = min. 65 cm X = min. 45 cm A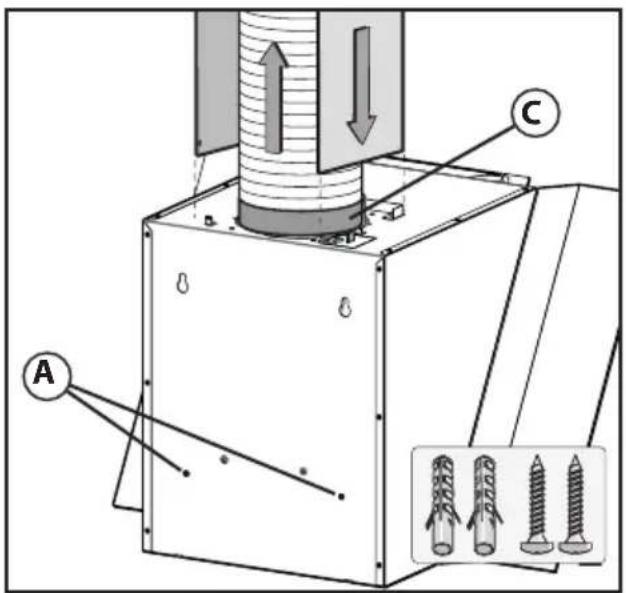
text_image
Technical diagram of a mechanical assembly with labeled components A, C, and threaded screw (3+), showing directional arrows and component layout.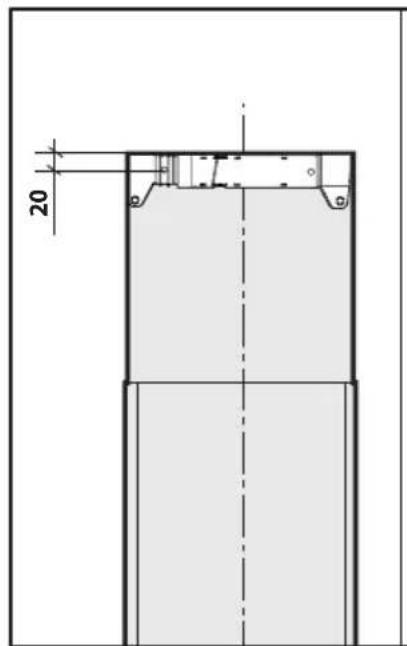
text_image
20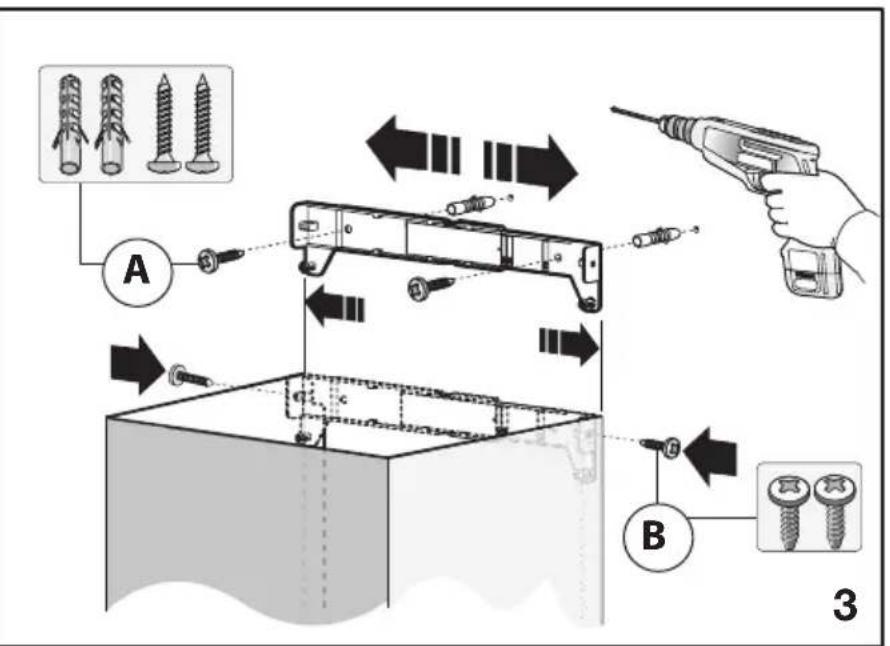
text_image
Diagram illustrating screw installation steps with labeled components A and B, showing tool application and assembly instructions.

natural_image
Diagram of a 3D container with a downward arrow indicating compression or cooling process (no text or symbols)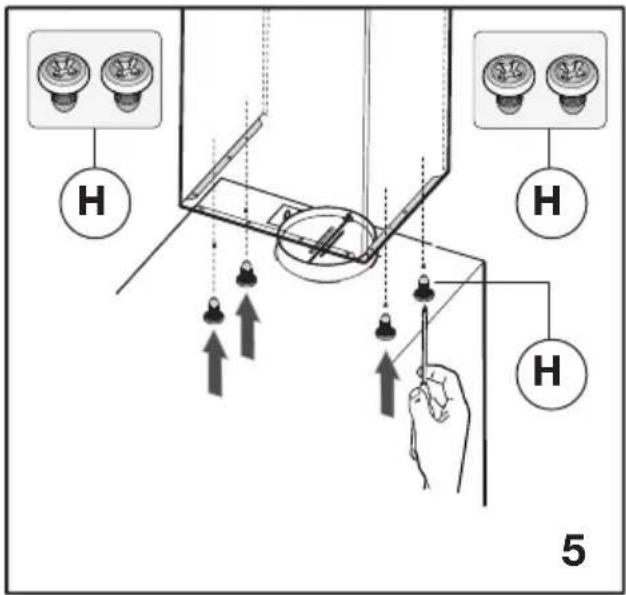
text_image
H H H 5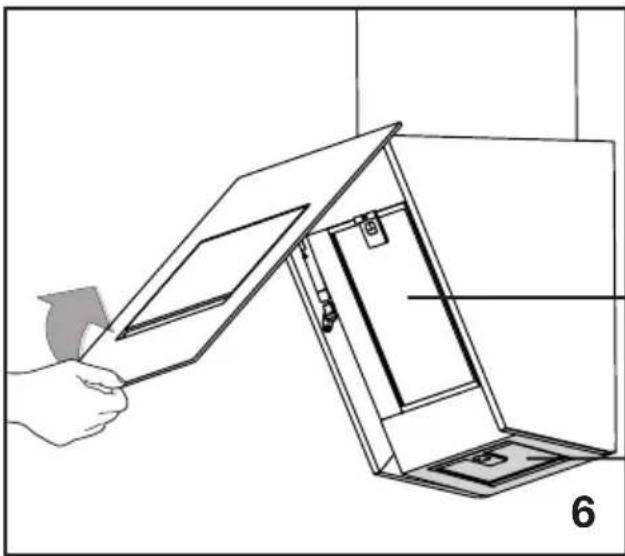
natural_image
Line drawing of a hand inserting a card into a box, showing internal structure and alignment (no text or symbols)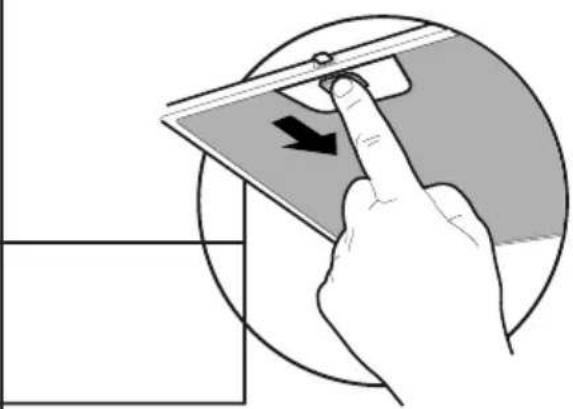
natural_image
Illustration of a hand pressing a directional arrow on a device component (no text or symbols)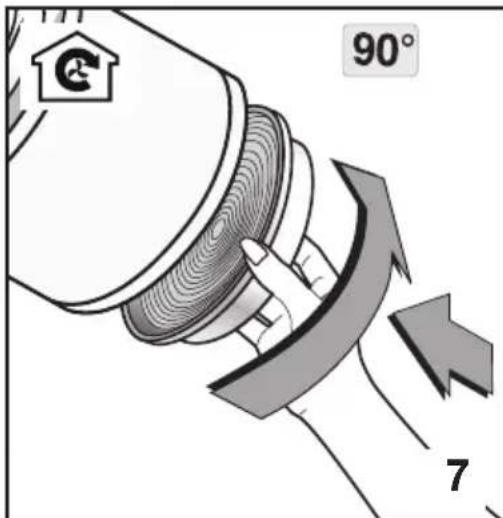
text_image
90° 7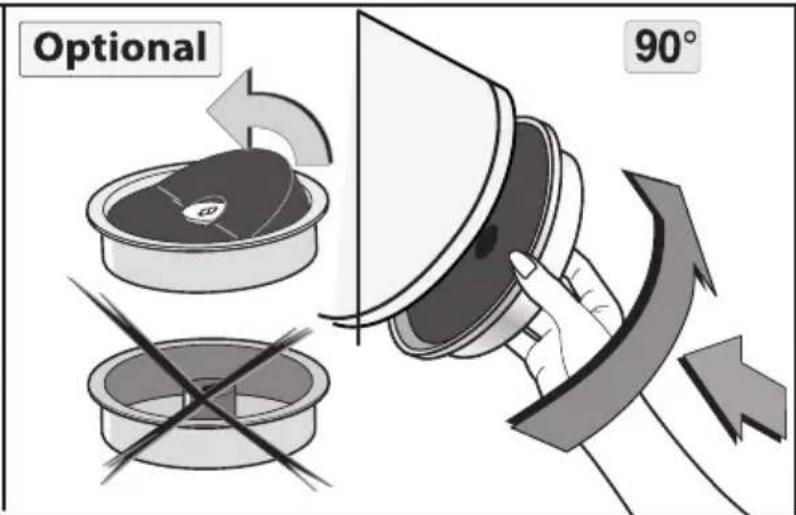
text_image
Optional 90°
natural_image
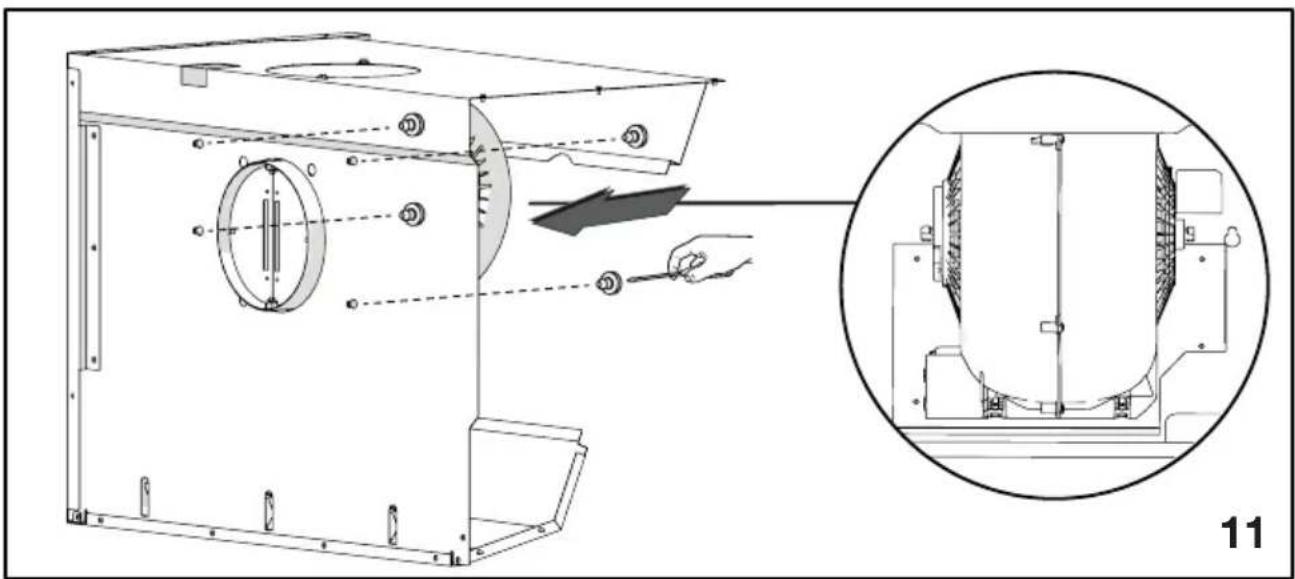
Technical line drawing of a mechanical device with internal components and a hand operating a tool (no text or symbols present)Fig. 11
natural_image
Technical line drawing of a mechanical device with internal components and a hand operating a tool (no text or symbols)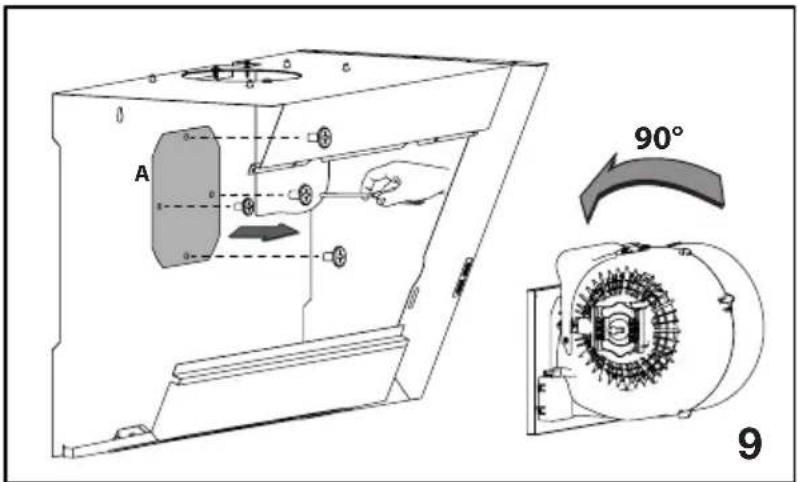
text_image
A 90° 9Fig. 12 Fig. 13
natural_image
Technical line drawing of a mechanical device with an inset close-up showing internal components (no text or symbols)INSTALLATIE - INSTALLATION
INSTALLATIE - INSTALLATION
www.pelgrim.nl
www.pelgrim.be

924611
Pelgrim