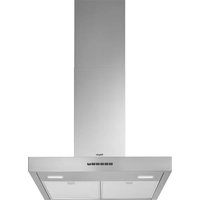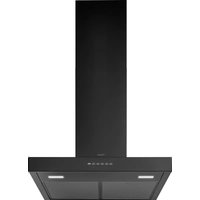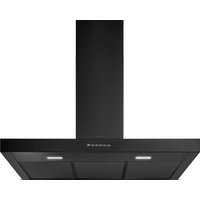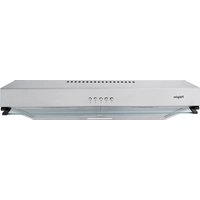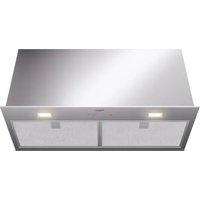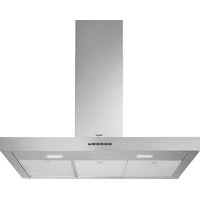
BSK963RVS - Basket Pelgrim - Free user manual and instructions
Find the device manual for free BSK963RVS Pelgrim in PDF.


User questions about BSK963RVS Pelgrim
0 question about this device. Answer the ones you know or ask your own.
Ask a new question about this device
Download the instructions for your Basket in PDF format for free! Find your manual BSK963RVS - Pelgrim and take your electronic device back in hand. On this page are published all the documents necessary for the use of your device. BSK963RVS by Pelgrim.
USER MANUAL BSK963RVS Pelgrim
Instructions for use
Cooker hood
NL Handleiding NL 3 - NL 10
natural_image
Diagram of a staircase with brick walls and a cabinet, showing airflow direction (no text or symbols)natural_image
Diagram of a vertical structure with brick wall and hanging platform, showing airflow or movement arrows (no text or symbols)HR0013, HR0017 of HF2012
text_image
QR code image containing encoded data, no visible human-readable textBeschrijving

text_image
1 2 3 4 5 6 1 2 3 4 5 6 2 3 Bnatural_image
Illustration of a microwave oven with a hand inserting a clip into it (no text or symbols)flowchart
graph TD
    A["Initial Solar Panel"] --> B{2x Speed Limit}
    B --> C["Intermediate Production"]
    C --> D["Final Output"]
    D --> E["Recycle to Final Product"]
text_image
Diagram illustrating airflow or ventilation process with warning symbol and magnified detail viewKoolstofffilter HF2012
flowchart
graph TD
    A["Top-Down View"] --> B["Component 1"]
    B --> C["Component 2"]
    C --> D["Component 3"]
    D --> E["Component 4"]
    E --> F["Final Assembly"]
text_image
Prohibition sign with crossed-out trash bin and no text or symbolsnatural_image
Diagram of a staircase with brick walls and a cabinet, showing airflow direction (no text or symbols)natural_image
Diagram of a vertical structure with brick wall and hanging box, showing airflow direction (no text or symbols)text_image
QR code image containing encoded data, no visible human-readable textDescription

text_image
1 2 3 4 5 6 1 2 3 4 5 6 2 3 Bnatural_image
Illustration of a kitchen oven with a door and a hand inserting a paper into it (no text or symbols)flowchart
graph TD
    A["Initial Solar Panel"] --> B{2x Speed Limit}
    B --> C["Intermediate Production"]
    C --> D["Final Output"]
    D --> E["Recycle to Final Product"]
text_image
Diagram illustrating airflow or ventilation process with warning symbol and magnified detail viewflowchart
graph TD
    A["Top Component"] --> B["Arrow to Top"]
    B --> C["Arrow to Bottom"]
    C --> D["Arrow to Bottom"]
    D --> E["Arrow to Bottom"]
    E --> F["Arrow to Bottom"]
text_image
Prohibition sign with a trash bin and crossed-out lines, indicating no waste or discharge.natural_image
Diagram of a staircase with brick walls and a cabinet, showing airflow direction (no text or symbols)natural_image
Diagram of a vertical structure with brick wall and adjacent equipment, showing airflow direction (no text or symbols)text_image
QR code image containing encoded data, no visible human-readable textBeschreibung

text_image
1 2 3 4 5 6 1 2 3 4 5 6 2 3 Bnatural_image
Illustration of a kitchen appliance with a hand inserting a small object into it (no text or symbols)flowchart
graph TD
    A["Initial Solar Panel"] --> B{2x Speed Limit}
    B --> C["Intermediate Production"]
    C --> D["Final Output"]
    D --> E["Recycle to Final Product"]
text_image
Diagram illustrating airflow or ventilation process with warning symbol and magnified detail viewKohlefilter HF2012
flowchart
graph TD
    A["Device with lock"] --> B{Locking}
    B --> C["Mode selection"]
    C --> D["Device with mode selection"]
    D --> E["Load mode selection"]
    E --> F["Device with mode selection"]
    F --> G["Load mode selection"]
text_image
Prohibition sign with crossed-out trash bin and no text or symbols| Description | 5 | |
| Operation | 5 |
Maintenance
| Cleaning | 6 | ||||
| Grease | filters | ||||
| Odour/fine particle filter HF3001 and HF3014 | 7 | ||||
| Carbon | filter | HF2012 | |||
| Lighting | 9 | ||||
Appendix
| Disposal | 10 |
Introduction
On reading these user manuals you will soon become familiar with the features of this appliance. Please read the appliance's safety and maintenance instructions.
Please retain the operating and installation instructions as these may be useful for future reference.

Read the separate safety instructions before using the device!
You can find the most recent version of the instructions for use on our website.
Exhaust systems
natural_image
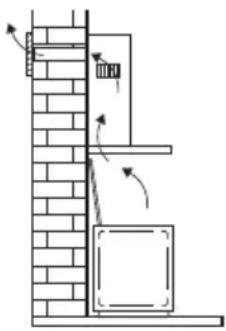
Diagram of a vertical structure with brick walls and a cabinet, showing directional arrows indicating movement or force (no text or symbols)The cooker hood can, depending on the model, be connected in one of two ways:
- As a cooker hood connected to an exhaust duct.
The cooking fumes are drawn into the cooking hood, filtered, and exhausted outdoors. This is the best way!
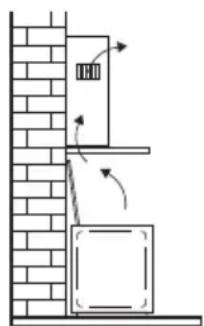
natural_image
Diagram of a vertical structure with brick wall and cabinet, showing airflow direction (no text or symbols)- As a recirculation cooker hood.
The cooking fumes are drawn into the cooking hood and the grease droplets and odours are filtered out.
The filtered air is not exhausted outdoors, but is returned to the kitchen. You then need to fit a carbon filter.
Note! The carbon filter must be ordered separately*.

HR0013, HR0017 or HF2012
*Shop easily at maintainlife.com

text_image
QR code image containing encoded data, no visible human-readable textDescription

text_image
1 2 3 4 5 6 1 2 3 4 5 6 2 3 B- Switching fan off
- Speed setting 1
- Speed setting 2
- Speed setting 3
- Intensive mode
- Lighting
Operation
Switching extraction on and off
- Select the desired extraction setting by pressing the corresponding speed setting buttons.
The cooker hood switches on. - Press the intensive mode button to select the highest setting (boost) (see switching on intensive setting).
- Quickly press and release the on/off button.
The cooker hood switches off.
Switching on intensive setting
-
Quickly press and release the intensive mode button. The intensive setting (boost setting 'B') is switched on for 5 minutes. The previous extraction setting will be reactivated after this period.
-
Press the on/off button or any other button to stop the intensive setting at any time.
Switching the lighting on and off
- Quickly press and release the lighting button.
The light switches on. - To turn off the lighting, quickly press and release the lighting button again.
Timer function
When the cooker hood is switched off, the boost function can be activated. After 5 minutes, the exhaust system switches off automatically.
Cleaning

Important!
For all maintenance first switch off the mains power to the cooker hood by pulling the plug out of the socket or by turning off the home's master switch. The hood needs to be cleaned regularly, both inside as well as outside (at least in the same frequency as the grease filter cleaning). Do not use abrasive cleaning products. Do not use alcohol!
Important!
If the instructions regarding cleaning the appliance or replacing the filters are not followed, this can cause a fire. These instructions should be followed! The manufacturer is not liable for damage to the hood or fire damage resulting from incompetent maintenance or from non-adherence to the above safety instructions.
Cooker hood
Clean the cooker hood with soapy water and a soft cloth. Then wash off with clean water. Do not use aggressive cleaning agents such as caustic soda. The cooker hood finish stays in good condition if it is buffed periodically following the application of wax.
Stainless steel cooker hoods
Do not use scouring pads or other abrasive cleaners on stainless steel cooker hoods. Finish with a non-abrasive, non-polishing agent and buff the stainless steel in the direction of the grain.
Metal grease filters
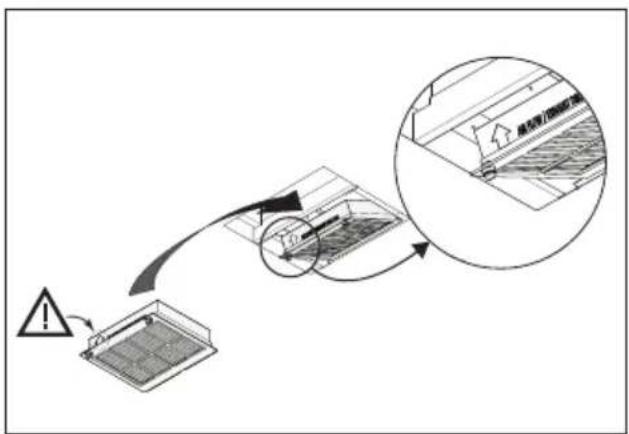
Metal grease filters should be cleaned once a month (or when indicated by the filter cleaning indicator – if present on the model) using a neutral cleaning agent, either by hand or in the dishwasher on a short, low-temperature program. Place the grease filters with the openings facing downwards in the dishwasher so the water can drain out of the filter. Aluminium grease filters become dull as a result of dishwasher cleaning agents. This is normal and does not effect the working.
Grease filters
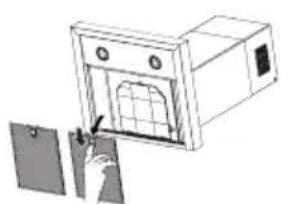
natural_image
Illustration of a kitchen appliance with a hand inserting a paper into it (no text or symbols visible)Removing the grease filters
- Switch off the motor and lighting.
- Remove the grease filters from the hood by pulling the special handle.
Odour/fine particle filter HF3001 and HF3014
- Fine dust is created during the frying of meat and vegetables. Inhaling it is bad for the lungs. With this odour and particle filter, your cooker hood contributes to a healthier indoor climate in the home.
- More noise is produced when odour/fine particle filters are used than when the cooker hood is used with an exhaust vent.
- Odour/fine particle filters function optimally at a lower motor speed. Consequently, you should avoid the setting 3 as much as possible.
Replacing the odour/fine particle filter
The odour/fine particle filter must be replaced annually. To replace the filter, follow the instructions supplied with the new filter. The recirculation set HR0013 or HR0017 should be ordered when first installed, depending on the extractor model.
• BSKxx2: HR0013 and HF3001.
• BSKxx3: HR0017 and HF3014.

Important:
- The saturation of the filter depends on the intensity of use, the manner of cooking and the regularity with which the grease filters are cleaned.
flowchart
graph TD
    A["Initial Solar Panel"] --> B{2x Speed Limit}
    B --> C["Assembly"]
    C --> D["Discharge to Final System"]
    D --> E["Final System"]
text_image
Diagram illustrating a warning or alert mechanism with labeled components and an inset image showing a building interior.Carbon filter HF2012
flowchart
graph TD
    A["Top Component"] --> B["Step 1: Down Arrow"]
    B --> C["Step 2: Left Side with Internal Components"]
    C --> D["Step 3: Right Side with Internal Components"]
    D --> E["Bottom Component"]
    E --> F["Step 4: Left Side with Internal Components"]
    F --> G["Step 5: Right Side with Internal Components"]
- More noise is produced when carbon filters are used than when the cooker hood is used with an exhaust vent.
- Carbon filters function optimally at a lower motor speed.
Consequently, you should avoid setting 3 as much as possible. - Clean the carbon filter every 3 to 4 months, depending on cooking behaviour.
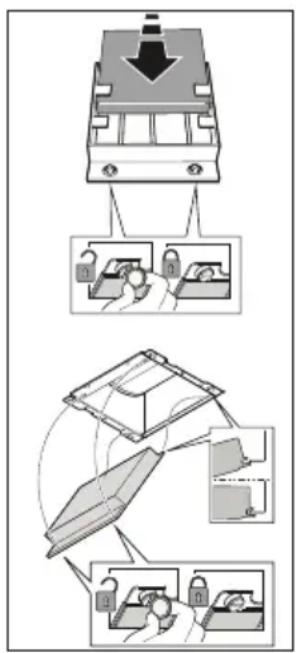
Replacing the carbon filter HF2012
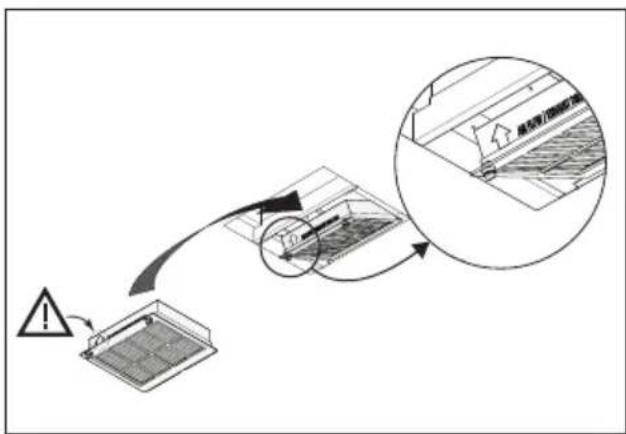
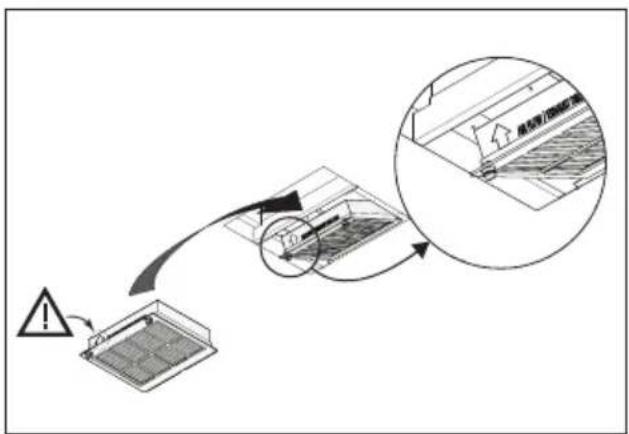
The carbon filter must always be used if the cooker hood is not ducted.
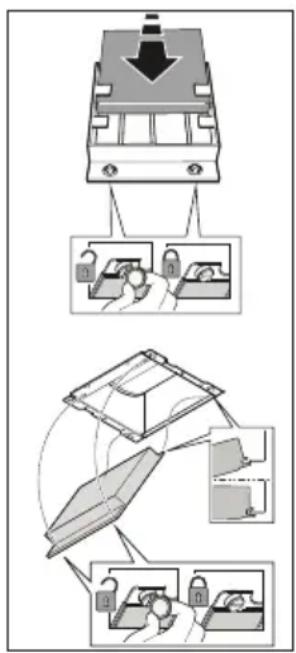
Disassembly
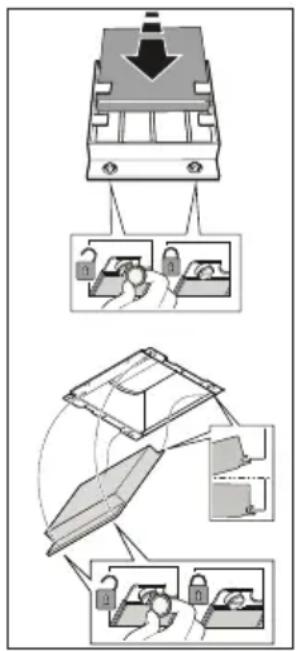
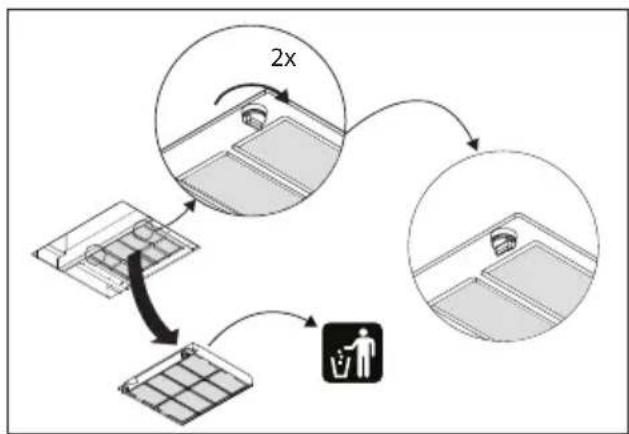
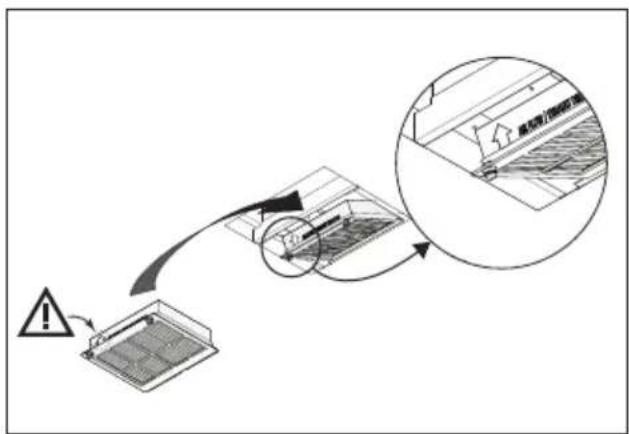
Remove the carbon filter by turning the twist locks on the front 90^ . Carefully remove the filter.
Assembly
First hook the carbon filter on the metal tab on the back of the hood and then secure the front, with the two twist locks, by turning them a quarter turn.
Note:
- The regenerable activated carbon filter can be washed by hand or in the dishwasher at a maximum temperature of 65 °C. The washing cycle must be done without other dishes and without dishwasher detergent. Do not use any cleaning agents!
- Remove excess water. Be careful to avoid damaging the filter. Let the filter dry in the oven for at least 1 hour at a maximum temperature of 80 °C. After a maximum of 3 years (or when the filter is damaged), the filter will need to be replaced.
- It is important that the grease filters and the regenerable activated carbon filter are properly dried before installation.
Lighting

This hood is fitted with a light system. This light system has to be replaced by an authorized technician. Do not attempt to replace it by yourself.
The lamp in this household appliance is only suitable for illumination of this appliance. The lamp is not suitable for household room illumination.
Disposal
Disposal of appliance and packaging
By ensuring this product is disposed of correctly, you will help prevent potential negative consequences for the environment and human health, which could otherwise be caused by inappropriate waste handling of this product. The local authorities can provide you with the relevant information.
The packaging of this appliance is recyclable. It could have been made from:
- cardboard;
- polythene foil (PE);
- CFK-free polystyrene (PS-hard foam).
You need to dispose of these materials responsibly in accordance with official regulations.

text_image
Prohibition sign with a trash bin and crossed-out lines, indicating no waste or discharge.To draw attention to the fact that the segregated processing of electric household appliances is compulsory, this appliance carries the symbol of a crossed-out dustbin. This means that at the end of its working life, you may not dispose of the appliance as household refuse. Instead, you should hand it in at a special refuse collection centre run by the local authority or at a dealer's providing this service.
Segregated processing of household appliances avoids any negative effects on the environment and public health that might otherwise occur. It enables the recovery of the materials used in the production of this appliance, thus realising considerable savings in terms of raw materials and energy.
CE
Declaration of conformity
We hereby declare that our products satisfy the applicable European directives, orders and regulations, as well as the requirements stated in the referenced standards.
www.pelgrim.nl
www.pelgrim.be

828069
Pelgrim