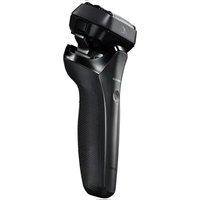
ER-GM40 - Shaver PANASONIC - Free user manual and instructions
Find the device manual for free ER-GM40 PANASONIC in PDF.

User questions about ER-GM40 PANASONIC
0 question about this device. Answer the ones you know or ask your own.
Ask a new question about this device
Download the instructions for your Shaver in PDF format for free! Find your manual ER-GM40 - PANASONIC and take your electronic device back in hand. On this page are published all the documents necessary for the use of your device. ER-GM40 by PANASONIC.
USER MANUAL ER-GM40 PANASONIC
Operating Instructions
(Household use) Facial Hair Remover
Model No. ER-GM40
English......3
Français......21
Español....39

natural_image
Line drawing of a cylindrical device with a handle and spout, no text or symbols presentPanasonic®
English
Operating Instructions
(Household use) Facial Hair Remover
Model No. ER-GM40
Contents
Safety precautions...... 4
Parts identification 8
Installing the battery 9
How to use 10
Maintenance....15
Removing and mounting the blade....17
Troubleshooting 18
Specifications 18
Thank you for purchasing this Panasonic product. Before operating this unit, please read these instructions completely and save them for future use.
Safety precautions
To reduce the risk of injury, loss of life, electric shock, fire, and damage to property, always observe the following safety precautions.
Explanation of symbols
The following symbols are used to classify and describe the level of hazard, injury, and property damage caused when the denotation is disregarded and improper use is performed.

WARNING
Denotes a potential hazard that could result in serious injury or death.

CAUTION
Denotes a hazard that could result in minor injury or property damage.
The following symbols are used to classify and describe the type of instructions to be observed.

This symbol is used to alert users to a specific operating procedure that must not be performed.

This symbol is used to alert users to a specific operating procedure that must be followed in order to operate the unit safely.

WARNING
▶ Preventing accidents
Do not store within the reach of children or infants. Do not let them use it.

- Putting parts or accessories in the mouth may cause an accident or injury.
→ Store with the protective cap attached after use.

Immediately stop using if there is an abnormality or malfunction.
- Failure to do so may cause fire or injury.
This appliance is not intended for use by persons (including children) with reduced physical, sensory or mental capabilities, or lack of experience and knowledge, unless they have

been given supervision or instruction concerning use of the appliance by a person responsible for their safety.
Children should be supervised to ensure that they do not play with the appliance.
- Failure to do so may cause an accident or injury.

CAUTION
▶ To protect your skin
Do not use in the following cases:
• People with sensitive skin
• People with skin allergies
Do not use on areas with pimples, etc.
- Doing so may result in injury to the skin.

CAUTION

Do not press the product forcibly against the skin. Avoid repetitive shaving of the same area. Do not pat the product during use.
- Doing so may result in pain, inflammation or injury of the skin.

Do not press the blade by force. Do not touch the blade directly with your fingers or nails during use.
- Doing so may cause injury to the skin or shorten the blade life prematurely.

Check the blade for deformation or damage before use.
- Failure to do so may cause skin injury.

When removing the protective cap, grasp it by the central part and pull it outward.
- Failure to do so may cause the blade to cut your hand.

Use the product only for shaping your eyebrows, beard or downy hair.
- Failure to do so may cause injury.

If there is any abnormality on your skin after use, stop using the product and consult a dermatologist.
- Failure to do so may cause symptoms to worsen.

Be sure to attach the protective cap when carrying the product around or storing it.
- Failure to do so may cause injury to the skin or shorten the service life of the blade.

CAUTION
This product

Do not share with your family or others.
- Doing so may result in infection or inflammation.

Do not drop or subject to shock.
- Doing so may cause injury.

Do not modify, disassemble or repair.
- Doing so may cause an accident or injury.
→ Contact an authorized service center for repair.
▶ Observe the following precautions

To trim your eyebrows, use the eyebrow cover or eyebrow comb.
- Failure to do so may cause eyelashes to be cut.
The battery

Do not throw into fire or disassembly.
The supply terminals are not to be short-circuited.
- Doing so may cause a burn or injury.
Always follow the cautions printed on the battery. Check the polarity of the battery (+ and -) and install it correctly.
Exhausted battery is to be removed from the appliance and safely disposed of.

Remove the battery when not using the appliance for an extended period of time.
Use the battery by the recommended use-by date. Non-rechargeable battery is not to be recharged.
- Failure to do so may cause overheating or explosion of the battery, injury or contamination of surroundings due to leakage.
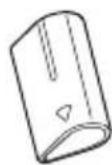
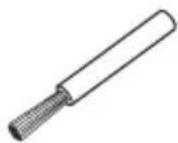
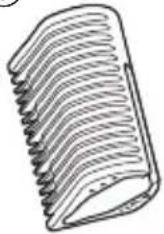
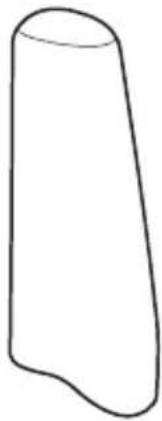
Parts identification
A
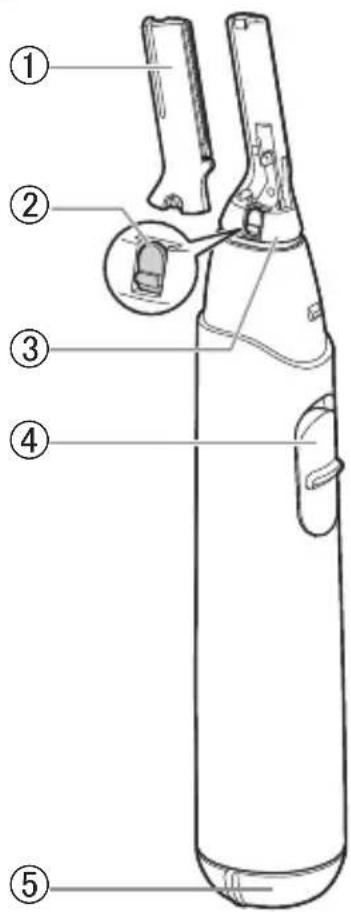
text_image
Labeled diagram of a cylindrical device with numbered parts, showing internal components and a magnified inset.B
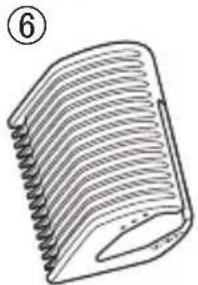
natural_image
Line drawing of a coiled spring or turbine blade (no text or symbols)⑦
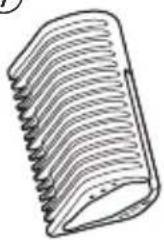
natural_image
Line drawing of a comb with multiple ridges (no text or symbols)C
D

natural_image
Simple line drawing of a 3D geometric shape resembling a truncated cone or prism (no text or symbols)E
A Main body
① Blade
② Blade locker
③ Head
④ Power switch [0/1]
⑤ Battery cover
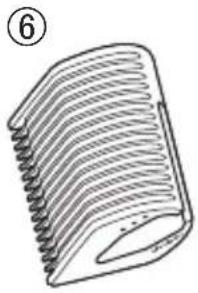
B Eyebrow comb
⑥ Eyebrow comb A (7 mm/6 mm/5 mm)
(9/32")/(15/64")/(3/16")
⑦ Eyebrow comb B
(4 mm/3 mm/2 mm)
(5/32")/(1/8")/(5/64")
© Eyebrow cover
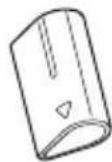
D Protective cap
Accessory
E Cleaning brush
Alkaline battery is not supplied.
Please buy it separately.
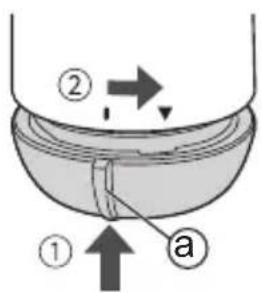
Installing the battery

text_image
Diagram showing a device with a minus sign and plus sign, connected to a mechanical component with a downward arrow indicating motion or assembly.• Make sure that the main body is turned off.
1. Remove the battery cover.
Turn the battery cover in the direction of the “①” arrow until the battery cover is removed.

text_image
Diagram showing two labeled arrows pointing to a liquid container with a stopper, indicating fluid movement or flow direction.2. Check the polarity (+ and -) and install the battery.
Thoroughly wipe the main body to prevent water droplets from getting inside when installing the battery.
3. Attach the battery cover.
① Align the “”on the battery cover with the “” mark and insert the battery cover.
② Rotate the battery cover until the “” is aligned with the “” mark on the main body.
text_image
Diagram showing a container with two labeled parts (① and ②) and directional arrows indicating flow or movement.Notes
- You can use the appliance for approximately 180 minutes with one Panasonic LR6 (AA alkaline battery). (when dry use in a room temperature of 20^ (68°F).) The use time will differ depending on the frequency and method of use.
- Be sure to use LR6 (AA alkaline battery).
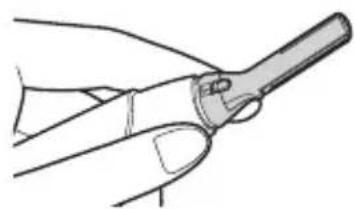
How to use
- When you use the product for the first time, try it by pressing it gently against the skin and start shaving gently.
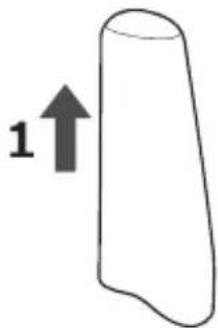
natural_image
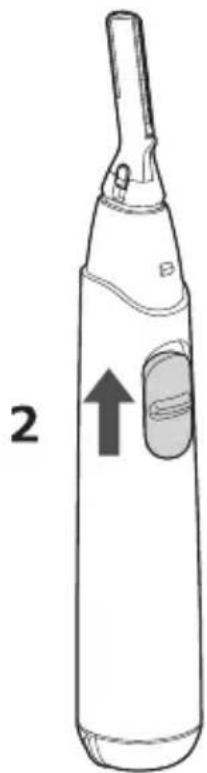
Simple line drawing of a 3D object with an upward arrow labeled '1' (no text or symbols on the object itself)- Hold the protective cap to pull it out.
- Turn on the power switch, and start trimming.
Trimming wet hair
- Do not use the attachments when trimming wet hair.
- Wet and apply soap beforehand to the area to be shaved.
natural_image
Line drawing of a handheld electric toothbrush with a labeled component and an arrow indicating direction (no text or symbols present)-
Slide the power switch to off position at the end of each use.
-
Clean the appliance after each use.
- Failure to do so may cause blade to lose sharpness.
(See page 15)
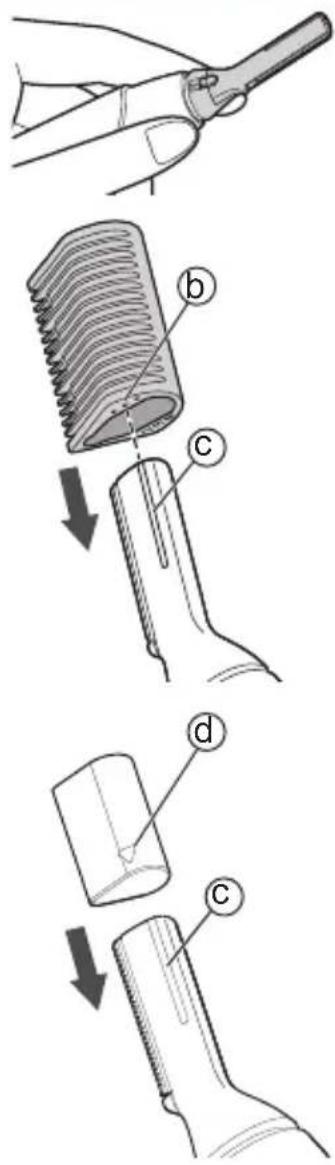
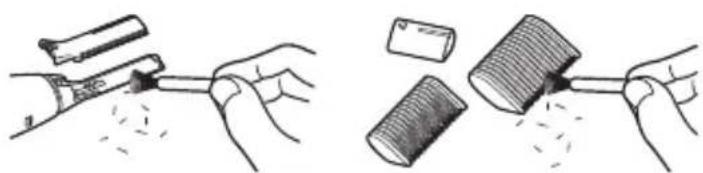
Removing and mounting the attachments
• Make sure that the main body is turned off.
How to mount
- Press the head with your fingers to avoid excessive vibration.
< Eyebrow comb A >
(7 mm/6 mm/5 mm) (9/32")/(15/64")/(3/16")
< Eyebrow comb B >
(4 mm/3 mm/2 mm) (5/32")/(1/8")/(5/64")
- Select the trimming length, align the guide line (b) with the groove (c) of the blade, and insert the eyebrow comb directly into the blade until a click is heard.
< Eyebrow cover >
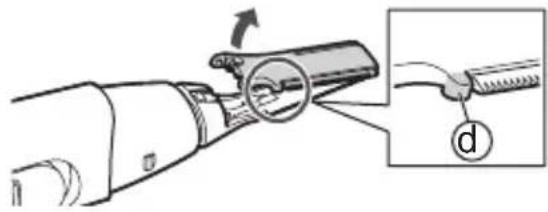
- Attach the eyebrow cover to the blade until a click is heard. (To install, align ▽ (d) with the groove (c) of the blade.)
text_image
Diagram illustrating four steps of hairpin tool application: cutting, threading, holding, and opening a clip.How to remove
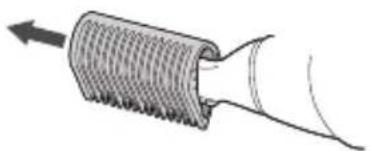
Remove it straightly.
natural_image
Diagram of a coiled tube or pipe with directional arrow indicating flow or movement (no text or symbols)How to trim
- Lay the blade flat on the skin. As indicated by the arrow, move the blade slowly against the flow of your downy hair.
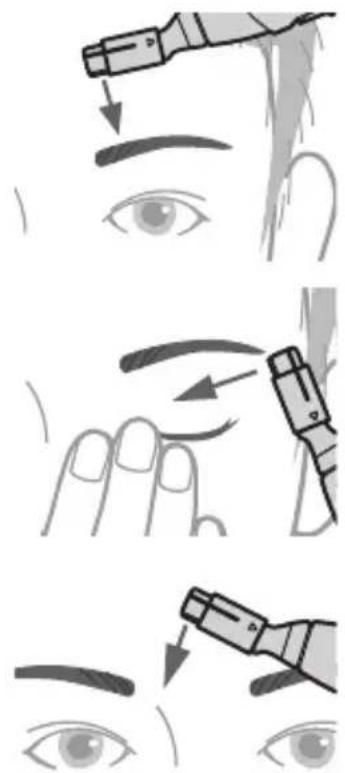
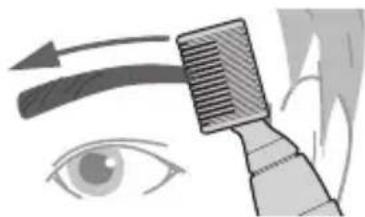
Eyebrow shaping
- When shaping your eyebrows If you change the shape too much, your face will look very different, so adjust it gradually.
Attach the eyebrow cover (©).
- Above the eyebrows Stop trimming at about 2 mm (5/64") to 3 mm (1/8") to the side of the eyebrow.
• Below the eyebrows Press the eyelid gently and stretch the skin while trimming.
- Between eyebrows Trim in the direction of the arrow. - It is easier to trim the eyebrows if you paint the eyebrows before trimming.
text_image
Illustration showing three-step eye makeup application steps with labeled arrows indicating direction of application.Eyebrow trimming
Select the trimming length (b), attach the eyebrow comb (B).

text_image
b 2 3 4English
- Press the eyebrow comb close to the skin to trim.
- Align the eyebrow comb with your eyebrow, and move it from the tail to the start of eyebrow.
- Repeat this step until the eyebrows are trimmed to the desired length.
natural_image
Illustration of a hairbrush applying eyeshadow to an eye (no text or symbols)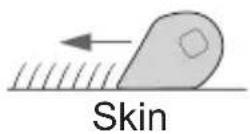
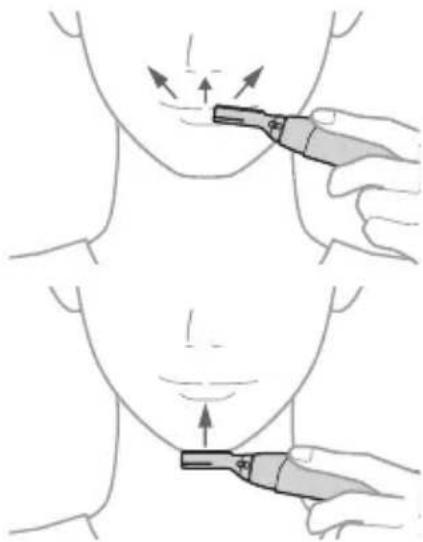
Beard trimming
• Below the nose Trim upward.
- Chin
Trim upward.
▶ If you stretch your skin to raise your beard, it will be easier to shave.
natural_image
Illustration showing two-step medical procedure on neck and chest (no text or symbols)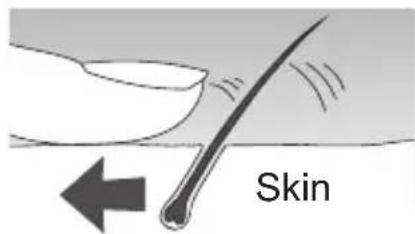
text_image
SkinDowny hair trimming
- Forehead Move from the hairline to the center of the forehead and then return to the hairline.
- Cheek Move outward from the central part of the face.
- Sideburns Select the desired length of the sideburns and trim downward.
- Neck Trim upward.

natural_image
Illustration of a hand holding a medical or anatomical tool over a human face, with arrows indicating direction of pressure or force (no text or symbols present)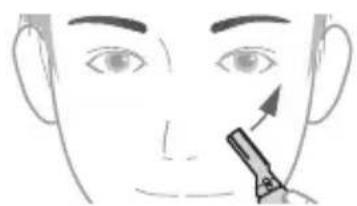
natural_image
Illustration of a person's face with a pointing tool near the nose (no text or symbols)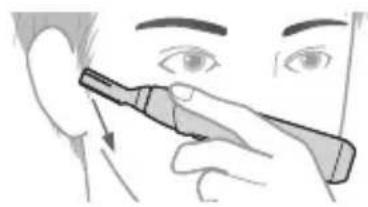
natural_image
Illustration of a person applying eye care to their ear with a tool (no text or symbols)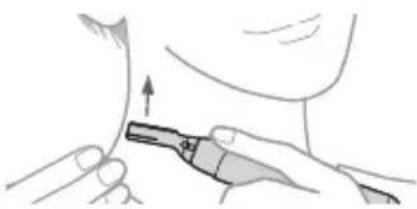
natural_image
Illustration of a person using a medical or surgical tool to apply tissue or material (no text or symbols visible)Maintenance
- Be sure to clean the appliance with the battery cover attached.
- Make sure that the main body is turned off.
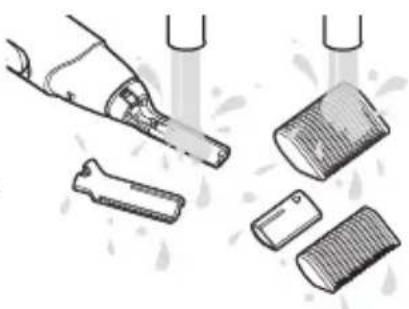
Wet cleaning
- Remove the blade and attachments (See pages 11 and 17) and rinse under running water.
• Cover the drainage outlet of washbasin to prevent the inner blade from flowing away.
- If you are concerned about the dirt, wash it off with hand soap or the like.
- Shake up and down several times to remove the water.
- Be careful not to hit the main body on the sink or any other object while draining the water. Failure to do so may cause malfunction.
natural_image
Illustration of a hand brushing a toothbrush and cutting into a grid with brushes (no text or symbols)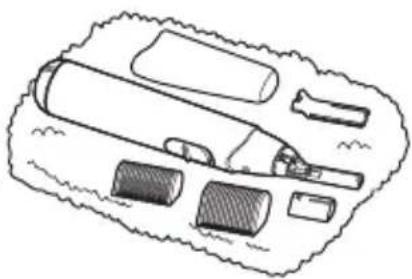
natural_image
Illustration of a medical or dental tool kit with no visible text or symbols- Wipe off the water with a towel and let it dry naturally.
- It will dry faster with the blade removed.
Dry cleaning
Brush off any remaining hair trimmings.
natural_image
Illustration showing two hand positions: one applying a tool to a surface, the other handling a gavel (no text or symbols present)Notes
- Do not use thinner, benzine, alcohol or other chemicals. Doing so may cause failure, cracking or discoloration of the main body. Wipe the main body only with a soft cloth slightly dampened with tap water or soapy tap water.
• After cleaning, attach the blade and the protective cap. - Store the main body in a place with low humidity after use. Failure to do so may cause malfunction due to condensation or rust.
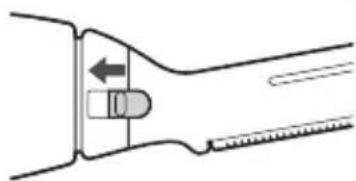
Removing and mounting the blade
- Press the head with your fingers to avoid excessive vibration.
• Make sure that the main body is turned off.
natural_image
Line drawing of a hand holding a pen or tool, no text or symbols presentRemoving the blade
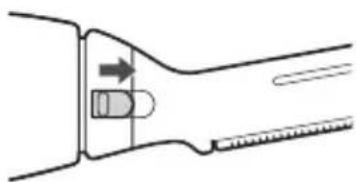
1. Slide the blade locker as indicated by the arrow.
- It is easier to slide it with your nail.
natural_image
Diagram of a mechanical tool or tool with an arrow indicating direction (no text or symbols present)2. Remove it in the arrow direction.
- You can remove it easily by raising the protrusion (d) with your fingernail.
- Be careful not to drop the blade.
natural_image
Illustration of a hand holding a tool with a magnified inset showing the tip and handle (no text or symbols)Mounting the blade
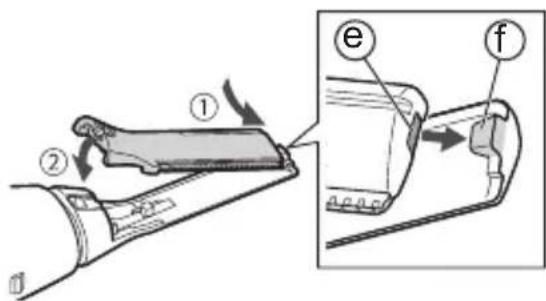
- Insert the tiny hook (f) on the top of the main body into the hole (e) of the blade.
text_image
Diagram illustrating a mechanical assembly with labeled parts and directional arrows, including parts e and f.2. Slide the blade locker as indicated by the arrow.
- It is easier to slide it with your nail.
natural_image
Diagram of a mechanical tool or grip with an arrow indicating direction (no text or symbols present)Troubleshooting
Problem Action
The appliance is not cutting as well as before.
Replace the blade.
Guidelines for replacement: Approximately 1.5 years (Differs
▶ depending on your hair state and how often you use the appliance (number of times/amount of time))
▶ Replace with a new battery.
Clean off any remaining hair from the appliance.
▶ Replace with a new battery.
Make sure the battery is installed correctly.
The appliance is not working.
If the problems still cannot be solved, contact the store where you purchased the unit or a service center authorized by Panasonic for repair.
Specifications
| Power supply Dry-cell battery | |
| Battery type | One LR6 (AA alkaline battery) (Sold separately) |
This product is intended for household use only.
Personal Care & Beauty Care Products
FOR USA ONLY
30-Day Quality Satisfaction Guarantee
If you are dissatisfied with any Panasonic Personal Care & Beauty Care Products for any reason, simply return it to the place of purchase with a dated proof of purchase, in the original packaging, with all accessories, parts and instructions, within 30 days of the date of purchase, for a full refund, or call Panasonic at 1-800-338-0552.
Abuse or misapplication of this product voids the guarantee.
PRODUCT REGISTRATION
(U.S. customers only)
Go to www.panasonic.com/register and register your product now to receive these benefits:
Safety Notification
We contact our customers in case of recall
Owner Verification
Proof of purchase in case of product theft or loss
Efficient Warranty Service
In case there is a problem with your product
Special Offers and Promotions from Panasonic
FOR YOUR CONVENIENCE, WE HAVE ESTABLISHED A TOLL-FREE (IN USA ONLY) NATIONAL ACCESSORY PURCHASE HOT LINE AT 1-800-332-5368.
Panasonic®
▶ Prévention des accidents
text_image
Labeled diagram of a hand holding a cylindrical device with numbered parts for identification.B
natural_image
Line drawing of a curved, ribbed object with no text or symbols⑦

natural_image
Line drawing of a comb with multiple curved blades (no text or symbols)C
D

natural_image
Simple line drawing of a 3D geometric shape resembling a truncated cone or prism (no text or symbols)E

A Boîtier
natural_image
Diagram of a device with a cylindrical component and a separate open cylindrical component, showing internal structure and polarity (no text or symbols)text_image
Diagram showing fluid flow with labeled arrows and numbered regions, likely illustrating a physical or fluid dynamics concept.text_image
Diagram showing a container with two labeled parts (① and ②) and directional arrows indicating flow or movement.Nota
natural_image
Line drawing of a handheld electric toothbrush with a labeled arrow and handle (no text or symbols on the device itself)natural_image
Line drawing of a hand holding a pen or tool, no text or symbols present
text_image
Diagram illustrating hairpin meshing process with labeled parts b and c, showing a downward arrow indicating direction of hairpin movement.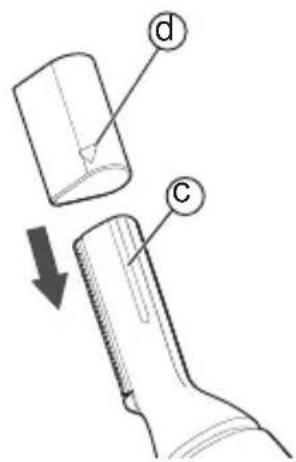
text_image
Diagram showing a mechanical component with labeled parts d and c, indicating a step or process in a tool or assembly.Comment retirer
natural_image
Diagram of a coiled tube or pipe with directional arrow indicating flow or movement (no text or symbols)Comment couper
text_image
Illustration showing three-step eye makeup application steps with labeled arrows indicating direction of application.Français
natural_image
Illustration of a hairbrush applying eyeshadow to an eye (no text or symbols)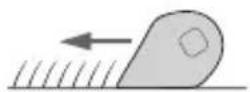
Peau
natural_image
Illustration of a medical procedure on neck and chest with two tool tips (no text or symbols)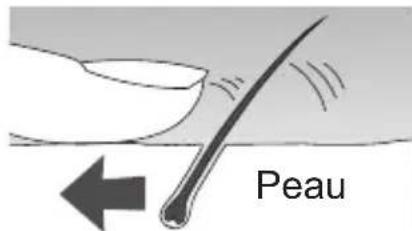
text_image
Peaunatural_image
Illustration of a hand holding a tool over an eye with arrows indicating direction (no text or symbols)- Joue
natural_image
Illustration of a person applying facial hair to the lower face with a pen (no text or symbols)- Favoris
natural_image
Illustration of a person using a handheld device to apply eye examination (no text or symbols present)- Cou
natural_image
Illustration of a person applying a medical or surgical tool to a surface, with an upward arrow indicating motion (no text or symbols present)Entretien
natural_image
Illustration of a hairbrush and two sets of hair clips with liquid splashing (no text or symbols)natural_image
Line drawing of a medical or laboratory device with no visible text or symbolsnatural_image
Illustration showing two methods of removing a tool, one using a pen and the other with a brush (no text or symbols present)▶ Nota
natural_image
Line drawing of a hand holding a pen or tool (no text or symbols)natural_image
Diagram of a tool handle with directional arrows indicating movement (no text or symbols)natural_image
Diagram of a mechanical device with an arrow indicating motion, showing a close-up of a cable being inserted (no text or symbols present)Montage de la lame
text_image
Diagram illustrating a mechanical component with labeled parts (①, ②, e, f) and directional arrows indicating movement or assembly.text_image
Labeled diagram of a hand holding a cylindrical device with numbered parts and an inset showing a small component.B

natural_image
Line drawing of a corrugated metal sheet with ridges, no text or symbols present⑦
C

D
natural_image
Simple line drawing of a 3D geometric shape resembling a truncated cone or prism (no text or symbols)E

A Cuerpo principal
natural_image
Simple line drawing of a cylindrical object with a small protrusion on top (no text or symbols)text_image
Diagram showing fluid flow in a container with labeled arrows and numbered partsnatural_image
Cross-sectional diagram of a mechanical component with a cylindrical body and internal cavity, showing no text or symbols.3. Coloque la tapa de la pila.
text_image
Diagram showing a container with two labeled parts (① and ②) and directional arrows indicating flow or movement.Notas
(7 mm/6 mm/5 mm) (9/32")/(15/64")/(3/16")
(4 mm/3 mm/2 mm) (5/32")/(1/8")/(5/64")
natural_image
Line drawing of a hand holding a pen or tool, no text or symbols present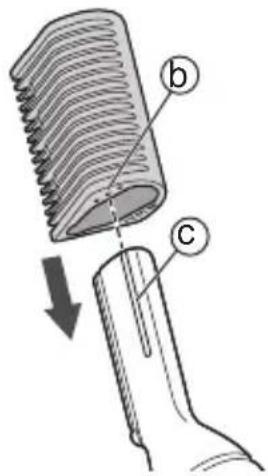
text_image
Diagram illustrating hair follicle structure with labeled parts b and c, showing hair follicle arrangement and hair extension.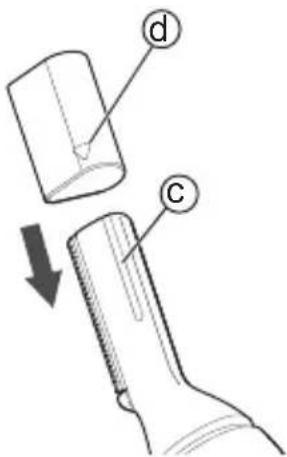
text_image
Diagram showing a mechanical component with labeled parts d and c, indicating a process or assembly step.Cómo quitarlo
natural_image
Diagram of a coiled tube or pipe with directional arrow indicating flow or movement (no text or symbols)Cómo cortar
text_image
Illustration showing three-step eye makeup application steps with labeled tool tips and arrows indicating direction of application.Español
natural_image
Illustration of a hairbrush applying eyeshadow to an eye (no text or symbols)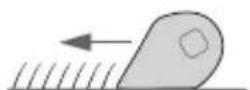
Piel
Recorte de la barba
natural_image
Illustration of a medical procedure on neck and chest with two hands demonstrating a tool (no text or symbols present)
text_image
PielRecorte de vello suave
- Frente
natural_image
Illustration of a hand holding a tool over a human face with arrows indicating direction (no text or symbols)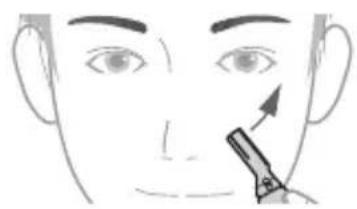
natural_image
Line drawing of a human face with a pencil applying product to the nose area (no text or symbols)
natural_image
Illustration of a person using a dental tool to apply eye examination (no text or symbols present)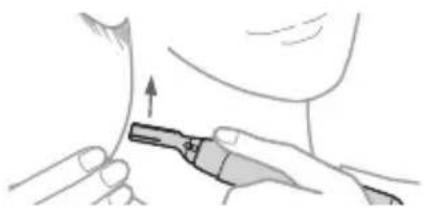
natural_image
Illustration of a medical procedure showing a tool applying force to a patient's neck area (no text or symbols present)Mantenimiento
natural_image
Illustration of a hand holding a tool next to a cylindrical object and two smaller objects, with water droplets visible (no text or symbols)natural_image
Illustration of a medical or laboratory tool kit with no visible text or symbolsnatural_image
Illustration showing two hand positions: one with a tool and the other with a gavel (no text or symbols present)▶ Notas
natural_image
Line drawing of a hand holding a tool, no text or symbols presentnatural_image
Pure mechanical diagram showing a lever and pivot mechanism without any text or symbolsnatural_image
Diagram of a mechanical device with a magnified inset showing a cable being inserted (no text or symbols present)Montar la cuchilla
text_image
Technical diagram showing a mechanical assembly with labeled parts (①, ②, e, f) and directional arrows indicating motion or movement.natural_image
Diagram of a mechanical tool with an arrow indicating motion or force (no text or symbols)Panasonic Corporation of North America
Two Riverfront Plaza, Newark, NJ 07102-5490
IN CANADA CONTACT:
AU CANADA, COMMUNIQUEZ AVEC:
Panasonic Canada Inc.
5770 Ambler Drive, Mississauga, Ontario L4W 2T3
www.panasonic.com
Service • Assistance • Accessories
www.panasonic.ca/english/support (In Canada)
www.panasonic.ca/french/support (Au Canada)
http://www.panasonic.com
© Panasonic Corporation 2021
Printed in China
Imprimé en Chine
Impreso en China
E EN, CA, ES
ER9700GM401551 Y0121-0