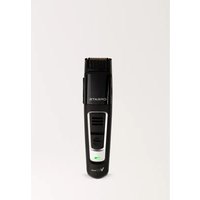
Clipper Easy - Shaver Create - Free user manual and instructions
Find the device manual for free Clipper Easy Create in PDF.

| Product Type | Electric Shaver |
| Brand | Create |
| Model | Clipper Easy |
| Dimensions (L x W x H) | 68 x 14 x 70 mm |
| Power Supply | Mains Adapter |
| Battery | Rechargeable, charging time about 4 hours |
| LED Indicator | Solid red (charging), flashing white (charged) |
| Cutting Heights | 3 mm, 6 mm, 9 mm, 12 mm (combs included) |
| Plug-and-Play Function | Can be used while charging |
| Maintenance | Clean with soapy water and lubricate with supplied oil |
| Safety | Do not immerse, do not use outdoors, keep out of reach of children |
| Box Contents | Shaver, charging base, adapter, 4 combs (3/6/9/12 mm), oil, cleaning brush |
| Use | Household use only |
| Compliance | Directives 2012/19/EU and 2015/863/EU |
| Manual Languages | French, German, English, Spanish, Italian, Dutch, Polish, Portuguese, + others on request |
Frequently Asked Questions - Clipper Easy Create
User questions about Clipper Easy Create
0 question about this device. Answer the ones you know or ask your own.
Ask a new question about this device
Download the instructions for your Shaver in PDF format for free! Find your manual Clipper Easy - Create and take your electronic device back in hand. On this page are published all the documents necessary for the use of your device. Clipper Easy by Create.
USER MANUAL Clipper Easy Create
natural_image
Line drawing of a hairless electric shaver with power button (no text or symbols)ELECTRIC HAIR CLIPPER
MAQUINILLA ELÉCTRICA DE CORTAR PELO
USER MANUAL
CREATE CREATE CREATE ATE CREATE CREATE CRE CREATE CREATE CREATE ATE CREATE CREATE CRE CREATE CREATE CREATE ATE CREATE CREATE CRE CREATE CREATE CREATE CREATE CREATE CREATE CREATE CREATE CREATE CREATE CREATE CREATE CREATE CREATE CREATE CREATE CREATE CREATE ATE CREATE CREATE CRE CREATE CREATE CREATE ATE CREATE CREATE CRE CREATE CREATE CREATE ATE CREATE CREATE CRE CREATE CREATE CRE CREATE CREATE CRE CREATE CREATE CRE CREATE CREATE CRE CREATE CREATE CRE CREATE CREATE CRE CREATE CREATE CRE
CREATE CREATE CREATE ATE CREATE CREATE CRE CREATE CREATE CREATE ATE CREATE CREATE CRE CREATE CREATE CREATE ATE CREATE CREATE CRE CREATE CREATE CREATE ATE CREATE CREATE CRE CREATE CREATE CREATE ATE CREATE CREATE CRE CREATE CREATE CREATE ATE CREATE CREATE CRE CREATE CREATE CREATE ATE CREATE CREATE CRE CREATE CREATE CRE CREATE CREATE CRE CREATE CREATE CRE CREATE CREATE CRE CREATE CREATE CRE CREATE CREATE CRE
INDEX
ENGLISH
Security instructions 6
Parts list 7
Adding oil 8
Cutting height adjustment 8
Charging method 8
Assemble and disassemble the head 9
Head cleaning 9
6
ESPAÑOL
Thank you for choosing our electric shaver. Before using the appliance, and to guarantee the best use, read these instructions carefully.
The safety precautions listed here reduce the risk of fire, electric shock, and injury when followed correctly. Please keep the manual in a safe place for future reference, as well as the warranty, sales receipt and box. If applicable, give these instructions to the future owner of the appliance. Always follow basic safety instructions and risk prevention measures when using an electrical appliance. The manufacturer will not be held responsible for any damage resulting from the failure of the user to follow these instructions.
SECURITY INSTRUCTIONS
When using any electrical appliance, the following basic safety precautions should always be observed.
- Check that the mains voltage corresponds to that indicated on the appliance.
- Use the appliance only for domestic purposes and domestic or similar spaces.
- Use the appliance only in the manner indicated in these instructions.
- Never leave the appliance unattended when in use.
- The appliance must be used only for the purpose for which it was designed. No responsibility is assumed for possible damage caused by incorrect use or improper handling.
- Children and people with disabilities are not always aware of the danger posed by the use of electrical appliances.
- This device can be used by children 8 years of age and older, and adults, with reduced physical, sensory or mental capabilities or lack of experience and knowledge, if they have been given supervision or instruction regarding the safe use of the device and understand the hazards involved.
- Children must not clean and maintain the appliance without supervision.
- This device is not a toy, do not let small children or disabled people play with it.
• To ensure the safety of your children, keep all packaging (plastic bags, boxes, Styrofoam, etc.) out of their reach.
Caution: Do not allow small children to play with plastic: Choking hazard exists.
- Never immerse the appliance in water or any other liquid for any reason.
- Never put it in the dishwasher.
-
Never use the appliance near hot surfaces.
-
Never use the appliance outdoors and always place it in a dry place.
- Never use accessories that are not recommended by the manufacturer. They could constitute a danger to the user and a risk of damage to the appliance.
- Make sure the appliance has cooled down before cleaning and storing it.
- This appliance is not designed to be operated by means of an external timer or a separate remote control system.
• Always place the unit on a flat surface. Also, make sure that you do not cover the device and that you do not put anything on it. - Incorrect operation or improper use can damage the device and cause injury to the user.
- This device, designed for home use, complies with the standards related to this type of product.
- The item should not be used if it has been dropped or if there are visible signs of damage.
- Do not remove the adapter from the socket with wet hands to avoid the risk of electric shock.
- As soon as charging is complete, please pull out the adapter from the power outlet, pull out the plug of the product, hold the plug and pull it out, do not pull the cord to avoid damage to the product.
PARTS LIST
- Blade
- Power button and speeds
- Cutting height selection
- Charging dock
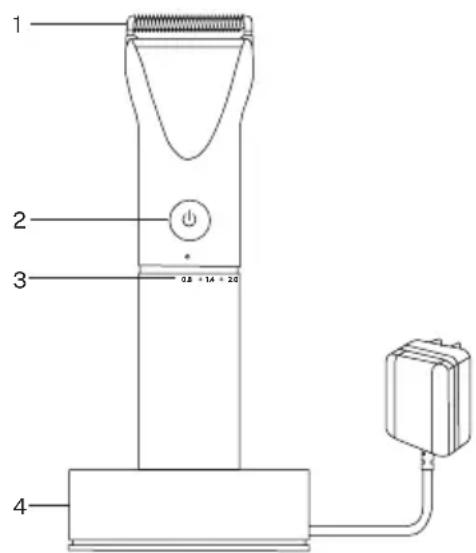
Accessories
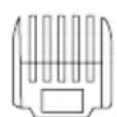
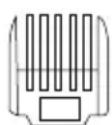
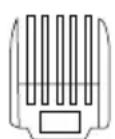
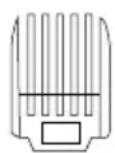
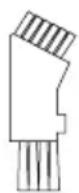
3 mm 6 mm 9 mm 12 mm Oil Cleaning brush
natural_image
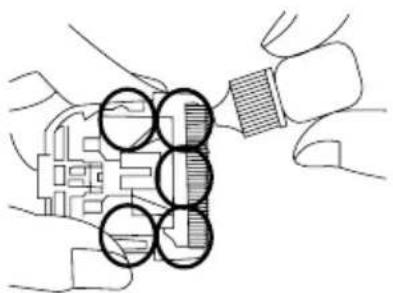
Illustration of hands holding a device with circular components, no text or symbols present- Add the oil into the cutter head before use. The product body may be a little hot when using or charging. But it will not affect its performance.
- Add one drip to each of the 5 circles showed in the picture.
- Add the oil to the positions as directed by the arrow.
- Don't use petrol, alcohol or thinner to clean the product. Otherwise, the product colour may change.
- Use diluted soap water to clean the product.
- Don't charge the product if the room temperature is higher than 40 °C or lower than 0 °C.
- Keep it out of the reach of children to avoid cuts by the clipper blade or swallowing its small parts.
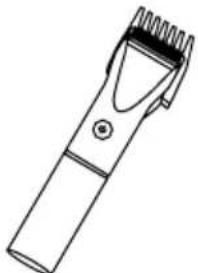
CUTTING HEIGHT ADJUSTMENT
natural_image
Line drawing of a hairpin with a textured handle and serrated tip (no text or symbols)
natural_image
Hand holding a handheld hairpin with a power button (no text or symbols visible)- Choose the suitable size you will need.
- Match it with the blade at the same level and then assemble.
• Take it out by pushing one side of the comb using your thumb.
CHARGING METHOD
This product can be charged on the charging base or using the charging adapter directly.
- Put the adaptor connector terminal into the base.
• Make sure the product is in the position of Power Off and then put it into the charging base. The LED light will show a fixed red color. - Charging time is around 4 hours.
- When the charging is finished, the LED light will show a flashing white color.
- If using charging base, please connect the adaptor with the base and then plug into the socket. (the blue charging indicator will be working on the base.) And then put the product into the base to start the charging.
Warning! Don't take the adaptor out from the socket with wet hands to avoid the risk of electric shock.
Notes:
- If the product is not going to be used for a long time, please ensure the battery is charged at least once every 3 months to avoid damage. Plug-and-play function means that you can use the product while charging in case of insufficient power.
- Put the adaptor connector terminal into the port of the product and then plug into a socket. Switch on the product and then use it.
• After using, switch off and then disconnect the adaptor connector with product. - If the battery has been used out, it may be difficult to start the product even if it is plugged. You should restart it after charging at least one or two minutes. While charging, the product body and the adaptor may be a little hot, however, it is a normal phenomenon.
• Take the adaptor out from the power socket
• Take the plug out from the product - Please hold the plug and take it out.
- Don't pull the cord in order to avoid any damage for adaptor.
- Don't charge the product more than 6 hours each time.
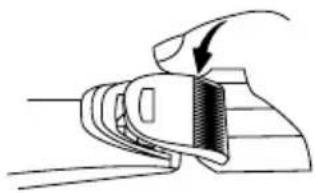
ASSEMBLE AND DISASSEMBLE THE HEAD
natural_image
Illustration of a hand holding a tool with a curved arrow indicating direction (no text or symbols)DISASSEMBLING
- Use the other hand to hold the cutting head to prevent it from flying out.
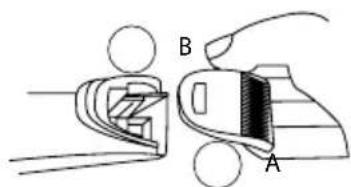
ASSEMBLING
- Insert A into B.
- Turn the control knob into the position of 0.2 mm.
- Press it until a click is heard.
HEAD CLEANING
- Clean the left hair in the cutting head.
- Hold the moving blade base and clean the left hair.
- Clean the left hair in the body of the product.
- Put a drip of oil in each marked part.

In compliance with Directives: 2012/19/EU and 2015/863/EU on the restriction of the use of dangerous substances in electric and electronic equipment as well as their waste disposal. The symbol with the crossed dustbin shown on the package indicates that the product at the end of its service life shall be collected as separate waste. Therefore, any products that have reached the end of their useful life must be given to waste disposal centres specialising in separate collection of waste electrical and electronic equipment, or given back to the retailer at the time of purchasing new similar equipment, on a one for one basis. The adequate separate collection for the subsequent start-up of the equipment sent to be recycled, treated and disposed of in an environmentally compatible way contributes to preventing possible negative effects on the environment and health and optimises the recycling and reuse of components making up the apparatus. Abusive disposal of the product by the user involves application of the administrative sanctions according to the laws.
natural_image
Illustration of hands holding a device with circular components, no text or symbols presentnatural_image
Line drawing of a hairpin with a textured handle and serrated tip (no text or symbols)
natural_image
Hand holding a handheld hairpin with a power button (no text or symbols visible)natural_image
Diagram of a hand holding a device with a curved arrow indicating rotation (no text or symbols)DESMONTAR
MONTAR
natural_image
Illustration of hands holding a device with circular components, no text or symbols presentnatural_image
Line drawing of a hairpin with a textured handle and screwdriver (no text or symbols)
natural_image
Hand holding a handheld hairpin with a power button (no text or symbols visible)natural_image
Diagram of a hand holding a device with an arrow indicating rotation (no text or symbols present)DESMONTAR
MONTE
natural_image
Illustration of hands holding a device with circular components, no text or symbols presentnatural_image
Line drawing of a hairpin with a textured handle and screwdriver (no text or symbols)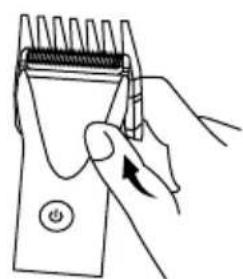
natural_image
Line drawing of a hand holding a hairpin with a button, no text or symbols presentnatural_image
Diagram of a mechanical component with an arrow indicating direction (no text or symbols)DÉMONTER
MONTER
natural_image
Illustration of hands holding a device with circular components, no visible text or symbolsnatural_image
Line drawing of a hairpin with a textured handle and screwdriver (no text or symbols)
natural_image
Line drawing of a hand using a handheld device to press or install a power button (no text or symbols present)natural_image
Illustration of a hand holding a tool with a curved arrow indicating motion (no text or symbols)SMONTARE
MONTARE
natural_image
Illustration of hands holding a mechanical component with circular annotations (no text or symbols)natural_image
Line drawing of a hairpin with a textured handle and screwdriver (no text or symbols)
natural_image
Hand holding a hairpin with a power button, no text or symbols visibleMONTIEREN UND DEMONTIEREN SIE DEN KOPF

natural_image
Diagram of a mechanical component with an arrow indicating force or direction (no text or symbols)ZERLEGEN
MONTIEREN
natural_image
Illustration of hands holding a device with circular components, no text or symbols presentnatural_image
Line drawing of a hairpin with a textured handle and serrated tip (no text or symbols)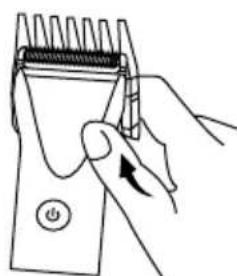
natural_image
Hand holding a handheld hairpin with a power button (no text or symbols visible)natural_image
Illustration of a hand holding a tool with a finger, showing a curved arrow indicating motion (no text or symbols present)DEMONTEREN
MONTEREN
natural_image
Illustration of hands holding a mechanical component with circular cutouts (no text or symbols)natural_image
Line drawing of a hairpin with a textured handle and serrated tip (no text or symbols)