Iris - Rocking chair Lionelo - Free user manual and instructions
Find the device manual for free Iris Lionelo in PDF.

| Brand | Lionelo |
| Model | Iris |
| Category | Rocking chair (baby bouncer) |
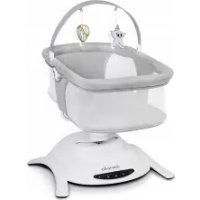
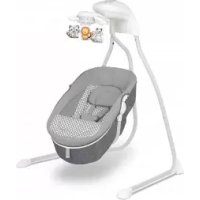
| Product type | Rocking bouncer with vibrations and electronic functions |
| Manufacturer | BrandLine Group Sp. z o. o. |
| Customer service | help@lionelo.com |
| Power supply | 4 AA 1.5V batteries or 5.8V DC 0.8A mains adapter (not included) |
| Rocking modes | 3 different modes |
| Rocking speeds | 5 adjustable positions |
| Seat rotation | 360° |
| Built-in melodies | 12 melodies with volume control |
| Backrest recline | 3 positions: semi-upright, reclined, semi-reclined |
| Restraint system | 3-point safety harness with central buckle |
| Recommended use | From birth until the child tries to sit up |
| Cover care | Machine washable at 30°C with mild detergent |
| Frame cleaning | Damp cloth and mild detergent, avoid caustic products |
| Safety instructions | Never leave unattended, do not use on elevated surface, not for sleep |
| Included accessories | Main module, seat with cover, stand, mounting elements, toy bar, USB cable |
Frequently Asked Questions - Iris Lionelo
User questions about Iris Lionelo
0 question about this device. Answer the ones you know or ask your own.
Ask a new question about this device
Download the instructions for your Rocking chair in PDF format for free! Find your manual Iris - Lionelo and take your electronic device back in hand. On this page are published all the documents necessary for the use of your device. Iris by Lionelo.
USER MANUAL Iris Lionelo
natural_image
Line drawing of a lionelo device with a propeller and fan (no text or symbols)A
natural_image
Simple line drawing of a cylindrical object with a central knob (no text or symbols)123
natural_image
Simple line drawing of a U-shaped cable or clamp device (no text or symbols)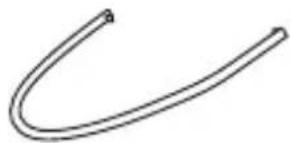
natural_image
Simple line drawing of a curved, straight pipe or tube (no text or symbols)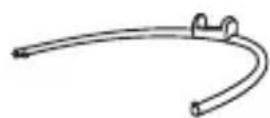
456
natural_image
Line drawing of a mechanical component or housing (no text or symbols)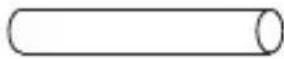
natural_image
Simple line drawing of a curved object with three small circles on its surface (no text or symbols)789
natural_image
Simple line drawing of a curved mechanical or anatomical structure with a hanging spherical object (no text or symbols)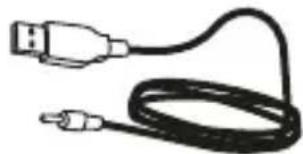
natural_image
Illustration of a USB cable with two connectors (no text or symbols)B
123

flowchart
graph LR
    A["Electric Vehicle Battery"] --> B["Battery"]
    B --> C["Battery Pack"]
    C --> D["Motor Switch"]
1
1A
natural_image
Diagram of a mechanical or fluidic system with two circular loops and directional arrows indicating flow or movement (no text or symbols)2
flowchart
graph TD
    A["Start"] --> B["State A: Click!"]
    B --> C["State B: Click!"]
    C --> D["Final State"]
    style A fill:#f9f,stroke:#333
    style B fill:#ccf,stroke:#333
    style C fill:#cfc,stroke:#333
    style D fill:#fcc,stroke:#333
3
3A
natural_image
Line drawing of a mechanical device with a base and lever, showing no text or symbols4

5
natural_image
Line drawing of a mechanical device with rotating arms and hanging weights (no text or symbols)6
flowchart
graph LR
    A["Car Mount"] --> B["Car Mount"]
    B --> C["Car Mount"]
    C --> D["Car Mount"]
    D --> E["Car Mount"]

    subgraph Step 1
    F["Car Mount"] --> G["Car Mount"]
    G --> H["Car Mount"]
    H --> I["Car Mount"]

    subgraph Step 2
    J["Car Mount"] --> K["Car Mount"]
    K --> L["Car Mount"]
    L --> M["Car Mount"]

    subgraph Step 3
    N["Car Mount"] --> O["Car Mount"]
    O --> P["Car Mount"]
    P --> Q["Car Mount"]
7
natural_image
Diagram of a car steering wheel with two side brackets and directional arrows indicating movement (no text or symbols)8

8A

natural_image
Diagram of a medical device with a central connector and two arms, no text or symbols present9
10

11
natural_image
Line drawing of a fan with an inset magnified view showing internal components (no text or symbols)12
natural_image
Line drawing of a mechanical device with rotating blades and a base, showing motion direction (no text or symbols)Dear Customer!
In case of any questions or comments on the purchased product, please contact us:
help@lionelo.com
Producer:
BrandLine Group Sp. z o. o.
IMPORTANT! READ CAREFULLY AND KEEP FOR FUTURE REFERENCE WARNING
- Never leave the child unattended.
- Stop using the product when the child starts trying to sit up.
- Never use this product on an elevated surface (e.g. a table).
- Always use the restraint system.
- Never use the toy bar to carry the product.
- Do not move or lift this product with the baby inside it.
- Never let the child sleep in this product. This product does not replace a cot or a crib. Should the child fall asleep, then it should be placed in a suitable cot or crib.
- Do not use the product if any components are broken or missing.
- Do not use accessories or replacement parts other than those approved by the manufacturer.
BATTERY AND POWER SUPPLY INFORMATION
- WARNING: Dispose of used batteries immediately. Keep new and used batteries away from children. If you think batteries may have been swallowed or placed inside any part of the body, seek immediate medical
attention.
- Do not recharge disposable batteries.
- Do not mix batteries of different types or old (used) batteries with new batteries.
- Insert batteries into the compartment according to the polarity (+ and -) and the markings inside the battery compartment.
- Always remove an exhausted battery. A battery left in the product may leak or explode and destroy the product.
- Do not short-circuit the power supply terminals.
- To ensure proper operation of the product, ensure that AA 1.5V type batteries are used.
- If the product is not used for a long period of time, remove the batteries from the compartment.
- Keep batteries away from children.
- Do not throw batteries into fire. Explosion hazard.
- Dispose of batteries according to regulations by throwing them into specially designated containers.
- The power supply used with the product must be checked regularly for damage to the cable, plug, casing and other parts, and must not be used if such damage is found.
- The product must only be used with a power supply unit with the recommended specifications (5,8V DC 0,8A).
CE
The product complies with the requirements of European Union directives. In accordance with Directive 2012/19/EU, this product is subject to separate collection. The product should not be disposed of with municipal waste as it may pose a risk to the environment and human health. Return the used product to the recycling centre for electrical and electronic equipment.
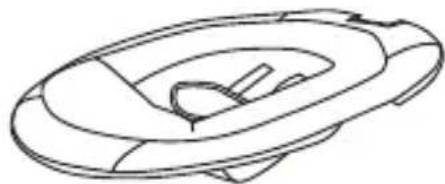
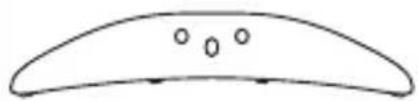
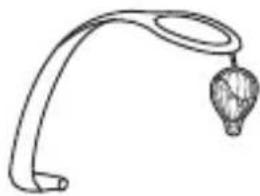
LIST OF PRODUCT PARTS (FIG. A)
-
Main module
-
Mounting element x4
-
Bracket
-
Base element x2
-
Lower frame installation element
-
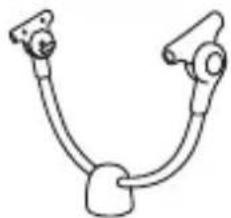
Toy headband
-
Upper frame installation element
-
USB cable
-
Seat with cover
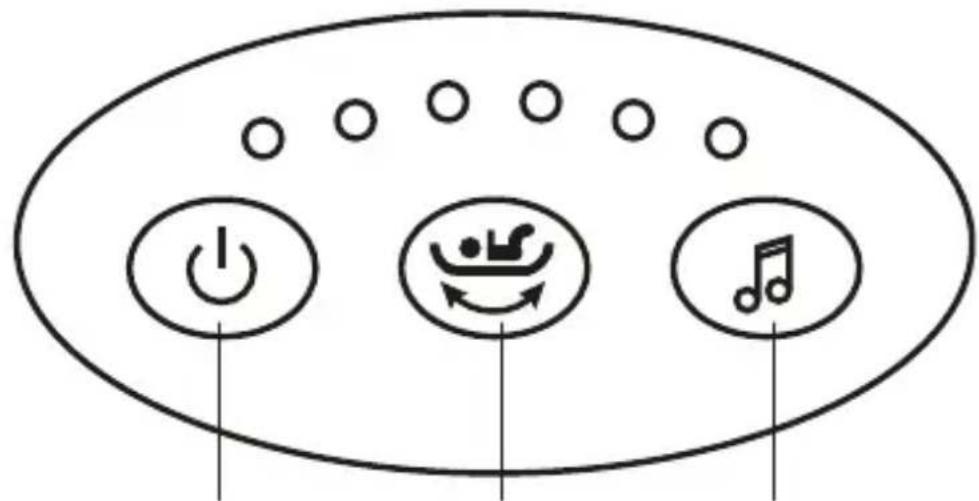
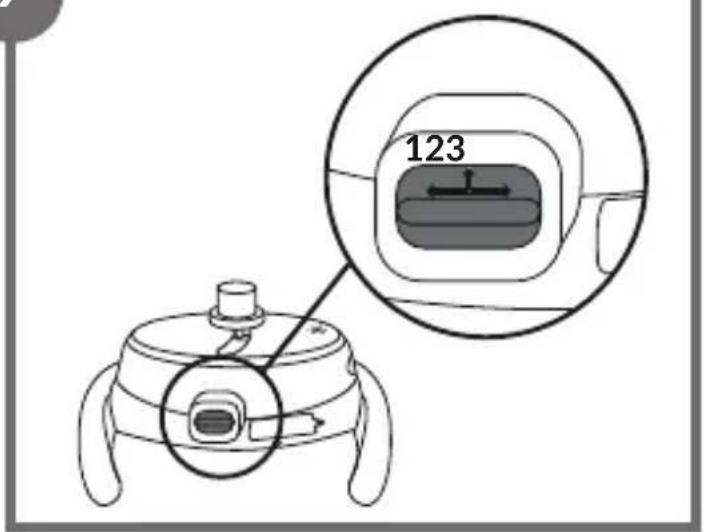
CONTROL PANEL (FIG. B)
-
Switch
-
Melody on/off switch
-
Rocking speed adjustment
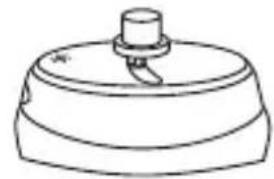
BATTERY REPLACEMENT (FIG. C)
- To replace the batteries, open the battery compartment) using a Phillips screwdriver (not supplied).
- Place 4 AA type 1.5V batteries into the compartment. Ensure correct battery polarity (+ and -).
- Close the compartment and tighten the screw.
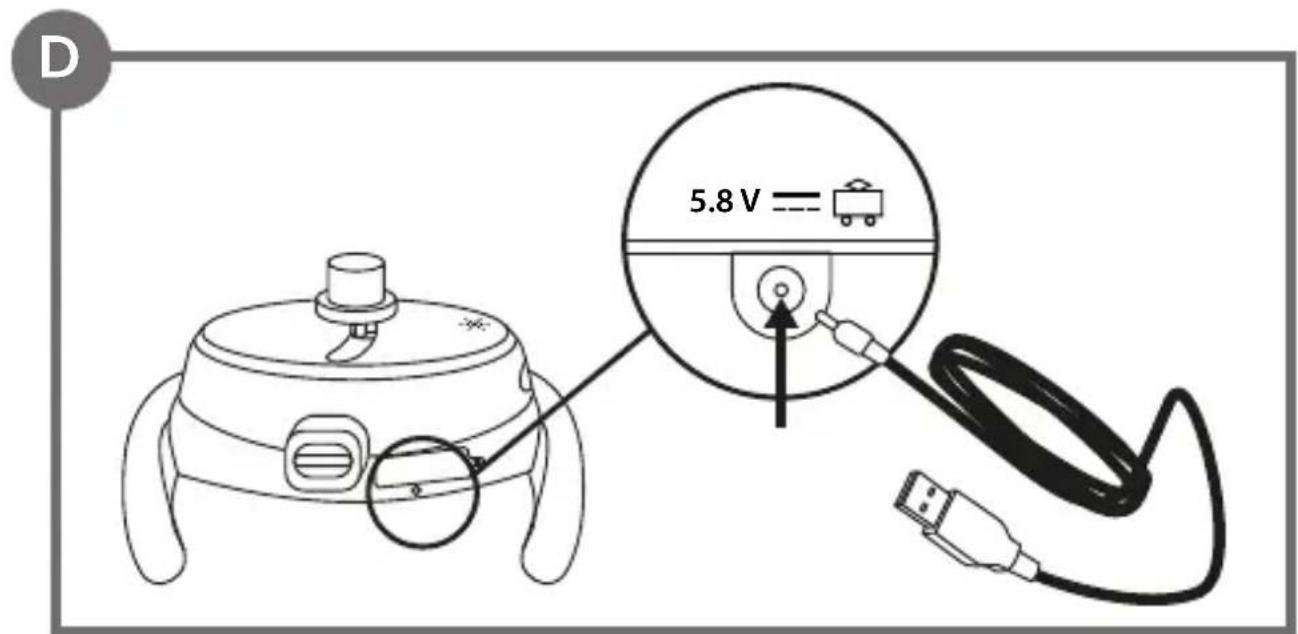
MAINS SUPPLY (FIG. D)
To use the product connected to the mains power supply, connect the cable to the port located on the main module of the rocker and to the adapter (fig. D) and then to an electrical outlet.
MOUNTING
Note! Installation can be performed only by an adult.
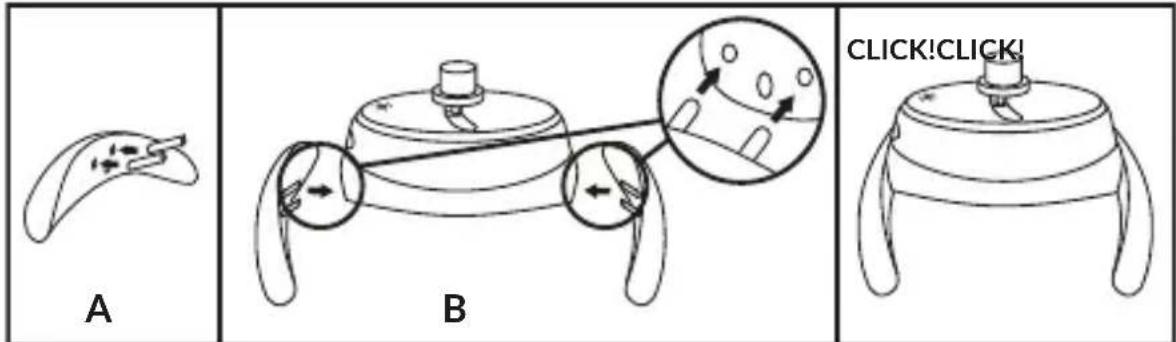
Main module installation
- Place the mounting elements (6, fig. A) in the corresponding holes of the base elements (A, fig. 1).
- Mount both base elements on the main module by inserting the mounting elements into the corresponding holes (B, fig. 1). Correct installation will signal a click. Make sure that the metal tab is visible on the underside of the product.
- To remove, push in the metal tab with a long thin object (fig. 1a) and pull on the base element.
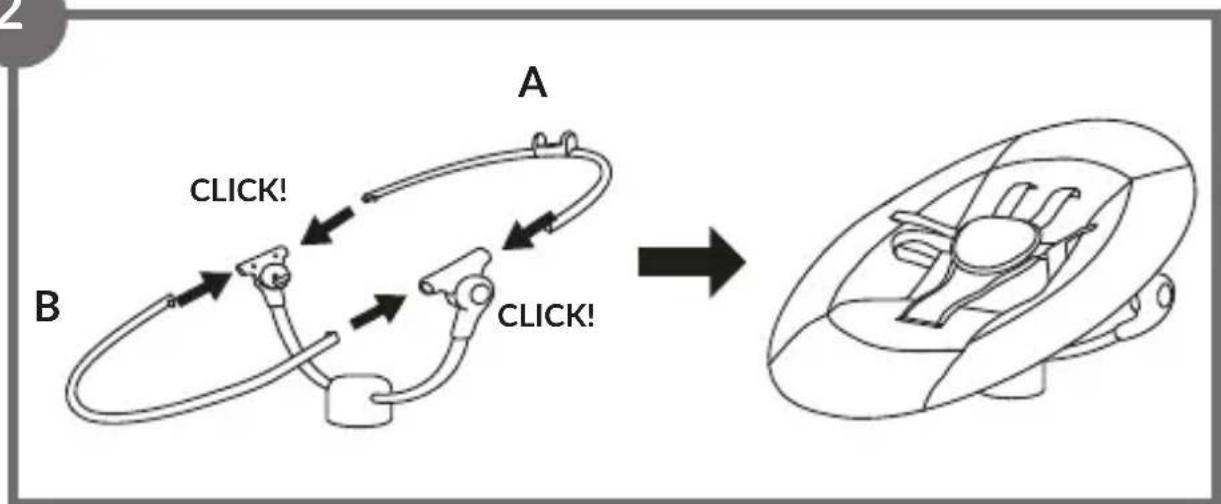
Seat installation and removal
- Connect the components of the seat frame – the upper component marked A (fig. 2) and the lower component marked B (fig. 2). Correct installation will signal a click. Place the cover over the entire seat and zip up (fig. 2).
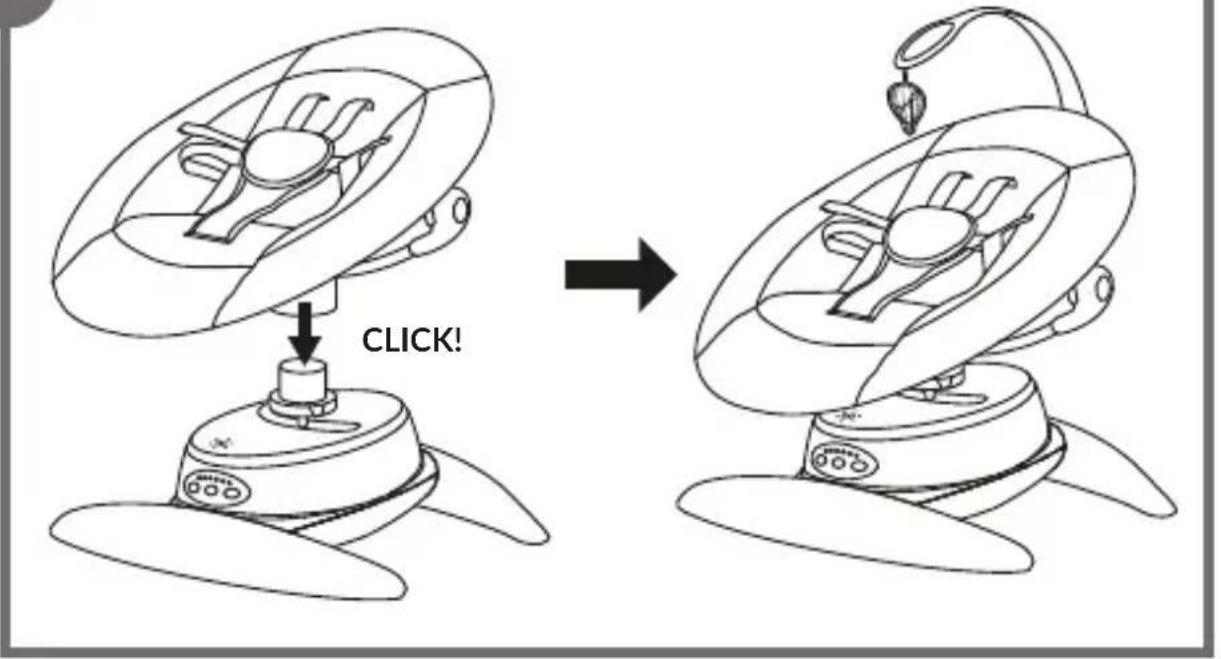
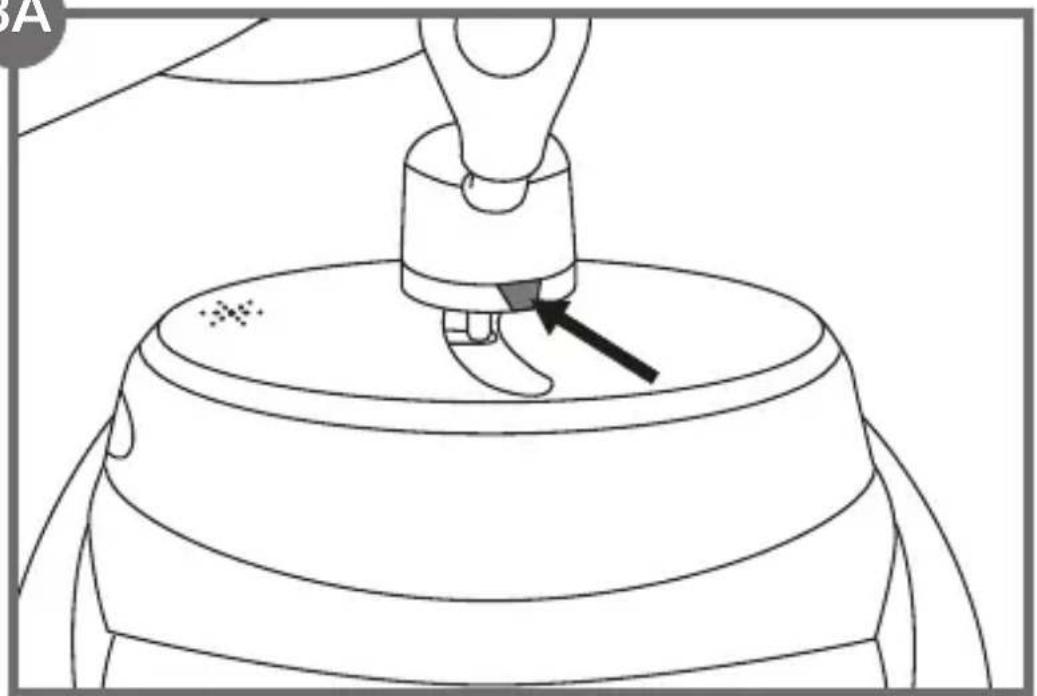
- Place the whole seat together with the support on the main module. Correct installation will signal a click (fig. 3).
Note! Make sure that both seat release buttons are not pushed in (fig. 3a).
- To remove the seat, press in the release buttons (fig. 3a) and pull the whole seat upwards. Then remove the cover and separate the individual frame parts by pressing in the metal tabs.
Toy headband installation
Note! Do not carry the product by holding the headband.
- To fit the toy headband, slide it into the guides on the seat (2, fig. 4). Correct installation will signal a click (fig. 4).
- To remove the headband, move both levers (1, fig. 4) and remove the headband.
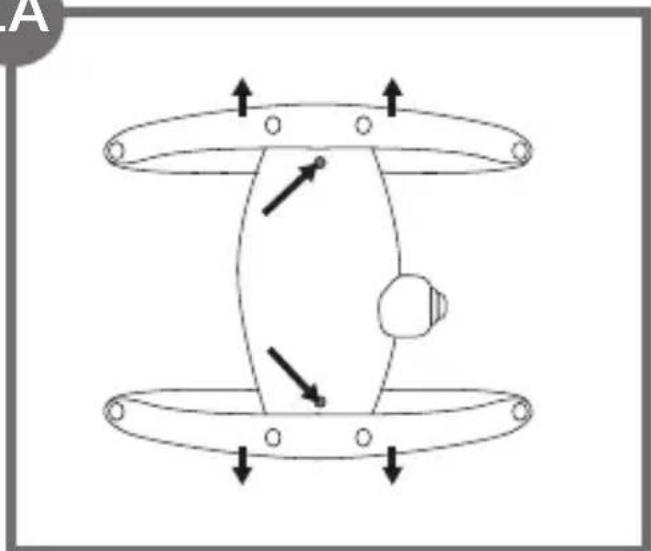
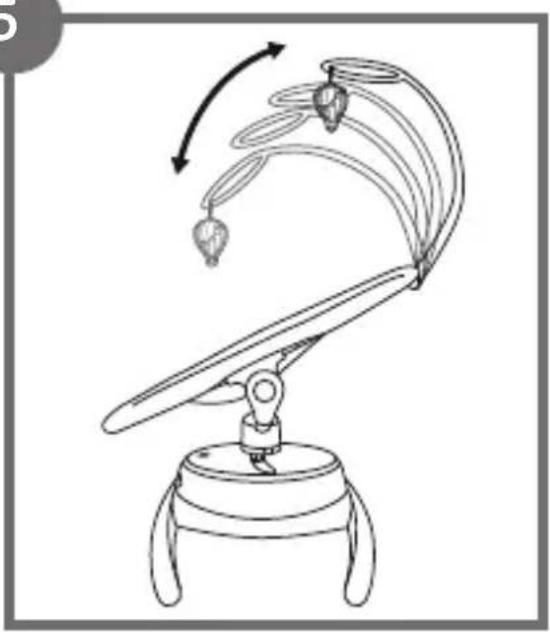
- The headband can be adjusted to one of the four available positions (fig. 5).
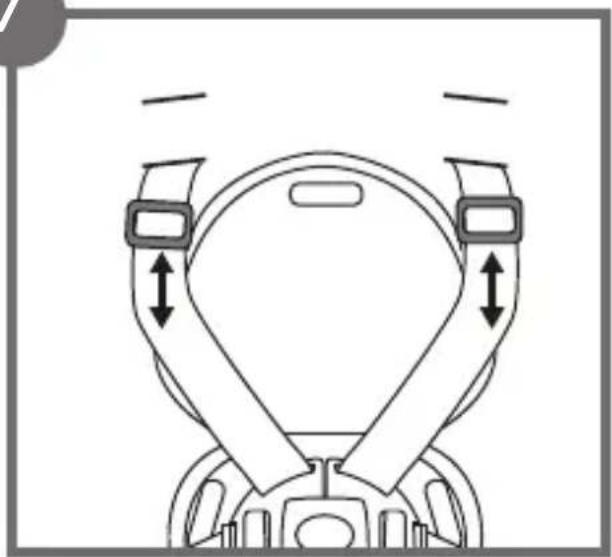
Belts adjustment
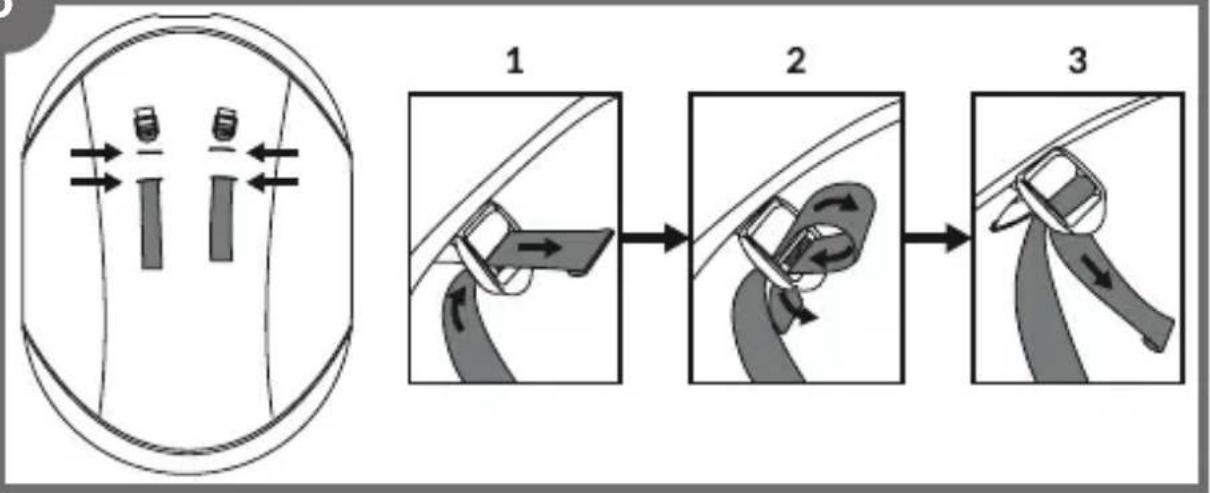
- Insert the belts in the corresponding holes in the shell and in the buckles at the back of the seat and tighten as shown (fig. 6, 7). Adjust the length and positioning of the belts.
- Once your child is in the seat, fasten the belts by inserting the latch elements into the central buckle. Correct fastening will be signaled by an audible click. Then fasten the fabric cover to protect against abrasion (fig. 8).
- To release the belts, press the central buckle (fig. 8a).
USE
To start the device, connect it to a power source or insert batteries, then press the switch on the control panel (1, fig. B).
Rocking mode
The product allows you to select one of 3 unique rocking movements. To change the rocking motion, lift the lever located in the main module (fig. 9) upwards and
then move it left or right.
The product allows a 5-position adjustment of the rocking speed. To increase or decrease the rocking speed, press the rocking speed adjustment button (2, fig. B) on the control panel.
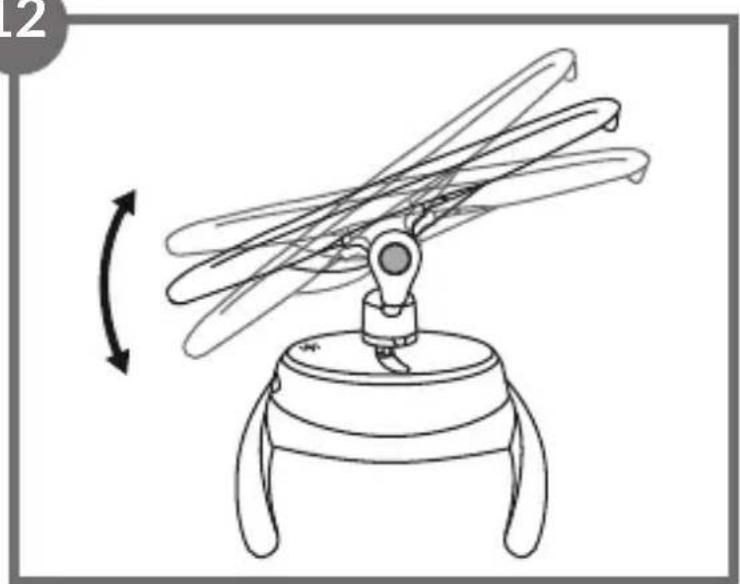
Rotating seat
The bouncer can be rotated 360^ in any direction (fig. 10). To do this, grasp the seat and gently turn it in the desired direction.
This function allows you to change the direction of rocking and to position the seat so that you can always maintain eye contact with your child.
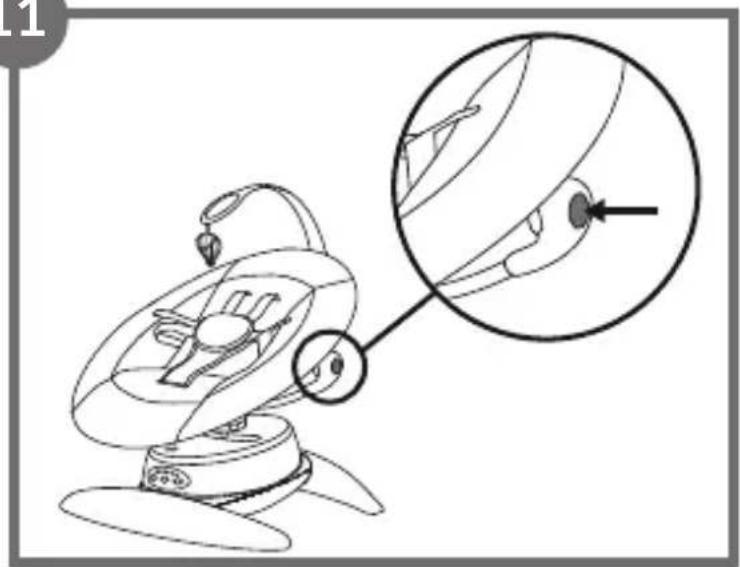
Seat tilt adjustment
To change the position of the seat, press the adjustment buttons on either side of the frame (fig. 11), then choose one of the three positions - half-sitting, reclining or half-lounging (fig. 11a).
Melodies
Press the melody button (3, fig. B) on the control panel to activate one of the 12 available melodies. Press the button again to switch off the melody being played. Press and hold to increase or decrease the volume.
TROUBLESHOOTING
| ProblemPossible solution | |
| Melody and rocking suddenly stop. The device incorrectly connected to the power supply / discharged batteries. | |
| The device does not switch on. Check that the batteries have been installed correctly. Make sure the batteries are not discharged. / Make sure the product is connected to the power supply. | |
| The device shakes excessively. Check that the mounting on the base has been carried out correctly. | |
| Weak indicator light. Make sure the batteries are not discharged. Replace batteries with new ones. | |
CLEANING AND MAINTENANCE
The cover can be washed at up to 30 °C with a mild detergent. Do not bleach, mechanically dry or iron.
Clean the frame, headband and toys with a damp cloth using a mild detergent. Do not use caustic cleaning agents. Wipe the frame and plastic parts dry before the next use.
Store the product in a dry place, away from heat and humidity.
The photos are for reference only, the actual look of the products may differ from the ones shown in the pictures.
PL
Drogi Kliencie!
BrandLine Group Sp. z o.o.
BrandLine Group Sp. z o.o.
LISTE OVER PRODUKTDELE (FIG. A)
Detailed warranty conditions are available on the website: