CL7500 OPTI - Headphones GEEMARC - Free user manual and instructions
Find the device manual for free CL7500 OPTI GEEMARC in PDF.


| Product Type | Digital Wireless Audio Headphones |
| Brand | Geemarc |
| Model | CL7500 OPTI |
| Transmission Technology | Digital FHSS 2.4 GHz |
| Indoor Range | Up to 22 meters |
| Maximum Volume | 125 dB |
| Frequency Response | 20 Hz – 20 kHz |
| Distortion | 0.5% |
| Signal-to-Noise Ratio | 75 dB |
| Channel Separation | 60 dB |
| Battery Type (headphones) | Rechargeable integrated lithium-ion 3.7 V / 1200 mAh |
| Charging Time | 5 hours |
| Base Power Supply | AC adapter 100-240 V~, 50/60 Hz, output 6 V / 0.6 A |
| Connectivity | Audio input 3.5 mm jack, optical input (SPDIF) |
| Settings | Volume, balance, tone, mono/stereo mode |
| Main Features | Automatic pairing, eco mode, automatic shut-off, wired use possible |
| Safety | Recommended volume limitation, sealed battery, do not disassemble |
| Maintenance | Regular cleaning of ear cushions, do not cover ventilation openings |
| Warranty | 2 years parts and labor (France) |
| Included Accessories | Charging base, AC adapter, 3.5 mm audio cable, optical cable, user guide |
Frequently Asked Questions - CL7500 OPTI GEEMARC
User questions about CL7500 OPTI GEEMARC
0 question about this device. Answer the ones you know or ask your own.
Ask a new question about this device
Download the instructions for your Headphones in PDF format for free! Find your manual CL7500 OPTI - GEEMARC and take your electronic device back in hand. On this page are published all the documents necessary for the use of your device. CL7500 OPTI by GEEMARC.
USER MANUAL CL7500 OPTI GEEMARC
2.4 GHz Wireless Digital Quality Sound
19-35 Fr
Setting Up –Connecting Base to TV (or other device)...5
USING THE CL7500-OPTI 9
Turning the CL7500-OPTI On 9
SETTINGS....10
Volume Setting 10
Balance Setting ....10
Tone Setting.... 11
Stereo/Mono Setting.... 11
PAIRING....12
ECO MODE / WIRED MODE ....13
WIRED MODE....14
CL7500 with Hi-Fi or MP3 Player 14
SAFETY INFORMATION ....15
Safety & Care advice....15
Battery Warnings....15
TROUBLESHOOTINGS....16
GENERAL INFORMATION / GUARANTEE .....17
GUARANTEE / RECYCLING DIRECTIVES......18
INTRODUCTION
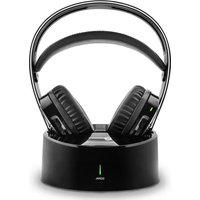
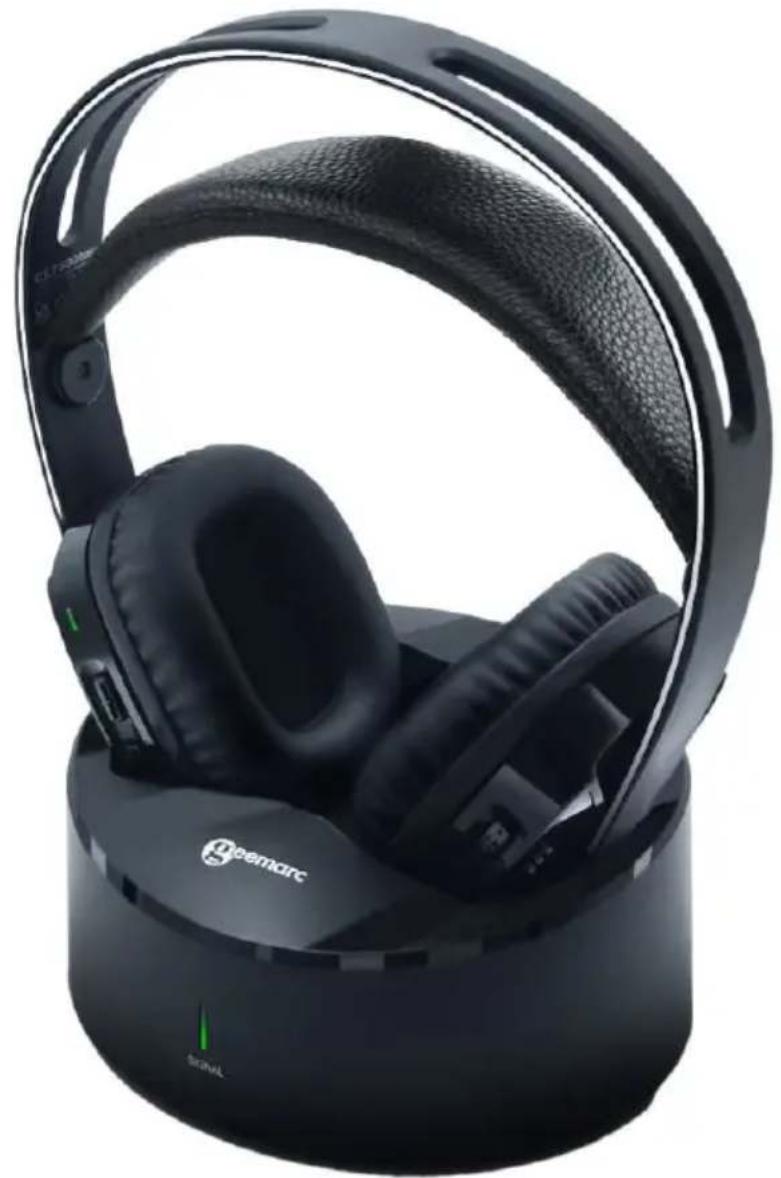
Congratulations on purchasing your Geemarc CL7500-OPTI the amplified TV listener headset. The CL7500-OPTI comprises a set of stylish top quality headphones together with a charging base that can be plugged into the TV, Laptop, Audio, MP3 and iPods. The headphones provide high quality CD sound and the volume can be increased up to 125dB.
The CL7500-OPTI is useful for the hard of hearing person, allowing them to listen to the TV or such like at a desired volume without the need to turn up the volume on the TV. Or, if one person likes to read in bed and the other likes to watch TV, simply wear this comfortable, lightweight and adjustable headset.
The headset also has built-in tone, volume and balance controls, and stereo or mono selection. It has a built-in rechargeable battery which self-charges when placed back on the charging base. The Geemarc CL7500-OPTI has an indoor range of up to 22 meters from the transmitter and works digitally through walls.
This easy to use, stylish device will allow you to hear the beauty of the sound, with amazing sound quality transmission.
natural_image
Black and white photo of an outdoor earbuds with black headband and earplands (no visible text or symbols)It is important that you read the instructions below in order to use your Geemarc CL7500-OPTI to its full potential. Keep this user guide in a safe place for future reference.
Unpacking the CL7500-OPTI
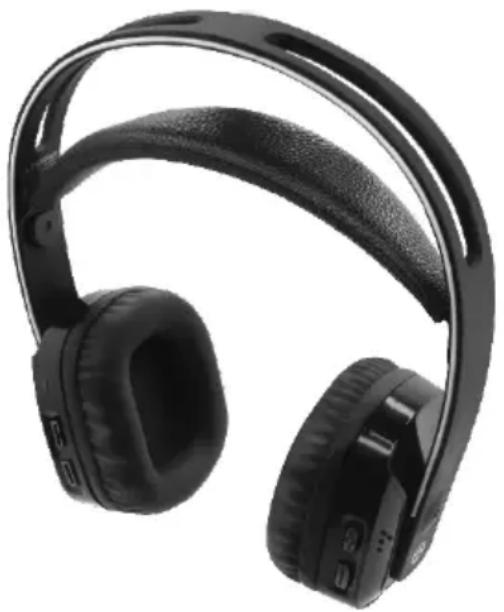
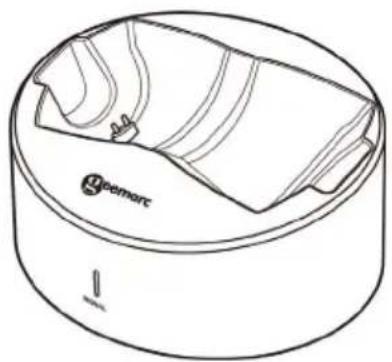
When unpacking the CL7500-OPTI, you should find the following in the box:
• CL7500-OPTI 1 receiver (headset)
- CL7500- OPTI Charging base
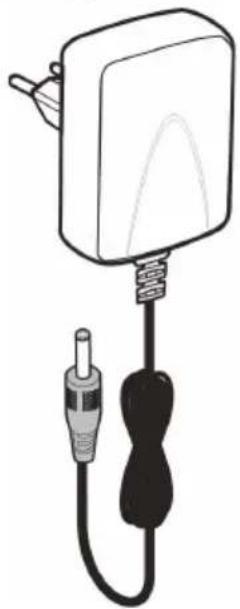
• AC/DC Power Adaptor
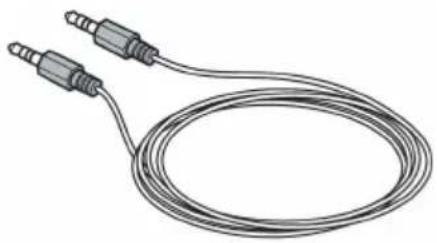
- Male jack 3.5mm
- Optical cable
- 1 User Guide
natural_image
Line drawing of a cylindrical device with a textured surface and a small inset showing internal components (no text or symbols)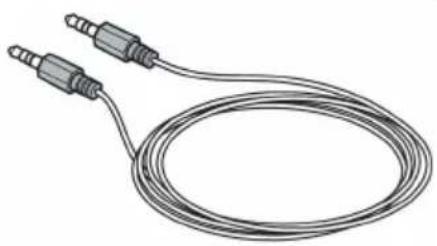
natural_image
Illustration of a coiled electrical sensor or probe with two connectors (no text or symbols)
natural_image
Illustration of a white rectangular device with a black cable and two connectors (no text or symbols)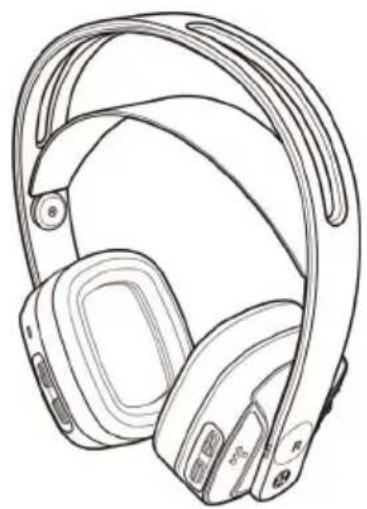
natural_image
Line drawing of a pair of outdoor headphones with exposed earbuds and headband (no text or symbols)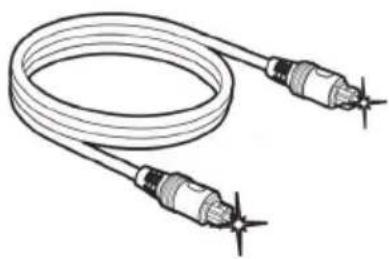
natural_image
Illustration of a coiled cable with two connectors and star-shaped connectors at ends (no text or symbols)
eemarc™
Hear the Difference
For product support and help, visit our website at
www.geemarc.com
For our Customer Helpline
Telephone: 01707 387602
INSTALLATION
Setting Up – Connecting Base to TV (or other device)
- Insert the AC/DC adaptor connector into the 'DC IN 6V' socket found on the back of the Charging Base.
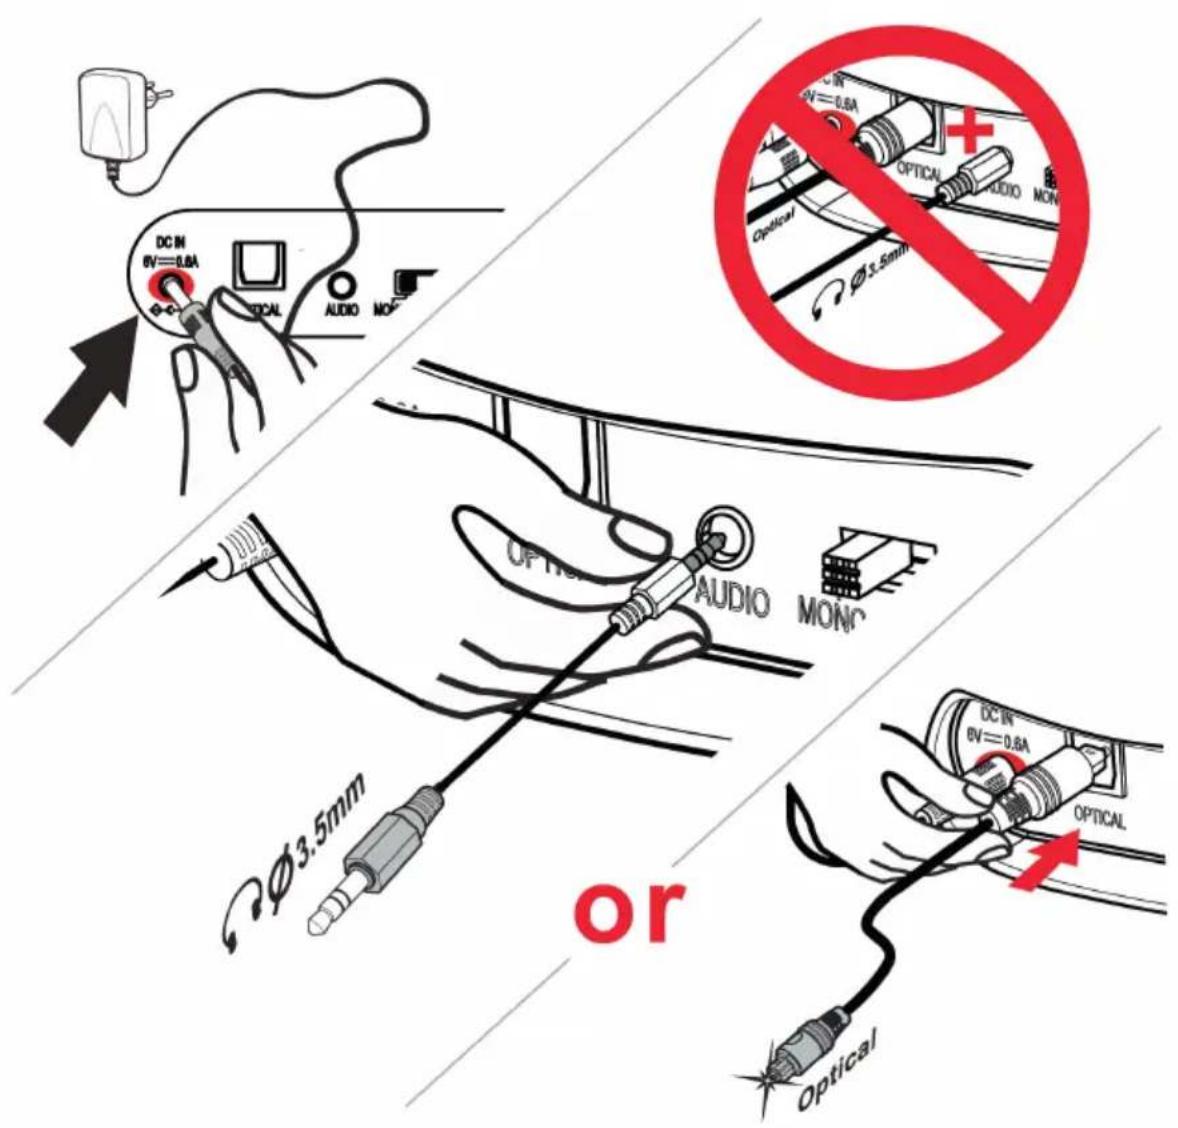
- Insert the other end of this lead (the male jack) into the female Jack or insert the optical cable on the back of the Charging Base.
INSTALLATION
TV / Hi-Fi / MP3 / Mobile phone .....
From A to source 1
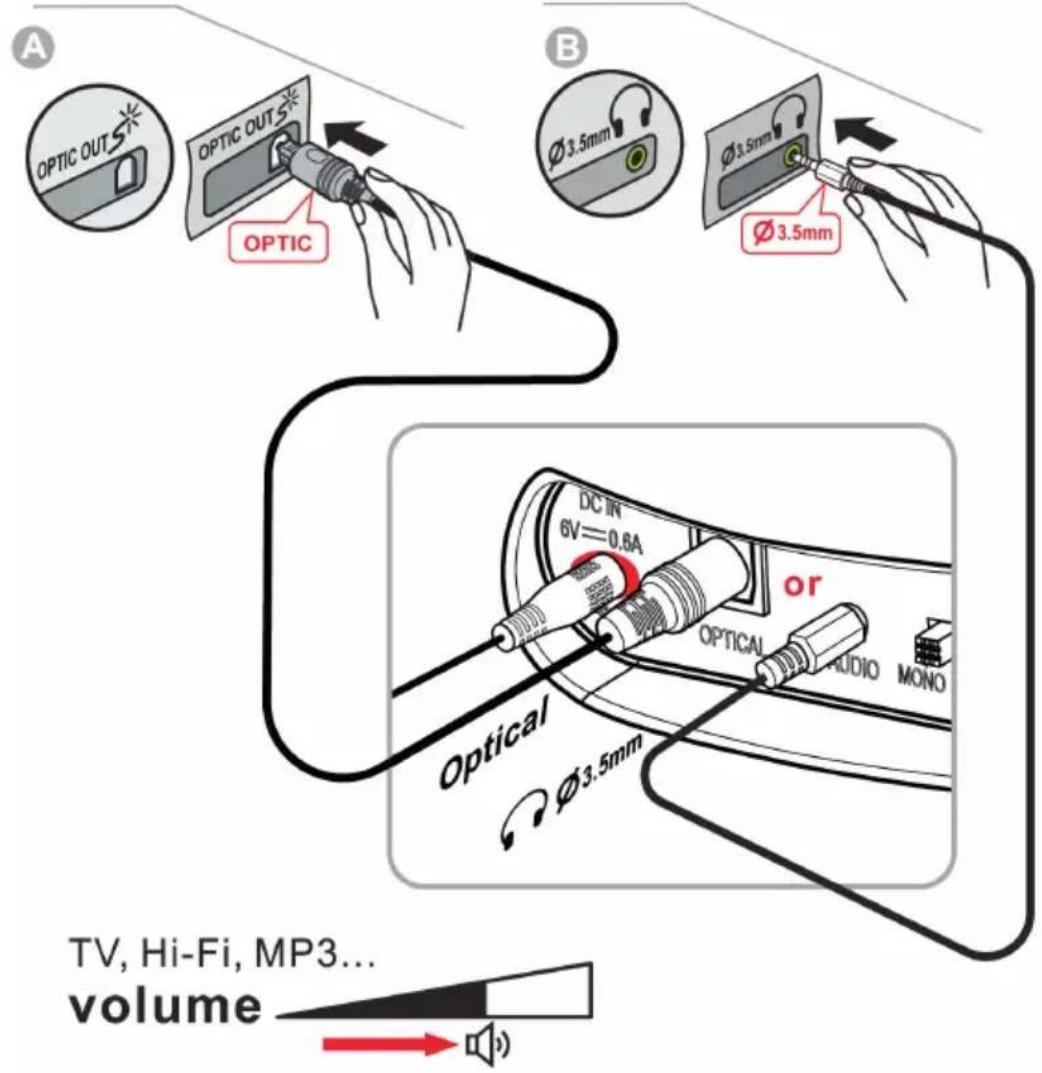
From B to source 2
There is different installation methods dependant on sockets available to you, please select from A or B below:
A. Connect the other end of the Optical cable to your AudioSource with optical digital audio output (e.g. TV set, Hi-Fi system).
B. Insert one end of the 3.5 mm jack cable into the charging base. Insert the other end of the 3.5 mm jack cable into audio-out socket of your Hi-Fi, mobile phone, TV or MP3 player.
Remark: if you want to use the wired headset feature directly, please refer to page 14.
INSTALLATION
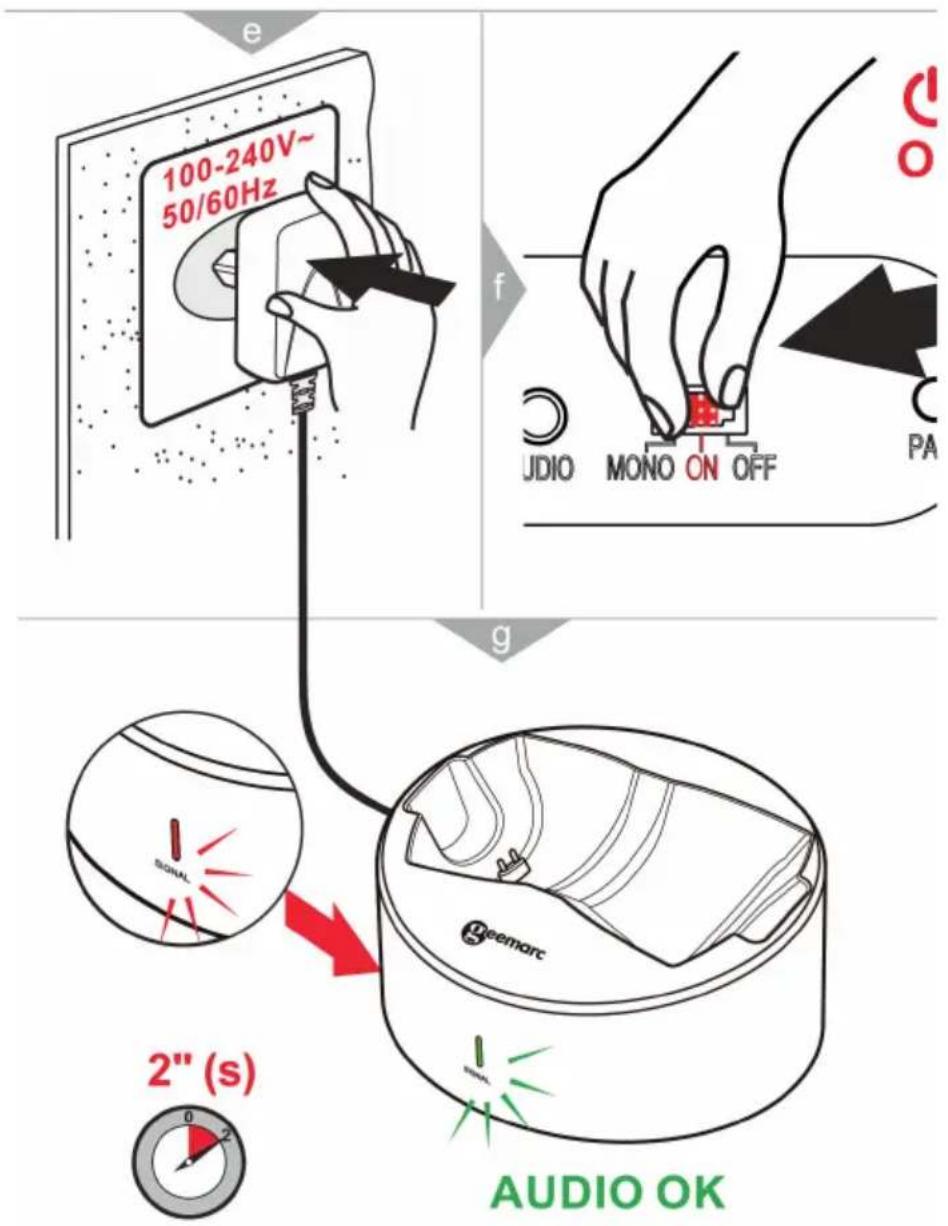
- Plug the AC adaptor into your home power socket.
-
Switch the Charging Base to On.
-
A red light will initially be displayed on the front of the base. After about 2 seconds the red light should go off and the green light will be displayed if your audio source is ON. The red light indicates that the audio source is not ON.
IF the red LED blinks, it means that the audio source is not connected
INSTALLATION
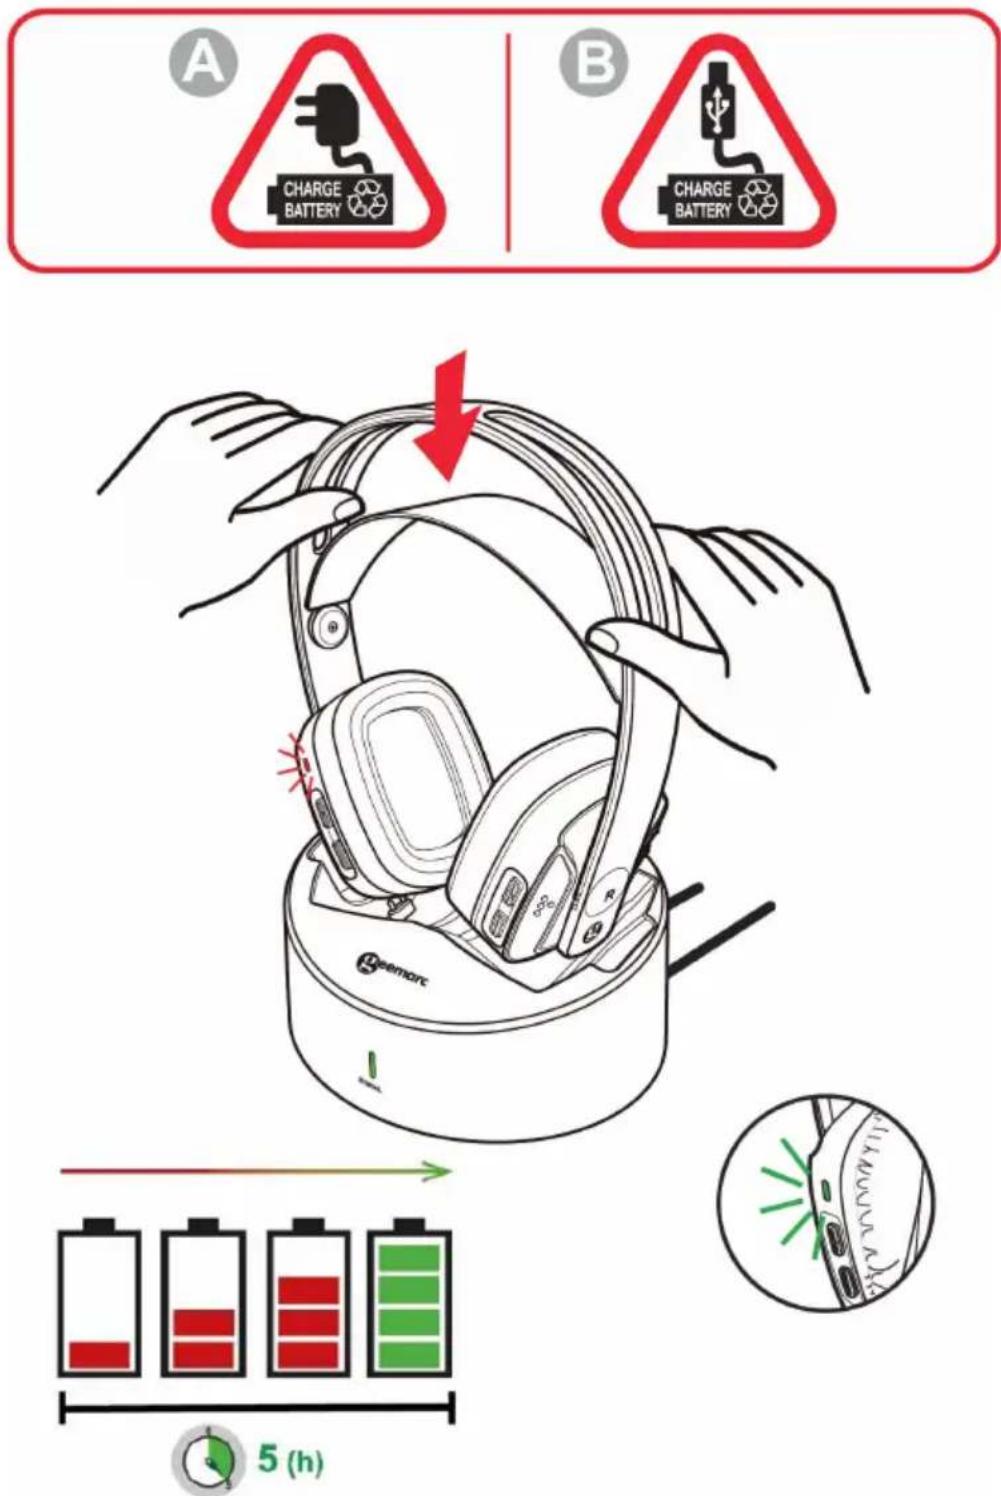
- Place the headphones onto the Charging Base. A red light will show on the headphones. The red light indicates the headphone's batteries are charging. Charging takes 5 hours. After full charge the red light changes to green.
Turning the CL7500-OPTI On
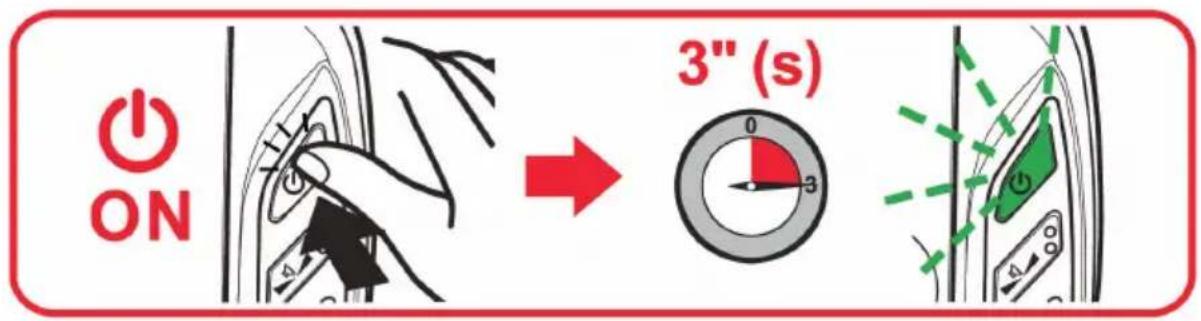
After full charge the headphones can be used. Take the headphones from the base.
Press and hold the Power button ⏻ on the headphones for 3 seconds. The Power Button ⏻ should light up a green color if your audio source is ON. The CL7500-OPTI is ready for use. The light will be red if there is no audio source activated.
Place the headphones over your head and ensure the TV is switched on. Your CL7500-OPTI is now set up for the recommended levels. For further personalisation see the Settings Chapter.
SETTINGS
Volume Setting
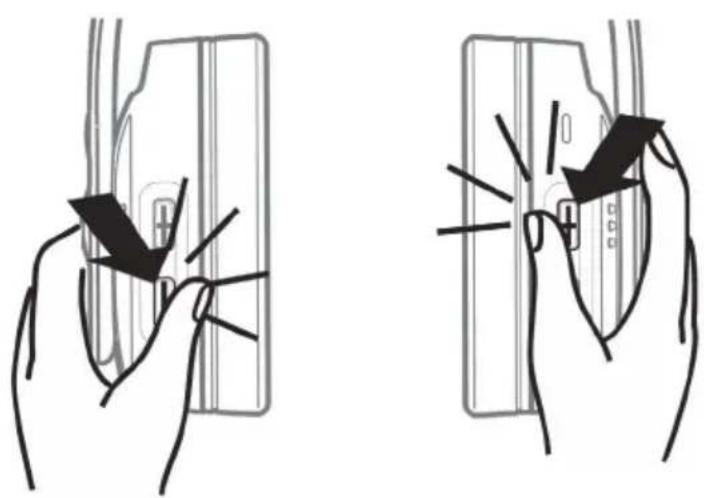
You can adjust the volumen by pressing ‘+’ button repeatedly or continuously to increase volume and ‘-’ button to decrease volume. The Headset will beep when volume reaches midway volume.
Balance Setting
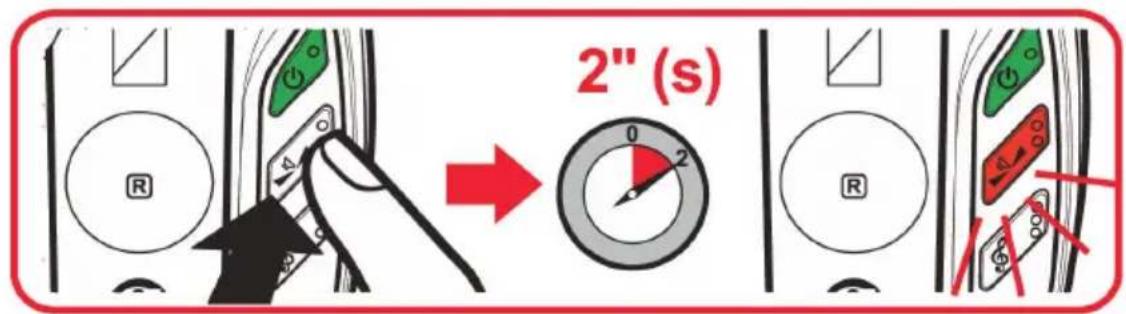
The balance can be controlled by pressing the balance button on the headphones. Press and hold this for 2 seconds, the button will light up red. At this point, pushing headset ‘-’ button will alter the audio to the left earphone. Pushing the ‘+’ button will alter the audio to the right earphone. At minimum, maximum or middle point a beep will be heard. If the buttons are not pressed, balance setting mode will switch off automatically after 5 seconds.

SETTINGS
Tone Setting
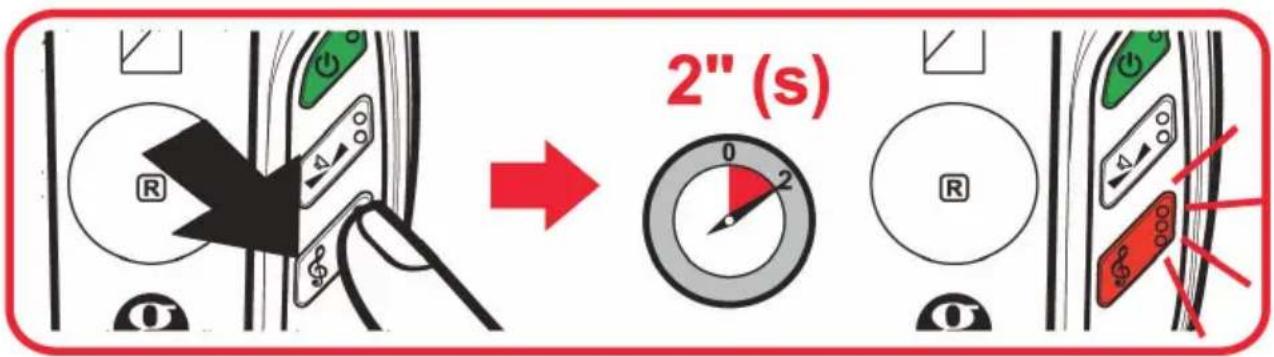
The tone can be controlled by pressing the tone button ⬤ on the headphones. Press and hold this for 2 seconds, the button will light up red. At this point, pushing headset ‘+’ button will increase the high tones. Pushing the ‘-’ button will increase the low tones. At minimum, maximum or middle point a beep will be heard. If the buttons are not pressed, tone setting mode will switch off automatically after 5 seconds.
Stereo/Mono Setting
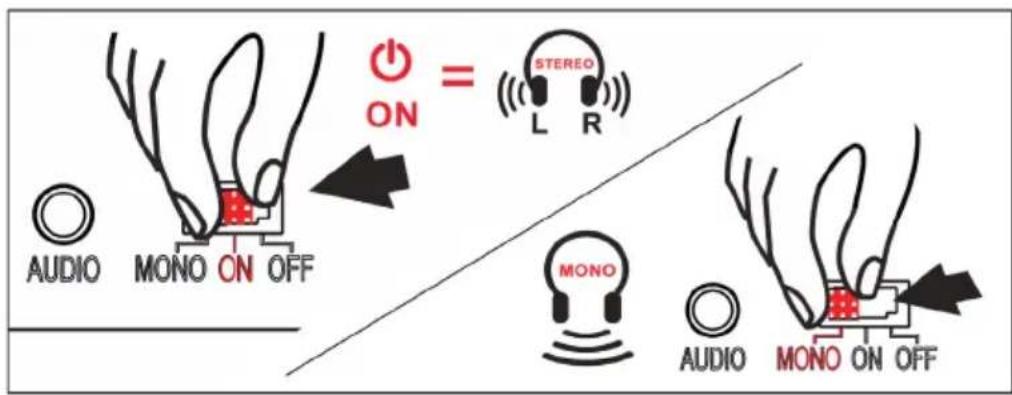
Stereo or Mono mode can be controlled by moving
OFF/ON/Mono switch to the desired side. This switch is found on the back of the charging base (using a needle or pencil is helpful).
Moving the switch to “ON” side means the CL7500-OPTI will work in Stereo mode. Moving the switch to “Mono” side means the CL7500-OPTI will work in Mono mode.
PAIRING
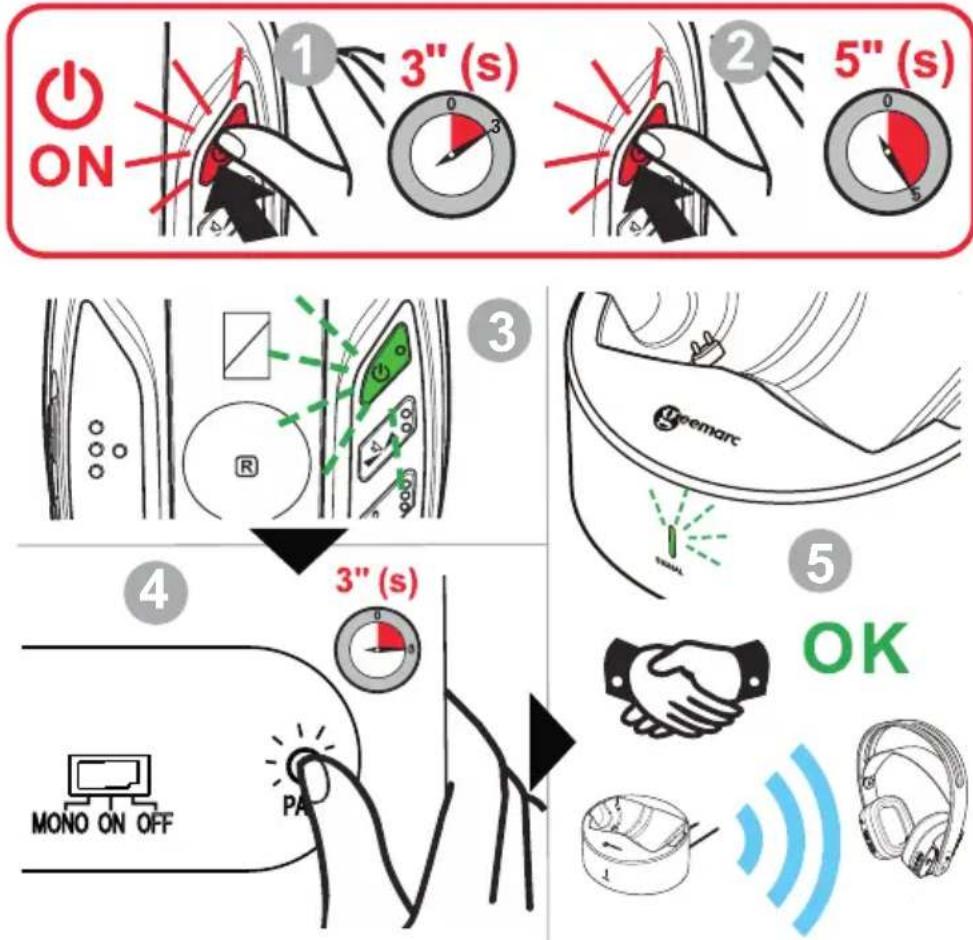
Your Headset was paired with the Charging Base at the factory so that when you switch on the Headset, it will automatically recognise the Base. However, if for any reason the Headset and Base are no longer paired, there is a very simple procedure to follow in order to pair the two devices:
Step①: Switch on the headset by press and hold the power button for 3 seconds, the Power button should light up a red color. Step②: Enter Pair mode of the headset by press and hold the Power button for 5 seconds.
Step 3: The Power Button of the headset will change from red to blink green.
Step 4: Enter Pair mode of the charging base by press and hold the PAIR Button found on the rear of the Base for 3 seconds (a pencil with a sharp point might help with this operation), the Led of the base will change to blink green.
Step 5: The Headset and charging base will be paired as shown by the green light on the headset and charging base.
ECO MODE / WIRED MODE

The CL7500-OPTI runs in Eco Mode, decreasing emissions by 90%.
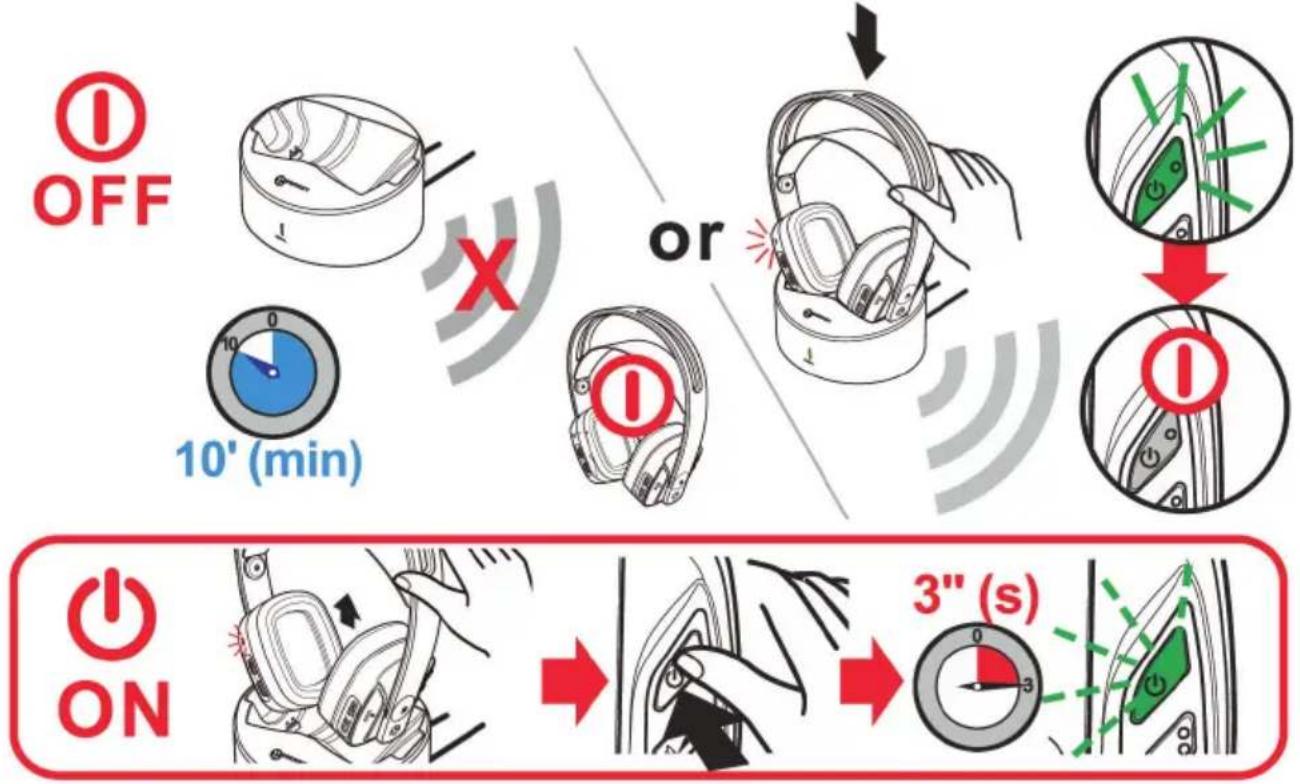
If the TV, Hi Fi or MP3 sound is reduced or muted for 4 minutes, the headphones will go into sleep mode. To wake up the headphones, increase the volume on that device.
If no sound is transmitted between the charging base and the headset for 10 minutes or you place the headset back on the base, the headset will switch off. When the audio cable is unplugged from the charging base with power still in connection, headphone will switch off after 15 minutes. To turn them back on again either lift the headset off the charging base and switch ON button.
flowchart
graph TD
    A["OFF"] --> B["10' (min)"]
    B --> C{X}
    C --> D["or"]
    D --> E["3" (s)"]
    E --> F["ON"]
    F --> G["3" (s)"]
    G --> H["ON"]
WIRED MODE
CL7500 with Hi-Fi or MP3 Player
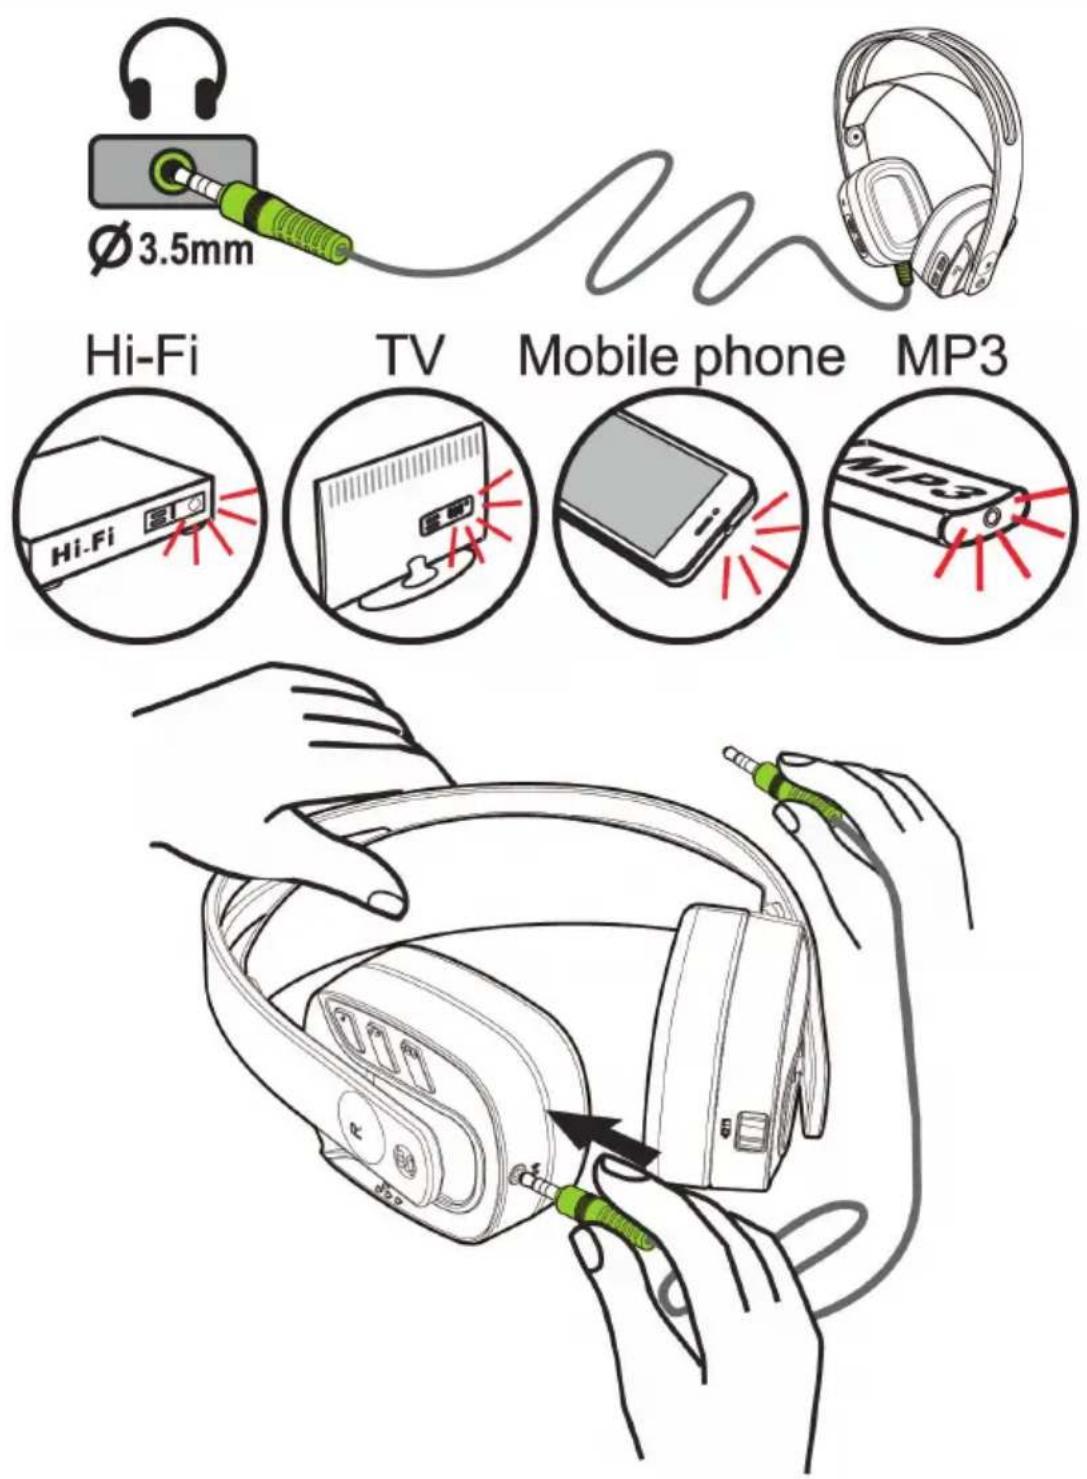
Insert one side of 3.5mm (male to male) cable jack into ‘Audio’ socket found on the bottom of the Headset. Insert the other side of the 3.5mm jack into audio-out socket of your Hi-fi, mobile phone, TV or MP3 player.
SAFETY INFORMATION

Safety & Care advice
To make the best use of this product and to use it safely, please read these instructions thoroughly before use and keep safe for future reference.
Warning: This product can be very loud. Take care to prevent others from using this product, if they do not have the same level of hearing loss.
Excessive sound pressure from earphones and headphones can cause hearing loss. Caution: Electric shock. DO NOT insert unattached plug heads in to mains power sockets. Plug heads MUST be fitted to the power adaptor.
Electrical connection: The unit is designed to operate from a 100-240VAC - 50/60Hz supply. (Classified as 'hazardous voltage' according to EN62368-1 standard).
The unit does not incorporate an integral power on/off switch. To disconnect the power, either switch off supply at the mains power socket or unplug the AC adaptor. When installing the unit, ensure that the mains power socket is readily accessible.
Caution: Risk of explosion if battery is replaced by an incorrect type. Dispose of used batteries according to the instructions.
DO NOT cover the ventilation.
DO NOT remove the ear pad as it is very difficult to replace.
Keep the unit away from heat sources.
DO NOT expose the unit to direct sunlight.
Clean the Headset and ear pads regularly.
DO NOT modify the unit in any way.
Please note: The unit may be subject to interference from appliances that generate strong electrical or magnetic fields e.g. microwaves, mobile phones, lighting transformers etc.

Battery Warnings:
• DO NOT attempt to dismantle.
• DO NOT dispose of in fire.
- DO NOT swallow.
- Keep away from children.
- Batteries are to be inserted with the correct polarity.
- DO NOT short-circuit the supply terminals.
- Exhausted batteries are to be removed from the product.
- DO NOT use another type of battery or non-rechargeable batteries to replace the rechargeable batteries.
- When the headphones are not in use or the batteries are charging, switch OFF the headphones to avoid damaging the batteries.
- The batteries must be fully charged when use for the first time. An initial 5 hours charge is required.

TROUBLESHOOTINGS

Troubleshooting
NO SOUND
- Ensure that the mains adapter is pushed fully into the power outlet and that its cable is properly connected to the DC IN 6V connector on the transmitter.
- Ensure that the on/off switch on the base is switched to the ON position. The LED will be either red or green.
- If the headphone battery level is low then put it in the charging base. Keep charging until the green light on the left hand side of the headset appears.
- Your TV, DVD, or other audio system must be turned on. Please ensure that there is an audio signal being broadcast. The LED on the base of your CL7500-OPTI will be green when the audio broadcast is being received.
- If the LED on the base is a flashing RED colour. Check that the audio transmitter is properly turned on and that the connecting wires are properly connected to the base of the CL7500-OPTI.
- Using the remote volume control of your audio source to increase the sound level (only when used as a wireless headphone).
- If your Led is red on your base, the audio signal input level is too low. Increase the volume from the audio source of Hi-Fi, CD, or TV, etc.
- The connected audio/video equipment may not be in playback mode. Start playback on by the equipment.
- The headphones output level is set too low. Adjust the volume to a suitable level with the button + and if the level is too low, increase the level of your audio source.
DISTORTION
- Restart the Pairing process. Press the "Pair" button 3 sec on the charging base and on the power button of the headset until to blink green. The process is finished when both LEDs are in Green.
- The headphone's batteries charge level may be too low. Recharge the batteries.
- Ensure that the volume setting is correct.
- The headphones may be too far away from the transmitter. Move closer to it.
- The audio signal input level is too strong. decrease the volume from the audio source of Hi-Fi, CD, or TV, etc.
Customer support
For product support and help, visit our website at www.geemarc.com
E-mail: help@geemarc.com
For our Customer Helpline: Telephone: 01707 387602
(lines are open 09h00 to 16h00 Mon to Fri)
GENERAL INFORMATION / GUARANTEE
General information
Features
- 2.4GHz FHSS digital technology with equalizer features for tone and balance adjustments.
• High quality stereo sound that is virtually interference-free
• Transmission is not restricted solely to line of sight
• Digital Pairing System on Headphone & Transmitter
• Electronic volume vontrol on headphones
• Built-in Pin-charger on transmitter
• Auto shut-off on headphone
• Auto On/Off RF function on transmitter
• 3.5mm Line in feature for wired headphone application - Optical line connection to connect on SPDIF or Optical output
- Operating distance up to 22 meters
Technical specifications
| Transmission mode | : 2.4GHz digital FHSS stereo |
| Carrier frequency | : 2.4GHz |
| Operating voltage | : Transmitter 6 V = 0.6 A/ 3.6W: Receiver 3.7V 1200 mAh (built-in Lithium rechargeable battery) |
| Frequency response | : 20 Hz - 20 KHz (electrical) |
| Distortion | : 0.5 % |
| Signal-to-noise ratio | : 75 dB |
| Channel separation | : 60 dB |
| Range | : 22 meters (open area) |
| Maximum RF Power | : 10dBm |
| Frequency band | : 2.406GHz - 2.472GHz |
Guarantee
From the moment your Geemarc CL7500 OPTI is purchased, Geemarc guarantee it for the period of two years. During this time, all repairs or replacements (at our discretion) are free of charge. Should you experience a problem then contact our Helpline or visit our website at www.geemarc.com. The guarantee does not cover accidents, negligence or breakage to any parts. The product must not be tampered with or taken apart by anyone who is not an authorised Geemarc representative. The Geemarc guarantee in no way limits your legal rights.
The product is covered by the legal guarantee of conformity as provided by applicable law.
Important: YOUR RECEIPT IS PART OF YOUR GUARANTEE AND MUST BE RETAINED AND PRODUCED IN THE EVENT OF A WARRANTY CLAIM.
Please note: The guarantee applies to the United Kingdom only.
EEC Declaration
Geemarc Telecom SA hereby declares that this CL7500 OPTI is in compliance with the essential requirements and other relevant provisions of the Radio Equipment Directive 2014/53/UE.
The declaration of conformity may be consulted at www.geemarc.com
To prevent possible hearing damage, DO NOT listen at high volume levels for long periods.
Disposal information
Disposal of old electrical & electronic equipment (applicable in the European Union and other European countries with separate collection systems)
The symbol on the product or its packaging indicates that this product may not be treated as household waste. Instead it should be handed over to the applicable collection point for the recycling of electrical and electronic equipment.
By ensuring this product is disposed of correctly, you will help prevent potential negative consequences for the environment and human health, which could otherwise be caused by inappropriate waste handling of this product.
For more detailed information about recycling this product, please contact your local council office, your household waste disposal service or the shop where the product was purchased.
All electrical and electronic products including batteries should be disposed of separately from the municipal waste stream via designated collection facilities appointed by the government or the local authorities.

Geemarc Telecom SA
This product is made in China To Geemarc Telecom
INTRODUCTION
INTRODUCTION....19
INFORMATIONS GENERALES......34
Garantie....34
GARANTIE / RECYCLAGE 35
INTRODUCTION
natural_image
Black and white photo of a pair of outdoor headsets with earbuds (no text or symbols visible)natural_image
Line drawing of a cylindrical device with a curved internal component and 'Goemarc' branding on the top (no text or symbols on the device itself)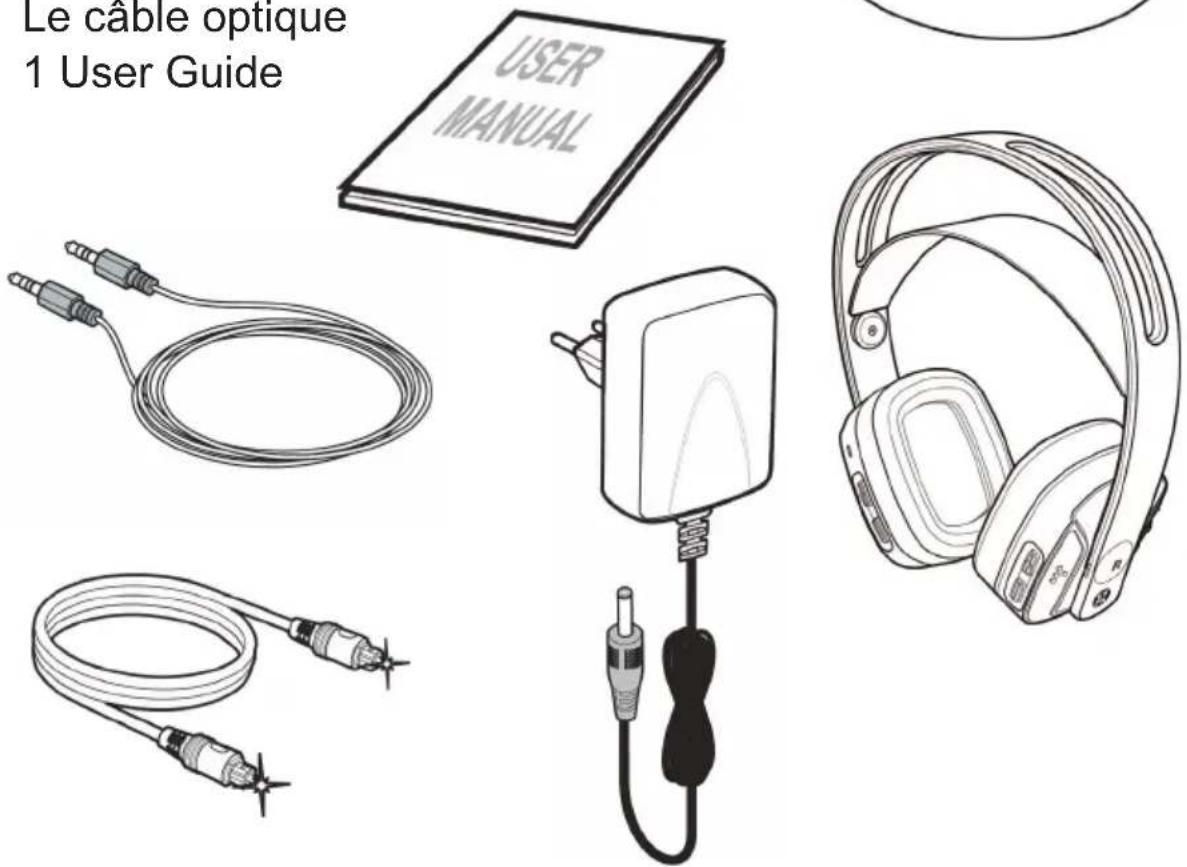

natural_image
Prohibition sign showing a crossed-out flame symbol (no text or numbers present)DEPANNAGE

Dépannage
AUCUN SON
natural_image
Black outdoor headphones with earbuds and black headband (no visible text or symbols)natural_image
Line drawing of a cylindrical device with a textured surface and a labeled 'Poemarc' logo (no text or symbols on the diagram itself)
natural_image
Illustration of a coiled electrical sensor or probe with two connectors (no text or symbols)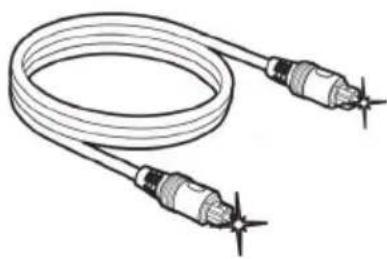
natural_image
Illustration of a coiled cable with two connectors and star-shaped connectors at the ends (no text or symbols)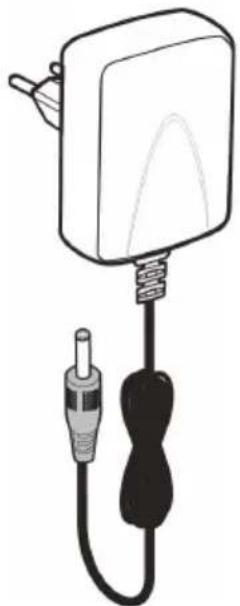
natural_image
Line drawing of a wall-mounted device with a black cable and two connectors (no text or symbols)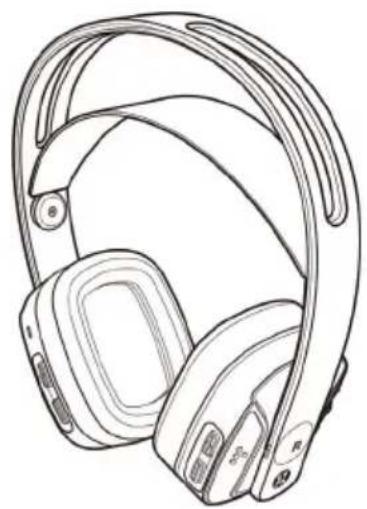
natural_image
Line drawing of a pair of freestanding headphones with exposed earbuds and headband (no text or symbols)
eemarc™
Hear the Difference
FEHLERSUCHE
natural_image
Black and white photo of a pair of black outdoor headsets with earbuds (no text or symbols visible)natural_image
Line drawing of a circular device with a textured surface and 'Geomarc' branding (no text or symbols on the diagram itself)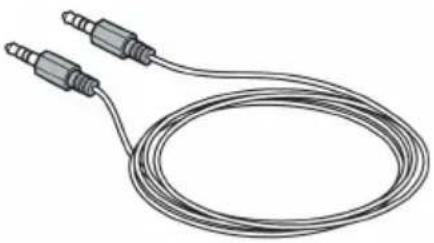
natural_image
Illustration of a coiled electrical sensor or probe with two connectors (no text or symbols)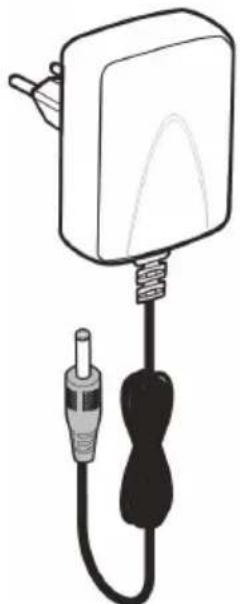
natural_image
Illustration of a white rectangular device with a black cable and two connectors (no text or symbols)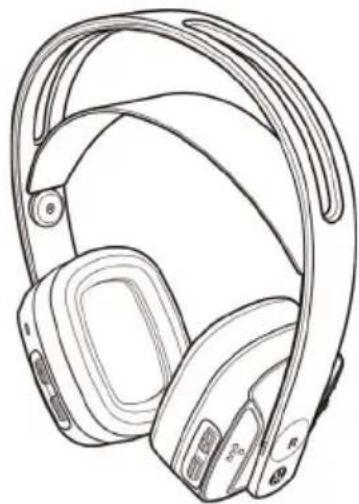
natural_image
Line drawing of a pair of耳机 headsets with straps and buttons (no text or symbols)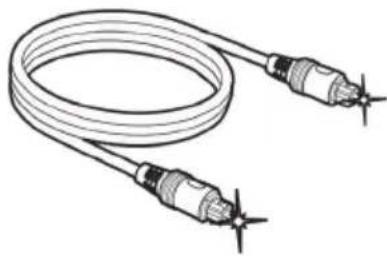
natural_image
Illustration of a coiled cable with two connectors and star-shaped connectors at the ends (no text or symbols)
eemarc™
Hear the Difference
natural_image
Black and white prohibition sign with a diagonal line crossing over a flame (no text or symbols)Technical specifications
Geemarc Telecom SA Parc de l'étoile 2 rue Galilée, 59760 GRANDE-SYNTHE, FRANCE This product is made in China To Geemarc Telecom
natural_image
Black Opemarc headphones with exposed black bands and a green indicator light (no text or symbols on the devices themselves)

UGCL7500
Geemarc Telecom SA
Parc de l'Etoile
2 Rue Galilée
59760 Grande-Synthe
E-mail : help@geemarc.com telephone 01707 387602
lines are open 09h00 to 16h00 Mon to Fri
- 19-35 Fr
- USING THE CL7500-OPTI 9
- SETTINGS....10
- PAIRING....12
- SAFETY INFORMATION ....15
- INTRODUCTION
- Unpacking the CL7500-OPTI
- INSTALLATION
- Setting Up – Connecting Base to TV (or other device)
- TV / Hi-Fi / MP3 / Mobile phone .....
- Turning the CL7500-OPTI On
- SETTINGS
- Volume Setting
- Balance Setting
- Tone Setting
- Stereo/Mono Setting
- PAIRING
- ECO MODE / WIRED MODE
- WIRED MODE
- CL7500 with Hi-Fi or MP3 Player
- SAFETY INFORMATION
- Safety & Care advice
- Battery Warnings:
- TROUBLESHOOTINGS
- Troubleshooting
- NO SOUND
- DISTORTION
- Customer support
- GENERAL INFORMATION / GUARANTEE
- General information
- Features
- Guarantee
- EEC Declaration
- Disposal information
- INTRODUCTION....19
- INFORMATIONS GENERALES......34
- GARANTIE / RECYCLAGE 35
- DEPANNAGE
- Dépannage
- AUCUN SON
- FEHLERSUCHE
- Technical specifications
Brand : GEEMARC
Model : CL7500 OPTI
Category : Headphones