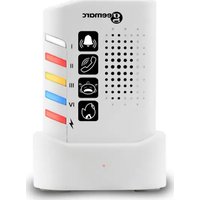
AMPLICALL 150 - Portable sound alarm GEEMARC - Free user manual and instructions
Find the device manual for free AMPLICALL 150 GEEMARC in PDF.


User questions about AMPLICALL 150 GEEMARC
0 question about this device. Answer the ones you know or ask your own.
Ask a new question about this device
Download the instructions for your Portable sound alarm in PDF format for free! Find your manual AMPLICALL 150 - GEEMARC and take your electronic device back in hand. On this page are published all the documents necessary for the use of your device. AMPLICALL 150 by GEEMARC.
USER MANUAL AMPLICALL 150 GEEMARC
Please refer to our website: www.geemarc.com for an up to date user guide, as there may be important updates and changes you need to be aware of.
PACKAGE CONTENTS
The AMPLICALL™150 box contains the following items:
✦ 1 Base station AC150 (AMPLICALL™150)
✨ 1 charging cradle
✨ 1 rechargeable battery (pre-installed)
✨ 1 AC/DC power adaptor
✨ 1 UK and 1 VDE plug adaptors
✨ 1 user's manual
✨ 1 set (8 pcs) alarm icon stickers
DESCRIPTION
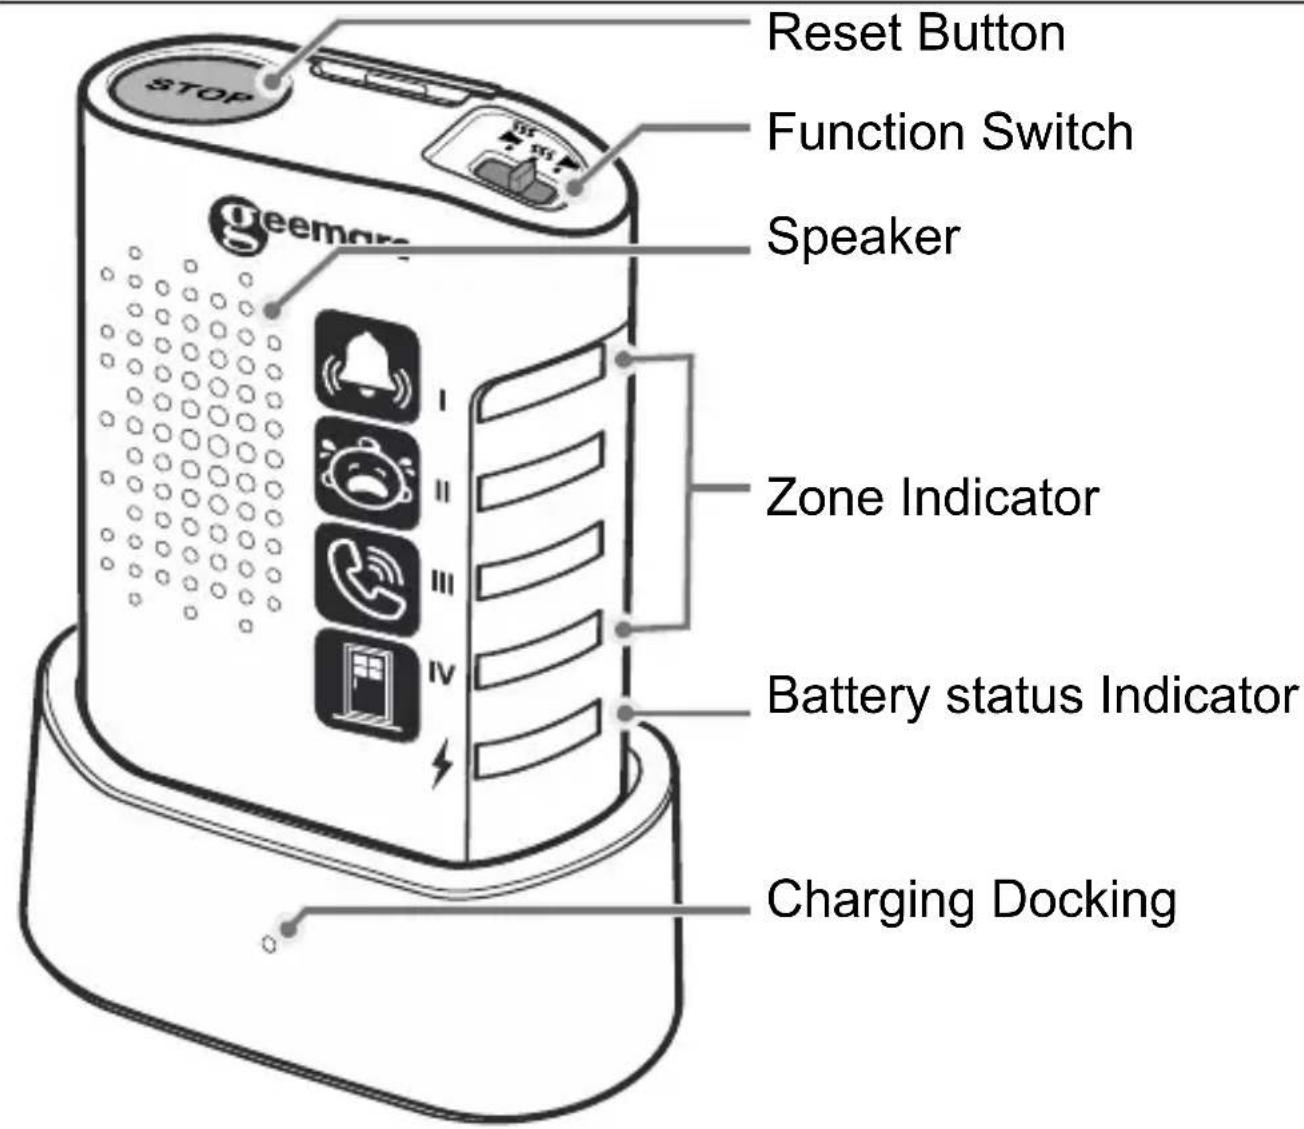
text_image
Reset Button Function Switch Speaker Zone Indicator Battery status Indicator Charging Docking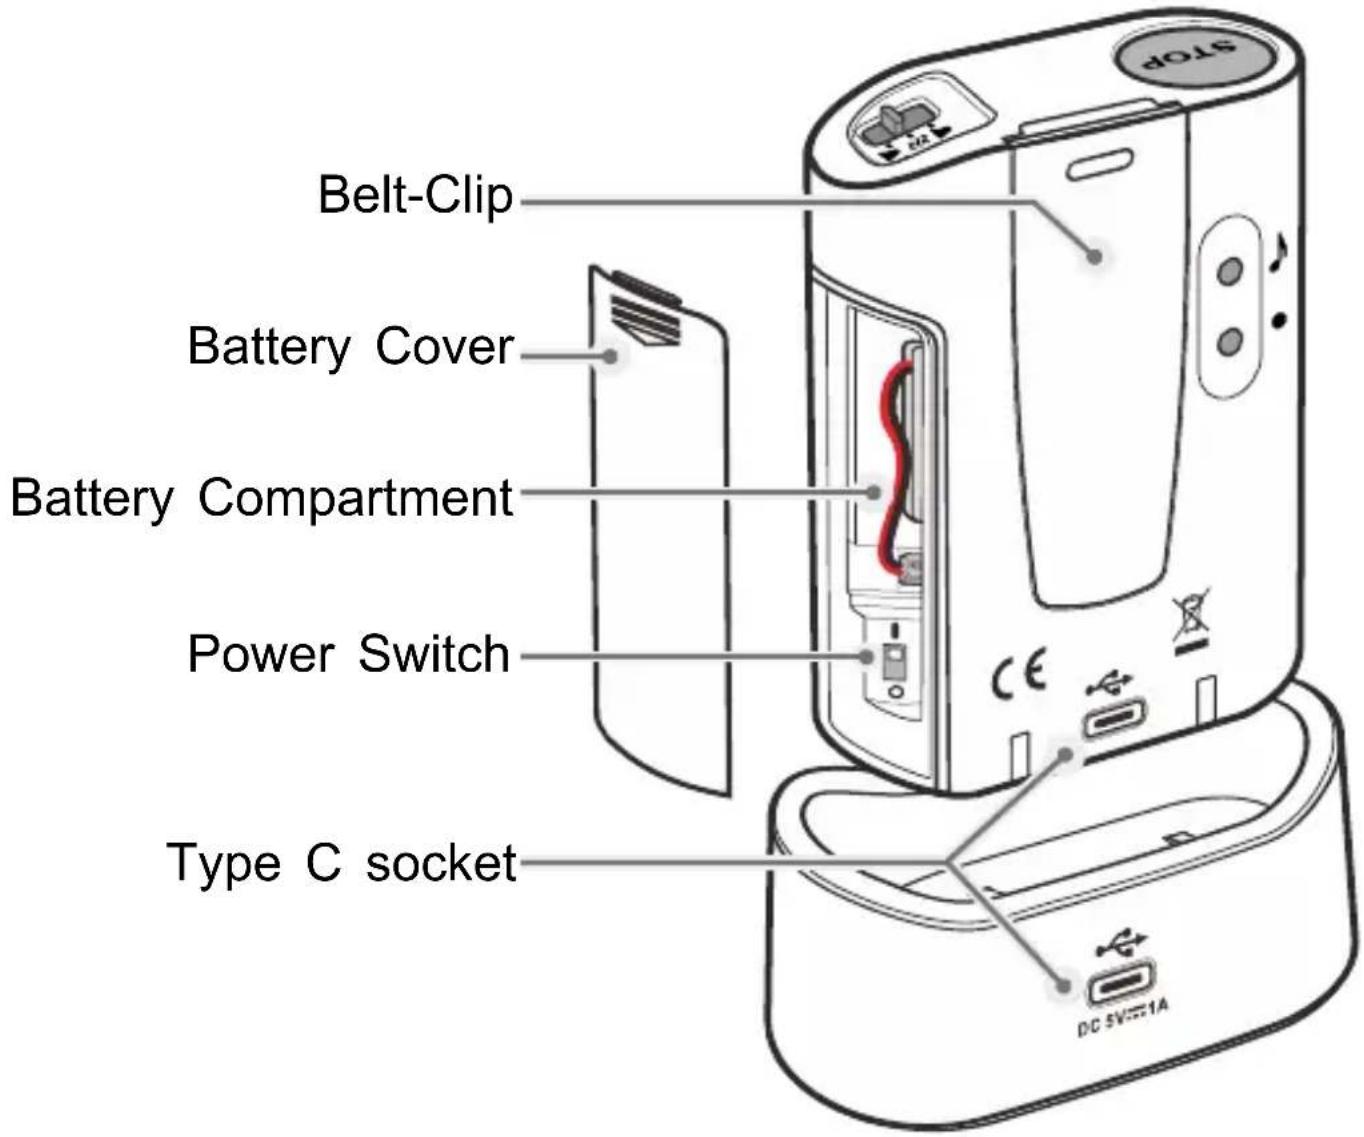
text_image
Belt-Clip Battery Cover Battery Compartment Power Switch Type C socket DC 5V=1A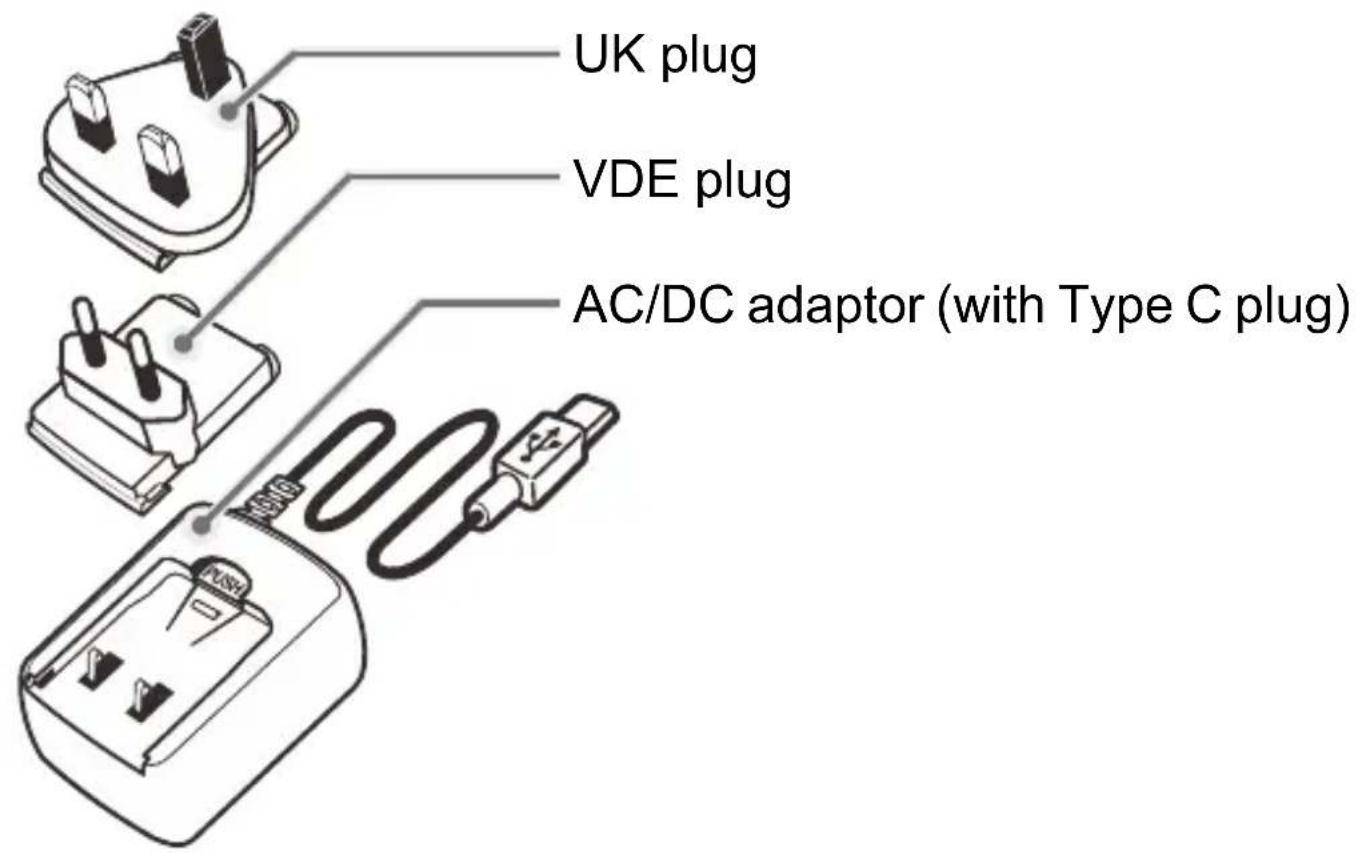
text_image
UK plug VDE plug AC/DC adaptor (with Type C plug)SWITCH ON/OFF
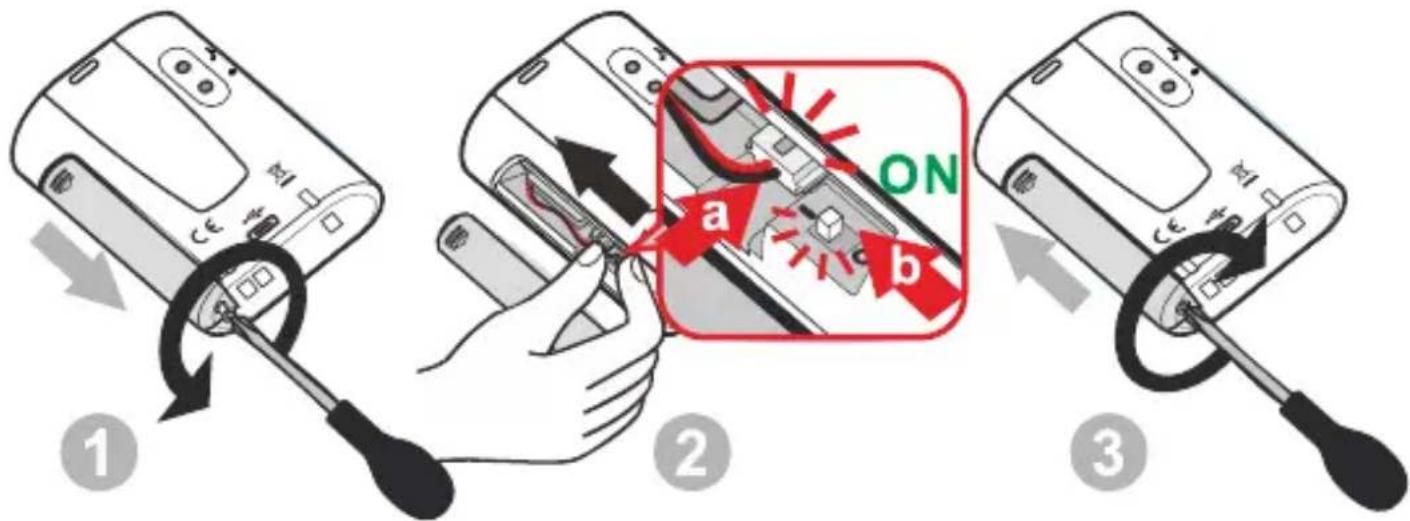
The receiver built-in a replace lithium polymer battery. When using for the first time, you need to turn on the power switch inside the battery cover ON (I).
When not used for a long period, it is recommended to turn the switch to the OFF (O) position.
text_image
Diagram illustrating the step-by-step operation of a device's internal circuit switch, showing disassembly and reassembly steps.Loosen the screw with a small phillips screwdriver.
Connect the battery and slide the switch to on position.
Close the battery cover and tight the screw with the screwdriver.
BATTERY CHARGING
text_image
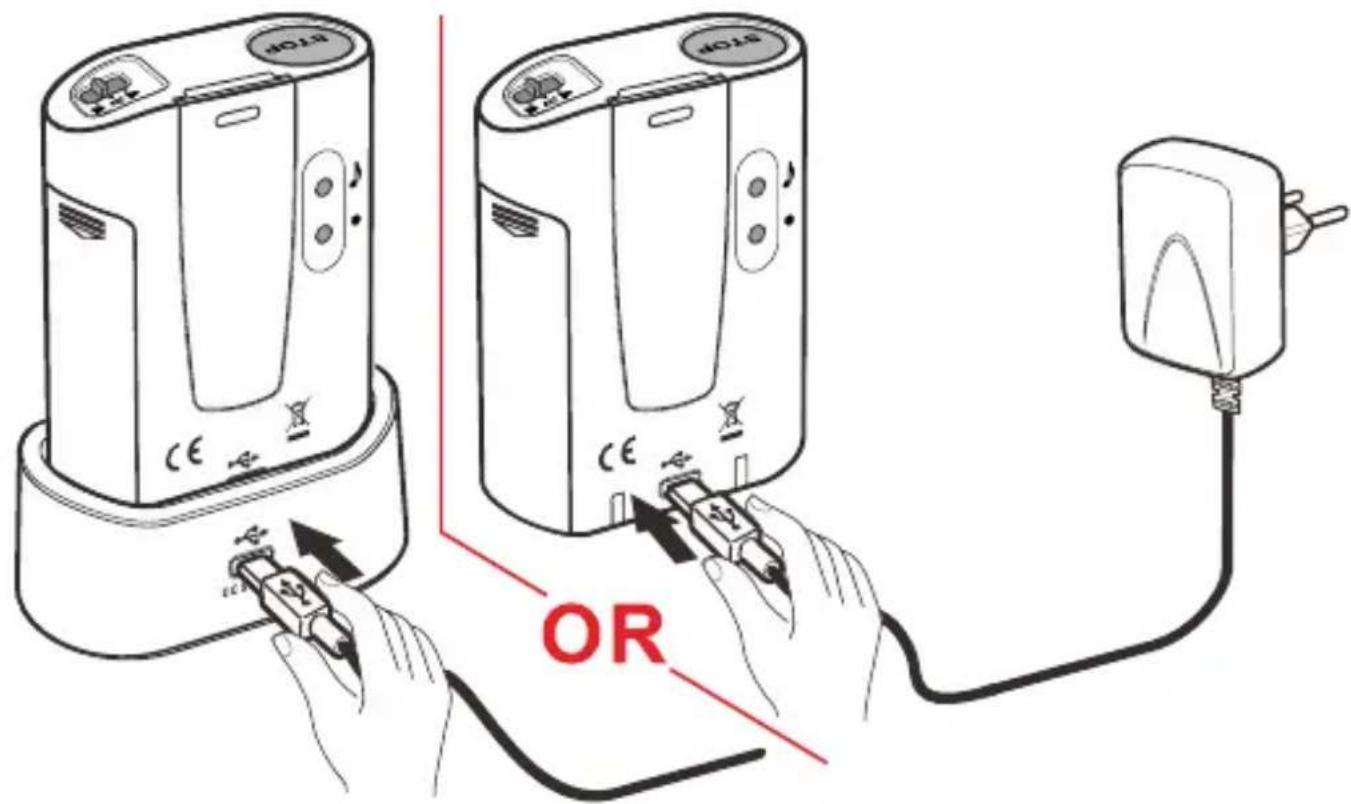
HOLT HOLT ORCharging with Docking – Connect the type C USB plug to the docking, put the AC150 receiver to the docking.
Charging without Docking – Drect connect the type C USB plug to the AC150 receiver unit.
text_image
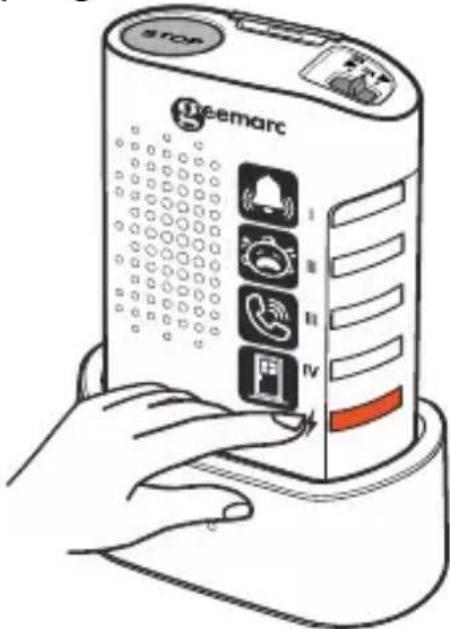
STOP teemarc I II III IVBattery status indicator
| Charging Mode | Standby Mode | |
| LED Light Charging | ||
| LED OFF Full Normal | ||
| LED Blink each 10S | Local Battery Low |
Battery low indicator – If a zone LED light is blinking every 10 S, it indicates the battery is low for this transmitter. You must recharge the battery as soon as possible.
PAIRING & ALARM MELODY
To pair a new device, please follow these steps:
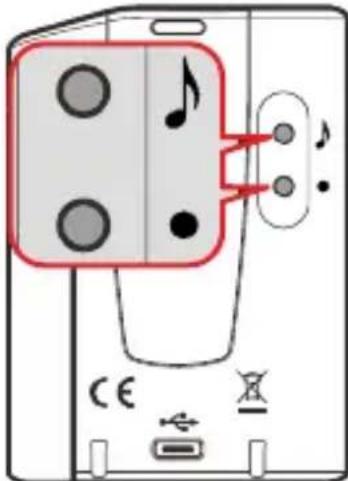
- Enter pairing mode for the AC150. Press & hold the LEARNING button (●) for 3 seconds. The LED in zone #1 will flash.
- Press the LEARNING button (●) again to move to the zone you wish to pair with. Press the melody selection (♪) button to
scroll through the melodies. Once you hear a melody you like, do not press any button during the melody.
- Once the zone and melody are selected, press one time on device (AC101, AC110, AC140) button to pair. If successful, the AMPLICALL150 will generate two short tones.
- Press the LEARNING button (●) to exit the pairing mode; the system is now ready to use.
text_image
Diagram showing a device with two circular buttons connected to a speaker, highlighting the speaker's sound and audio signal.Remove and transmitter of the AC150 memory
First, press and hold the (●) button for 3 seconds to enter the pairing mode.
✧ Press the (●) button to move to the zone which is to be deleted.
✨ Press and hold the(●) and (♩) buttons together for 3 seconds
The receiver will generate a tone to indicate the transmitter of this zone has been deleted.
CHANGE THE MELODY IN DESIERD ZONE
First, press and hold the (●) button for 3 seconds to enter the pairing mode.
✨ Press the (●) button to move to the zone then press the (♪) button to select the melody required.
✨ Press the (●) button until the pairing mode is exited.
USING
When the AC150 receives a trigger signal, it will play a melody and vibrating (depend on the Alarm setting position). The zone LED will light to show which sensor is triggered. The Zone LED will keep lighting until the reset button is pressed..
GUARANTEE
From the moment your Geemarc AMPLICALL™150 is purchased, Geemarc guarantee is for the period of two years. During this time, all repairs or replacements (at our discretion) are free of charge. Should you experience a problem then contact our help line or visit our website at www.geemarc.com. The guarantee does not cover accidents, negligence or breakages to any parts. The product must not be tampered with or taken apart by anyone who is not an authorized Geemarc representative. The Geemarc guarantee in no way limits your legal rights.
IMPORTANT: YOUR RECEIPT IS PART OF YOUR GUARANTEE AND MUST BE RETAINED AND PRODUCED IN THE EVENT OF A WARRANTY CLAIM.
Please note: The guarantee applies to the United Kingdom only.
DECLARATIONS:
UKCA Directives
Geemarc Telecom SA hereby declares that this AMPLICALL™ 150 is in compliance with the essential requirements and other relevant provisions of the Radio Equipment Directive 2014/53/UE.
The UKCA declaration of conformity may be consulted at www.geemarc.com
RF power : < 250mW
Recycling Directives
The WEEE (Waste Electrical and Electronic Equipment) has been put in place for the products at the end of their useful life are recycled in the best way.
When this product is finished with, please do not put it in your domestic waste bin. Please use one of the following disposal options:
- Remove the batteries and deposit them in an appropriate WEEE skip. Deposit the product in an appropriate WEEE skip.
- Or, hand the old product to the retailer. If you purchase a new one, they should accept it. Thus if you respect these instructions you ensure human health and environmental protection.

text_image
geemarc™ Hear the Difference
text_image
! i ✓ RohS UK CACEFor product support and help visit our website at www.geemarc.com
E-mail : help@geemarc.com
telephone 01707 387602
lines are open 09h00 to 16h00 Mon to Fri
2 Rue Galilée, Parc de l'Etoile, 59791 GRANDE-SYNTHE Cedex, FRANCE
This product is made in China To Geemarc Telecom
MISE EN MARCHE/ARRÊT
text_image
Diagram showing a device with two buttons and a highlighted connection point, labeled with symbols like 'CE', 'USB', and 'X'.text_image
! i RoHS UK CA CE