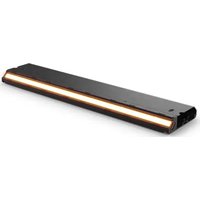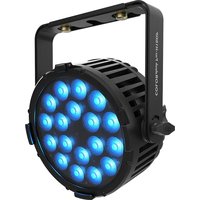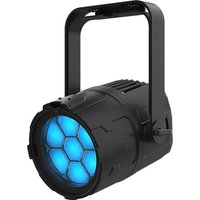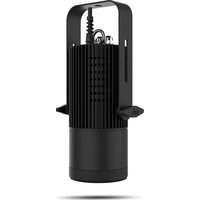
Ovation H-55WW - Lamp Chauvet - Free user manual and instructions
Find the device manual for free Ovation H-55WW Chauvet in PDF.


User questions about Ovation H-55WW Chauvet
0 question about this device. Answer the ones you know or ask your own.
Ask a new question about this device
Download the instructions for your Lamp in PDF format for free! Find your manual Ovation H-55WW - Chauvet and take your electronic device back in hand. On this page are published all the documents necessary for the use of your device. Ovation H-55WW by Chauvet.
USER MANUAL Ovation H-55WW Chauvet
natural_image
Technical line drawing of a mechanical device with coiled components and a meshed base (no text or symbols)Model ID: OVATIONH55WWBLK
OVATIONH55WWWHT
About This Guide
The Ovation H-55WW Quick Reference Guide (QRG) has basic product information such as connection, mounting, menu options, and DMX values.
Disclaimer
The information and specifications contained in this QRG are subject to change without notice.
LIMITED WARRANTY
FOR WARRANTY REGISTRATION AND COMPLETE TERMS AND CONDITIONS PLEASE VISIT OUR WEBSITE.
For Customers in the United States and Mexico: www.chauvetlighting.com/warranty-registration.
For Customers in the United Kingdom, Republic of Ireland, Belgium, the Netherlands, Luxembourg, France, and Germany: www.chauvetlighting.eu/warranty-registration
Chauvet warrants that this product shall be free from defects in material and workmanship under normal use, for the period specified in, and subject to the exclusions and limitations set forth in the full limited warranty on our website. This warranty extends only to the original purchaser of the product and is not transferable. To exercise rights under this warranty, you must provide proof of purchase in the form of an original sales receipt from an authorized dealer that shows the product name and date of purchase. THERE ARE NO OTHER EXPRESS OR IMPLIED WARRANTIES. This warranty gives you specific legal rights. You may also have other rights that vary from state to state and country to country. This warranty is valid only in the United States, United Kingdom, Republic of Ireland, Belgium, the Netherlands, Luxembourg, France, Germany and Mexico. For warranty terms in other countries, please consult your local distributor.
Safety Notes
- The luminaire should be positioned so that prolonged staring into the luminaire at a distance closer than 7.2 m is not expected.
- If the external flexible cable or cord of this luminaire is damaged, it shall be replaced by a special cord or cord exclusively available from the manufacturer or his service agent.
- The light source contained in this luminaire shall only be replaced by the manufacturer or his service agent or a similar qualified person.
- The luminaire is intended for professional use only.
- DO NOT open this product. It contains no user-serviceable parts.
- To eliminate unnecessary wear and improve its lifespan, during periods of non-use completely disconnect the product from power via breaker or by unplugging it.
- DO NOT look at the light source when the product is on.
- CAUTION: This product's housing may be hot when lights are operating.
• Mount this product in a location with adequate ventilation, at least 20 in (50 cm) from adjacent surfaces. - DO NOT operate this product outdoors or in any location where dust, excessive heat, water, or humidity may affect it. (IP20)
• DO NOT leave any flammable material within 50 cm of this product while operating or connected to power. - CAUTION: When transferring product from extreme temperature environments, (e.g., cold truck to warm humid ballroom) condensation may form on the internal electronics of the product. To avoid causing a failure, allow product to fully acclimate to the surrounding environment before connecting it to power.
- USE a safety cable when mounting this product overhead.
- DO NOT operate this product if the housing, lenses, or cables appear damaged.
- DO NOT connect this product to a dimmer or rheostat.
- ONLY connect this product to a grounded and protected circuit.
- ONLY use the hanging/mounting bracket to carry this product.
- In the event of a serious operating problem, stop using immediately.
• The maximum ambient temperature is 113 °F (45 °C). Do not operate this product at higher temperatures.
FCC Compliance
This device complies with Part 15 Part B of the FCC Rules. Operation is subject to the following two conditions:
- This device may not cause harmful interference, and
- This device must accept any interference received, including interference that may cause undesired operation.
Any changes or modifications not expressly approved by the party responsible for compliance could void the user's authority to operate the equipment.
RF Exposure Warning for North America, and Australia
Warning! This equipment complies with FCC radiation exposure limits set forth for an uncontrolled environment. This equipment should be installed and operated with a minimum distance of 20cm between the radiator and your body. This transmitter must not be co-located or operating in conjunction with any other antenna or transmitter.
Contact
Outside the U.S., U.K., Ireland, Benelux, France, Germany, or Mexico, contact your distributor to request support or return a product. Refer to Contact Us at the end of this QRG for contact information.
What is Included
- Ovation H-55WW
• 65°, 40°, and 25° Lens -
80^ Filter
-
Egg Crate
• Recess and Sconce Mounting Kits - Quick Reference Guide
AC Power
This product has an auto-ranging power supply that can work with an input voltage range of 100–240 VAC, 50/60 Hz.
AC Plug
| Connection | Wire (U.S.) | Wire (Europe) | Screw Color |
| AC Live Black Brown Yellow/Brass | |||
| AC Neutral White Blue Silver | |||
| AC Ground Green/Yellow Green/Yellow | Green |
Replacing The Fuse
- Disconnect this product from power.
- Using a flat-head screwdriver, unscrew the fuse holder cap from the housing.
- Remove blown fuse and replace with a good fuse of the same type and rating.
- Screw the fuse holder cap back in place and reconnect power.

To eliminate unnecessary wear and improve its lifespan, during periods of non-use completely disconnect the product from power via breaker or by unplugging it.
DMX Linking
The Ovation H-55WW will work with a DMX controller using a wireless, 5-pin DMX serial, or hard wire connection. A DMX Primer is available from www.chauvetprofessional.com.
DMX Connection
The Ovation H-55WW uses a DMX connection for its DMX personalities: 1Ch, 2Ch, 3Ch or 6Ch.
DMX Hard-Wired Diagram
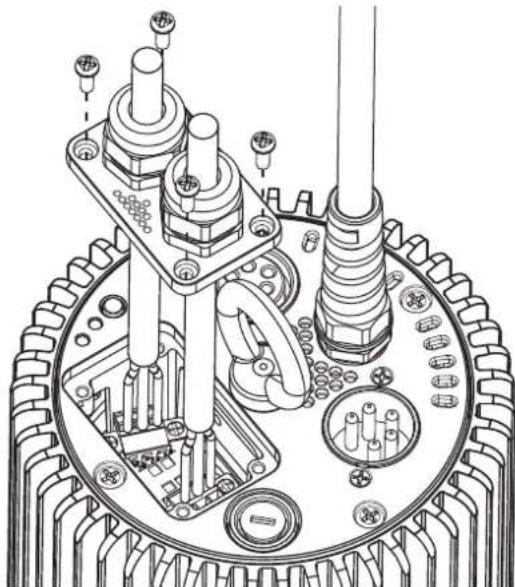
natural_image
Technical line drawing of a mechanical assembly with gears and shafts (no text or symbols)Master/Slave Connection
The Ovation H-55WW uses the DMX data connection for its Master/Slave mode.
RDM (Remote Device Management)
Remote Device Management, or RDM, is a standard for allowing DMX-enabled devices to communicate bi-directionally along existing DMX cabling. Check the DMX controller's User Manual or with the manufacturer as not all DMX controllers have this capability. The Ovation H-55WW supports RDM protocol that allows feedback to make changes to menu map options. Download the User Manual from www.chauvetprofessional.com for more details.
Wireless Operation
In optimal conditions, the Ovation H-55WW can operate up to 300 m (900 ft) away from the W-DMX transmitter. The W-DMX receiver in the Ovation H-55WW must be paired with the W-DMX transmitter for wireless operation.
Initial Setup
- Turn the W-DMX transmitter on.
- Connect the W-DMX transmitter to a DMX controller.
- Place the Ovation H-55WW within 300 m from the W-DMX transmitter.
- Disconnect any DMX cable from the Ovation H-55WW.
- Turn the Ovation H-55WW on.
Wireless Configuration
To configure the wireless mode, press and hold the button next to the indicator lights.
| Mode Wireless Indicator Light Description | ||
| OFF Green/Red lights off Fixture is off | ||
| RECEIVE MODE | Green light flashing slowly In Receiving Mode | |
| Red light off Waiting for wireless connection | ||
| Red light on Connected with W-DMX Control and there is a DMX input signal | ||
| Red light flashing slowly | Connected with W-DMX Control but no DMX input signal detected | |
| Red light flashing quickly Connected to W-DMX Control but the signal is weak | ||

W-DMX operation can be interrupted or inhibited by liquid masses between the transmitter and receiver such as water, snow, or people. For best results, keep the area between the transmitter and receiver clear of any liquid mass.
Mounting
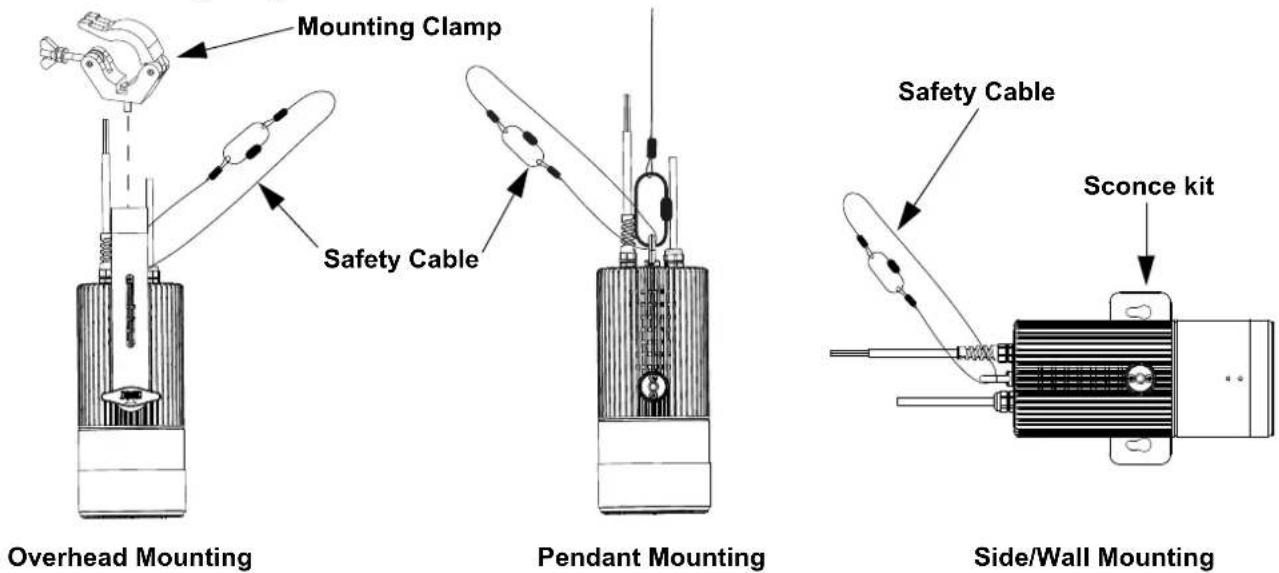
Before mounting this product, read the Safety Notes. Use at least one mounting point per product. Make sure the mounting clamps are capable of supporting the weight of the product. For our Chauvet line of mounting clamps, go to http://trusst.com/productcategory/truss-clamps/.
Product Mounting Diagram
Menu Map
Refer to the Ovation H-55WW product page on www.chauvetprofessional.com for the latest menu map.

RDM2go, or other RDM-capable interface, is required for fixture setup.
| Main Level Programming Levels Description | |||||
| DMX Address | Address 001-512 | Selects starting address (*highest channel restricted to personality chosen) | |||
| DMX Channel | 1CH 1-channel: Dimmer | ||||
| 2CH 2-channel: dimmer, | 16-bit dimmer | ||||
| 3CH 3-channel: dimmer, | 16-bit dimmer, strobe | ||||
| 6CH | 6-channel: Dimmer, 16-bit dimmer, strobe, auto programs, auto speed, control | ||||
| Dimmer Curve | SCurve | Sets the dimmer curve | |||
| Linear | |||||
| Square | |||||
| I Square | |||||
| Dimmer Mode | Off Linear dimmer | ||||
| Dimmer 1 Fast dimmer curve | |||||
| Dimmer 2 Medium dimmer curve | |||||
| Dimmer 3 Slow dimmer curve | |||||
| LED Frequency | 600Hz | Selects the PWM output frequency | |||
| 1200Hz | |||||
| 2000Hz | |||||
| 4000Hz | |||||
| 6000Hz | |||||
| 25KHz | |||||
| Factory Reset | No | Reset to factory defaults | |||
| Yes | |||||
| Specific PIDS | 1 8206 Clean Device Hours | 0 Do not clean device hours | |||
| 1 Clean device hours | |||||
| 2 8207 Static-Dimmer 0-255 Dimmer (0-100%) | |||||
| 3 | 8208 | Static-Strobe | 0-255 | Strobe (0-100%) | |
| 4 | 8209 | Auto Show | 1-4 | Selects automatic programs | |
| 5 | 8210 | Auto Speed | 1-100 | Sets program speed | |
| 6 8211 Master/Slave | 0 Master mode | ||||
| 1 Slave mode | |||||
| 7 8212 W-DMX On/Off | 0 W-DMX off | ||||
| 1 W-DMX on | |||||
| 8 8215 Receive Reset | 0 Do not reset receiver | ||||
| 1 Reset receiver | |||||
| 9 8216 Emergency Mode | 0 Emergency mode off | ||||
| 1 Emergency mode on | |||||
DMX Values
6 Ch
| Channel Function Value Percent/Setting | |||
| 1 Dimmer 000 ⇔ 255 0–100% | |||
| 2 | Dimmer Fine | 000 ⇔ 255 | 0–100% |
| 3 Strobe | 000 ⇔ 010 No function011 ⇔ 255 Strobe, slow to fast | ||
| 4 Auto | Programs | 000 ⇔ 010 No function011 ⇔ 070 Auto program 1071 ⇔ 130 Auto program 2131 ⇔ 190 Auto program 3191 ⇔ 255 Auto program 4 | |
| 5 Auto | Speed 000 ⇔ 255 0–100% | ||
| 6 | Control(hold for 3 seconds) | 000 ⇔ 007 No function008 ⇔ 015 Dimmer reset016 ⇔ 023 S-curve dimmer024 ⇔ 031 Linear dimmer032 ⇔ 039 Square dimmer curve040 ⇔ 047 Inverse square dimmer curve048 ⇔ 055 Dimmer speed mode OFF056 ⇔ 063 Dimmer speed 1 (fastest)064 ⇔ 071 Dimmer speed 2072 ⇔ 079 Dimmer speed 3 (slowest)080 ⇔ 255 Reserved for future use | |
3 Ch
| Channel Function Value Percent/Setting | |||
| 1 Dimmer 000 ⇔ 255 0–100% | |||
| 2 | Dimmer Fine | 000 ⇔ 255 | 0–100% |
| 3 Strobe | 000 ⇔ 010 No function011 ⇔ 255 Strobe, slow to fast | ||
2 Ch
| Channel Function Value Percent/Setting | |||
| 1 Dimmer 000 ⇔ 255 0–100% | |||
| 2 | Dimmer Fine | 000 ⇔ 255 | 0–100% |
1 Ch
| Channel | Function | Value | Percent/Setting |
| 1 Dimmer | 000 ⇔ 255 0–100% |
Technical Specifications
Dimensions and Weight
Length Width Height Weight
13.14 in (334 mm) 6.92 in (176 mm) 4.52 in (115 mm) 7.4 lb (3.4 kg)
Note: Dimensions in inches are rounded.
Power
Power Supply Type Range Voltage Selection
Switching (internal) 100–240 VAC, 50/60 Hz Auto-ranging
| Parameter | 120 V, 60 Hz | 208 V, 60 Hz | 230 V, 50 Hz |
| Consumption | 60 W | 61 W | 63 W |
| Operating current | 0.497 A | 0.297 | 0.269 A |
| Fuse | T2 A, 250 V | T2 A, 250 V | T2 A, 250 V |
| Power I/O | US/Canada | UK/Worldwide | |
| Fixed Power Cord | Bare-wired | Bare-wired | |
Light Source
| Type | Color | Quantity | Power | Current | Lifespan |
| LED | Warm white | 1 | 129.5 W | 1.45 A | 50,000 hours |
Photometrics
| Filter/Lens | Beam Angle | Field Angle | Illuminance @ 5 m |
| 80° filter | 41° | 126° | 131 lux |
| 65° lens | 39° | 73° | 212 lux |
| 45° lens | 30° | 58° | 400 lux |
| 25° lens | 24° | 39° | 728 lux |
Thermal
Minimum External Temp. Maximum External Temp. Cooling
-4 °F (-20 °C) 113 °F (45 °C) Convection
DMX
| I/O Connector | Channel Range |
| 5-pin XLR, W-DMX | 1, 2, 3 or 6 |
Ordering
| Product | Item Name | Item Code | UPC Number |
| Ovation H-55WW (black) | OVATIONH55WWBLK | 03031628 | 781462219765 |
| Ovation H-55WW (white) | OVATIONH55WWWHT | 03031627 | 781462219758 |
Instructions for Ovation H-55WW Houselight Recess Kit Installation
The instructions for installing the Houselight Recess Kit with the Ovation H-55WW can be found below.
Instructions for Ovation H-55WW
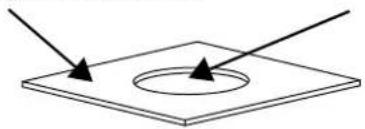
- Drill a 145–160 mm hole on the ceiling.
Ceiling Drill hole here.
natural_image
Simple line drawing of a diamond-shaped plate with two arrows pointing inward toward a circular hole (no text or symbols)
Ensure that the ceiling can support the weight of the fixture and associated hardware before installing.
-
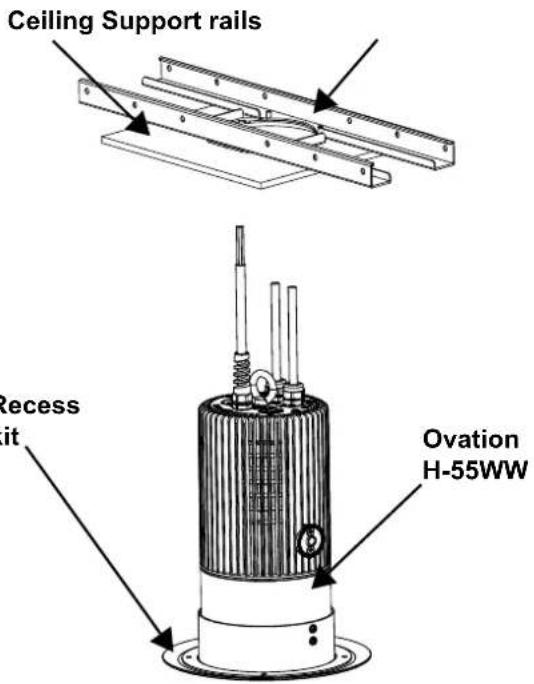
Attach the support rails to the ceiling.
-
Attach the recess kit to the fixture.
text_image
Ceiling Support rails Recess Unit Ovation H-55WW
When using the recess kit, the fixture must be installed into a plenum space with adequate open space for ventilation. Installing into confined spaces with no airflow is not permitted.
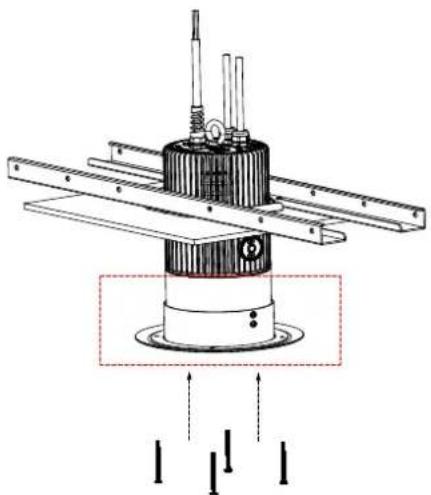
- Attach the fixture into the ceiling using 4 pieces of M4 screws.
natural_image
Technical diagram of a mechanical assembly with no visible text or symbols- Setup is finished.

A Distance of at least 20 in (508 mm) from wall to ceiling, in all directions, is required when installing the recess kit.
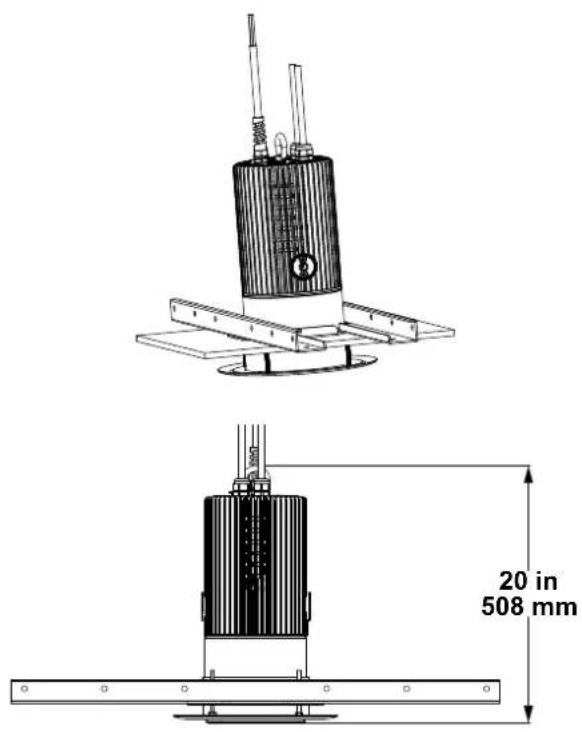
text_image
20 in 508 mmExploded view of fixture installation
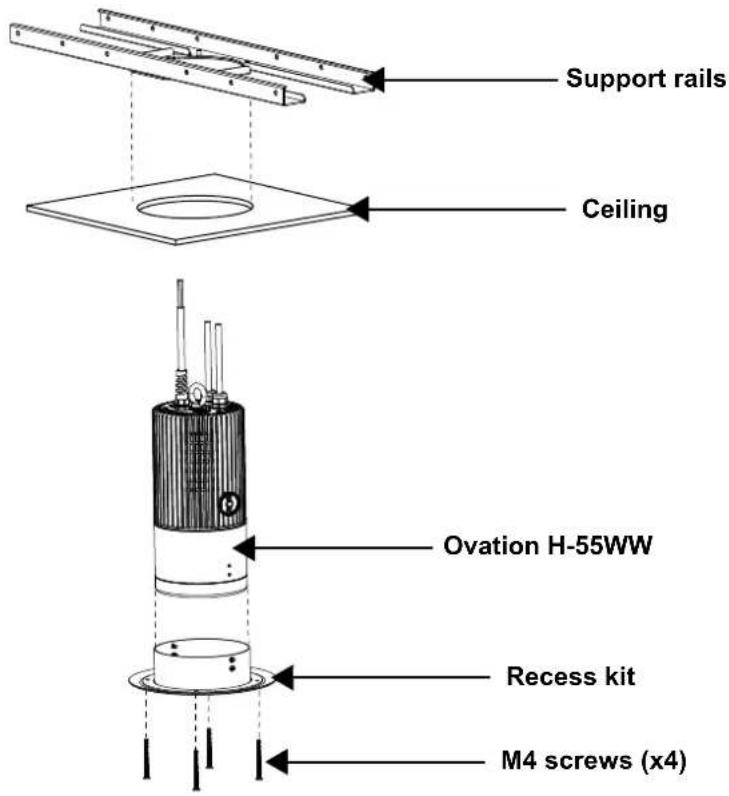
text_image
Support rails Ceiling Ovation H-55WW Recess kit M4 screws (x4)Acerca de Esta Guía
natural_image
Technical line drawing of a mechanical assembly with gears and shafts (no text or symbols)natural_image
Technical diagram of a mechanical assembly with no visible text or symbolsnatural_image
Technical line drawing of a mechanical assembly with gears and shafts (no text or symbols)natural_image
Technical diagram of a mechanical assembly with mounting flanges and a central component (no text or labels)natural_image
Technical line drawing of a mechanical assembly with gears and shafts (no text or symbols)RDM (Remote Device Management)
natural_image
Technical diagram of a mechanical assembly with mounting flanges and a central component (no text or labels)- Setup ist erledigt.

text_image
20 in 508 mmnatural_image
Technical line drawing of a mechanical assembly with gears and components (no text or symbols)Master/slave-verbinding
To configure the wireless mode, press and hold the button next to the indicator lights.
natural_image
Technical diagram of a mechanical assembly with mounting flanges and a central component (no visible text or symbols)- Setup is voltooid.

text_image
20 in 508 mmGeneral Information Technical Support
Chauvet World Headquarters
Address: 5200 NW 108th Ave. Voice: (844) 393-7575
Sunrise, FL 33351 Fax: (954) 756-8015
Voice: (954) 577-4455 Email: chauvetcs@chauvetlighting.com
Fax: (954) 929-5560
Toll Free: (800) 762-1084 Website: www.chauvetprofessional.com
Chauvet Europe Ltd.
Address: Unit 1C Email: UKtech@chauvetlighting.eu
Brookhill Road Industrial Estate
Pinxton, Nottingham, UK Website: www.chauvetprofessional.eu
NG16 6NT
Voice: +44 (0) 1773 511115
Fax: +44 (0) 1773 511110
Chauvet Europe BVBA
Address: Stokstraat 18 Email: BNLtech@chauvetlighting.eu
9770 Kruishoutem
Belgium Website: www.chauvetprofessional.eu
Voice: +32 9 388 93 97
Chauvet France
Address: 3, Rue Ampère
91380 Chilly-Mazarin
Email: FRtech@chauvetlighting.fr
France Website: www.chauvetprofessional.eu
Voice: +33 1 78 85 33 59
Chauvet Germany
(Entrance by Calle 2)
Email: servicio@chauvet.com.mx
Zona Industrial Lerma Website: www.chauvetprofessional.mx
Visit the applicable website above to verify our contact information and instructions to request support. Outside the U.S., U.K., Ireland, Mexico, France, Germany, or Benelux, contact the dealer of record.

UL 1573
CSA C22.2 No. 166
us
E113093

RoHS