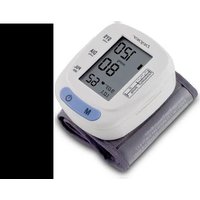
40.121 - Sphygmomanometer Beper - Free user manual and instructions
Find the device manual for free 40.121 Beper in PDF.


| Product Type | Automatic wrist blood pressure monitor |
| Brand | Beper |
| Model | 40.121 (BP-2116) |
| Measurement method | Oscillometric |
| Pressure measurement range | 0 – 300 mmHg |
| Pulse measurement range | 30 – 180 beats/min |
| Pressure accuracy | ±3 mmHg |
| Pulse accuracy | ±5% |
| Memory | 120 readings with date and time |
| Display | LCD screen 45 x 30 mm |
| WHO indicator | Yes, blood pressure classification according to WHO |
| Arrhythmia detection | Yes, irregular heartbeat indicator |
| Average calculation | Average of last 3 readings |
| Inflation | Automatic |
| Auto-off | Yes, after 3 minutes of inactivity |
| Power supply | 2 AAA batteries (included) |
| Battery life | Approximately 2 months for 3 measurements per day |
| Dimensions (L x W x H) | 79 x 66 x 28 mm |
| Weight (without batteries) | Approximately 225 g |
| Wrist circumference | 13.5 – 21.5 cm (cuff included) |
| Operating temperature | 10°C – 40°C |
| Operating humidity | 15% – 90% RH |
| Cleaning | Damp cloth with mild detergent; cuff: alcohol then water, air dry |
| Warranty | 24 months against material and manufacturing defects |
| Standards | EN 60601-1, EN 60601-1-2, EN 1060-1/-3/-4 |
Frequently Asked Questions - 40.121 Beper
User questions about 40.121 Beper
0 question about this device. Answer the ones you know or ask your own.
Ask a new question about this device
Download the instructions for your Sphygmomanometer in PDF format for free! Find your manual 40.121 - Beper and take your electronic device back in hand. On this page are published all the documents necessary for the use of your device. 40.121 by Beper.
USER MANUAL 40.121 Beper
For further information and/or for instructions for use in other languages , please visit: www.beper.com
Fig.A
Fig.B
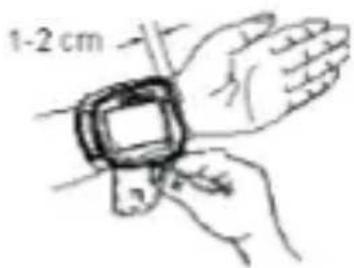
Fig.C
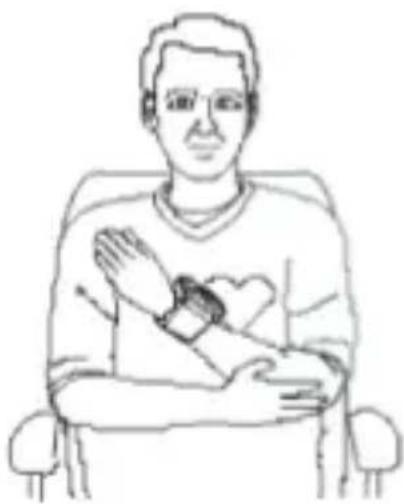
Fig.D
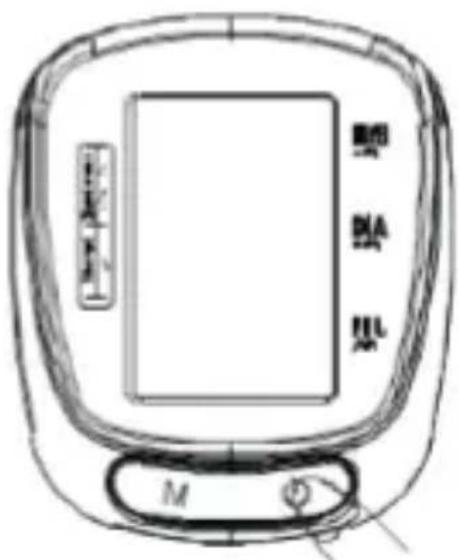
Fig.E
Wrist blood pressure monitor Use Instructions
Safety Notice
Thank you for purchasing the BP-2116 Blood Pressure Monitor.
The unit has been constructed using reliable circuitry and durable materials. Used properly, this unit will provide yeas of satisfactory use.
This device is intended for non-invasive measuring of an adult individuals' systolic, diastolic blood pressure and heart rate using the oscillometric method. The device is not intended for use on infants and children. The device is designed for home or clinical use. All values can be read out in one LCD DISPLAY. Measurement position is on adult wrist only.
Please read this manual thoroughly before using the unit. Please retain this manual for future reference. For specific information about your blood pressure, please CONSULT YOUR DOCTOR.
To avoid risk and damage follow all warning precautions. Operate unit only as intended. Read all instructions prior to use.
| Caution | |
| Individuals with serious circulation problems may experience discomfort. Consult your physician prior to use. |  |
| Contact your physician if test results regularly indicate abnormal readings. Do not attempt to reftract there symptoms without consulting your physician first. | |
| Product is designed for its intended use only. Do not misuse in any way. |  |
| Product is not intended for infants or individuals who cannot express their intentions. | |
| Do not disassemble or attempt to repair. | |
| Do not use cell phones and other devices, which generate strong electrical or electromagnetic fields, near the device, as they may cause incorrect readings. | |
Wrist blood pressure monitor Use Instructions
Only use a recommended AC adaptor complying with EN 60601-1 and EN 60601-1-2 see page 60 An unauthorized adaptor may cause fire and electric shock.
 | |
| Do not mix new and old batteries simultaneously. | |
| Replace batteries when Low Battery Indicator |  "appears on screen. "appears on screen. |
| Be sure battery polarity is correct. | |
| Do not mix battery types. Long-life alkaline batteries are recommended. | |
| Remove batteries from device when not in operation for more than 3 months. | |
| Dispose batteries properly, observe local laws and regulations. | |
Wrist blood pressure monitor Use Instructions
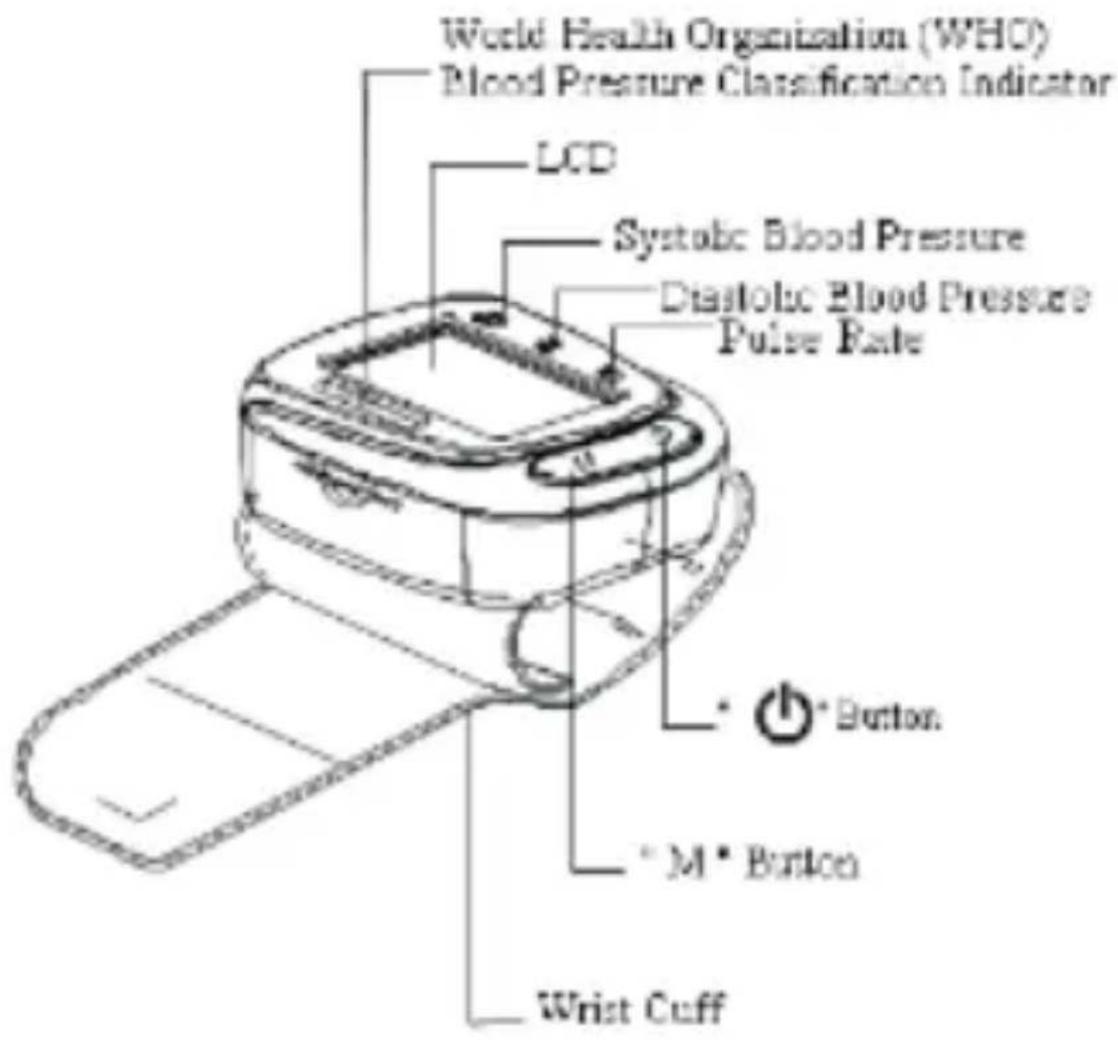
Wrist blood pressure monitor Use Instructions
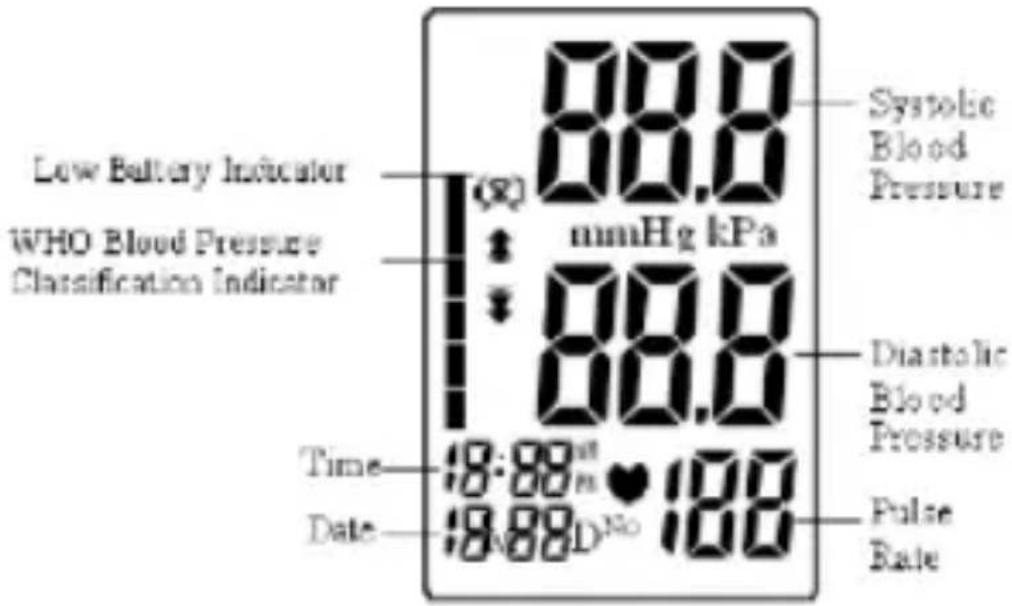
Important Testing Guidelines
-
Avoid eating, exercising, and bathing for 30 minutes prior to testing.
-
Sit in a calm environment for at least 5 minutes prior to testing.
-
Do not stand while testing. Sit in a relaxed position while keeping your wrist level with your heart.
-
Avoid speaking or moving body parts while testing.
-
While testing, avoid strong electromagnetic interference such as microwave ovens and cell phones.
-
Wait 3 minutes or longer before re-testing.
-
Try to measure your blood pressure at the same time each day for consistency.
-
Test comparisons should only be made when monitor is used on the same wrist, in the same position, and at the same time of day.
-
This blood pressure monitor is not recommended for people with severe arrhythmia.
Wrist blood pressure monitor Use Instructions
Quick Start
- Install batteries. (See Figure A)
- Remove clothing from the wrist area (See Figure B).
- Rest for several minutes prior to testing. Wrap cuff around left wrist (See Figure C)
- Sit in a comfortable position and place wrist level with heart. (See Figure D)
- Press “ ⏻ ” button to start testing. (See Figure E)
Battery Installation
Slide battery cover off as indicated by arrow.
Install 2 new AAA alkaline batteries according to polarity.
Close battery cover.
Note:
1) Replace batteries when Low Battery Indicator “ 🔊” appears on screen.
2) Batteries should be removed from device when not in operation for an extended period of time
Unit Operation
- Time /Date Setting
With power off, Press “ 🔊” button 3 seconds to set the Time/Date mode. Set the month first by adjusting the “M” button. Press “ 🔊” button again to confirm current month.
Continue setting the day, hour, and minute in the same fashion.
Every time the “ ⏻” button is pressed, it will lock in your selection and continue in succession (month, day, hour, minute.)
- Save Settings
While in any setting mode, press “ ⏻ ” button about 3 seconds to turn the unit off. All information will be saved
Note: Unit will automatically save all information and shut off if left it for 3 minutes.
Wrist blood pressure monitor Use Instructions
Applying The Wrist Monitor
Do not apply over clothing. If wearing a long sleeved shirt, be sure to roll sleeve back to forearm.
Apply monitor to wrist as illustrated. Tighten cuff firmly as not to wiggle.
Do not stand while testing. Sit in a comfortable position and place wrist level with heart.
Testing
1. Power On
Press and hold “ ⏻ ” button until a beep sounds. The LCD screen will appear for one second as unit performs a quick diagnosis. A long tone indicates device is ready for testing.
Note: Unit will not function if residual air from previous testing is present in cuff. The LCD will flash “ ⏻” until pressure is stabilized.
2. Pressurization
Initial pressure is first pumped to 190 mmHg. If the current user's systolic blood pressure is over 190mmHg, the unit will automatically re-inflate to the proper shelf.
Note: Pressurization will gradually subside and ultimately stop when cuff is not properly applied to the wrist.
If this occurs, pressing the “ ⏻ ” button to turn the unit off.
3. Testing
After cuff inflation, air will slowly subside as indicated by the corresponding cuff pressure value. A flashing will appear simultaneously on screen signaling heart beat detection.
Note: Remain relaxed during testing. Avoid speaking or moving body parts
4. Result display
Three short beeps sound when testing is complete. The screen will display measurements for systolic and diastolic blood pressure. A indicator representing the current measurement will appear next to the corresponding WHO Classification.
Wrist blood pressure monitor Use Instructions
Power Off
The “ ⏻” button can be pressed to turn off the unit in any mode. The unit can turn off the power itself about 3 minutes no operation in any mode.
Safety Precaution: If pressure in cuff becomes too extreme while testing, press the “” button to turn power off.
The cuff pressure will rapidly dissipate once the unit is off.
Memory Check
With power off, you may check past test results by using the “M” buttons.
Upon activating test results, you can press the "M" buttons to scroll through all test results stored in memory. The LCD will display the last measurement memory as NO:1 reading.
Memory Deletion
Memory may be deleted while in Memory Check mode. Press and hold the “ 🔊” button for approximately 3 seconds to delete all memory records. The monitor will beep indicating successful deletion and then transfer into testing mode. Then press the “ 🔊”
button to turn the unit off.
Note: Memory cannot be recovered once it has been deleted
Low Battery Indicator
4 short warning beeps sound when battery life is depleting and unable to inflate cuff for testing. The “☒” appears simultaneously for approximately 5 seconds prior to shutting down. Replace batteries at this time. No memory loss will occur throughout this process.
Wrist blood pressure monitor Use Instructions
| PROBLEM CAUSE | SOLUTION | |
| Blood pressure results are not within typical range | Cuff is too tight or not properly positioned on the armInaccurate test results due to body movement or monitor movement | Firmly reposition cuff approximately above the elbow joint (See Page 12)Sit in a relaxed position with arm placed near heart.Avoid speaking or moving body parts while testing.Make sure the monitor unit is placed in a stationary position throughout the testing period. (See Page 7) |
| “Err” displayed Cuff | ails to inflate properlyImproper operationPressurization is over 300mmHg | Make sure hose is properly fastened to cuff and monitor unitRead user manual carefully and re-test properly.Read user manual carefully and re-test properly. |
Wrist blood pressure monitor Use Instructions
Blood Pressure
Blood pressure is the force of blood pushing against the walls of arteries. It is typically measured in millimeters of mercury (mmHg.) Systolic blood pressure is the maximum force exerted against blood vessel walls each time the heart beats. Diastolic blood pressure is the force exerted on blood vessels when the heart is resting between beats. An individual's blood pressure frequently changes throughout the course of a day. Excitement and tension can cause blood pressure to rise, while drinking alcohol and bathing can lower blood pressure. Certain hormones like adrenaline (which your body releases under stress) can cause blood vessels to constrict, leading to a rise in blood pressure. If these measuring numbers become too high, it means the heart is working harder than it should.
WHO Blood Pressure Classification Indicator
The BP-2116 is equipped with a classification indicator based on established guidelines from the World Health Organization.
The chart below (color coded on monitor unit) indicates test results.
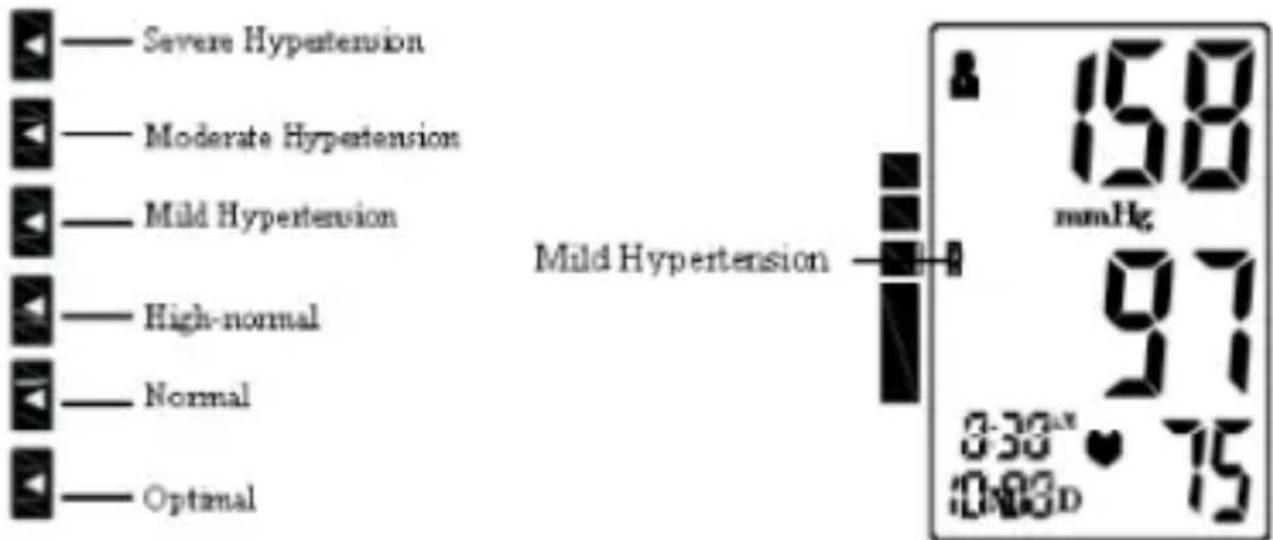
Wrist blood pressure monitor Use Instructions
Health Reminder
Hypertension is a dangerous disease that can affect the quality of life. It can lead to a lot of problems including heart failure, kidney failure, and cerebral hemorrhaging. By maintaining a healthy lifestyle and visiting your physician on a regular basis, hypertension and relative diseases are much easier to control when diagnosed in the early stages.
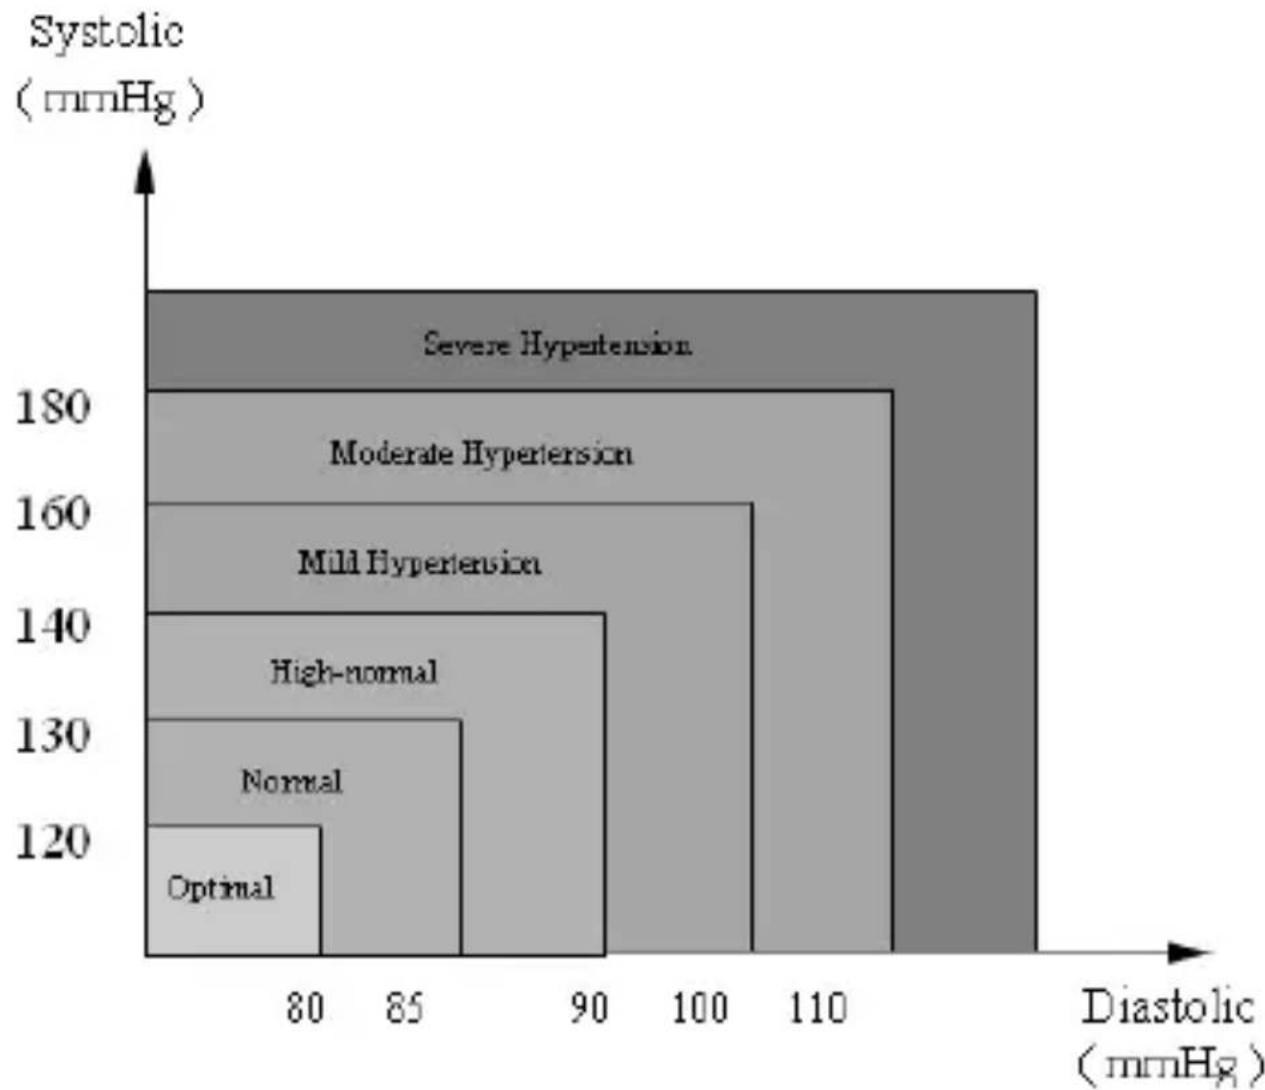
Wrist blood pressure monitor Use Instructions
Note: Do not be alarmed if an abnormal reading occurs. A better indication of an individual's blood pressure occurs after 2-3 readings are taken at the same time each day over an extended period of time. Consult your physical if test results remain abnormal.
Blood Pressure Q&A
Q: What is the difference between measuring blood pressure at home or at a professional healthcare clinic?
A: Blood pressure readings taken at home are now seen to give a more accurate account as they better reflect your daily life.
Readings can be elevated when taken in a clinical or medical environment. This is known as White Coat Hypertension and may be caused by feeling anxious or nervous.
Note: Abnormal test results may be caused by:
-
Improper cuff placement Make sure cuff is snug-not too tight or too loose.
-
Improper body position Make sure to keep your body in an upright position.
-
Feeling anxious or nervous Take 2-3 deep breaths, wait a few minutes and resume testing.
Q: What causes different readings?
A: Blood pressure varies throughout the course of a day. Many factors including diet, stress, cuff placement, etc. may affect an individual's blood pressure.
Q: Should I apply the cuff to the left or right wrist? What is the difference?
A: Either wrist can be used when testing, however, when comparing results, the same wrist should be used.
Testing on your left wrist may provide more accurate results as it is located closer to your heart.
Q: What is the best time of day for testing?
A: Morning time or any time you feel relaxed and stress free.
Wrist blood pressure monitor Use Instructions
Maintenance
- Avoid dropping, slamming, or throwing the unit.
- Avoid extreme temperatures. Do not expose unit directly under sunshine.
- When cleaning the unit, use a soft fabric and lightly wipe with mild detergent.
Use a damp cloth to remove dirt and excess detergent.
-
Cuff Cleaning: Do not soak cuff in water! Apply a small amount of rubbing alcohol to a soft cloth to clean cuff's surface. Use a damp cloth (water-based) to wipe clean. Allow cuff to dry naturally at room temperature.
-
Do not use petrol, thinners or similar solvents.
-
Remove batteries when not in operation for an extended period of time.
-
Do not disassemble product.
-
It is recommended the performance should be checked every 2 years
SPECIFICATIONS
| Product Description | Wrist-type Fully AutomaticBlood Pressure Monitor | |
| Model | BP-2116 | |
| Display | LCD Digital Display Size:45mmx30mm | |
| Measurement Method | Oscillometric Method | |
| Measurement RangePulse | Pressure | 0mmHg ~ 300mmHg |
| 30 to 180 Beats/Minute | ||
Wrist blood pressure monitor Use Instructions
| Measurement Accuracy | Pressure | ±3mmHg |
| Pulse | ±5% | |
| Pressurization | Automatic Pressurization | |
| Memory | 120 Memories with Date and Time | |
| Function | WHO Classification Indicator | |
| Low Battery Detection | ||
| Automatic Power-Off | ||
| Power Source | 2 Alkaline Batteries Size AAA |
| Battery Life | Approximately 2 months at 3 tests per day |
| Unit Weight | Approx. 228g (8 oz) (Excluding Battery) |
| Unit Dimensions | Approx. 79 x 66 x 28 mm |
| Cuff Circumference | Approx. 75 (W)×300(L) mmFits wrist circumference 13.5-21.5 cm(5.3 -8.5 )" |
Wrist blood pressure monitor Use Instructions
| Operating EnvironmentHumidity | Temperature | 10□~40□(50□~104□) |
| Humidity | 15%~90% RH | |
| Storage EnvironmentHumidity | Temperature | -20□-55□(-4□-131□) |
| Humidity | 15%~90% RH | |
| Classification | Internal Powered Equipment,Type BF  | |
This Blood Pressure Monitor complies with the European regulations and bears the CE mark“CE0 197”.
Safety standard:
EN 60601-1 Medical electrical equipment part 1: General requirements for safety
EMC standard:
EN 60601-1-2 Medical electrical equipment part 1-2: General requirements for safety- Collateral standard: Electromagnetic compatibility- Requirements and tests
Performance standards:
EN 1060-1 Non-invasive sphygmomanometers – General requirements
EN 1060-3 Non-invasive sphygmomanometers – Supplementary requirements for electro-mechanical blood pressure measuring systems.
EN 1060-4 Non-invasive sphygmomanometers - Test procedures to determine the overall system accuracy of automated non -invasive sphygmomanometers.
For any improvement reasons, Beper reserves the right to modify or improve the product without any notice.
Wrist blood pressure monitor Use Instructions

DISPOSAL OF OLD ELECTRICAL APPLIANCES

The European directive 2011/65/EU on Waste Electrical and Electronic Equipment (WEEE), requires that old household electrical appliances must not be disposed of in the normal unsorted municipal waste stream. Old appliances must be collected separately in order to optimize the recovery and recycling of the materials they contain, and reduce the impact on human health and the environment.
The crossed out "wheeled bin" symbol
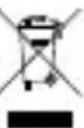
on the product reminds you of your obligation,
that when you dispose of the appliance, it must be separately collected.
GUARANTEE CERTIFICATE
This appliance has been checked in the factory. From the date of original purchase a 24 month guarantee applies to material and production defects. The purchase receipt and the guarantee certificate must be submitted together in case of claim to guarantee.
For any technical assistance, please contact directly the seller or our head office in order to preserve the appliance's efficiency and NOT TO void the guarantee. Any intervention on this appliance by non-authorized persons will automatically void the guarantee.
Guarantee conditions
If the appliance shows defects as a result of faulty material and/or production during the period of guarantee, we guarantee repair free of charge on condition that:
- The appliance has been used properly and for the purpose for which it has been intended.
- Repairs are professionally carried out by qualified persons who are appointed by the supplier.
- The purchase receipt shall be presented.
- The appliance showing a fair wear and tear shall not be covered by this guarantee.
Therefore, any part that could be accidentally broken or having visible signs of use in consumable products (such as lamps, batteries, heating elements...) is excluded from the guarantee, and any defect whatsoever resulting from non-respect of the rules for use, negligence in usage and/or maintenance of the appliance, damage during transport and any other damage not attributable the supplier.
For every defect that could not be repaired within the guarantee period, the appliance will be replaced free of charge.
Technical assistance
Even after the guarantee period we will always pay attention to repairs for defected appliances.
For technical assistance and/or repairs after the guarantee period you can directly contact the below address:
CONTACT YOUR DISTRIBUTOR IN YOUR COUNTRY OR AFTER SALES DEPARTMENT
BEPER. E-MAIL assistenza@beper.com
WHICH WILL FORWARD YOUR ENQUIRIES TO YOUR DISTRIBUTOR.
Usine
Fig.D Fig.E
Assistance technique
Fabrik
Fig.A
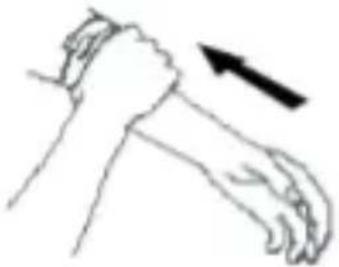
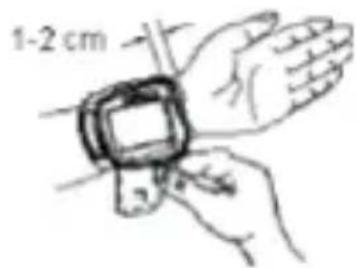
Fig.B Fig.C
Fig.D Fig.E
Fábrica
Fig.A
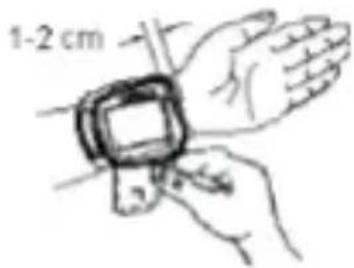
Fig.B Fig.C
Fig.D Fig.E


- SAFETY NOTICE
- IMPORTANT TESTING GUIDELINES
- QUICK START
- BATTERY INSTALLATION
- UNIT OPERATION
- APPLYING THE WRIST MONITOR
- TESTING
- POWER ON
- PRESSURIZATION
- RESULT DISPLAY
- POWER OFF
- MEMORY CHECK
- MEMORY DELETION
- LOW BATTERY INDICATOR
- BLOOD PRESSURE
- WHO BLOOD PRESSURE CLASSIFICATION INDICATOR
- HEALTH REMINDER
- BLOOD PRESSURE Q&A
- MAINTENANCE
- DISPOSAL OF OLD ELECTRICAL APPLIANCES
- GUARANTEE CERTIFICATE
- GUARANTEE CONDITIONS
- TECHNICAL ASSISTANCE
- ASSISTANCE TECHNIQUE
Brand : Beper
Model : 40.121
Category : Sphygmomanometer