Dream&Swing - Crib Foppapedretti - Free user manual and instructions
Find the device manual for free Dream&Swing Foppapedretti in PDF.


| Product Type | Baby bed with cradle, rocking function and co-sleeping function |
| Age of use | From birth to 6 months (until the child can sit up, kneel, or push up) |
| Maximum weight capacity | 9 kg |
| Mattress dimensions | 810 x 480 x 35 mm |
| Internal cradle dimensions | 840 x 510 mm (max) |
| Material | Textile and metal |
| Power supply | AC/DC adapter included for rocking and melodies; CR2025 3V battery for remote control (included) |
| Rocking function | 2 selectable speeds |
| Melodies | 8 sounds: 5 melodies + 3 nature sounds |
| Co-sleeping mode | Yes, with included fixing straps to attach to the parent bed |
| Height adjustment | Multiple positions with possible tilt (anti-reflux, max 2 notches difference) |
| Wheels | 4 wheels with brakes (removable, caps included) |
| Storage basket | Included |
| Mattress cover | Removable and washable (follow instructions on label) |
| Remote control batteries | 1 CR2025 3V battery included |
| Warranty | 12 months |
| Safety | Complies with standards EN 16890:2017+A1:2021 |
| Usage | On a horizontal surface, do not use more than one mattress |
| Spare parts | Contact FOPPAPEDRETTI for original parts |
Frequently Asked Questions - Dream&Swing Foppapedretti
User questions about Dream&Swing Foppapedretti
0 question about this device. Answer the ones you know or ask your own.
Ask a new question about this device
Download the instructions for your Crib in PDF format for free! Find your manual Dream&Swing - Foppapedretti and take your electronic device back in hand. On this page are published all the documents necessary for the use of your device. Dream&Swing by Foppapedretti.
USER MANUAL Dream&Swing Foppapedretti
EN 1130:2019
EN CRIB - Assembly instructions
Valid for electrical and musical device only
IT. IMPORTANTE - LEGGERE ATTENTAMENTE E CONSERVARE PER FUTURO RIFERIMENTO
EN. IMPORTANT! READ THE INSTRUCTIONS CAREFULLY AND KEEP FOR FUTURE REFERENCE
FR. IMPORTANT! LIRE ATTENTIVEMENT ET CONSERVER SOIGNEUSEMENT A PORTEE DE MAIN POUR UNE UTILISATION ULTERIEURE


29
IMPORTANTE! LEGGERE ATTENTAMENTE E CONSERVARE PER RIFERIMENTI FUTURI
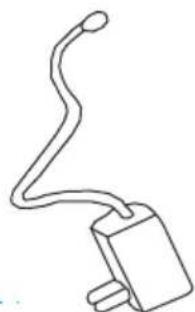
16 Trasformatore
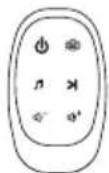
15 Telecomando
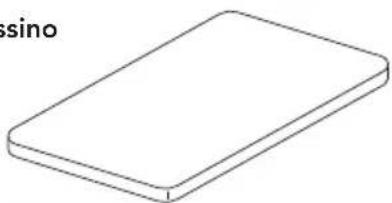
11 Materassino
12 Ruote
Piedini


4 Culla
MONTAGGIO
MONTAGGIO DELLE RUOTE (a) DEI PIEDINI (b) (fig.1a, fig.1b, fig.1c)
USO
TELECOMANDO:
TASTO POWER:
IMPORTANT! READ CAREFULLY AND KEEP FOR FUTURE REFERENCE.
- CAUTION: The use of the product is allowed for a child aged 0 - 6 months, up to a maximum weight of 9 kg.
- Do not use the crib without the frame.
- The crib must only be assembled by an adult.
- All opening, adjusting, fixing and positioning of the crib must only be carried out by an adult.
- Make sure that those using the crib are aware of exactly how it works.
- WARNING – Do not use this product without reading the instructions for use first.
- WARNING – Stop to using the product as soon as the child can sit or kneel, or pull itself up.
- WARNING – Placing additional items in the product may cause suffocation.
- WARNING – Do not place the product close to another product, which
- could present a danger of suffocation or strangulation, e.g. strings, blind / curtain cords, etc.
- WARNING – Do not use more than one mattress in the product.
- The crib must always be placed on a horizontal floor. Never leave the crib on a sloping surface with the child inside.
- Children should not be allowed to play near the crib without adult supervision.
- The crib is ready for use only when all the locking mechanisms are correctly engaged. Check carefully that they are inserted before use and that there are no loose or damaged components.
- Before using the crib, make sure that the assembly devices are properly tightened and check that no screws are loose, as the child's body parts or clothing could get trapped (e.g. strings, necklaces, soother clips, etc.) and this may result in a risk of strangulation.
- CAUTION: Use only the mattress supplied with the crib or any spare mattresses approved by FOPPAPEDRETTI.
- Be aware of the risk of burns from cigarettes, naked flames and other heat sources, like electric or gas heaters, that are near the product.
WARNING
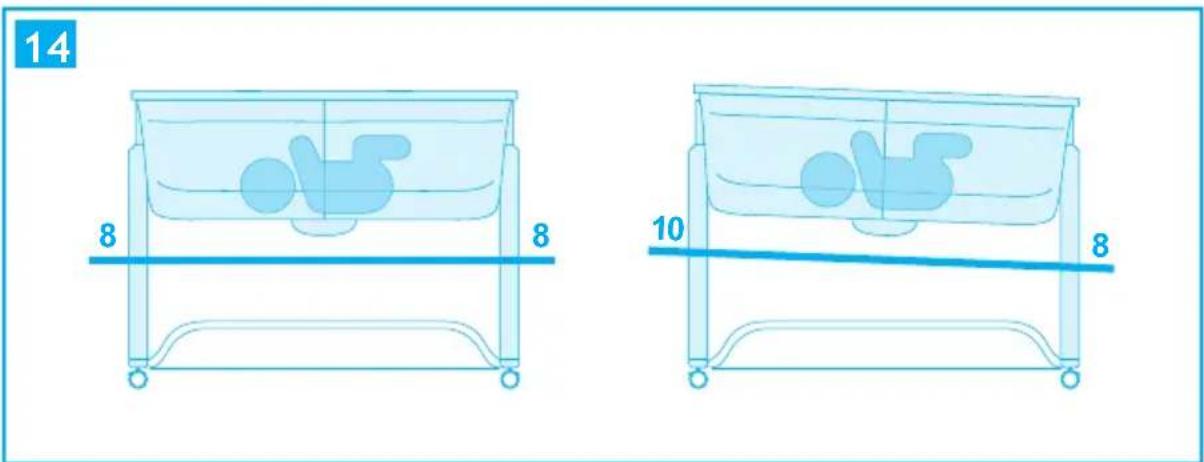
- WARNING: you can tilt the crib with a maximum of 2 positions' difference between one leg and the other, for example, with the right leg in position 10 and the left in position 8. To adjust it, follow the instructions. You cannot adjust the two sides of the crib to be different heights.
- CAUTION: The child's head must always be placed on the most raised side
- WARNING: DO NOT USE the crib if any part is missing, damaged or broken.
- Contact FOPPAPEDRETTI for spare parts and user instructions if needed. DO NOT REPLACE missing, damaged or broken parts with original components or components not approved by FOPPAPEDRETTI.
- WARNING: Only use the mattress sold or any replacement mattresses approved by FOPPAPEDRETTI with the product. Do not add a second mattress, choking hazard.
- CAUTION: Check the crib periodically to make sure that there are no loose parts, damage or missing components.
- Only use spare parts approved by the manufacturer. Do not use any accessories to the product that have not been supplied by the manufacturer.
- Do not adjust the crib while the child is inside it.
- Do not move the crib while the child is inside it.
- Do not use the product for more than one child at a time.
- Do not leave any objects inside the crib that could reduce the height of the sides.
- Do not leave small objects inside the crib, as these could be swallowed by the child.
- Do not place the crib near walls and obstacles, to prevent the risk of the childgetting trapped.
- When not in use, keep the crib out of the reach of children.
- CAUTION: when the product is used in the crib version, the reclining bed rail must only ever be used in the raised position. Only in the co-sleeping version can the crib be used with the bed rail reclined.
CO-SLEEPING MODE (FIXED TO THE BED)
• Always use all parts needed for each configuration of use.
- DO NOT USE the crib if any part is missing, damaged or broken. Contact FOPPAPEDRETTI for spare parts and user instructions if needed. DO NOTREPLACE missing, damaged or broken parts with original components
WARNING
or components not approved by FOPPAPEDRETTI.
- Use only the fastening straps included in the package.
- When the product is used in "Co-sleeping configuration (fastened to the bed)", the product must always be placed on a horizontal surface. Never leave the product on an inclined surface with the child inside of it.
- To prevent the risk of the head becoming trapped, when in the “Co-Sleeping Mode” (fixed to the bed) the crib must be correctly fixed to the parent’s bed, as described in the instructions for use, using the fastening straps supplied.
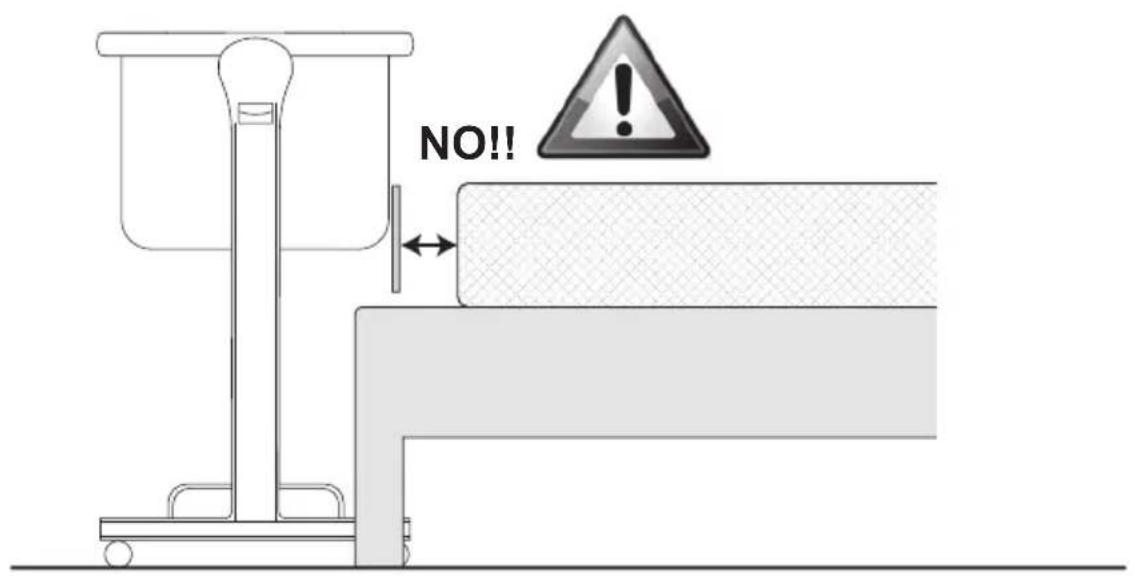
- IMPORTANT: There must be no gap between the crib and the adult bed.
- Before each use, check that the crib is attached by pulling it away from the adult bed. Tighten the anchoring strap if necessary.
- DO NOT use the product if there is a gap between the crib and the adult bed.
- Do not fill any gap between the crib and the adult bed with cushions, blankets or other objects as they may cause suffocation.
- DANGER! The folding side must always be raised and locked when the product is not attached to the parents' bed.
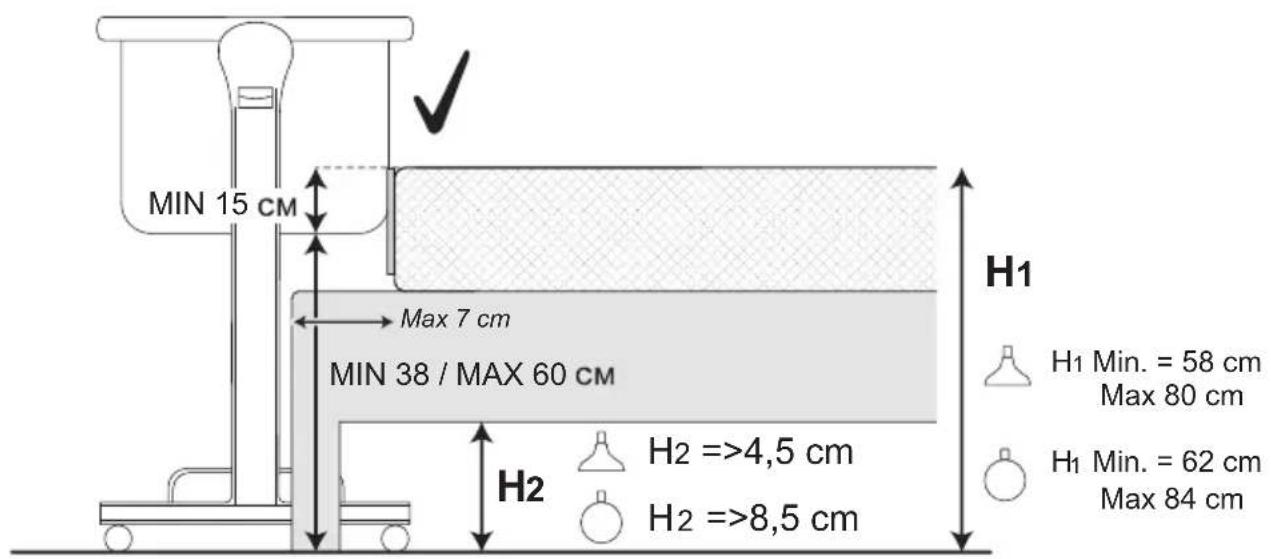
- WARNING: To avoid hazards from the child's neck being caught on the top rail on the side that is next to the adult bed, the top rail must not be higher than the adult bed mattress.
- WARNING: To avoid the risk of your child being strangled the attachment system to the adult's bed shall always be kept away from and out the crib.
MATTRESS WARNINGS (EN 16890:2017+A1:2021)
- The dimension shall take into account that there shall be no gap more than 30 mm between the mattress and the sides end ends in any position of the mattress.
- Do not use the product if any part is broken, torn or missing and use only spare parts approved by the manufacturer.
- WARNING – Do not use more than one mattress in the crib (crib or suspended cradle).
- WARNING – To avoid a fire risk, never place the product near electric heaters, gas stoves or other sources of strong heat (crib or suspended cradle).
WARNING
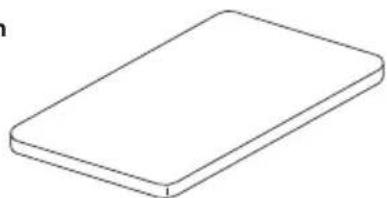
- Mattress dimensions: 810x480x35 mm
- Suitable for cribs with maximum internal dimensions of 840x510 mm.
Mattress maintenance
- The mattress comes with a removable and washable fabric cover.
- Check the product regularly for any wear and tear. In the event of damage, do not use it and keep it out of the reach of children.
- When washing the fabric, carefully follow the instructions on the label.
- Do not clean with solvents, abrasives or overly aggressive products.
• After each wash, check the tolerance of the fabric and stitching. - WARNING: During covering and/or uncovering and assembly and/or disassembly, handle the fabric with care to avoid accidental breakage or damage.
- WARNING: Covering, uncovering, assembly and disassembly must be carried out by an adult.
WARNING
SAFETY OF THE ELECTRICAL PARTS:
- CAUTION: The operations to switch the crib on/off must always be performed by an adult.
- WARNING: Batteries must only be replaced and fitted by an adult.
- WARNING: Batteries may leak acid or explode if thrown into a fire.
- WARNING: Always dispose of leaking batteries immediately: They can cause burns or their types of injuries.
- WARNING: Non-rechargeable batteries are not to be recharged; they might explode.
- WARNING: Do not leave the product out in the rain; water infiltrations will damage the electronic circuit.
- WARNING: Only use batteries which are equivalent to those recommended.
- WARNING: Batteries are to be inserted with the correct polarity.
- WARNING: Different types of batteries or new and used batteries are not to be mixed.
- CAUTION: Old batteries must be removed from the remote control.
- WARNING: Do not short-circuit the battery terminals.
- CAUTION: If the remote control is left idle for long periods of time, it is advisable to remove the batteries from the battery compartment.
- CAUTION: Use the same or equivalent batteries as the type recommended for the operation of this product, for the remote control battery model CR2025 - 3V.
- WARNING: The use of rechargeable batteries is not recommended as the product may not work properly.
- WARNING: Rechargeable batteries must only be recharged under adult supervision.
- WARNING: Rechargeable batteries must be removed from the product during recharging.
- WARNING: Remove the batteries from the product before disposing of the product.
- WARNING: Always keep batteries and tools out of the reach of children.
- Transformers used with the infant swing are to be regularly examined for damage to the cord, plug, enclosure and other parts, and in the event of such damage, they shall not be used.
- The infant swing shall only be used with the recommended transformer.
BATTERIES
REPLACING THE BATTERIES:
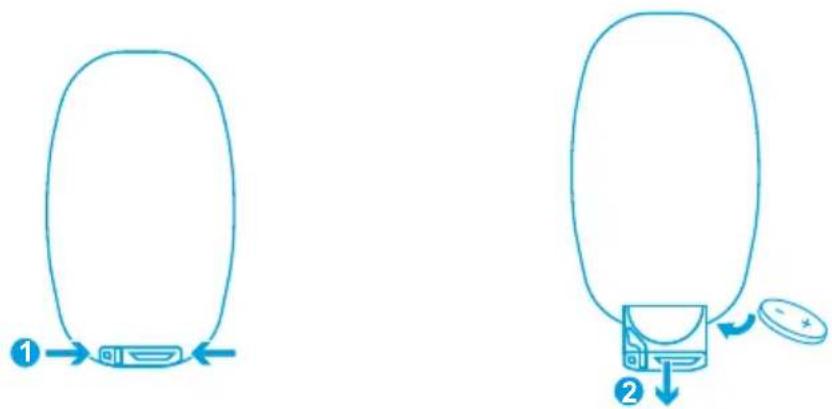
To replace the battery, move the locking tab inwards and pull out the battery holder, as shown in the figure. Remove the flat battery and insert the new one, observing the correct polarity. Insert the battery holder into the remote control, making sure that it is inserted correctly. Remove the protective film to activate battery operation.
INFORMATION ON THE BATTERIES:
IMPORTANT: Keep batteries out of the reach of children.
BATTERIES:
• 1 battery CR2025 - 3V, for remote control (included)
- The use of rechargeable batteries is not recommended for this product.
- Replace the batteries when the sound or swing does not work correctly
PRECAUTIONS WITH THE BATTERIES:
• Always insert the batteries with the correct polarity.
- Do absolutely not throw the batteries in a fire. They can explode.
- The batteries can easily be swallowed by children and cause dangerous consequences.
- Never leave children to handle the batteries. Keep the batteries away from their reach.
- If you think that your child swallowed a battery, contact urgently a doctor.
- For safety, remove worn out batteries from the product.
- Never recharge normal not rechargeable or alkaline batteries. It could cause explosion or leakage of liquids.
- Remove the batteries if you won't use the product for long time.
- Do not short-circuit the power clamps.
- Do not throw batteries in the garbage, but bring them to collection points.
CORRECT DISPOSAL OF THIS PRODUCT (Waste Electrical & Electronic Equipment) (Applicable in the European Union and other European countries with separate collection systems)
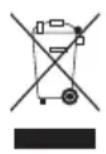
This marking shown on the product or its literature, indicates that it should not be disposed with other household wastes at the end of its working life. To prevent possible harm to the environment or human health from uncontrolled waste disposal, please separate this from other types of wastes and recycle it responsibly to promote the sustainable reuse of material resources. Household users should contact either the retailer where they purchased this product, or their local government office, for details of where and how they can take this item for environmentally safe recycling. This product should not be mixed with other commercial wastes for disposal. If the waste material should be disposed of illegally, fines may be applied, as provided for by the Decree Law in force.
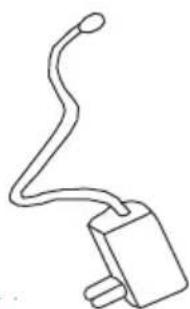
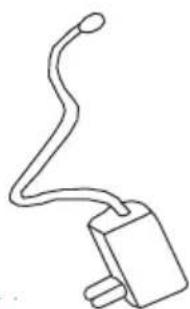
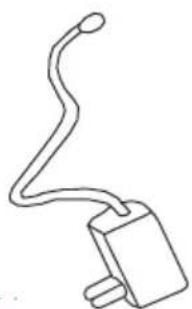
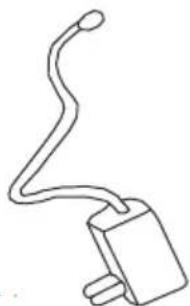
16 Power Transformer
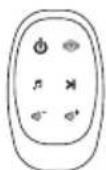
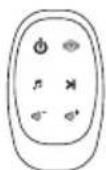
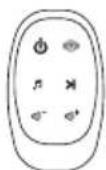
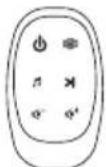
15 Remote control
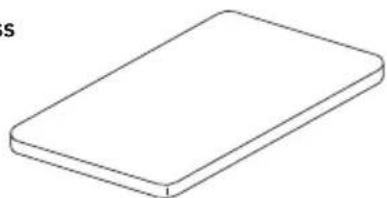
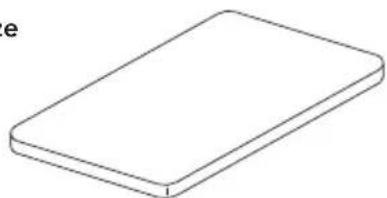
5 Mattress
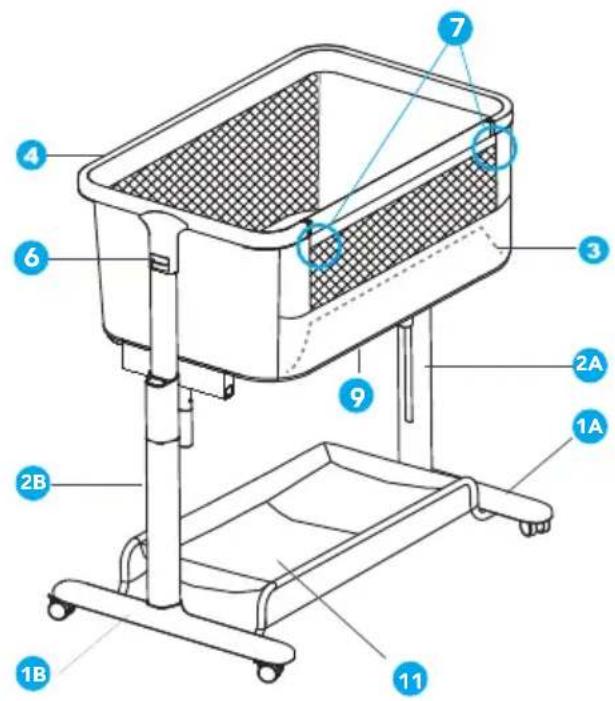
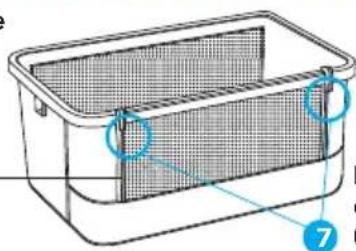
11 Storage basket
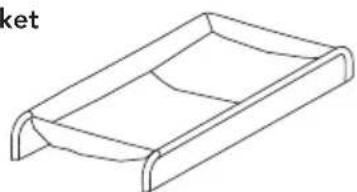

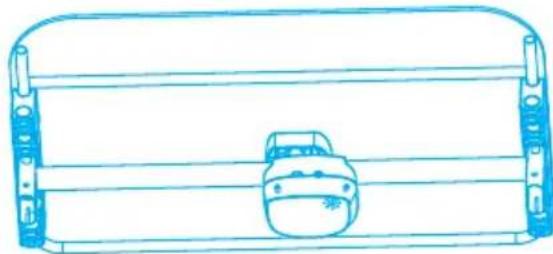
3 Co-sleeping protective bar
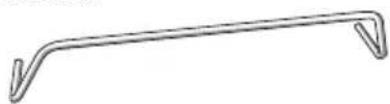
4 Crib
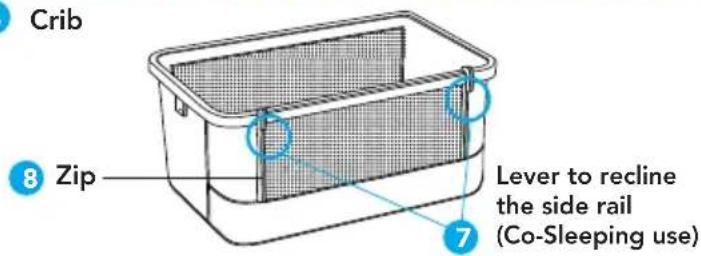
9 Crib bottom
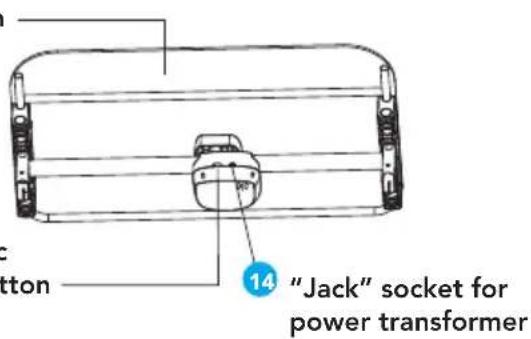
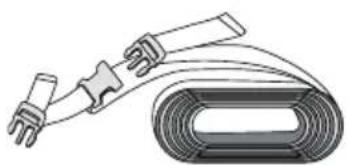
17 stening straps for co-sleeping use
ASSEMBLY
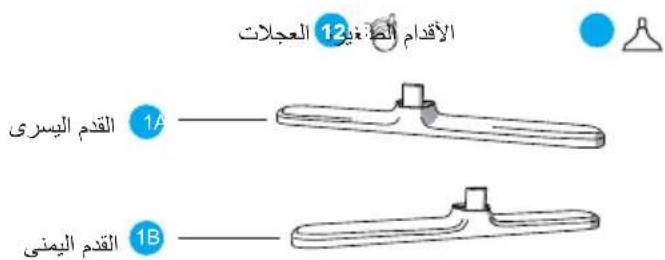
ASSEMBLING THE WHEELS (a) ON THE FEET (b) (fig.1a, fig.1b, fig.1c)
Assembling the wheels (a): Insert the wheels into the appropriate seats on the right and left legs, following the position and direction indicated by the arrows in the figure. Push the wheel firmly into its seat until you hear a click, which means that it has been assembled correctly.
Removing the wheel: Pull the wheel down firmly to remove it.
WHEEL BRAKE (fig.1a)
Engaging the brake: Press the lever as shown in the figure to engage the brake (LOCK).
Disengaging the brake: Lift the lever as shown in the figure to disengage the brake (UNLOCK).
Assembling the feet(b): Insert the feet into the appropriate seats on the right and left legs, following the position and direction indicated by the arrows in the figure. Push the foot firmly into its seat until you hear a click, which means that it has been assembled correctly.
Removing the foot: Pull the foot down firmly to remove it.
NOTE: the crib can only be used with 4 wheels or 4 feet, different configurations are not allowed (fig.1c).
ASSEMBLING THE BASKET (fig.2)
Insert the basket frame into its seats as shown in the figure.
ASSEMBLING THE LEGS (fig.3)
Installing the left leg (A) – Align and insert the lower end of the left leg into its seat on the left foot (ref A-A) as shown in the figure. Press down until it is locked in place. An audible click will indicate proper locking.
Installing the right leg – Align and insert the lower end of the right leg into its seat on the right foot as shown in the figure. Press down until it is locked in place. An audible click will indicate proper locking.
ASSEMBLING THE BOTTOM OF THE CRIB (fig.4a, fig.4b, fig.5)
Undo the press-studs and remove the bottom from the upholstery (see points 1, 2 and 3).
Align and insert the support into its seat on the leg, press the metal pin to complete assembly. An audible click will indicate proper locking. The components will be correctly assembled when the metal pin locks into the hole on the support. Repeat the operation on the opposite side.
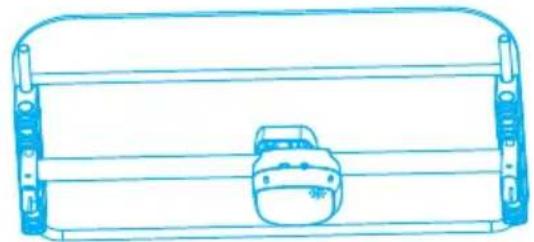
ASSEMBLING THE CO-SLEEPING PROTECTION BARRIER (fig. 6)
Align the ends of the protection barrier in their seats as shown in the figure. Push until the barrier is locked.
ASSEMBLING THE CRIB FRAME (fig.7, fig.8)
Align and insert the lower end of the left crib support into its seat on the left leg, as shown in the figure. Press down until it is locked in place. An audible click will indicate proper locking. The components will be correctly assembled when the metal pin locks into the hole on the support. Repeat the operation on the opposite side.
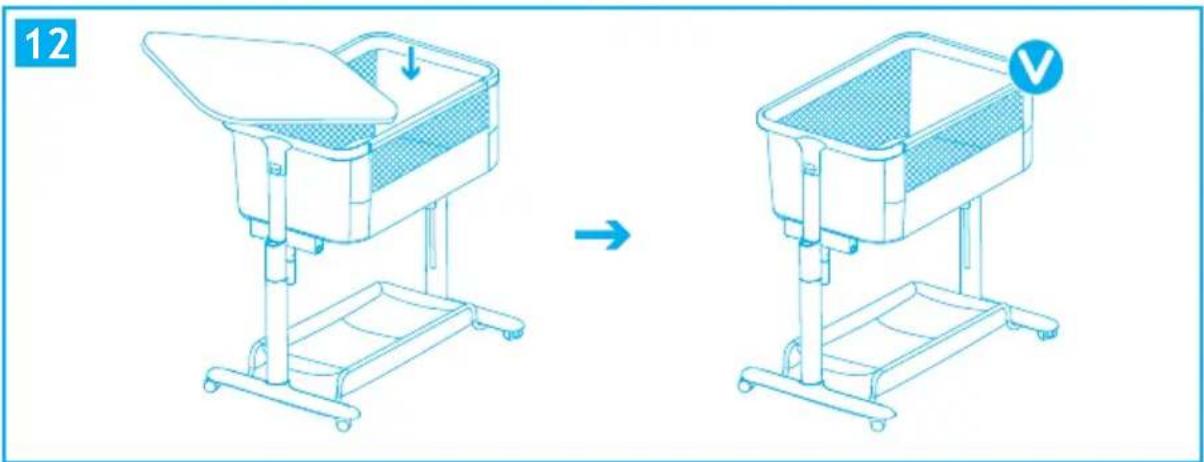
FITTING THE UPHOLSTERY (fig. 9, fig. 10, fig. 11, fig. 12)
Remove the mattress from the bottom.
Fit the front side of the upholstery on the protective bar as shown in the figure.
Position the upholstery correctly around the perimeter of the bottom and fasten the edges with the press-studs on the underside of the bottom, as shown in the figure.
Place the mattress on the bottom of the crib facing upwards.
ASSEMBLY
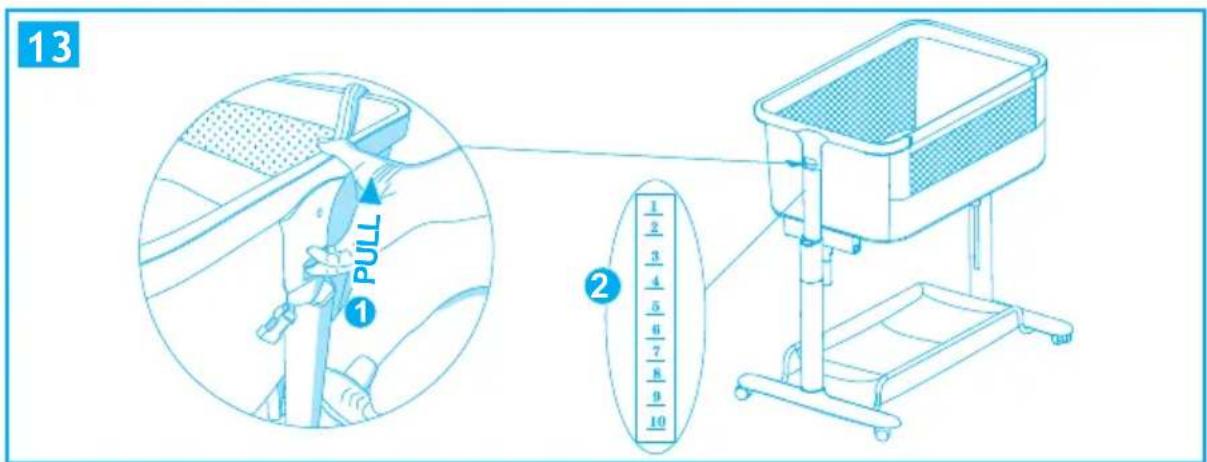
ADJUSTING THE CRIB HEIGHT (fig.13, fig. 14)
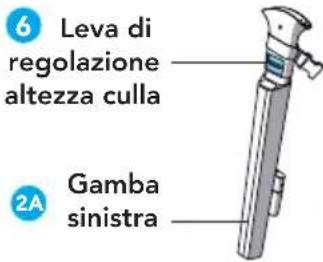
It is possible to adjust the height of the crib in different positions. To adjust the height, press the adjustment lever (right and left) and lift or lower the crib to the desired position (fig. XX), then release the lever. Make sure that the crib locks into the chosen position correctly.
The base of the crib can be tilted slightly (fig. XX).
CAUTION: the crib can be tilted with a difference of no more than 2 positions between one leg and the other (e.g. right leg in position 10 and left leg in position 8), anti-reflux mode.
CAUTION: the baby's head must always be placed on the side that is most raised (fig. XX).
CO-SLEEPING MODE (ATTACHING THE CRIB TO THE PARENTS' BED)
CAUTION – It is possible to use co-sleeping mode with bed types that meet the following requirements:
- The drop-side rail of the crib must always be next to the mattress of the parents' bed. The mattress of the parents' bed must be aligned with, or higher than, the height of the drop-side rail of the crib. (fig. 29)
- The crib must be securely attached to the parents' bed frame or to the mattress support (bed base or slats).
CAUTION – Make sure that the crib in co-sleeping mode does not interfere with the parents' bed.
CAUTION – Use the crib with the side rail lowered only in co-sleeping mode.
CAUTION - When the crib is used in co-sleeping mode, the legs must be adjusted to the same height, with the bottom horizontal.
CAUTION – If the crib is used with wheels, they must be braked in co-sleeping mode.
CAUTION – NEVER USE the "Rocking" swing movement when the crib is in "co-Sleeping" mode (attached to the bed).
CAUTION – When the crib is used in "Co-Sleeping" mode (attached to the bed), it must always be attached to the long side of the bed. DO NOT install the crib at the foot or head of the bed.
CAUTION – Whenever the crib side rail is lowered, check that the position relating to the parents' mattress is unchanged from the previous paragraphs.
Place the crib next to the parents' bed.
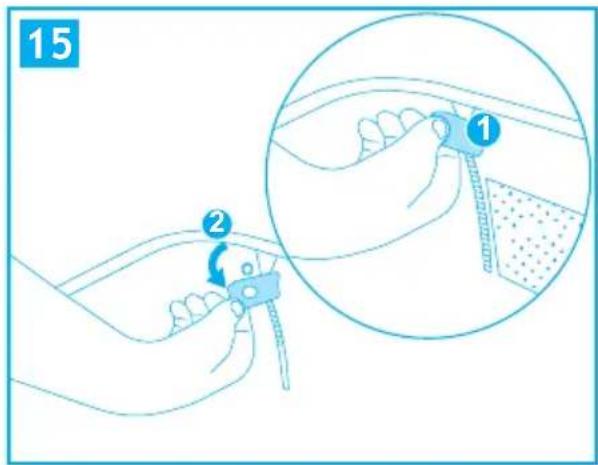
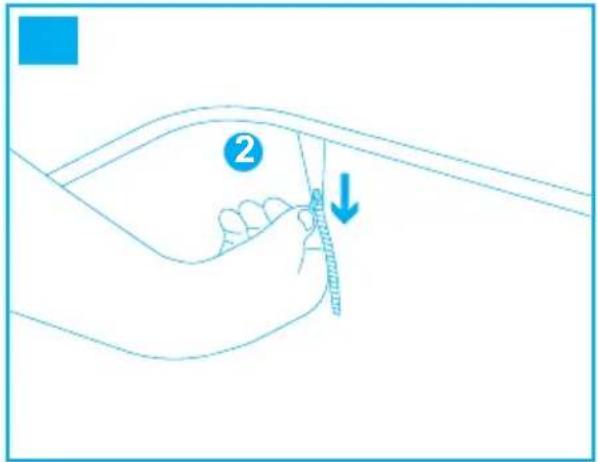
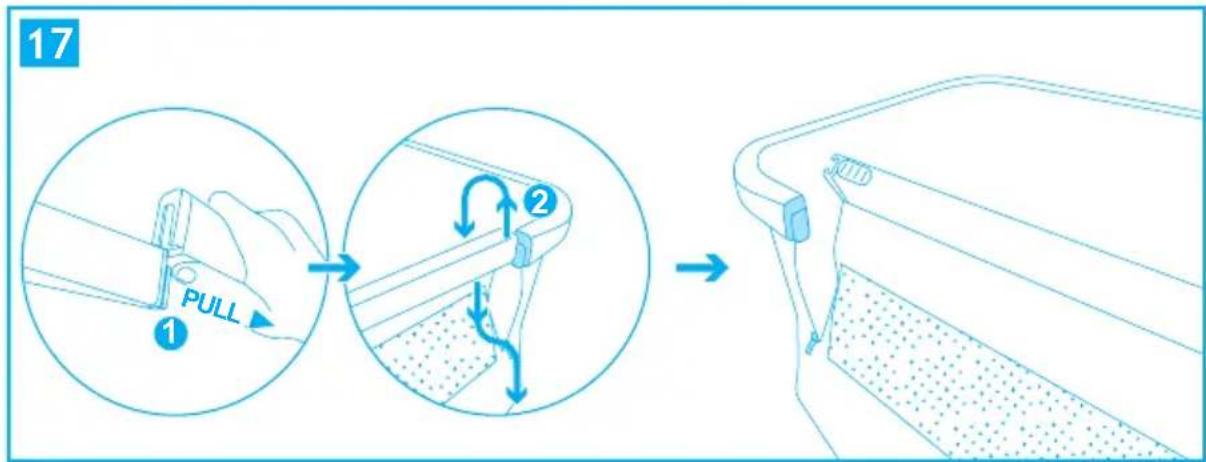
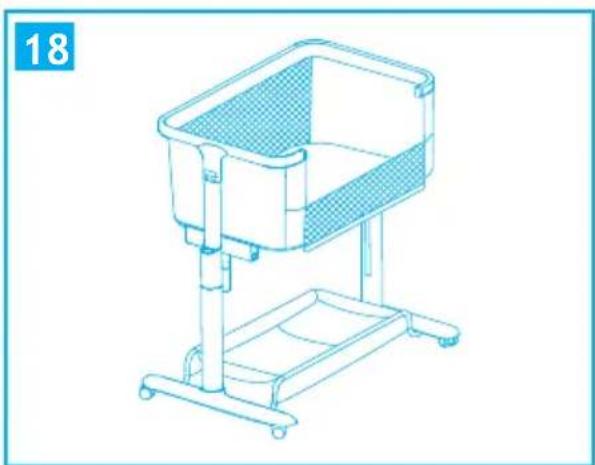
RECLINING THE SIDE RAIL (fig.15, fig. 16, fig. 17, fig.18):
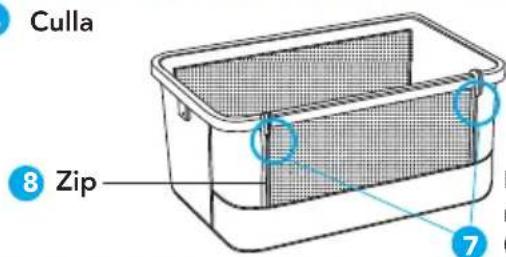
- Release the edge with the press-stud on the right and left side of the side rail;
- Pull the zip down completely, on the right and left side of the side rail;
- Pull the right and left closing lever on the lower side of the side rail inwards and, while keeping them activated, lift the side rail up and fold it towards the inside of the crib.
- Place the folded side rail on the outside of the crib.
- To lift the side rail, repeat steps 1, 2, 3, 4, 5 in reverse order. Be sure to have pulled the zip up completely on the right and left side of the side rail.
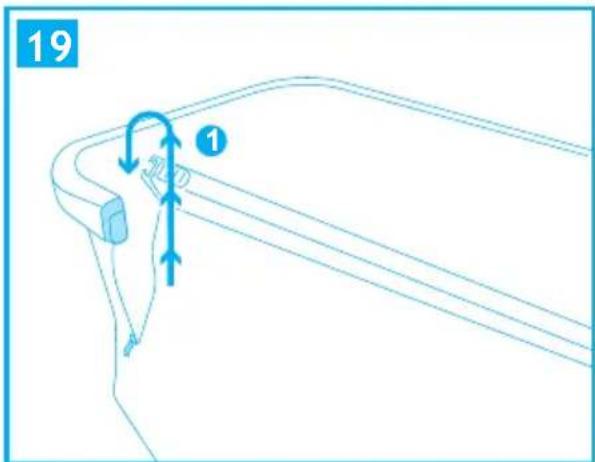
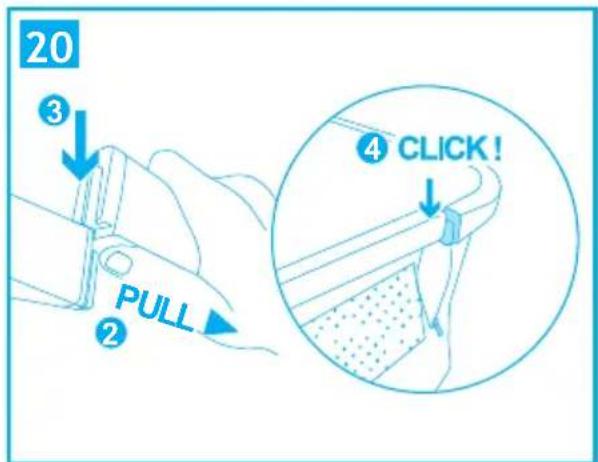
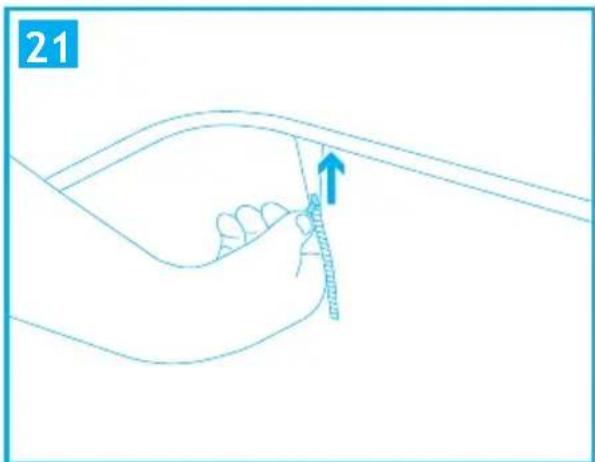
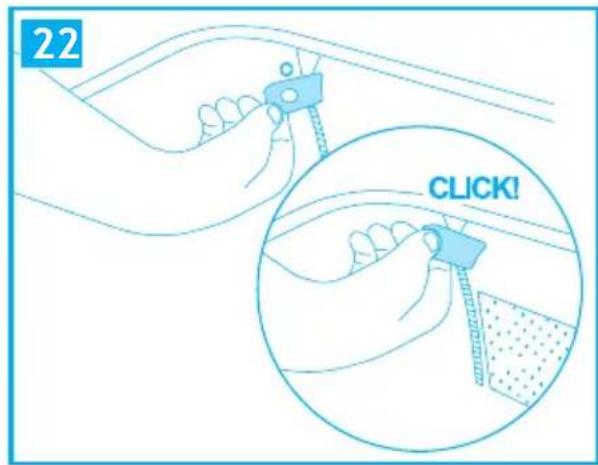
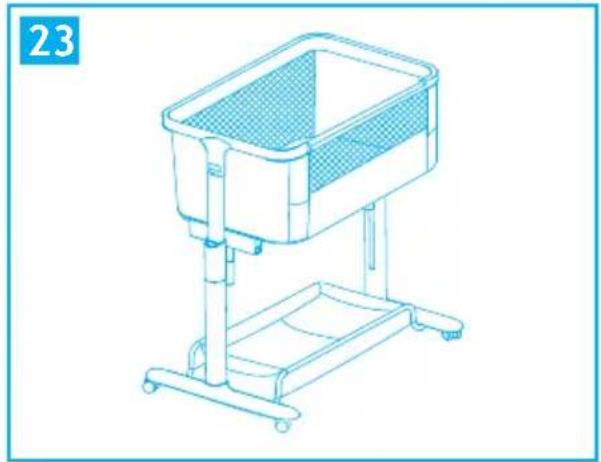
LIFTING THE SIDE RAIL (fig.19, fig. 20, fig. 21, fig. 22, fig. 23):
- Lift the side rail from the inside of the crib and fold it outwards, then hook the right and left ends of the side rail in their seats, as shown in the figure. An audible click will indicate proper hooking.
- Pull the right and left zip up completely;
- Attach the edge with the press-stud on the right and left side of the side rail.
Place the crib next to the parents' bed, making sure that the reclined side rail is next to the mattress and that the mattress of the parents' bed is aligned with or higher than the height of the reclined side rail. If necessary, adjust the crib to the required height; refer to the paragraph "ADJUSTING THE CRIB HEIGHT".
USE
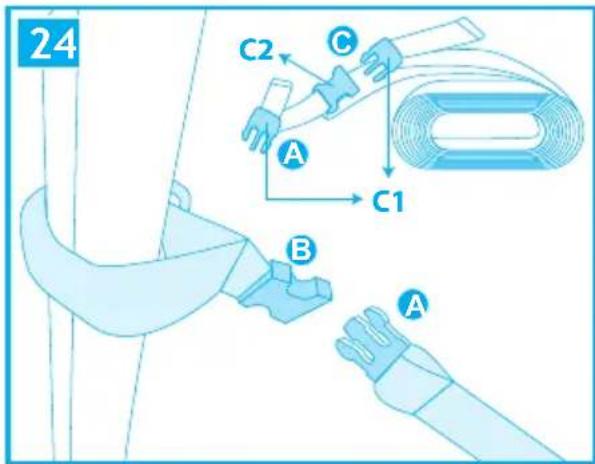
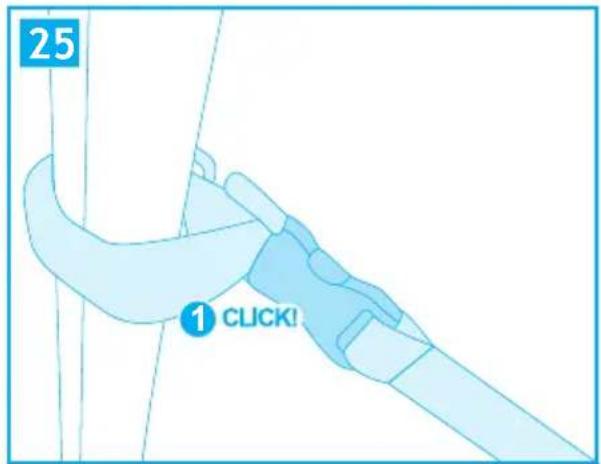
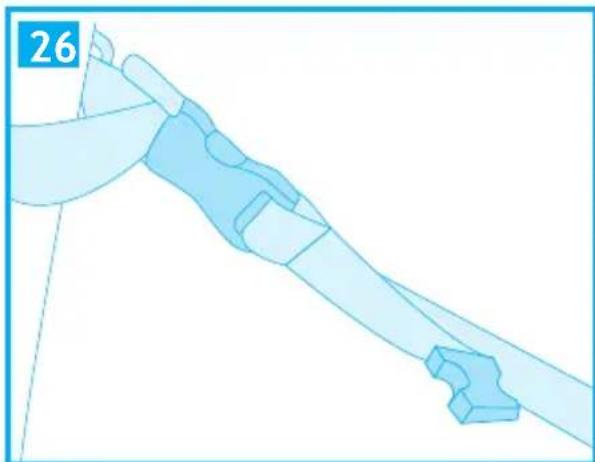
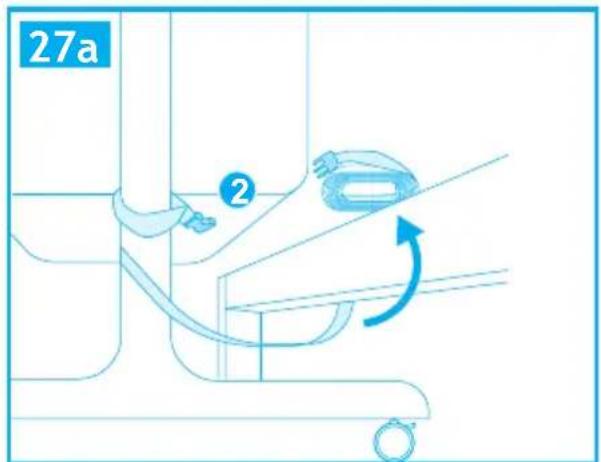
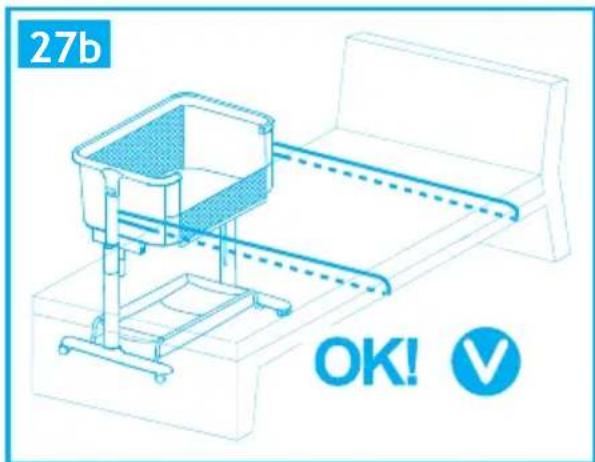
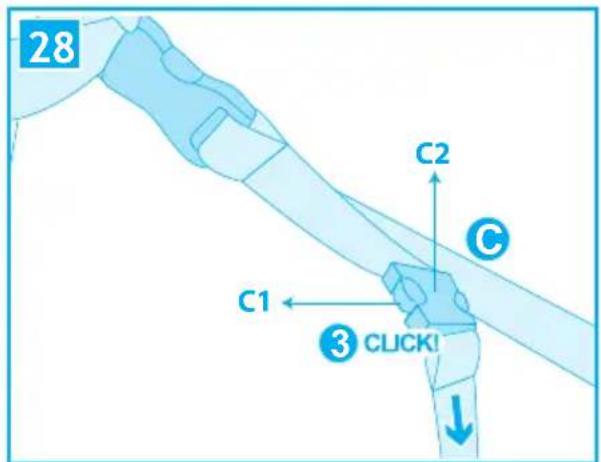
To attach the crib to the bed, use the safety straps supplied (fig. 24, fig. 25, fig. 26, fig. 27, fig. 28) and:
- Attach buckle A to buckle B,
• Pass the free end of the safety strap around the mattress bed base or slatted frame, as shown in the figure, and attach buckle C1 to buckle C2. Repeat the operation with the second safety strap too. - Tension both straps to secure the crib firmly to the parents' bed.
- Wrap the free end of the strap and secure it with the special elastic band.
- Be sure to have performed the required operations correctly.
- If the crib is used with wheels, engage the brake on all wheels.
SWING FUNCTION AND MUSIC
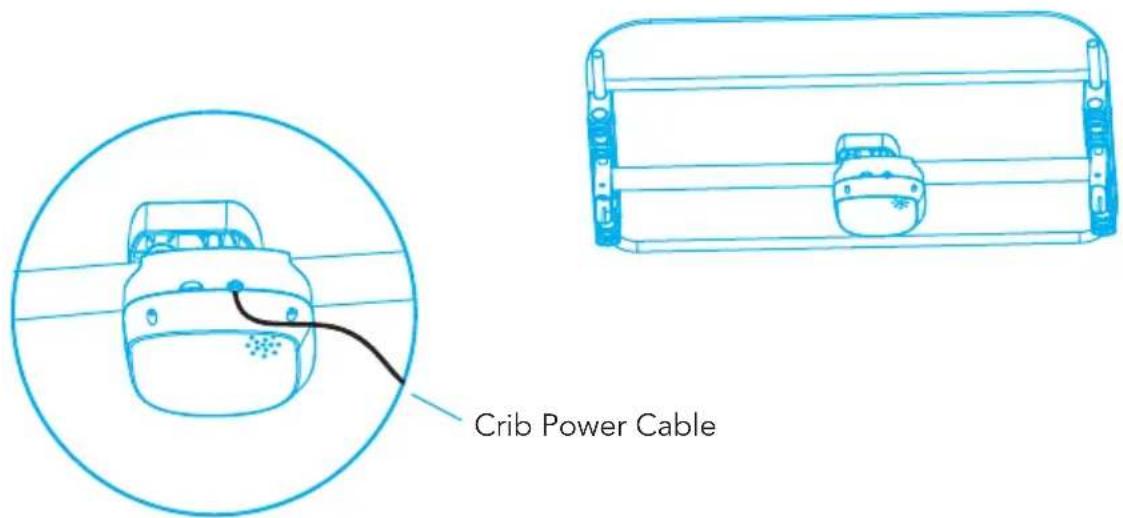
Connect the transformer connector supplied to the jack socket at the front of the crib frame on the underside of the bottom. Plug the transformer into the electrical outlet.
IMPORTANT: Make sure that the AC/DC transformer power cable is completely out of reach of the baby. Secure the transformer cable on the frame using a cable tie or fastening device.
CONTROL PANEL FUNCTIONS
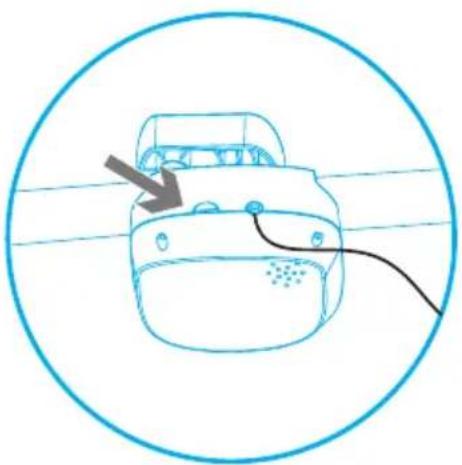
To activate the swing function (speed 1) and music, press the POWER key (ON/OFF).
The product features 8 sounds including 5 melodies and 3 nature sounds that are played in automatic sequence.
To deactivate the swing function and music, press the POWER key (ON/OFF).
REMOTE CONTROL
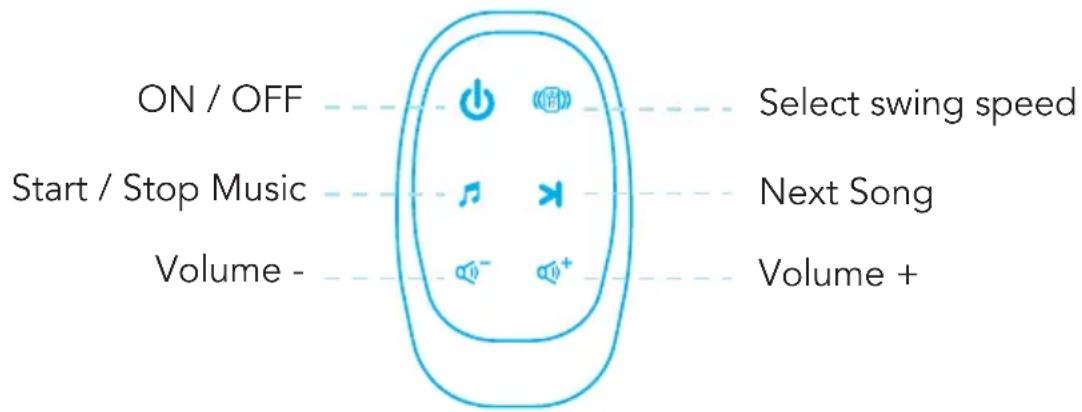
POWER KEY:
Press the power key to activate the swing function (speed 1) and switch the music on. The 8 melodies available are played in automatic sequence.
Press the power key to deactivate the swing function (speed 1) and switch the music off. The 8 melodies available are played in automatic sequence.
《图》 SWING KEY
Press the swing key once to activate swing speed 1, press a second time to activate speed 2, press a third time to switch off the swing function.
Note: if swing speed 1 was started by pressing the POWER key, repeatedly pressing the SWING key will start speed 2 and switch off the swing function.
MELODY KEY
Pressing the melody key once activates the melody, the other melodies are played in automatic sequence.
NEXT MELODY KEY
Pressing the next melody key plays the next melody. There are 5 available melodies + 3 nature sounds.
VOLUME KEY +
Key to turn the volume up.
VOLUME KEY -
Key to turn the volume down.
FORMAL GUARANTEE
The contents of this document as stated below will come into effect as from 01.01.2005 and replace, on every account and in full, any previous message referring to the guarantee provided by Foppa Pedretti S.p.A.
FORMAL GUARANTEE
Foppa Pedretti S.p.A. the head office of which is located at n. 11 Via Volta, Grumello del Monte (Italy), guarantees directly to the Consumer that this brand new product is free of faults with regard to the materials, design and manufacture and that it complies with the characteristics as declared by the manufacturer.
This formal guarantee is valid in all Member Countries of the European Union and it neither excludes nor limits the Consumer's rights in accordance with mandatory measures provided for by the law with regard to the Retailer of the Product.
To take advantage of this formal guarantee, the Consumer must return the faulty product to the Retailer, presenting to the same the proof of purchase of the Product which must clearly show the Retailer's address, the date of purchase of the Product with the Retailer's stamp and signature and an indication of the Product itself or, alternatively, the receipt which must not have been altered and which must clearly show the same information as that referred to above.
The formal guarantee is valid for twelve (12) months from the date of purchase of the Product. During this period, Foppa Pedretti S.p.A. will repair or replace the faulty product, at its own discretion. The formal guarantee is granted to the end buyer of the Product (Consumer) and it neither excludes nor limits the mandatory rights of the Consumer as provided for by the law and/or the rights that the Consumer may have with regard to the Dealer/Retailer of the Product.
EXCLUSIONS TO THE FORMAL GUARANTEE.
The formal guarantee is excluded in the case of damage caused to the Product for the following reasons: if the product is used in a way that does not comply with the information contained in the use and assembly instruction sheet, if the product is knocked or dropped, if the Product is exposed to humidity or extreme heat or environmental conditions, or to sudden changes in the same, corrosion, oxidization, unauthorized alterations or repairs to the Product, repairs using unauthorised spare parts, improper use, improper maintenance or failure to carry out the same, improper maintenance compared to the information given on the use and assembly instruction sheet, incorrect assembly, accidents, damage caused by food or drink, damage caused by chemical products, cases of force majeure.
In any case, Foppa Pedretti S.p.A. declines all responsibility for damage caused to persons or to property, other than the Product, when such damage is caused by a failure to comply with the instructions/advice/warnings cont a ined in the manua I or, alternatively, in the use and assembly instruction sheet provided with each Product for the owner/user. (Purely as an example, in the case of a cot: "Check your baby constantly.
Make sure that the sheets and blankets do not cover the baby's head...").
Furthermore, Foppa Pedretti S.p.A. declines all responsibility for damage to persons and to property when the breakage of its products is due to a deterioration in the components of the Product that are subject to wear. All the components of the Product made of plastic are considered to be components subject to wear.
MISES EN GARDE
IMPORTANT – A LIRE ATTENTIVEMENT ET A CONSERVER POUR REFERENCE ULTERIEURE.
MODE CO-SLEEPING (FIXATION AU LIT)
INFORMATIONS SUR LES PILES:
16 Transformateur
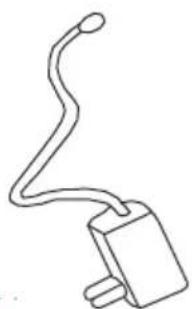
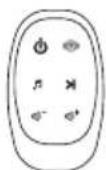
15 Télécommande
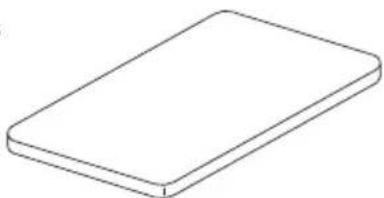
5 Matelas
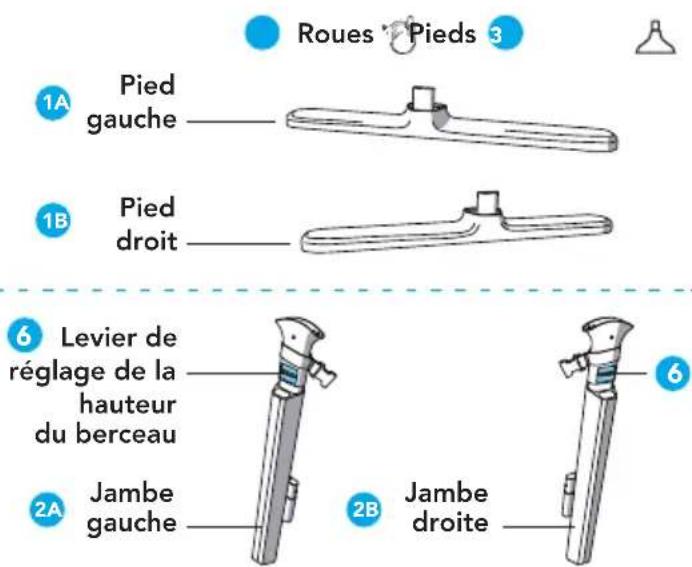
ASSEMBLÉE
MONTAGE DES ROUES (a) ET DES CAPUCHONS (b) (fig.1a, fig.1b, fig.1c)
MODE CO-SLEEPING (FIXATION AU LIT DES PARENTS)
UTILISATION
TÉLÉCOMMANDE :
TOUCHE POWER
EXCLUSIONS DE LA GARANTIE CONVENTIONNELLE.
16 Transformer
15 Fernbedienung
5 Matratze
12
Räder

13
Fernbedienung

4 Wiege
MONTAGE
MONTAGE DER RÄDER (a) DER FÜBCHEN (b) (Abb.1a, Abb.1b, Abb.1c)
FERNBEDIENUNG:
TASTE POWER
![graph TD A["Process Step"] --> B["Container"] B --> C["Coin"]](/content/2026/04/673841/images/f8e47d20074065705b2091902a6a1d841df453a290c1571ccdec80012942b035.jpg)
16 Transformador
15 Control remoto
5 Colchón
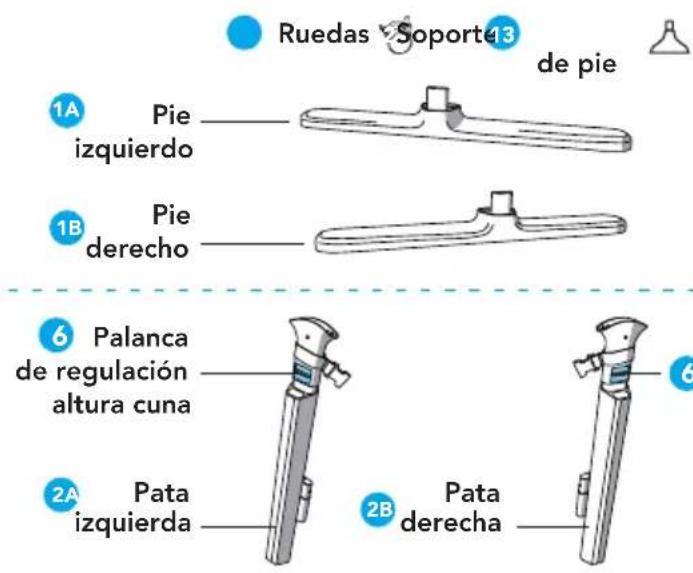
8 Cremallera
Palanca para reclinar la barandilla (uso co-Sleeping)
9 Fondo cuna
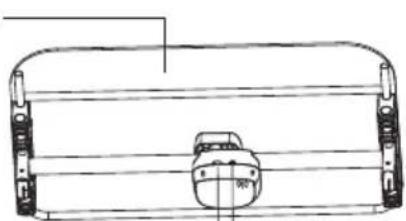
MONTAJE
MONTAJE DE LAS RUEDAS (a) DE LOS SOPORTES (b) (fig.1a, fig.1b, fig.1c)
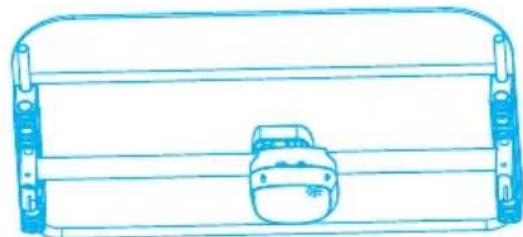
USO
CONTROL REMOTO:
TECLA POWER
ADVERTÊNCIAS SOBRE AS BATERIAS
16 Transformador
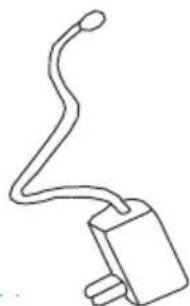
15 Controlo remoto
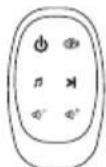
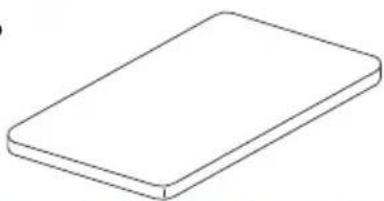
5 Colchão
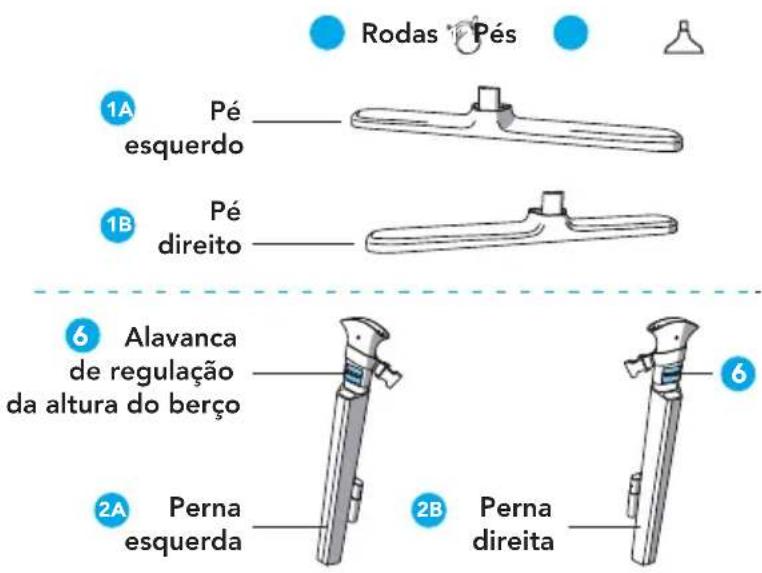
4 Berço
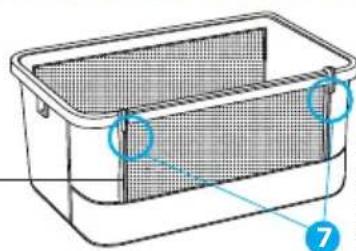
9 Fundo do berço
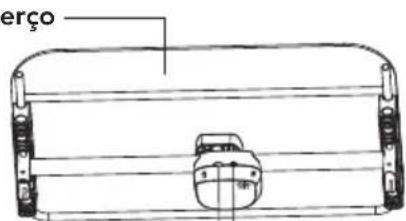
MONTAGEM
MONTAGEM DAS RODAS (a) DOS PÉS (b) (fig.1a, fig.1b, fig.1c)
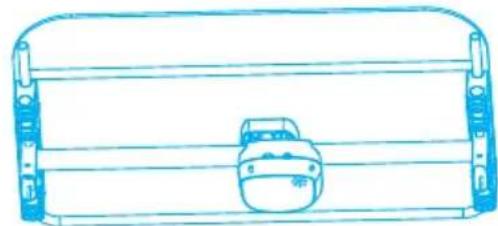
CONTROLO REMOTO:
TECLA POWER
16 Μετασχηματιστής
15 Τηλεχειριστήριο
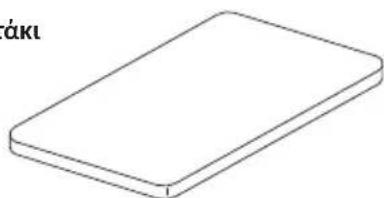
5 Στρωματάκι
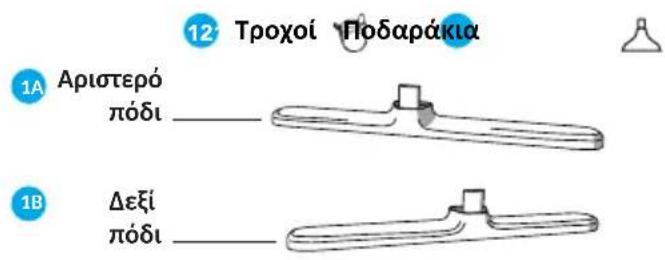
4 Koúvia
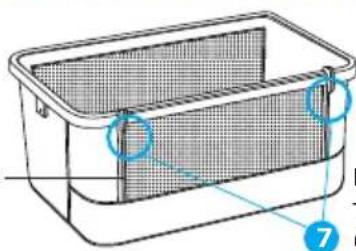
ΣΥΝΑΡΜΟΛΌΓΗΣΗ
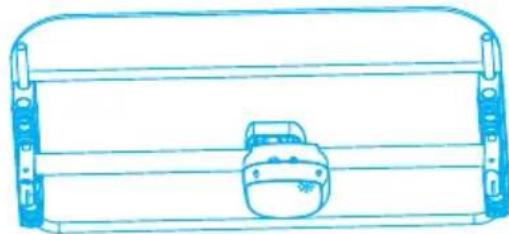
ΧΡΗΣΗ
THΛΕΧΕΙΡΙΣΤΗΡΙΟ:
ПАНКТРО POWER
16 Transformatorin
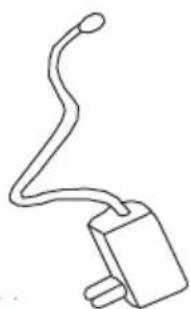
15 Telekomanda
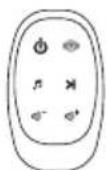
5 Dysheku
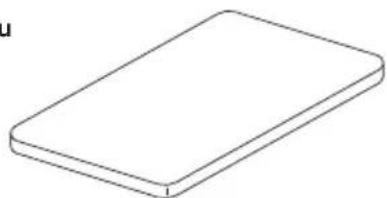

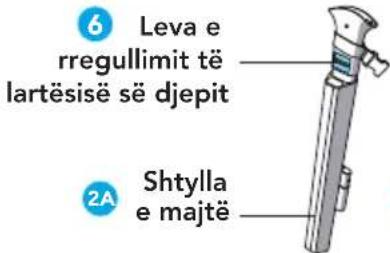
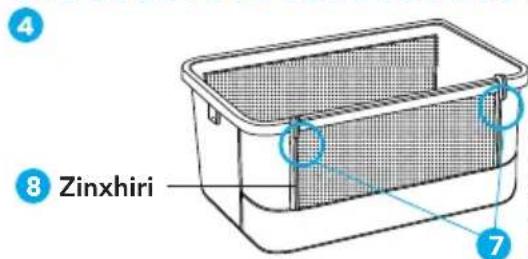
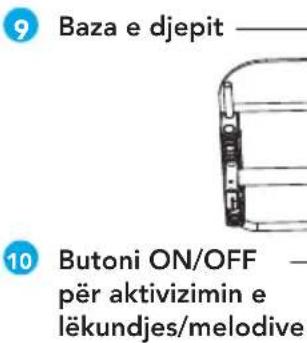
MONTIM
MONTIMI I RROTAVE (a) TË KËMBËZAVE (b) (fig.1a, fig.1b, fig.1c)
PËRDÖRIMI
TELEKOMANDA:
BUTONI "POWER"
المحول 16
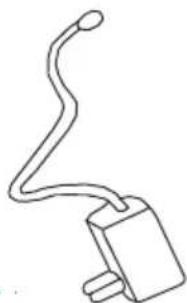
سلة حمل الأشياء 11
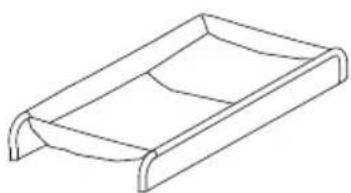
وظائق لوحة التحكم



- IMPORTANTE! LEGGERE ATTENTAMENTE E CONSERVARE PER RIFERIMENTI FUTURI
- MONTAGGIO
- MONTAGGIO DELLE RUOTE (A) DEI PIEDINI (B) (FIG.1A, FIG.1B, FIG.1C)
- USO
- TELECOMANDO
- TASTO POWER
- IMPORTANT! READ CAREFULLY AND KEEP FOR FUTURE REFERENCE
- WARNING
- CO-SLEEPING MODE (FIXED TO THE BED)
- MATTRESS WARNINGS (EN 16890:2017+A1:2021)
- MATTRESS MAINTENANCE
- SAFETY OF THE ELECTRICAL PARTS
- BATTERIES
- REPLACING THE BATTERIES
- INFORMATION ON THE BATTERIES
- PRECAUTIONS WITH THE BATTERIES
- CORRECT DISPOSAL OF THIS PRODUCT (WASTE ELECTRICAL & ELECTRONIC EQUIPMENT) (APPLICABLE IN THE EUROPEAN UNION AND OTHER EUROPEAN COUNTRIES WITH SEPARATE COLLECTION SYSTEMS)
- ASSEMBLY
- ASSEMBLING THE WHEELS (A) ON THE FEET (B) (FIG.1A, FIG.1B, FIG.1C)
- WHEEL BRAKE (FIG.1A)
- ASSEMBLING THE BASKET (FIG.2)
- ASSEMBLING THE LEGS (FIG.3)
- ASSEMBLING THE BOTTOM OF THE CRIB (FIG.4A, FIG.4B, FIG.5)
- ASSEMBLING THE CO-SLEEPING PROTECTION BARRIER (FIG. 6)
- ASSEMBLING THE CRIB FRAME (FIG.7, FIG.8)
- FITTING THE UPHOLSTERY (FIG. 9, FIG. 10, FIG. 11, FIG. 12)
- ADJUSTING THE CRIB HEIGHT (FIG.13, FIG. 14)
- CO-SLEEPING MODE (ATTACHING THE CRIB TO THE PARENTS' BED)
- RECLINING THE SIDE RAIL (FIG.15, FIG. 16, FIG. 17, FIG.18)
- LIFTING THE SIDE RAIL (FIG.19, FIG. 20, FIG. 21, FIG. 22, FIG. 23)
- USE
- SWING FUNCTION AND MUSIC
- CONTROL PANEL FUNCTIONS
- REMOTE CONTROL
- POWER KEY
- 《图》 SWING KEY
- MELODY KEY
- NEXT MELODY KEY
- VOLUME KEY
- FORMAL GUARANTEE
- EXCLUSIONS TO THE FORMAL GUARANTEE
- MISES EN GARDE
- IMPORTANT – A LIRE ATTENTIVEMENT ET A CONSERVER POUR REFERENCE ULTERIEURE
- MODE CO-SLEEPING (FIXATION AU LIT)
- INFORMATIONS SUR LES PILES
- ASSEMBLÉE
- MONTAGE DES ROUES (A) ET DES CAPUCHONS (B) (FIG.1A, FIG.1B, FIG.1C)
- MODE CO-SLEEPING (FIXATION AU LIT DES PARENTS)
- UTILISATION
- TÉLÉCOMMANDE
- TOUCHE POWER
- EXCLUSIONS DE LA GARANTIE CONVENTIONNELLE
- MONTAGE
- MONTAGE DER RÄDER (A) DER FÜBCHEN (B) (ABB.1A, ABB.1B, ABB.1C)
- FERNBEDIENUNG
- TASTE POWER
- MONTAJE
- MONTAJE DE LAS RUEDAS (A) DE LOS SOPORTES (B) (FIG.1A, FIG.1B, FIG.1C)
- CONTROL REMOTO
- TECLA POWER
- ADVERTÊNCIAS SOBRE AS BATERIAS
- MONTAGEM
- MONTAGEM DAS RODAS (A) DOS PÉS (B) (FIG.1A, FIG.1B, FIG.1C)
- CONTROLO REMOTO
- ΣΥΝΑΡΜΟΛΌΓΗΣΗ
- ΧΡΗΣΗ
- THΛΕΧΕΙΡΙΣΤΗΡΙΟ
- ПАНКТРО POWER
- MONTIM
- MONTIMI I RROTAVE (A) TË KËMBËZAVE (B) (FIG.1A, FIG.1B, FIG.1C)
- PËRDÖRIMI
- TELEKOMANDA
- BUTONI "POWER
Brand : Foppapedretti
Model : Dream&Swing
Category : Crib