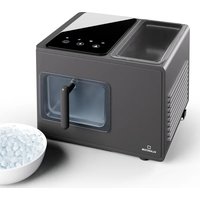
Glacial Pro Nugget - Ice Maker Klarstein - Free user manual and instructions
Find the device manual for free Glacial Pro Nugget Klarstein in PDF.


User questions about Glacial Pro Nugget Klarstein
0 question about this device. Answer the ones you know or ask your own.
Ask a new question about this device
Download the instructions for your Ice Maker in PDF format for free! Find your manual Glacial Pro Nugget - Klarstein and take your electronic device back in hand. On this page are published all the documents necessary for the use of your device. Glacial Pro Nugget by Klarstein.
USER MANUAL Glacial Pro Nugget Klarstein
area
| Category | Value | | -------- | ----- | | 1 | 100 | | 2 | 100 | | 3 | 100 | | 4 | 100 | | 5 | 100 | | 6 | 100 | | 7 | 100 | | 8 | 100 | | 9 | 100 | | 10 | 100 | | 11 | 100 | | 12 | 100 | | 13 | 100 | | 14 | 100 | | 15 | 100 | | 16 | 100 | | 17 | 100 | | 18 | 100 | | 19 | 100 | | 20 | 100 | | 21 | 100 | | 22 | 100 | | 23 | 100 | | 24 | 100 | | 25 | 100 | | 26 | 100 | | 27 | 100 | | 28 | 100 | | 29 | 100 | | 30 | 100 | | 31 | 100 | | 32 | 100 | | 33 | 100 | | 34 | 100 | | 35 | 100 | | 36 | 100 | | 37 | 100 | | 38 | 100 | | 39 | 100 | | 40 | 100 | | 41 | 100 | | 42 | 100 | | 43 | 100 | | 44 | 100 | | 45 | 100 | | 46 | 100 | | 47 | 100 | | 48 | 100 | | 49 | 100 | | 50 | 100 | | 51 | 100 | | 52 | 100 | | 53 | 100 | | 54 | 100 | | 55 | 100 | | 56 | 100 | | 57 | 100 | | 58 | 100 | | 59 | 100 | | 60 | 100 | | 61 | 100 | | 62 | 100 | | 63 | 100 | | 64 | 100 | | 65 | 100 | | 66 | 100 | | 67 | 100 | | 68 | 100 | | 69 | 100 | | 70 | 100 | | 71 | 100 | | 72 | 100 | | 73 | 100 | | 74 | 100 | | 75 | 100 | | 76 | 100 | | 77 | 100 | | 78 | 100 | | 79 | 100 | | 80 | 100 | | Note: The actual values are not provided in the code. I have used the label 'Value' as a placeholder for the value detection. You would need to run the code to get the actual values from the code list. Please note that the actual values would be the result of this example. You would need to run the code to get the actual values from the code list. You would need to run the code to get the actual values from the code list. You would need to run the code to get the actual values from the code list. You would need to run the code to get the actual values from the code list. You would need to run the code to get the actual values from the code list. You would need to run the code to get the actual values from the code list. You would need to run the code to get the actual values from you would need to run the code. You would need to run the code to get the actual values from you would need to run the code.text_image
QR code image containing encoded data, no visible human-readable textnatural_image
Symbol of a trash bin with crossed lines and a rectangular base (no text or labels)Berlin Brands Group UK Limited
PO Box 42
272 Kensington High Street
London, W8 6ND
United Kingdom
Dear customer,
Congratulations on your purchase. Please read the following instructions carefully and follow them to prevent potential damage. We accept no liability for damage caused by disregarding the instructions and improper use. Please scan the QR code to access the latest operating instructions and further information about the product.
text_image
QR code image containing encoded data, no visible human-readable textCONTENTS
Safety Instructions 16
Device overview 18
Control panel 19
Indicator lights and buttons 19
Operation 22
Cleaning and Care 22
Disposal Considerations 24
Manufacturer & importer (UK) 24
TECHNICAL DATA
| Article number 10045770 | |
| Power supply 220-240 V ~ 50 Hz | |
| Power 145 W | |
| Daily ice production 16 kg / 24 h | |
| Ice holder capacity 1.4 kg | |
| Water tank capacity 2.1 L |
SAFETY INSTRUCTIONS
- Place the device on a level surface.
- Only use the unit indoors.
- Unplug the device when not in use.
- Never immerse the power cord or the plug in water or other liquids.
- Only use equipment that is expressly recommended for this device by the manufacturer.
- Do not place the device directly under a power socket.
- Do not let the power cord hang off the work surface so that children cannot pull on it.
- Do not overfill the unit, otherwise short circuits and electric shocks may occur.
- Make sure that the lid is always closed during operation.
- Do not pull the plug out of the socket by the cable; instead, hold it securely with your hand while unplugging it.
- Only use this device for its defined purpose. We accept no liability for damage caused by disregarding the instructions or improper use. Only use the device in the household.
- Do not connect the device to a timer or remote-controlled socket.
- Do not immerse the device in water.
- If the power cord is damaged, it must be replaced by the manufacturer, an authorised specialist company or a similarly qualified person.
- When disposing of the appliance, follow the local regulations for the disposal of appliances containing flammable gas.
- Do not store highly flammable or explosive substances in the unit.
- Only fill the device with drinking water.
- Children from the age of 8 years and mentally, sensory and physically impaired persons may only use the device if they have been informed in detail about the functions and safety precautions by a supervisor responsible for them beforehand and understand the associated risks.
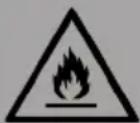
This unit contains the refrigerant Isobutane (R600a), a natural gas that has high environmental compatibility, but is flammable. Although it is flammable, it does not damage the ozone layer or increase the greenhouse effect. The use of this refrigerant results in a slightly higher noise level of the unit. In addition to the compressor noise, you can hear the flow of refrigerant. This is unavoidable and has no negative effect on the performance of the device. Be careful during transport to avoid damage to the refrigerant circuit. Refrigerant leaks can irritate the eyes.
WARNING
Fire hazard from improper disposal! Please observe the local regulations for the disposal of appliances containing flammable refrigerants and gases.
- Keep ventilation openings in the unit housing free of obstructions.
- Do not damage the refrigerant circuit.
- Do not use mechanical devices or other means to speed up the defrosting process or the ice-making process.
- Do not use any other type of electrical appliance inside the ice maker.
Special Notes
- When positioning the unit, take care that the power cord is not pinched or damaged.
- Make sure that there are no multiple sockets or power supply units on the back of the device.
To avoid contamination of food, please follow the instructions below:
- Regularly clean surfaces that may come into contact with food. Clean the water drain regularly.
- If the device has a water tank, clean it if the device has not been used for 48 hours. Rinse the tank if no water has been drawn for 5 days.

WARNING
When using, during maintenance and when disposing of the device, pay attention to the left symbol located on the back or on the compressor of the device. This symbol warns you of possible fires. There are flammable substances in the refrigerant lines and in the compressor. Keep the appliance away from sources of fire during use, maintenance and disposal.
DEVICE OVERVIEW
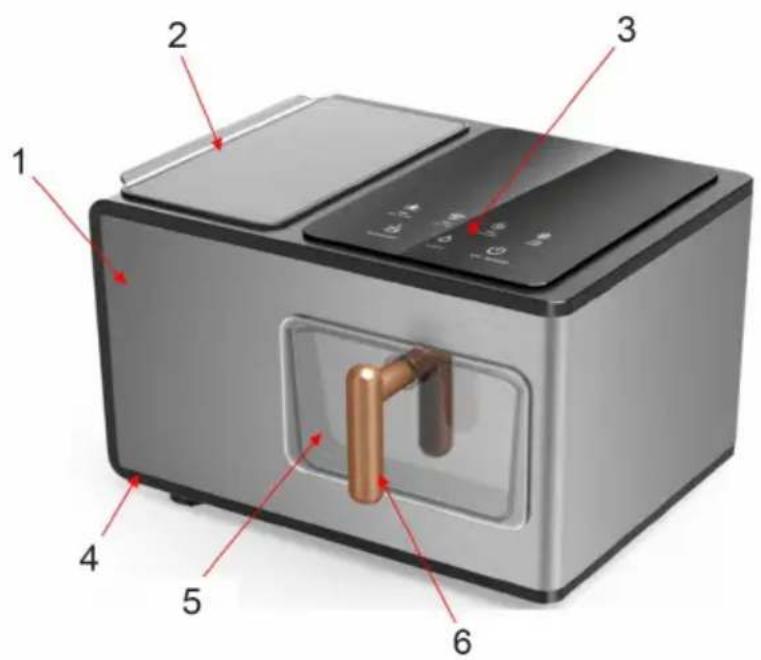 | |||
| 1 Metal cover 4 Base plate | |||
| 2 Fuel filler cap 5 Ice collection tray | |||
| 3 Control panel 6 Handle of ice collection tray | |||
Important information about this device:
- Do not tilt the device more than 45 degrees or turn the device upside down during transport. This can damage the compressor and the sealing system.
- Remove all packaging materials, carefully inspect the device and make sure that the device, power cord and plug are in good condition.
- The device should be placed on a level surface. To ensure adequate ventilation, the distance between the back of the ice cube maker and the wall should be at least 150 mm and it should be kept away from stoves, radiators or other heat sources.
• Make sure that the mains voltage matches the voltage marked on the device.
- Check regularly whether the filter screen of the water tank is clogged. After the unit has been working for 100 hours, it is recommended to clean the water tank filter screen with a fine brush to avoid clogging, which could lead to abnormal operation of the whole unit.
CONTROL PANEL
| 1 Water shortage indicator light 5 Cleaning button | ||
| 2 "Ice full" indicator light 6 Light button | ||
| 3 Cleaning indicator light 7 | Ice cube preparation and on/ off button | |
| 4 Cooling indicator light | ||
INDICATOR LIGHTS AND BUTTONS
• The low water and ice full indicator lights are red.
- The indicator lights and the buttons for cleaning, ice cube preparation, light and on/off light up white.
Setup and operation
- In standby mode, the on/off button for ice cube preparation will flash every second.
- In standby mode, press ICE MAKING (on/off) button once to enter ice cube preparation mode, then press ICE MAKING (on/off) button again to return to standby mode.
- In standby mode, press the CLEANING button once to activate cleaning mode. Then press and hold the CLEANING button for 3 seconds to return to standby or ice making mode.
Ice cube making mode
Note: In ice making mode, ICE MAKING (on/off) buttons and the ice cube preparation indicator light are always on.
- From ice making mode, you cannot go directly to cleaning mode by pressing the CLEANING button.
- In ice making mode, press the ICE MAKING (on/off) button once to return to standby mode.
- Then press the CLEANING button to activate cleaning mode.
Cleaning mode
In cleaning mode, the water flows from the upper water tank to the evaporator and back to the lower water tank (water circulation). After the water pump runs for 7 minutes, the cleaning mode will end and the standby mode will be activated.
- In cleaning mode, press and hold the CLEAN button for 3 seconds to enter standby mode. (In cleaning mode, pressing the ice making button (ON/OFF) does not allow you to enter ice making mode directly, it only returns to standby mode. By pressing the ice making button (ON/OFF) again, you can enter the ice making mode).
In case of water shortage
Note: In the event of a water shortage, the water shortage indicator light will remain on.
- In case of water shortage, press the ICE MAKING (on/off) button once to enter standby mode. Press the CLEANING button to enter cleaning mode. The device returns directly to standby mode when water is scarce. Only after refilling water again (both in the upper and in the lower water tank up to the maximum mark) can the CLEANING button be pressed again to activate the cleaning mode.
When the ice holder is full
Note: When the ice is full, the "Ice full" indicator light lights up continuously.
- When the ice holder is full, the compressor will stop working and an alarm will sound.
- Press the CLEANING button to enter cleaning mode. The device returns directly to standby mode when the ice container is full.
- The ice in the ice collection tray must first be removed before you can return to ice making mode, cleaning mode or standby mode.
Turning on the light
Press the light button once to keep the ice tray light on. Press the light button again to turn it off. The ice tray light can be turned on/off in any condition. After the light has been on for 10 minutes, it will turn off automatically.
Freeze alert
During the ice making process, if the low water, full ice, cleaning and ice making indicator lights are flashing at the same time and the CLEANING, LIGHT and ICE MAKING buttons are on at the same time, this is a freeze alarm. In this situation, the power supply must be interrupted immediately. Wait 4 hours for the ice in the evaporator to melt before turning it on again.
Cleaning function
Press the CLEANING button in standby mode to enter cleaning mode. The CLEANING indicator lamp lights up. In ice making mode, you cannot switch directly fro ice making mode to cleaning mode by pressing the CLEANING button. You need to press the ice making button (ON/OFF) to return to standby mode. Then press the CLEANING button and the cleaning indicator light will light up. In the cleaning process, the water pump continuously pumps water from the lower water tank to the upper water tank and the water from the upper water tank flows back to the lower water tank through the overflow opening. The device will rinse continuously for 7 minutes and then return to standby mode after cleaning. When the program detects that the lower water tank is low on water in the cleaning mode, the water shortage indicator light will turn on and the device will return to standby mode.
Error detection and troubleshooting
- ADD WATER: Under normal conditions, the ADD WATER indicator light is not lit. If the ADD WATER indicator light is red and constantly on, it means that the water tank does not have enough water. The device stops making ice. Fill the water tank with water (the float switch will float on top). The ADD WATER indicator light then goes out automatically and the device returns to normal operating status.
- ICE FULL: When the ice in the ice collection tray has reached maximum capacity, the ICE FULL indicator light will turn solid white and the machine will stop making ice. The ICE FULL indicator light then goes out automatically and the device returns to normal operating status.
- FREEZE ALERT: During the ice making process, if the low water, full ice, cleaning and ice making indicator lights are flashing at the same time and the CLEANING, LIGHT and ICE MAKING buttons are on at the same time, this is a freeze alarm. In this situation, the power supply must be interrupted immediately. Wait 4 hours for the ice in the evaporator to melt before turning it on again.
OPERATION
- Open the lid and fill the water tank with water. There is a maximum MAX scale in the water tank. The water should not exceed the MAX position. If the water exceeds the maximum value, the excess water will flow into the lower water tank.
- Connect the device to the mains. Press the ICE MAKING button once and the device will start making ice. When the ice in the ice collection tray has reached maximum capacity, the ICE FULL indicator light will turn solid white and the machine will stop making ice. The ICE FULL indicator light then goes out automatically and the device returns to normal operating status.
CLEANING AND CARE
- Clean the inner liner, ice tray, water tank and ice scoop regularly. When cleaning, unplug the power cord and remove the ice cubes. Use a diluted solution of water and vinegar to clean the inside and outside of the ice machine. Rinse thoroughly before use.
- Keep the ventilation openings in the housing of the device free and make sure that no water penetrates during cleaning.
-
Do not use mechanical devices or other means to speed up the defrosting process.
-
When the unit is restarted after a period of inactivity, it may not be able to pump up enough water. In this case, the ADD WATER indicator lights up. Simply press the ICE MAKING (on/off) button again to restart the device.
- To keep the ice clean, change the water in the water tank at least once a day. If you will not be using the device for a long time, drain the water and clean the device.
- If the compressor does not work due to lack of water, full ice or power failure, it will start with a delay of 3 minutes after being switched on again.
• Always fill with fresh water before starting ice production.
| Problem Potential cause Possible solution | ||
| The device is exceptionally loud and buzzes. | The power voltage is too low. Stop the | device and plug the device into an outlet that matches the specified voltage. |
| The water indicator comes on. | There is not enough water in the tank. | Top up with water. |
| The indicators on the control panel do not light up. | The fuse is broken or the device is switched off. | Replace the fuse or switch on the device. |
| The unit runs but is not making ice. | Problem with the coolant. Contact a | specialist company to have it checked and repaired. |
| The compressor is broken. | ||
| The fan motor is damaged. | ||
| All lights flash at the same time. | The connection of the motor is loose. | Contact a specialist company to have it checked and repaired. |
| The motor is jammed, the motor fails or is damaged. | ||
| The micro switch is damaged. | ||
| The ice comes up to the ice bar but the ice holder indicator does not come on. | The moving detection mechanism on the ice bar is broken. | Contact a specialist company to have it checked and repaired. |
| The display is broken. | ||
DISPOSAL CONSIDERATIONS
natural_image
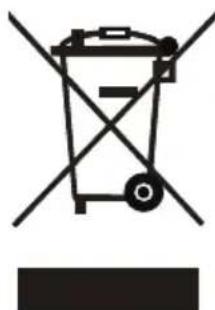
Symbol of a trash bin with crossed lines indicating no waste or discharge, accompanied by a solid black rectangle below (no text or labels)If there is a legal regulation in your country regarding the disposal of electrical and electronic equipment, this symbol on the product or on the packaging indicates that this product must not be disposed of with household waste. Instead, it must be taken to a collection point for the recycling of electrical and electronic equipment. By disposing of this product in accordance with the regulations, you protect the environment and the health of those around you from negative consequences. For information on recycling and disposal of this product, contact your local government or household waste disposal service.
MANUFACTURER & IMPORTER (UK)
Manufacturer:
Chal-Tec GmbH, Wallstrasse 16, 10179 Berlin, Germany.
Importer for Great Britain:
Berlin Brands Group UK Limited
PO Box 42
272 Kensington High Street
London, W8 6ND
United Kingdom
Cher client, chère cliente,
text_image
QR code image containing encoded data, no visible human-readable textSOMMAIRE
natural_image
Symbol of a trash bin crossed out by a diagonal line, with no text or labels present.Berlin Brands Group UK Ltd
PO Box 42
272 Kensington High Street
London, W8 6ND
United Kingdom
Gentile cliente,
text_image
QR code image containing encoded data, no visible human-readable textINDICE
text_image
Labeled diagram of a microwave oven with numbered parts and interior pipesnatural_image
Symbol of a trash bin crossed with a diagonal line, no text or labels presentPRODUTTORE E IMPORTATORE (UK)
Produttore:
Chal-Tec GmbH, Wallstraße 16, 10179 Berlino, Germania.
Berlin Brands Group UK Limited
PO Box 42
272 Kensington High Street
London, W8 6ND
United Kingdom
Estimado cliente:
text_image
QR code image containing encoded data, no visible human-readable textÍNDICE
natural_image
Symbol of a trash bin crossed out by a diagonal line, with no text or labels present.Berlin Brands Group UK Limited
PO Box 42
272 Kensington High Street
London, W8 6ND
Reino Unido

area
| Category | Value | | -------- | ----- | | 1 | 100 | | 2 | 100 | | 3 | 100 | | 4 | 100 | | 5 | 100 | | 6 | 100 | | 7 | 100 | | 8 | 100 | | 9 | 100 | | 10 | 100 | | 11 | 100 | | 12 | 100 | | 13 | 100 | | 14 | 100 | | 15 | 100 | | 16 | 100 | | 17 | 100 | | 18 | 100 | | 19 | 100 | | 20 | 100 | | 21 | 100 | | 22 | 100 | | 23 | 100 | | 24 | 100 | | 25 | 100 | | 26 | 100 | | 27 | 100 | | 28 | 100 | | 29 | 100 | | 30 | 100 | | 31 | 100 | | 32 | 100 | | 33 | 100 | | 34 | 100 | | 35 | 100 | | 36 | 100 | | 37 | 100 | | 38 | 100 | | 39 | 100 | | 40 | 100 | | 41 | 100 | | 42 | 100 | | 43 | 100 | | 44 | 100 | | 45 | 100 | | 46 | 100 | | 47 | 100 | | 48 | 100 | | 49 | 100 | | 50 | 100 | | 51 | 100 | | 52 | 100 | | 53 | 100 | | 54 | 100 | | 55 | 100 | | 56 | 100 | | 57 | 100 | | 58 | 100 | | 59 | 100 | | 60 | 100 | | 61 | 100 | | 62 | 100 | | 63 | 100 | | 64 | 100 | | 65 | 100 | | 66 | 100 | | 67 | 100 | | 68 | 100 | | 69 | 100 | | 70 | 100 | | 71 | 100 | | 72 | 100 | | 73 | 100 | | 74 | 100 | | 75 | 100 | | 76 | 100 | | 77 | 100 | | 78 | 100 | | 79 | 100 | | 80 | 100 | | Note: The actual values are not provided in the code. I have used the label 'Value' as a placeholder for the value detection. You would need to run the code to get the actual values from the code list. Please note that the actual values would be the result of this example. You would need to run the code to get the actual values from the code list. You would need to run the code to get the actual values from the code list. You would need to run the code to get the actual values from the code list. You would need to run the code to get the actual values from the code list. You would need to run the code to get the actual values from the code list. You would need to run the code to get the actual values from the code list. You would need to run the code to get the actual values from you would need to run the code. You would need to run the code to get the actual values from you would need to run the code.
