
U424AAG-E - Surveillance Camera Lorex - Free user manual and instructions
Find the device manual for free U424AAG-E Lorex in PDF.

| Brand | Lorex |
| Model | U424AAG-E |
| Product Type | 2K Wireless Surveillance Camera |
| Video Resolution | 2K (2560 x 1440) |
| Power Source | Built-in rechargeable battery, included AC adapter |
| Battery Life | Up to 2-4 hours (2 cells) or 3-5 hours (3 cells) for a full charge |
| Connectivity | Wi-Fi 2.4 GHz / 5 GHz |
| Night Vision | Passive infrared (PIR) sensor with mechanical IR filter |
| Audio | Built-in microphone (audio recording possible) |
| Motion Detection | Passive infrared (PIR) sensor |
| Mounting | Wall mount included, with security screws |
| Dimensions (H x W x D) | 121 mm x 131 mm x 73 mm |
| Weight | Approximately 0.6 kg |
| Package Contents | Camera, antenna, power adapter and cable, Allen key, drill bit, screwdriver, anchors (4), screws (4), security screws (2), mounting bracket |
| Compatible Apps | Lorex Cirrus (iOS and Android) |
| Certifications | FCC Part 15 |
| Warranty | See lorex.com/warranty |
Frequently Asked Questions - U424AAG-E Lorex
Use the included screwdriver.
User questions about U424AAG-E Lorex
0 question about this device. Answer the ones you know or ask your own.
Ask a new question about this device
Download the instructions for your Surveillance Camera in PDF format for free! Find your manual U424AAG-E - Lorex and take your electronic device back in hand. On this page are published all the documents necessary for the use of your device. U424AAG-E by Lorex.
USER MANUAL U424AAG-E Lorex
Thank you for your purchase!
How to get started with your 2K Wire-Free Camera
Safety Precautions
- Read this guide carefully and keep it for future reference.
- Follow all instructions for safe use and handling of the product.
- Operate the camera within the specified temperature, humidity and voltage and use manufacturer approved accessories.
- Do not disassemble the camera.
- Do not point the camera directly at the sun or a source of intense light.
- Periodic cleaning may be required. Use a damp cloth only. Do not use any harsh, chemical-based cleaners.
Disclaimers
- A regulated UL / CSA approved power supply is required for use with this camera (included). Use of a non-regulated, non-conforming power supply can damage this product and voids the warranty.
- Not intended for submersion in water. Installation in a sheltered location recommended.
- Audio recording without consent is illegal in certain jurisdictions. Lorex Corporation assumes no liability for use of its products that does not conform with local laws.
- This camera includes an Auto Mechanical IR Cut Filter. When the camera changes between Day/Night viewing modes, an audible clicking noise may be heard from the camera. This clicking is normal and indicates that the camera filter is working.
- Some channels on the 5GHz Wi-Fi band are restricted in Canada. This means certain Wi-Fi networks may not be available to connect to during setup.
Contents
Section
1 Package Contents
2 Overview
3 Before You Start
4 Setup
5 Pairing to the App
6 App Live View
7 Mounting

Package Contents
2K Wire-Free Security Camera (x1)
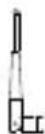
Camera Antenna (x1)
Re-chargeable Battery Pack (x1)
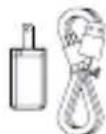
Charging Adapter & Cable (x1)
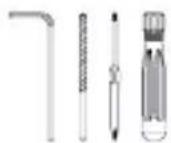
Allen Key (x1) Drill Bit (x1) Screwdriver (x1)
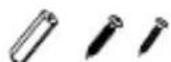
Anchors (x4) Screws (x4) Security Screws (x2)
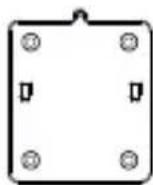
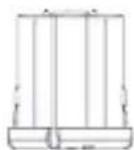
Mounting Bracket (x1)
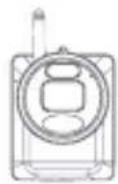
2 Overview
SIDEFRONT
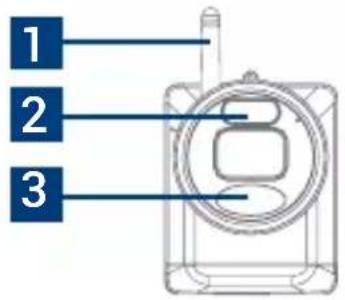
- Detachable antenna
- Warning light
- PIR sensor
- Locking screw
- Power port
- Battery charging indicator
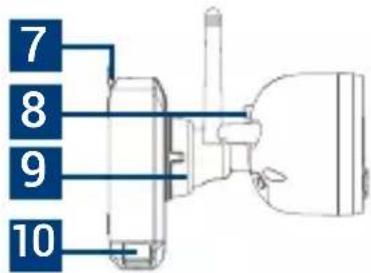
- Fastener
- Pairing button
- Adjustment ring
- Battery release tabs (x2)
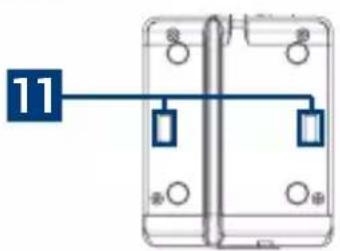
- Mounting plate slots (x2)
BOTTOM BACK MOUNTING PLATE
Dimensions
• Height: 4.8" (121mm)
- Width: 5.2" (131mm)
- Length: 2.9" (73mm)

Before You Start
The camera battery comes partially charged (due to safety regulations). Please, fully charge the battery before use and setup. You can charge the battery pack inside or outside of the camera.
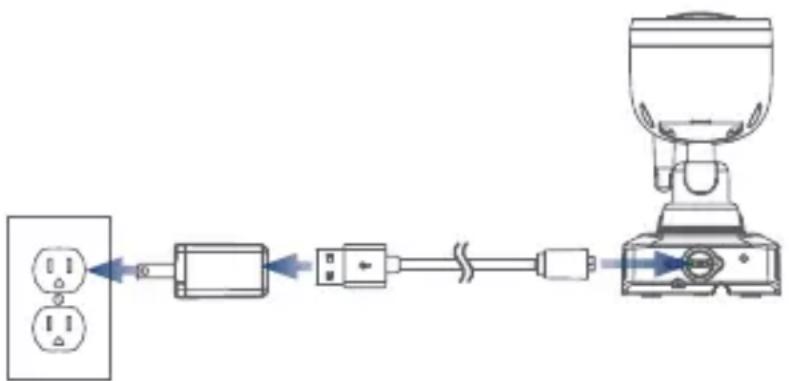
To charge the camera battery pack:
- Remove the protective film on the battery contacts and camera lens.
- Using the provided battery charging adapter and cable, connect the camera to a nearby outlet.
flowchart
graph LR
    A["Switch"] --> B["Plug"]
    B --> C["Switch"]
    C --> D["Motor"]
    D --> E["Cap"]
    style A fill:#f9f,stroke:#333
    style E fill:#bbf,stroke:#333
Camera Battery Charging Indicator Battery Charging Time
| (solid) | Fully charged |
| (solid) | Charging |
| 2-cell 2-4 hours | |
| 3-cell 3-5 hours |
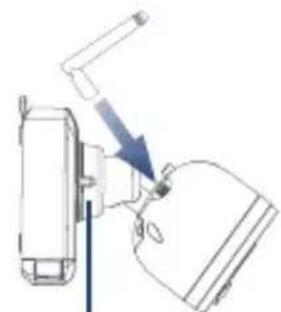
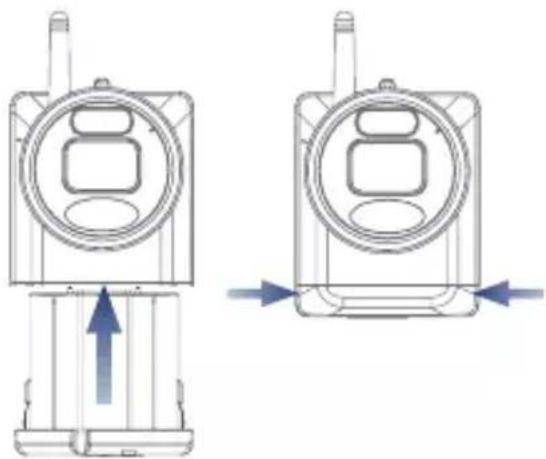
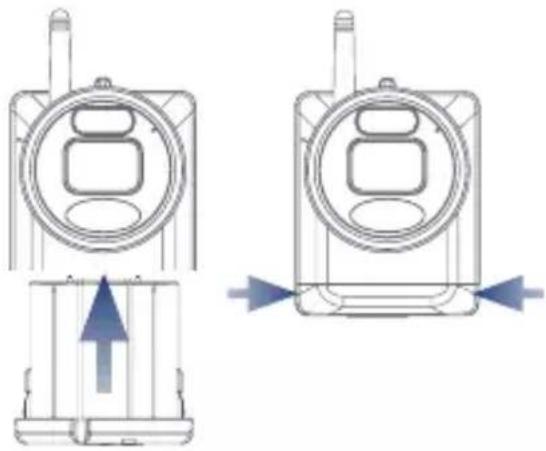
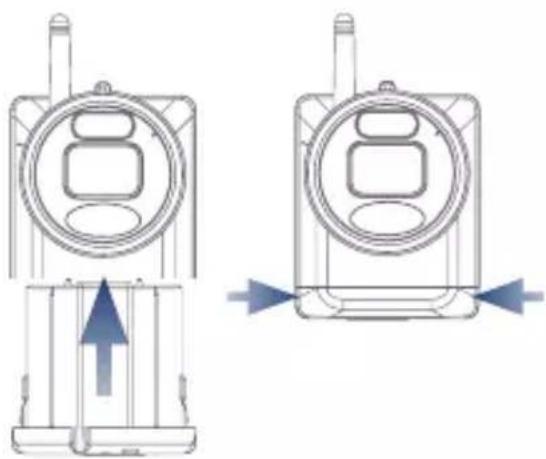
4 Setup
- Turn the adjustment ring counterclockwise to loosen and angle the camera.
- Screw in the antenna.
- Insert the battery pack into the bottom of the camera.
Note: You will hear a 'beep' when the power pack is properly inserted. If you do not hear this alert, remove the power pack by pushing in on the battery release tabs then re-insert.
natural_image
Diagram of a mechanical device with a blue arrow indicating direction (no text or symbols)Adjustment ring
natural_image
Technical line drawing of two views of a mobile phone device with directional arrows indicating movement (no text or symbols)
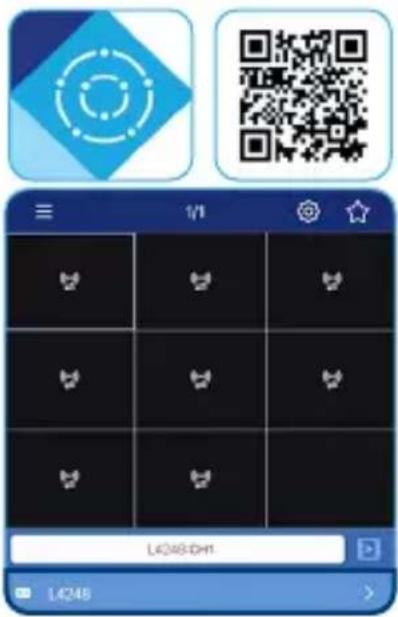
Pairing to the App
- Download the Lorex Cirrus app by scanning the QR code.
- Open the Lorex Cirrus app and sign in or create an account.
-
From the Home screen, select your recorder from the list of devices.
-
Tap any free channel marked with a 🎨 icon.
-
Tap Pair.
-
Press and hold the pairing button on the back of the camera until the red LED lights stop flashing, then release the pairing button. A 'Pairing success!' message will appear on screen. If you do not see this message, repeat steps 3-6.
Optional: Pairing on the Recorder
Click the icon in an empty channel screen. After you press and hold the pairing button on the back of your camera, you will have 30 seconds to pair the camera.

App Live View
![Device casting Settings Favorite group Name display Device name L4248:CH1[P2P] Search / playback video L4248 L222A8](/content/2026/04/667606/images/0de42375618814c3125a50cd33730d05a96423491d45e486d3de3c8463bf0dca.jpg)

Mounting
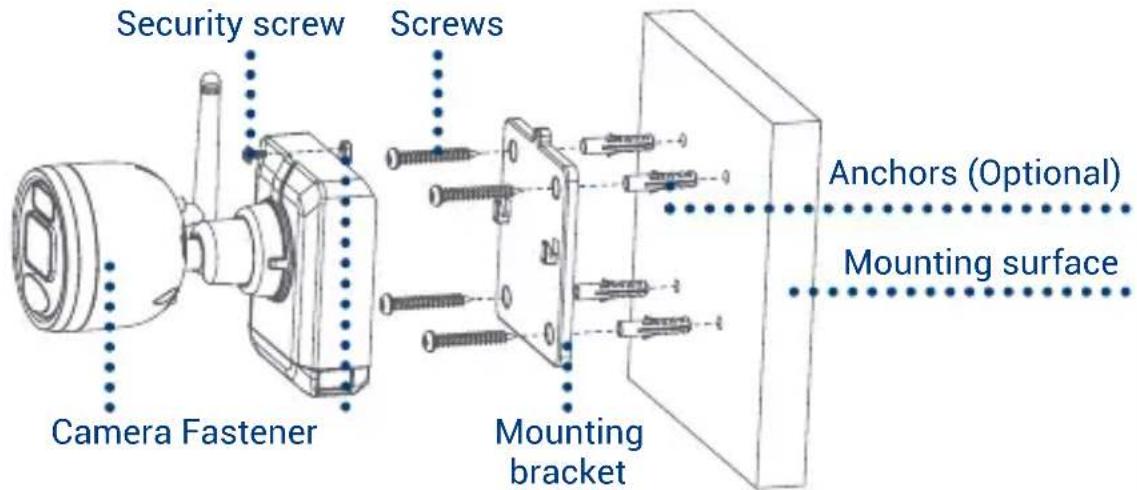
- Set the mounting bracket to the desired mounting position.
- Mark holes through the mounting bracket.
- Using the included drill bit, drill holes where marked.
-
Using the included screwdriver, secure the bracket with the provided mounting screws. Optional: If you are mounting the camera into drywall, use the provided drywall anchors.
-
Orient the camera fastener upwards, then align the camera's mounting plate slots to the tabs in the mounting bracket. Push in and slide down to secure in place.
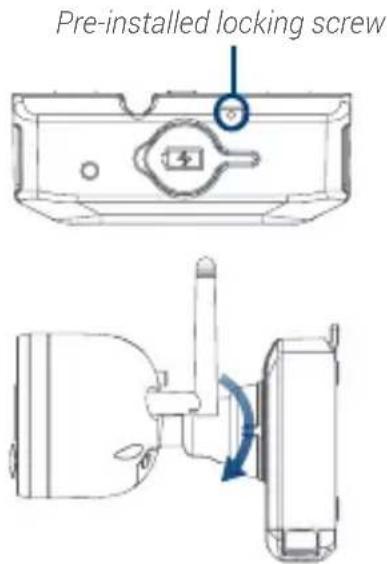
- Insert the security screw through the fastener on the top of the camera and mounting bracket, then tighten with the screwdriver.
- Tighten the pre-installed locking screw using the screwdriver.
Note: To remove the battery pack in the future, loosen the locking screw.
- Adjust the camera to the desired position. Tighten the adjustment ring clockwise.
Need help?
Visit help.lorex.com for up-to-date information and resources:
- Download product guides
- Watch how-to-videos
• Find related troubleshooting tips & FAQs
Register your product
Please see our full Terms of Service and Limited Hardware Warranty Policy at lorex.com/warranty.

This device complies with part 15 of the FCC Rules. Operation is subject to the following two conditions: (1) This device may not cause harmful interference, and (2) This device must accept any interference received, including interference that may cause undesired operation.
Copyright©2021LorexCorporation
As our products are subject to continuous improvement, Lorex reserves the right to modify product design, specifications and prices, without notice and without incurring any obligation.
E&OE. All rights reserved.
U424AA-Series_QSG_TRILINGUAL_R1
LOREX®
Caméra 2K sans fils
Série U424AA
Bloc-piles rechargeable (x1)
flowchart
graph LR
    A["Power Supply"] --> B["Plug"]
    B --> C["Switch"]
    C --> D["Coiled Cable"]
    D --> E["Device with Top Cover"]
natural_image
Diagram of a mechanical device with a lever and directional arrow, no visible text or symbolsBague de réglage
natural_image
Technical line drawing of two types of mobile phone devices with directional arrows indicating movement (no text or symbols)
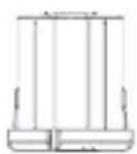
natural_image
Technical line drawing of a mechanical component with a central hole and mounting holes (no text or symbols)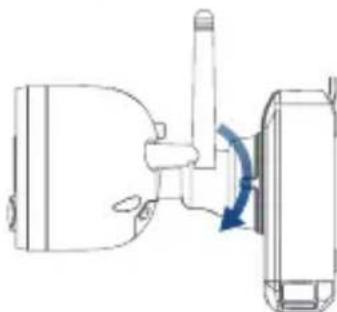
natural_image
Diagram of a mechanical device with a rotating shaft and housing, showing no text or symbolsBesoin d'aide?
Copyright © 2021 Lorex Corporation
natural_image
Diagram of a device with a lever and directional arrow, no visible text or symbolsAnillo de ajuste
natural_image
Technical line drawing of two types of mobile phone enclosures with directional arrows indicating movement (no text or symbols)
natural_image
Technical line drawing of a mechanical component with no visible text or symbols¿Necesita ayuda?
Copyright © 2021 Lorex Corporation