USER MANUAL MAXIFY GX5550 CANON
Read Safety and Important Information (addendum) first.
natural_image
Icon showing a printer with a paper airplane and a document, symbolizing file transfer or sync (no text present)
Installing the Printer...... page 1
natural_image
Two white icons: a laptop and a smartphone, on a solid red background (no text or symbols)
Connecting to a Computer, Smartphone or Tablet......page 2
natural_image
Line drawing of a printer with two hands inserting a slot into the front panel (no text or symbols)

Setting Up the Printer
1. Box Contents
- Ink Bottles
Power Cord
- Setup CD-ROM
• Safety and Important Information
• Getting Started (this manual)
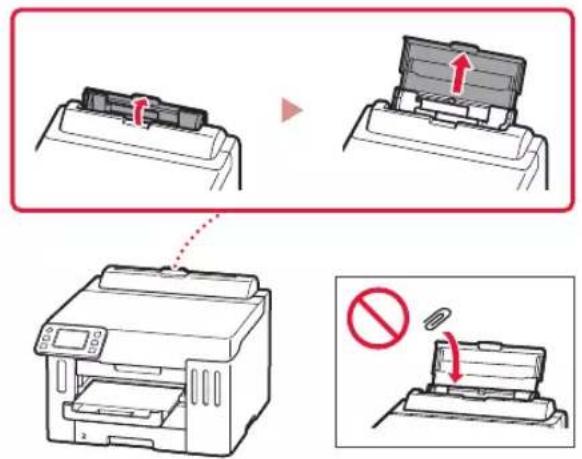
2. Removing the Orange Tape
1 Remove the orange tape.
2 Open the top cover, and then remove the orange tape.
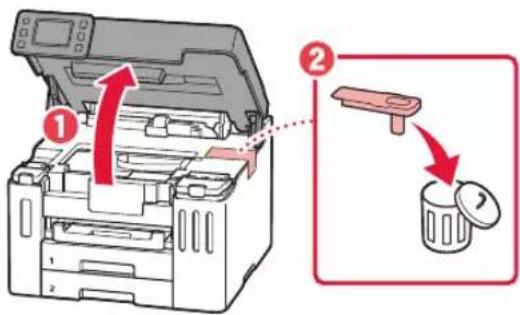
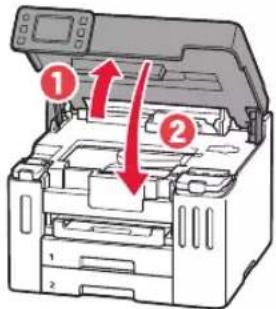
3 Close the top cover.
- If you lift the top cover slightly and release it, it will close by itself.
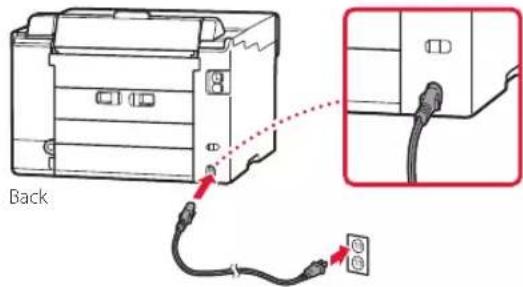
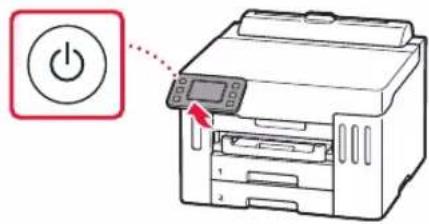
3. Turning on the Printer
1 Connect the power cord.
2 Open the operation panel and press the ON button.
4. Follow the Instructions on the Printer's Screen to Complete Setup
Follow the on-screen instructions to install ink and load paper. Continue until you reach the final screen.
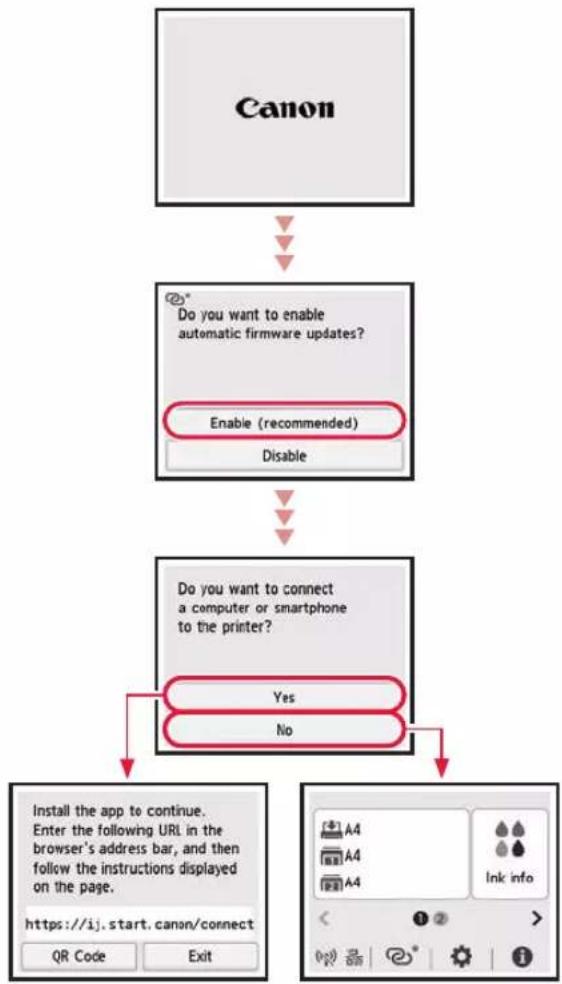
flowchart
graph TD
A["Canon"] --> B["Do you want to enable automatic firmware updates?\nEnable (recommended)\nDisable"]
B --> C["Do you want to connect a computer or smartphone to the printer?\nYes\nNo"]
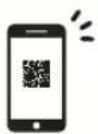
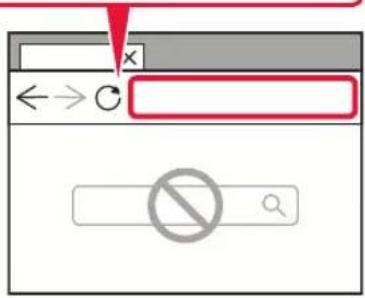
C --> D["Install the app to continue.\nEnter the following URL in the browser's address bar, and then follow the instructions displayed on the page.\nhttps://ij.start.canon/connect\nQR Code\nExit"]
Setting Up the Printer
5. Connecting to a Computer or Smartphone

If you are using multiple computers/smartphones, perform these steps on each device. Also perform these steps to add a new computer/smartphone or replace your current one.
1 Access the Canon website directly. No need to search.
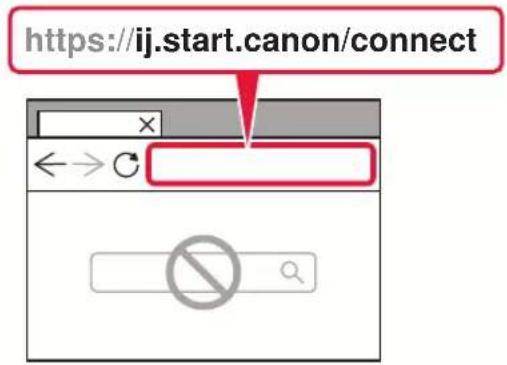

2 Enter your printer's model name and click Go.
3 Follow the on-screen instructions.

Note
Refer to the Online Manual if you cannot connect the printer to your computer or smartphone (network trouble).

Using the Setup CD-ROM
- Double click EasySetup.exe on the screen that appears.
- If the printer selection screen appears, select GX5540.
If the installation screen appears, click Next.
- Follow the on-screen instructions.
If nothing appears, start Explorer and then run EasySetup.exe in the CD-ROM.
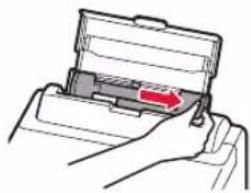
Loading Paper
1 Open the rear tray cover and extend the paper support.
2 Slide the right-hand side paper guide to the far right.
3 Load several sheets of paper with the print side facing up and slide the side paper guide against the edge of the paper stack.

Refer to the Online Manual for details.

https://ij.start.canon/pst
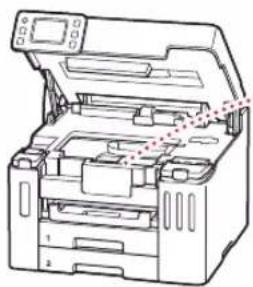
Transporting Your Printer
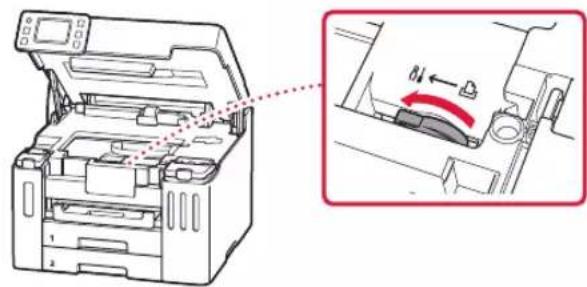
When relocating the printer, check the following. Refer to the Online Manual for details.
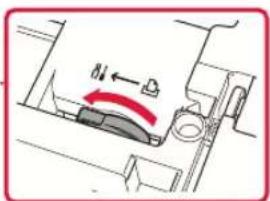
Check that the position of the ink valve lever is closed.
natural_image
Technical diagram of a printer with an open lid and internal components, showing a close-up view of the lid's internal structure (no text or symbols present)
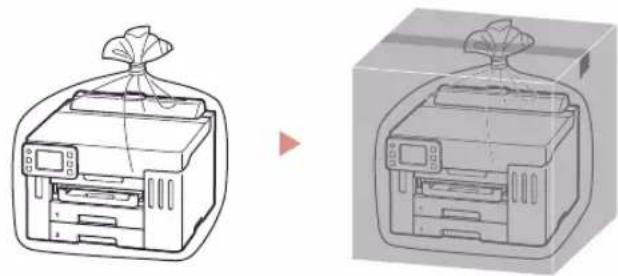
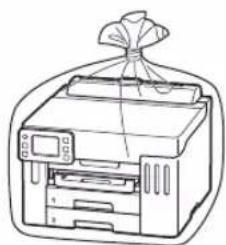
Pack the printer in a plastic bag in case ink leaks.
- Pack the printer in a sturdy box so that it is placed with its bottom facing down, using sufficient protective material to ensure safe transport.
- Do not tilt the printer. Ink may leak.
- Please handle with care and ensure the box remains flat and NOT turned upside down or on its side, as the printer may be damaged and ink in the printer may leak.
- When a shipping agent is handling transport of the printer, have its box marked "THIS SIDE UP" to keep the printer with its bottom facing down. Mark also with "FRAGILE" or "HANDLE WITH CARE".
natural_image
Illustration of a printer and its 3D printing machine, showing front and side views (no text or symbols)
3. Encender la impresora
flowchart
graph TD
    A["Canon"] --> B["Do you want to enable automatic firmware updates?\nEnable (recommended)\nDisable"]
    B --> C["Do you want to connect a computer or smartphone to the printer?\nYes\nNo"]
    C --> D["Install the app to continue.\nEnter the following URL in the browser's address bar, and then follow the instructions displayed on the page.\nhttps://ij.start.canon/connect\nQR Code\nExit"]


natural_image
Technical line drawing of a printer with an inset showing a mechanical component (no text or symbols)
natural_image
Illustration of a printer with a cloth and paper bag, shown from front and side views (no text or symbols)
Configurando a impressora
3. Ligando a impressora
flowchart
graph TD
    A["Canon"] --> B["Do you want to enable automatic firmware updates?\nEnable (recommended)\nDisable"]
    B --> C["Do you want to connect a computer or smartphone to the printer?\nYes\nNo"]
    C --> D["Install the app to continue.\nEnter the following URL in the browser's address bar, and then follow the instructions displayed on the page.\nhttps://ij.start.canon/connect\nQR Code\nExit"]
Configurando a impressora


natural_image
Technical diagram of a printer with internal components and a close-up view showing a red curved arrow indicating rotation (no text or symbols present)
natural_image
Illustration of a printer with a bag and paper towel, shown from front and side views (no text or symbols)
Configuration de l'imprimante


natural_image
Technical diagram of a printer with internal components and a close-up view showing a red curved arrow indicating rotation (no text or symbols present)
natural_image
Illustration of a printer and its 3D printing machine, showing front and side views (no text or symbols)
Настройка принтера
flowchart
graph TD
    A["Canon"] --> B["Do you want to enable automatic firmware updates?"]
    B --> C{Enable (recommended)}
    C -->|Yes| D["Do you want to connect a computer or smartphone to the printer?"]
    C -->|No| E["Install the app to continue. Enter the following URL in the browser's address bar, and then follow the instructions displayed on the page. https://ij.start.canon/connect"]
    D --> F["QR Code"]
    D --> G["Exit"]
Настройка принтера

natural_image
Illustration of a printer and its 3D printing machine, showing front and side views (no text or symbols)
flowchart
graph TD
    A["Canon"] --> B["Do you want to enable automatic firmware updates?\nEnable (recommended)\nDisable"]
    B --> C["Do you want to connect a computer or smartphone to the printer?\nYes\nNo"]
    C --> D["Install the app to continue.\nEnter the following URL in the browser's address bar, and then follow the instructions displayed on the page.\nhttps://ij.start.canon/connect\nQR Code\nExit"]


natural_image
Diagram of a printer with an open lid and internal components, showing a close-up of the lid's edge detail (no text or symbols present)
natural_image
Illustration of a printer and its 3D printing device, showing front and side views (no text or symbols)
تحميل الورق

natural_image
Illustration of a hand holding a device with a red arrow indicating the process (no text or symbols present)
natural_image
Line drawing of a printer with a paper airplane, no text or symbols present

natural_image
Line drawing of a printer with a ribbon tied to top (no text or symbols)
natural_image
Line drawing of an open industrial machine with internal components and a red dotted line indicating a connection or inspection (no text or symbols present)

https://ij.start.canon/connect


flowchart
graph TD
    A["Canon"] --> B["Do you want to enable automatic firmware updates?\nEnable (recommended)\nDisable"]
    B --> C["Do you want to connect a computer or smartphone to the printer?\nYes\nNo"]
    C --> D["Install the app to continue.\nEnter the following URL in the browser's address bar, and then follow the instructions displayed on the page.\nhttps://ij.start.canon/connect\nQR Code\nExit"]
1. مح\*Tويات elaborate
زجاجات الحبر
سلك الطاقة
أغلق الغطاء العلوي.
3
3. تشغيل الطبعة
natural_image
Illustration of a smartphone and a laptop connected by lines, no text or symbols present


Frequently Asked Questions

