
GLM 25-23 Professional - Rangefinder BOSCH - Free user manual and instructions
Find the device manual for free GLM 25-23 Professional BOSCH in PDF.

| Brand | Bosch |
| Model | GLM 25-23 Professional |
| Type | Laser rangefinder |
| Range (favorable conditions) | 0.15 - 25 m |
| Range (unfavorable conditions) | 0.15 - 10 m |
| Measurement accuracy (favorable conditions) | ±2.0 mm |
| Measurement accuracy (unfavorable conditions) | ±4.0 mm |
| Smallest display unit | 1.0 mm |
| Measurement time | 0.5 s - 4.2 s |
| Laser class | 2 |
| Laser type | 635 nm, < 1 mW |
| Laser beam divergence | < 1.5 mrad (full angle) |
| Power supply | 2 batteries 1.5 V LR03 (AAA) |
| Operating temperature | -10 °C to +45 °C |
| Storage temperature | -20 °C to +70 °C |
| Max. relative humidity | 90% |
| Max. operating altitude | 2,000 m |
| Measurement functions | Distance measurement, continuous measurement, area measurement |
| Safety | Laser class 2, do not direct the beam towards eyes |
| Maintenance | Clean with a soft damp cloth, do not immerse |
| After-sales service | Bosch after-sales service, website www.bosch-pt.com |
Frequently Asked Questions - GLM 25-23 Professional BOSCH
User questions about GLM 25-23 Professional BOSCH
0 question about this device. Answer the ones you know or ask your own.
Ask a new question about this device
Download the instructions for your Rangefinder in PDF format for free! Find your manual GLM 25-23 Professional - BOSCH and take your electronic device back in hand. On this page are published all the documents necessary for the use of your device. GLM 25-23 Professional by BOSCH.
USER MANUAL GLM 25-23 Professional BOSCH
operating instructions
en Original instructions
fr Notice originale
es Manual original
operating instructions

Scan for more information
natural_image
Abstract geometric diagram with white shapes on black background, no text or symbols present(g)
(h)
(i)
6
English ...... Page 7
Français ...... Page 17
All instructions must be read and observed in order for the measuring tool to function safely. The safeguards integrated into the measuring tool may be compromised if the measuring tool is not used in accordance with these instructions. Never make warning signs on the measuring tool unrecognisable. SAVE THESE INSTRUCTIONS FOR FUTURE REFERENCE AND INCLUDE THEM WITH THE MEASURING TOOL WHEN TRANSFERRING IT TO A THIRD PARTY.
▶ Warning! If operating or adjustment devices other than those specified here are used or other procedures are carried out, this can lead to dangerous exposure to radiation.
The measuring tool is delivered with a laser warning sign (marked in the illustration of the measuring tool on the graphics page).
If the text of the laser warning label is not in your national language, stick the provided warning label in your national language over it before operating for the first time.
Do not direct the laser beam at persons or animals and do not stare into the direct or reflected laser beam yourself. You could blind somebody, cause accidents or damage your eyes.
▶ If laser radiation hits your eye, you must close your eyes and immediately turn your head away from the beam.
8 | English
▶ Do not make any modifications to the laser equipment.
▶ Have the measuring tool serviced only by a qualified specialist using only original replacement parts. This will ensure that the safety of the measuring tool is maintained.
▶ Do not let children use the laser measuring tool unsupervised. They could unintentionally blind themselves or other persons.
▶ Do not use the measuring tool in explosive atmospheres which contain flammable liquids, gases or dust. Sparks may be produced inside the measuring tool, which can ignite dust or fumes.
▶ Do not use the laser goggles (accessory) as protective goggles. The laser goggles make the laser beam easier to see; they do not protect you against laser radiation.
▶ Do not use the laser goggles (accessory) as sunglasses or while driving. The laser goggles do not provide full UV protection and impair your ability to see colours.
Product Description and Specifications
Intended Use
The measuring tool is intended for measuring distances, lengths, heights and clearances, and for calculating areas.
The measuring tool is suitable for indoor and outdoor use.
This product is a consumer laser product in accordance with EN 50689.
Product Features
The numbering of the product features refers to the representation of the measuring tool in the images.
English | 9
(1) Display
(2) ▲ Measuring button
(3) Func Function button
(4) Reference level of measurement symbol (rear edge)
(5) Carrying strap mount
(6) Battery compartment cover
(7) Locking mechanism of the battery compartment cover
(8) Serial number
(9) Laser warning label
(10) Reception lens
(11) Laser beam output
Display elements
(a) Status bar
(b) Measuring function display
(c) Laser switched on
(d) Battery indicator
(e) Measured value lines
(f) Current measured value/result line
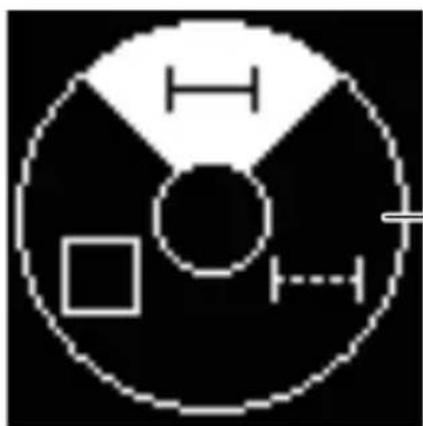
(g) Measuring functions menu
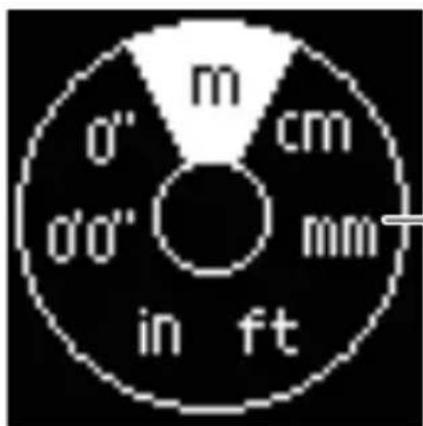
(h) Units of measurement menu
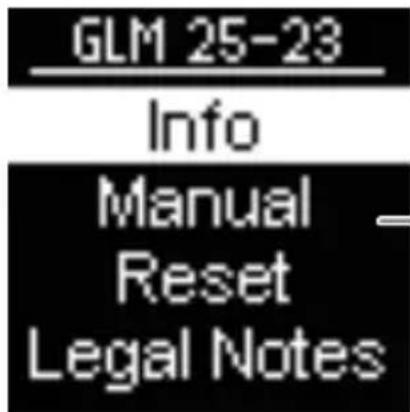
(i) More information menu
10 | English
Technical data
| Digital laser measure GLM 25-23 | |
| Article number | 3 601 K72 W.. |
| Measuring rangeA) | 0.15 - 25 m |
| Measuring range (unfavourable conditions)B) | 0.15 - 10 m |
| Measuring accuracyA) | ±2.0 mm |
| Measuring accuracy (unfavourable conditions)B) | ±4.0 mm |
| Smallest display unit 1.0 mm | |
| Measuring time 0.5 s - 4.2 s | |
| General | |
| Operating temperature -10 °C to +45 °C | |
| Storage temperature -20 °C to +70 °C | |
| Relative air humidity max. 90 % | |
| Max. altitude 2000 m | |
| Pollution degree according to IEC 61010-1 | 2C) |
| Laser class 2 | |
| Laser type 635 nm, < 1 mW | |
| Divergence of the laser beam < 1.5 mrad (full angle) | |
| Batteries 2 × 1.5 V LR03 | (AAA) |
Digital laser measure GLM 25-23
Rechargeable batteries 2 × 1.2 V HR03
(AAA)
A) When measuring from the back edge of the measuring tool, this applies for high reflectivity of the target (e.g. a wall painted white), weak background lighting and a 20 °C operating temperature; a distance-dependent deviation of ±0.05 mm/m must additionally be factored in.
B) When measuring from the back edge of the measuring tool, this applies for high reflectivity of the target (e.g. a wall painted white), strong background lighting, 20 °C operating temperature and high elevation. In addition, a deviation of ±0.15 mm/m must be taken into account, depending on the distance.
C) Only non-conductive deposits occur, whereby occasional temporary conductivity caused by condensation is expected.
The serial number (8) on the type plate is used to clearly identify your measuring tool.
Inserting/Changing the Battery
Always replace all the batteries/rechargeable batteries at the same time. Only use batteries/rechargeable batteries from the same manufacturer and which have the same capacity.
When inserting the batteries, ensure that the polarity is correct according to the illustration on the inside of the battery compartment.
▶ Take the batteries out of the measuring tool when you are not using it for a prolonged period of time. The batteries can corrode and self-discharge during prolonged storage.
12 | English
Operation
Starting Operation
▶ Never leave the measuring tool unattended when switched on, and ensure the measuring tool is switched off after use. Others may be dazzled by the laser beam.
▶ Protect the measuring tool from moisture and direct sunlight.
Do not expose the measuring tool to any extreme temperatures or variations in temperature. For example, do not leave it in a car for extended periods of time. In case of large variations in temperature, allow the measuring tool to adjust to the ambient temperature before putting it into operation. The precision of the measuring tool may be compromised if exposed to extreme temperatures or variations in temperature.
- Avoid substantial knocks to the measuring tool and avoid dropping it. After strong external influences on the measuring tool, you should always carry out an accuracy check (see "Accuracy Check", page 14) before further work.
Switching On and Off
» Press the button to switch on the measuring tool.
» Press and hold the ▲ button to switch off the measuring tool.
If no button on the measuring tool is pressed for approx. 5 min, the measuring tool will switch off automatically to preserve the non-rechargeable batteries.
Measuring Process
When switching on for the first time, the measuring tool will be in the length measurement function. When switching on every subsequent time, the measuring tool will be in the measuring function that was last used.
The rear edge of the measuring tool is always the reference level for the measurement.
» Apply the measuring tool to the point at which you want to start the measurement (e.g. wall).
» Press the ▲ button to switch on the laser beam.
» Target the target surface with the laser beam.
» Briefly press the button again to start the measurement.
For more information, you can access the online operating instructions at www.bosch-pt.com/manuals
The measuring tool must not be moved during a measurement. Therefore, place the measuring tool, as far as this is possible, against or on a firm stop or supporting surface.
The reception lens (10) and the laser beam output (11) must not be covered during the measuring process.
Basic settings
The measuring tool offers the following basic settings:
- Changing the unit of measurement
- Information on the measuring tool
– QR code for the online operating manual - Reset to factory settings
– Licence Texts and Legal Notes
14 | English
For more information, you can access the online operating instructions at www.bosch-pt.com/manuals
Measuring functions
Selecting/Changing Measuring Function
natural_image
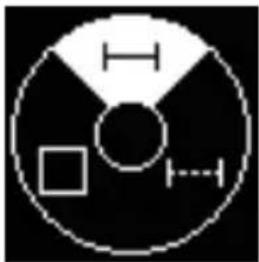
Circular diagram with geometric shapes (circle, square, crosshairs) and a vertical line, no text or symbols present.You will find the following functions in the Functions menu:
- Length measurement
- Continuous measurement
- Area measurement
» Press the button to open the Functions menu.
» Select the required measuring function with the button.
» To confirm the selection, press the ▲ button.
For more information, you can access the online operating instructions at www.bosch-pt.com/manuals
Accuracy Check
Regularly check the accuracy of the measuring tool.
For more information, you can access the online operating instructions at www.bosch-pt.com/manuals
Error Message
If a measurement cannot be performed correctly, the error message Error will appear in the display.
» Try to perform the measuring process again.
» If the error message appears again, switch the measuring tool off and back on, and start the measurement again.

The measuring tool monitors correct operation in every measurement. If a defect is detected, the display will indicate only the symbol shown opposite and the measuring tool switches itself off. In this case, have the measuring tool checked by an after-sales service agent for Bosch power tools.
Maintenance and Service
Maintenance and Cleaning
Keep the measuring tool clean at all times.
Never immerse the measuring tool in water or other liquids.
Wipe off any dirt using a damp, soft cloth. Do not use any detergents or solvents.
Take particular care of the reception lens (10), which must be handled with the same level of care you would give to a pair of glasses or a camera lens.
Send in the measuring tool if it requires repair.
After-Sales Service and Application Service
Our after-sales service responds to your questions concerning maintenance and repair of your product as well as spare parts.
You can find explosion drawings and information on spare parts at: www.bosch-pt.com
The Bosch product use advice team will be happy to help you with any questions about our products and their accessories.
In all correspondence and spare parts orders, please always include the 10-digit article number given on the nameplate of the product.
16 | English
Malaysia
Robert Bosch Sdn. Bhd.(220975-V) PT/SMY
No. 8A, Jalan 13/6
46200 Petaling Jaya
Selangor
Tel.: (03) 79663194
Toll-Free: 1800 880188
Fax: (03) 79583838
E-Mail: kiathoe.chong@my.bosch.com
www.bosch-pt.com.my
Great Britain
Robert Bosch Ltd. (B.S.C.)
P.O. Box 98
Broadwater Park
North Orbital Road
Denham Uxbridge
UB 9 5HJ
At www.bosch-pt.co.uk you can order spare parts or arrange the collection of a product in need of servicing or repair.
Tel. Service: (0344) 7360109
E-Mail: boschservicecentre@bosch.com
You can find further service addresses at:
www.bosch-pt.com/serviceaddresses
Disposal
Measuring tools, accessories and packaging should be recycled in an environmentally friendly manner.
Do not dispose of measuring tools or batteries with household waste.
Only for EU countries:
According to the Directive 2012/19/EU on waste electrical and electronic equipment and its transposition into national law, measuring tools that are no longer usable, and, according to the Directive 2006/66/EC, defective or drained batteries must be collected separately and disposed of in an environmentally correct manner.
If disposed incorrectly, waste electrical and electronic equipment may have harmful effects on the environment and human health, due to the potential presence of hazardous substances.
Only for United Kingdom:
According to The Waste Electrical and Electronic Equipment Regulations 2013 (SI 2013/3113) (as amended) and the Waste Batteries and Accumulators Regulations 2009 (SI 2009/890) (as amended), products that are no longer usable must be collected separately and disposed of in an environmentally friendly manner.
Français
Piles rechargeables 2 × 1,2 V HR03
(AAA)
natural_image
Pure electrical circuit symbol diagram without any text or labelsRobert Bosch Morocco SARL
53, Rue Lieutenant Mahroud Mohamed
20300 Casablanca
Tel.: +212 5 29 31 43 27
E-Mail : sav.outillage@ma.bosch.com
France
Robert Bosch (France) S.A.S.
www.bosch-pt.com/serviceaddresses
natural_image
Pure electrical circuit symbol diagram without any text or labelsCalle Robert Bosch No. 405
www.bosch-pt.com/serviceaddresses
Eliminación
natural_image
Circular diagram with geometric shapes (circle, square, crosshairs) and a vertical line, no text or symbols present.www.bosch-pt.com/serviceaddresses
Descarte
natural_image
Pure electrical circuit symbol diagram without any text or labelswww.bosch-pt.com/serviceaddresses
Tasfiye
natural_image
Pure electrical circuit symbol diagram without any text or labelswww.bosch-pt.com/serviceaddresses
Утилизация
natural_image
Circular diagram with geometric shapes (circle, square, crosshairs) and a vertical bar, no text or symbols present.www.bosch-pt.com/serviceaddresses
Утилізація
natural_image
Pure electrical circuit symbol diagram without any text or labelswww.bosch-pt.com/serviceaddresses
Кәдеге жарату
JLQJQJQJQJQJQJQJQJQJQJQJQJQJQJQJQJQJQJQJQJQJQJQJQJQJQJQJQJQJQJQJQJQJQJQJQJQJQJQJQJQJQJQJQJQJQJQJQJQJQJQ
www.bosch-pt.com/manuals
natural_image
Pure electrical circuit symbol diagram without any text or labels- Uedmdoo3s6m3s
- 30000000
- 35600m80u 356m32s
» ΜΟΣΣΦΟΜΟΥΟ ΜΟΛΟΣΣΙΒ Φυκε ΘΥΣΕΩΟΥΔΟΥ ΔΥΒΟΥΗΣΑΣΙΣΑΒΙΣΑΣΟ.
» somhogos gsbmdzou usfomm mggodo moma3000 Func
» smhj3nU cosuscosuOyngdmso Qossfomgon
moms3u ▲
www.bosch-pt.com/serviceaddresses
བྱིན་བྱིན་པརྒྱོད་
natural_image
Circular diagram with geometric symbols (circle, square, crosshairs) and a vertical line, no readable text or labels.www.bosch-pt.com/serviceaddresses
Отстранување
natural_image
Circular diagram with geometric shapes (circle, square, cross) and symbols, no readable text or labelswww.bosch-pt.com/serviceaddresses
Uklanjanje dubreta
Merni alati, pribor i ambalaža treba da se uključe u reciklažu koja odgovara zaštiti čovekove okoline.

Merne alate i baterije nemojte bacati u kućni otpad!
Samo za EU-zemlje:
Prema evropskoj direktivi 2012/19/EU o starim električnim i elektronskim uređajima i njenoj primeni u nacionalnom pravu, merni alati koji se više ne mogu koristiti, a prema evropskoj direktivi 2006/66/EC akumulatori/baterije koje su u kvaru ili istrošene moraju se odvojeno sakupljati i uključiti u reciklažu koja ispunjava ekološke uslove.
Robert Bosch Morocco SARL
www.bosch-pt.com/serviceaddresses
2 × 1,2 V HR03 (AAA)
متر ليزرى ديجيتالى
سلول های باتری
www.bosch-pt.com/serviceaddresses