KCA-1351 - Camera DENVER - Free user manual and instructions
Find the device manual for free KCA-1351 DENVER in PDF.
User questions about KCA-1351 DENVER
0 question about this device. Answer the ones you know or ask your own.
Ask a new question about this device
Download the instructions for your Camera in PDF format for free! Find your manual KCA-1351 - DENVER and take your electronic device back in hand. On this page are published all the documents necessary for the use of your device. KCA-1351 by DENVER.
USER MANUAL KCA-1351 DENVER
natural_image
Abstract geometric logo with a stylized letter 'D' inside a hexagonal shape (no text or symbols)denver
natural_image
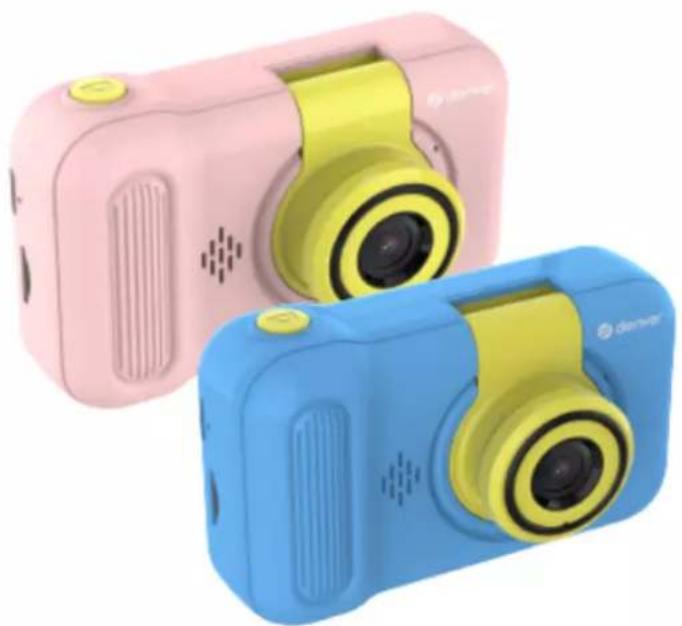
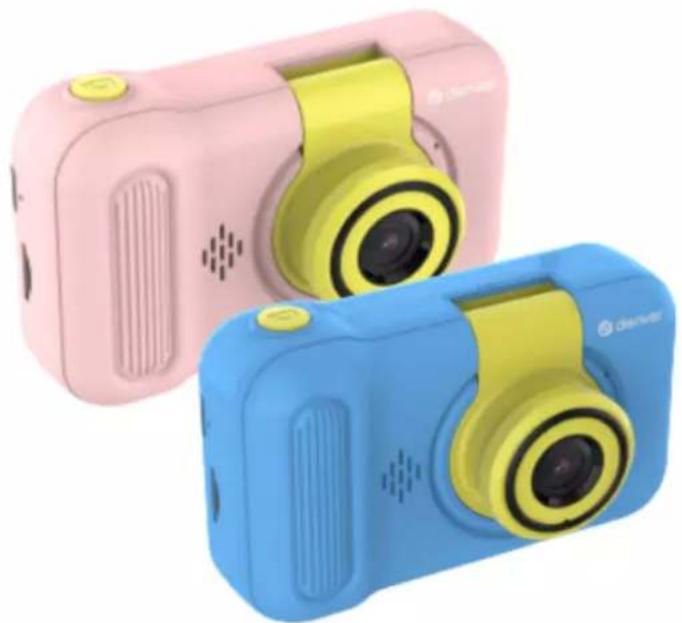
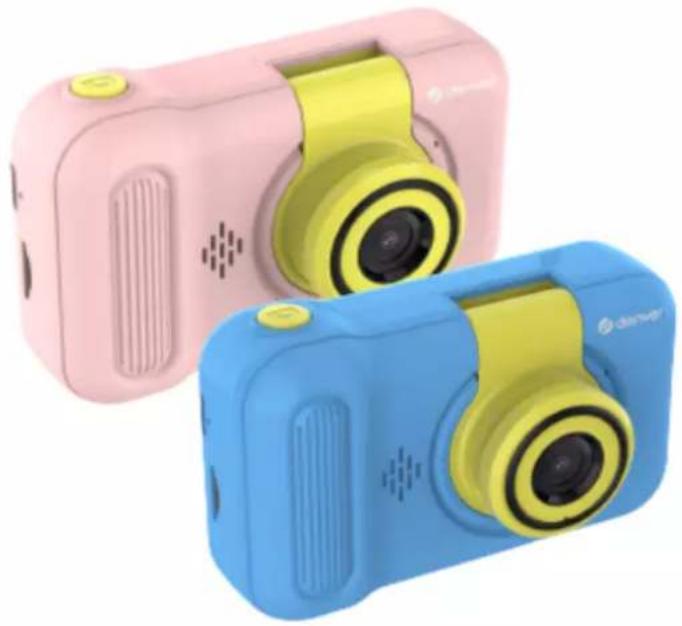
Two colorful digital camera models, one pink and one blue, with no visible text or symbols.KCA-1351
08/2023

FR
Please read the safety instructions carefully before using the product for the first time and keep the instructions for future reference.
- Warning: This product includes lithium polymer batteries.
- Warning: Choking Hazard – Children under 3 yrs. can choke or suffocate on camera because of its small size. Adult supervision required. Keep camera away from toddlers and pets to avoid chewing and swallowing. Discard broken buttons or parts at once.
- Product operating and storage temperature is from 0 degree Celsius to 40 degree Celsius. Under and over this temperature might affect the function.
- Never open the product. Touching the inside electrics can cause electric shock. Repairs or service should only be performed by qualified personnel.
- Do not expose to heat, water, moisture, direct sunlight!
- The unit is not waterproof. If water or foreign objects enter the unit, it may result in fire or electric shock. If water or a foreign object enters the unit, stop use immediately.
- Only charge with supplied USB cable.
- Do not use non original accessories together with the product as this can make the product functionality abnormal.
CAMERA USER GUIDE
Product description
text_image
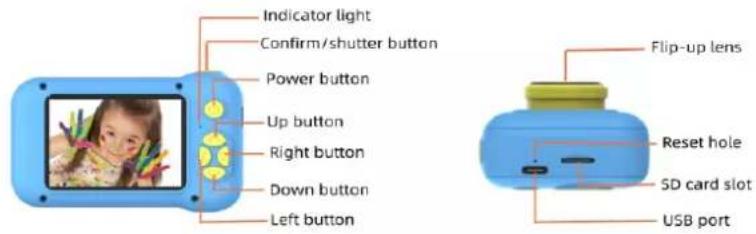
Indicator light Confirm/shutter button Power button Up button Right button Down button Left button Flip-up lens Reset hole SD card slot USB port1. Confirm/Shutter button
① Photo/video mode: Press to release the shutter and take a photo/video.
② Playback/MP3 mode: Press to play or pause playback.
③ Game mode: Press to confirm the selection.
④ Setting Mode: Press to save the setting.
2. Power button
Press and hold to turn on/off the device; press to exit the mode and return to the home screen.
3. Up/down button
In photo mode, press the button to turn on/off the 5-second photo delay function. In video mode, press the button to select the special effects.
4.Right button
In photo mode, press the button to select the photo frame, special effects and other functions.
5.Left button
In photo mode, press the button to select the frame, special effects and other functions. In camera mode, you can choose slow motion, time-lapse camera, normal camera and other functions.
6. Down button
In video mode, press the button to select the special effects camera.
7. Zoom in and out
Press and hold the up/down buttons in photo mode for image zoom in and out.
8. Lens
Camera viewfinder window. 180° flip-up lens.
9. Indicator light
Two-color light, blue light is always on when the power is switched on. Red light is the charging indicator, always on when charging and off when fully charged.
10. SD card slot
Supports memory card up to 64GB.
Note: To reinstall or replace the card, insert the card (or any new micro SD card) into the card slot with the contacts facing the display side.
11. USB port
For connecting to PC (data transfer) and external power supply to charge the battery.
12. Reset switch
If there is a dead situation, press the reset button to restore the device to the factory settings.
Home page icons:
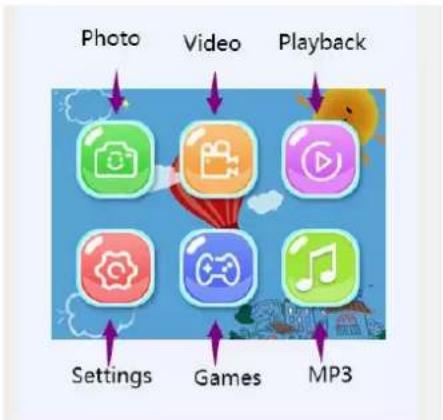
flowchart
graph TD
    A["Photo"] --> B["Settings"]
    C["Video"] --> D["Games"]
    E["Playback"] --> F["MP3"]
Basic operating instructions
1. Power on and off
Press the power button to turn on the camera, the blue indicator will light up when the power is on.
Press the power button again to turn off the camera, the blue light turns off.
2. Video mode
- Press the direction buttons to select the video icon on the home screen, then press the "confirm/shutter" button enter the video mode.
- Press the "confirm/shutter" button to start recording, and press "confirm/shutter" again to stop recording. In the video mode, press the up/down buttons to switch between different special effects scenes. Press the left button to switch between slow motion, time-lapse, and normal video.
3. Photo mode
- Press the direction buttons to select the photo icon on the home screen, then press the "confirm/shutter" button enter the photo mode.
- Press the "confirm/shutter" button to take pictures, the camera will sound a beep indicating that the photo is complete. In the photo mode, press the left/right buttons to switch between different photo frames and special effects, or press the up/down buttons to switch the time-lapse photo function on or off.
4. Playback
- Press the direction buttons to select the playback icon on the home screen, then press the "confirm/shutter" button to enter the playback mode.
- Press the left/right buttons to select the previous or the next playback file.
- Press the up button to delete a single video or photo. Press the down button to delete all videos or photos.
5. Game mode
- Press the direction buttons to select the games icon on the home screen, then press the "confirm/shutter" button enter the game mode. To start a game, press the left/right buttons to select the desired game, then press the "confirm/shutter" button.
In the game mode screen:
- Press the up button to move upwards;
- Press the down button to move downwards;
- Press the left button to move to the left;
- Press the right button to move to the right.
6. Menu settings
- Press the direction buttons to select the settings icon on the home screen, then press the "confirm/shutter" button to enter setting mode.
- You can scroll up and down through the settings by pressing the up/down buttons, and enter the submenu by pressing the "confirm/shutter" button; use the up/down buttons to select the setting item you want to change, and press "confirm/shutter" to confirm.
To exit the setting status, press the power button.
7. Music mode
- Press the direction buttons to select the music icon on the home screen, then press the "confirm/shutter" button to enter the music mode.
In the music mode:
- Use the left/right buttons to select the previous/next song.
- Press "Down" to decrease the volume, or press "Up" to increase the volume.
*Note: Music files in MP3 format should first be copied to the MP3 folder in the camera's memory SD card. Adult operation is recommended.
8. USB mode
Connect the USB cable to the computer. If no SD card is connected, the camera will enter the PCCAM mode; if the camera is equipped with an SD card, it will enter the U disk mode.
9. Instructions for battery use
*Note: Adult operation is recommended.
- Plug the supplied USB cable into the camera's USB port.
- Plug the large end of the USB cable into your computer or a standard USB power adapter.
- After successful connection, you will see a battery charging symbol appearing on the camera screen.
- For battery level indication, see icons below:

Sufficient power

Low power

Insufficient power
Note: The red and blue alternating lights are on when charging, and the red light goes off when the battery is full.
Product Specifications
| Display | 2.4" IPS display |
| Lens | 180° Flip lens for taking selfies |
| Storage Media Micro | SD card, up to 64GB (micro card must be formatted in FAT32) |
| Photo format JPG | |
| Video format AVI | |
| Video resolution 1920*1080 1280*720 (Interpolated) | |
| Time Markers On/off | |
| Photo resolution 40M | 20M 18M 16M 12M 8M 5M 3M 2M (Interpolated) |
| Photo Frame Multiple photo frames + special effects | |
| MP3 Playback | Support |
| Games | Greedy snake / go maze / airplane / push box / 2048 number game |
Warning: lithium battery inside
Please notice - All products are subject to change without any notice. We take reservations for errors and omissions in the manual.
ALL RIGHTS RESERVED, COPYRIGHT DENVER A/S

text_image
denver denver.eu CEElectric and electronic equipment and included batteries contains materials, components and substances that can be hazardous to your health and the environment, if the waste material (discarded electric and electronic equipment and batteries) is not handled correctly.
Electric and electronic equipment and batteries is marked with the crossed out trash can symbol, seen above. This symbol signifies that electric and electronic equipment and batteries should not be disposed of with other household waste, but should be disposed of separately.
As the end user it is important that you submit your used batteries to the appropriate and designated facility. In this manner you make sure that the batteries are recycled in accordance with legislature and will not harm the environment.
All cities have established collection points, where electric and electronic equipment and batteries can either be submitted free of charge at recycling stations and other collection sites, or be collected from the households. Additional information is available at the technical department of your city.
DENVER A/S
Omega 5A, Soeften
DK-8382 Hinnerup
Denmark
www.facebook.com/denver.eu

natural_image
Abstract geometric logo with a stylized white letter 'D' inside a black hexagon (no text or symbols)denver

natural_image
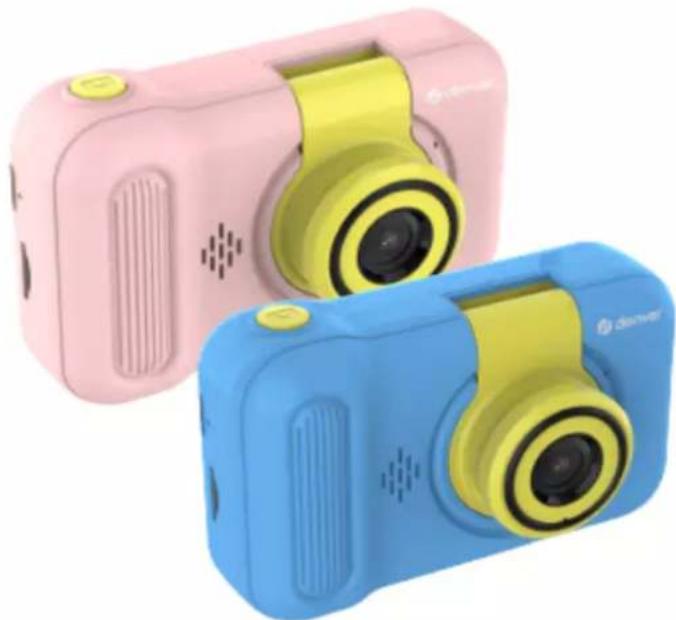
Two colorful digital camera models, one pink and one blue, with no visible text or symbols.KCA-1351
08/2023

FR
natural_image
Abstract geometric logo with a stylized letter 'D' inside a hexagonal shape (no text or symbols)denver
natural_image
Two colorful digital camera models, one pink and one blue, with no visible text or symbols on the devices themselves.KCA-1351
08/2023

FR
natural_image
Abstract geometric logo with a stylized white letter 'D' inside a black hexagon (no text or symbols)denver

natural_image
Two colorful digital camera models, one pink and one blue, with no visible text or symbols.KCA-1351
08/2023

FR
natural_image
Abstract geometric logo with a stylized letter 'D' inside a hexagonal shape (no text or symbols)denver

natural_image
Two colorful digital camera models, one pink and one blue, with no visible text or symbols on the devices themselves.KCA-1351
08/2023

FR
1. Bouton Confirmer/Dé clencheur
natural_image
Abstract geometric logo with a stylized white letter 'D' inside a black hexagonal shape (no text or symbols)denver

natural_image
Two colorful digital camera models, one pink and one blue, with no visible text or symbols on the devices themselves.KCA-1351
08/2023

FR
natural_image
Abstract geometric logo with a stylized letter 'D' inside a hexagonal shape (no text or symbols)denver

natural_image
Two colorful digital camera models, one pink and one blue, with no visible text or symbols.KCA-1351
08/2023

FR
natural_image
Abstract geometric logo with a stylized letter 'D' inside a hexagonal shape (no text or symbols)denver
natural_image
Two colorful digital camera models, one pink and one blue, with no visible text or symbols.KCA-1351
08/2023

FR
natural_image
Abstract geometric logo with a stylized letter 'D' inside a hexagonal shape (no text or symbols)denver

natural_image
Two colorful digital camera models, one pink and one blue, with no visible text or symbols on the devices themselves.KCA-1351
08/2023

FR
natural_image
Abstract geometric logo with a stylized letter 'D' inside a hexagonal shape (no text or symbols)denver

natural_image
Two colorful digital camera models, one pink and one blue, with no visible text or symbols on the devices themselves.KCA-1351
08/2023

FR
natural_image
Abstract geometric logo with a stylized letter 'D' inside a hexagonal shape (no text or symbols)denver

natural_image
Two colorful digital camera models, one pink and one blue, with no visible text or symbols.KCA-1351
08/2023

FR
natural_image
Abstract geometric logo with a stylized letter 'D' inside a hexagonal shape (no text or symbols)denver
natural_image
Two colorful digital camera models, one pink and one blue, displayed side by side (no text or symbols visible)KCA-1351
08/2023

FR
(Push "1" for support)
For technical questions, please write to: support.hq@denver.eu
For all other questions please write to:
contact.hq@denver.eu
Benelux
DENVER BENELUX B.V.
Barwoutswaarder 13C+D
3449 HE Woerden
The Netherlands
Phone: 0900-3437623
E-Mail: support.nl@denver.eu
Spain/Portugal
DENVER SPAIN S.A
Ronda Augustes y Louis Lumiere, n° 23 - nave 16
Parque Tecnológico
46980 PATERNA
Valencia (Spain)
Spain
Phone: +34 960 046 883
Mail: support.es@denver.eu
Portugal:
Phone: +35 1255 240 294
E-Mail: denver.service@satfiel.com
Germany
Denver Germany GmbH Service
Max-Emanuel-Str. 4
94036 Passau
Phone: +49 851 379 369 40
support.de@denver.eu
Fairfixx GmbH
Repair and service
(for TV, E-Mobility/Hoverboards/Balanceboards,
Smartphones & Tablets)
Tel.: +49 851 379 369 69
If your country is not listed above,
please write an email to
support@denver.eu

denver
DENVER A/S
Omega 5A, Soeften
DK-8382 Hinnerup
Denmark