CSC632 - Steam cleaner Montiss - Free user manual and instructions
Find the device manual for free CSC632 Montiss in PDF.

| Product Type | Steam Cleaner |
| Brand | Montiss |
| Model | CSC632 |
| Power Supply | 230 V, 50 Hz, 1500 W |
| Water Tank Capacity | 320 mL |
| Steam Output | 18 to 32 g/min, adjustable to 3 levels |
| Heat-up Time | Approximately 25 seconds |
| Steam Duration | 10 to 18 minutes |
| Protection Rating | IPX4 |
| Overpressure Protection | Yes |
| Steam Functions | Dusting, sweeping, scrubbing, neutral mode |
| Usage Mode | Steam mop with remote control and detachable handheld steamer |
| Included Accessories | Steam squeegee, cone brush, small/medium brushes, angle nozzle, cement tool, stripping head, direct steam nozzle, steam cloths, cone brush cloth, microfiber cloths, 1.4 m hose, window brush base |
| Diffuser Rotation Angle | Wide angle for corners and confined spaces |
| Maintenance | Descaling recommended every 25 to 50 uses with white vinegar |
| Microfiber Pad Cleaning | Machine washable in hot water, without bleach or fabric softener |
| Warranty | 24 months |
| Repairability | Repairs by authorized service only, no user serviceable parts |
| Weight (approx) | Approximately 3 kg |
| Dimensions (approx) | 120 x 30 x 20 cm |
Frequently Asked Questions - CSC632 Montiss
User questions about CSC632 Montiss
0 question about this device. Answer the ones you know or ask your own.
Ask a new question about this device
Download the instructions for your Steam cleaner in PDF format for free! Find your manual CSC632 - Montiss and take your electronic device back in hand. On this page are published all the documents necessary for the use of your device. CSC632 by Montiss.
USER MANUAL CSC632 Montiss
natural_image
White and gray electric vacuum cleaner with handle and control panel (no visible text or symbols)Gebruiksaanwijzing
User manual
Bedienungsanleitung
Mode d'emploi
Index
Nederlands....3
Deutsch....18
English....34
Français....49
Nederlands
VEILIGHEIDSINSTRUCTIES
text_image
A B C D E F G H I J K L M N O Q R TONDERDELEN VOOR DE PRODUCTASSEMBLAGE
1 Handvat
text_image
Labeled diagram of a vacuum cleaner with numbered parts for identificationGEBRUIK
FUNCTIES
natural_image
Line drawing of a medical or laboratory instrument with a handle and clamped parts, labeled 'g.1' (no text or symbols on the diagram itself)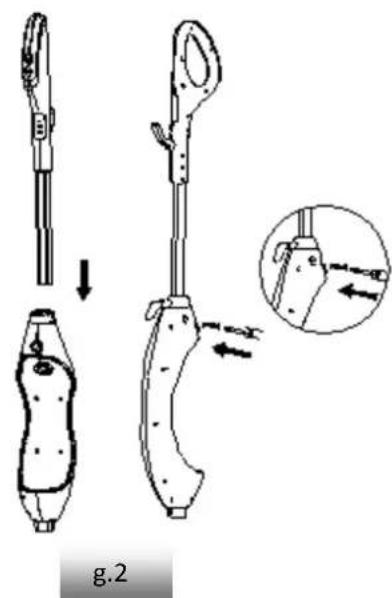
text_image
g.2De stoomkop bevesgen:
natural_image
Line drawing of a vacuum cleaner and its base device (no text or symbols)g.3
De handreiniger bevesgen (g. 4)
natural_image
Simple line drawing of a device with a curved handle and a circular component, labeled 'g.4' (no text or symbols on the diagram itself)natural_image
Diagram showing a mechanical device with a downward arrow indicating motion or assembly (no text or symbols present)GEBRUIK
1 De watertank vullen
natural_image
Simple line drawing of a triangular shape with internal curved lines and a central circular element (no text or symbols)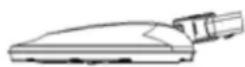
g.10
natural_image
Line drawing of a device with a screw and arrow indicating direction (no text or symbols)g.12

natural_image
Hand-drawn illustration of a hand holding a tool near a device with an arrow indicating motion (no text or symbols)g.13
natural_image
Simple line drawing of a stylized object with a pointed tip and circular eyes, no text or symbols present.g.14
natural_image
Simple line drawing of a device with a curved cable and a separate device (no text or symbols)g.15
text_image
Technical diagram of a mechanical device with labeled parts A through T, including exploded and assembled views.KOMPONENTEN FÜR DIE MONTAGE DES PRODUKTS
natural_image
Line drawing of a medical or laboratory instrument with multiple parts and a label 'Abb. 1' (no readable text or symbols on the diagram itself)natural_image
Diagram of a device with a curved handle and a magnified view showing internal components (no text or symbols)natural_image
Diagram showing a hand pressing down on a device with an arrow indicating downward motion, labeled 'Abb. 5' (no text or symbols on the diagram itself)natural_image
Technical line drawing of a handheld device with internal components and exploded view (no text or symbols)Abb. 9
natural_image
Simple line drawing of a triangular shape with a circular element on top (no text or symbols)
Abb. 10
natural_image
Line drawing of a handheld device with a screw and arrow indicator (no text or symbols)Abb. 12
natural_image
Hand holding a tool near a device with an arrow indicating motion (no text or symbols)Abb. 13
natural_image
Simple line drawing of a device with a handle and arrow, no text or symbols presentAbb. 14
natural_image
Diagram of a device with a curved cable and a magnified view, labeled Abb. 15 (no text or symbols on the diagram itself)WARNING: Read all safety warnings and all instrucons. Failure to follow the warnings and instrucons listed below may result in electric shock, re and/or serious injury.
Warning: When using electrical appliances, basics safety precautions, including the following, should always be followed to reduce the risk of re, electric shock, personal injury and material damage.
- Read all of this manual carefully before using the appliance.
- The intended use is described in this manual. The use of any accessory or aachment or the performance of any operaon with this appliance other than those recommended in this instrucon manual may present a risk of personal injury.
- Retain this manual for future reference.
- Do not direct steam at people, animals, electrical appliances or electrical outlets.
- Do not expose to rain.
- Do not immerse the appliance in the water.
- Do not leave the appliance unaended. Keep children away from the unit while in use.
- Do not leave the appliance connected to an electrical outlet when not in use.
- Never pull the power cord to disconnect the appliance from the socket. Keep the appliance cord away from heat, oil and sharp edges.
- Do not handle the steam cleaner with wet hands.
- Do not pull or carry by cord, use the cord as a handle, close the door on the cord, pull the cord around sharp corners or expose it to heated surfaces.
- Do not use the appliance in an enclosed space lled with vapor given off by oil-base paint thinner, some moth-proong substances, ammable dust, or other explosive or toxic vapors.
- Do not use on leather, wax polished furniture or oors, synthetic fabrics, velvet or other delicate steam-sensitive materials.
- Do not use on any unsealed hard oor surfaces. Additionally, on surfaces that have been treated with wax or some no-wax oors, the sheen may be removed by the heat and steam acon. It is always recommended to test an isolated area of the surface to be cleaned before proceeding. We also recommend that you check the use and care instrucons from the oor manufacturer.
- Never put de-scaling, aromac, alcoholic or detergent products into the steam mop, as this may damage it or make it unsafe for use.
- If the circuit breaker acvates while using the steam funcon, disconnue the product use immediately and contact the customer support center.(Beware of the risk of electrical shock.
- The appliance emits very hot steam to sanitize the area of use. This means that the steam head and cleaning pads are geng very hot during use.
! Cauon: Always wear suitable shoes when using your steam mop and when changing the accessories on your steam mop. Do not wear slippers or open footwear.
- The lid may become hot during use.
- Care should be taken when using this appliance. DO NOT touch any parts which may become hot during use.
- Do not use when the micro-ber cleaning pads are not installed correct.
- This appliance is not intended for use by persons (including children) with reduced physical,
sensory or mental capabilities, or lack of experience and knowledge, unless they have been given supervision or instrucon concerning the use of the appliances by a person responsible for their safety.
● Children should be supervised to ensure that they do not play with the appliance.
It is important for you to read and understand this manual. The informaon it contains relates to protecng YOUR SAFETY and PREVENTING PROBLEMS. The symbols below are used to help you recognize this informaon.
! DANGER: Indicates an imminently hazardous situaon which, if not avoided, will result in death or serious injury.
! WARNING: Indicates a potentially hazardous situation which, if not avoided, could result in death or serious injury.
! CAUTION: Indicates a potenally hazardous situaon which, if not avoided, may result in minor or moderate injury.
NOTICE: Used without the safety alert symbol indicates a potenally hazardous situation which, if not avoided, may result in property damage.
Residual risks:
Additional residual risks may arise when using the tool which may not be included in the enclosed safety warnings. These risks can arise from misuse, prolonged use, etc.
Even with the applicaon of the relevant safety regulaons and the implementation of safety devices, certain residual risks can't be avoided. These include
- Injuries caused by touching any moving parts.
- Injuries caused by touching any hot parts.
- Injuries caused when changing any parts or accessories.
- Injuries caused by prolonged use of the appliance. When using any appliance for prolonged periods ensure you take regular breaks.
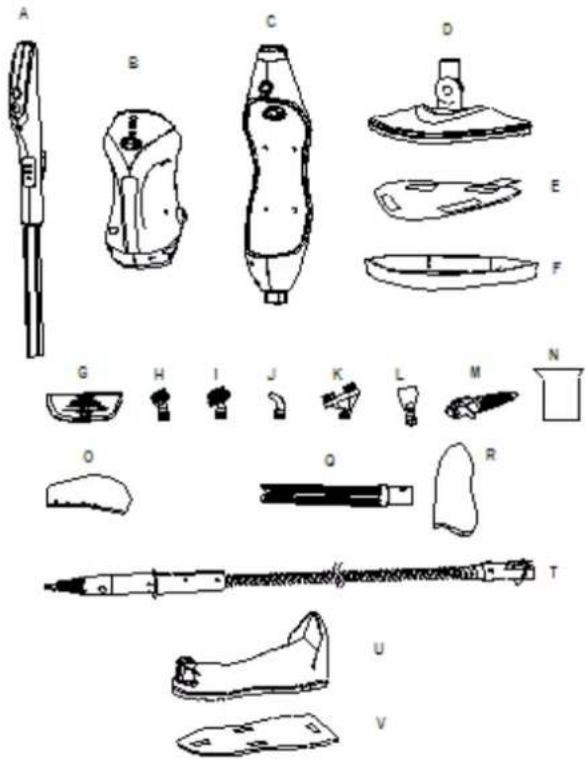
THE PRODUCT
STANDARD FEATURES
A Handle
B Handle held steam cleaner
C Steam mop body
D Steam head
E Microber pad
F Carpet Glider
G Window squeegee
H Small Scrub Brush
I Big Scrub Brush
J Angle Nozzle
K Grout Cleaning Tool
L Scraping Tool
M Direct steam nozzle
N Measuring cup
O Garment Steamer Cloth
Q Tapered brush
R Tapered brush cloth
T Accessory hose
text_image
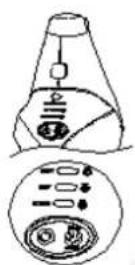
Technical diagram of a shoe with labeled parts, including accessories and accessoriesPRODUCT COMPONENTS TO ASSEMBLY THE PRODUCT
1 Handle
2 Handle steam buon
3 Handle on/o switch
4 Signal transming window
5 Hang up hook
6 Steam gear indicator light
7 Tube
8 Release buon
9 Signal receiving window
10 Main body steam gear indicator light
11 Main body indicator light
12 Main body on/o switch
13 Main body steam buon
14 Water tank cap
15 Water tank
16 Hand held steamer housing
17 Power cord
18 Steam head spindle
THE USE
FUNCTIONS
- Connuous steam output(up to 5 minutes connuously working, the steam averaged) 18-32g / min
- Three adjustable steam
• Steam output me: 10-18 minutes
• Red and blue light, warm-up and work instrucons
• Pressure relief protecon, keeping the pressure in the heang unit constant
• The steam head has a big rotary angle, can clean corners and low space
• Triangle and square mop head for your choose - Remote control handle, can control the main body and steam mode. Steam gears LED light shows at the same me.
ASSEMBLY
NOTE: Each steam mop is 100% tested in the factory to ensure product performance and safety. When assembling your new steam mop for the rst me you may noce water residue inside of the unit.
!WARNING: Before aempng any of the following operaons, make sure that the appliance is switched o and unplugged and that the appliance is cold and contains minimal or no water.
Aaching the handle:
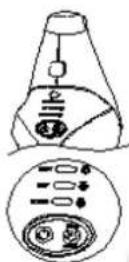
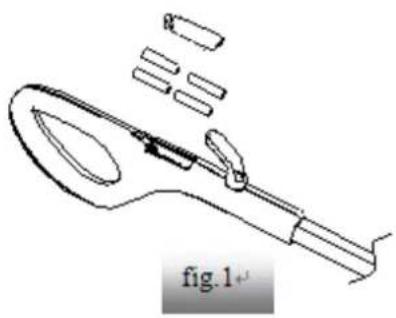
1 Open the baery cover in the back part of handle, put in 4*3AAA, 1.5v baery, close the baery cover. (g.1)
Noce: Long me no use, please take out the baery.
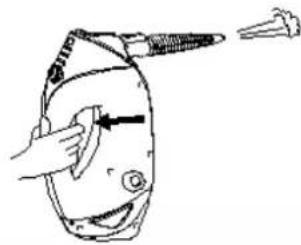
2 Slide the boom end of the handle tube (A) into the top end of the Handheld Steamer Housing (C) until it clicks into place. (g,2)
3 Secure the assembled handle and pole by using the large screw (screwdriver not included). (g.2)
natural_image
Line drawing of a medical or laboratory instrument with no visible text or symbols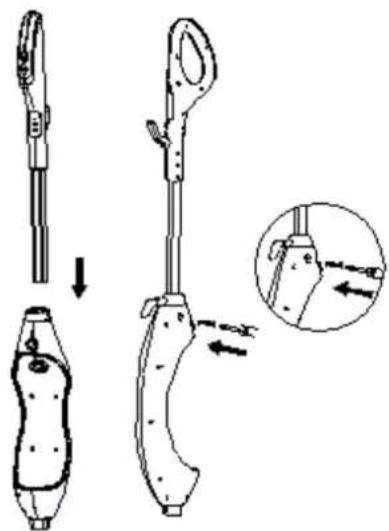
text_image
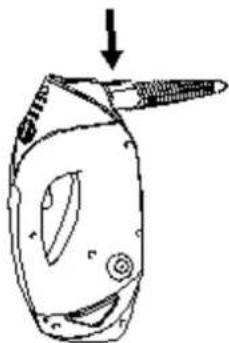
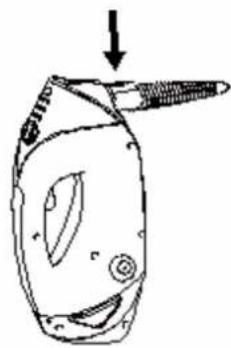
Technical diagram showing a mechanical device with labeled parts and an inset view of the component being inserted.Aaching the steam head:
1 Slide the boom end of steam mop body (C) onto the steam head (D) unl steam head spindle (18) clicks into place.
2 The Steam head (D) can be removed from the steam mop body (C) by pressing salient point on the Steam head (D) spindle.
natural_image
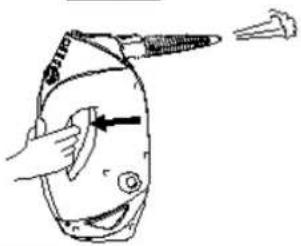
Line drawing of a vacuum cleaner and its base device, showing step-by-step assembly (no text or symbols)Aaching the hand held steam cleaner (g. 4)
1 Push the hand held steam cleaner (B) rmly into the steam mop body (C) unl it clicks into place.
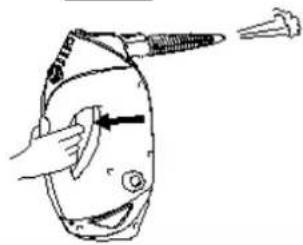
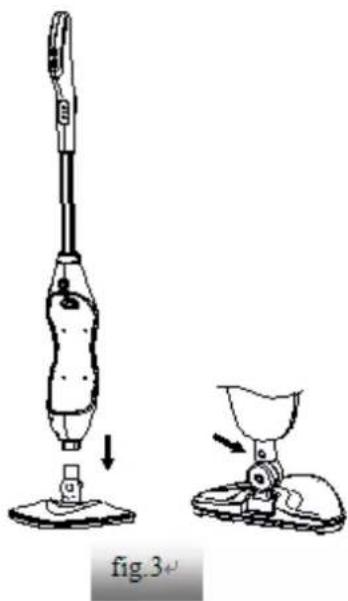
Aaching a cleaning pad:
1 Because of barb design at the boom of steam head (D), just place a micro-ber cleaning pad (F) to the steam head, they can bond hard.
2 Place the front of your shoe onto the cleaning pad removal tab and press down rmly.
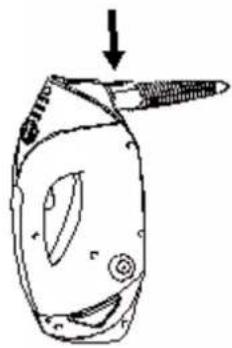
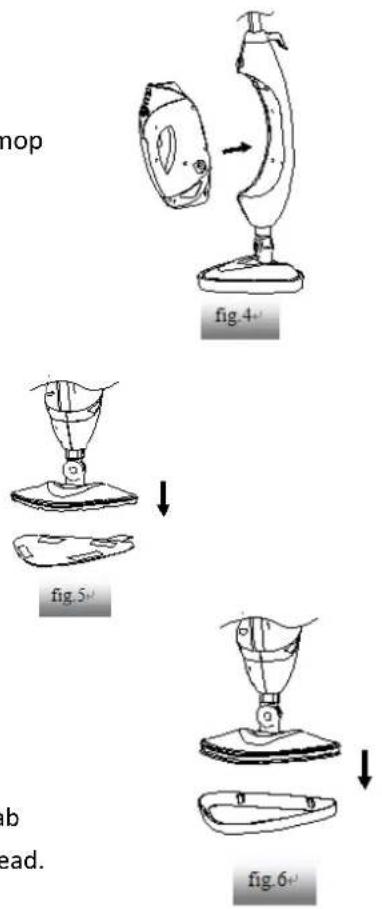
Aaching Carpet Gilder:
1 Press the micro-ber cleaning pad (H) with the main body to carpet gilder (I) by vercal pressure, unl it clicks into place.
2 Place the front of your shoe onto the cleaning pad removal tab and press down rmly, the carpet gilder will remove the steam head.
flowchart
graph TD
    A["Top View Top"] --> B["Step 1: Top View Top"]
    B --> C["Step 2: Top View Top"]
    C --> D["Step 3: Top View Top"]
    D --> E["Step 4: Top View Top"]
    E --> F["Step 5: Bottom View Top"]
    F --> G["Step 6: Bottom View Top"]
OPERATION
1 Filling the water tank
• Turn the water tank cap counter clockwise and remove from the tank.(g.7)
- Use the lling ask and pour water into the tank. Do not overll. Replace the cap on the water tank. (g.8)
2 Plug in the appliance to a grounded outlet.
3 The main body indicator light will be ash, press the handle on/o switch (3), main body indicator light will glow red, steam gear indicator light (6) on the handle and main body steam gear indicator light (10) will bright. Aer 25 seconds, the main body indicator light will change blue. Steam will be release. (g.9) 4 Press handle steam buon (2), the user can adjust steam volume according to dierent objects.

natural_image
Technical line drawing of a handheld device with multiple views and internal components (no text or symbols)Press ON/OFF switch, enter DUST seng at the same me, DUST indicator light will be bright, DUST seng is light steam for a quick dusng and best dry me.
Press steam buon one me enter MOP mode; MOP and DUST indicator light will be bright at the same me. The MOP seng is for normal, everyday steam cleaning.
Press steam button two mes enter SCRUB mode; all MOP, DUST, SCRUB indicator light will be
bright, SCRUB seng is for heavy cleaning and will leave oors damp.
Press steam buon three mes enter neutral mode: MOP,DUST,SCRUB indicator light will not be bright, product stop working - Neutral mod; if you are not proceed the functional operaon within 6 minutes, the product will be switch into standby mode automatically. main body indicator light will ash).
Noce: In order to reduce the power consumption of the baery, handle on/o switch (3) on the handle (A), light will be put out automatically if you don't operate within 6 minutes. Press any key on the handle (A), it can wake up indicator light.
Noce: When use the product to clean the oor, press steam buon (2) and on/o switch (3) on the handle (A). The handle steam gear indicator light (6) and main body steam gear indicator light will bright at the same me. If press main body on/o switch (12) and main body steam buon, the indicator light on the handle will not bright at the same me. Press key again on the handle (A), back to normal.
5 Clean your oors with a forward and backward moon.
When you are done, press the ON/OFF SETTING buon unl the red light ashing as in standby mode.
6 When switch the appliance on, the red indicator lights will ash, it indicate preheang. If the lights does not illuminate, please check the "troubleshoong" secon for more details.
NOTICE: If power failure in the middle of the warm-up or power-o aer the warm-up is complete, turn the power supply on again, according to the interval of the power is turned on again, the product may repeat the above warm-up operaon.
7 When normal cleaning, the steam head has a big rotary angle, can clean corners and also can clean low spaces. (g. 10)
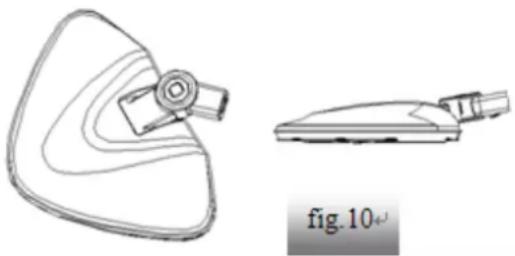
natural_image
Technical line drawing of a mechanical component with a triangular base and a separate view labeled 'fig. 10' (no text or symbols on the diagram itself)8 Using as a steam cleaner in hand:
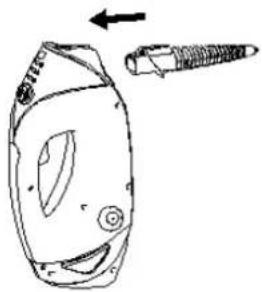
- Push the release buon (8) down and pull the hand held steam cleaner (B) away from the steam mop body (C). (g.11)
- First attach the Direct Steam Nozzle onto the Hand Held Steam Cleaner unl it clicks into place.(g.12)
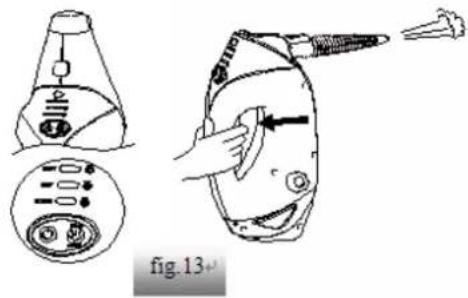
Plug in the appliance to a grounded outlet. The main body indicator light will ash.
Press the main body on/o switch (12), the indicator light will glow red, aer 25 seconds, indicator light will change blue. To change modes press the STEAM CONTROL buon to selected either DUST, MOP or SCRUB mode. You can change the steam mode while the hand held steam cleaner is in standby or in use. Hold down the steam trigger to start steaming. (g.13)
CAUTION: Do not press the steam trigger until the Direct Steam Nozzle is snapped into the main nozzle of your Hand Held Steam Cleaner.
- To remove the Direct Steam Nozzle, press and hold down the Release Buons. Then slide out the Accessory Hose using the grip. (g.14)
NOTE: The Hand Held Steam Cleaner may connue to emit steam for a few seconds aer the trigger is released. This is normal, and the steaming will eventually come to a stop.
natural_image
Line drawing of a device with a screw and arrow indicating direction (no text or symbols)fig.12
text_image
fig.13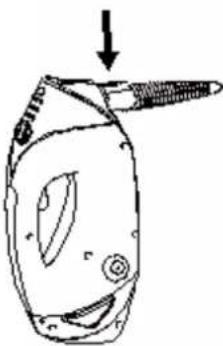
natural_image
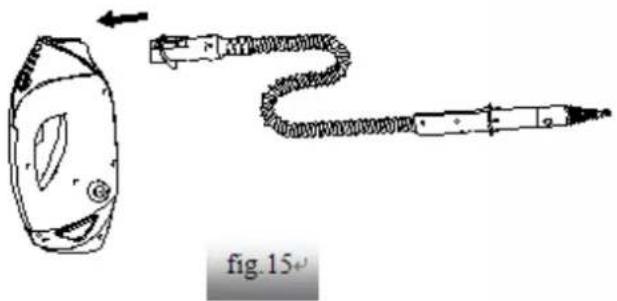
Simple line drawing of a stylized hat with a pointed tip and circular eyes, no text or symbols present.9 Using Your Removable Hand Held Steam Cleaner with Accessory Hose
- To use the Accessory Hose, First each the Accessory Hose to the Hand Held Steam Cleaner until it clicks into place.(g.15)
- Select the desired cleaning tool for use. Follow the cleaning tool sub-assembly instrucons for the selected tool.
- To remove the Accessory Hose, press and hold down the Release Buons. Then slide out the Accessory Hose using the grip.
CAUTION: Do not press the steam trigger while aaching or removing the Accessory Hose. CAUTION: Do not use the Accessory Hose without cleaning tools aached.
natural_image
Diagram of a hairdryer with a coiled cord and connector, labeled 'fig. 15+' (no text or symbols on the diagram itself)ACCESSORIES HAND HELD STEAM CLEANER:
| !CAUTION!Before cleaning any electrical appliance, check and follow appliance manufacture's cleaning guidelines. | ||
| ACCESSORY | REQUIRED ACCESSORIES THAT MUST BE CONNECTED TO THE ACCESSORY ADAPTOR | SUGGESTD USE |
| Window Squeegee/Garment Steaming Tool | 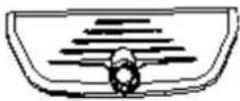 | Shower glass doors, mirrors, glass, removing soap scum and grime.Garment tool for taking wrinkles out of garments, teaming draperies, tablecloths and more. |
| Tapered brush |  | Armchairs, Sofas, cushions, maresses, car interiors, blinds, vercal walls, garden furniture, gazeboes, garden umbrellas and rocking chairs |
| Small and Medium Scrub brushes |  | Oven, microwaves, stove tops, showers, bathtubs, faucet xtures, les, grout, toys, refrigerators, etc. |
| Angle Nozzle | [K04K] | Stove tops, around faucet edges, grout, microwaves, sinks, hard to reach areas, etc. |
| Grout cleaning Tool |  | Cleaning all grout lines, sanded or non-sanded. |
| Scraping Tool | [OW67] | Scraping baked on food, grime, and grease.Removing residue or other dicult substances from surfaces, such as stove tops and ovens |
| Direct Steam Nozzle | 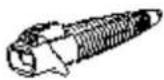 | lossen and dislodge compact dirt found in corners or ght plac es |
| Garment Steamer Cloth | 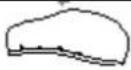 | For use when steaming garments, draperies, tablecloths, etc. |
| Tapered brush cloth | [wecz] | Set in tapered brush, For use when steaming garments, draperies, tablecloths, etc. |
| Microber Pad | 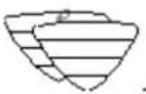 | For general cleaning of hard oors and refreshing carpets. |
CLEANING AND MAINTENANCE
BE SURE THAT THE UNIT IS DISCONNECTED FROM THE POWER OUTLET WHEN PERFORMING CLEANING
Drain the remaining water into the tank and clean the tank aer every use.
How to decalcify the Water Tank interior:
To clean calcium deposits that build up inside the water tank, add one or two tablespoons of white vinegar to a full water tank, close it and then shake the content. DO NOT TURN THE STEAMER ON.
Cleaning procedure to remove lime scale:
If your steam mop begins to produce steam more slowly than usual or stops producing steam, you may need to remove lime scale. Lime scale can develop over me on the metal parts and greatly aect mop performance.
It is necessary to remove lime scale on regular basis every 25-50 mes you use a full tank of water or at least once a month, especially in areas with hard water.
The frequency of lime scale removal depends upon the hardness of you tap water and how oen you use the steam mop.
By using cleaning soluon:
1 Prepare a soluon of 1/3 white vinegar and 2/3 tap water and add to the water tank.
2 Secure and posion the unit to ensure steam released is aimed away from the oor or surrounding objects and surface. Plug the unit and turn it ON by pressing the power switch and allow the unit to produce. The steam unit will use the vinegar/water.
3 Repeat the above procedure as many mes as necessary unit a normal steam ow rate is achieved.
4 Fill the water tank with fresh water and rinse out.
5 Fill the water tank with fresh water, each to the unit and release steam through the system unit until the water tank is empty.
Cleaning microber pads:
1 Machine washable on "warm" seng. Always use a mild detergent.
2 For best care results, lay at to dry.
3 IMPORTANT: Allow the steamer to fully cool down before performing any maintenance or troublesomeng checks.
4 IMPORTANT: Never use bleach or fabric soener when washing the microber cleaning pad.
Storage:
1 Aer the steamer is used, turn power o and then unplug the power cord.
2 Take out the water tank and empty the residual water in the tank and clean the external surface with a dry cloth. Unl the steam mop cools down, clean the appliances.
3 Remove the cleaning pad and wash it so that it will be ready for next use.
4 Store the product in a protected, dry area. Keep the water funnel and measuring cup for future use.
5 Keep out of reach of children.
WARNING
Don't leave the steamer unaended during the lime scale removal process and/or while in use NOTICE:
Preform a test cleaning on a suitable isolated area aer each lime scale removal to ensure that there is no debris le in the system.
This product contains no serviceable parts. Do not try to repair it yourself. Any servicing that requires disassembly other than cleaning must be performed by a qualified appliance repair technician.
ALL servicing should be done by an authorized service representave.
NOTICE: After cleaning, take out the water tank before cut o the power, and then let the product work for a while, unl there is no steam. It can make pipe without water, good to store.
TROUBLESHOOTING
USE TROUBLESHOOTING GUIDE AS A FIRST STEP TO RESOLVE ANY PROBLEMS YOU MAY BE EXPERIENCING.
All servicing should be done by an authorized service representave.
!WARNING!: TO REDUCE THE RISK OF PERSONAL INJURY, UNPLUG THE STEAMER BEFORE SERVICING AND ALLOW TO COOL
| PROBLEM | POSSIBLE REASON | POSSIBLE SOLUTION |
| Reduced steam or no steam | Water tank may be empty | Fill water into the water tank |
| Steam nozzle may be blocked | Clean steam nozzle | |
| There is no power to the unit | Make sure unit is plugged in | |
| Didn't press power buon | Press power buon | |
| Unit will not turn on | Blown fuse or breaker | Replace fuse or reset breaker in home |
| Power cord not plugged in | Plug cord into a working circuit | |
| Internal fuse is blown | Contact with customer service |
DISPOSAL OF YOUR OLD APPLIANCE
- When this crossed-out wheeled bin symbol is aached to a product it means the product is covered by the European Directive 2002/96/EC.
- All electrical and electronic products should be disposed of separately from the municipal waste stream via designated collecon facilities appointed by the government or the local authorities.
- The correct disposal of your old appliance will help prevent potential negative consequences for the environment and human health.
- For more detailed information about disposal of your appliance, please contact your city oce, waste disposal service or the shop where you purchased the product.

TECHNICAL DETAILS
- Rated voltage: 230V
• Rated frequency: 50Hz
• Output power: 1500W (+5%, -10%)
• water tank capacity: 320mL
• Waterproof level: IPX4
• Model number: CSC632
Monss is a registered brand name of:
Trebs BV
Thermiekstraat 1a
6361HB Nuth
The Netherlands
www.trebs.nl
GUARANTEE
This guarantee covers your device for a period of 24 months from the date of purchase for service and replacement of parts, on the condition that you have used the device correctly as described in the user manual. This guarantee does not exclude naonal legislaon that may exist in the country of purchase in regards to warranty regulaons.
When you make a claim under this guarantee, you must submit the original invoice or receipt with clear menon of the date of purchase, name of retailer and the descripon and model number of the device. You are advised to keep these documents in a safe place.
This device is intended for domesc use only. Damage and/or malfuncons as the result of industrial or commercial use are excluded from the warranty.
The guarantee for this device expires if:
• The original invoice or receipt has in one way or another been changed or made illegible;
- The model or serial number on the device has been changed, removed, deleted or made illegible;
- Repairs have been executed by unauthorized repair workshops or persons who are not authorized to do so:
- The damage is the result of an external cause, such as re damage, water damage, transport damage, atmospheric discharges, insucient or improper maintenance;
- The device has been operated in another country than for which originally designed, approved, released and produced, as well as defects occurred as the result of such modicaons:
- The device has not been used according to the guidelines and direcons in the user manual supplied with the device.
Accessories and parts of the product that are susceptible to wear and tear are not included in this guarantee. Should you wish to reorder these, please visit www.trebs.nl
In the unlikely event your device is not funconing well or shows any defect, please contact your retailer. To avoid any inconvenience, we advise you to read the user manual carefully before contacting them.
Francais
text_image
Technical diagram showing exploded view of mechanical components with labeled parts A through NPIÈCES DU PRODUIT SERVANT À SON ASSEMBLAGE
text_image
Labeled diagram of a vacuum cleaner with numbered parts for identificationUTILISATION
FONCTIONS
natural_image
Line drawing of a handheld tool with multiple blades and a handle, labeled 'g.1' at bottom (no other text or symbols)
text_image
Technical diagram showing a mechanical device with labeled parts and an inset view of the component being inserted.g.2
Fixaon du diuseur :
natural_image
Line drawing of a vacuum cleaner and its base device (no text or symbols)fig.3
g.3
natural_image
Simple line drawing of a banana-shaped object with an arrow indicating rotation (no text or symbols)natural_image
Diagram showing a hand pressing down on a device with an arrow indicating downward motion (no text or symbols)natural_image
Technical line drawing of a handheld device with internal components and exploded views (no text or symbols)natural_image
Technical line drawing of a mechanical component with a triangular base and a separate view showing a cylindrical part (no text or symbols)natural_image
Simple line drawing of a device with a screw and arrow, no text or symbols presentg.12
natural_image
Hand holding a tool near a device with a pointed tip (no text or symbols visible)g.13
natural_image
Simple line drawing of a device with a handle and arrow, no text or symbols presentg.14
natural_image
Simple line drawing of a soldering iron with a curved wire and head (no text or symbols)g.15