FN65 - Fan Duronic - Free user manual and instructions
Find the device manual for free FN65 Duronic in PDF.
| Product type | Pedestal fan |
| Brand | Duronic |
| Model | FN65 |
| Supply voltage | 220 V |
| Frequency | 50 Hz |
| Power | 60 W |
| Number of speeds | 3 (L, M, H) |
| Built-in timer | Yes, from 0.5 to 7.5 hours |
| Oscillation function | Yes |
| Remote control | Yes (batteries not included) |
| Adjustable height | Yes (telescopic pole) |
| Protective grille | Yes, front and rear |
| Head tilt | Yes, manually adjustable |
| Maintenance and cleaning | Soft damp cloth, without abrasive products |
| Warranty | 1 year |
| Recommended use | Domestic, indoor |
| Plug type | European |
Frequently Asked Questions - FN65 Duronic
User questions about FN65 Duronic
0 question about this device. Answer the ones you know or ask your own.
Ask a new question about this device
Download the instructions for your Fan in PDF format for free! Find your manual FN65 - Duronic and take your electronic device back in hand. On this page are published all the documents necessary for the use of your device. FN65 by Duronic.
USER MANUAL FN65 Duronic
Creative Consumer Electronics
natural_image
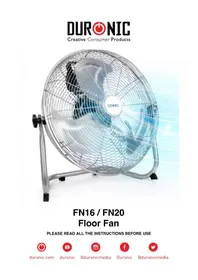
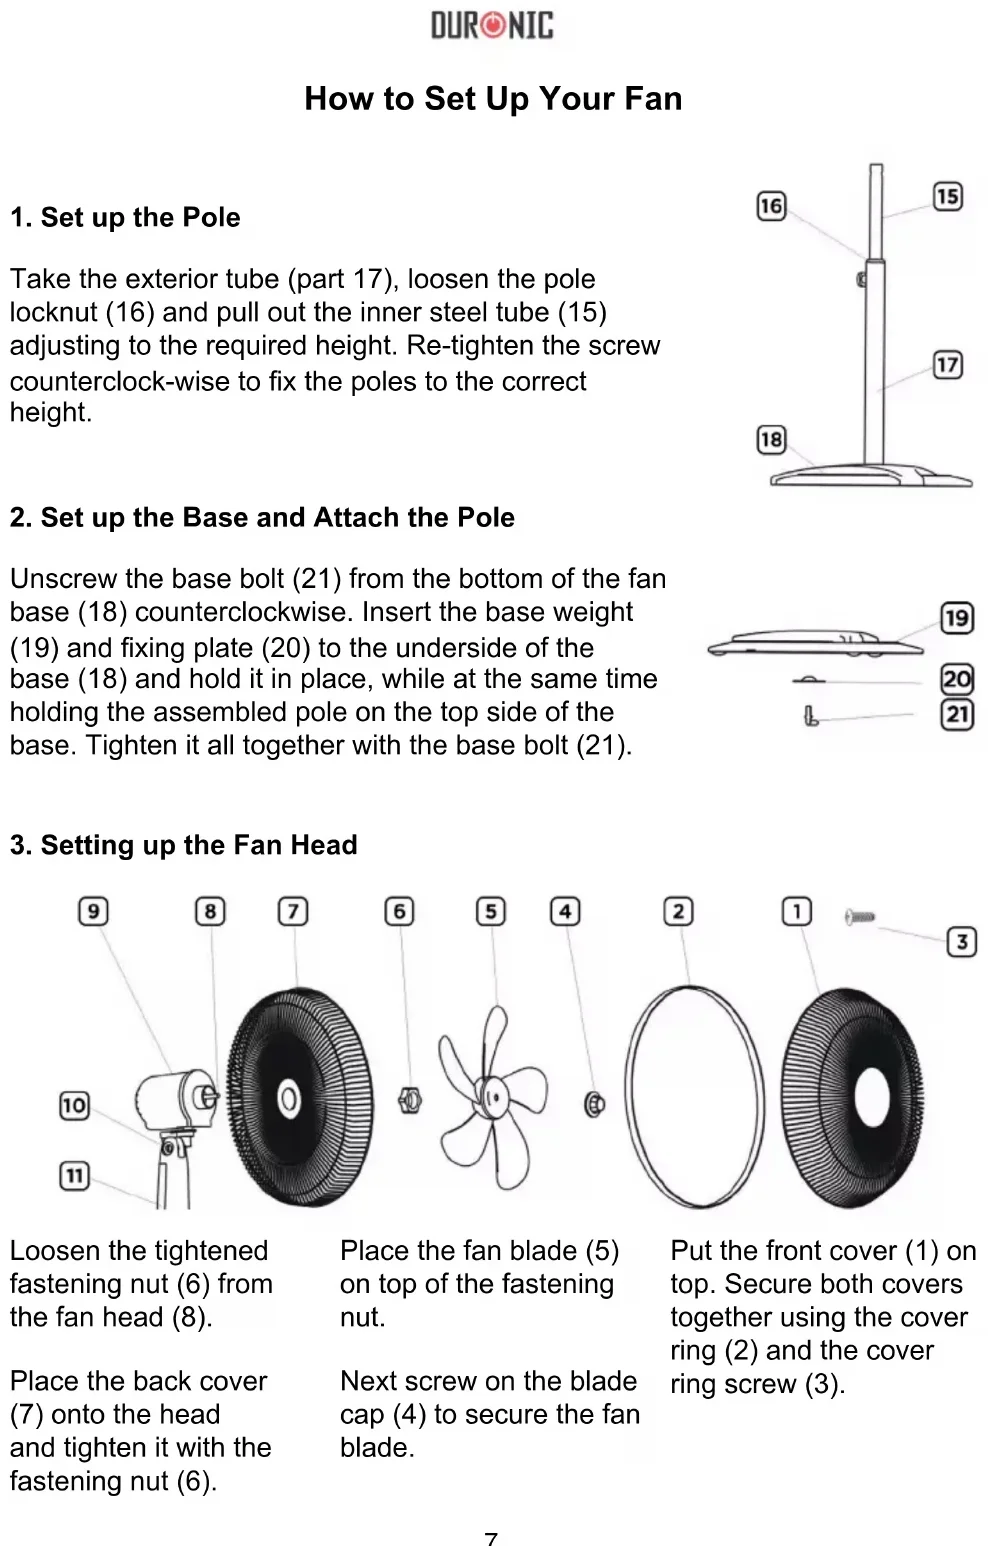
Line drawing of a standard office desk fan with visible blades and handle (no text or symbols)FN65 - Standing Fan
PLEASE READ ALL THE INSTRUCTIONS BEFORE USE

duronic.com

duronic

@duronicmedia

Duronic

@duronicmedia
DURONIC
Contents
English Manual 4
-
In order to prevent the risk of an electrical shock, do not open or attempt to make any repairs to the fan yourself. This should be done by a qualified technician.
-
Never insert foreign objects or accessories through the grill of the fan.
-
Always unplug the appliance first before manually handling the fan or any of the parts.
-
Make sure that the fan is on a flat, even and stable surface when operating as this enables safe usage and will prevent the fan from falling.
-
Do not use outdoors as the weather (eg. rain) may affect its performance, as well as the aesthetics of the fan. Additionally, never submerge the fan under water as this may cause internal damage to the motor.
-
Do not operate the fan with a damaged cable or plug. Do not operate the fan if it malfunctions, or has been dropped or damaged in any way.
-
Do not operate the fan in the presence of flammable fumes.
-
Do not use the fan near curtains, plants, or where other objects can become caught in the blades.
-
To disconnect the fan, pull the plug out of the mains power outlet. Do not pull it using the cable.
-
Do not run the cable under carpeting or cover the cable with rugs, runners, or similar covers.
-
This appliance is not intended for use by persons (including children) with reduced physical, sensory or mental capabilities, unless they have been given supervision or instruction concerning use of the appliance by a person responsible for their safety. Children should be supervised to ensure they do not injure themselves or cause harm to their surroundings.
-
If you notice any anomalies such as an unusual noise from the fan, turn the appliance off and unplug it immediately.
-
This product is made for household domestic use only and not for commercial purposes.
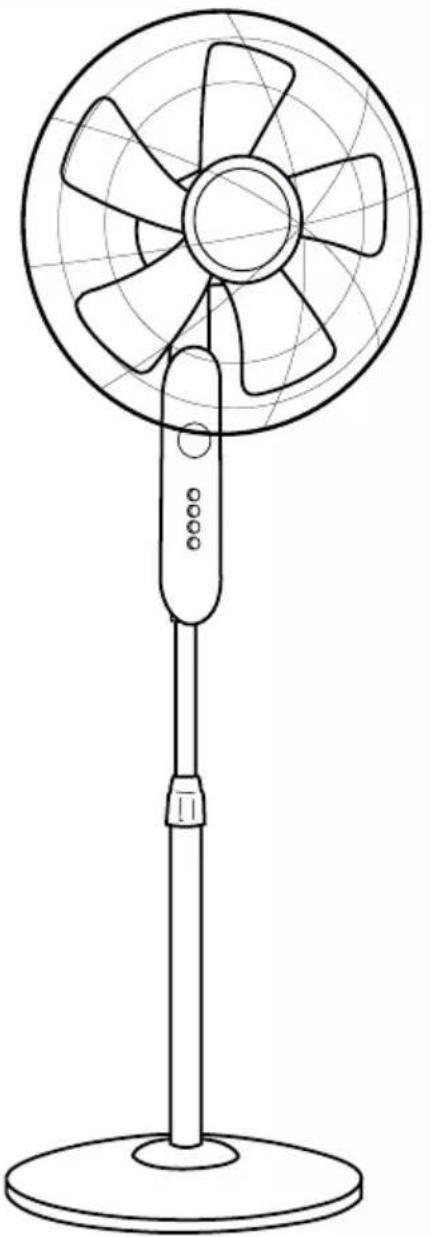
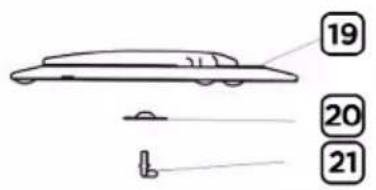
Fan Components
text_image
Exploded diagram of a fan assembly with numbered parts and component labels| 1 Front Cover 12 Control Box Locknut | |
| 2 Cover Ring 13 Control Panel | |
| 3 Cover Ring Screw 14 Power Switch | |
| 4 Blade Cap 15 Pole Inner Tube | |
| 5 Fan Blade 16 Pole Locknut | |
| 6 Fastening Nut 17 Pole Exterior Tube | |
| 7 Back Cover 18 Base | |
| 8 Motor Shaft Pin 19 Base Weight | |
| 9 Fan Head/Motor 20 Fixing Plate for Base | |
| 10 Tilting Joint 21 Base Bolt | |
| 11 Control Box |
How to Set Up Your Fan
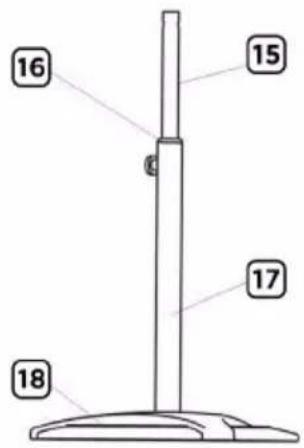
1. Set up the Pole
Take the exterior tube (part 17), loosen the pole locknut (16) and pull out the inner steel tube (15) adjusting to the required height. Re-tighten the screw counterclock-wise to fix the poles to the correct height.
text_image
16 15 17 182. Set up the Base and Attach the Pole
Unscrew the base bolt (21) from the bottom of the fan base (18) counterclockwise. Insert the base weight (19) and fixing plate (20) to the underside of the base (18) and hold it in place, while at the same time holding the assembled pole on the top side of the base. Tighten it all together with the base bolt (21).
text_image
19 20 213. Setting up the Fan Head
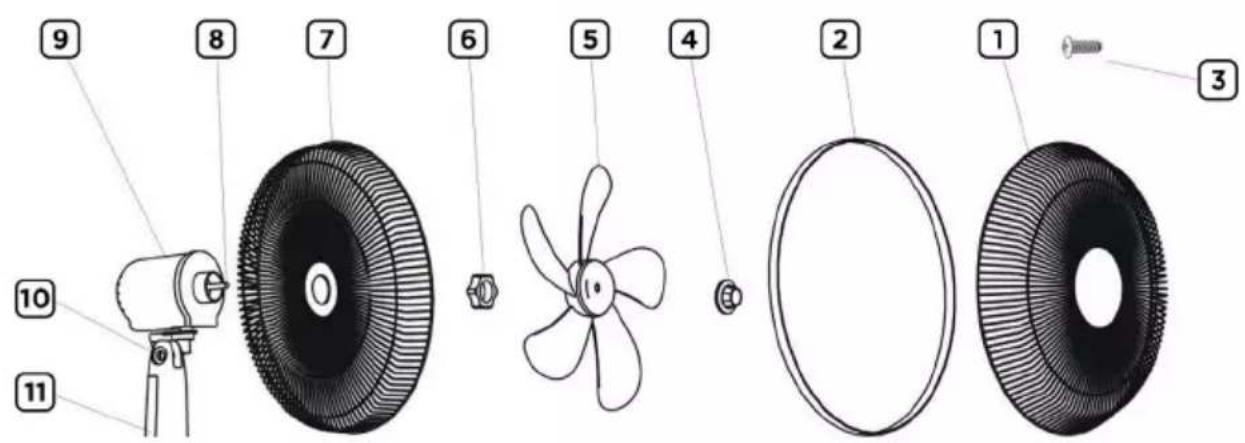
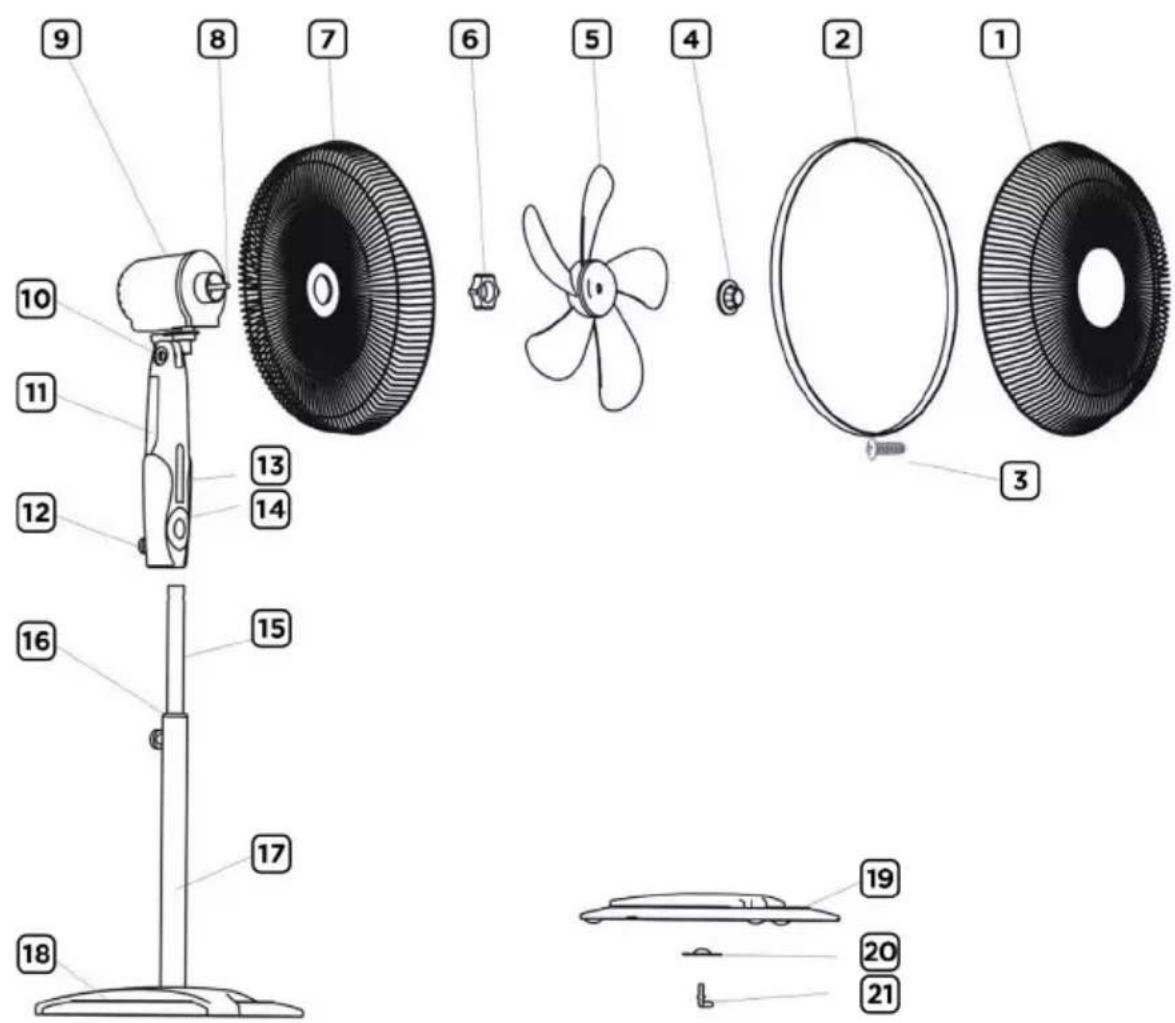
text_image
Exploded diagram of a fan assembly with numbered parts including camera, propeller, and washerLoosen the tightened fastening nut (6) from the fan head (8).
Place the back cover (7) onto the head and tighten it with the fastening nut (6).
Place the fan blade (5) on top of the fastening nut.
Next screw on the blade cap (4) to secure the fan blade.
Put the front cover (1) on top. Secure both covers together using the cover ring (2) and the cover ring screw (3).
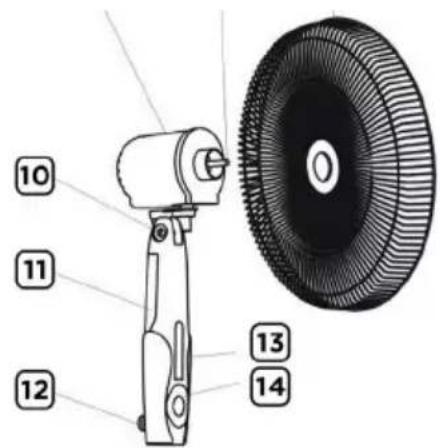
4. Fixing the pole to the Fan Head
The fan head should now all be assembled and attached to the control box. Next, loosen the control box locknut (12) and place the whole assembled fan head with control box onto the inner tube (15) and fasten in place by tightening the control box locknut (12).
text_image
Technical diagram of a mechanical device with numbered parts labeled 10 to 14Replacing the Remote Control Batteries
- Open the battery cover on the back of the remote.
- Remove the old battery and dispose of it responsibly.
- Insert the new battery (ensure that the positive and negative side of the battery are in the correct place).
- Close the battery cover.
Technical Specification
| Model Voltage Frequency Power | ||
| FN65 220V 50Hz 60W | ||
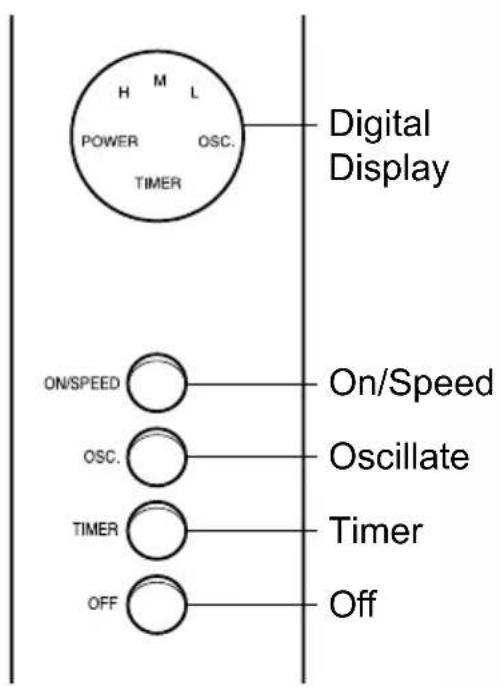
How to Use the FN65
text_image
H M L POWER OSC. TIMER Digital Display ON/SPEED On/Speed OSC. Oscillate TIMER Timer OFF OffThe Control Pad
text_image
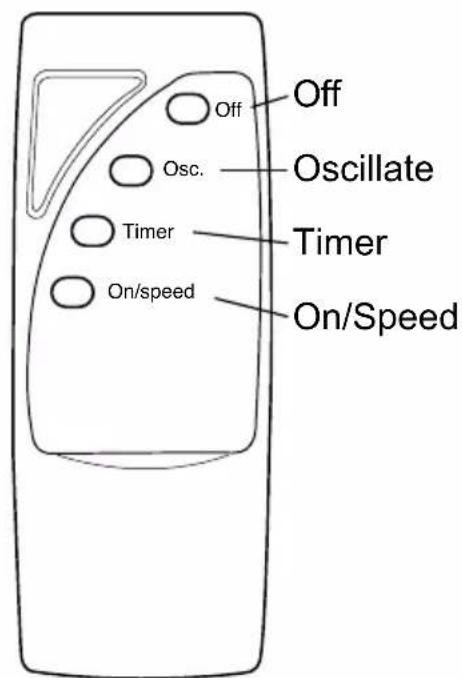
Off Off Osc. Oscillate Timer Timer On/speed On/SpeedThe Remote Control
1. Adjustment of the Wind Direction
The angle of the fan head is adjustable upwards or downwards by slightly lifting or pressing the mesh cover.
2. Adjustment of the Rotation/Oscillation
Pressing the oscillation button on the control pad or remote control will activate the rotation function.
3. Adjusting the Wind Speed
This fan has 3 speed settings which can be selected by repeatedly pressing the 'SPEED' button on the control pad or remote control: L = low wind, M = medium wind, H = high wind. Press the 'OFF' button to stop the fan.
4. Setting the Timer
This fan has a built-in timer which will automatically turn off the fan after a selected time. Simply press the ‘TIMER’ button repeatedly on the control panel or remote control to set the timer to the desired time. The timer can be set for 0.5 - 7.5 hours.
DURONIC
Maintenance And Storage
-
Unplug the unit and store the fan in a cool, dry location when not in use.
-
Never submerge the fan in water. To keep the fan clean, use a soft, damp cloth. You can use a mild detergent if necessary. After cleaning, wipe the unit dry by using a soft dry cloth.
-
Do not use alcohol, gasoline, abrasive powders, furniture polish or brushes to clean the fan as this may cause damage and deterioration to the surface of the fan.
-
Always ensure the fan is completely dry before operating again.
DURONIC
Warranty
1 Year Guarantee from Shine-Mart Ltd, Trademark owners of Duronic Products. NOTE: THESE STATEMENTS DO NOT AFFECT YOUR STATUTORY RIGHTS AS A CONSUMER
This product has been manufactured under the strictest or quality control procedures, and using the highest quality of materials, to ensure excellent performance and reliability. It will give very good and long lasting service, provided it is properly used and maintained. The product is guaranteed for 1 years from the date of original purchase. If any defect arises due to a faulty materials or poor workmanship, the faulty product must be returned to the original place of purchase. Refund or replacement is at the discretion of that company.
Duronic Products are offered with a 1 year guarantee under the following conditions:
- The product must be returned to the retailer with original proof of purchase.
- The product must be installed and used in accordance with the instructions contained in this operating manual.
- It must be used only for domestic purposes.
- It does not cover wear and tear, malicious damage, misuse, neglect, inexpert repairs or consumable parts.
- Shine-Mart Ltd has no responsibilities for accidental or consequential loss or damage.
- Shine-Mart Ltd are not liable to carry out any type of servicing work, under the guarantee
- Valid in the UK only
This product is fitted with CE:1363 plug and fuse Imported by Shine-Mart Ltd, RM3 8SB

Information on waste Disposal for Consumers of
Electrical & Electronic Equipment.
This mark on a product and/or accompanying documents indicates that when it is to be disposed of, it must be treated as Waste Electrical & Electronic Equipment, (WEEE).
Any WEEE marked products must not be mixed with general household waste, but kept separate for the treatment, recovery and recycling of the materials used.
For proper treatment, recovery and recycling; please take all WEEE marked waste to your Local Authority Civic waste site, where it will be accepted free of charge.
If customers dispose of Waste Electrical & Electronic Equipment correctly, they will be helping to save valuable resources and preventing any potential negative effects upon human health and the environment, of any hazardous materials that the waste may contain.
Follow Us

text_image
duronic.com duronic @duronicmedia duronic @duronicmediatext_image
Exploded diagram of a fan assembly with numbered parts for identification and labelingtext_image
Exploded diagram of a mechanical component with numbered parts and exploded view, including a camera and fan assembly.text_image
Technical diagram of a mechanical device with numbered parts labeled 10 to 14text_image
Off Osc. Oscillate Timer Timer On/speed On/SpeedLa télécommande