
Intuition Experience EA876D - Coffee machine KRUPS - Free user manual and instructions
Find the device manual for free Intuition Experience EA876D KRUPS in PDF.
User questions about Intuition Experience EA876D KRUPS
0 question about this device. Answer the ones you know or ask your own.
Ask a new question about this device
Download the instructions for your Coffee machine in PDF format for free! Find your manual Intuition Experience EA876D - KRUPS and take your electronic device back in hand. On this page are published all the documents necessary for the use of your device. Intuition Experience EA876D by KRUPS.
USER MANUAL Intuition Experience EA876D KRUPS
FR ...... P. 14 – 27
EN P. 28-41
DE ...... P. 42 - 55
NL ...... P. 56 – 69
DA P. 70-83
NO ...... P. 84 – 97
SV P. 98-111
FI P. 112-125
ES ...... P. 126 - 139
IT P. 140-153
PT ...... P. 154 - 167
EL ...... P. 168 - 182
CS ...... P. 183 - 196
SK P. 197-210
HU ...... P. 211-224
PL P. 225-238
RU ...... P. 239 - 252
UK P. 253-266
RO ...... P. 267 - 280
BG ...... P. 281 - 294
HR ...... P. 295-308
KRUPS
EA876/EA877 INTUITION EXPERIENCE
EAB76/EAB77 INTUITION EXPERIENCE

www.krups.com

text_image
A B F 1 D1 D2 D3 G D C G I E H R mi 000 000 400 300 200 100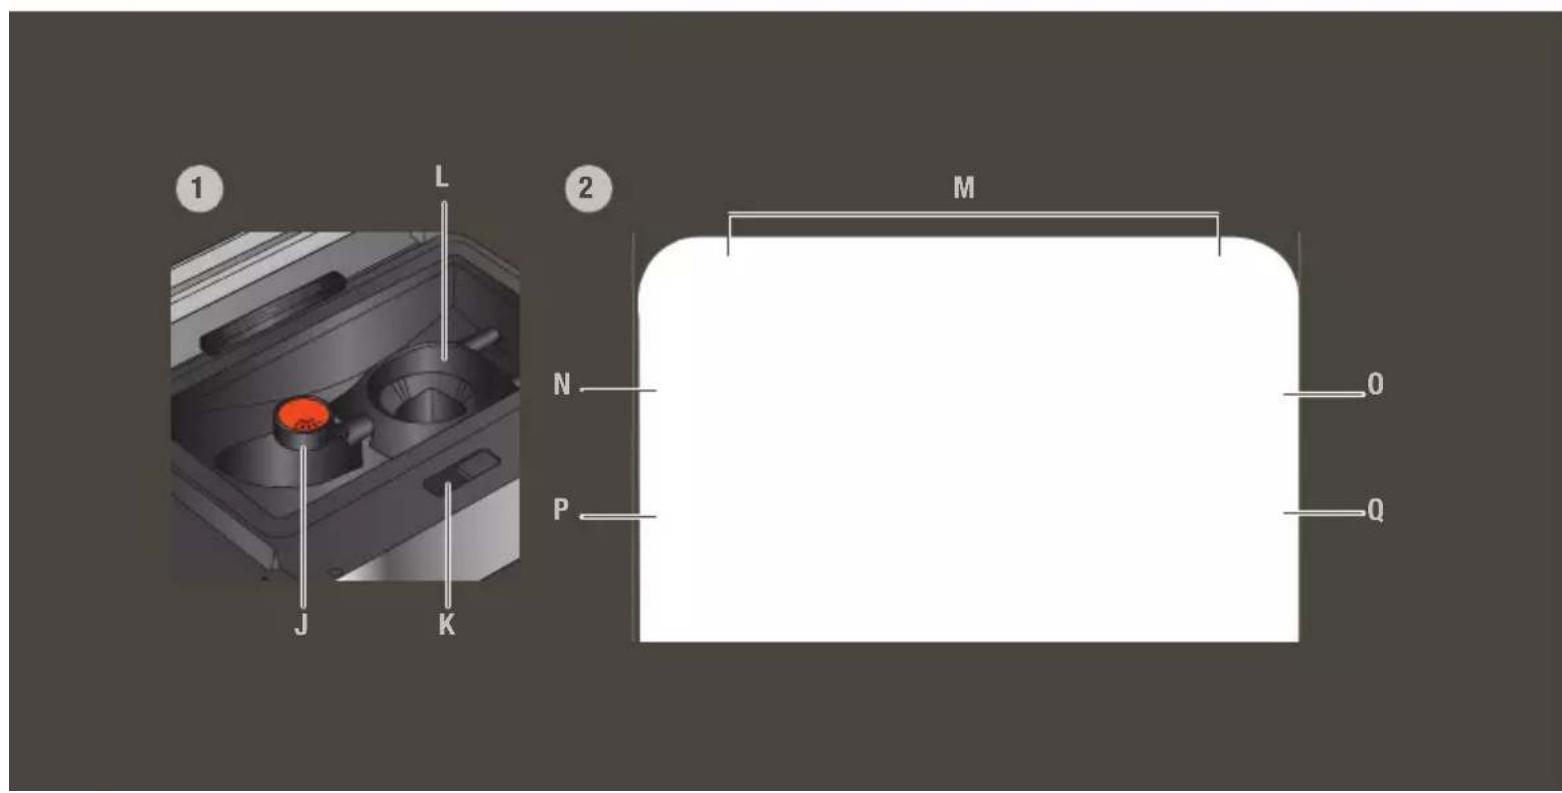
text_image
① L J K ② M N P O Q1 1st USE

FR - 1ÈRE UTILISATION DE - ERSTMALIGE BENUTZUNG
NL - 1STE GEBRUIK
NO - F∅RSTE GANGS BRUK
FI - ENSIMMÄINEN KÄYTTÖKERTA
IT - PRIMO UTILIZZO
EL - ΠΡΩΤΗ ΧΡΗΣΗ
SK - PRVÉ POUŽITIE
PL - PIERWSZE UŻYCIE
natural_image
Hand inserting a plug into an electrical outlet socket with an arrow indicating direction (no text or symbols)
text_image
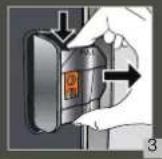
Diagram showing a finger pressing a button with a power symbol and downward arrow, labeled with numbers 3 and 4.
natural_image
Illustration of a transparent cylindrical container with a metal rod extending upward (no text or symbols)
natural_image
Illustration of a hand placing a tray into a microwave oven with a digital display (no text or symbols visible)
text_image
KRUPS RUBER 600 ml 5
natural_image
Illustration of a computer monitor with three dots on screen, no visible text or symbols
natural_image
Illustration of a Krups water dispenser with a glass bowl and control panel (no text or symbols)
natural_image
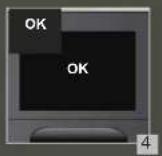
Illustration of a computer monitor with a checkmark icon, no text or symbols present
natural_image
Illustration of a hand pouring granular material into a device with a black arrow indicating the process (no text or symbols present)
natural_image
Illustration of a hand pressing down on a printer with a paper filter, showing no text or symbols.
text_image
K S K P S 1211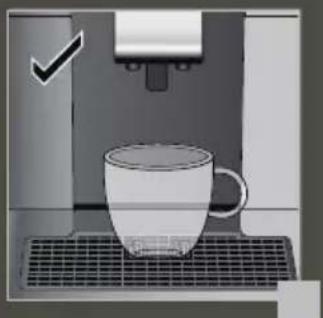
natural_image
Illustration of a coffee machine with a cup on a griddle (no text or symbols)2 MAKE A MILK RECIPE

FR - PRÉPARER UNE RECETTE LACTÉE
NL - EEN MELKRECEPT MAKEN
NO - TILBERED EN DRIKK MED MELK
FI - MAITOPOHJAISEN JUOMAN
VALMISTAMINEN
IT - PREPARAZIONE DI BEVANDE A BASE DI LATTE
EL - ΠΑΡΑΣΚΕΥΗ ΣΥΝΤΑΓΗΣ ΜΕ ΓΑΛΑ
SK - PRÍPRAVA MLIEČNEHO RECEPTU
PL - UŻYCIE NACZYNIA NA MLEKO
UK - ПРИГОТУВАННЯ НАПОЇВ З
МОЛОКОМ
BG - ПРИГОТВЯНЕ НА РЕЦЕПТА С МЛЯКО
DE - ZUBEREITUNG EINES MILCHGETRÄNKS
DA - LAV EN MALKEOPSKRIFT
SV - TILLRED EN DRYCK MED MJÖLK
ES - PREPARAR UNA RECETA DE BEBIDA LÁCTEA
PT - PREPARAR UMA BEBIDA À BASE DE LEITE
CS - VYTVORTE RECEPT S MLEKEM
HU - KÉSZÍTSEN EGY TEJRECEPTET
RU - ПРИГОТОВЛЕНИЕ НАПИТКОВ С
МОЛОКОМ
RO - PREPARATI O RETETĂ CU LAPTE
HR - PRIPREMA NAPITAKA S MLJEKOM

text_image
Diagram showing two experimental setups with labeled components and a central container, likely illustrating a chemical or laboratory procedure.
natural_image
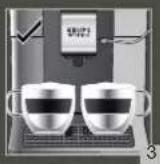
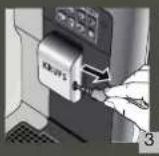
Two-panel image showing a coffee machine interface and its corresponding view of the same coffee mug (no text or symbols visible)3 MAKE 2 CUPS OF A MILK RECIPE AT ONCE

FR - POUR 2 TASSES INSTANTANÉES D'UNE RECETTE AVEC DU LAIT
NL - MAAK ONMIDDELLIK 2 KOPJES VAN
EEN MELKRECEPT
NO- LAG 2 KOPPER MED EN MELKEOPPSKRIFT PÅ EN GANG
FI - TEE 2 KUPILLISTA MAITOKAHVIA KERRALLA
IT - PREPARAZIONE DI 2 BEVANDE A BASE DI LATTE CONTEMPORANEAMENTE
EL - ΠΑΡΑΣΚΕΥΗ 2 ΦΛΙΤΖΑΝΙΩΝ ΜΙΑΣ ΣΥΝΤΑΓΗΣ ΜΕ ΓΑΛΑ ΣΤΗ ΣΤΙΓΜΗ ΡŘΙΡRAVTE
SK - PRIPRAVTE NARAZ 2 ŠÁLKY
MLIEČNEHO RECEPTU
PL - PRZYGOTOWANIE 2 FILIZANEK NAPOJU Z MLEKIEM NA RAZ
UK - ГОТУЙТЕ 2 ЧАШКИ НАПОЮ 3
МОЛОКОМ ЗА ОДИН РАЗ
BG - ИЗПЪЛНЯВАНЕ НА РЕЦЕПТА С
МЛЯКО ЗА 2 ЧАШИ НАВЕДНЬЖ
DE - 2 TASSEN EINES MILCHREZEPTES AUF
EINMAL ZUBEREITEN
DA - OPSKRIFT TIL AT LAVE 2 KOPPER MÄELK PÅ
SAMME TID
SV - TILLAGA 2 KOPPAR AV ETT MJÖLKRECEPT
I TAGET
ES - HAGA 2 TAZAS DE UNA BEBIDA CON LECHE A LA VEZ
PT - PREPARE 2 CHÁVENAS DE UMA RECEITA
DE LEITE NUMINSTANTE
CS - NAJEDNOU 2 ŠÁLKY MLÉČNÉ RECEPTURY
HU - EGYSZERRE 2 CSÉSZE TEJITALT KÉSZÍTSEN
RU - ГОТОВЬТЕ 2 ЧАШКИ МОЛОЧНОГО
НАПИТКА ОДНОВРЕМЕННО
RO - PREPARAREA SIMULTANĂ A 2 CEȘTI DE BĂUTURĂ CU LAPTE
HR - NAPRAVITE 2 ŠALICE NAPITKAS
MLIJEKOM ODJEDNOM
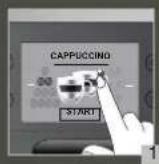

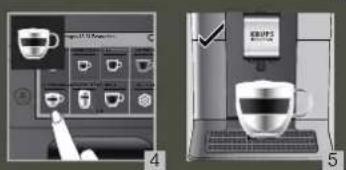
4 QUICK RINSING MILK AFTER A CAPPUCINO

FR - RINÇAGE RAPIDE DU LAIT APRÈS UN CAPPUCCINO
NL - SNELLE MELKSPOELING NA EEN CAPPUCCINO
NO - HURTIG MELKESKYLLING ETTER EN CAPPUCCINO
FI - NOPEA MAIDON HUUHTELU
CAPPUCCINON JÄLKEEN
IT - RISCIACQUO RAPIDO DEL CIRCUITO
DEL LATTE DOPO UN CAPPUCCINO
EL - ΓΡΗΓΟΡΗ ΕΚΠΛΥΣΗ ΓΑΛΑΚΤΟΣ ΜΕΤΑ
ΑΠΟ ΚΑΠΟΥΤΣΙΝΟ
SK - RÝCHLE OPLACHOVANIE MLIEKA PO CAPPUCCINE
PL - SZYBKIE PŁUKANIE SYSTEMU MLEKA PO CAPPUCCINO
UK - ШВИДКЕ ЗМИВАННЯ МОЛОКА ПІСЛЯ
ПРИГОТУВАННЯ КАПУЧИНО
BG - БЪРЗО ИЗПЛАКВАНЕ НА МЛЯКОТО
СЛЕД КАПУЧИНО
DE - SCHNELLE MILCHSPÜLUNG NACH EINEM CAPPUCCINO
DA - HURTIG MÄLKESKYLNING EFTER EN CAPPUCCINO
SV - SNABB MJÖLKSKÖLJNING EFTER EN CAPPUCINO
ES - ENJUAGUE RÁPIDO DE LA LECHE DESPUÉS DE HACER UN CAPPUCCINO
PT - LAVAGEM RÁPIDA DO LEITE APÓS PREPARAÇÃO DE UM CAPPUCCINO
CS - RYCHLÉ OPLACHOVÁNÍ MLÉKA PO CAPPUCCINU
HU - A TEJ GYORS KIMOSÁSA CAPPUCCINO
KÉSZÍTÉSE UTÁN
RU - БЫСТРАЯ ПРОМЫВКА МОЛОЧНОЙ СИСТЕМЫ ПОСЛЕ ПРИГОТОВЛЕНИЯ КАПУЧИНО
RO - CLĂTIREA RAPIDĂ A LAPTELUI DUPĂ UN CAPPUCCINO
HR - BRZO ISPIRANJE MLIJEKA NAKON
CAPPUCCINA


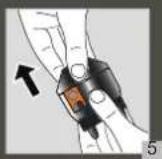
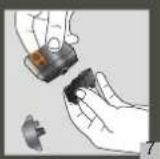
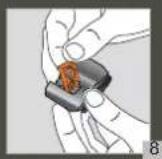
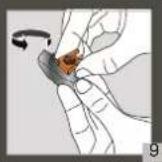
5 MANUAL DEEP CLEANING OF MILK SYSTEM - 5 MIN

FR - NETTOYAGE MANUEL APPROFONDI
DU LAIT - 5 MIN
NL - HANDMATIGE DIEPE REINIGING VAN
HET MELKSYSTEEM - 5 MIN
NO - MANUELL ORDENTLIG RENGJ∅RING
AV MELKESYSTEMET - 5 MIN
FI - MANUAALINEN MAITOJÄRJESTELMÄN
SYVÄPUHDISTUS - 5 MIN
IT - PULIZIA PROFONDA MANUALE DEL CIRCUITO DEL LATTE - 5 MIN
EL - XEIPOKINHTOΣ BAΘΥΣ KAΘΑΡΙΣΜΟΣ
TOY ΣΥΣΤΗΜΑΤΟΣ ΓΑΛΑΚΤΟΣ - 5
ΛΕΠΤΑ
SK - MANUÁLNE HÍBKOVE ČISTENIE
MLIEČNEHO SYSTÉMU - 5 MIN
PL - RĘCZNE SZCZEGÓŁOWE CZYSZCZENIE SYSTEMU MLEKA - 5 MIN
UK - ГЛИБОКЕ РУЧНЕ ОЧИЩЕННЯ
СИСТЕМИ МОЛОКА - 5 ХВ
BG - РЪЧНО ДЪЛБОКО ПОЧИСТВАНЕ НА СИСТЕМАТА ЗА МЛЯКО
DE - MANUELLE TIEFENREINIGUNG DES MILCHSYSTEMS - 5 MIN.
DA - MANUEL HOVEDRENSNING AF MÄLKESYSTEMET - 5 MIN.
SV - MANUELL DJUPRENGÖRING AV
MJÖLKSYSTEMET - 5 MINUTER
ES - LIMPIEZA PROFUNDA MANUAL DEL SISTEMA DE LECHE - 5 MINUTOS
PT - LIMPEZA MANUAL PROFUNDA DO SISTEMA DO LEITE - 5 MIN
CS - RUČNÍ HLOUBKOVÉ ČIŠTĚNÍ MLĚČNÉHO
SYSTÉMU - 5 MIN
HU - A TEJRENDSZER MANUÁLIS
MÉLYTISZTÍTÁSA - 5 PERC
RU - ЗАПУСКАЕМАЯ ВРУЧНУЮ ГЛУБОКАЯ ОЧИСТКА МОЛОЧНОЙ СИСТЕМЫ – 5 МИН.
RO - CLĂTIREA MANUALĂ ÎN PROFUNZIME A SISTEMULUI DE LAPTE - 5 MIN
HR - RUČNO DUBINSKO ČIŠĆENJE SUSTAVA
MLIJEKA - 5 MIN.


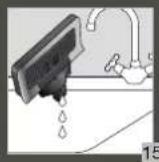
8 CLEAN THE WATER TANK REGULARLY

FR - NETTOYER LE RÉSERVOIR D'EAU
RÉGULIÈREMENT
NL - MAAK HET WATERRESERVOIR
REGELMATIG SCHOOL
NO - RENGJ∅R VANNTANKEN REGELMESSIG
FI - PUHDISTA VESISÄILIÖ
SÄÄNNÖLLISESTI
IT - PULIRE REGOLARMENTE IL SERBATOIO
DELL'ACQUA
EL - KAΘΑΡΙΖΕΤΕ ΤΑΚΤΙΚΑ ΤΟ ΔΟΧΕΙΟ
ΝΕΡΟΨ
SK - NÁDRŽ NA VODU PRAVIDELNE ČISTITE
PL - PAMIĘTAJ O REGULARNYM CZYSZCZENIU POJEMNIKA NA WODE
UK - РЕГУЛЯРНО ОЧИЩАЙТЕ РЕЗЕРВУАР
ДЛЯ ВОДИ
BG - ПОЧИСТВАЙТЕ РЕДОВНО
РЕЗЕРВОАРА ЗА ВОДА
DE - REINIGEN SIE DEN WASSERTANK
REGELMÄSSIG
DA - RENG∅R VANDBEHOLDEREN
REGELMÆSSIGT
SV - RENGÖR VATTENBEHÄLLAREN
REGELBUNDET
ES - LIMPIA CON FRECUENCIA EL DEPÓSITO DE AGUA
PT - LIMPE O RESERVATÓRIO DE ÁGUA REGULARMENTE
CS - PRAVIDELNĚ ČISTÉTE NÁDRŽKU NA VODU
HU - RENDSZERESEN TISZTÍTSA MEG A VÍZTARTÁLYT
RU - РЕГУЛЯРНО ОЧИЩАЙТЕ РЕЗЕРВУАР
ДЛЯ ВОДЫ
RO - CURĂTATI REZERVORUL DE APĂ ÎN MOD REGULAT
HR - REDOVITO ČISTITE SPREMNIK ZA VODU


9 COMPLETE AUTOMATIC CLEANING OF THE MACHINE 3 x / YEAR - 13 MIN

FR - NETTOYAGE AUTOMATIQUE COMPLET DE LA MACHINE 3 x / ANNÉE - 13 MIN
NL - VOLLEDIGE AUTOMATISCHE REINIGING VAN DE MACHINE 3 x - JAAR - 13 MIN
NO -FULLFOR MASKINENS AUTOMATISKE RENS 3 x/ARET-13 MIN
FI - KEITTIMEN PERUSTEELLINEN
AUTOMAATTINEN PUHDISTUS 3 KRT
VUODESSA - 13 MIN
IT - PULIZIA AUTOMATICA COMPLETA DELLA MACCHINA (3x ANNO) - 13 MIN
EL - ΟΛΟΚΛΗΡΩΜΕΝΟΣ ΑΥΤΟΜΑΤΟΣ
ΚΑΘΑΡΙΣΜΟΣ ΤΗΣ ΣΥΣΚΕΥΗΣ 3 ΦΟΡΕΣ ΤΟΝ
ΧΡΟΝΟ - 13 ΛΕΠΤΑ
SK - REALIZÁCIA AUTOMATICKÉHO CISTENIA
ZARIADENIA 3 x / ROK - 13 MIN
PL - PRZEPROWADZANIE AUTOMATYCZNEGO CZYSZCZENIA EKSPRESU 3x / ROK - 13 MIN
UK - ПОВНЕ АВТОМАТИЧНЕ ОЧИЩЕННЯ
КАВОМАШИНИ З РАЗИ НА РІК – 13 ХВ
BG - ПЪЛНО АВТОМАТИЧНО ПОЧИСТВАНЕ НА
КАФЕМАШИНАТА 3 x / ГОДИШНО – 13 МИН
DE - KOMPLETTE AUTOMATISCHE REINIGUNG DER MASCHINE 3 x / JAHR - 13 MIN
DA - GENNEMF∅R AUTOMATISK RENSNING AF
MASKINEN 3 x OM ÅRET – 13 MIN
SV • AUTOMATISK RENGÖRING AV HELA MASKINEN
3 ggr / ÅR- 13 MIN
ES - COMPLETAR LA LIMPIEZA AUTOMÁTICA DE LA MÁQUNA 3 x / AÑO - 13 MIN
PT - LIMPEZA AUTOMATICA COMPLETA DA MAQUINA 3 x / ANO - 13 MIN
CS - KOMPLETNÍ AUTOMATICKÉ ÓŠTĚNÍ STROJE
3 X / ROK - 13 MIN
HU - A GÉP TELJES AUTOMATIKUS TISZTÍTÁSA
ÉVENTE HÁROMSZOR - 13 PERC
RU - ПРОГРАММА АВТОМАТИЧЕСКОЙ ОЧИСТКИ УСТРОЙСТВА 3 РАЗА В ГОД - 13 МИН
RO - CURĂTAREA AUTOMATĂ COMPLETĂ A MAŞINI
3 x / AN - 13 MIN
HR - SPROVEDITE AUTOMATSKO ČIŠĆENJE
UREDAJA 3 x / GODIŠNJE - 13 MIN


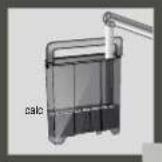
10 DESCALING PROGRAM - 20 MIN

FR - PROGRAMME DE DÉTARTRAGE
20 MIN
NL - ONTKALKINGSPROGRAMMA - 20 MIN
NO -AVKALKNINGSPROGRAM - 20 MIN
FI - KALKINPOISTO-OHJELMA - 20 MIN
IT - PROGRAMMA DI DECALCIFICAZIONE-
20 MIN
EL - ΠΡΟΓΡΑΜΜΑ ΑΦΑΛΑΤΩΣΗΣ - 20 ΛΕΠΤΑ
SK - PROGRAM NA ODSTRÁNENIE
VODNÉHO KAMEÑA - 20 MIN
PL - PROGRAM ODKAMIENIANIA - 20 MIN
UK -ПРОГРАМА ВИДАЛЕННЯ НАКИПУ - 20 ХВ
BG -ПРОГРАМА ЗА ОТСТРАНЯВАНЕ НА КОТЛЕН КАМЪК – 20 МИН
DE -ENTKALKUNGSPROGRAMM - 20 MIN
DA -AFKALKNINGSPROGRAM - 20 MIN
SV - AUTOMATISKT AVKALKNINGSPROGRAM - 20 MIN
ES - PROGRAMA DE DESCALCIFICACAO - 20 MIN
PT - PROGRAMA DE DESCALCIFICAÇÃO
CS - ODVAPNOVACI PROGRAM - 20 MIN
HU -VÍZKÖMENTESÍTŐ PROGRAM - 20 PERC
RU - ПРОГРАММА УДАЛЕНИЯ НАКИПИ
20 МИН
RO -PROGRAM DE DETARTRARE - 20 MIN
HR -PROGRAM ZA UKLANJANJE KAMENCA - 20 MIN


Chère cliente, cher client,
INFORMATIONS IMPORTANTES SUR LE PRODUIT
ACCESSOIRES FOURNIS AVEC VOTRE MACHINE
Très soutenue (Dark French)
Soutenue (French)
Thank you for purchasing a KRUPS espresso machine with built-in grinder.
KRUPS espresso machines with built-in grinders are designed, developed and manufactured in France, thereby ensuring the strictest guarantees in terms of origin and manufacturing quality.
Your machine is designed to be as easy to use as possible and to create barista quality drinks. Enjoy an Espresso, a Ristretto, a long coffee, or even a Cappuccino, Latte Macchialo or Café Latte, among other types of coffee, all at the touch of a button! To make things easier for you, KRUPS has developed an intuitive light indicator. This will guide you when using your machine and brighten up your coffee breaks.
Your KRUPS espresso machine is also equipped with a large intuitive touch screen, like a smartphone screen, for great ease of use. The advanced technologies present in your machine enable you to obtain the best possible result, revealing the maximum aromas and flavours from freshly ground coffee beans.
We hope that you enjoy your coffee and that your KRUPS machine is to your complete satisfaction.
The KRUPS team

NEED SUPPORT IN GETTING STARTED WITH YOUR MACHINE?


Find a list of tutorials saved in your machine to assist you in using it.
They will take you step-by-step through how to make a drink, manage your favourites, and maintain your machine.
List of tutorials available:
1. How to make your drinks
a. Making a coffee drink
b. Making a milk drink
c. Making 2 drinks at the same time
2. How to manage a profile
d. Create and configure your profile
e. Add a drink to your profile (after
making
f. Add a drink to your profile (from
the profile page)
g. Remove a drink from your profile
3. How to maintain your machine
h. Carry out rinsing
i. Carry out cleaning
J. Carry out descaling
k. Cleaning the milk nozzle

IMPORTANT PRODUCT INFORMATION
Carefully read the user manual and the "safety instructions" booklet before you use your appliance for the first time and keep it: improper use will release KRUPS from any liability.

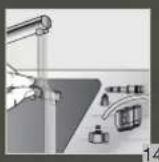
ACCESSORIES SUPPLIED WITH YOUR MACHINE
Check the accessories supplied with your machine. If a part is missing, contact your KRUPS consumer service directly.
Products supplied
| 1. | 2 cleaning tablets |  | |
| 2. | 1 sachet of descaler |  | |
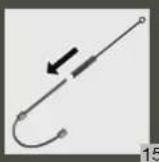
| 3. | Milk tube for the "one touch cappuccino" block |  | |
| 4. | Additional milk tube for the "one touch cappuccino" block |  | |
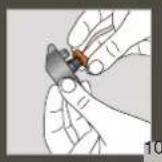
| 5. | Steam circuit cleaning needle located in the coffee nozzle |  | |
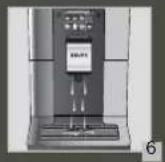
| 6. | 1 Claris Aqua Filter System cartridge with screwing accessory. |  | |
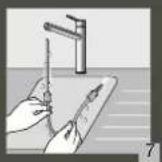
| 7. | 1 stick to check the water hardness |  | |
| 8. | Operating Instructions - Safety recommendations bookletDirectory of Krups after-sales service centresWarranty documents |  | |
| 9. | Cleaning pipe |  | |
| Only for the intuition Expérience + EA877 | |||
| 10. | Milk pot: You can put the milk pot in the dishwasher without its lid | ||

Caution: Only use Krups accessories for this machine to maintain the warranty.

TECHNICAL DATA
| Appliance Automatic Espresso EA87 | |
| Power supply 220-240V-- / 50 Hz | |
| Pump pressure 15 bar | |
| Coffee bean container | 250 g |
| Energy consumption | When operating: 1550 W |
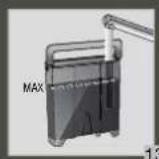
| Water tank | 3 L |
| Getting started and storage | Inside, in a dry place (away from ice) |
| Dimensions (mm) H x L x D | 365 x 240 x 400 |
| Weight of EA87 (kg) | 8.9 |
Subject to technical modifications.

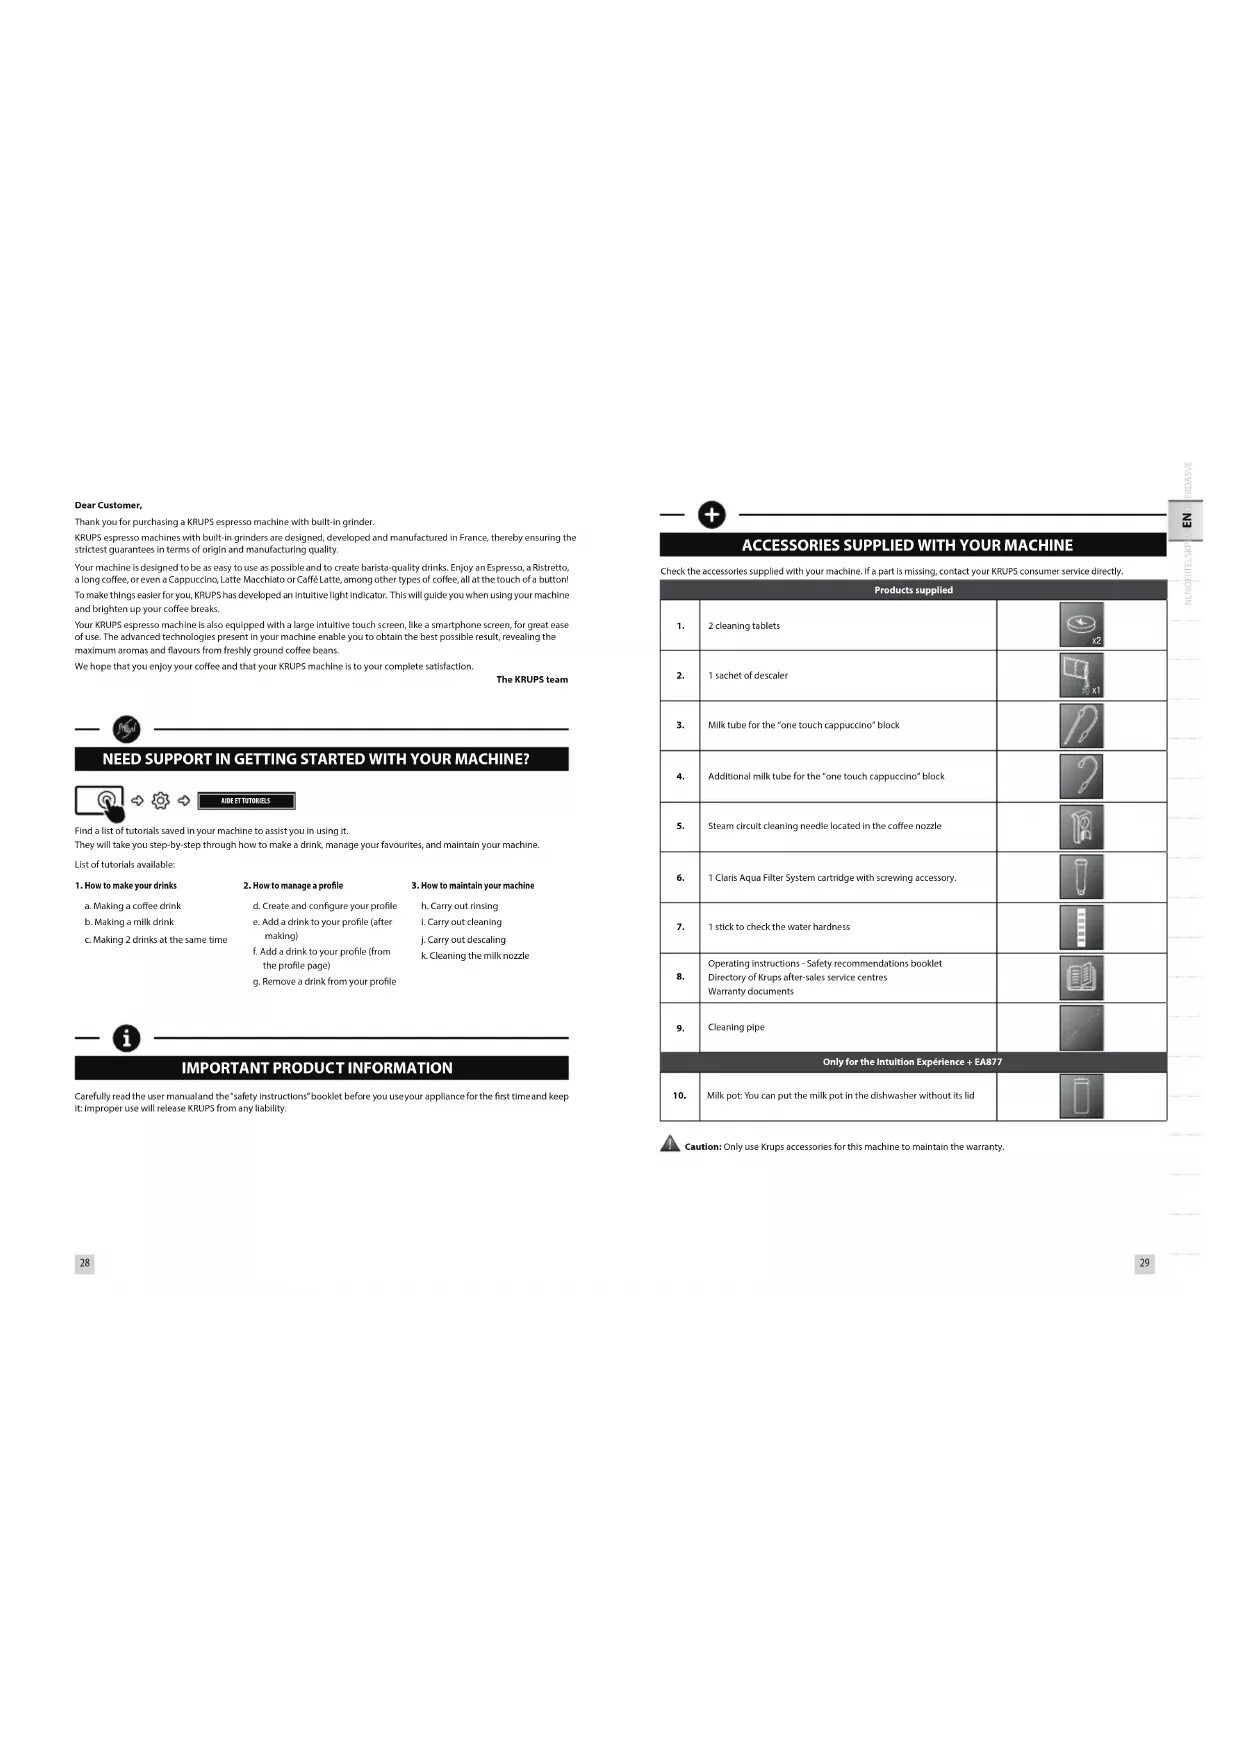
APPLIANCE DESCRIPTION
A. Water tank lid handle
B. Water tank
C. Coffee grounds collection tray
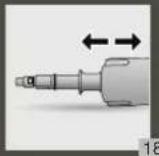
D. Height-adjustable coffee/milk nozzles with cup(s) lighting system
D1. "one touch cappuccino" block
D2. Removable door
D3. Cleaning needle
E. Removable grid and drip tray
F. Coffee bean container lid
G. Milk tube for the "one touch cappuccino" block and connector
H. Water level floats
1. Intuitive light indicator
-
Coffee bean container
J. Grinding fineness adjustment button
K. Cleaning tablet hatch
L. Metal conical grinding mill -
Control panel
M. Navigation touch screen
N. ON/OFF
0. Home screen shortcut
P. Profiles
Q. Machine configurations
R. Milk pot (only for Intuition Experience + EAB77)

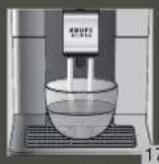
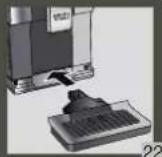
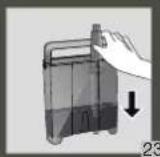
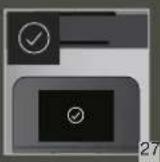
GETTING STARTED & APPLIANCE INSTALLATION
INITIAL OPERATION
Place the machine on a stable, horizontal, clean and dry work surface.
When using the machine for the first time, you are asked to select various settings.
Priming the machine allows the water circuits to be filled, so that the machine can operate. Preheating and automatic rinsing will take place.
For more information, refer to the Quick Start Guide - 1st USE. Follow the instructions that appear on the screen
Your appliance has been checked and tested before leaving the manufacturing facility. Despite all the attention paid to cleaning, it is nevertheless possible that you find coffee residues in the coffee grinder and/or coffee drops on the grid of the drip tray. When unpacking, you may also notice the presence of dust on the machine due to the protective material. We recommend that you thoroughly clean your machine before first use with a cloth. We thank you for your understanding. Never use a damaged appliance.
MACHINE STANDBY
Depending on the preparation, the machine performs automatic rinsing when it is put on standby. The cycle lasts only a few seconds and stops automatically.

HINTS AND TIPS
WATER
The quality of the water greatly influences the quality of the aromas. Limescale and chlorine may alter the taste of coffee. To preserve all the aromas of your coffee, we recommend that you use fresh water as well as a Claris Aqua Filter System cartridge, or bottled water with dry residue below 800 mg/L (see label on bottle). See the chapter "FILTER AND WATER HARDNESS".
CUP
When preparing hot drinks we recommend using preheated cups (by passing them under hot water) the size of which is adapted to your desired quantity.
BEANS
Roasted coffee beans may lose their aroma if they are not protected. We advise you to use the amount of beans equivalent to your consumption over the next 2-3 days and to choose 250 g bags.
The quality of coffee beans is variable and tastes are subjective. Arabica will give you fine, floral aromas unlike Robusta which is higher in caffeine, more bitter and full-bodied. It is common to mix the two types of coffee to achieve a more balanced coffee. Please do not hesitate to seek advice from your roaster.
We do not recommend the use of oily and caramelised beans as these can damage the machine.
The fineness of the ground beans influences the strength of the aromas and the quality of the crema. The more finely ground the beans, the smoother the crema. Grinding can also be adapted for the desired drink.

INTUITIVE LIGHT INDICATOR
Your intuition machine has smart, bright technology to make your everyday life easier: the intuitive light indicator (I). This technology has a dual functionality:
- The machine automatically detects and controls the levels of coffee-beans, water and coffee grounds. When you need to fill or empty your containers, as well as when maintenance is required, the red warning light comes on and you should follow the information on your screen.
- The intuitive indicator light also allows you to personalise your experience. You can assign a colour to each profile. When one of the profiles is selected, the Indicator light takes on the colour of this profile to promote immediate understanding and ultra-fast and intuitive navigation.
See the chapter "MY PROFILE".

FILTER AND WATER HARDNESS
WHAT DOES THE WATER HARDNESS ADJUSTMENT DO?
To avoid scaling your machine and to optimise the quality of your coffee, we advise you to set the hardness of your water on your machine.
HOW TO INDICATE THE WATER HARDNESS OF YOUR MACHINE.


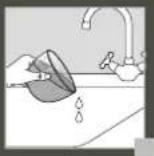
- Fill a glass of water Dip the test stick that comes with the machine into your glass filled with water.
- Wait 1 minute. The squares on the test stick change colour.
- Count the number of coloured squares. This tells you how hard your water is, between 0 and 4.
- In the "Water hardness" menu, press the corresponding number between 0 and 4.
- Press OK.
YOU NO LONGER HAVE A TEST STICK?
If you need to repeat this operation later, be sure to change the hardness of the water according to the place of use or the information provided by the water companies, using the table below:
| Degree of water hardness | Class 0 Very soft | Class 1 Soft | Class 2 Medium hard | Class 3 Hard | Class 4 Very hard |
| °dH | <3° | >4° | >7° | >14° | >21° |
| °e | <3,75° | >5° | >8,75° | >17,5° | >26,25° |
| °f | <5,4° | >7,2° | >12,6° | >25,2° | >37,8° |
| Appliance settings | 0 | 1 | 2 | 3 | 4 |
WHY INSTALL A FILTER CARTRIDGE?
The Clans Aqua Filter System cartridge helps to optimise the taste of your coffee, to limit the build-up of limescale and to reduce maintenance operations.
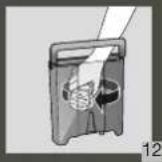
HOW TO INSTALL THE CLARIS AQUA FILTER SYSTEM CARTRIDGE


- The cartridge is placed in the water tank.
- We advise that, when you install your cartridge, you turn the grey ring at the far end of the filter cartridge to show the date of installation 1-2 months.
- Correctly position the cartridge in its location, with the numbered ring upwards.
- Use the black screw-in attachment, supplied with the cartridge, to correctly position and screw the cartridge in place.
WHEN SHOULD YOU CHANGE THE CLARIS AQUA FILTER SYSTEM CARTRIDGE?

1.2 months after installation or when the machine indicates this.

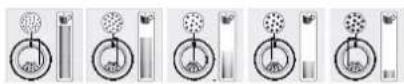
GRINDER: ADJUSTING THE GRINDING FINENESS
WHY ADJUST THE GRINDING FINENESS?
You can adjust the strength of your coffee by adjusting the grinding fineness of the coffee beans.
Varying the grinding fineness makes it possible to adapt to different types of bean:
• A heavily roasted and oily bean will require a coarse grind,
• A lighter roasted bean will be drier and will require a fine grind.
In addition, for the same coffee, the setting of your grind impacts the aroma in the cup: the finer the grind, the more powerful the aroma.

Very intense
(Dark French)
Intense
(French)
Mature
(Light French)
Average
(Amber)
Light
(Blonde)
HOW TO ADJUST THE GRINDING FINENESS
Turn the setting button located in the coffee bean container to suit your bean type and the power of aroma desired. This adjustment must be performed during grinding and notch by notch. After 3 preparations you will notice a distinct difference in taste;
HOW DO YOU KNOW WHEN THERE ARE NO MORE BEANS IN THE CONTAINER?
Your Intuition machine is equipped with a sensor to predict the lack of coffee beans in the container. An on-screen message will appear and the Intuitive Indicator Light (I) will illuminate red.
WHAT IF THE ALERT APPEARS DURING THE MAKING?
Fill the container with coffee beans, press OK and the recipe will resume. So no wasted coffee!
HOW TO IF I WANT TO CHANGE COFFEE OR IF I HAVE NO MORE COFFEE?
If you press OK without having added coffee beans, the machine tries to restart and goes back to alert. If you press OK again, the machine performs the making using all the remaining coffee. The grinder is now empty.
If an alert message appears on your screen and the alert light turns red when there are enough beans:
- Press the OK button to start preheating.
- Disable the "no bean" alert to avoid detections when there is coffee left in the coffee bean container.


PREPARING DRINKS
DRINKS AVAILABLE FROM THIS MACHINE:
Intuition Experience allows you to make a wide variety of coffee and milk-based recipes, hot or cold, to meet all your desires. The recipes are available in direct access from your control panel. The anchors, available at the bottom of your control panel (in slider view) are also a shortcut to access them. A description of each drink and associated preparation tips are available by tapping the [] on your screen once your drink has been selected.
| Drinks | Approximate size | Possible volumes | Coffee strength | ||
| Coffees | 25 ml | 20 - 40 ml | √ | √ | |
| 40 ml | 40 - 70 ml | √ | √ | ||
| 70 ml | 70 - 100 ml | √ | √ | ||
| 120 ml | 80 - 180 ml | √ | √ | ||
| 100 ml | 40 - 140 ml | √ | |||
| 120 ml | 90 - 150 ml | √ | |||
| 150 ml | 80 - 170 ml | √ | |||
| 375 ml | 375 - 1000 ml | √ | |||
| Milk Drinks | M = 60 mlL = 80 mlXL = 100 ml | √ | √ | ||
| M = 120 mlL = 180 mlXL = 240 ml | √ | √ | |||
| M = 120 mlL = 180 mlXL = 240 ml | √ | √ | |||
| M = 160 mlL = 200 mlXL = 240 ml | √ | ||||
| M = 120 mlL = 160 mlXL = 200 ml | √ | ||||
| M = 200 mlL = 280 mlXL = 350 ml | √ | √ | |||
| M = 190 mlL = 250 mlXL = 340 ml | √ | √ | |||
| Iced Drinks* | about 380 ml | √ | |||
| about 350 ml | √ | ||||
| about 350 ml | |||||
| Teas | The worstHot water at the ideal green tea temperature. | 200 ml 20 - 300 ml | ||||
| The noirHot water at the ideal black tea temperature. | 200 ml 20 - 300 ml | |||||
| The infusionHot water at the ideal temperature for an infusion. | 200 ml 20 - 300 ml |
HOW TO ADJUST THE HEIGHT OF THE COFFEE NOZZLES
For all of the drinks offered you can lower and reassemble the coffee nozzles according to the size of your cup(s)
HOW TO START PREPARING MY DRINK
Refer to the tutorial saved in your machine "How to make your drinks?"


AIDE FT TUTORIELS
DEPENDING ON THE DRINK, DIFFERENT SETTINGS ARE POSSIBLE:
• One or two cups: to launch the duplicate recipe, select the drink and press
• Coffee strength: to increase or decrease the strength of the coffee by changing the amount of ground coffee, select the
drink and choose between 1 and 4 beans, 1 being the mildest and 4 the strongest
• Volume in cup: to increase or decrease the amount of water used for extraction.
For more information, refer to the table of drinks in the leaflet and to the Quick Start Guide - DRINK SETTINGS.
HOW TO STOP A DRINK WHILE MAKING
You can stop the preparation of your drink at any time by pressing the button STOP. When a cycle is interrupted, the stop is not immediate. The machine will have a time of non-accessibility which will be indicated by a message on your screen
MILK DRINKS

ADVICE AND TIPS
To make frothy milk, you should opt for pasteurised UHT milk from the fridge (3-5°C). The use of special milks (micro-filtered, raw, fermented, enriched) or plant milks (almond, oat, soya, etc.) may give results that are less satisfactory in terms of the quality and quantity of froth.
HOW TO START PREPARING A MILKY DRINK
Refer to the beginning of the manual at 2 PREPARING A MILK RECIPE, or consult the tutorial saved in your machine "Making a milk drink".


AIDE ET TUTORIELS
ICED DRINKS (ONLY FOR THE INTUITION EXPERIENCE + EA877)
Intuition Experience + offers new exclusive cold drinks such as Frappé, Chilled Coffee or Nitro Coffee.
Making an iced drink requires one or more actions in advance on your part. To obtain an optimum result in the cup: Use a 400-450ml gloss and standard size ice cubes (4 x 2.5 x 2.2cm). Your machine will help you throughout the making. We recommend that you follow the preparatory stages of the recipes step by step on your screen. Preparation tips and tricks are also available in the information section, by tapping the 📄 on your screen.
TEA AND INFUSIONS
For your teas and infusions, you have three recipes that offer the most suitable temperature for each type of tea. The temperature of green tea will be lower than that of black tea and infusions.
HOW TO ADJUST THE WATER TEMPERATURE

→

→

R

You can set between T1 and T3, with T1 being the most lukewarm temperature and T3 the hottest. If you decrease/increase the temperature you will decrease/increase the temperature of each type of tea, however the temperature of green tea will always be lower than that of black tea and infusion.

PROFILES
WHAT IS THE PROFILES FUNCTION FOR?
The Profiles feature enables you to access a personalised space where you can store and save your favourite drinks. It is very easily accessible thanks to a direct button on the control panel of the machine. Faster and ideal for everyday use, the drinks saved in your profile are launched directly with one touch without any settings being required. You can record up to 7 recipes per profile.
The profile also allows greater personalisation of your interface and different settings:
| First name It is possible to add a first name for greater personalisation. | |
| Colour | It enables you to select the colour of the desired intuitive indicator light to identify its profile more easily. |
| Display | You can also set the type of display for your drinks on the Profile screen. They may appear in "slider" mode or in "mosaic" mode. |
| Programming | The "Profile" feature also enables you to define a time of day or a key word for each drink. This will allow you to find your drinks more easily at any time. |
| Brightness This enables activation or deactivation of the light indicator. | |
HOW TO CREATE A PROFILE?
Press the Profiles button and follow the on-screen prompts or view the tutorials saved in your profile.


HOW TO MANAGE YOUR FAVOURITE DRINKS WITHIN A PROFILE
You can add a drink to a profile in 2 ways:
- After making a drink, a button 📋 appears on the screen.
- Directly in the profile.
If I stop my favourite drink while it is pouring, this is the length that will be recorded.
HOW TO ORGANISE/ORDER/REMOVE FAVOURITE DRINKS
- Hold your finger down on a drink icon for a few seconds.
- A delete cross appears at the top right of the drink menu.
- Press again, hold your finger on the drink and drag to rearrange the drinks.

GENERAL MAINTENANCE
Carrying out proper maintenance will prolong the life of your machine and preserve the authentic taste of your coffee.
WHEN DO I EMPTY THE DRIP TRAY?
When the floats are in the upper position indicating that it is too full.
• The drip tray allows you to collect the water or the coffee that flows from the appliance during and after preparation.
- It is important to always leave it in place and to empty it regularly.
- For hygiene reasons, we recommend that you dismantle the drip tray to clean each element daily and let it air dry before replacing it in the machine.
- Refer to the Quick Start Guide – CLEANING THE DRIP TRAY, fig 1-2-3-4-5-6-7. You can put the drip tray in the dishwasher without its metal grid.
WHEN TO EMPLY THE GRINDING CONTAINER
The coffee grounds container takes in the extracted ground coffee
• Empty the grounds container when the machine asks you to.
- You can empty it more regularly, but when the machine is lit up this is so that it can record that the container has indeed been emptied.

Failure to regularly empty your coffee grounds container as indicated above may damage your appliance.
MAINTAINING THE GRINDING TRAY
For hygiene reasons, we recommend that you clean the grounds container with hot soapy water every day and let it air dry before replacing it in the machine. Refer to the Quick Start Guide – CLEANING THE GRINDS TRAY, fig 1-2-3-4-5.
Do not put in the dishwasher.
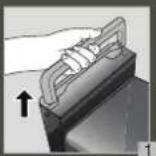
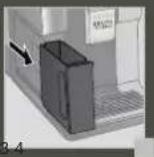
MAINTAINING THE WATER TANK
To preserve the aromas of your coffee and for hygiene reasons, we recommend that you use fresh water, clean your water tank every day with hot water and a sponge and let it air dry. air before replacing it on the machine.
BEAN CONTAINER MAINTENANCE
Coffee beans can leave greasy residue on the walls of the bean container which can affect the quality of your coffee. For the preservation of the best flavour and for hygienic reasons we recommend you wipe it with a dry, soft cloth each time it needs to be refilled.

Important: Do not use water to clean the bean container, the presence of water in the bean container could damage your machine.
WHY AND HOW TO MAINTAIN THE MILK SYSTEM AFTER MAKING MILK DRINKS


AIDE ET TUTORIELS

Important: In order to obtain a quality of foam that is always identical, we advise you to carry out the following maintenance:
| Maintenance When? Explanation | Accessories required: | ||
| Milk rinsing 30 s - 20 ml | After each milk drink, when prompted by the machine. | Allows you to rinse the machine's milk circuit. You can start a milk system rinse at any time. | |
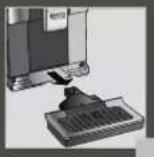
| Manual cleaning of the milk pot 30s | After each milk drink | We recommend that you clean the milk pot with hot water and with soap after each use. You can put the milk jug in the dishwasher without its lid. | Hot water + soap + sponge |
| Manual rinsing of the milk tube 30s | After each milk drink. | This rinsing consists of carefully manually cleaning the milk tube and its metal nozzle with hot water AFTER EACH USE. | Hot water + soap + pipe cleaner |
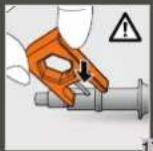
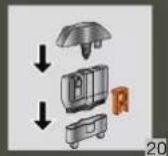
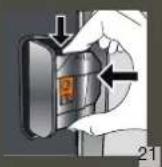
| Manual milk cleaning 5 min | When the machine asks you to or at any time. | This cleaning consists of dismantling and cleaning the removable "one touch cappuccino" block (D1). For optimum milk froth results, it is advisable to clean it regularly. Refer to chapter 5 of the Quick Start Guide - MANUAL, THOROUGH CLEANING OF THE MILK DISTRIBUTION SYSTEM - 5 MIN. | Cleaning needle (D3) |
| Maintenance When? Explanation | Accessories required: | ||
| Coffee flushing 45s - 30 ml | After 2 days of non-use or at any time. | Allows you to rinse the machine's coffee circuit. This process only uses hot water. It ensures the authentic taste of your coffee. | |
| Tea flushing 30 s - 20 ml | After making a tea drink. | Allows you to perform a hot water rinse to ensure the authentic taste of your tea or infusion. | |
| Cleaning 13 min - 600 ml | When the machine asks you to or at any time. | For reasons of hygiene and to preserve the quality of your coffee, we recommend that you clean and degrease the machine's coffee circuit. It guarantees you optimal preservation of the aromas of your drinks. | 1 KRUPS n°1 cleaning tablet |
| Descaling 20 min - 600 ml | When the machine asks you to or at any time. When the number of drinks is not enough for descaling to be required, the function is not active. | Descaling your machine ensures its proper functioning and eliminates any deposit of limescale or tartar. This step is very important to ensure the proper operation and durability of your appliance. | 1 KRUPS n°2 sachet of descaler |

Important: If your product is equipped with our Claris - Aqua filter System FD88 cartridge please remove it before the descaling procedure.

OTHER FUNCTIONS
HOW TO ACCESS YOUR MACHINE'S SETTINGS
Your KRUPS intuition machine has many settings, donot hesitate to try them! This will allow you to personalise your experience even more.


REGAGES
LIST OF SETTINGS:
| Language | Selection of the language of your choice from 21 languages. |
| Date and time | Setting the date is required, particularly if using an anti-limescale cartridge. Setting the time and 12 or 24 hour clock display. |
| Screen brightness | To adjust the screen brightness. |
| Light | To activate or deactivate the intuitive indicator light. |
| Choice of 1st screen | Choose the presentation of the first screen. |
| Auto stop | To choose the duration after which your appliance will stop automatically. This function allows you to consume less electricity. |
| Auto illumination | To turn on the machine and automatically start preheating the appliance at a chosen time. Do you always have your coffee at the same time each day? This feature is made for you! By setting the auto start, you can save time and only have to start your drink. |
| Volume unit | Selection of the unit of measurement: ml or oz. |
| Auto rinsing | You can choose to activate automatic rinsing of the coffee outlet or not when starting the machine. |
| Water hardness | To adjust the hardness of the water between 0 and 4. For more information, refer to the chapter "Measuring water hardness". |
| Coffee temperature | To set the temperature of your coffee between T1 and T3. |
| Tea temperature | To set the temperature of your tea between T1 and T3. |
| Type of coffee | Indicate the type of coffee added in the bean containers. |

ANSWERS TO YOUR QUESTIONS
OPERATION
- The machine displays a fault, the software is frozen OR the machine is malfunctioning.
Turn off and unplug the machine, remove the filter cartridge, wait 1 minute and restart the machine. Press and hold the ON/OFF button for at least 3 seconds to start.
- The appliance does not turn on after pressing the ON/OFF button (for at least 3 seconds).
☑ Check the fuses and the power socket of your electrical installation. Check that the two power plugs are correctly inserted into the socket.
- A power failure has occurred during a cycle.
The appliance resets automatically when it turns back on.
- The grinder is running empty.
This is normal if it happens occasionally and if there are no coffee beans or only a small amount. It can run for up to 10 seconds off-load to know its consumption and ensure the correct operation of its function
√ Coffee beans remain in the container
- The coffee may be too oily and is therefore not being correctly captured by the appliance. You could try helping the beans to go down and see if that gets it working again. However, it is advisable to change coffee (ref. type of beans function).
• This is my usual coffee that has worked well until now: contact your KRUPS consumer service.
USE
- The grinder makes an abnormal noise.
☑ Foreign bodies are likely to be present in the grinder. Try to clean out with a vacuum cleaner, otherwise contact your KRUPS consumer service.
- There is water under the appliance.
Before removing the drip tray, wait 15 seconds after the flow of coffee so that the machine finishes its cycle correctly.
√ Check that the drip tray is well positioned on the machine. It must always be in place even when the machine is not in use.
√ Verify that the drip tray is not full.
- The adjustment button for the grinding fineness is difficult to turn.
Turn the adjustment button of the grinding fineness only when the grinder is operating.
- The appliance has not delivered any coffee.
√ An incident has been detected during its making.
The appliance is reset automatically and is ready for a new cycle.
- You have used ground coffee instead of coffee beans.
Use your vacuum cleaner to collect the ground coffee from the bean container.
- Water runs from the coffee nozzles when the machine stops.
This is normal. It is an automatic rinsing process to clean the coffee nozzles and ensure that they do not become blocked
STEAM AND MILK
- The milk flow of your machine appears to be partially or completely blocked.
Refer to the beginning of the manual at S. IN-DEPTH MANUAL CLEANING OF THE MILK DISTRIBUTION SYSTEM - 5 MIN., or see the tutorial saved in your machine "Cleaning the milk nozzle".
- No steam comes out.
a. When using a steam cycle for the first time, if no steam comes out correctly:
√ Check that the steam output is not blocked. See above: "The steam output of your machine appears to be partially or completely blocked".
√ Perform the following process once only
Empty the water tank and temporarily remove the Claris Aqua Filter System cartridge. Fill the tank with mineral water high in calcium (>100 mg/L) and make successive steam cycles (5 to 10 cycles) in a container until a continuous jet of steam is obtained. Return the cartridge to the reservoir.
b. The steam nozzle had already worked:
Check that the steam output is not blocked. See above: "The steam output of your machine appears to be partially or completely blocked". If after completing the above steps it still does not work, please contact your KRUPS consumer service.
- Steam escapes from the grid of the drip tray.
Depending on the type of preparation, steam may escape from the grid of the drip tray.
- Steam appears under the bean tray lid.
√ Check that the cleaning tablet hatch located under the lid (L) is properly closed.
MAINTENANCE
- The machine does not request descaling.
The descaling cycle is requested from a large number of milky drink preparations or hot water. If you only consume coffee, descaling will not be required often.
- Some grounds are in the drip tray
A small amount of ground coffee can get into the drip tray. The machine is designed to evacuate any excess ground coffee so that the percolation zone remains clean.
- The intuitive indicator light is still on after you have emptied the coffee grounds tray.
√ Reinstall the coffee grounds tray.
- After filling the water tank, the intuitive indicator light stays on.
√ Check the correct positioning of the tank in the appliance. The floats at the bottom of the tank must move freely. Check and unlock the floats if necessary.
DRINKS
- The coffee is pouring too slowly.
Turn the "fineness of grinding" button to the right to obtain a coarser ground coffee (this may depend on the type of coffee used).
√ Perform one or several rinsing cycles.
√ Change the Clans Aqua Filter System cartridge.
- The coffee is too light or not full-bodied enough.
√ Check that the bean container contains coffee and that it is moving down correctly.
√ Avoid the use of oily, caramelised or flavoured coffees which may not be captured properly
Decrease the volume of the preparation and increase the strength of the preparation using the coffee strength function. Turn the "fineness of grinding" button to obtain a finer ground coffee. Make your drink in two cycles using the 2-cup function.
- The espresso or the coffee is not hot enough.
☑ Increase the temperature of the coffee in the machine's settings. Heat the cup by rinsing with hot water before starting to prepare the drink.
Before making your coffee, carry out a rinse of the coffee circuit. A coffee rinsing function when switching on the appliance can be activated in settings / auto rinsing
- Clear water is running from the coffee nozzles before each coffee.
A pre-infusion takes place when you start a recipe, and this can lead to a small amount of water coming out of the coffee nozzles.
If one of the problems outlined above persists, contact KRUPS Consumer Service.
ÉLIMINATION

Some appliances contain a battery that is only accessible by a repairer for safety reasons. To replace the batteries, contact your nearest service centre.
Important: Your appliance contains many recoverable or recyclable materials.
Let's help protect the environment!
Leave it at a collection point for processing
WARRANTY
The guarantee does not apply in the following cases:
- Presence of foreign bodies in the shredder,
Ground coffee has been poured into the bean container.
The Claris - Aqua Filter System filter cartridge is not used according to KRUPS instructions. - In the event of lack of descaling, cleaning or regular maintenance.
Any work on the appliance must be carried out by an authorised KRUPS centre.
This Espresso Automatic coffee/espresso machine must only be used for the preparation of coffee, hot water or to froth milk.
Manufacturer: GSM - 1076 Rue Saint-Léonard 53100 Mayenne - France
D1. "one touch cappuccino" block
D2. Abnehmbare Tür
D3. Reinigungsnadel
BESCHRIJVING VAN HET APPARAAT
HOE BEREID IK MIJN DRANKJE VOOR?
D1. "one touch-cappuccinoblok"
D2. Aftagelig läge
D3. Rengøringsnål
TILBEH∅R SOM F∅LGER MED MASKINEN
Kontroller tilbehøret som fulgte med maskinen. Hvis en del mangler, ta kontakt direkte med KRUPS' forbrukertjeneste.
Bare for inflation experience + EAS?
| Teas | The ventVamt vann mod donidelle temperaturestof granite. | 200 ml 20 - 300 ml | |||
| The noirVamt vann mod donidelle temperaturestof coatte. | 200 ml 20 - 300 ml | ||||
| The infusionVamt vann mod donidelle temperaturestof airway. | 200 ml 20 - 300 ml |
SLIK JUSTERER DU H∅YDEN PÅ KAFFEDYSENE
GENERELT VEDLIKEHOLD
VEDLIKEHOLDE DRYPPBRETTET
VEDLIKEHOLD AV SLIPEBRETTET
VEDLIKEHOLDE VANNBEHOLDEREN
VEDLIKEHOLD AV B∅NNEBEHOLDER
Kaffebonner kan etterlate fettrester på veggene i børnebeholderen som kan påvirke kaffekvaliteten. For å bevare best mulig smak, og av hygieniske grunner, anbefaler vi at du tærker den med en tørr, myk klut hver gang den må etterfylles.

VEDLIKEHOLD AV MELKESYSTEMET
HVORFOR OG HVORDAN DU VEDLIKEHOLDER MELKESYSTEMET ETTER AT DU HAR LAGET MELKEDRIKKER
ANDRE VEDLIKEHOLDSOPPGAVER
ANDRA UNDERHÅLLSUPPGIFTER
In addition, for the same coffee, the setting of your grind impacts the aroma in the cup: the finer the grind, the more powerful the aroma.