
NV45AB3 - Stapler HiKOKI - Free user manual and instructions
Find the device manual for free NV45AB3 HiKOKI in PDF.
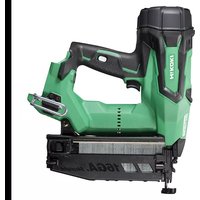
| Product Type | Pneumatic Nailer |
| Brand | HiKOKI |
| Model | NV45AB3 |
| Air pressure | 4.9 - 8.3 bar |
| Nail type | Coil nails, length 10.5 - 45 mm, diameter 3.05 mm |
| Magazine capacity | 120 nails (1 coil) |
| Dimensions (L × H × W) | 250 × 264 × 117 mm |
| Weight | 2.5 kg |
| Power source | Compressed air via 6 mm inner diameter hose |
| Trigger mechanism | Single sequential (intermittent) or continuous |
| Applications | Roofing (shingles), insulation (insulation boards) |
| Sound pressure level | 87 dB(A) at work station |
| Sound power level | 97 dB(A) |
| Vibration value | 2.5 m/s² (uncertainty K = 1.5) |
| Safety | Eye and ear protection mandatory; do not point at people |
| Maintenance | Lubrication with recommended oil (Shell Tonna); regular cleaning of residue |
| Depth adjustment | Rotary adjuster by quarter turns (approximately 0.25 mm per quarter) |
| Troubleshooting | Jamming: disconnect the hose, use a rod and hammer |
| Storage | Disconnect, empty the magazine, store in a warm and dry place |
| Spare parts | Use genuine HiKOKI parts; repairs by an authorized service center |
Frequently Asked Questions - NV45AB3 HiKOKI
User questions about NV45AB3 HiKOKI
0 question about this device. Answer the ones you know or ask your own.
Ask a new question about this device
Download the instructions for your Stapler in PDF format for free! Find your manual NV45AB3 - HiKOKI and take your electronic device back in hand. On this page are published all the documents necessary for the use of your device. NV45AB3 by HiKOKI.
USER MANUAL NV45AB3 HiKOKI
Read through carefully and understand these instructions before use.
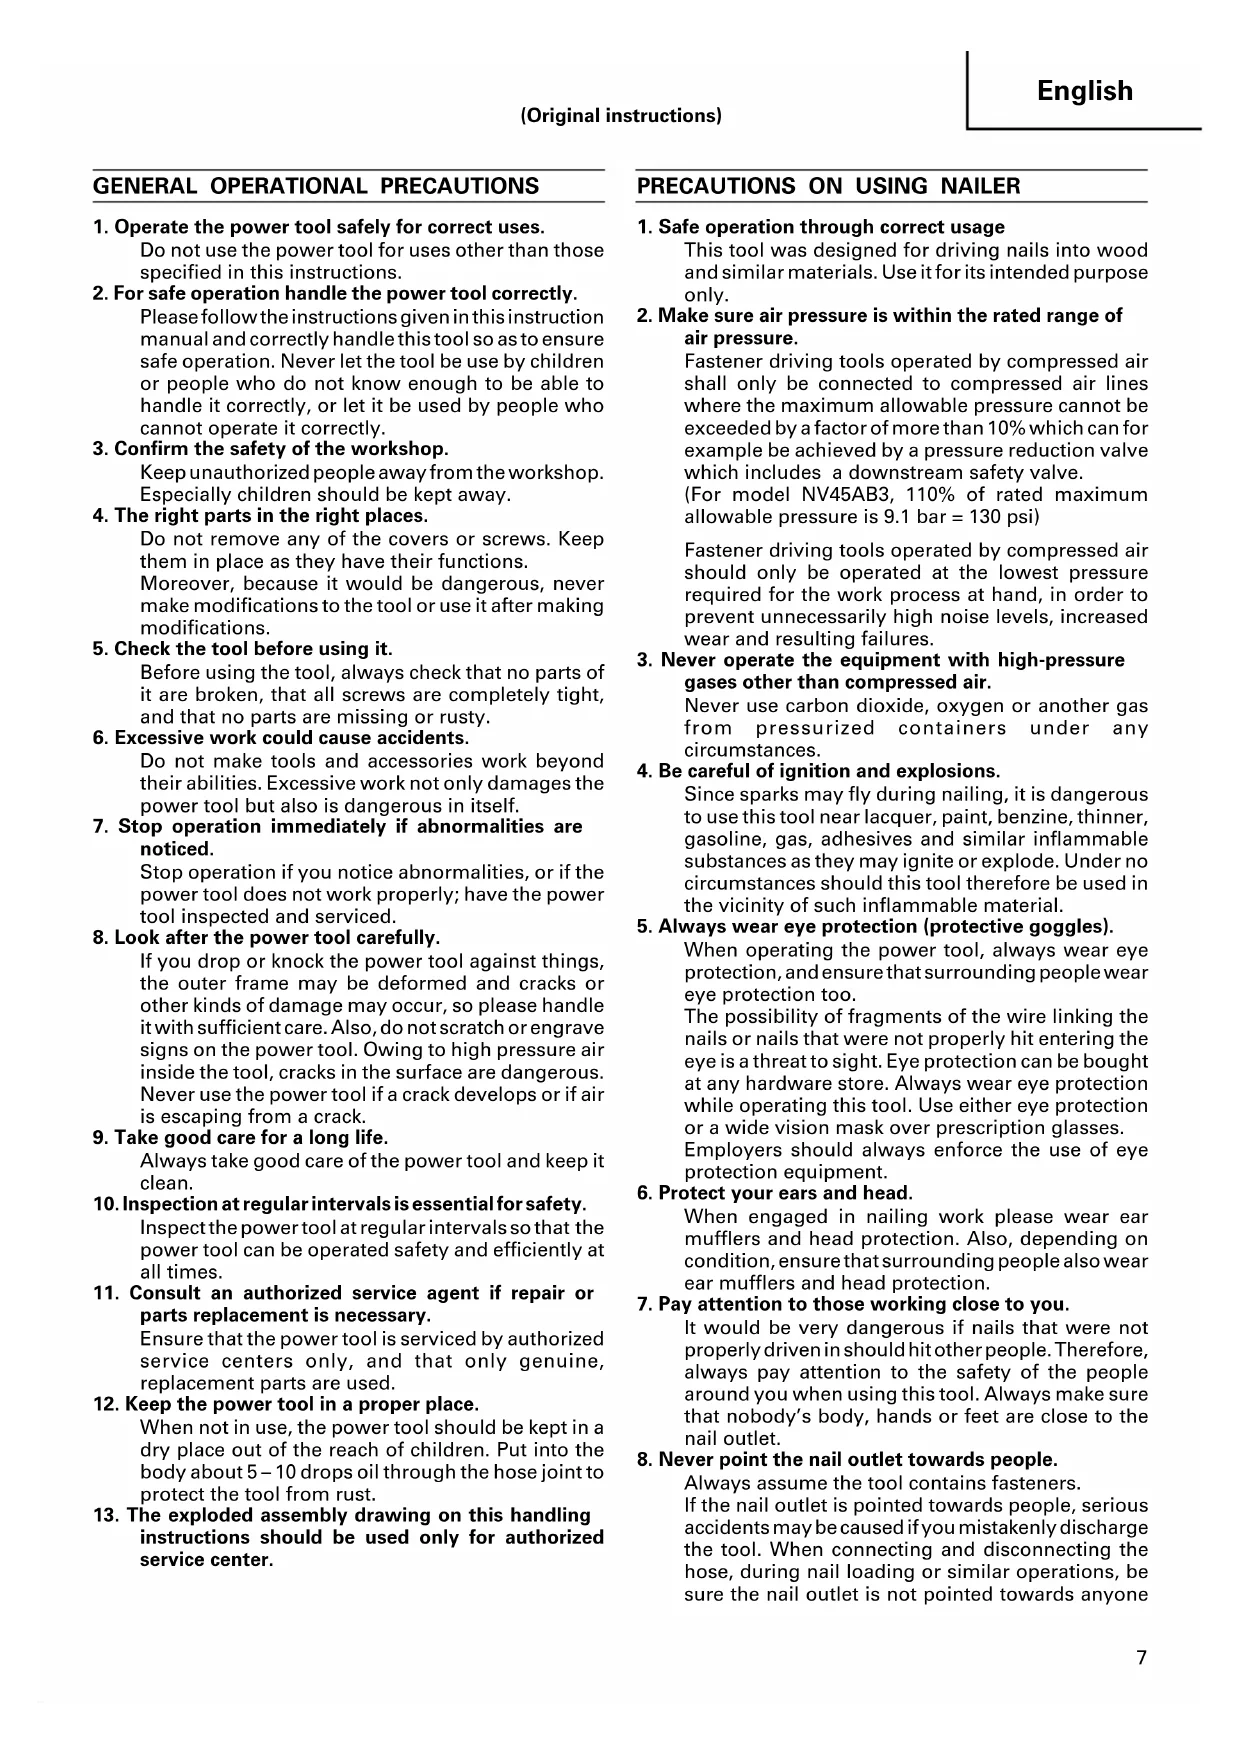
1. Operate the power tool safely for correct uses.
Do not use the power tool for uses other than those specified in this instructions.
2. For safe operation handle the power tool correctly.
Please follow the instructions given in this instruction manual and correctly handle this tool so as to ensure safe operation. Never let the tool be use by children or people who do not know enough to be able to handle it correctly, or let it be used by people who cannot operate it correctly.
3. Confirm the safety of the workshop.
Keep unauthorized people away from the workshop. Especially children should be kept away.
4. The right parts in the right places.
Do not remove any of the covers or screws. Keep them in place as they have their functions.
Moreover, because it would be dangerous, never make modifications to the tool or use it after making modifications.
5. Check the tool before using it.
Before using the tool, always check that no parts of it are broken, that all screws are completely tight, and that no parts are missing or rusty.
6. Excessive work could cause accidents.
Do not make tools and accessories work beyond their abilities. Excessive work not only damages the power tool but also is dangerous in itself.
7. Stop operation immediately if abnormalities are noticed.
Stop operation if you notice abnormalities, or if the power tool does not work properly; have the power tool inspected and serviced.
8. Look after the power tool carefully.
If you drop or knock the power tool against things, the outer frame may be deformed and cracks or other kinds of damage may occur, so please handle it with sufficient care. Also, do not scratch or engrave signs on the power tool. Owing to high pressure air inside the tool, cracks in the surface are dangerous. Never use the power tool if a crack develops or if air is escaping from a crack.
9. Take good care for a long life.
Always take good care of the power tool and keep it clean.
10. Inspection at regular intervals is essential for safety.
Inspect the power tool at regular intervals so that the power tool can be operated safely and efficiently at all times.
11. Consult an authorized service agent if repair or parts replacement is necessary.
Ensure that the power tool is serviced by authorized service centers only, and that only genuine, replacement parts are used.
12. Keep the power tool in a proper place.
When not in use, the power tool should be kept in a dry place out of the reach of children. Put into the body about 5-10 drops oil through the hose joint to protect the tool from rust.
13. The exploded assembly drawing on this handling instructions should be used only for authorized service center.
PRECAUTIONS ON USING NAILER
1. Safe operation through correct usage
This tool was designed for driving nails into wood and similar materials. Use it for its intended purpose only.
2. Make sure air pressure is within the rated range of air pressure.
Fastener driving tools operated by compressed air shall only be connected to compressed air lines where the maximum allowable pressure cannot be exceeded by a factor of more than 10% which can for example be achieved by a pressure reduction valve which includes a downstream safety valve.
(For model NV45AB3, 110% of rated maximum allowable pressure is 9.1 bar = 130 psi)
Fastener driving tools operated by compressed air should only be operated at the lowest pressure required for the work process at hand, in order to prevent unnecessarily high noise levels, increased wear and resulting failures.
3. Never operate the equipment with high-pressure gases other than compressed air.
Never use carbon dioxide, oxygen or another gas from pressurized containers under any circumstances.
4. Be careful of ignition and explosions.
Since sparks may fly during nailing, it is dangerous to use this tool near lacquer, paint, benzine, thinner, gasoline, gas, adhesives and similar inflammable substances as they may ignite or explode. Under no circumstances should this tool therefore be used in the vicinity of such inflammable material.
5. Always wear eye protection (protective goggles).
When operating the power tool, always wear eye protection, and ensure that surrounding people wear eye protection too.
The possibility of fragments of the wire linking the nails or nails that were not properly hit entering the eye is a threat to sight. Eye protection can be bought at any hardware store. Always wear eye protection while operating this tool. Use either eye protection or a wide vision mask over prescription glasses.
Employers should always enforce the use of eye protection equipment.
6. Protect your ears and head.
When engaged in nailing work please wear ear mufflers and head protection. Also, depending on condition, ensure that surrounding people also wear ear mufflers and head protection.
7. Pay attention to those working close to you.
It would be very dangerous if nails that were not properly driven in should hit other people. Therefore, always pay attention to the safety of the people around you when using this tool. Always make sure that nobody's body, hands or feet are close to the nail outlet.
8. Never point the nail outlet towards people.
Always assume the tool contains fasteners. If the nail outlet is pointed towards people, serious accidents may be caused if you mistakenly discharge the tool. When connecting and disconnecting the hose, during nail loading or similar operations, be sure the nail outlet is not pointed towards anyone
(including yourself). Even when no nails are loaded at all, it is dangerous to discharge the tool while pointing it at someone, so never attempt to do so. No horseplay. Respect the tool as a working implement.
9. Before using the power tool, check the push lever.
Before using the power tool make sure to check that the push lever and valve operate properly. Without nails loaded into the power tool, connect the hose and check the following. If the sound of operation occurs this indicates a fault, so in such a case do not use the power tool until it has been inspected and repaired.
If merely pulling the trigger causes operating sound of driver blade movement occur, the power tool is faulty.
Of merely pushing the push lever against the material to be nailed causes the sound of driver blade movement to occur, the power tool is faulty. Furthermore, with regard to the push lever, please note that it must never be modified or removed.
10. Use specified nails only.
Never use nails other than those specified and described in these instructions.
11. Be careful when connecting the hose.
When connecting the hose and loading nails in order not to fire the tool by mistake, make sure of the following.
Do not touch the trigger.
Do not allow the firing head to contact with any surface.
Keep the firing head down.
Strictly observe the above instructions, and always make sure that no part of the body, hands or legs is ever in front of the nail outlet.
12. Do not carelessly place your finger on the trigger.
Do not place your finger on the trigger except when actually nailing. If you carry this tool or hand it to someone while having your finger on the trigger, you may inadvertently discharge a nail and thus cause an accident.
13. Completely Close the nail guide and do not open it during operation.
If nailing is attempted when the nail guide is open, nails will not be driven into the timber, and there is a risk of dangerous discharge.
14. Press the nail outlet firmly against the material to be nailed.
When driving in nails, press the nail outlet firmly against the material to be nailed. If the outlet is not applied properly, the nails may rebound.
15. Keep hands and feet away from the firing head when using.
It is very dangerous for a nail to hit the hands or feet by mistake.
16. Beware of the tool's kickback
Do not approach the top of the tool with your head etc. during operation. This is dangerous because the tool may recoil violently if the nail currently being driven in comes into contact with a previous nail or a knot in the wood.
17. Take care when nailing thin boards or the corners of wood.
When nailing thin boards, the nails may pass right through, as may also be the case when nailing the corners of wood due to deviation of the nails. In such cases, always make sure that there is no one (and nobody's hands or feet; etc.) behind the thin board or next to the wood you are going to nail.
18. Simultaneous nailing on both sides of the same wall is dangerous
Under no circumstances should nailing be performed on both sides of a wall at the same time. This would be very dangerous since the nails might pass through the wall and thus cause injuries.
19. Do not use the power tool on scaffoldings, ladders.
The power tool shall not be used for specific application for example:
- when changing one driving location to another involves the use of scafforldings, stairs, ladders or ladder alike constructions, e.g. roof laths,
-closing boxes or crates,
-fitting transportation safety systems e.g. on vehicles and wagons
20. Do not disconnect the hose with your finger on the trigger.
If you disconnect the hose with your finger on the trigger, the next time the hose is connected, there is a danger that the power tool will fire a nail spontaneously, or operate incorrectly.
21. Disconnect the hose and take out any nails left in the magazine after use.
Disconnect tool from air before doing tool maintenance, cleaning a jammed fastener, leaving work area, moving tool to another location, or after use. It is very dangerous for a nail to be fired by mistake.
22. When removing a nail which has become stuck, make sure to first of all disconnect the hose and release compressed air.
When removing a nail which has become stuck in the nail outlet, first of all make sure to disconnect the hose and release compressed air inside the power tool.
Accidental firing of the nail could be very dangerous.
23. To avoid hazards caused by falling nails, never open the magazine with the device facing downward while loading nails.
24. A female plug (air socket) should not be used in the body.
If a female plug is installed in the body, the compressed air sometimes can not be drawn when the hose is disconnected so avoid this.
The tool and air supply hose must have a hose coupling such that all pressure is removed from the tool when the coupling joint is disconnected.
SPECIFICATIONS
| Type of power Piston reciprocating | |
| Air pressure (Gauge) 4.9 – 8.3 | bar (70 – 120 psi.) |
| Applicable nails ref. Fig. | |
| Amount of loadable nails 120 | nails (1 coil) |
| Size | 250 mm (L) × 264 mm (H) × 117 mm (W) (9-23/32" × 10-3/8" × 4"-5/8") |
| Weight 2.5 kg (5.5 lbs) | |
| Nail-feeding method Piston reciprocation | |
| Hose (inside diam.) 6 mm (1/4") | |
NAIL SELECTION
Choose a suitable nail from Fig. Nails which are not shown in Fig. can not be driven with this tool. Nails are linked and rolled.

Dimensions of nails
STANDARD ACCESSORIES
Eye protector 1
OPTIONAL ACCESSORY
Single Sequential Actuation Mechanism Kit (Code No.878-226)
(Sequential Fire Parts Set, Single Shot Parts) With the sequential fire parts, the nail is driven only by squeezing the trigger after pushing down the push lever.
By installing these parts, driving nails into improper positions and unexpected firing of nails caused by accidental operation of the push lever can be prevented.
APPLICATIONS
Installation of asphalt roofing shingles in building construction.
Installation of insulation boards in building construction.
Be sure to use the hose provided with minimum 6mm (1 / 4^ ) inside diameter.
NOTE:
The air supply hoses must have a minimum working pressure rating of 12.8 bar (180 psi) or 150 percent of the maximum pressure produced in the air supply system, whichever is higher.
2. Check on safety
CAUTION
Unauthorized persons (including children) must be kept away from the equipment.
Wear eye protector.
Check the retaining screws which fix the exhaust cover, etc. for tightness.
Check the nailer for air leaks and defective or rusty parts.
Check whether or not the push lever works correctly.
Also check whether or not any dirt has adhered to the moving parts of the push lever.
Recheck on operational safety.
BEFORE USE
1. Check the air pressure
CAUTION
The air pressure must be constantly maintained at 4.9 -8.3 bar (70 - 120 psi.).
Adjust the air pressure between 4.9 to 8.3 bar (70-120 psi.) according to the diameters and length of nails and hardness of the wood being nailed. Pay special attention to the output pressure, capacity, and piping on the air compressor, so that air pressure does not exceed the specified limit. Note that excessive pressure may affect overall performance, service life, and safety.
2. Lubrication
(1) Prior to operating this nailer, be sure to provide an air set between the air compressor and this device. Lubrication through the air set offers smooth operation, extended service life, and anticorrosion.
Adjust the oiler so that a single drop of oil is supplied at intervals of 5 to 10 nailing cycles.
(2) It is recommended using the recommended oil (SHELL TONNA). Other applicable oils are listed. Never mix two or more types of different oils.
3. Load nails
(1) Grip the nail guide and knob with your fingers. Press the knob down and swing the nail guide open. Then open the magazine cover. (Fig. 2)
(2) Adjust the position of the nail holder according to the nail length. (Fig. 3)
The nail will not feed smoothly if the nail holder is not correctly adjusted.
a. Turn the nail holder about 90 degrees counterclockwise.
b. Move the nail holder up and down to align the plate of the nail holder with a mark on the magazine in accordance with the length of the nails being used.
c. Turn the nail holder 90 degrees clockwise until you hear "click".
NOTE:
Before loading nails in the magazine, adjust the nail holder. If the magazine cover is forcibly closed without adjusting the nail holder correctly, the nail holder may be damaged.
(3) Place the nail coil in the magazine.
Insert the first nail into the magazine opening. (Fig. 4)
(4) Close the magazine cover.
(5) a. Uncoil enough nails to reach the driving hole.
b. Insert the first nail into the driving hole and the second nail between the two pawls of the feeder.
c. Fit the nail heads in the guide slot. (Fig. 5)
NOTE:
Be careful not to deform the collated wires and not to disengage the nails with the guide surface.
Otherwise, the nail guide will not close correctly.
d. Pulling the nails to the right
After checking and making sure that the magazine cover is closed, hook your fingers on the nail guide and knob, turn the nail guide clockwise while pressing the knob downward, and then close the nail guide completely. (Fig. 6)
(6) Lock the knob completely.
CAUTION
To prevent unintentional operation, never touch the trigger or place the top end of the push lever on a work bench or floor. Also, never face the nail outlet toward any part of a person.
NOTE:
Before loading the nails in the magazine, position the nail holder according to the length of the nail. If the nail holder position is not adjusted, the nail jam. If the cover is forcibly closed without adjusting the position of the nail holder, the nail holder may be damaged.
Never use the head or body of this device as a hammer.
Take precautions to ensure the safety of persons in the vicinity during operation.
1. Nailing procedures
NOTE:
For nailing asphalt composition shingles the correct air pressure is that which will drive the nail, so that the underneath side of the nail touches or creases the top surface of the shingle without breaking or cutting it.
This Nailer is equipped with the push lever and does not operate unless the push lever is depressed (upward position).
There are two methods of operation to drive nails with this Nailer.
They are:
- Intermittent operation (Trigger fire):
- Continuous operation (Push lever fire):
(1) Intermittent operation (Trigger fire)
a. Position the nail outlet on the workpiece with finger off the trigger.
b. Depress the push lever firmly until it is completely depressed.
c. Pull the trigger to drive a nail.
d. Remove finger from the trigger.
To drive another nail, move the Nailer along the workpiece and repeat this procedure. (Fig. 7)
CAUTION
This tool will sometimes fire twice in rapid succession when strongly pressed flush against a surface or when using on hard materials. In such cases, fire the nails by squeezing and quickly releasing the trigger.
(2) Continuous operation (Push lever fire)
a. Pull the trigger with the Nailer off the workpiece.
b. Depress the push lever against the workpiece to drive a nail.
c. Move the Nailer along the workpiece with a bouncing motion.
Each depression of the push lever will drive a nail. As soon as the desired number of nails have been driven, remove finger from the trigger. (Fig. 8)
CAUTION
Exercise care when nailing corners of lumber. When continuous nailing corners of lumber, a nail may go astray or break through the corner.
NOTE:
Precautions on no-load operation
Sometimes nailing will continue after driving in all nails previously contained in the magazine.
This is termed "no-load operation". Such operation may deteriorate the bumper, magazine, and nail feeder.
To avoid no-load operation, occasionally confirm the amount of remaining nails. On the other hand, all nails should be removed after using this nailer.
After completing operation, put into the body about 5-10 drops oil through the hose joint to protect the tool from rust.
Under low temperature conditions, the machine sometimes does not operate correctly. Always operate the machine at the appropriate ambient temperature.
2. Adjusting the nail-driving depth
CAUTION
When making adjustments, be sure remove your finger from the trigger. When making adjustments, be sure that the nail outlet is not facing downward and that body parts or other persons are not in the path of the nail outlet.
To assure that each nail penetrates to the same depth, be sure that:
1) the air pressure to the Nailer remains constant (regulator is installed and working properly), and
2) the Nailer is always held firmly against the workpiece. If nails are driven too deep or shallow into the workpiece, adjust the nailing in the following order.
a. DISCONNECT AIR HOSE FROM NAILER (Fig. 9)
b. If nails are driven too deep, turn the adjuster counterclockwise while pulling it downward.
When the adjuster is released, it returns upward. Furthermore, turn the adjuster until it reaches a position where it gets fixed with a clock. (Fig. 10)
If nails are driven too shallow, turn the adjuster clockwise while pulling it downward.
When the adjuster is released, it return upward. Furthermore, turn the adjuster until it reaches a position where it gets fixed with a clock. (Fig. 11)
The adjuster can be fiexed each at 1/4 rotation.
The adjuster moves approximately 0.25mm per 1/4 rotation.
c. Stop turning the adjuster when a suitable position is reached for a nailing test.
d. Connect the air hose.
ALWAYS WEAR EYE PROTECTOR.
Perform a nailing test.
e.DISCONNECT AIR HOSE FROM NAILER.
f. Choose a suitable position for the adjuster.
NOTE:
The nail-driving depth can also be adjusted by changing the air pressure used. Carry this out together with movement of the adjuster. Using a high air pressure that does not match the nail-driving resistance will shorten the life of this nailer.
INSPECTION AND MAINTENANCE
CAUTION
Be sure to disconnect the hose during cleaning jams, inspection, maintenance and cleaning.
1. Countermeasure for nail jamming
(1) Remove the nail roll from the magazine, open the nail guide, insert a rod into the outlet and tap the rod with a hammer. (Fig. 12).
(2) Remove the jammed nail with slotted screwdriver. (Fig. 13)
(3) Cut off the defective part of the steel wire which links the nails with cutting nippers, correct the deformation, then load the nail roll in the magazine.
(4) In case of frequent jams, consult the Authorized Service Center from which you bought this machine.
2. Check on mounting screws for each part
At regular intervals check every part for loose mounting screws and whether or not there are any air leaks. Retighten any loose screws. Operating the equipment with loose screws untightened will incur a hazard.
3. Protection against dirt
Remove dirt from the inlet port and interior of the hose.
Use only clean oil to protect the air intake port and sliding part against clogging or damage.
4. Inspecting the feeders
(1) Occasionally clean the knob sliding part and then apply the recommended oil. (See Fig. 14)
(2) Open the nail guide and remove dust, etc., as shown in Fig. 15. Apply lubricant to the sliding groove of the feeder and feeder shaft. Check the main nail stopper and sub nail stopper slide smoothly by pushing them with your finger.
(3) Also, apply the recommended oil to the feeding surface of the nose and nail guide after cleaning. This promotes smooth operation and retards corrosion.
CAUTION
Check for smooth movement of the feeders and stoppers before use. If movement is uneven, nails could be fired at an irregular angle, presenting a hazard to the operator and others nearby.
5. Cleaning and removal of tar and dirt
Adhesion of tar and dirt to areas around the discharge outlet, push lever or nail feed parts will interfere with proper operation.
Please clean and remove tar and dirt with kerosene, #2 fuel oil or diesel fuel.
CAUTION
Never use gasoline or other similar highly volatile liquids for cleaning. Vapors of such liquids inside the power tool could be ignited by sparks produced during nailing and cause an explosion.
Never use kerosene to oil the tool.
(1) Please immerse only the area around the discharge outlet in solvent and do not immerse the cylinder or magazine.(See Fig. 16)
CAUTION
Do not immerse the nailer in solvent. Plastic parts and the O-ring etc. may be demaged.
(2) Throughout dry the power tool. If any oily film from the solvent remains, it will promote adhesion of tar and frequent cleaning will be necessary.
(3) After cleaning check that the push lever, the spring to return the push lever, and the feeder move smoothly.
CAUTION
The push lever must be free to move without sticking or binding. The spring must positively return the push lever to its down position whenever the push lever is released from being held in its up position.
6. Inspecting the magazine
Clean the magazine. Remove dust of wooden chips which may have accumulated in the magazine.
7. Storing
When not in use for an extended period, apply a thin coat of the lubricant to the steel parts to avoid rust.
Do not store the Nailer in a cold weather environment. Keep the Nailer in a warm area.
When ot in use, the Nailer should be stored in a warm and dry place.
Keep out of reach of children.
8. Service parts list
CAUTION
Repair, modification and inspection of HiKOKI Power Tools must be carried out by an HiKOKI Authorized Service Center.
This Parts List will be helpful if presented with the tool to the HiKOKI Authorized Service Center when requesting repair or other maintenance.
In the operation and maintenance of power tools, the safety regulations and standards prescribed in each country must be observed.
MODIFICATIONS:
HiKOKI Power Tools are constantly being improved and modified to incorporate the latest technological advancements.
Accordingly, some parts may be changed without prior notice.
COMPRESSOR
CAUTION
When the maximum, operating pressure of the air compressor exceeds 8.3 bar (120 psi.), be sure to provide a reducing valve between the air compressor and nailer. Then, adjust the air pressure within the operating range of 4.9 8.3 bar (70 120~psi.) .If the air set is installed, lubrication is also possible, thus providing additional convenience.
OILER-FILTER-REDUCING VALVE (Air Set)
So that the equipment can be operated under an optimum condition to ensure extended service life, it is advisable to use an oiler filter reducing valve. Please limit the length of the hose between the unit and the air set to within 10m when using. (Fig. 17)
APPLICABLE LUBRICANTS
| Type of lubricant Name | of lubricant |
| Recommended oil SHE | L TONNA |
| Motor oil SAE10W | SAE20W |
| Turbine oil ISO VG3 | 2 - 68(#90 - #180) |
Noise Information
Noise characteristic values in accordance with EN 792-13:
The typical A-weighted single-event sound power level
LWA,1s,d=97 dB
The typical A-weighted single-event emission sound
pressure level at work station L_pA,1s,d = 87dB
Uncertainty KpA: 2.5 dB (A)
These values are tool-related characteristic values and do not represent the noise development at the point of use. Noise development at the point of use will for example depend on the working environment, the workpiece, the workpiece support and the number of driving operations, etc.
Depending on the conditions at the workplace and the form of the workpiece, individual noise attenuation measures may need to be carried out, such as placing workpieces on sound-damping supports, preventing workpiece vibration by means of clamping or covering, adjusting to the minimum air pressure required for the operaion involved,etc.
In special cases it is necessary to wear hearing protection equipment.
Vibration Information
The typical vibration characteristic value in accordance with EN 792-13: 2.5m / s^2
Uncertainty K: 1.5m / s^2
This values is a tool-related characteristic value and does not represent the influence to the hand-arm-system when using the tool. An influence to the hand-arm-system when using the tool will for example depend on the gripping force, the contact pressure force, the working direction, the adjustment of energy supply, the workpiece, the wrokpiece support.
GENERELLE VORSICHTSMASSNAHMSN
Ereignis: LwA,1s,d = 97 dB
ACCESSIONS STANDARDS
ACCESSIONS EN OPTION
INSPECTION ET MANUTENTION
ATTENTION
STANDAARD ACCESSORIES
Oogbescherming 1
OPTIONE ACCESSORIES
Siemensring 34, 47877 willich, Germany
Tel: +49 2154 49930
Fax: +49 2154 499350
URL: http://www.hikoki-powertools.de
Hikoki Power Tools Netherlands B.V.
Brabanthaven 11, 3433 PJ Nieuwegein, The Netherlands
Tel: +31 30 6084040
Fax: +31 30 6067266
URL: http://www.hikoki-powertools.nl
Hikoki Power Tools (U.K.) Ltd.
Precedent Drive, Rooksley, Milton Keynes, MK 13, 8PJ
United Kingdom
Tel: +44 1908 660663
Fax: +44 1908 606642
URL: http://www.hikoki-powertools.uk
Hikoki Power Tools France S.A.S.
Hikoki Power Tools Belgium N.V./S.A.
Koningin Astridlaan 51, B-1780 Wemmel, Belgium
Tel: +32 2 460 1720
Fax: +32 2 460 2542
URL http://www.hikoki-powertools.be
Hikoki Power Tools Italia S.p.A
Via Piave 35, 36077, Altavilla Vicentina (VI), Italy
Tel: +39 0444 548111
Fax: +39 0444 548110
URL: http://www.hikoki-powertools.it
Hikoki Power Tools Ibérica, S.A.
C/ Puigbarral, 26-28, Pol. Ind. Can Petit, 08227 Terrassa
(Barcelona), Spain
Tel: +34 93 735 6722
Fax: +34 93 735 7442
URL: http://www.hikoki-powertools.es


- Operate the power tool safely for correct uses.
- For safe operation handle the power tool correctly.
- Confirm the safety of the workshop.
- The right parts in the right places.
- Check the tool before using it.
- Excessive work could cause accidents.
- Stop operation immediately if abnormalities are noticed.
- Look after the power tool carefully.
- Take good care for a long life.
- Inspection at regular intervals is essential for safety.
- Consult an authorized service agent if repair or parts replacement is necessary.
- Keep the power tool in a proper place.
- The exploded assembly drawing on this handling instructions should be used only for authorized service center.
- PRECAUTIONS ON USING NAILER
- Safe operation through correct usage
- Make sure air pressure is within the rated range of air pressure.
- Never operate the equipment with high-pressure gases other than compressed air.
- Be careful of ignition and explosions.
- Always wear eye protection (protective goggles).
- Protect your ears and head.
- Pay attention to those working close to you.
- Never point the nail outlet towards people.
- Before using the power tool, check the push lever.
- Use specified nails only.
- Be careful when connecting the hose.
- Do not carelessly place your finger on the trigger.
- Completely Close the nail guide and do not open it during operation.
- Press the nail outlet firmly against the material to be nailed.
- Keep hands and feet away from the firing head when using.
- Beware of the tool's kickback
- Take care when nailing thin boards or the corners of wood.
- Simultaneous nailing on both sides of the same wall is dangerous
- Do not use the power tool on scaffoldings, ladders.
- Do not disconnect the hose with your finger on the trigger.
- Disconnect the hose and take out any nails left in the magazine after use.
- When removing a nail which has become stuck, make sure to first of all disconnect the hose and release compressed air.
- To avoid hazards caused by falling nails, never open the magazine with the device facing downward while loading nails.
- A female plug (air socket) should not be used in the body.
- SPECIFICATIONS
- NAIL SELECTION
- STANDARD ACCESSORIES
- OPTIONAL ACCESSORY
- APPLICATIONS
- NOTE:
- Check on safety
- CAUTION
- BEFORE USE
- Check the air pressure
- Lubrication
- Load nails
- Nailing procedures
- Adjusting the nail-driving depth
- INSPECTION AND MAINTENANCE
- Countermeasure for nail jamming
- Check on mounting screws for each part
- Protection against dirt
- Inspecting the feeders
- Cleaning and removal of tar and dirt
- Inspecting the magazine
- Storing
- Service parts list
- MODIFICATIONS:
- COMPRESSOR
- OILER-FILTER-REDUCING VALVE (Air Set)
- APPLICABLE LUBRICANTS
- Noise Information
- Vibration Information
- GENERELLE VORSICHTSMASSNAHMSN
- ACCESSIONS STANDARDS
- ACCESSIONS EN OPTION
- INSPECTION ET MANUTENTION
- ATTENTION
- STANDAARD ACCESSORIES
- OPTIONE ACCESSORIES
- Hikoki Power Tools Netherlands B.V.
- Hikoki Power Tools (U.K.) Ltd.
- Hikoki Power Tools France S.A.S.
- Hikoki Power Tools Belgium N.V./S.A.
- Hikoki Power Tools Italia S.p.A
- Hikoki Power Tools Ibérica, S.A.
Brand : HiKOKI
Model : NV45AB3
Category : Stapler