Mini Pro HS - Earphones SoundPEATS - Free user manual and instructions
Find the device manual for free Mini Pro HS SoundPEATS in PDF.

User questions about Mini Pro HS SoundPEATS
0 question about this device. Answer the ones you know or ask your own.
Ask a new question about this device
Download the instructions for your Earphones in PDF format for free! Find your manual Mini Pro HS - SoundPEATS and take your electronic device back in hand. On this page are published all the documents necessary for the use of your device. Mini Pro HS by SoundPEATS.
USER MANUAL Mini Pro HS SoundPEATS
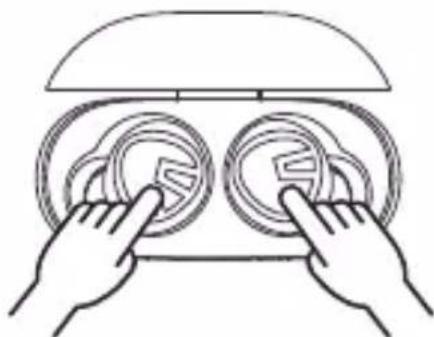
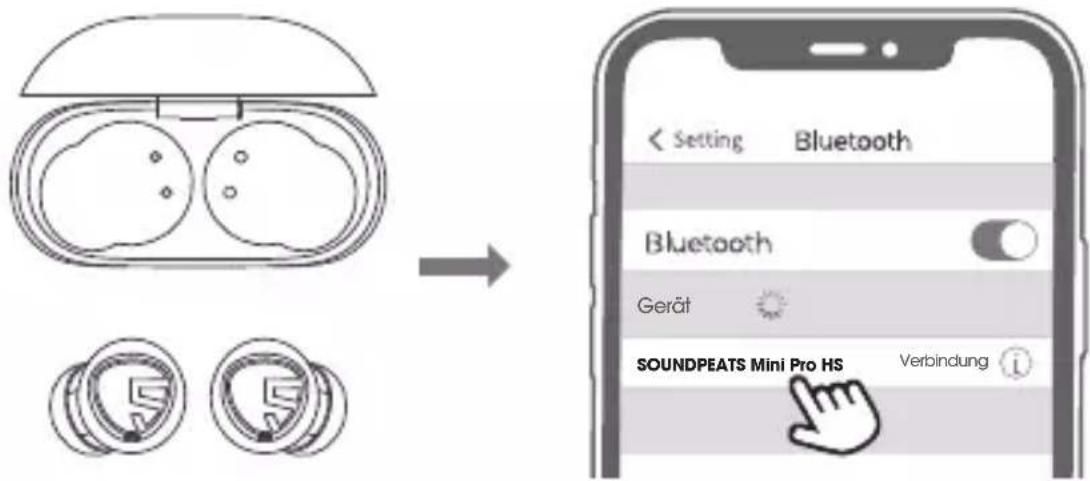
Open the charging case lid and take out both earbuds, then remove the insulating film and put them back.
-
The earbuds automatically pair to each other after being taken out from the charging case. LED indicator on main earbud flashes in red and white, the second earbud stays in white.
-
Activate Bluetooth on the device, and choose "SOUNDPEATS Mini Pro HS" on Bluetooth list to pair.
ANC Mode
Press and hold the left MFB for 1.5 second, switch from Normal mode/ ANC ON/ Pass through mode.
natural_image
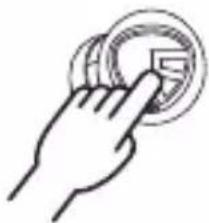
Hand pressing a circular button with a small square icon (no text or symbols)Reset
- Clear the pairing record from your device.
- Place back both earbuds into charging case and make sure they are in charging status.
- Press and hold both buttons for 10s until both LEDs flash in red and white twice, reset complete.
natural_image
Line drawing of two hands holding circular objects with a lid, no text or symbols presentProduct Diagram
flowchart
graph LR
    A["Phone"] --> B["TV"]
    B --> C["Video"]
    C --> D["Audio"]
    D --> E["Mobile Device"]
    E --> F["Interface"]
    F --> G["Server"]
    G --> H["Mobile Device"]
    H --> I["Audio"]
    I --> J["Mobile Device"]
    J --> K["Interface"]
    K --> L["Server"]
    L --> M["Mobile Device"]
    M --> N["Audio"]
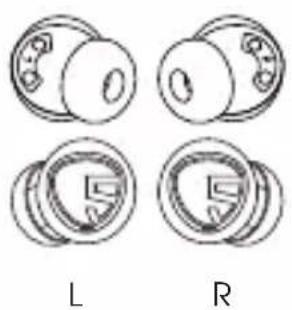
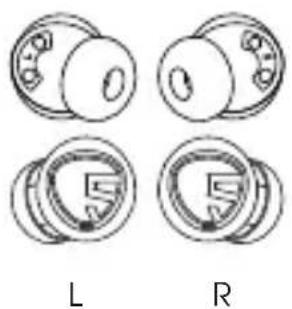
Wearing
natural_image
Four technical diagrams showing mechanical components labeled L and R, with no readable text or symbols beyond labels.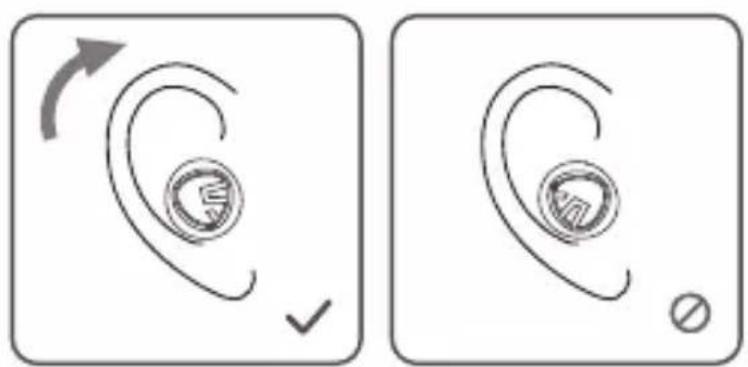
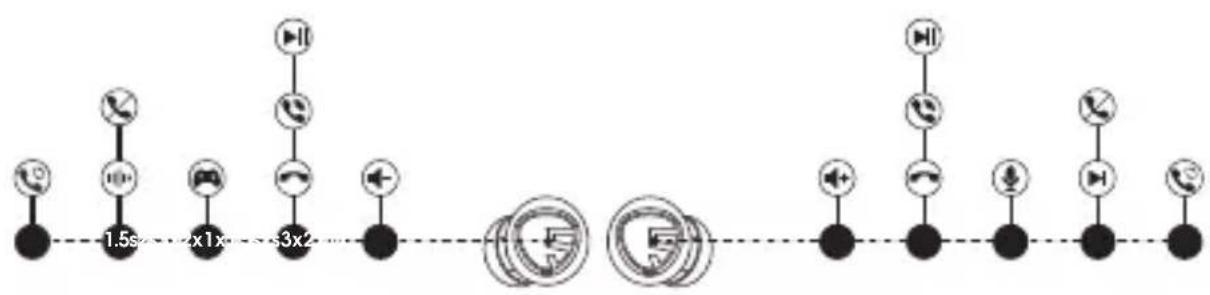
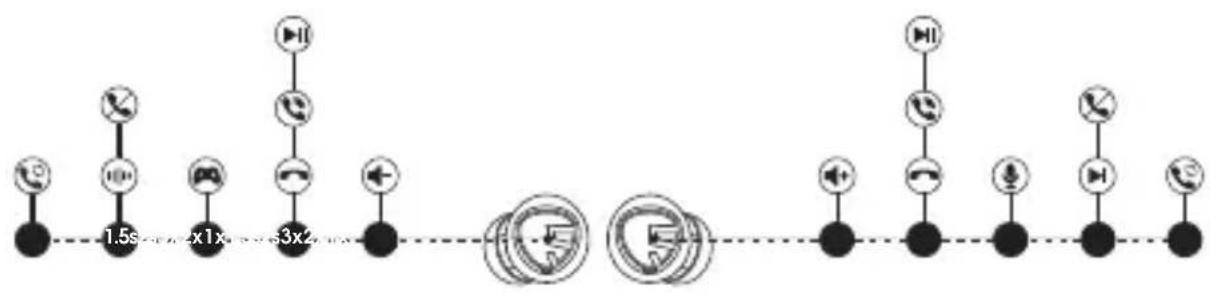
Touch Control
| Power On | Auto: Open up the case lid and take out the earbudsManually: Press and hold the MFB for 1.5s |
| Power Off | Auto: Place back the earbudsManually: Press and hold the MFB for 10s |
| Play / Pause | Double tap the MFB |
| Volume - | Single tap the left MFB |
| Volume + | Single tap the right MFB |
| Next Track | Press and hold right MFB for 1.5s |
| Answer / Hang Up Phone Call | Double tap the MFB |
| Reject Phone Call | Press and hold the MFB for 1.5s |
| Switch Between Two Calls | Press and hold the MFB for 2s |
| Manually Enter Pairing Mode | Press and hold the MFB for 6s |
| Activate Voice Assistant | Triple tap the right MFB |
| Enter/Exit Game Mode | Triple tap the left MFB |
| Normal Mode/ ANC Mode/ Transparency Mode | Press and hold left MFB for 1.5s |
Q&A
Q1: What does the LED of earbuds mean?
The LED indicators of earbuds stay red when it is in charging, disappear when fully charged.
Q2: What does the LED on the charging case tell?
| Green | 100%-50% |
| Yellow | 49%-10% |
| Red | Less than 10% |
While charging the charging case, the LED flashes slowly.
| Red | Less than 20% |
| Yellow | 20% - 69% |
| Green | 70% - 99% |
| Stays in Green | 100% |
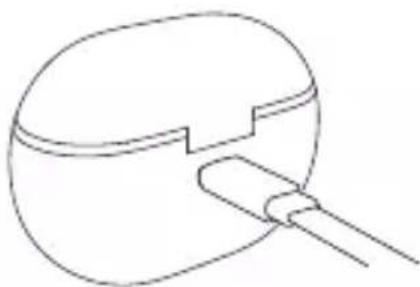
Q3: How to charge the case?
-
Use a Type-C adapter to charge the case (current not over 1A).
-
Please charge the earbuds and case at least once per 3 months when not in use for a long time.
natural_image
Simple line drawing of a mechanical component with a handle and internal structure (no text or symbols)Q4: Why are the earbuds still connected to my phone after placing back?
-
The charging case is out of battery. The case will not turn off the earbuds if the case battery is dead.
-
Please make sure the earbuds sit well in the charging case, and the charging contactors on both the earbuds and charging case are clean. Please try something like microfiber cloth to clean the contactors.
Q5: The battery life is not as advertised?
A single charge will not give you 28 hours playtime constantly. The earbuds work around 8 hours per charge with normal mode, 6 hours per charge with ANC mode. The charging case provides another 2.5 recharges.
FCC Statement
This equipment has been tested and found to comply with the limits for a Class B digital device, pursuant to Part 15 of the FCC rules. These limits are designed to provide reasonable protection against harmful interference in a residential installation. This equipment generates uses and can radiate radio frequency energy and, if not installed and used in accordance with the instructions, may cause harmful interference to radio communications. However, there is no guarantee that interference will not occur in a particular installation. If this equipment does cause harmful interference to radio or television reception, which can be determined by turning the equipment off and on, the user is encouraged to try to correct the interference by one or more of the following measures:
- Reorient or relocate the receiving antenna.
– Increase the separation between the equipment and receiver. - Connect the equipment into an outlet on a circuit different from that to which the receiver is connected.
- Consult the dealer or an experienced radio/TV technician for help.
This device complies with part 15 of the FCC rules. Operation is subject to the following two conditions:
(1) This device may not cause harmful interference.
(2) this device must accept any interference received, including interference that may cause undesired operation.
Changes or modifications not expressly approved by the party responsible for compliance could void the user's authority to operate the equipment.
IC ID
- English: "
This device complies with Industry Canada licence-exempt RSS standard(s). Operation is subject to the following two conditions:
(1) this device may not cause interference, and
(2) this device must accept any interference, including interference that may cause undesired operation of the device."
- French:"
RF warning statement:
The device has been evaluated to meet general RF exposure requirement. The device can be used in portable exposure condition without restriction.
Erster Start
natural_image
Hand pressing a circular button with a small icon on the left (no text or symbols)Zurücksetzen
natural_image
Line drawing of two hands holding circular objects on a device (no text or symbols)natural_image
Four circular mechanical components labeled L and R, showing different cross-sectional views (no text or symbols beyond labels)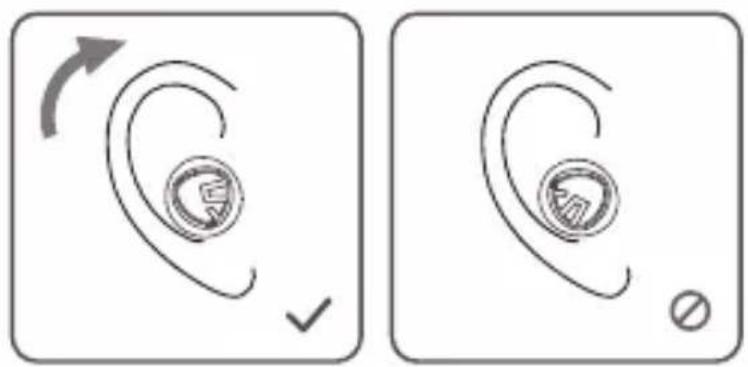
Steuerung
natural_image
Simple line drawing of a mechanical component with a handle and internal structure (no text or symbols)natural_image
Hand pressing a circular button with a small square icon (no text or symbols)Réinitialiser
natural_image
Line drawing of two hands interacting with circular objects inside a container (no text or symbols)natural_image
Four mechanical bearing illustrations labeled L and R, showing different housing configurations (no text or symbols beyond labels)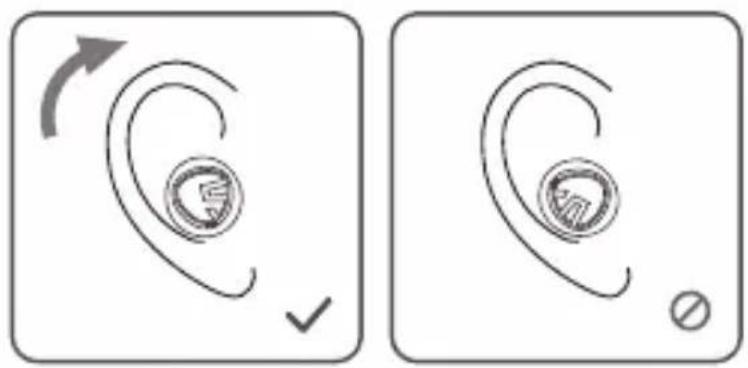
Contrôle
natural_image
Simple line drawing of a mechanical component with a handle and internal structure (no text or symbols)natural_image
Hand pressing a circular button with a grid of dots (no text or symbols)Reiniciar
natural_image
Line drawing of two hands holding circular objects on a device (no text or symbols)Ejemplo de Producto
flowchart
graph LR
    A["Phone"] --> B["Router"]
    B --> C["Mobile Phone"]
    C --> D["Server"]
    D --> E["Wireless Server"]
    E --> F["Communication Node"]
    F --> G["Mobile Phone"]
    G --> H["Server"]
    H --> I["Wireless Server"]
    I --> J["Mobile Phone"]
    J --> K["Server"]
    K --> L["Wireless Server"]
    L --> M["Mobile Phone"]
    M --> N["Server"]
    N --> O["Wireless Server"]
    O --> P["Mobile Phone"]
    P --> Q["Server"]
    Q --> R["Wireless Server"]
Porte des écouteurs
natural_image
Four mechanical bearing illustrations labeled L and R, showing different housing configurations (no text or symbols beyond labels)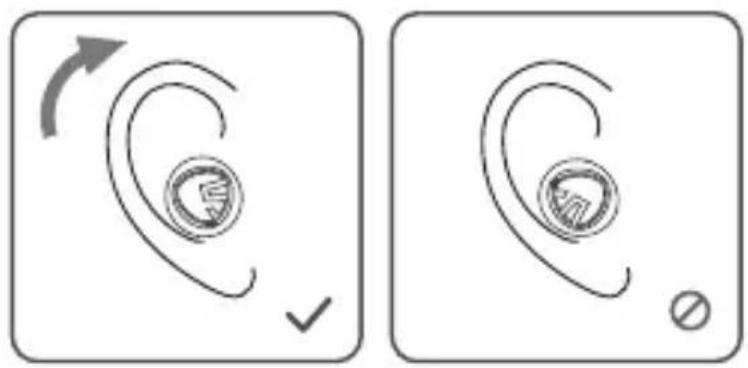
Control