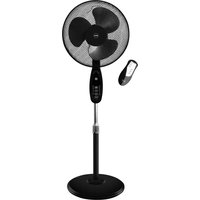
Toll WG100 - Fan Eldom - Free user manual and instructions
Find the device manual for free Toll WG100 Eldom in PDF.


| Product type | Pedestal fan |
| Brand | Eldom |
| Model | Toll WG100 |
| Power | 45 W |
| Supply voltage | 220-240 V ~ 50/60 Hz |
| Speeds | 3 (L, M, H) |
| Operating modes | Natural (NAT), Normal (NOR), Night (SLP) |
| Oscillation | Yes, via remote control |
| Timer | From 0.5 h to 7.5 h in 0.5 h increments |
| Remote control | Yes, with backlight |
| Adjustable height | Yes, via telescopic tube |
| Adjustable tilt | Yes |
| Blade diameter | Not specified |
| Grill material | Metal with protective coating |
| Weight | Approximately 5 kg (estimate) |
| Dimensions (max height) | Approximately 130 cm (estimate) |
| Intended use | Domestic, improving thermal comfort |
| Maintenance and cleaning | Unplug before cleaning; do not immerse; clean with a damp cloth |
| Safety | Do not use outdoors; keep away from children; do not cover the grille |
| Spare parts | Blade, grills, nuts, tubes; available via after-sales service |
| Warranty | Manufacturer standard (not specified) |
Frequently Asked Questions - Toll WG100 Eldom
User questions about Toll WG100 Eldom
0 question about this device. Answer the ones you know or ask your own.
Ask a new question about this device
Download the instructions for your Fan in PDF format for free! Find your manual Toll WG100 - Eldom and take your electronic device back in hand. On this page are published all the documents necessary for the use of your device. Toll WG100 by Eldom.
USER MANUAL Toll WG100 Eldom
natural_image
Black outdoor fan with mesh grille and three blades, mounted on a stand (no visible text or symbols)Eldom Sp. z o.o. • ul. Pawła Chromika 5a • 40-238 Katowice, POLAND tel: +48 32 2553340 • fax: +48 32 2530412 • www.eldom.eu
_
| _
一
1

/EN/ The disposal of used electrical and electronic equipment (applies to European Union countries and other European countries with separate waste-collection systems).
This symbol on the product or its packaging indicates that it should not be classified as household waste. It should be handed over to an appropriate company dealing with the collection and recycling of electrical and electronic equipment. The correct disposal of the product will prevent potential negative consequences for the environment and human health resulting from hazardous substances present in the product. Electrical devices must be handed over to restrict their re-use and further treatment. If the device contains batte ries, remove them, and hand them over to a storage point separately. DO NOT THROW EQUIPMENT INTO THE MUNICIPAL WASTE BIN. Material recycling helps to preserve natural resources. For detailed information on how to recycle this product, please contact your local authority, the recycling company, or the shop where you bought it.
• DANE TECHNICZNE
natural_image
Two-panel image showing a metal tool on a stand and a close-up of a mechanical component being held by a hand (no text or symbols visible)• UŻYTKOWANIE
Before first use, please thoroughly read the entire manual.
It is recommended to keep this instructions manual for future reference.
-
The cord should be plugged into the power supply of parameters indicated in the data plate.
-
Please, do not plug too many appliances to a single electric circuit.
-
WARNING: do not use close to bathtubs, showers, swimming pools and other water containers.
-
The unit is designed to operate at a household.
-
Place the unit on a flat and dry surface.
-
Do not inert fingers or any other objects into the inlet and outlet holes.
-
Do not place the unit near cushions or curtains.
-
Working fan must be always supervised, especially, when there are children nearby.
-
Leaving a room where a fan operates, switch it off.
-
Do not spray any insect killers or similar agents near the operating fan.
-
Do not use the appliance under high temperature (exceeding 40^ C), in localizations where the humidity rate is high (e.g. bathroom) and localizations where explosive atmosphere occurs.
-
Before switching the unit on make sure all its elements are correctly fixed. Under no circumstances one may switch the unit on before it has been completely assembled!
-
Do not cover the protective mesh.
- Do not use the appliance as a hanger.
- In case the power cord is damaged it must be replaced by the manufacturer's authorized service center.
- The device can be used by children aged 8 and older and by persons with limited physical, sensory or mental capabilities, or persons without sufficient experience and knowledge only under supervision or if previously instructed on the safe use of the appliance and the possible risks. Children shall not play with the appliance. Cleaning and maintenance that are the responsibility of the user shall not be carried out by children without supervision. Protect the appliance and the power cord against children under 8 years old.
- The device can be repaired only by authorized service center. Any upgrades or any use of non-original spare parts or equipment components is prohibited and endanger the safety of use.
- Eldom Sp. z o. o. is not liable for any damage resulting from improper use of the appliance.
WARNING: Improper use of the appliance may cause injury
WARNING: Plastic bag can be dangerous, to avoid danger of suffocation keep this bag away from babies and children.
- WARRANTY
– This appliance is designed for domestic use only.
– It cannot be used for professional purposes or for other than the intended use.
- Improper use will nullify the guarantee.
- Bracket
- Protective net - front
- Propeller locking nut
- Propeller
- Safety nut net
- Protective net - rear
- Mandrel
- Motor housing
- Body
- Control panel
- Cable
- Lock
- Extension tube
- Height adjustment ring
- Base tube
- Base
- Remote control

• TECHNICAL DATA
— power: 45W
— supply voltage:
220-240V\~ 50/60Hz

• CONTROL PANEL (10)
SPEED/ON - fan on, speed control
OFF - switching off the device
TIMER - switching on/off of automatic switching off
MODE - selection of programmed operation modes
L, M, H - fan speed control (low, medium, high)
NAT, NOR, SLP - operating mode indicator lights (natural, normal, night)
4H, 2H, 1H, 0.5H - indicators of automatic shut-off time setting
• REMOTE CONTROL (17)
LAMP - lamp on/off
SWING - oscillation on/off
TIME - on/off of automatic switch off
SPEED/ON - fan on/off, control of operating speed
MODE - selection of programmed operation modes
OFF - switching off the device

- INTENDED USE
Fan WG100 is designed to improve thermal comfort in living spaces. With its help, the air is set in motion, thus providing a pleasant cooling sensation.

natural_image
Two-panel image showing a kitchen sink and a hand holding a tool on a circular object, labeled 'Fig. 1' (no text or symbols in the image itself)• USE
— Before use, check that the unit is complete and undamaged.
— Before first use, unpack the appliance and assemble the individual components.
- Connect the tube (15) to the base (16) - fig. 1
– Slide out the tube (13) and lock it with the ring (14).
- Connect the body (9) to the tube (13) and lock by tightening the lock (14).
– Slide the rear mesh (6) onto the stem (7).
- Align the holes of the net (6) with the hooks on the motor housing (8) and fix with the nut (5).
– Slide the propeller (4) onto the stem (7) and fix it with the nut (3).
- Loosen the bolt in the bracket (1), then put the bracket (1) on the mounted net (6).
- Fit the front net (2) into the bracket (1) and secure by tightening the screw in the bracket (1) as far as it will go.
— Place assembled unit on a stable and level surface.
- Adjust height. Loosen the ring (14), slide the tube (13) in or out to the required height and then lock by tightening the ring (14).
- Adjust the angle of the canopy.
– Unwind the cable completely.
• OPERATION
— All setting changes are confirmed with a beep.
- With the OFF button you can switch off all functions of the device at once.
- Connect the device to the mains according to the parameters given above.
- Switch on the appliance using the "SPEED/ON" button and by pressing it set the speed - the indicator light (L, M, or H) will light up.
- Using the buttons on the control panel or remote control additionally select other functions.
- To switch off press the "OFF" button.
- Press the "SPEED/ON" button to switch on the fan.
- Press the "MODE" button until the "NAT" light comes on.
•The fan will cycle the speed from highest to lowest.
NOR - Normal mode
• Use the "SPEED/ON" button to switch on the fan and select the operating speed.
- Press the "MODE" button until the "NOR" light comes on.
•The fan will run at the selected speed.
SLP - night mode
- Press the "SPEED/ON" button to switch on the fan and select the operating speed.
- Press the "MODE" button until the "SLP" light comes on.
• The fan will cycle on and off - operating at the selected speed.
• A DDITIONAL FUNCTIONS
OSCILLATION - activation possible only from remote control
• Use the "SPEED/ON" button to switch on the fan and select the operating speed.
- Press the "SWING" button on the remote control.
• The fan will run at the selected speed.
• To deactivate the function, press the "SWING" button on the remote control.
TIMER
- This function allows you to set a time after which the unit will automatically switch off.
- The function can only be activated when the unit is switched on.
• Use the "SPEED/ÓN" button to switch on the fan and select the operating speed.
- Press the "TIME" button on the remote control or ""TIME" on the control panel.
- 1 time - setting of automatic switch off in half an hour - the "0.5H" light will come on,
- 2 times - setting automatic switch off in 1 hour - "1H" indicator light will come on,
- 3 times - switch off in 1.5 hours - "1H" and "0.5H" indicator lights will come on,
- 4 times - switch off in 2 hours - "2H" indicator light will come on,
- 5 times - switch off in 2.5 hours - "2H" and "0.5H" indicator lights will come on,
- 6 times - switch off in 3 hours - "1H" and "2H" indicator lights will come on,
- 7 times - switch off in 3.5 hours - "1H" and "2H", "0.5H" indicator lights will come on,
- 8 times - switch off in 4 hours - "4H" indicator light comes on,
- 9 times - switch off in 4.5 hours - "4H" and "0.5H" indicator lights will come on,
- 10 times - switch off in 5 hours - the "4H" and "1H" lights will come on,
- 11 times - switch off in 5.5 hours - the "4H", "1H" and "0.5H" lights will come on,
- 12 times - switch off in 6 hours - the "4H" and "2H" lights will come on,
- 13 times - switch off in 6.5 hours - the "4H", "2H" and "0.5H" lights will come on,
- 14 times - off in 7 hours - the "4H", "2H" and "1H" lights will come on,
- 15 times - switch off in 7.5 hours - the "4H", "2H", "1H" and "0.5H" lights will come on.
• The fan will run at the selected speed.
• CLEANING AND MAINTENANCE
— Unplug the appliance from the mains and wait for the propeller to stop before cleaning.
— The appliance must not be submerged in water
— Wipe the unit with a damp cloth and then wipe dry.
- Remove the front net, propeller and rear net - wipe the components with a damp cloth and then wipe dry.
- Do not use strong or surface-damaging cleaners to clean. Do not use any aggressive cleaning agents.
• ENVIRONMENTAL PROTECTION
– The appliance is made of materials which can be recycled.
- It should be handed over to the applicable collection point for the recycling of electrical and electronic equipment.
• SCHALTTAFEL (10)
natural_image
Two-panel image showing a mechanical device with a circular component being handled, labeled 'Abb. 1' (no text or symbols on the device itself)• MONTAGE
natural_image
Two-panel image showing a kitchen sink and a hand holding a tool on a circular object (no text or symbols visible)• МОНТАЖ
natural_image
Two-panel image showing a mechanical device with a lid and a close-up of a circular component being held by a hand (no visible text or symbols)• MONTAJE
natural_image
Two-panel image showing a metal bowl being cleaned and a mechanical component being inserted (no text or symbols visible)• ASSEMBLAGE DE L'APPAREIL
natural_image
Two-panel image showing a metal bowl being dipped and then placed on a circular mechanical component, with no visible text or symbols.• MONTAGGIO
WENTYLATOR POKOJOWY WG100

- • DANE TECHNICZNE
- • UŻYTKOWANIE
- - WARRANTY
- • TECHNICAL DATA
- • CONTROL PANEL (10)
- • REMOTE CONTROL (17)
- - INTENDED USE
- • USE
- • OPERATION
- NOR - Normal mode
- SLP - night mode
- • A DDITIONAL FUNCTIONS
- OSCILLATION - activation possible only from remote control
- TIMER
- • CLEANING AND MAINTENANCE
- • ENVIRONMENTAL PROTECTION
- • SCHALTTAFEL (10)
- • MONTAGE
- • МОНТАЖ
- • MONTAJE
- • ASSEMBLAGE DE L'APPAREIL
- • MONTAGGIO
- WENTYLATOR POKOJOWY WG100
Brand : Eldom
Model : Toll WG100
Category : Fan