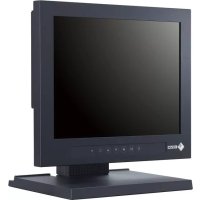
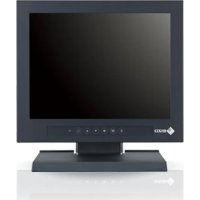
DuraVision FDS1903-A - Monitor EIZO - Free user manual and instructions
Find the device manual for free DuraVision FDS1903-A EIZO in PDF.
User questions about DuraVision FDS1903-A EIZO
0 question about this device. Answer the ones you know or ask your own.
Ask a new question about this device
Download the instructions for your Monitor in PDF format for free! Find your manual DuraVision FDS1903-A - EIZO and take your electronic device back in hand. On this page are published all the documents necessary for the use of your device. DuraVision FDS1903-A by EIZO.
USER MANUAL DuraVision FDS1903-A EIZO
- For the latest product information including the “User’s Manual”, refer to our web site : www.eizoglobal.com Color LCD Monitor User’s Manual English2 SAFETY SYMBOLS This manual and this product use the safety symbols below. They denote critical information. Please read them carefully. WARNING Failure to abide by the information in a WARNING may result in serious injury and can be life threatening. CAUTION Failure to abide by the information in a CAUTION may result in moderate injury and / or property or product damage. Indicates a warning or caution. For example, indicates an “electrical shock” hazard. Indicates a prohibited action. For example, means “Do not disassemble”. Indicates a mandatory action. For example, means “Ground the unit”. No part of this manual may be reproduced, stored in a retrieval system, or transmitted, in any form or by any means, electronic, mechanical, or otherwise, without the prior written permission of EIZO Corporation. EIZO Corporation is under no obligation to hold any submitted material or information condential unless prior arrangements are made pursuant to EIZO Corporation’s receipt of said information. Although every eort has been made to ensure that this manual provides up-to-date information, please note that EIZO monitor specications are subject to change without notice.3 PRECAUTIONS PRECAUTIONS IMPORTANT
- This product has been adjusted specically for use in the region to which it was originally shipped. If the product is used outside the region, it may not operate as specied in the specications.
- To personal safety and proper maintenance, please read carefully this section and the caution statements on the monitor. Location of the Caution Statements English4 PRECAUTIONS WARNING If the unit begins to emit smoke, smells like something is burning, or makes strange noises, disconnect all power connections immediately and contact your EIZO representative for advice. Attempting to use a malfunctioning unit may result in re, electric shock, or equipment damage. Do not disassemble or modify the unit. Opening the cabinet or modifying the unit may result in re, electric shock, or burn. Refer all servicing to qualied service personnel. Do not attempt to service this product yourself as opening or removing covers may result in re, electric shock, or equipment damage. Keep small objects or liquids away from the unit. Small objects accidentally falling through the ventilation slots into the cabinet or spillage into the cabinet may result in re, electric shock, or equipment damage. If an object or liquid falls/spills into the cabinet, unplug the unit immediately. Have the unit checked by a qualied service engineer before using it again. Place the unit at a sturdy and stable place. A unit placed on an inadequate surface may fall and result in injury or equipment damage. If the unit falls, disconnect the power immediately and ask your local EIZO representative for advice. Do not continue using a damaged unit. Using a damaged unit may result in re or electric shock. Use the unit in an appropriate location. Otherwise, re, electric shock, or equipment damage may result.
- Do not place outdoors.
- Do not place in any form of transportation (ships, aircraft, trains, automobiles, etc.).
- Do not place in dusty or humid environments.
- Do not place in locations where water may be splashed on the screen (bathrooms, kitchens, etc.)
- Do not place in locations where steam comes in direct contact with the screen.
- Do not place near heat generating devices or humidiers.
- Do not place in locations where the product is subject to direct sunlight.
- Do not place in environments with inammable gas.
- Do not place in environments with corrosive gases (such as sulfur dioxide, hydrogen sulde, nitrogen dioxide, chlorine, ammonia, and ozone)
- Do not place in environments with dust, components that accelerate corrosion in the atmosphere (such as sodium chloride and sulfur), conductive metals, and so on To avoid danger of suocation, keep the plastic packing bags away from babies and children. Use the enclosed power cord and connect to the standard power outlet in your country. Be sure to use within the rated voltage of the power cord. Otherwise, re or electric shock may result. Power supply: 100-240Vac 50/60Hz To disconnect the power cord, grasp the plug rmly and pull. Tugging on the cord may damage and result in re or electric shock. The equipment must be connected to a grounded main outlet. Failure to do so may result in re or electric shock. Use the correct voltage.
- The unit is designed for use with a specic voltage only. Connection to another voltage than specied in this “Instructions for Use” may cause re, electric shock, or equipment damage. Power supply: 100-240Vac 50/60Hz
- Do not overload your power circuit, as this may result in re or electric shock.5 PRECAUTIONS WARNING Handle the power cord with care.
- Do not place the cord underneath the unit or other heavy objects.
- Do not pull on or tie the cord. If the power cord becomes damaged, stop using it. Using of a damaged cord may result in re or electric shock. Never touch the plug and power cord if it begins to thunder. Touching them may result in electric shock. When attaching an arm stand, please refer to the user’s manual of the arm stand and install the unit securely. Otherwise, the unit may become detached, resulting in injury and/or equipment damage. Before installation, make sure that desks, walls, or any other installation surface has adequate mechanical strength. If the unit falls, please ask your local EIZO representative for advice. Do not continue using a damaged unit. Using a damaged unit may result in re or electric shock. When reattaching the tilt stand, please use the same screws and tighten them securely. Do not touch a damaged LCD panel directly with bare hands. Liquid crystal is poisonous. If any part of your skin comes in direct contact with the panel, wash thoroughly. If liquid crystal enters your eyes or mouth, immediately ush with large amounts of water and seek medical attention. English6 PRECAUTIONS CAUTION Handle with care when carrying the unit. Disconnect the power cord and cables when moving the unit. Moving the unit with the power cord or cables attached is dangerous and may result in injury. Carry or place the unit according to the correct specied methods.
- When carrying, grasp and rmly hold the unit as shown in the illustration below.
- Monitors of size 30 inches and above are heavy. When unpacking and/or carrying the monitor, ensure at least two people are utilized. Dropping the unit may result in injury or equipment damage. Do not block the ventilation slots on the cabinet.
- Do not place any objects on the ventilation slots.
- Do not install the unit in a place with poor ventilation or inadequate space.
- Do not use the unit laid down or upside down. Blocking the ventilation slots prevents proper airow and may result in re, electric shock, or equipment damage. Do not touch the plug with wet hands. Doing so may result in electrical shock. Use an easily accessible power outlet. This is to facilitate disconnecting the power in case of a problem. Periodically clean the area around the power plug and the ventilation slot of the monitor. Dust, water, or oil on the plug may result in re. Unplug the unit before cleaning it. Cleaning the unit while it is plugged into a power outlet may result in electric shock. If you plan to leave the unit unused for an extended period of time, disconnect the power cord from the wall socket after turning o the power switch for the safety and the power conservation.7 Notice for this monitor Notice for this monitor This product is suited for displaying surveillance camera images. This product has been adjusted specically for use in the region to which it was originally shipped. If the product is used outside the region, it may not operate as specied in the specications. This product may not be covered by warranty for uses other than those described in this manual. The specications noted in this manual are only applicable when the following are used:
- Power cords provided with the product
- Signal cables specied by us Only use optional products manufactured or specied by us with this product. If you place this product on a lacquer-coated desk, the color may adhere to the bottom of the stand due to the composition of the rubber. Check the desk surface before use. It takes about 30 minutes (under our measurement conditions) for the monitor display to stabilize. Please wait 30 minutes or more after the monitor power has been turned on, and then adjust the monitor. Monitors should be set to a lower brightness to prevent a loss in the screen quality caused by long-term use and to maintain stable use. When the screen image is changed after displaying the same image for extended periods of time, an afterimage may appear. Use the screen saver or power save function to avoid displaying the same image for extended periods of time. Depending on the image, an afterimage may appear even if it was displayed for a short period of time. To remove such a phenomenon, change the image or keep the power turned o for several hours. Periodic cleaning is recommended to keep the monitor looking new and to prolong its operation lifetime (refer to “Cleaning” (page 8)). The LCD panel is manufactured using high-precision technology. Although, missing pixels or lit pixels may appear on the LCD panel, this is not a malfunction. Percentage of eective dots: 99.9994 % or higher. The backlight of the LCD panel has a xed lifetime. Depending on the usage pattern, such as usage for long continuous periods, the lifespan of the backlight may run out sooner, requiring replacement. When the screen becomes dark or begins to icker, please contact your local EIZO representative. Do not press on the LCD panel or edge of the frame strongly, as this may result in display malfunctions, such as interference patterns, etc. If pressure is continuously applied to the LCD panel surface, the liquid crystal may deteriorate or the LCD panel may be damaged. (If the pressure marks remain on the panel, leave the monitor with a black or white screen. The symptom may disappear.) Do not scratch or press on the LCD panel with any sharp objects, at this may result in damage to the LCD panel. Do not attempt to brush with tissues as this may scratch the panel. When the monitor is cold and brought into a room or the room temperature goes up quickly, dew condensation may occur on the interior and exterior surfaces of the monitor. In that case, do not turn the monitor on. Instead wait until the dew condensation disappears, otherwise it may cause some damage to the monitor. English8 Notice for this monitor Cleaning The stains on the cabinet and LCD panel surface can be removed by moistening part of a soft cloth with water. Attention
- Chemicals such as alcohol and antiseptic solution may cause gloss variation, tarnishing, and fading of the cabinet or LCD panel, and also quality deterioration of the image.
- Never use thinner, benzine, wax, or abrasive cleaner as they may damage the cabinet or LCD panel surface. Note
- It is recommended that ScreenCleaner (available as an option) be used to clean the cabinet and LCD panel surface. To use the monitor comfortably
- An excessively dark or bright screen may aect your eyes. Adjust the brightness of the monitor according to the environmental conditions.
Chapter 3 Basic Adjustment/Setting .............. 15
- 3-1. How to Operate the Buttons p. 153
- -2. Switching Input Signals p. 16
- 3-3. Adjusting the Brightness p. 16
- 3-4. Adjusting Volume p. 17
Chapter 4 Advanced Adjustment/Setting ...... 18
- Equipped with two types of input terminals - HDMI connector PCs and audio-visual devices are supported Displays HDCP (High-bandwidth Digital Content Protection) protected contents. - BNC connector Supported formats: NTSC, PAL, SECAM
- A 2-year long-term warranty for 24-hour continuous use 1-2. Package Contents Check that all the following items are included in the packaging box. If any items are missing, contact your local EIZO representative. Note
- Please retain the packing materials for future transport of the monitor.
- User's Manual (Limited Warranty included)
1-3. Controls and Functions
Not used 1 Operation button Displays menus. Operate the switches according to the operation guide.
Connects to external equipment compatible with the monitor.
- When connecting to a PC or digital video equipment: see page 12 • When connecting to analog video equipment: see page 13
When connecting to a PC or digital video equipment Attention
- When replacing the current monitor with this monitor, be sure to change the PC or digital video equipment settings for the resolution and vertical scan frequency to those appropriate for this monitor. Compatible Resolutions/Frequencies The monitor supports the following resolutions.Resolution Vertical scan frequency (Hz)Interlace Progressive640 × 480 59.94 / 60 - 720 × 400 70 - 720 × 480 59.94 / 60ü ü720 × 576 50ü ü800 × 600 60 - 1024 × 768 60 - 1280 × 720 50 / 59.94 / 60 - 1280 × 960 60 - 1280 × 1024
1920 × 1080 50 / 59.94 / 60 - *1 Recommended resolution (Set this resolution.)*2 The screen image is reduced in size when displayed.
1. Connect the monitor to a PC or digital video equipment with a signal cable that matches the
connectors. HDMI Signal cable HH200HS (option)
Chapter 2 Connecting Cables2. You can use the connector clamp included in the packaging to x the signal cable to the monitor. MAINTENANCEAUDIO INVIDEO Connector clampSignal cableAttention
- Connect with an HDMI cable to output HDMI audio.
When connecting to analog video equipment
1. Connect the monitor to the analog video equipment with a signal cable that matches the
connectors. VIDEO BNC AUDIO INBNC cable (commercially available product) Audio output connectorAudio cable (commercially available product) *1 If the video output connector for the analog video equipment has an RCA plug, use a BNC-RCA conversion adapter to make the connection.
Chapter 2 Connecting Cables
English2. Plug the power cord of the monitor into a power outlet. Plug the power cord into a power outlet and the Power connector on the monitor. Attention
- Turn o the power after you are nished. Unplugging the power cord completely shuts o power supply to the monitor. 2-2. Turning On the Power Press . 2-3. Adjusting the Screen Height and Angle Hold left and right edge of the monitor with both hands, and adjust the screen height, tilt and swivel the screen to the best condition for working. Attention
- Be sure that the cables are correctly connected.
Chapter 2 Connecting CablesChapter 3 Basic Adjustment/Setting
This chapter describes the basic functions that can be adjusted and set using the operation buttons on the front of the monitor. For advanced adjustment and setting procedures using the Setting menu, see “Chapter 4 Advanced Adjustment/Setting” (page 18). 3-1. How to Operate the Buttons
1. Press any of the buttons (excluding ).
The operation guide appears.
The Setting menu appears.
1. Select the menu with , and then select .
The Adjustment/Setting menu appears.
2. Choose an item to set/adjust with , and then set/adjust the item with or .
1. Select after completing setting/adjusting to save the settings.
several times will terminate the Setting menu.
Chapter 3 Basic Adjustment/Setting
English3-2. Switching Input Signals When a monitor has multiple signal inputs, the signal to display on-screen can be changed. 3-3. Adjusting the Brightness The brightness of the screen can be adjusted to suit the installation environment or personal preference. Settings 0 to 100
Chapter 3 Basic Adjustment/Setting3-4. Adjusting Volume
The volume can be adjusted. Settings 0 to 30
Chapter 3 Basic Adjustment/Setting
EnglishChapter 4 Advanced Adjustment/Setting This chapter describes the advanced monitor adjustment and setting procedures using the Setting menu. For basic functions, see “Chapter 3 Basic Adjustment/Setting” (page 15). 4-1. Basic Operation of the Setting Menu
The operation guide appears.
The Setting menu appears.
1. Select a menu to adjust/set with and select .
The Sub menu appears.
2. Select an item to adjust/set with and select .
The Adjustment/Setting menu appears.
3. Perform adjustment/setting with or and select to accept the changes.
The Sub menu appears.Selecting during adjustment/setting will cancel the adjustment/setting and restore the state prior to making changes.
1. Selecting or several times will terminate the Setting menu.
Chapter 4 Advanced Adjustment/SettingEnglish
Color Adjustment The color setting status can be adjusted according to personal preference. Attention
- It takes about 30 minutes for the monitor display to stabilize. Please wait 30 minutes or more after power to the monitor has been turned on before adjusting the monitor.
- The same image may be seen in dierent colors on multiple monitors due to dierences between individual monitors. Make ne color adjustment visually when matching colors on multiple monitors. Functions Description Brightness The screen brightness is adjusted by changing the brightness of the backlight (light source from the LCD back panel).Settings: 0 to 100 Note
- When your feel the image is bright even if the brightness is set to 0, adjust the contrast.ContrastThe brightness of the screen is adjusted by varying the video signal level.Settings: 0% to 100% Note
- 100% displays every color gradation. • When adjusting the monitor, it is recommended to perform brightness adjustment, which does not lose gradation characteristics, prior to contrast adjustment. • Perform contrast adjustment in the following cases. - When you feel the image is bright even if the brightness is set to 0. (Set the contrast to lower than 100%).TemperatureThe color temperature can be adjusted.The color temperature is normally used to express the color of "White" and/or "Black" by a numerical value. The value is expressed in degrees "K" (Kelvin).The screen becomes reddish at a low color temperature, and bluish at a high color temperature, like the temperature of a ame. The gain preset values are set for each color temperature setting value.Settings: Native, 4000K to 10000K (in units of 100K), User Note
- The value shown in "K" is available only as a reference. • "Gain" allows you to perform more advanced adjustment. • If set to "Native", the image is displayed in the preset color of the LCD panel (Gain: 100 for each RGB channel). • When gain is changed, the color temperature is changed to "User".GammaAdjust the gamma.The brightness of the monitor varies depending on the input signal, however, the variation rate is not simply proportional to the input signal. The control performed to keep the balance between the input signal and the brightness of the monitor is called "Gamma correction".Settings: 1.8, 2.0, 2.2, 2.4, Dynamic Note
- If "Dynamic" is selected, the display is adjusted to emphasize low gradation contrast.
Chapter 4 Advanced Adjustment/SettingFunctions Description
Advanced Settings Hue Adjust the hue. Settings: -100 to 100 Note
- Using this function may make some color gradations unavailable for display. Saturation Adjust the color saturation. Settings: -100 to 100 Note
- Using this function may make some color gradations unavailable for display.
- The minimum value (-100) changes the screen to monochrome. Gain The brightness of each color component red, green, and blue is called Gain. The hue of "white" can be changed by adjusting the gain. Settings: 0% to 100% Note
- Using this function may make some color gradations unavailable for display.
- The gain value changes according to the color temperature.
- When gain is changed, the color temperature is changed to "User". Reset Resets the currently selected color adjustments back to the default settings.
Chapter 4 Advanced Adjustment/SettingEnglish
Signal Settings The signal settings are used to congure advanced settings for input signals, such as the screen display size and color format. The settings of each function diers depending on the input signal. √: Settable -: Not settable Functions Input Signal Description HDMI Video Screen Size √ √ The screen size of the monitor display can be changed. Settings(HDMI): Auto, Full, Enlarged, Normal
- "Auto" The monitor automatically changes the screen size according to the resolution information and aspect ratio information from the input signal.
- "Full" Displays an image in full screen. Images are distorted in some cases because the vertical rate is not equal to the horizontal rate.
- "Enlarged" Displays an image in full screen. However, since aspect ratios are maintained, part of an image may not be visible for the horizontal or vertical edge of the image.
- "Normal" Displays the image at the set resolution or at the size specied by the input signal. Attention
- If the resolution of the image is 1920×1080, the displayed resolution will be reduced even when set to "Full", "Enlarged" or "Normal". Note
Chapter 4 Advanced Adjustment/Setting√: Settable -: Not settable
Functions Input Signal Description HDMI Video Screen Size √ √ Settings (Video): Full, 4:3, 16:9a, 16:9b, 16:9c
- "Full" Displays an image in full screen. Images are distorted in some cases because the vertical rate is not equal to the horizontal rate.
- "4:3" Displays the image in full screen while maintaining a 4:3 aspect ratio.
- "16:9a" Displays the full height of the image in full screen. Since the image is displayed while maintaining a 16:9 aspect ratio, the right and left sides of the image are cut o.
- "16:9b" Displays the image while maintaining a 16:9 aspect ratio. The right and left sides of the image are cut o.
- "16:9c" Displays the image in full screen while maintaining a 16:9 aspect ratio. Note
- Example settings - "Full" - "4:3" - "16:9a" - "16:9b" - "16:9c" Portion that is cut off Portion that is cut off
Chapter 4 Advanced Adjustment/SettingEnglish
Input Range √ - Depending on the connected equipment, the black and white levels in the video signal output to the monitor may be restricted. If the signal is displayed on the monitor in its restricted form, the blacks will be faint, the whites dull, and contrast will be reduced. To restore the monitor's original contrast ratio, the output range can be extended for this kind of signal. Settings: Auto
- "Auto" The monitor automatically recognizes the brightness range of input signals and displays images appropriately.
- "Full" The output range of signals is not extended.
- "Limited" The output range of signals is extended from 16 to 235 to 0 to 255 for display. Noise Reduction √ √ Use this function to reduce noise and roughness in images. Settings: O, Light, Middle, Heavy Note
- Using the Noise Reduction function may lead to deterioration of ne images. Sharpness √ √ This function allows you to emphasize the outline of the image by emphasizing the color dierence between the pixels composing the image and to improve a sense of quality and materiality. Settings: O, Light, Middle, Heavy Overscan - √ Switches the display range of the input image (overscan). If "O" is selected, most input images will be displayed. Settings: O, On Note
- Depending on the input signal, noise may be visible at the edges of the screen. *1 Only enabled when input signal information for automatically determining the setting is detected
Chapter 4 Advanced Adjustment/Setting●
Preferences The monitor's settings can be congured to suit the usage environment or personal preference. Functions Description Up View Optimizes the display for viewing the screen from below, so that the display appears similar to when viewing the screen from the front. Settings: O, -20°, -40° Power Save The monitor or digital video equipment can be set to enter power saving mode according to the state of the PC. The monitor changes to power saving mode about 15 seconds after signal input ceases to be detected. When the monitor has shifted to power saving mode, images are not displayed on the screen.
- Exiting power saving mode - If the monitor receives input, it automatically exits power saving mode and returns to the normal display mode. Settings: On, O Note
- At the time of shifting to power saving mode, a message that indicates the transition is displayed 5 seconds in advance.
- When you are not using the monitor, disconnect the power plug to cut o power consumption completely.
- Power consumption varies even when the stereo mini jack cable is connected. Monitor Reset Restore all settings to their default values except for the following settings.
Language The display language for menus and messages can be selected. Settings English, German, French, Spanish, Italian, Swedish, Japanese, Simplied Chinese, Traditional Chinese
Chapter 4 Advanced Adjustment/SettingChapter 5 Administrator Settings
This chapter describes how to congure monitor operation using the "Administrator Settings" menu. This menu is for administrators. Conguration on this menu is not required for normal monitor use. 5-1. Basic Operation of the "Administrator Settings" Menu
1. Press to turn o the monitor.
2. While pressing the third button from the left, press
for more than 2 seconds to turn on the monitor. The "Administrator Settings" menu appears.
1. Choose an item to set with , and then select .
The Adjustment/Setting menu appears.
2. Set with and select .
The "Administrator Settings" menu appears.
Applying and exiting
1. Select "Apply", and then select .
The settings are conrmed and the "Administrator Settings" menu quits.
Chapter 5 Administrator Settings
English5-2. "Administrator Settings" Menu Functions Function Description Auto Input Detection This product automatically recognizes the connector through which signals are input and displays images on the screen accordingly. Settings: O, On
- “O” The input signal is selected manually. The input signal to display can be selected using the operation button ( ) on the front of the monitor. For more information, see “3-2. Switching Input Signals” (page 16).
- “On” The input signal is selected automatically. When connecting to multiple PCs or pieces of digital video equipment, if the PCs or digital video equipment turn o or enter power saving mode, any other available signal is displayed automatically. Note
- When this function is set to "On", the monitor only enters power saving mode after all connected PCs or digital video equipment have been turned o or have entered power saving mode. On-Screen Logo When the monitor is turned on, the EIZO logo appears on the screen. When this function is set to "O", the EIZO logo does not appear. Settings: On, O Key Lock In order to prevent changes to settings, the operation buttons on the front of the monitor can be locked. Settings: O, Menu, All
- "O" Enables all buttons.
Chapter 5 Administrator SettingsChapter 6 Troubleshooting
6-1. No Picture Problems Possible cause and remedy 1. No picture • Power indicator does not light up. • Check whether the power cord is connected properly. • Press on the monitor. • Turn o the power, and then turn it on again a few minutes later.
- Power indicator is lighting orange. • Move the mouse or press any key on the keyboard.
- Check whether the power of the external device is turned on. • Check whether the signal cable is connected properly. • Switch the input signal.
- Power indicator is lighting blue. • Check whether the power of the external device is turned on.
- Switch the input signal. • Adjust using "Brightness" and "Contrast" (see page 19). 6-2. Imaging Problems Problems Possible cause and remedy
1. The screen is too bright or too dark. • Adjust using "Brightness" or "Contrast" (see page 19).
(The LCD monitor backlight has a limited life span. If the screen becomes dark or begins to icker, contact your local representative.)2. Green/red/blue/white/dark dots remain on the screen. • This is due to LCD panel characteristics and not a malfunction.3. Interference patterns or pressure marks remain on the screen. • Display a white or black image over the entire screen. The symptom may disappear.
4. Afterimages appear. • Afterimages are particular to LCD monitors. Avoid displaying the
same image for a long time. • Use the screen saver or power saving function to avoid displaying the same image for extended periods of time. 6-3. Other Problems Problems Possible cause and remedy
1. The Setting menu does not appear. • Check whether the operation button lock function works (see “Key
2. No audio output. • Check whether the stereo mini jack cable is connected properly.
- Check whether volume is set to 0. • Check the PC or digital video equipment and the audio playback software to see whether they are congured correctly. • When displaying images from a device connected to the input signal connector (HDMI), audio from the stereo mini jack cable is not output. • When displaying images from a device connected to the input signal connector (VIDEO), audio from the HDMI cable is not output.3. Items cannot be selected on the Setting menu. • Items displayed in gray cannot be changed.
Chapter 6 Troubleshooting
EnglishChapter 7 Reference 7-1. Attaching an Arm An optional arm (or an optional stand) can be attached by removing the stand section. Please refer to our web site for the corresponding optional arm (or optional stand).www.eizoglobal.comAttention • When attaching an arm or stand, follow the instructions of their User's Manual.
- When using another manufacturer's arm or stand, conrm the following in advance and select one conforming to the VESA standard. Use the screws securing the unit and the stand. - Clearance between screw holes: 100 mm × 100 mm - Plate thickness: 2.6 mm - Must be strong enough to support weight of the monitor unit (excluding the stand) and attachments such as cables. • When using an arm or stand, attach it to meet the following tilt angles of the monitor. - Up 60 degrees, down 45 degrees (horizontal display) - Up 45 degrees, down 45 degrees (vertical display, 90 degrees clockwise) • Connect the cables after attaching an arm or stand.
- The monitor, arm, and stand are heavy. Dropping them may result in injury or equipment damage.
Attachment procedure
To prevent damaging the panel surface, lay the monitor on a soft cloth spread on a stable surface with the panel surface facing down.
Remove the stand. Prepare a screwdriver. Using a screwdriver, remove the screws (four) securing the unit and the stand.
7-2. Connecting Multiple External Devices The product allows you to connect multiple external devices and switch between them for display. Connection examples Signal cable HH200HS (option) HDMI VIDEOBNC cable (commercially available product) BNC HDMI Note
- The input signal changes each time the operation button ( ) on the front of the monitor is selected. When the signal is switched, the active input port name appears at the top right corner of the screen.
- This product automatically recognizes the connector through which signals are input and displays images on the screen accordingly. For more information, see “Auto Input Detection” (page 26).
Chapter 7 Reference7-3. Specications
Video Input Supported Format NTSC, PAL, SECAM Input Signal Connector BNC × 1 Signal Level 1.0Vp-p/75Ω Audio Speaker Output 0.5 W + 0.5 W Input Signal Connector Stereo mini jack×1 Audio Input Format HDMI: 2 ch linear PCM (32 kHz / 44.1 kHz / 48 kHz) Power Supply 100-240 VAC ±10%, 50/60 Hz, 0.40-0.25 A Power Consumption Screen Display On 23 W or less Power Saving Mode 2.5 W or less (for single signal input, when audio cable is not connected) Power O 0.4 W or less (for single signal input) Dimensions Main Unit 405.0 mm (W) × 406.5 - 506.5 mm (H) × 205.0 mm (D) Main Unit (without stand) 405.0 mm (W) × 334.0 mm (H) × 61.5 mm (D) Net. Weight Main Unit Approx. 5.9 kg Main Unit (without stand) Approx. 4.1 kg Movement Range Tilt Up 30˚, Down 0˚ Swivel Right 35°, Left 35° Vertical Rotation Right 90° Environmental Conditions Temperature Operating: 0 °C - 40 °C Transportation / Storage: -20 °C - 60 °C Humidity Operating: 20% - 80% R.H. (no condensation) Transportation / Storage: 10% - 92% R.H. (no condensation) Air Pressure Operating: 540 hPa - 1060 hPa Transportation / Storage: 200 hPa - 1060 hPa *1 HDMI CEC (or mutual control) is not supported.
Appendix Appendix Trademark The terms HDMI and HDMI High-Denition Multimedia Interface, and the HDMI Logo are trademarks or registered trademarks of HDMI Licensing, LLC in the United States and other countries. The DisplayPort Compliance Logo and VESA are registered trademarks of the Video Electronics Standards Association. The SuperSpeed USB Trident Logo is a registered trademark of USB Implementers Forum, Inc. The USB Power Delivery Trident Logos are trademarks of USB Implementers Forum, Inc. DICOM is the registered trademark of the National Electrical Manufacturers Association for its standards publications relating to digital communications of medical information. Kensington and Microsaver are registered trademarks of ACCO Brands Corporation. Thunderbolt is a trademark of Intel Corporation in the United States and/or other countries. Microsoft and Windows are registered trademarks of Microsoft Corporation in the United States and other countries. Adobe is a registered trademark of Adobe Systems Incorporated in the United States and other countries. Apple, macOS, Mac OS, OS X, Macintosh and ColorSync are registered trademarks of Apple Inc. EIZO, the EIZO Logo, ColorEdge, CuratOR, DuraVision, FlexScan, FORIS, RadiCS, RadiForce, RadiNET, Raptor and ScreenManager are registered trademarks of EIZO Corporation in Japan and other countries. ColorEdge Tablet Controller, ColorNavigator, EcoView NET, EIZO EasyPIX, EIZO Monitor Congurator, EIZO ScreenSlicer, G-Ignition, i•Sound, Quick Color Match, RadiLight, Re/Vue, SafeGuard, Screen Administrator, Screen InStyle, ScreenCleaner and UniColor Pro are trademarks of EIZO Corporation. All other company and product names are trademarks or registered trademarks of their respective owners. License The bitmap font used for this product is designed by Ricoh Industrial Solutions Inc. Copyright Using the special functions, such as screen size change (ex. changing the horizontal and vertical ratio of images input) for commercial purposes or for the purpose of showing in public may violate copyright laws.33 Appendix English Warning for Radio interference For U.S.A, Canada Only FCC Supplier’s Declaration of Conformity We, the Responsible Party EIZO Inc. 5710 Warland Drive, Cypress, CA 90630 Phone: (562) 431-5011 declare that the product Trade name: EIZO Model: DuraVision FDS1903-A is in conformity with Part 15 of the FCC Rules. Operation of this product is subject to the following two conditions: (1) this device may not cause harmful interference, and (2) this device must accept any interference received, including interference that may cause undesired operation. WARNING! This equipment has been tested and found to comply with the limits for a Class A digital device, pursuant to Part 15 of the FCC Rules. These limits are designed to provide reasonable protection against harmful interference when the equipment is operated in a commercial environment. This equipment generates, uses, and can radiate radio frequency energy and if not installed and used in accordance with the instruction manual, may cause harmful interference to radio communications. Operation of this equipment in a residential area is likely to cause harmful interference in which case the user will required to correct the interference at his own expense. Changes or modications not expressly approved by the party responsible for compliance could void the user’s authority to operate the equipment. Note Use the attached specied cable below or EIZO signal cable with this monitor so as to keep interference within the limits of a Class A digital device. - Shielded Signal Cable (enclosed) Canadian Notice This Class A information technology equipment complies with Canadian ICES-003. Cet équipement informatique de classe A est conforme à la norme NMB-003 du Canada. For Europe, Australia, New Zealand, etc Only Warning Operation of this equipment in a residential environment could cause radio interference. Warnung Der Betrieb dieses Geräts in einer Wohnumgebung konnte Funkstörungen verursachen. Avertissement L’utilisation de cet équipement dans une zone résidentielle pourrait provoquer des interférences radio.34 Appendix LIMITED WARRANTY EIZO Corporation (hereinafter referred to as “EIZO”) and distributors authorized by EIZO (hereinafter referred to as the “Distributors”) warrant, subject to and in accordance with the terms of this limited warranty (hereinafter referred to as the “Warranty”), to the original purchaser (hereinafter referred to as the “Original Purchaser”) who purchased the product specied in this document (hereinafter referred to as the “Product”) from EIZO or Distributors, that EIZO and Distributors shall, at their sole discretion, either repair or replace the Product at no charge if the Original Purchaser becomes aware within the Warranty Period (dened below) that the Product malfunctions or is damaged in the course of normal use of the Product in accordance with the description in the instruction manual of the Product (hereinafter referred to as the “User’s Manual”). The period of this Warranty is two (2) years from the date of purchase of the Product (hereinafter referred to as the “Warranty Period”). EIZO and Distributors shall bear no liability or obligation with regard to the Product in relation to the Original Purchaser or any third parties other than as provided under this Warranty. EIZO and Distributors will cease to hold or store any parts (excluding design parts) of the Product upon expiration of seven (7) years after the production of the Product is discontinued. In repairing the monitor, EIZO and Distributors will use renewal parts which comply with our QC standards. If the unit cannot be repaired due to its condition or the stockout of a relevant part, EIZO and Distributors may oer the replacement by a product with equivalent performance instead of repairing it. The Warranty is valid only in the countries or territories where the Distributors are located. The Warranty does not restrict any legal rights of the Original Purchaser. Notwithstanding any other provision of this Warranty, EIZO and Distributors shall have no obligation under this Warranty whatsoever in any of the cases as set forth below: (a) Any defect of the Product caused by freight damage, modication, alteration, abuse, misuse, accident, incorrect installation, disaster, adherent dust, faulty maintenance and/or improper repair by third party other than EIZO and Distributors; (b) Any incompatibility of the Product due to possible technical innovations and/or regulations; (c) Any deterioration of the sensor, including measurement value of the sensor; (d) Any defect of the Product caused by external equipments; (e) Any defect of the Product caused by the use under environmental conditions other than EIZO and Distributors’ estimation; (f) Any deterioration of the attachments of the Product (e.g. cables, User’s Manual, CD-ROM, etc.); (g) Any deterioration of the consumables, and/or accessories of the Product (e.g. batteries, remote controller, touch pen, etc.); (h) Any deformation, discoloration, and/or warp of the exterior of the Product including that of the surface of the LCD panel; (i) Any defect of the Product caused by placement in a location where it may be affected by strong vibration or shocks; (j) Any defect of the Product caused by liquid leaking from battery; (k) Any deterioration of display performance caused by the deterioration of expendable parts such as the LCD panel and/or backlight, etc. (e.g. changes in brightness, changes in brightness uniformity, changes in color, changes in color uniformity, defects in pixels including burnt pixels, etc.); (l) Any deterioration or malfunction of the cooling fan caused by adherent dust. To obtain service under the Warranty, the Original Purchaser must deliver the Product, freight prepaid, in its original package or other adequate package aording an equal degree of protection, assuming the risk of damage and/or loss in transit, to the local Distributor. The Original Purchaser must present proof of purchase of the Product and the date of such purchase when requesting services under the Warranty. The Warranty Period for any replaced and/or repaired product under this Warranty shall expire at the end of the original Warranty Period. EIZO OR DISTRIBUTORS ARE NOT RESPONSIBLE FOR ANY DAMAGE TO, OR LOSS OF, DATA OR OTHER INFORMATION STORED IN ANY MEDIA OR ANY PART OF ANY PRODUCT RETURNED TO EIZO OR DISTRIBUTORS FOR REPAIR. EIZO AND DISTRIBUTORS MAKE NO FURTHER WARRANTIES, EXPRESSED OR IMPLIED, WITH RESPECT TO THE PRODUCT AND ITS QUALITY, PERFORMANCE, MERCHANTABILITY OR FITNESS FOR ANY PARTICULAR USE. IN NO EVENT SHALL EIZO OR DISTRIBUTORS BE LIABLE FOR ANY INCIDENTAL, INDIRECT, SPECIAL, CONSEQUENTIAL OR OTHER DAMAGE WHATSOEVER (INCLUDING, WITHOUT LIMITATION, DAMAGES FOR LOSS OF PROFIT, BUSINESS INTERRUPTION, LOSS OF BUSINESS INFORMATION, OR ANY OTHER PECUNIARY LOSS) ARISING OUT OF THE USE OR INABILITY TO USE THE PRODUCT OR IN ANY CONNECTION WITH THE PRODUCT, WHETHER BASED ON CONTRACT, TORT, NEGLIGENCE, STRICT LIABILITY OR OTHERWISE, EVEN IF EIZO OR DISTRIBUTORS HAVE BEEN ADVISED OF THE POSSIBILITY OF SUCH DAMAGES. THIS EXCLUSION ALSO INCLUDES ANY LIABILITY WHICH MAY ARISE OUT OF THIRD PARTY CLAIMS AGAINST THE ORIGINAL PURCHASER. THE ESSENCE OF THIS PROVISION IS TO LIMIT THE POTENTIAL LIABILITY OF EIZO AND DISTRIBUTORS ARISING OUT OF THIS LIMITED WARRANTY AND/OR SALES.Important Veuillez lire attentivement ce « Manuel d’utilisation » an de vous familiariser avec ce produit et de l’utiliser ecacement et en toute sécurité. Veuillez conserver ce manuel pour référence ultérieure.
- Contact Addresses (Adresses de contact)