SP-STM10.1WB - Steam cleaner Swiss Pro+ - Free user manual and instructions
Find the device manual for free SP-STM10.1WB Swiss Pro+ in PDF.

| Product type | Steam mop and handheld cleaner |
| Brand | Swiss Pro+ |
| Model | SP-STM10.1WB |
| Rated voltage | 220-240 V, 50/60 Hz |
| Rated power | 1500 W |
| Water tank capacity | 450 ml ± 20 ml |
| Use | Indoor, domestic use only |
| Compatible floor types | Marble, ceramic, carpet, stone, linoleum, sealed hardwood floors, parquet |
| Main functions | Steam cleaning for floors, portable steam cleaning for surfaces and windows, garment steaming |
| Included accessories | Carpet glider, microfiber pads (x2), measuring cup, straight nozzle, round nylon brush, round brass brush, fine brush, scraper, curved nozzle, microfiber cloth, window washer/steamer |
| Telescopic handle | Yes, with lock |
| Steam adjustment | Variable via control |
| Heat-up time | About 30 seconds |
| Maintenance | Regular descaling with white vinegar, washing accessories with clear water, microfiber cloths machine washable at 60°C |
| Safety | Automatic shut-off not mentioned, unplug before maintenance, do not immerse, do not direct steam at people/animals/plants |
| Weight | Approx. 2.5 kg (estimate) |
| Dimensions (approx.) | Adjustable height, mop head approx. 30 cm |
| Manufacturer warranty | Standard, voided if used commercially |
Frequently Asked Questions - SP-STM10.1WB Swiss Pro+
User questions about SP-STM10.1WB Swiss Pro+
0 question about this device. Answer the ones you know or ask your own.
Ask a new question about this device
Download the instructions for your Steam cleaner in PDF format for free! Find your manual SP-STM10.1WB - Swiss Pro+ and take your electronic device back in hand. On this page are published all the documents necessary for the use of your device. SP-STM10.1WB by Swiss Pro+.
USER MANUAL SP-STM10.1WB Swiss Pro+
Model No.: SP-STM10.1WB/SP-STM10.1WG

Instruction manual
As with any electrical appliance, basic precautions should always be followed when using this product including the following:

WARNING
- Check that the mains voltage indicated on the product corresponds to the voltage of your wall socket.
Rated voltage: 220-240V, 50/60Hz, 1500W
- To protect against the risk of electric shock, connect this device only to properly grounded outlets
- This product is intended for household use only.
- Do not use outdoors.
- Do not leave the steam mop unattended while it is plugged in. Remove the plug from the socke when not in use and when for maintenance.
- Do not use the steam mop as a toy. Young children should be supervised to make sure they do play with the appliance. Close attention is required when used near children, pets or plants.
- This appliance is not intended for use by persons (including children) with reduced physical, sensory or mental capabilities, lack of experience and knowledge. Unless they have been given supervision or instruction concerning use of the appliance by a person responsible for their safety
- Never point the steam at people, animals or plants.
- Do not immerse the steam mop in water or other liquids.
- Do not use with a damaged cord or plug. If the steam mop does not work because it has been dropped, damaged, left outside or submerged in water, return it to the distributor. If the power of this damaged, it must be replaced by the manufacturer or a qualified service centre in order to avoid a hazard.
- Do not pull or grab the appliance by the cord. Never use the cord as a handle. Do not close it caught on the cord and do not place the cord near sharp edges or corners. Keep the power off away from heated surfaces.
- Never force the plug into an outlet.
- Do not use telescoping cords or sockets with insufficient electrical current capacity.
- To safely unplug the appliance after use, grasp the plug and pull it gently. Do not pull the plug of the socket by pulling the cord.
- Do not touch the plug or the steam mop with wet hands or operate it without shoes.
- Do not insert any objects into the openings of the device. Do not use it if an opening is block
- Do not use the mop head without the floor cloth in place.
-
Do not use it without water in the water tank.
-
Be extra careful when using on stairs.
- Store your steam mop indoors in a cool, dry place.
- Never put hot water or other liquids such as aromatic products, alcohol-based products or detergents into the steam mop water tank. This makes the operation of the device unsafe and damage the device.
- Always keep the steam outlet clear. Do not place the steam vent on soft surfaces that could be the flow of steam. Keep the openings free of fluff, hair and other possible obstacles to ensure good flow of steam.
- Only use it as instructed in this manual. Only use accessories recommended by the manufacture
- Use of attachments not supplied or sold by the manufacturer or its authorized resellers may cause fire, electric shock, or injury.
- The liquid or steam should not be directed at equipment containing electrical components such as the interior of ovens.
- Do not expose to rain.
- Stop using the steam mop if you notice any water leakage and contact a qualified technician.
- Do not use the steam mop in enclosed spaces filled with flammable, explosive or toxic fumes as paint thinners or oil-based paints.
- Do not use on leather, wax polished furniture or floors, unsealed hardwoods, parquet floors, synthetics, velvet or other delicate steam sensitive materials.
- Do not use the appliance as a means of heating something.
- Unplug the appliance from the mains before carrying out any maintenance work.
- Do not touch hot surfaces.
- Do not place on or near a hot gas burner, electric burner or in a heated oven.
- To disconnect the device, turn the power switch (O/I) to the "OFF" position. Turn off the steam control and remove the plug from the socket.
- Do not use the device for anything other than its intended purpose.
- Be careful when using the appliance because of the steam emission.
- To avoid power overload, do not use any other appliance on the same outlet as the steam mo

WARNING: DANGER OF SCALDING
Please note: For household use only.
Commercial use of this device will void the manufacturer's warranty.
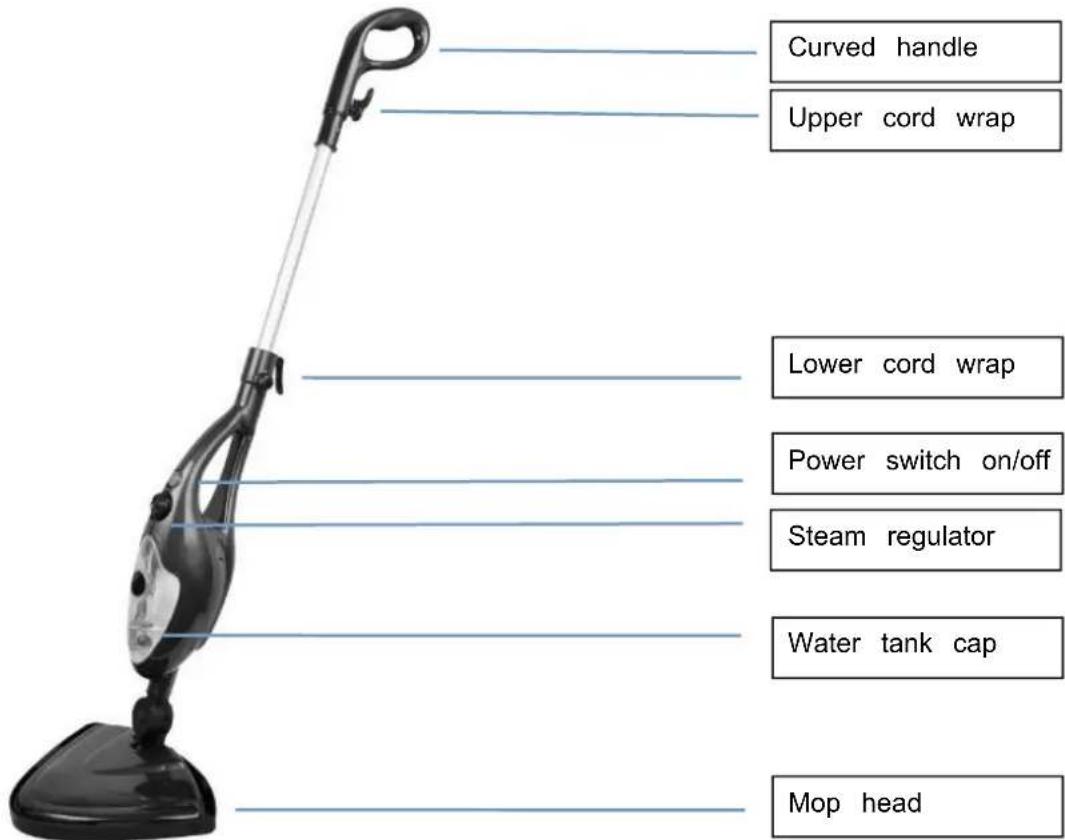
KEY FEATURES
ACCESSORIES
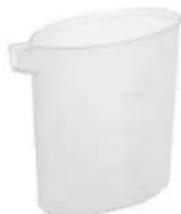
Carpet Glider Microfibre Pads Measuring Cup
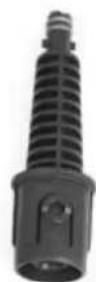
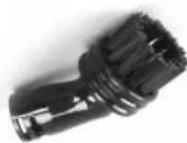
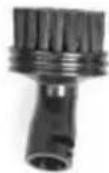
Straight Nozzle Small Brush Large Brush
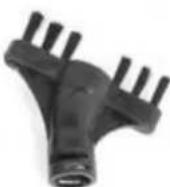
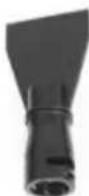
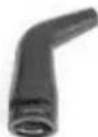
Slim Brush Scaper Bend Nozzle
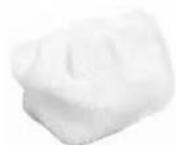
Microfiber Cloth

Window Cleaner
HOW TO ASSEMBLE THE STEAM MOP

WARNING
Please make sure that the appliance is unplugged and the power switch (O/I) is in the "OFF" position before assembling the appliance or changing accessories.
- Attach the mop head to the main body by Inserting
the swivel coupling into the designated hole in the main bo until it clicks into place with the lock button. You will hear a clicking sound. As illustrated in Fig. 1a.
Make sure that the Mop Head issecurely locked in place before u

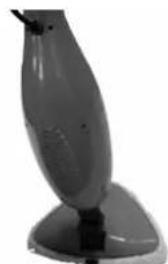
Fig.1a
- Insert the stretch handle into the designated opening in the
main body until it locks into place with the handle lock button. As illustrated in Fig.1b.
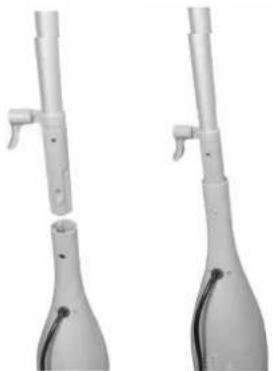
Fig.1b
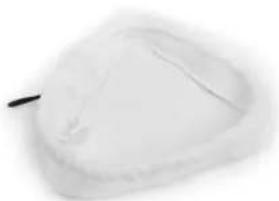
- Place the microfiber cloth pad on the mop head.
Fasten the microfibre cloth pad by pulling the cord while pressing the toggle. As illustrated in Fig.1c.
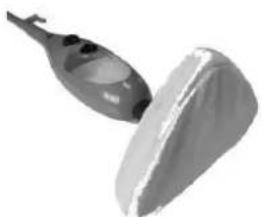
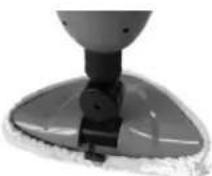
Fig.1c
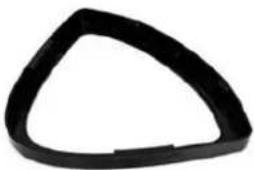
- When using the steam mop on carpeted surfaces:
Place the mop head with microfibre cloth in place, on top of the carpet glider as shown in Fig. 1d. Do not attempt to use the steam mop unit on carpets/rugs without the carpet glider in place

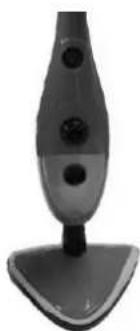
Fig. 1d
Notice: Never use the carpet glider on surfaces that are prone to scratches.

CAUTION
Never assemble or remove the accessories while the appliance is in operation.
HOW TO USE THE STEAM MOP
READ CAREFULLY BEFORE USE
The steam mop is designed to thoroughly clean floor surfaces such as marble, ceramic, carpet, stone linoleum, sealed hardwood floors and parquet. Not all floor types are suitable for steam cleaning.
The heat and steam action removes the wax on wax-treated surfaces. Do not use the device on unsealed floors and do not leave the device on a wooden or heat-sensitive floor for long periods of This can cause the wood grain to lift, among other types of damage.
Take special care when using on vinyl, linoleum or other heat sensitive floors. Too much heat can be the glue under the floor. Use only on laminate floors that have been professionally installed and with crevices or tears through which moisture can penetrate. Test the steam mop on a small insulated area of your floor before using it on any floor surface. Always read the instructions for use before using steam mop. If in doubt, consult a flooring specialist. Only use the carpet glider on carpets and rugs. Using the carpet glider on other floor surfaces will cause streaks and possibly scratches.
Notice: This product gives off steam and creates moisture. Water stains, discoloration or damage to the floor surface may occur if the unit is left in one place for too long.
- Fill the water tank with water:

CAUTION
Make sure that the steam mop is unplugged. Turn the water tank cap counter clockwise approximately 90^ to the "OPEN" position and remove the cap as shown. Hold the steam mop at a angle. Add water in the tank to the MAX level using the measuring cup. Don't let it overflow. The
maximum tank capacity is 450ML ± 20ML.
Replace the water tank cap and turn it approxim 90^ clockwise to the "CLOSE" position until the cap is securely in place. (As illustrated in Fig. 2
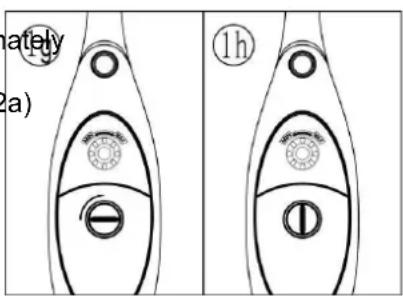
Fig. 2a
The steam mop uses tap water. However, in hard water a distilled water should be used for better performance.
Make sure that the copper cone in the water tank is always submerged in water when using the steam cleaner.
(As illustrated in Fig. 2b)
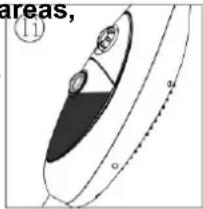
Fig. 2b
Notice: Never put detergents or fragrances in the steam mop. This will make operation unsafe and damage the device.
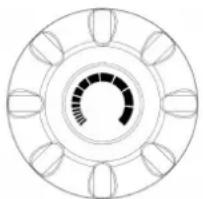
- Turn the steam switch to adjust the size of the steam production. You can adjust the steam flow control and steam output while using the steam mop.
- Once the unit is fully assembled and filled with water, plug the power cord into a grounded outlet. On/off switch (O/I) is in the OFF (O) position. Set the power switch (O/I) to the ON position (I).
After about 30 seconds, the steam control will turn on, you can then adjust the steam output, the r will start to release steam. To stop dispensing steam, turn off the steam control and then move the power switch (O/I) to the OFF position (O) (as shown in Fig. 2c). Allow the device to reset by wait seconds before turning the device back on. If you turn on the device without waiting, it will cause puddles. Puddles may also occur if you turn off the appliance and leave the steam control on.
Make sure that the appliance is completely switched off and disconnected from the mains after each use.
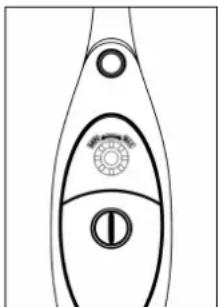
Fig. 2c
-
Slowly move over the surface to be cleaned. The absorbent mopping cloth absorbs the dirt loosened by the steam. Apply the steam generously. Keep a towel on the hand and wipe off any excess water that may build up.
-
When the steam mop stops dispensing steam, simply turn off the appliance and remove the plug from the socket. Refill the water tank and continue cleaning.
HANDHELD STEAMER
The handheld steamer is an ideal portable cleaner for use on work surfaces, countertops, sinks, windows, mirrors, tiles and cleaning stains on floors, carpets and rugs. Use with the straight nozzle, brush or brush heads to blast away dirt, grease, mould and more.
HOW TO ASSEMBLE THE HANDHELD STEAMER

CAUTION
- To attach the straight nozzle: Insert the straight nozzle into the designated hole in the main body unit. It locks into place with the lock button on the main body unit. (You will hear a clicking sound) As illustrated in Fig. 4. and Fig. 4b.
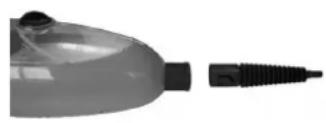
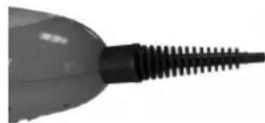
Fig. 4a
Fig. 4b
Make sure the straight nozzle is securely locked in place before use.
- Attach either the round brush or the round brass brush by screwing it onto the threaded end of straight nozzle as illustrated in Fig. 5a and FIG. 5b.
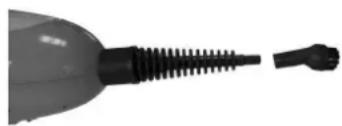
Fig. 5a
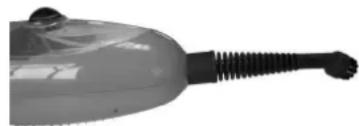
Fig. 5b
The round nylon brush is ideal for cleaning smooth hard surfaces such as toilets, sinks and counter etc.
The round copper brush is ideal for cleaning coarse or metal surfaces such as brick floors, car wheels, metal doors and metal frames, etc.
Both brushes can also effectively clean the grease on pans, stoves and ovens in the kitchen. They be used with soap or detergent to clean dirty areas.
Notice: Never use the round brass brush on surfaces that are prone to scratches.
GARMENT STEAMING TOOL
- To use the window cleaner as a garment steamer, install the microfiber cloth (garment steamer) on the window cleaner/garment steamer. (As illustrated in Fig. 3a, 3b and 3c).
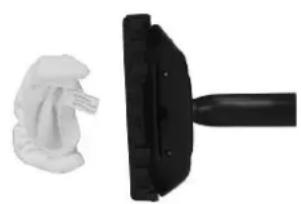
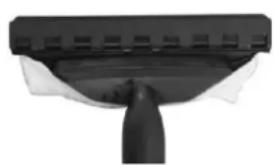
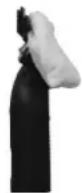
Fig 3a Fig. 3b Fig. 3c
Notice:
-
Do not use this attachment on heat and steam sensitive surfaces. The power and heat of the steamer may adversely affect certain materials. Always check the suitability of using the steamer on a particular surface by testing a hidden area first.
-
Please refer to the label on the garment to check if the garment can be steamed. Some fabrics as leather, suede, and velvet may not be suitable for dry cleaning. If you are not sure, steam a slit of the inside of the garment to test that it will not damage the fabric before steaming the entire gas or fabric.

WARNING
- Never direct steam towards people, animals or plants.
- Do not touch the garment steamer/cloth during use as these parts can become extremely hot. Ke the telescopic hose away from your body and do not touch the hose as it can get hot.
When the handheld steamer stops dispensing steam, simply switch off the appliance and remove the plug from the socket. Refill the water tank and continue cleaning. When you're done cleaning, let the garment steamer cool down. Carefully remove it from the window cleaning tool as the garment steam cloth may still be hot.
Notice:
- Do not use this steam mop on windows with frost.
- Be careful when using the steamer on glass as it may break.
- Do not use the steamer on leather, waxed furniture, waxed floors, synthetics, velvet or other delicate, steam sensitive materials.

CAUTION: Pulling on the telescopic hose with excessive force will damage the hose, potentially
leading to steam leakage.

WARNING
Never leave the steam mop unattended when it is plugged in.
For Best Results:
- Sweep or vacuum the floor before using the steam mop.
- To avoid water puddles: The microfibre cloth must be clean and dry before use. To replace the cleaning cloth, proceed as follows: Allow the cleaning cloth to cool. Remove the cloth from the device, replace it with a new microfiber cloth (optional item) and continue to use. Select low steam control position.
- To sanitize part of your floor, leave the steam mop on a high steam setting over the steaming area for about 10 seconds, but never longer than 15 seconds.
NOTICE: Do not perform this procedure on heat and steam sensitive floors.
IMPORTANT
- Never steam in one place for too long. This can cause damage to the floor surface.
- Do not place hands or feet under the steam mop. The device becomes very hot.
- A pulsing sound may be heard during use, indicating that the mop is producing steam. This sound is normal.
A little bit of water may "spit" that has mixed with the steam. This is also normal. - The power and heat of the steam can adversely affect certain materials. Always check the suitability of using the steam mop on a surface by performing a preliminary test on a hidden ar
AFTER USE
- Remove the plug from the mains socket.
- Allow the mop pad/cloths to cool and carefully remove the cleaning cloth from the mop head as cleaning cloth may still be hot.
- Any remaining water in the water tank must be emptied before storing the appliance. Always em the water tank at the end of each use.
- Allow all water (which may remain as condensate product) to drain from the steam vent before storing the appliance.
- Wrap the power cord around the upper and lower cord wrap.
- Wipe all surfaces of the steam mop with a soft cloth. Keep it in a protected, dry place.
- Please store the device in a cool and dry place when not in use. Do not leave it exposed to rain or rain.
- Storing the steam mop upright with a wet mop/cloth may result in the formation of white spots on your floor. To remove the white spots, clean the area with vinegar. Be sure to remove the mop before storing.
CLEANING AND MAINTENANCE

WARNING
ENSURE THAT THE APPLIANCE IS DISCONNECTED FROM THE OUTLET WHILE CLEANING AND MAINTENANCE OF IT.
Drain the remaining water in the tank and clean the tank after each use.
Use detergent to clean the accessories (straight nozzle and round brush) if they are dirty. Then was with clean water and let it air dry.
How to descale the inside of the water tank:
To remove limescale from the water tank, add one or two tablespoons of white vinegar to a full water tank, close the water tank cap and shake the contents.
Do not turn on the steamer. Leave the device for a few hours. Empty the water tank, refill it with water and empty it until it rinses clear.

WARNING
DO NOT IMMERSE THE STEAM MOP IN WATER.
Cleaning procedure to remove lime scale
If your steam cleaner starts producing steam more slowly than normal or stops producing steam, you may need to remove the limescale. Limescale can build up on the metal parts over time and greatly affect the performance of the mop. It is necessary to regularly remove limescale. Approximately after using a full tank of water 25-50 times or at least once a month, especially in hard water areas. The frequency of limescale removal depends on the hardness of your tap water and how often you use steam cleaner.
The steam mop uses tap water. However, in hard water areas, distilled water should be used better performance.
Follow these procedures to remove limescale from the steam cleaner:
By using the scraper:
Make sure that the steam mop is disconnected from the mains before performing maintenance.
By using cleaning solution:
- Make a solution of 1/3 white vinegar and 2/3 tap water and add to the water tank.
- Secure the appliance and position it so that the steam that is released is not directed at the floor or
surrounding objects and surfaces. Plug in the appliance, switch ON the appliance by pressing the
On/Off switch (O/I) and let the appliance produce steam until the vinegar/water solution is used to
- Repeat the above procedures as many times as necessary until a normal steam flow rate is achieved.
- Fill the water tank with fresh water and rinse it out.
- Fill the water tank with fresh water. Attach it to the appliance and let steam escape through the system until the water tank is empty.

WARNING
Do not leave the steamer unattended while removing limescale and/or during use. NOTICE: Perform a test clean on a suitably insulated area after any limescale removal to ensure there is no debris in the system.

WARNING
RISK OF BURNS
Cleaning clogged steam accessories:
Due to the high mineral content of water in some areas, you will notice less steam coming out of portable steamer accessories. This can be caused by a build-up of scale in the tip of the mouthpiece. How to remove limescale: We recommend using a spray lubricant. Inject a few drops of lubricant into the tip of the straight nozzle. After injecting lubricant into the part, fill the steamer with water as instructed and run a continuous stream of steam through the affected accessory for several minutes to remove the deposits. Once the steam path is clean, aim the steamer at a neutral surface or cleaning cloth to ensure no debris is emitted.
WE RECOMMEND PERFORMING THIS PROCEDURE IN A PROTECTED AND WELL VENTILATED AREA.
Maintenance of microfibre cloths:
Machine wash at 60^ (140°F)
- Do not bleach
- Do not use fabric softener
TROUBLESHOOTING GUIDE

WARNING
TO REDUCE THE RISK OF FIRE, ELECTRIC SHOCK, OR INJURY, UNPLUG THE POWER CORD BEFORE MAINTENANCE.
| Problem | Possible Cause | Solution |
| THE DEVICE DOES NOT TURN ON: | The device is not Plugged in o turned ON | Make sure the device is plugged into proper outlet and the switch is ON |
| REDUCED STEAM OR NO STEAM: | Water tank is empty | Fill the water tank |
| Blocked steam nozzle | Remove mop head and clean the no | |
| Lime scale deposit | Follow cleaning procedure in this use guide to remove lime scale | |
| STEAM ESCAPES FROM CONNECTION: | Attachment is not connected properly | Turn the device OFF, allow to cool disconnect the accessory and reattach properly. |
| Debris or obstacles at the connection points | Remove the accessory and check an clean the connection points. | |
| THE CLEANING CLOTH BECOMES WET: | The cloth gets saturated with w | Remove wet cloth and replace with new cloth cleaning cloth (optional) or allow cloth to cool, wring out and reattach |
FR
GARANTIES IMPORTANTES
LISEZ-LE ATTENTIVEMENT. LE NON-RESPECT DES INSTRUCTIONS DU PRODUIT ANNULERA VOTRE GARANTIE. LISEZ TOUTES LES INSTRUCTIONS AVANT D'UTILISER CE VAPEUR À VAPEUR.
WAARSCHUWING : GEVAAR VOOR VERBRANDING
HOE DE STOOM MOP TE MONTEREN

WAARSCHUWING
GIDS VOOR PROBLEEMOPLOSSING

WAARSCHUWING
OM HET RISICO OP BRAND, ELEKTRISCHE SCHOK OF LETSEL TE VERMINDEREN, HALT U DE STEKKER UIT HET STOPCONTACT VOOR ONDERHOUD.