Powerfly FS 9 Equipped - Bike TREK - Free user manual and instructions
Find the device manual for free Powerfly FS 9 Equipped TREK in PDF.

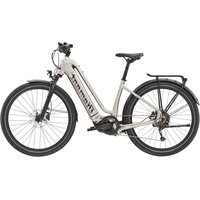
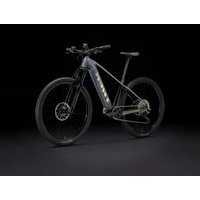
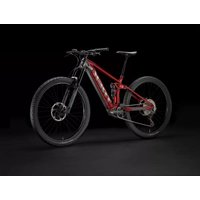
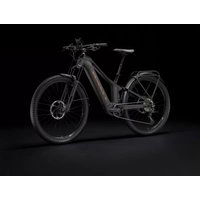
| Product type | Electric all-terrain bike (MTB) |
| Brand | Trek |
| Model | Powerfly FS 9 Equipped |
| Category | Bicycle |
| Main component | Bontrager Drop Line telescopic seatpost |
| Frame material | Aluminum or carbon depending on version |
| Power source | Electric battery (pedal assist) |
| Main functions | Electric pedal assist, height-adjustable telescopic seatpost |
| Seatpost use | Lower by pressing lever while seated; raise by unloading weight and pressing lever |
| Maintenance before each ride | Clean seatpost with soft cloth and water; check collar tightness |
| Monthly maintenance | Check cable and housing; tighten screws to specified torque |
| Annual lubrication | Remove post, clean, apply thin layer of grease (metal frame) or wipe (carbon frame) |
| Safety | Do not disassemble post; release spring only when seated; do not lift bike by saddle if post is compressed |
| Seatpost collar torque | 6.7 Nm maximum |
| Remote lever torque (aluminum handlebar) | 4 Nm |
| Remote lever torque (carbon handlebar) | 3 Nm |
| Spare parts | Cable, housing, remote lever |
| Warranty | Bontrager warranty (see www.bontrager.com) |
| Manual | Available in PDF at notice-facile.com and trekbikes.com |
Frequently Asked Questions - Powerfly FS 9 Equipped TREK
User questions about Powerfly FS 9 Equipped TREK
0 question about this device. Answer the ones you know or ask your own.
Ask a new question about this device
Download the instructions for your Bike in PDF format for free! Find your manual Powerfly FS 9 Equipped - TREK and take your electronic device back in hand. On this page are published all the documents necessary for the use of your device. Powerfly FS 9 Equipped by TREK.
USER MANUAL Powerfly FS 9 Equipped TREK
The Bontrager Line dropper post is a height-adjustable seatpost that lets you change your position on the bike with the press of a lever. It is designed for mountain bikes, where the ability to quickly change the height of your center of gravity can be a real help when riding on varying terrain.
IMPORTANT:
Keep for future reference
This manual gives instructions on the use and maintenance of the Drop Line dropper post. It also provides installation instructions written for an experienced bicycle mechanic. The initial installation and some maintenance should only be performed by your retailer.
If after reading this manual you have additional questions, contact your retailer or the technical support team:
Bontrager Attn: Customer Service
801 W. Madison Street
Waterloo, Wisconsin 53594
920.478.4678
trekbikes.com
Check for updates
For revisions to this manual and the most current information, check our web site at trekbikes.com
BE SAFE
A bicycle can be fun when used for transportation, recreation, exercise, or competition. However, a bicycle can also be dangerous, for example, if you try to ride beyond the limits of your bicycle or the limits of your ability. This manual does not provide all the safety information needed for a person riding a bicycle. Please read the safety information in your bicycle owner's manual before using this seatpost. If you do not have a bicycle owner's manual, visit trekbikes.com/manuals
Meaning of safety signs and language
In this manual the Safety Alert symbol, a triangle with an exclamation mark, shows a hazardous situation which, if not avoided, could cause injury.

'WARNING' indicates the possibility of serious or death.
USING THE SEAT POST
Before you ride fast or in difficult conditions, learn the operation and performance of your Drop Line seatpost. Practice at slower speeds in a flat, empty parking area.
General safety information
Do not disassemble the seatpost. Only your retailer should do this. The cartridge spring is under pressure. A sudden release of pressure could damage the post or cause injury. See the note that follows.
Do not release the spring (extend the seatpost) unless you are sitting on the saddle. The seatpost extends quickly and strongly, which could punch or pinch someone if the seatpost extends without the control of your weight on the saddle.
NOTE
Lifting or hanging the bike by the saddle should ONLY be done with the dropper post in the fully extended position. Always leave the post fully extended when shipping, storing or traveling. Performing any of these actions with the post compressed could cause damage.
To lower the saddle
- Sit on the saddle.
- Press and hold the remote lever.
- When the saddle is at the desired height, release the lever.
To raise the saddle
- Sit on the saddle, but lightly.
-
Press and hold the remote lever.
-
Lift off the saddle.
The saddle height increases.
- When the saddle is at the desired height, release the lever.
MAINTAINING THE SEAT POST
Before every ride
Clean the seatpost with a soft cloth and water. If this does not remove debris, try a bicycle cleaner or a small amount of degreaser. When using a cleaner or degreaser, lay the bike flat or place it upside down to prevent degreaser from contacting and entering the seal. Never use an abrasive cleaner.
Check the main collar on post for tightness. It should be as tight as possible with bare hands.
Once a month
Inspect the cable and housing. The cable should move smoothly in the housing, and the housing should have no kinks, cracks, or worn spots. If there is a problem with the cable or housing, replace them.
Check the seatpost bolts for tightness.
- Tighten the seatpost clamp bolt to the specifications in the bicycle owner's manual.
- Tighten the saddle clamp bolts to manufactures specifications.
LUBRICATION
Do not lubricate the moving parts of the seatpost. If the seatpost operation seems sticky, follow the cleaning instructions in Maintaining the Seatpost.
Once a year, apply lubricant to the part of the seatpost inside the bike frame. Use the procedure for your frame and seatpost materials:
For a metal frame
- Loosen the seatpost binder bolt and remove the seatpost from the frame.
- Clean the used grease off the seatpost.
- Apply a thin layer of grease to the section of the seatpost that will be in the frame.
- Put the seatpost into the frame.
- Adjust the saddle to the correct height and align it. Tighten the seatpost binder bolt.
For a carbon composite frame
- Loosen the seatpost binder bolt and remove the seatpost from the frame.
- Clean the seatpost and the inner surface of the seat tube with a soft cloth and clean water.
- Let the seatpost dry. Then put it into the frame.
- Adjust the saddle to the correct height and align it. Tighten the seatpost binder bolt.
WARNING: Incorrect mechanical work can make your bicycle unsafe. Read your bicycle owner's manual for more information, or consult your retailer.
INSTALLING THE SEAT POST
This section explains how to install the Line dropper post. These instructions are written for an experienced bicycle mechanic at an authorized retailer.
Bike requirements
The cable from the remote lever to the seatpost travels inside the seat tube of the bike frame. To function, the bike frame must have an opening for the cable to exit the frame. If the frame does not have an opening for the cable, this seatpost is incompatible. DO NOT modify the frame.
Before you begin the installation, make sure the diameter of the Drop Line seatpost correctly fits the frame. Over tightening seat binder can affect post performance. Do not exceed 6.7 N-m torque.
Contents of package
- Line dropper post
- Cable housing (shift type), 150cm, with two housing end caps
- Remote lever
- Shift cable, 1600mm
NOTE: Optional universal lever (available separately)
Tools required
- Measuring device (tape measure)
- 2.5mm hex wrench
- 4mm hex wrench
- Torque wrench
- Tool for seatpost clamp bolt
- SIS-type housing cutters/cable cutters
- Bicycle cable lube or light oil
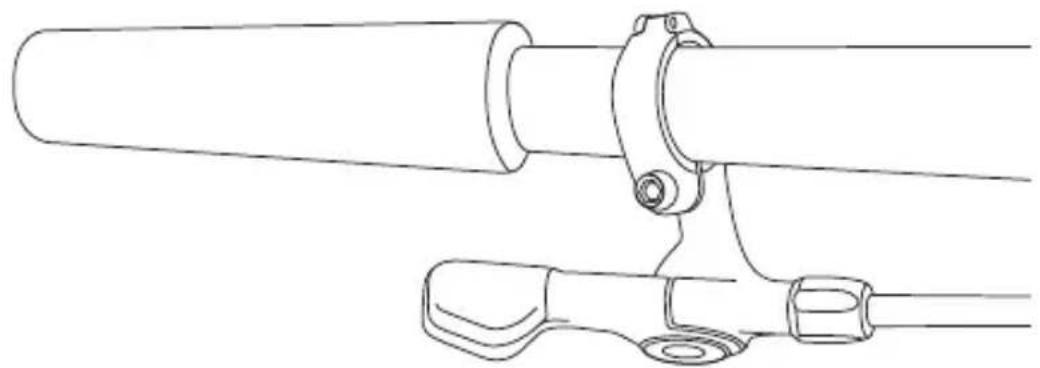
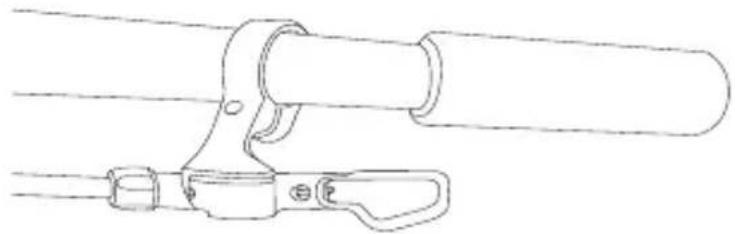
INSTALLING THE REMOTE LEVER
- Remove the grip and lever(s) from one side of the handlebar.
NOTE
Most riders prefer the lever on the left side of the handlebar, just inboard from the brake lever.
-
Place the lever on the handlebar. Tighten the clamp bolt according to the handlebar material:
-
Aluminum: 4 Nm
-
Carbon composite: 3 Nm
-
Re-install the parts you removed in Step 1.
natural_image
Technical line drawing of a mechanical assembly with two cylindrical components and a base mount (no text or symbols)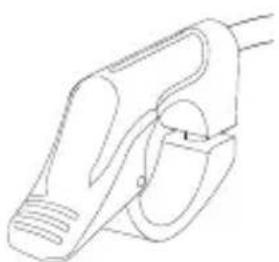
natural_image
Line drawing of a hand gripping a mechanical component (no text or symbols)Also works with Bontrager Universal lever
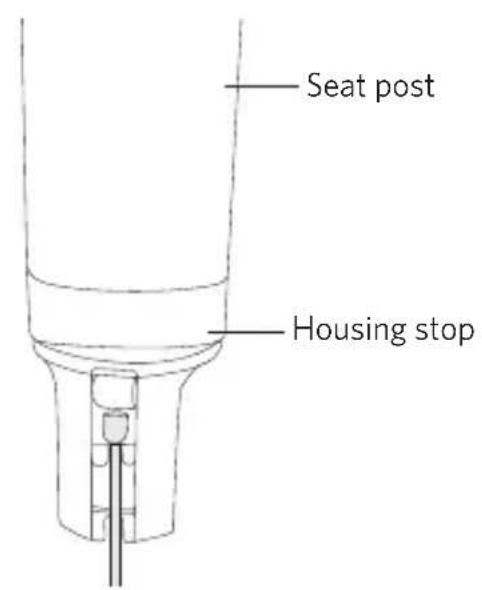
INSTALLING THE SEATPOST AND HOUSING
- Remove the old seatpost, and determine the position of the new one.
NOTE
Make sure the minimum-insertion mark on the seatpost cannot be seen above the bicycle frame.
- Pass the housing through the frame.
- At the seat tube, attach an end cap on the housing.
- Pass the cable through the end cap and housing.
- Attach the cable head to the bottom of the seatpost, and seat the housing in its stop.
- Insert the seatpost into the frame to the position determined in Step 1.
- Determine the length of the housing. At the lever, mark the spot to cut the housing.
NOTE
Make sure the housing will not interfere with any other bike part and that the housing will not get caught on any bike part when rotating the handlebar.
-
Remove the seatpost and retract the cable so that it does not go past the cut mark on the housing.
-
Cut the housing and install the other end cap.
INSTALLING THE CABLE
- Slide the cable back through the housing, and install the seatpost again.
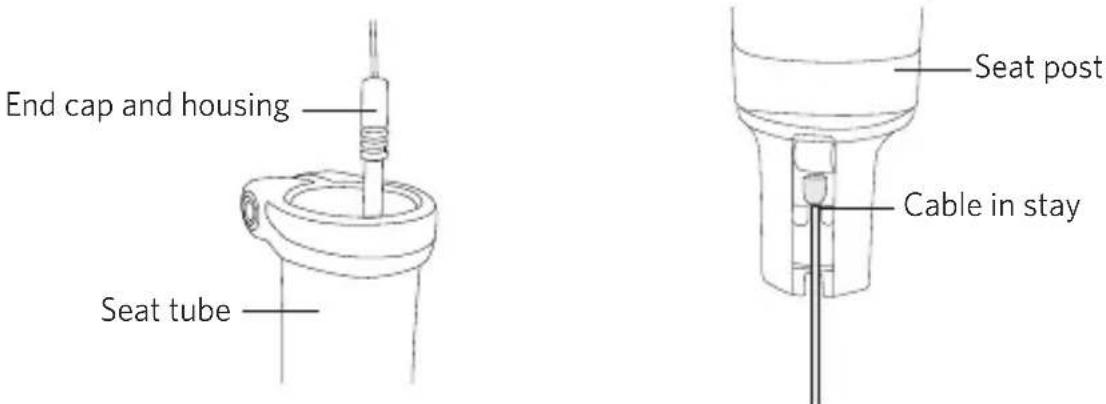
TIP
For a metal frame, apply a thin layer of grease to the section of the seatpost that will be in the frame. For a carbon composite frame, wipe the seatpost and the inside of the seat tube with a clean cloth. Do not apply lubricant.
- Pass the cable through the remote lever.
- Place the lever in the position where the cable will be its shortest, pull the cable taut, and tighten the set screw so that the cable cannot slip.
- Cut the cable so that there is no more than 1.5mm of cable extending past the cable clamp.
natural_image
Line drawing of a mechanical clamp or lever assembly (no text or symbols)NOTE
The cable clamp fulfills the function of a cable end cap, so no cable end cap is necessary.
- If needed, secure the housing to the frame.
- Turn the barrel adjuster to remove all slack.
INSTALLING THE SADDLE
- Place the flat section of the saddle rails in the saddle clamp. The clamp must remain completely on the flat section of the rails.
- Tighten the saddle clamp bolts to manufactures specifications.
WARNING: An incorrectly positioned seatpost or incorrect clamp design can break the saddle rails or the saddle-clamp bolt, and cause you to fall. Only clamp the flat portion of the rails of a correctly fitted saddle in the saddle-clamp.
FINISHING UP
- Check the operation of the seatpost (see Using the seatpost).
WARRANTY
The Bontrager Drop Line dropper post is covered by a warranty. For details, visit www.bontrager.com
TIJA TELESCÓPICA LINE
natural_image
Technical line drawing of a mechanical assembly with two cylindrical components and a base mount (no text or symbols)
natural_image
Line drawing of a mechanical clamp or lever mechanism (no text or symbols)natural_image
Line drawing of a mechanical clamp or bracket assembly (no text or symbols)NOTA
natural_image
Technical line drawing of a mechanical assembly with two cylindrical components and a base mount (no text or symbols)
natural_image
Line drawing of a mechanical clamp or bracket with no text or symbolsnatural_image
Line drawing of a mechanical clamp or tool with a cylindrical component inserted (no text or symbols)REMARQUE
natural_image
Technical line drawing of a mechanical assembly with two cylindrical components and a base mount (no text or symbols)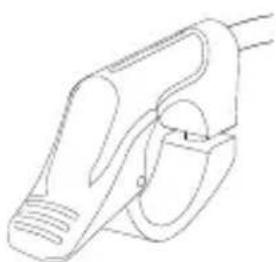
natural_image
Line drawing of a mechanical clamp or lever mechanism (no text or symbols)natural_image
Line drawing of a mechanical clamp or tool assembly (no text or symbols)HINWEIS
This is the manual for your Bontrager Drop Line seat post. Check for updates at trekbikes.com.