ML105 - Flash MAKITA - Free user manual and instructions
Find the device manual for free ML105 MAKITA in PDF.
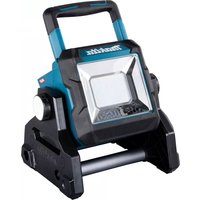
| Product Type | LED Flashlight |
| Brand | Makita |
| Model | ML105 |
| Nominal Voltage | 10.8 V - 12 V DC max. |
| Light Source | LED 4.9 W x 1 |
| Operating Time (with BL1041B battery) | 14 hours |
| Operating Time (with BL1021B battery) | 7.0 hours |
| Operating Time (with BL1016 battery) | 5.5 hours |
| Dimensions (with BL1041B battery) | L 268 mm x P 66 mm x H 93 mm |
| Net Weight | 0.53 kg - 0.70 kg (depending on battery) |
| Compatible Battery Type | Makita slide batteries 10.8 V - 12 V max (BL10xx series) |
| Battery Charge Indicator | Yes (on batteries with suffix "B") |
| Protection against rapid discharge | Yes (automatic shutdown) |
| Adjustable head angle | Yes, 12 positions |
| Belt hook | Yes (removable, 2 mounting positions) |
| Magnetic mount (optional) | Available as accessory |
| Switch | Push ON/OFF |
| Maintenance and cleaning | Wipe with a dry cloth; do not use solvents |
| Repairability | Contact an authorized Makita service center |
| Warranty | Use only genuine Makita parts and accessories |
| Safety | Do not stare at the LED; do not expose to rain; do not dispose of battery in fire |
Frequently Asked Questions - ML105 MAKITA
User questions about ML105 MAKITA
0 question about this device. Answer the ones you know or ask your own.
Ask a new question about this device
Download the instructions for your Flash in PDF format for free! Find your manual ML105 - MAKITA and take your electronic device back in hand. On this page are published all the documents necessary for the use of your device. ML105 by MAKITA.
USER MANUAL ML105 MAKITA
ENCordless LED Flashlight Instruction manual
natural_image
Line drawing of a handheld device with a flashlight and cable (no text or symbols)
text_image
Technical diagram of a device with numbered parts and directional arrows indicating movement or assembly.1
text_image
Diagram showing a connector with labeled parts 4 and 5, highlighting a specific component.2
text_image
63
natural_image
Diagram of a person holding a device with a curved arrow indicating motion or direction (no text or symbols)4
text_image
7 85
text_image
7 86

text_image
97
natural_image
Technical line drawing of a mechanical device with cable and wiring, no text or symbols present8
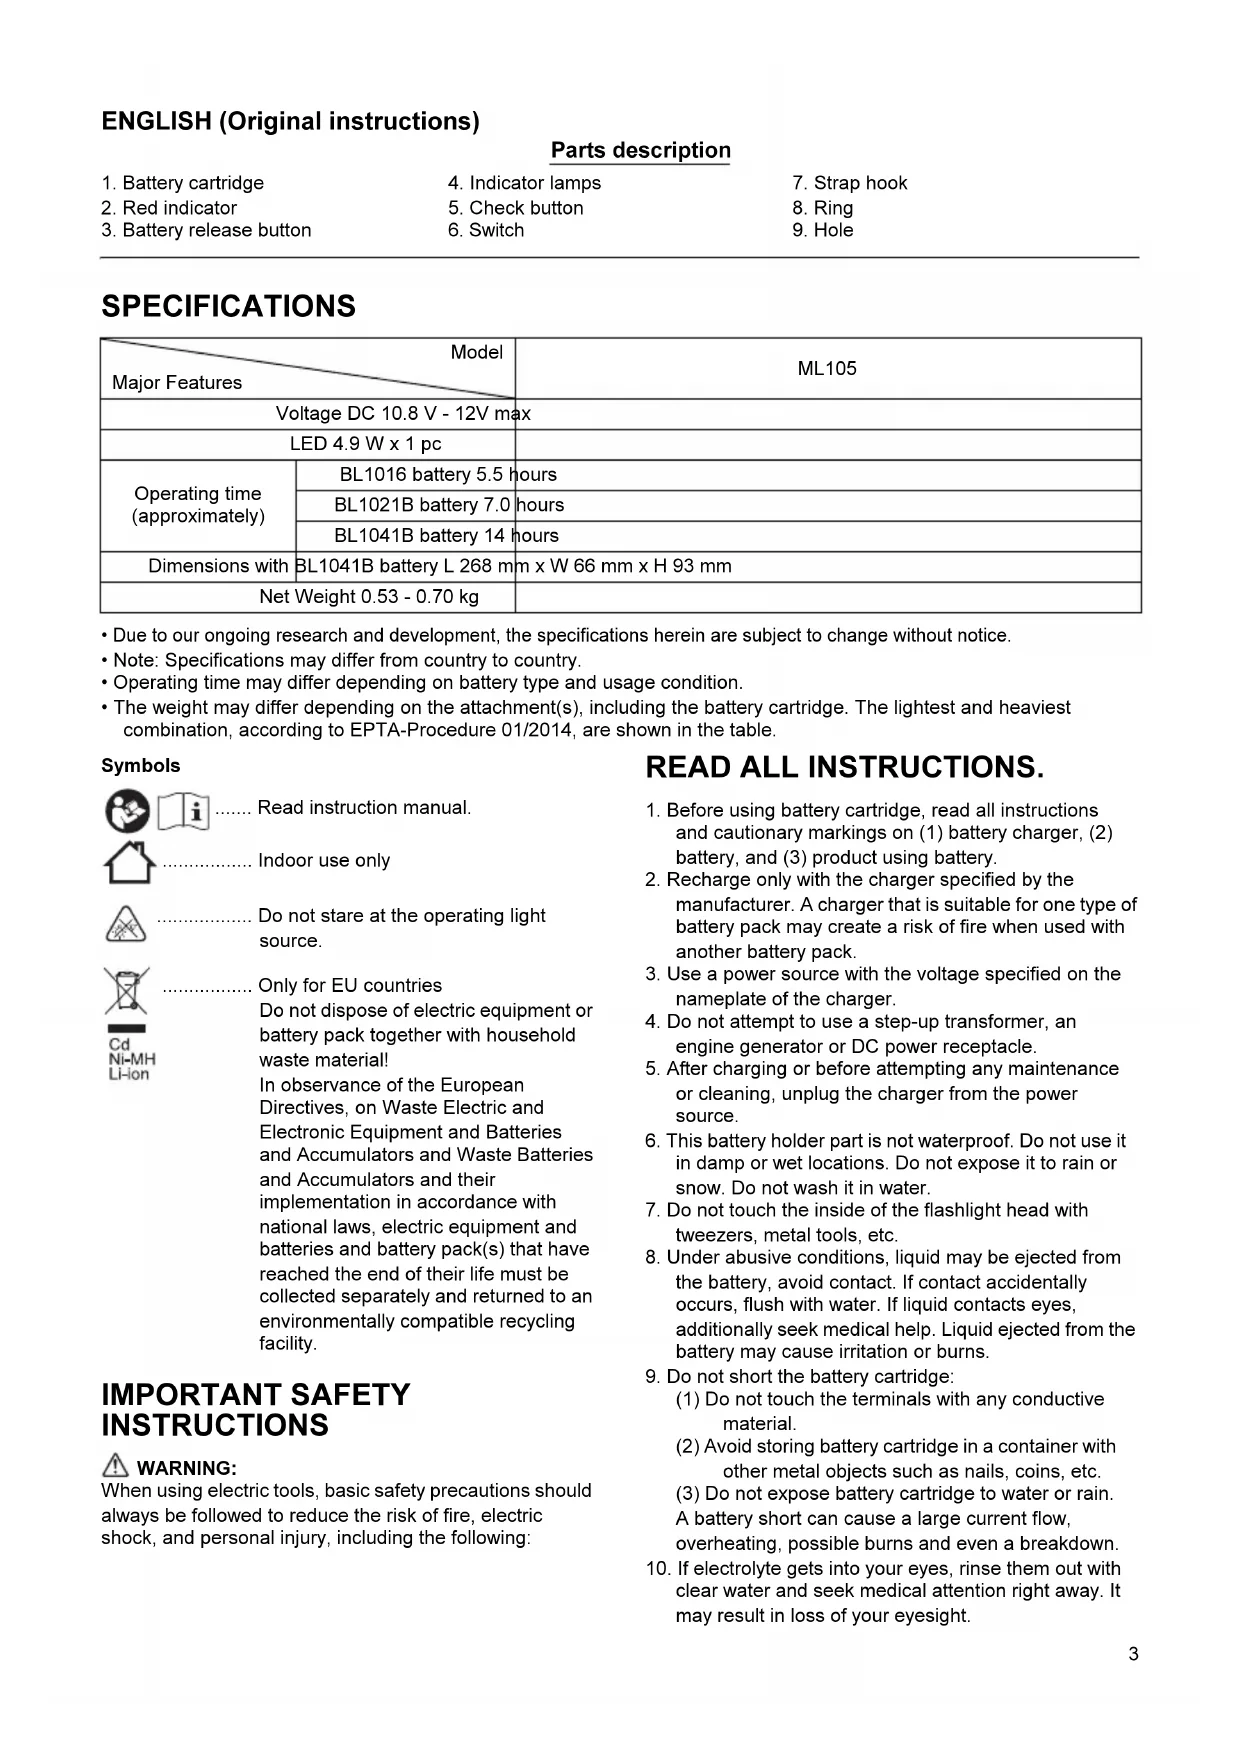
ENGLISH (Original instructions)
Parts description
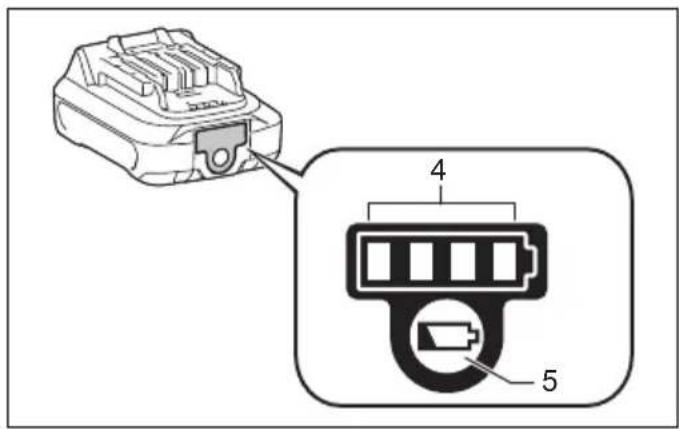
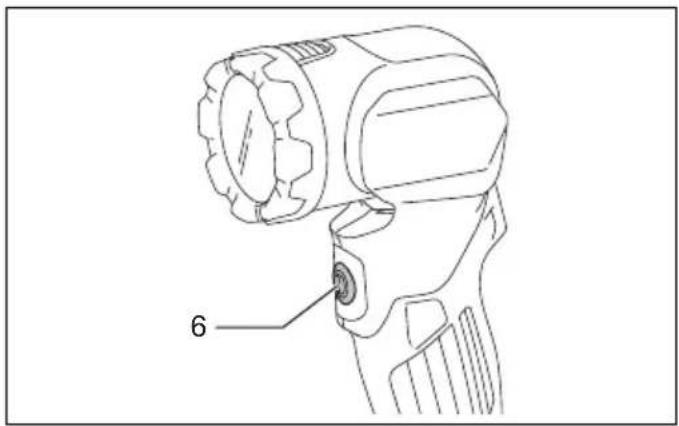
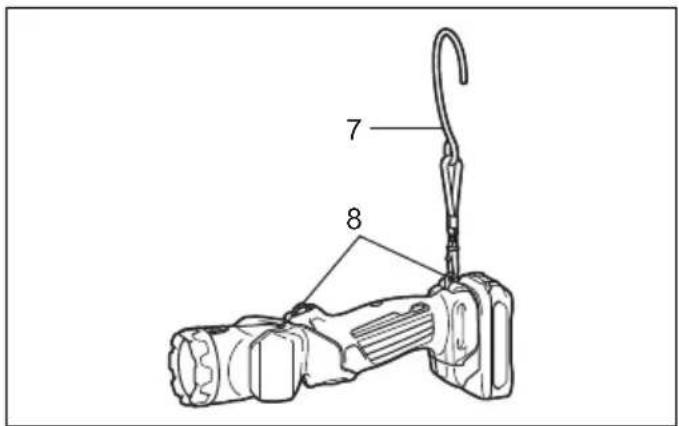
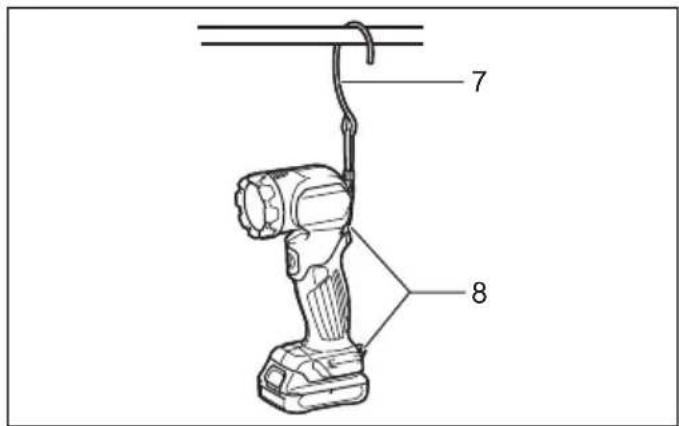
| 1. Battery cartridge | 4. Indicator lamps | 7. Strap hook |
| 2. Red indicator | 5. Check button | 8. Ring |
| 3. Battery release button | 6. Switch | 9. Hole |
SPECIFICATIONS
| Model Major Features | ML105 | |
| Voltage DC 10.8 V - 12V max | ||
| LED 4.9 W x 1 pc | ||
| Operating time (approximately) | BL1016 battery 5.5 hours | |
| BL1021B battery 7.0 hours | ||
| BL1041B battery 14 hours | ||
| Dimensions with | BL1041B battery L 268 mm x W 66 mm x H 93 mm | |
| Net Weight 0.53 - 0.70 kg | ||
- Due to our ongoing research and development, the specifications herein are subject to change without notice.
- Note: Specifications may differ from country to country.
- Operating time may differ depending on battery type and usage condition.
- The weight may differ depending on the attachment(s), including the battery cartridge. The lightest and heaviest combination, according to EPTA-Procedure 01/2014, are shown in the table.
Symbols


Read instruction manual.

Indoor use only

Do not stare at the operating light source.

Only for EU countries

Do not dispose of electric equipment or battery pack together with household waste material!
In observance of the European Directives, on Waste Electric and Electronic Equipment and Batteries and Accumulators and Waste Batteries and Accumulators and their implementation in accordance with national laws, electric equipment and batteries and battery pack(s) that have reached the end of their life must be collected separately and returned to an environmentally compatible recycling facility.
IMPORTANT SAFETY INSTRUCTIONS
WARNING:
When using electric tools, basic safety precautions should always be followed to reduce the risk of fire, electric shock, and personal injury, including the following:
READ ALL INSTRUCTIONS.
- Before using battery cartridge, read all instructions and cautionary markings on (1) battery charger, (2) battery, and (3) product using battery.
- Recharge only with the charger specified by the manufacturer. A charger that is suitable for one type of battery pack may create a risk of fire when used with another battery pack.
- Use a power source with the voltage specified on the nameplate of the charger.
- Do not attempt to use a step-up transformer, an engine generator or DC power receptacle.
- After charging or before attempting any maintenance or cleaning, unplug the charger from the power source.
- This battery holder part is not waterproof. Do not use it in damp or wet locations. Do not expose it to rain or snow. Do not wash it in water.
- Do not touch the inside of the flashlight head with tweezers, metal tools, etc.
- Under abusive conditions, liquid may be ejected from the battery, avoid contact. If contact accidentally occurs, flush with water. If liquid contacts eyes, additionally seek medical help. Liquid ejected from the battery may cause irritation or burns.
- Do not short the battery cartridge:
(1) Do not touch the terminals with any conductive material.
(2) Avoid storing battery cartridge in a container with other metal objects such as nails, coins, etc.
(3) Do not expose battery cartridge to water or rain. A battery short can cause a large current flow, overheating, possible burns and even a breakdown. -
If electrolyte gets into your eyes, rinse them out with clear water and seek medical attention right away. It may result in loss of your eyesight.
-
Be careful not to drop or strike battery.
- Do not incinerate the battery cartridge even if it is severely damaged or is completely worn out. The battery cartridge can explode in a fire.
- The light source contained in this luminaire shall only be replaced by the manufacture or his service agent or a similar qualified person.

CAUTION:
-
When the tool is not in use, always switch off and remove the battery cartridge from the tool.
-
Do not store the tool and battery cartridge in locations where the temperature may reach or exceed 50 °C (122 °F).
-
Do not give the tool a shock by dropping, striking, etc.
-
Do not expose the light to eyes continuously. It may hurt them.
-
Do not cover or clog the lit tool with cloth or carton, etc. Covering or clogging it may cause a flame.
-
Do not disassemble the charger or battery cartridge; take it to a qualified serviceman when service or repair is required. Incorrect reassembly may result in a risk of electric shock or fire.
-
Use the tools only with specifically designated battery packs. Use of any other battery packs may create a risk of injury and fire.
-
If operating time has become excessively shorter, stop operating immediately. It may result in a risk of overheating, possible burns and even an explosion.
-
Do not use a damaged battery.
-
If any problem develops, consult your nearest Makita Service Center or dealer. To maintain product safety and reliability, repairs, maintenance or adjustment should be carried out by Makita Authorized Service Center.
-
Only use genuine Makita batteries. Use of non-genuine Makita batteries, or batteries that have been altered, may result in the battery bursting causing fires, personal injury and damage. It will also void the Makita warranty for the Makita tool and charger.
SAVE THESE INSTRUCTIONS.
Tips for maintaining maximum battery life
-
Charge the battery cartridge before completely discharged. Always stop tool operation and charge the battery cartridge when you notice less tool power.
-
Never recharge a fully charged battery cartridge. Overcharging shortens the battery service life.
-
Charge the battery cartridge with room temperature at 10 °C - 40 °C ( 50 °F - 104 °F ). Let a hot battery cartridge cool down before charging it.
-
Charge the battery cartridge once in every six months if you do not use it for a long period of time.
FUNCTIONAL DESCRIPTION
Charging
Charge the battery cartridge with the Makita charger before use.
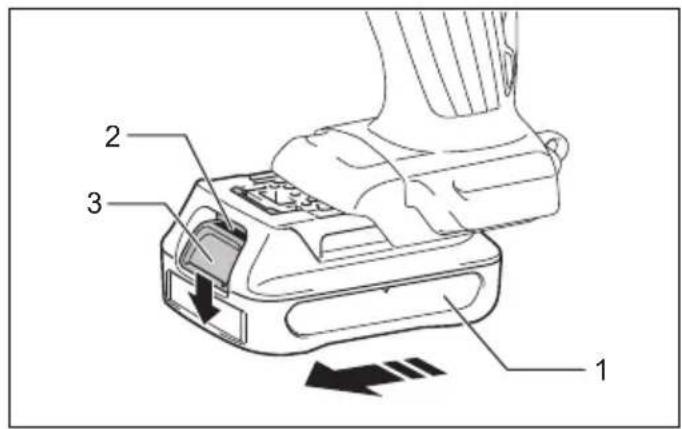
Installing or removing battery cartridge (Fig. 1)
CAUTION:
- Always switch off the tool before installing or removing of the battery cartridge.
- Hold the tool and the battery cartridge firmly when installing or removing battery cartridge. Failure to hold the tool and the battery cartridge firmly may cause them to slip off your hands and result in damage to the tool and battery cartridge and a personal injury.
To remove the battery cartridge, slide it from the tool while sliding the button on the front of the cartridge.
To install the battery cartridge, align the tongue on the battery cartridge with the groove in the housing and slip it into place. Insert it all the way until it locks in place with a little click. If you can see the red indicator on the upper side of the button, it is not locked completely.
CAUTION:
- Always install the battery cartridge fully until the red indicator cannot be seen. If not, it may accidentally fall out of the tool, causing injury to you or someone around you.
- Do not install the battery cartridge forcibly. If the cartridge does not slide in easily, it is not being inserted correctly.
Indicating the remaining battery capacity (Fig. 2)
(Only for battery cartridges with "B" at the end of the model number.)
Press the check button on the battery cartridge to indicate the remaining battery capacity. The indicator lamps light up for few seconds.
| Indicator lamps | Remaining capacity | |
| Lighted Off | ||
| 75% to 100% | ||
| 50% to 75% | ||
| 25% to 50% | ||
| 0% to 25% | ||
NOTE:
- Depending on the conditions of use and the ambient temperature, the indication may differ slightly from the actual capacity.
Overdischarge protection
When the battery capacity is not enough, the light goes off automatically. In this case, remove the battery from the tool and charge the battery.
Lighting up the LED light (Fig. 3)
CAUTION:
- Do not look in the LED light or see the source of light directly.
Push the switch to light up the LED light. To turn off, push the switch again.
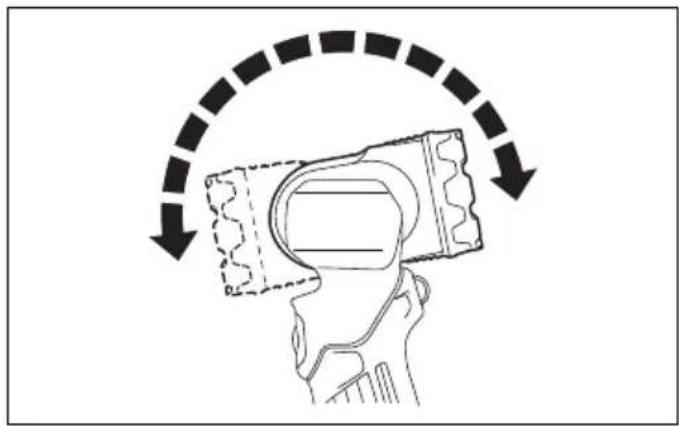
Head angle (Fig. 4)
The head angle can be adjusted in 12 stages. Adjust as desired.
Strap hook (Fig. 5, 6)
The strap hook is convenient for temporarily hanging the tool.
The strap hook can be installed on the upper or lower ring in accordance with usage.
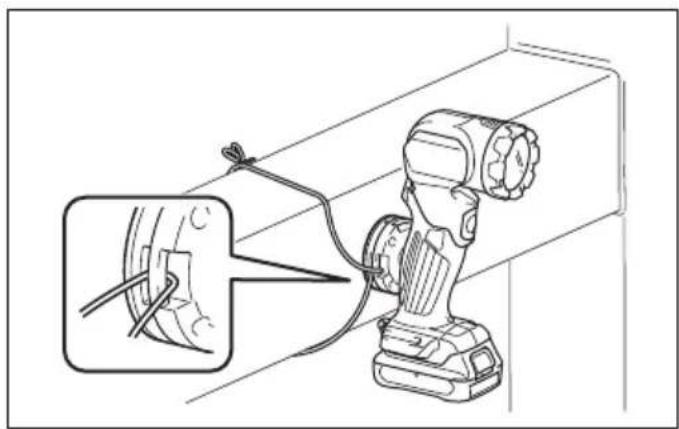
Magnet Attachment (optional accessory) (Fig. 7, 8)
Attach the magnet attachment by tightening the screw. When attaching the tool with the magnet attachment, use a string to fix the magnet attachment.
WARNING:
- Do not bring the magnet attachment closer to precision equipment such as electronic device, clock, watch, or IC card. The magnetic force may affect them.
- Do not use the magnet attachment near the heart pacemaker. There is a risk of malfunction.
- Before the attachment, make sure that the magnet can be attached to the desired metal, and there is enough space for the attachment. After the attachment, make sure that the tool is firmly fixed.
NOTICE:
- If the magnet attachment is attached to the material for a long period, the surface of the material may be damaged depending on the use conditions.
- When detaching the magnet attachment, do not slide it. The surface to which the magnet attachment is attached may be damaged.
MAINTENANCE
CAUTION:
- Never use gasoline, benzine, thinner, alcohol or the like. Discoloration, deformation or cracks may result. To maintain product SAFETY and RELIABILITY, repairs, any other maintenance or adjustment should be performed by Makita Authorized Service Centers, always using Makita replacement parts.
OPTIONAL ACCESSORIES
CAUTION:
These accessories or attachments are recommended for use with your Makita tool specified in this manual. The use of any other accessories or attachments might present a risk of injury to persons. The accessories or attachments should be used only in the proper and intended manner.
- Magnet attachment
- Makita genuine battery and charger
NOTE:
Some items in the list may be included in the tool package as standard accessories. They may differ from country to country.