
HDW3618DNPK - Fridge HAIER - Free user manual and instructions
Find the device manual for free HDW3618DNPK HAIER in PDF.
| Product type | Combined fridge / freezer |
| Brand | Haier |
| Model | HDW3618DNPK |
| Minimum width required | 920 mm |
| Minimum depth required | 1137 mm |
| Fridge temperature | 2 °C to 8 °C (adjustable in 1 °C steps) |
| Freezer temperature | -16 °C to -24 °C (adjustable in 1 °C steps) |
| Default fridge temperature | 4 °C |
| Default freezer temperature | -18 °C |
| Super cooling function | Yes (accelerated cooling to 2 °C, max duration 30 h) |
| Super freezing function | Yes (accelerated freezing to -24 °C, max duration 50 h) |
| Eco mode | Yes (automatic temperatures 5 °C and -18 °C) |
| Holiday function | Yes (turns off the fridge, keeps the freezer) |
| Defrosting | Automatic (no manual intervention) |
| Control panel | Touch with On/Off, Wi-Fi, Mode, TEMP buttons |
| Connectivity | Wi-Fi 2.4 GHz (hOn application) |
| Door reversibility | Yes (tools required: electric screwdriver) |
| HCS filter | Yes (humidity regulation) |
| Demo mode | Yes (accessible via key combination) |
| Error codes | Communication error, fan fault |
Frequently Asked Questions - HDW3618DNPK HAIER
User questions about HDW3618DNPK HAIER
0 question about this device. Answer the ones you know or ask your own.
Ask a new question about this device
Download the instructions for your Fridge in PDF format for free! Find your manual HDW3618DNPK - HAIER and take your electronic device back in hand. On this page are published all the documents necessary for the use of your device. HDW3618DNPK by HAIER.
USER MANUAL HDW3618DNPK HAIER
Discover extra contents and create your inventory list


| EN | 1 | |
| BG | 11 | |
| CS | 21 | |
| DA | 31 | |
| DE | 41 | |
| EL | 51 | |
| ES | 61 | |
| FI | 71 | |
| FR | 81 | |
| HR | 91 | |
| HU | 101 | |
| IT | 111 | |
| NL | 121 | |
| NO | 131 | |
| PL | 141 | |
| PT | 151 | |
| RO | 161 | |
| RU | 171 | |
| SK | 181 | |
| SL | 191 | |
| SR | 201 | |
| SV | 211 | |
| UK | 221 | |
| AR | 231 | |
| TR | 241 | |
| ET | 251 | |
| LT | 261 | |
| LV | 271 |
Summary
PRODUCT DESCRIPTION ...... 2
Space requirements .... 2
USE....3
Use 3
Customized temperature 4
Super Cool function 4
Super Freeze function 5
Eco mode 5
Holiday function 5
Defrosting 5
Demo mode 6
Error Codes 6
App connection....7
Step 1 7
Step 2 7
Step 3 7
Wi-Fi Use....8
DOOR REVERSIBILITY....9
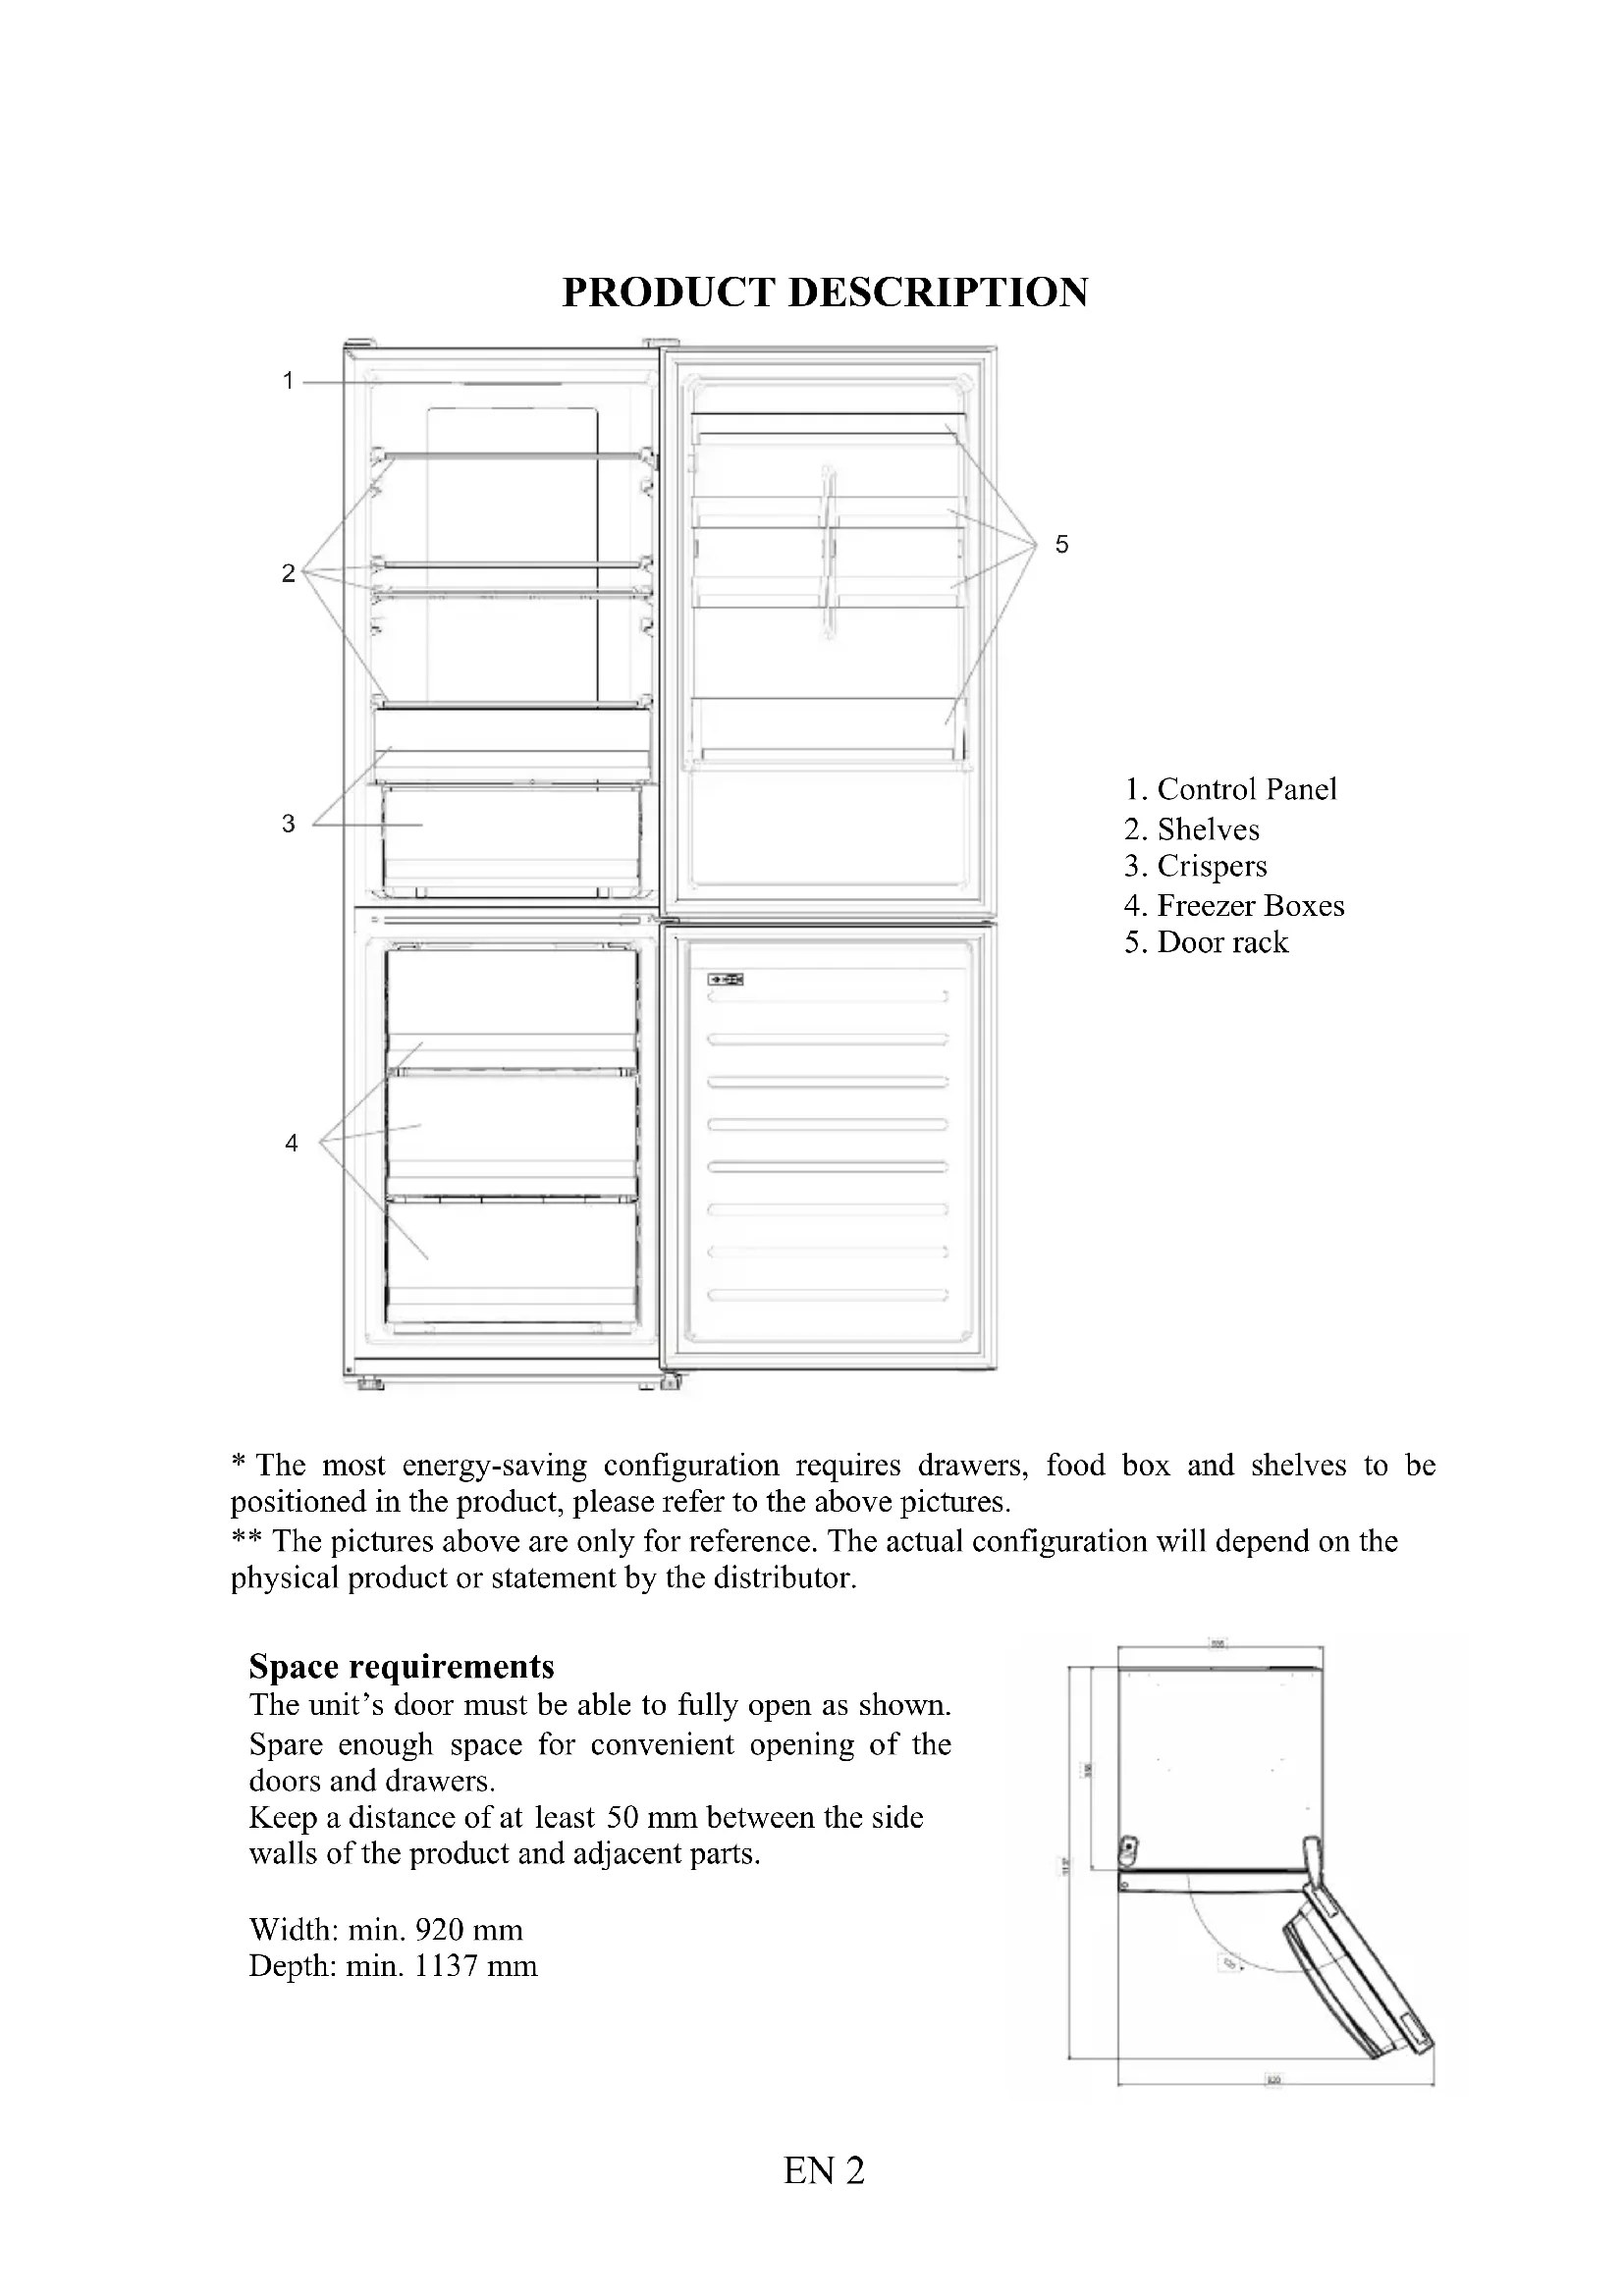
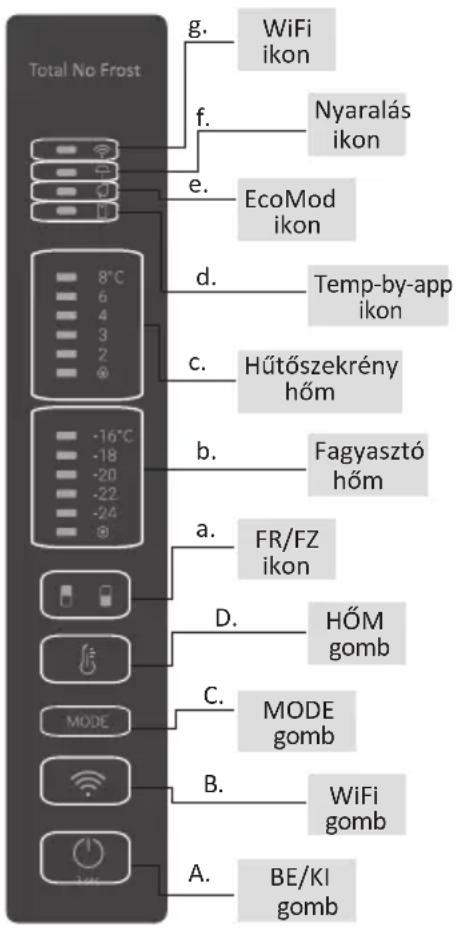
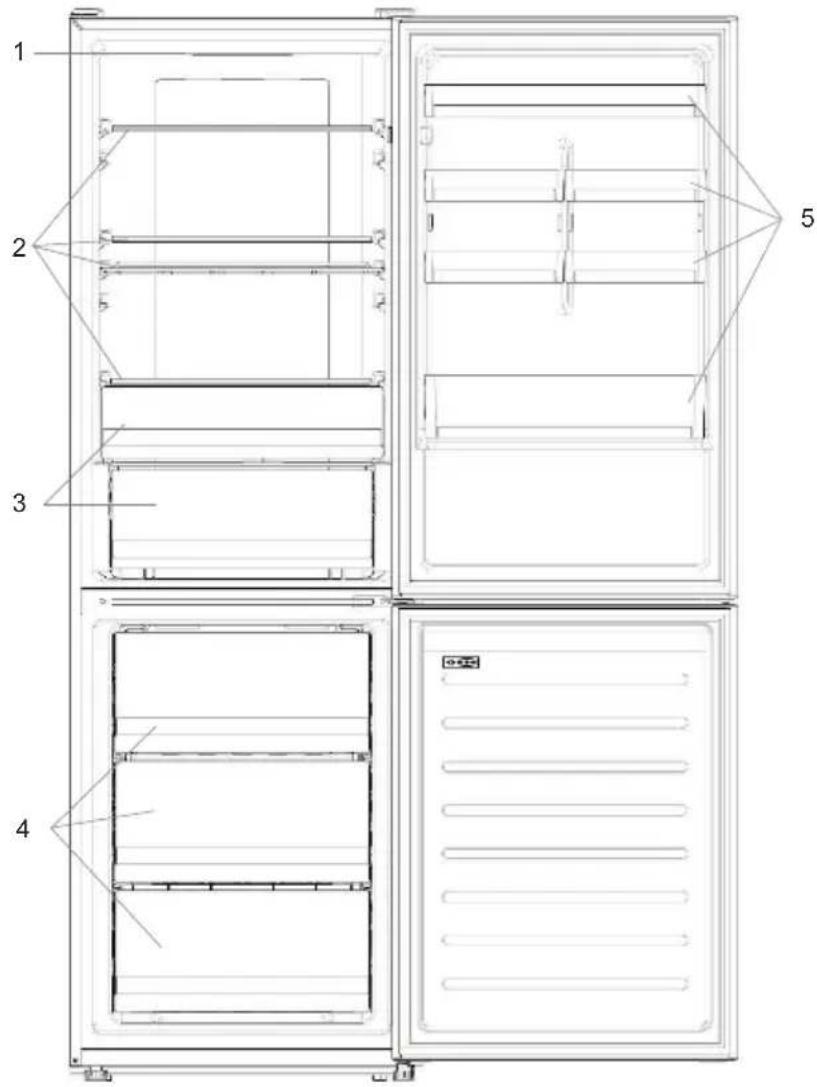
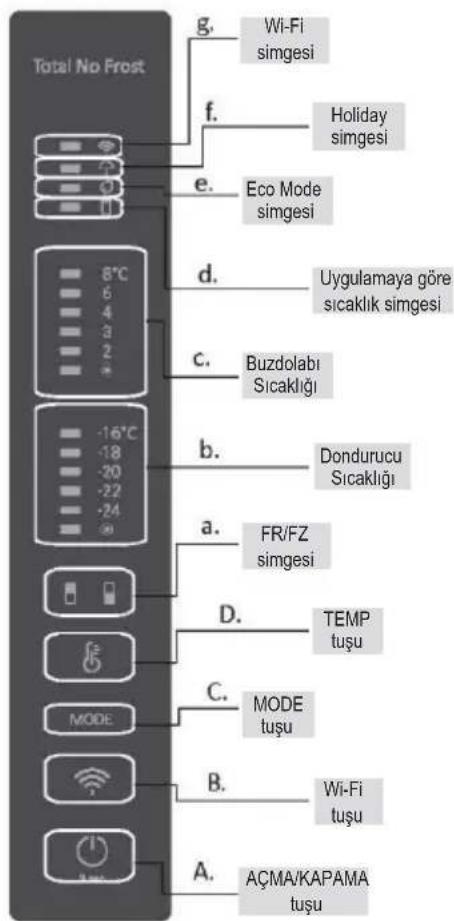
PRODUCT DESCRIPTION
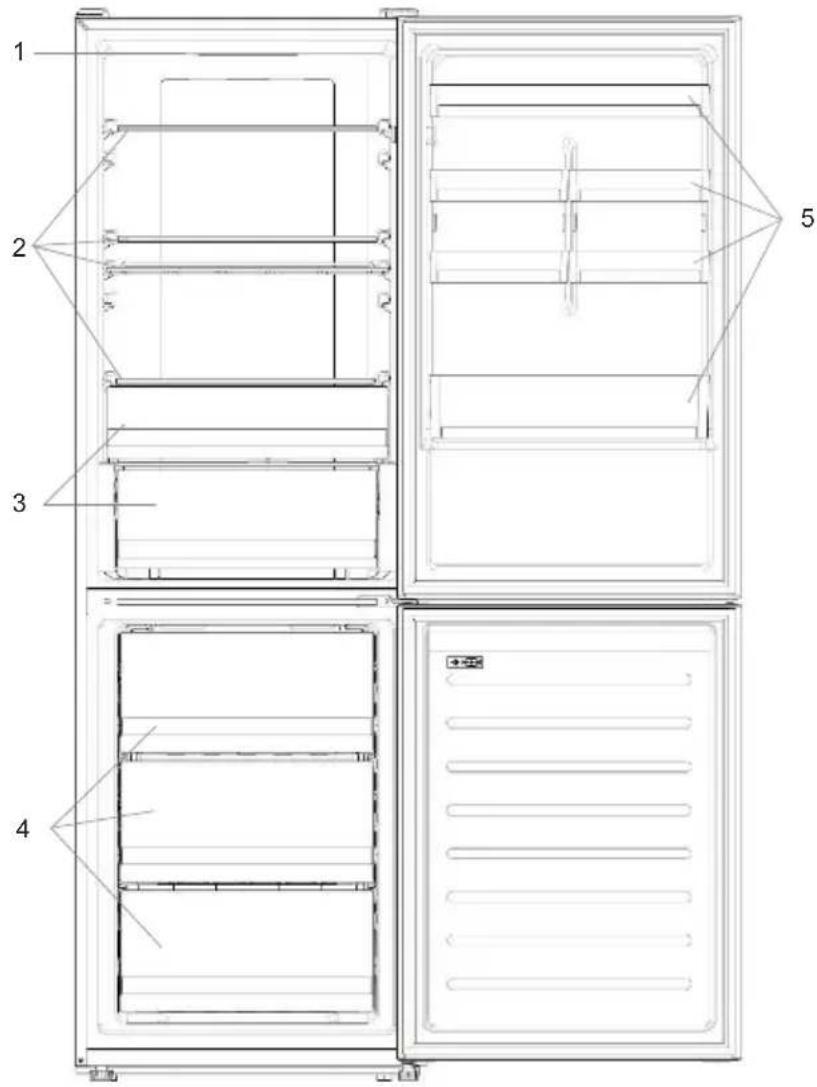
- Control Panel
- Shelves
- Crispers
- Freezer Boxes
- Door rack
* The most energy-saving configuration requires drawers, food box and shelves to be positioned in the product, please refer to the above pictures.
** The pictures above are only for reference. The actual configuration will depend on the physical product or statement by the distributor.
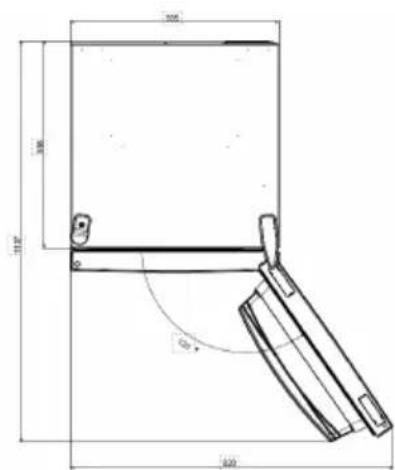
Space requirements
The unit's door must be able to fully open as shown. Spare enough space for convenient opening of the doors and drawers.
Keep a distance of at least 50 mm between the side walls of the product and adjacent parts.
Width: min. 920 mm
Depth: min. 1137 mm
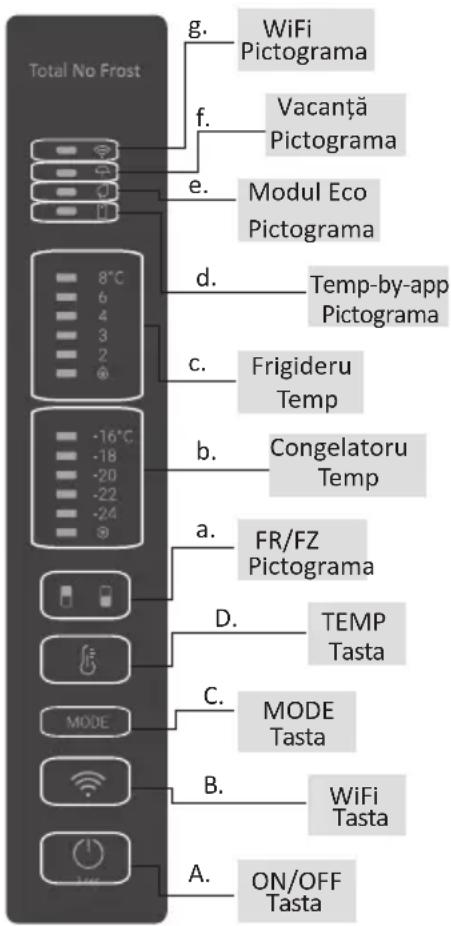
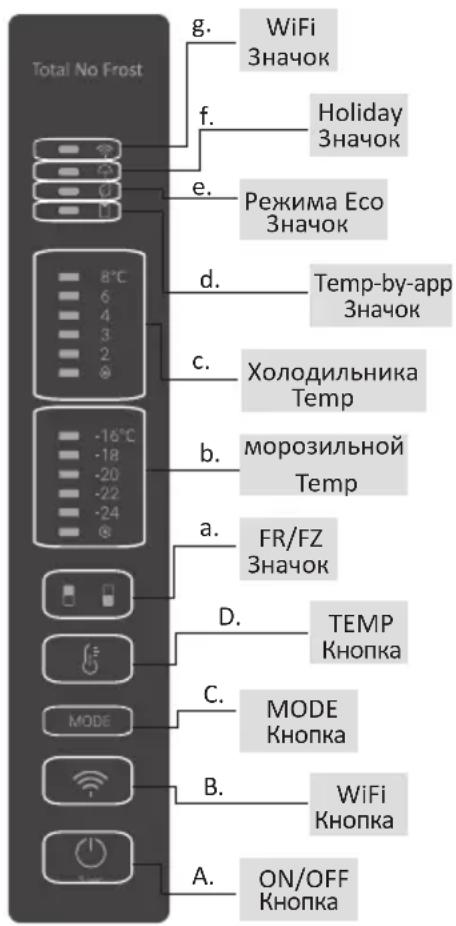
USE
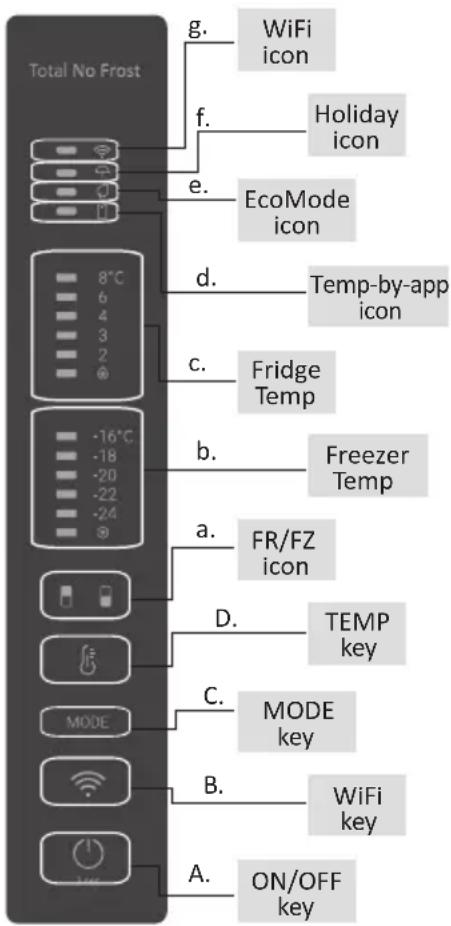
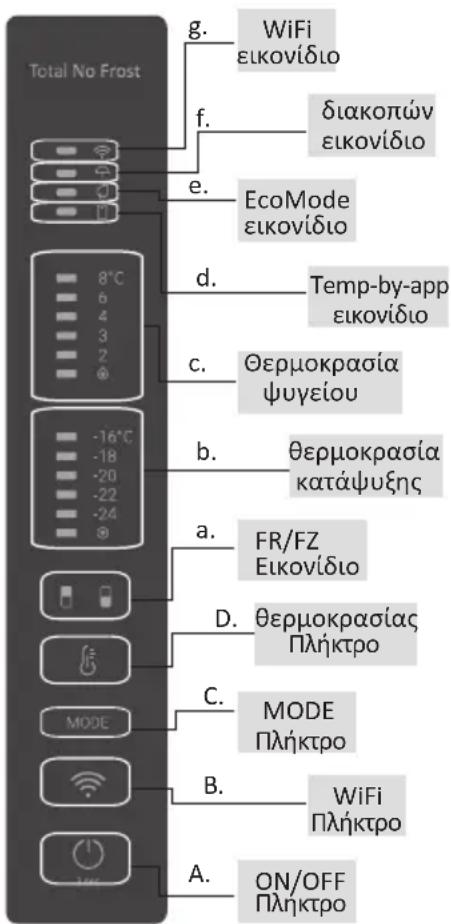
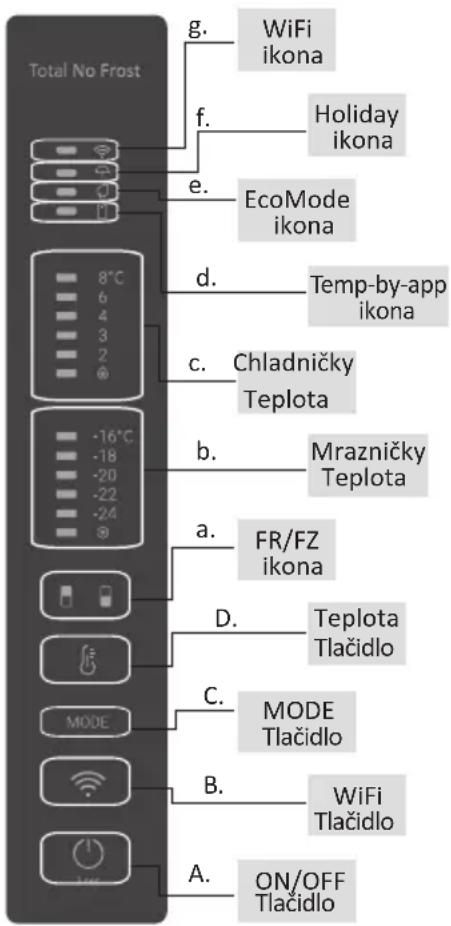
A. ON/OFF key, used to switch on/off the appliance
B. Wi-Fi key, used to switch on/off the Wi-Fi
C. Mode key, used to selected the desired function
D. TEMP key, used to selected the fridge and freezer temperature
a. Fridge /freezer area icon, shows which compartment of the appliance is selected
b. Freezer temperature levels, show which is the selected temperature in the freezer
c. Fridge temperature levels, show which is the selected temperature
d. Customized temperature icon, show if the temperature has been selected by app
e. Eco mode icon, shows whether the eco mode is activated
f. Holiday function icon, show whether the holiday function is activated
g. Wi-Fi Icon, shows whether the Wi-Fi is working and the appliance is connected
Use
- Plug on the appliance, it automatically turns on. The temperature will automatically set at 4 °C in the fridge and -18 °C in the freezer.
- To change the temperature, press the TEMP key for 5 seconds, an acoustic signal is made and the icon of the selected compartment (fridge or freezer) as well as all the temperature LEDs of the corresponding compartment turn on for 2s, after 2s the selection of the compartment is confirmed. With the selected compartment icon on, quick press the TEMP key to change the temperature. When the setting increases, the corresponding LED light will turn on. An acoustic signal is made every time the TEMP key is pressed and the temperature is changed, after 5 seconds the selection is confirmed. After 30s without operation the fridge/freezer icon area turns off, while the LEDs of the selected temperatures stay on. When the TEMP key is touched again, the icon of the last are selected (Fridge or freezer) turns on.
• In case of power loss, the last cooling level set will be restored
- To restore the default setting, long press the Temp key button and click the ON/OFF key button 5 times (in 5 seconds)
- Under the normal operating condition (in spring and autumn), it is recommended to set the temperature at 4 °C. In summer when the ambient temperature is high, it is recommended to set temperature at 6\~8 °C, so as to guarantee the fridge and freezer temperatures and reduce the refrigerator continuous running time; and in winter when the ambient temperature is low, it is recommended to set temperature at 3\~4 °C to avoid frequent start/stop of the refrigerator.
Customized temperature
From the app it is possible to customize the temperature for both fridge and freezer. The temperature can be set with 1 °C sensitivity. It is possible to select a temperature from 2 °C to 8 °C in the fridge, and from -16 °C to -24 °C in the freezer.
When the temperature is selected by the app, the customized temperature icon turns on, while all the temperature LED lights of the affected compartment are turned off (i.e. if the refrigerator temperature is selected from the app, LEDs from 2 °C to 8 °C are turned off. If the freezer temperature is selected from the app, LEDs from -16 °C to -24 °C are turned off) If only a single area (freezer or fridge) has the customized temperature, the temperature selection of the other area is not changed and the LED light of the selected temperature of that area remains on. An acoustic signal is made every time the temperature is changed.
Super Cool function
It is suggested to switch on the Super Cool function if a large quantity of food should be stored (for example after the purchase). The Super-Cool function accelerates the cooling of fresh food and protects the goods already stored from undesirable warming. When the function is activated, the temperature of the fridge is automatically set at 2 ^ .
How to use the Super Cool function:
- The function can be activated by long pressing TEMP key to select the fridge compartment, and then quick pressing the TEMP key until the Super Cool icon led is turned on, or it can be turned on from the app. When the function is activated, the Super Cool LED is always ON.
- To exit the Super Cool function, press the TEMP key or turn it off from the app.
- The Super Cool function automatically ends when the function has lasted for more than 30 hours.
- When the Super Cool ends, the icon of the control panel is switched off and the previously set cooling level is restored.
Note: Super Cool and Super Freeze function cannot be activated simultaneously
Super Freeze function
The super freezing function accelerates the freezing of fresh food and protects the goods already stored from undesirable warming. If a large amount of food has to be freeze, it is recommended to set the Super-Freeze function on 24h before the usage. When the function is activated, the temperature is automatically set at -24 °C.
How to use the Super Freeze function:
- The function can be launched by long pressing TEMP key to select the freezer compartment, and then quick pressing TEMP key until the Super Freeze icon led is turned on, or it can be turned on from the app. When the function is activated, the Super Freeze LED is always ON.
- To exit the Super Freeze function, press the TEMP key or turn it off from the app.
- The Super Freeze function automatically ends when the function has lasted for more than 50 hours.
- When the Super Freeze ends, the icon of the control panel is switched off and the previously set freezing level is restored.
Note: Super Cool and Super Freeze function cannot be activated simultaneously
Eco mode
The Eco mode can be activated to optimize the performance of the appliance, whereas obtaining the best food storage. The Eco mode will automatically set the temperature at 5 °C in fridge and at -18 °C in the freezer
How to use the Eco mode:
- The function can be activated from control panel by pressing the “mode” key until the Eco mode icon turns on (an acoustic signal confirms the selection), or by selecting the function from the app. When the function is activated, the Eco mode icon is always ON.
- To exit the Eco turn it off from the app or chose another function from the control panel.
- When the Eco Mode ends, the icon of the control panel is switched off and the previously set cooling levels are restored.
Holiday function
The Holiday function can be used to reduce the energy consumption of the appliance, when it is not used regularly. When the function is on, the LED lights are off (even if the door is open) and the fridge is turned off, whereas the freezer will keep working normally.
How to use the Holiday function:
- The function can be activated from control panel by pressing the “mode” key until the Holiday icon turns on (an acoustic signal confirms the selection), or by selecting the function from the app. When the function is activated, the Holiday icon is always ON.
- To exit the Holiday function, turn it off from the app or chose another function from the control panel.
- When the Holiday function ends, the icon of the control panel is switched off and the previously set cooling levels are restored.
Defrosting
The defrosting of the refrigerator and freezer compartment are done automatically: no manual operation is needed.
HCS
When a certain moisture level is reached, the HCS filter fibers open causing moisture to decrease and then close again.
Demo mode
To enter the demo mode, with the display unlocked, keep pressed the SET key and press the WiFi key 5 times within 5 seconds. To exit the demo mode, perform the same operation or power off the refrigerator.
Error Codes
- Communication error
[-16°C;-18°C;-20°C;-22°C;-24°C] lights in the freezer turn on sequentially, it means there has been a communication error between the main control board and the display board. Please, contact the technical assistance to help solve the problem
- Fan
[-16°C;-20°C;-22°C;-24°C] lights in the freezer flashing simultaneously if the fan is not working properly. Please, contact the technical assistance to help solve the problem
APP CONNECTION IN APP PAIRING PROCEDURE
Step 1
- Download the hOn app on the stores


Step 2
- Create your account on the hOn App or log in if you already have an account

Step 3
- Follow pairing instructions in the hOn App
Wi-Fi Use
If the Wi-Fi has not been configured yet, when the refrigerator turns on, it will automatically enter the configuration mode and keep this status for 30 minutes. The Wi-Fi icon blinks and product enrollment can start.
- Follow in app instructions to configure the Wi-Fi (see above)
- Once the Wi-Fi is configured and the connection established, the Wi-Fi icon is on and fixed.
- After 30 minutes without performing any operation, the Wi-Fi will automatically exit the configuration mode
- If the Wi-Fi has already been configured, it will automatically reconnect according to the configuration information.
To reset the Wi-Fi, press Wi-Fi key and SET key for 2s.
To turn off the Wi-Fi, press Wi-Fi key for 3s.
Radio-module - Technical data
| Frequency rate (OFR) | 2400 MHz-2843.5 MHz |
| Channel frequencies | 2412...2472 MHz(step size 5 MHz) |
| Maximum power(EIRP) | 100 mW |
Radio equipment type is in compliance with Directive 2014/53/EU.
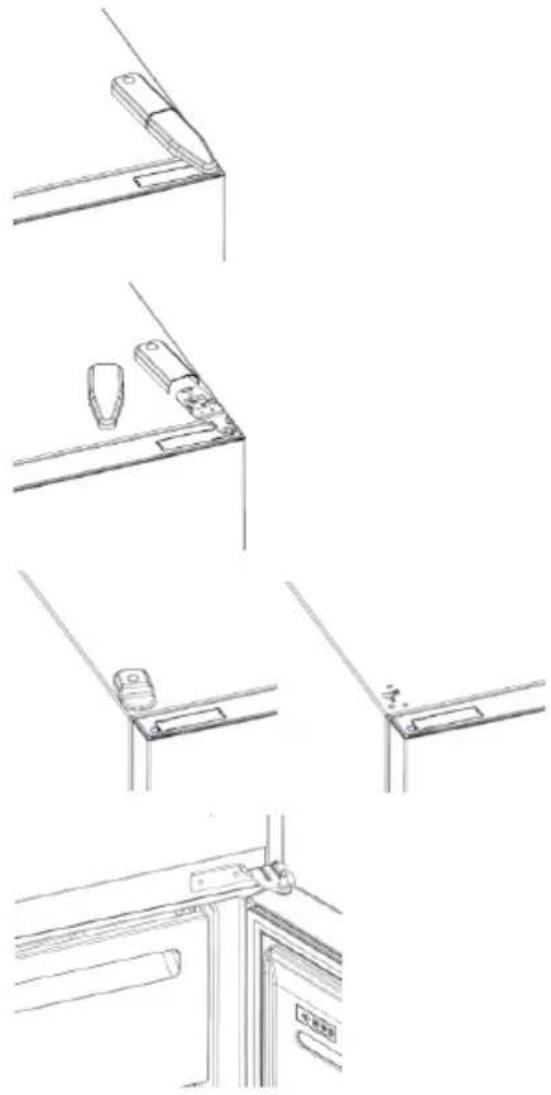
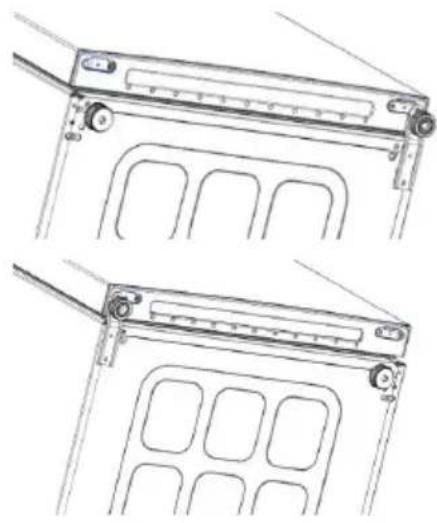
DOOR REVERSIBILITY
Tools needed: Electric screwdriver
- Remove the top hinge cover
- Unscrew the top hinge
- Remove the top hinge cover (left)
- Remove middle hinge
natural_image
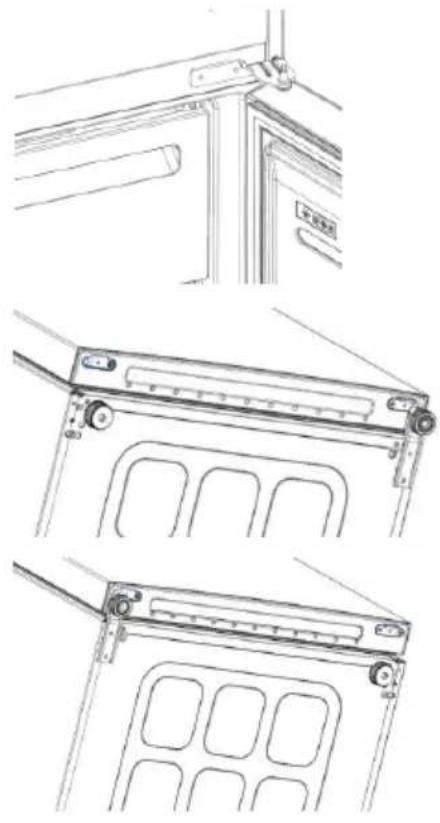
Line drawings of a door frame assembly with bracket, handle, and door lock (no text or symbols)- Remove lower hinge
- Mount hinge foot
- Mount middle hinge
- Mount the upper hinge plate
- Mount the upper hinge cover

natural_image
Technical line drawing of two mechanical components with mounting brackets and internal compartments (no text or symbols)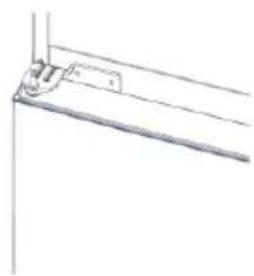
natural_image
Pure technical line drawing of a mechanical bracket or support structure without any text, numbers, or symbols
natural_image
Pure technical line drawing of a corner joint or bracket (no text or symbols)
natural_image
Pure technical line drawing of a corner joint or bracket (no text or symbols)Резюме
ОПИСАНИЕ НА ПРОДУКТА .....12
Изисквания за пространство ....12
УПОТРЕБА ....13
Употреба ....13
Персонализирана температура .....14

Стъпка 2
Стъпка 3
natural_image
Pure technical line drawing of a mechanical joint or bracket (no text or symbols)
natural_image
Simple line drawing of a mechanical component or bracket with two protruding parts (no text or symbols)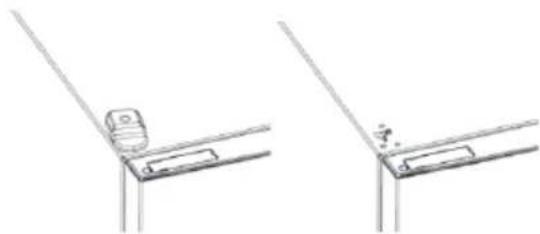
natural_image
Technical line drawing of two mechanical bracket components (no text or symbols)natural_image
Technical line drawings of three different mechanical or architectural components (no text or symbols)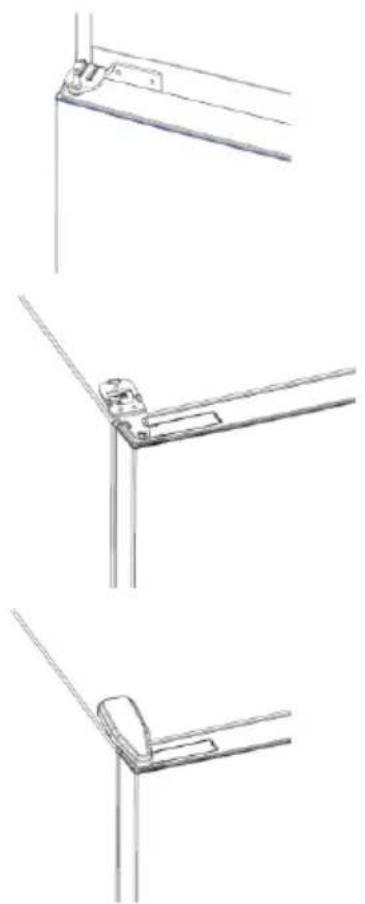
natural_image
Technical line drawings of three different metal bracket mounting configurations (no text or symbols)Shrnutí
POPIS VÝROBKU 22
PROPOJENÍ S APLIKACÍ POSTUP PÁROVÁNÍ S APLIKACÍ
Krok 1

Krok 2
Krok 3
natural_image
Pure technical line drawing of a mechanical bracket or angle (no text or symbols)
natural_image
Simple line drawing of a kitchen counter with two items on a shelf (no text or symbols)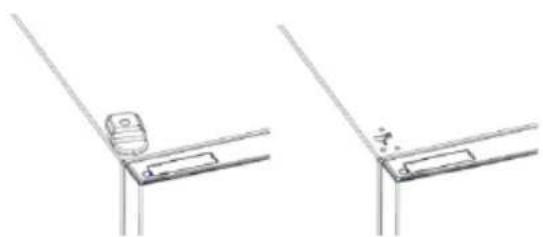
natural_image
Technical line drawing showing two views of a mechanical bracket or bracket assembly (no text or symbols)natural_image
Technical line drawings of three different mechanical or architectural components (no text or symbols)
natural_image
Technical line drawings of three different metal bracket mounting configurations (no text or symbols)Oversigt
PRODUKTBESKRIVELSE.... 32
Pladskrav....32
BRUG....33
Brug....33
Tilpasset temperatur....34
Super Cool-funktion....34
APP-FORBINDELSE FREMGANGSMÅDE VED PARRING I APP
Trin 1
• Download hOn-appen i butikkerne


Trin 2
Trin 3
natural_image
Line drawings of kitchen appliances and fixtures (no text or symbols)natural_image
Technical line drawing of a mechanical device with multiple ports and mounting brackets (no text or symbols)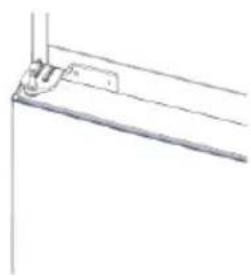
natural_image
Pure technical line drawing of a mechanical bracket or support structure without any text, numbers, or symbols
natural_image
Pure technical line drawing of a mechanical joint or bracket (no text or symbols)
natural_image
Simple line drawing of a corner bracket with diagonal lines (no text or symbols)Zusammenfassung

Schritt 2
Schritt 3
natural_image
Pure technical line drawing of a mechanical bracket or angle joint (no text or symbols)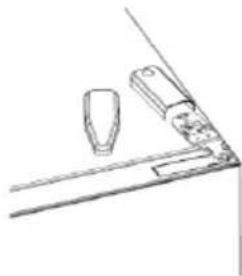
natural_image
Simple line drawing of a mechanical or architectural component with two protrusions and a base (no text or symbols)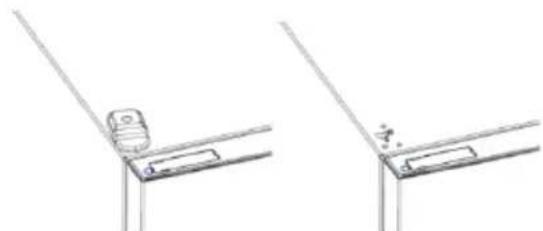
natural_image
Technical line drawing of two mechanical bracket components (no text or symbols)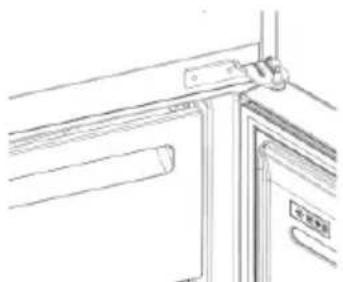
natural_image
Line drawing of a door frame with a handle and label (no readable text or symbols)ΧΡΗΣΗ

Βήμα 2
Βήμα 3
natural_image
Pure technical line drawing of a mechanical joint or bracket (no text or symbols)
natural_image
Simple line drawing of a table with two items on top, no text or symbols present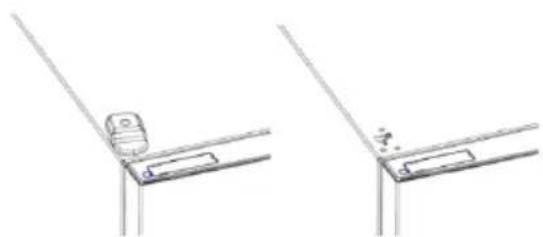
natural_image
Technical line drawing showing two mechanical bracket assembly configurations (no text or symbols)natural_image
Technical line drawings of three different mechanical or architectural components (no text or symbols)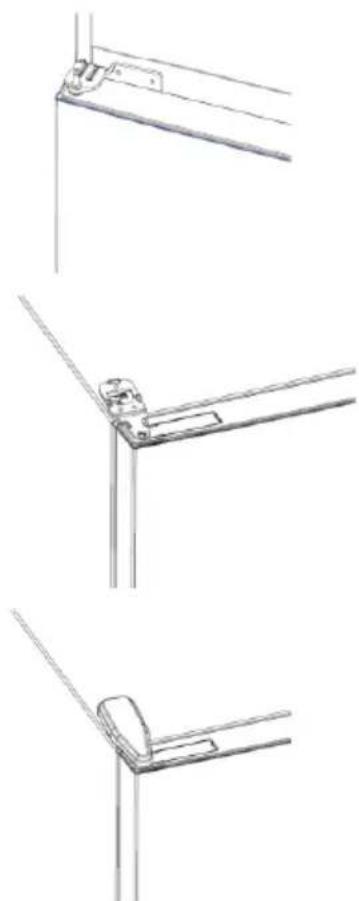
natural_image
Technical line drawings of three different metal bracket mounting configurations (no text or symbols)Resumen
Paso 3
natural_image
Line drawings of kitchen appliances and fixtures (no text or symbols)natural_image
Technical line drawing of two mechanical components with mounting brackets and internal compartments (no text or symbols)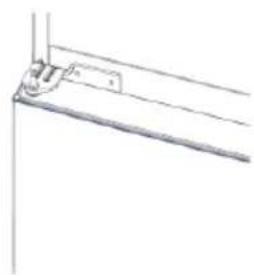
natural_image
Pure technical line drawing of a mechanical bracket or mounting detail (no text or symbols)
natural_image
Pure technical line drawing of a mechanical joint or bracket (no text or symbols)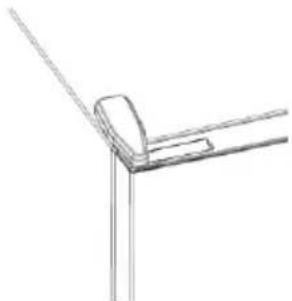
natural_image
Pure technical line drawing of a corner joint or bracket (no text or symbols)Yhteenveto
TUOTEKUVAUS....72
Tilantarve 72
KÄYTTÖ....73
Käyttö 73

Vaihe 2
Vaihe 3
natural_image
Pure technical line drawing of a mechanical clamp or bracket (no text or symbols)
natural_image
Simple line drawing of a mechanical or architectural component with no text or symbols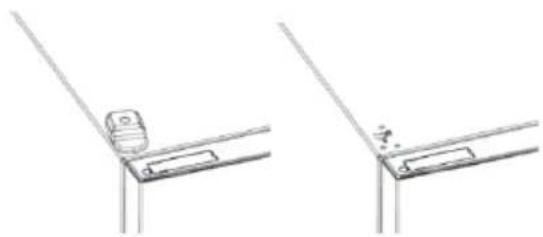
natural_image
Technical line drawing showing two bracket mounting details with a small component, no text or symbols presentnatural_image
Technical line drawings of three different door frame structures (no text or symbols)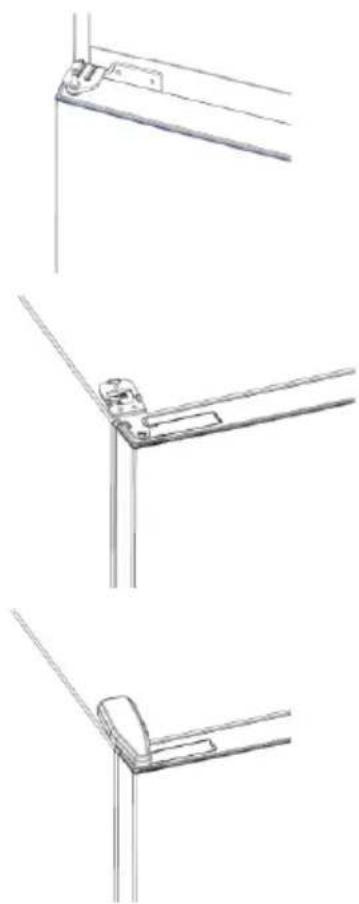
natural_image
Technical line drawings of three different metal bracket mounting configurations (no text or symbols)Sommaire
DESCRIPTION DU PRODUIT 82
Espace requis ....82
UTILISATION 83
Utilisation 83

Étape 2
Étape 3
natural_image
Line drawings of a door frame assembly with bracket, handle, and door lock (no text or symbols)natural_image
Technical line drawing of two mechanical components with mounting brackets and internal compartments (no text or symbols)
natural_image
Pure technical line drawing of a mechanical bracket or support structure without any text, numbers, or symbols
natural_image
Pure technical line drawing of a mechanical joint or bracket (no text or symbols)
natural_image
Pure technical line drawing of a corner joint or bracket (no text or symbols)Sažetak
OPIS PROIZVODA 92
Prostorni zahtjevi 92
UPORABA....93
Uporaba 93
Prilagođena temperatura 94

2. korak
3. korak
- Pridržavajte se uputa za uparivanje u aplikaciji hOn
Uporaba mreže Wi-Fi
Ako se mreža Wi-Fi još nije konfigurirala kada se hladnjak uključuje, automatski prelazi u način konfiguriranja i ostaje u tom statusu 30 minuta. Ikona za Wi-Fi treperi i priključivanje proizvoda može početi.
- Pridržavajte se uputa u aplikaciji za konfiguriranje mreže Wi-Fi (pogledajte gore)
- Nakon što se konfigurira mreža Wi-Fi i uspostavi veza, uključuje se ikona mreže Wi-Fi i fiksno ostaje uključena.
- Nakon 30 minuta bez izvođenja bilo kakve radnje, mrežom Wi-Fi automatski se izlazi iz načina konfiguriranja.
- Ako se mreža Wi-Fi već konfigurirala, automatski se ponovno povezuje u skladu s informacijama o konfiguriranju.
Da biste ponovno postavili mrežu Wi-Fi, pritisnite tipku za Wi-Fi i tipku SET na dvije sekunde.
Da biste isključili mrežu Wi-Fi, pritisnite tipku za Wi-Fi na tri sekunde.
Radio-modul - Tehnički podaci
| Učestalost (OFR) | 2400 MHz-2843.5 MHz |
| Frekvencije kanala | 2412...2472 MHz(veličina koraka 5 MHz) |
| Maksimalna snaga(EIRP) | 100 mW |
natural_image
Line drawings of kitchen appliances and fixtures in various orientations (no text or symbols)- Uklonite donju šarku
- Postavite postolje šarke
- Postavite srednju šarku
- Postavite ploču gornje šarke
- Postavite poklopac gornje šarke
natural_image
Technical line drawing of two mechanical components with mounting brackets and internal compartments (no text or symbols)
natural_image
Pure technical line drawing of a mechanical bracket or support structure without any text, numbers, or symbols
natural_image
Pure technical line drawing of a mechanical joint or bracket (no text or symbols)
natural_image
Pure technical line drawing of a corner joint or bracket (no text or symbols)Összegzés
TERMÉKLEÍRÁS....102
Helyigény ....102
HASZNÁLAT ....103
Használat ....103
HASZNÁLAT

2. lépés
3. lépés
natural_image
Pure technical line drawing of a mechanical joint or bracket (no text or symbols)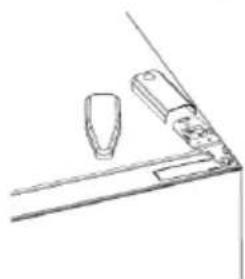
natural_image
Simple line drawing of a mechanical or architectural component with no text or symbols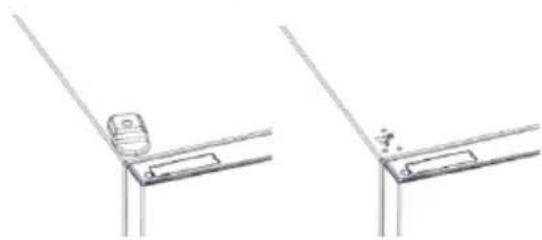
natural_image
Technical line drawing showing two mechanical components mounted on a bracket (no text or symbols)
natural_image
Line drawing of a door frame with handle and door, no text or symbols presentnatural_image
Technical line drawing of a mechanical device with two views (top and side), showing internal compartments and mounting brackets (no text or symbols)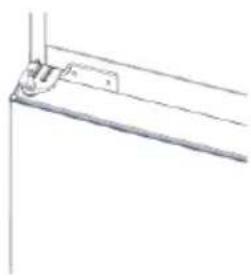
natural_image
Pure technical line drawing of a mechanical bracket or support structure without any text, numbers, or symbols
natural_image
Pure technical line drawing of a mechanical joint or bracket (no text or symbols)
natural_image
Pure technical line drawing of a corner joint or bracket (no text or symbols)Indice

Fase 2
Fase 3
natural_image
Line drawings of a door frame assembly with no text or symbolsnatural_image
Technical line drawing of a mechanical device with two views (top and side), showing internal compartments and mounting points (no text or symbols)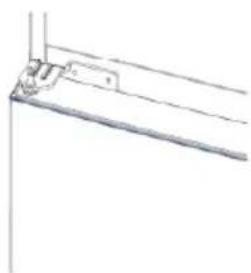
natural_image
Pure technical line drawing of a mechanical bracket or mounting detail (no text or symbols)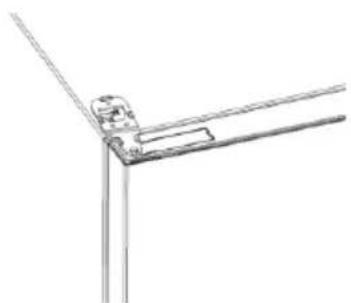
natural_image
Pure technical line drawing of a mechanical joint or bracket (no text or symbols)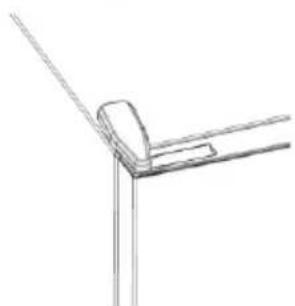
natural_image
Pure technical line drawing of a corner joint or bracket (no text or symbols)Samenvatting
PRODUCTBESCHRIJVING....122

Stap 2
Stap 3
natural_image
Line drawings of kitchen appliances and fixtures (no text or symbols)natural_image
Technical line drawing of two mechanical components with mounting brackets and internal compartments (no text or symbols)
natural_image
Pure technical line drawing of a mechanical bracket or support structure without any text, numbers, or symbols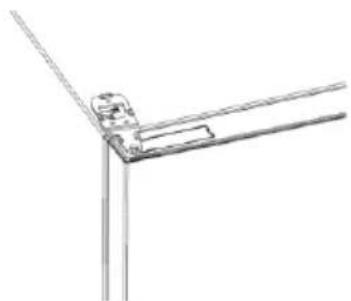
natural_image
Pure technical line drawing of a mechanical joint or bracket (no text or symbols)
natural_image
Pure technical line drawing of a corner joint or bracket (no text or symbols)Sammendrag
PRODUKTBESKRIVELSE....132
Plassbehov....132
BRUK....133
Bruk....133
Tilpasset temperatur....134
APP-TILKOBLING....137
Trinn 1....137
Trinn 2....137
Trinn 3....137
Wi-Fi-bruk 138
D∅R-REVERSIBILITET....139
PRODUKTBESKRIVELSE

Trinn 2
- Opprett kontoen din på hOn-appen, eller logg på hvis du allerede har en konto

Trinn 3
natural_image
Pure technical line drawing of a mechanical joint or bracket (no text or symbols)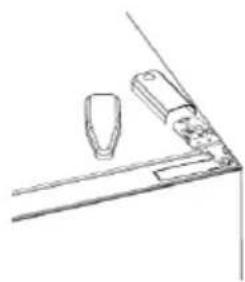
natural_image
Simple line drawing of a mechanical or architectural component with no text or symbols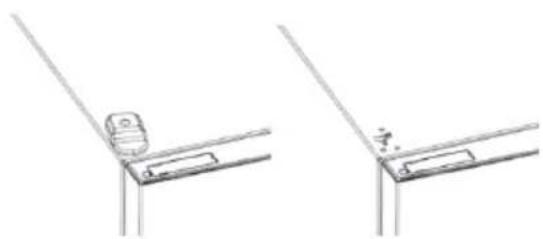
natural_image
Technical line drawing showing two views of a bracket or hinge with a small object on the left side (no text or symbols)natural_image
Technical line drawings of three different door frame structures (no text or symbols)
natural_image
Technical line drawings of three different metal bracket mounting configurations (no text or symbols)Podsumowanie
OPIS PRODUKTU....142

Krok 2
Krok 3
natural_image
Pure technical line drawing of a mechanical joint or bracket (no text or symbols)
natural_image
Line drawing of a mechanical component with two cylindrical parts mounted on a base (no text or symbols)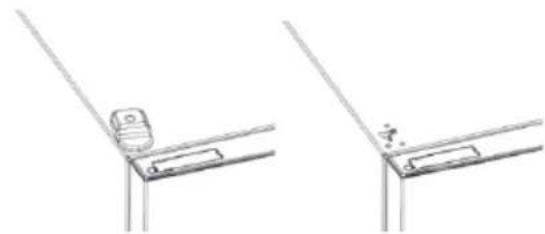
natural_image
Technical line drawing showing two views of a bracket or support structure with no visible text or symbols
natural_image
Line drawing of a door with a handle and door panel, no text or symbols presentnatural_image
Technical line drawing of two mechanical components with mounting brackets and internal compartments (no text or symbols)
natural_image
Pure technical line drawing of a mechanical bracket or support structure without any text, numbers, or symbols
natural_image
Pure technical line drawing of a mechanical joint or bracket (no text or symbols)
natural_image
Pure technical line drawing of a corner joint or bracket (no text or symbols)Resumo

Passo 2
Passo 3
natural_image
Line drawings of kitchen appliances and fixtures (no text or symbols)natural_image
Technical line drawing of a mechanical device with two views (top and side), showing internal compartments and mounting brackets (no text or symbols)
natural_image
Pure technical line drawing of a mechanical bracket or support structure without any text, numbers, or symbols
natural_image
Pure technical line drawing of a mechanical joint or bracket (no text or symbols)
natural_image
Pure technical line drawing of a corner joint or bracket (no text or symbols)Cuprins
DESCRIEREA PRODUSULUI 162
UTILIZAREA

Pasul 2
Pasul 3
natural_image
Line drawings of kitchen appliances and fixtures in various orientations (no text or symbols)natural_image
Technical line drawing of two mechanical components with mounting brackets and internal compartments (no text or symbols)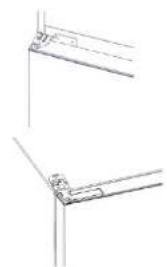
natural_image
Pure technical line drawing of two mechanical joint configurations without any text or symbols
Оглавление

War 2
War 3
natural_image
Pure technical line drawing of a mechanical joint or bracket (no text or symbols)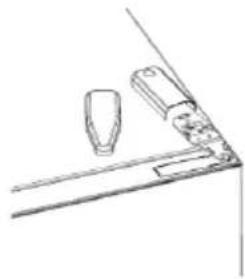
natural_image
Simple line drawing of a mechanical or architectural component with two cylindrical parts and a base (no text or symbols)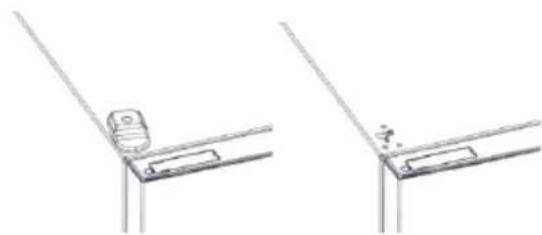
natural_image
Technical line drawing showing two views of a bracket or support structure with no visible text or symbols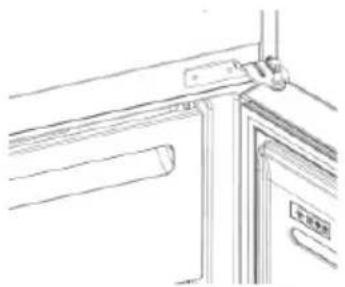
natural_image
Pure technical line drawing of a door or cabinet structure without any text, numbers, or symbolsnatural_image
Technical line drawing of a mechanical device with two views (top and side), showing internal compartments and mounting brackets (no text or symbols)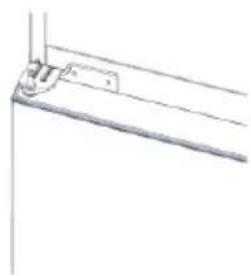
natural_image
Pure technical line drawing of a mechanical bracket or support structure without any text, numbers, or symbols
natural_image
Pure technical line drawing of a mechanical joint or bracket (no text or symbols)
natural_image
Pure technical line drawing of a corner joint or bracket (no text or symbols)Zhrnutie
POPIS PRODUKTU 182
POUŽITIE

Krok 2
Krok 3
- Postupujte podl'a pokynov na párovanie v aplikácii hOn
Používanie Wi-Fi
natural_image
Pure technical line drawing of a mechanical joint or bracket (no text or symbols)
natural_image
Simple line drawing of a mechanical component or bracket with two cylindrical parts and a base (no text or symbols)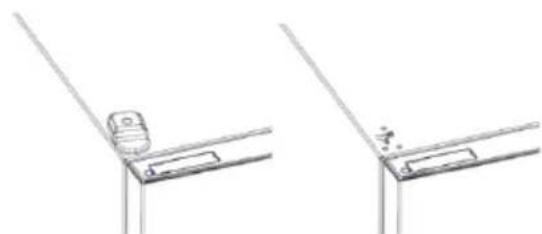
natural_image
Technical line drawing showing two views of a bracket or support structure with no visible text or symbols
natural_image
Line drawing of a door handle assembly with no text or symbolsnatural_image
Technical line drawing of two mechanical components with mounting brackets and internal compartments (no text or symbols)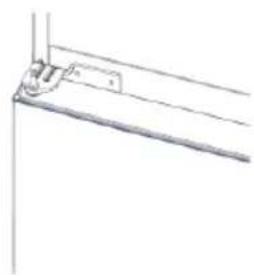
natural_image
Pure technical line drawing of a mechanical bracket or mounting detail (no text or symbols)
natural_image
Pure technical line drawing of a mechanical joint or bracket (no text or symbols)
natural_image
Pure technical line drawing of a corner joint or bracket (no text or symbols)Povzetek
OPIS IZDELKA 192
Prostorske zahteve....192
UPORABA....193
Uporaba....193
Temperatura po meri....194
Funkcija Super Cool....194
Funkcija Super Freeze....195
Način ECO 195
Funkcija Holiday....195
Odmrzovanje....195

2. korak
- Ustvarite svoj račun v aplikaciji hOn ali se prijavite, če račun že imate

3. korak
natural_image
Pure technical line drawing of a mechanical joint or bracket (no text or symbols)
natural_image
Simple line drawing of a cabinet or shelf with two items, no text or symbols present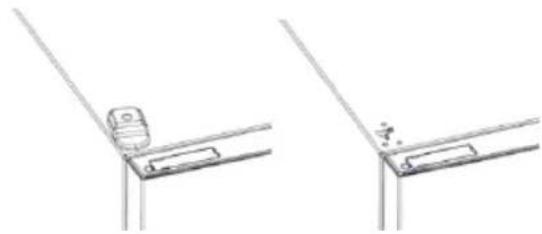
natural_image
Technical line drawing showing two views of a mechanical bracket or bracket assembly (no text or symbols)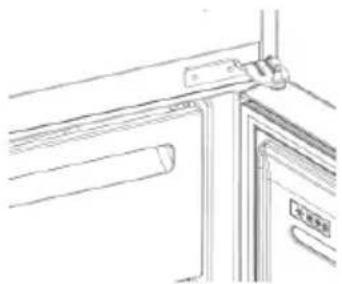
natural_image
Line drawing of a door frame with handle and door, no text or symbols presentnatural_image
Technical line drawing of two mechanical components with mounting brackets and internal compartments (no text or symbols)
natural_image
Pure technical line drawing of a mechanical bracket or support structure without any text, numbers, or symbols
natural_image
Pure technical line drawing of a mechanical joint or bracket (no text or symbols)
natural_image
Pure technical line drawing of a corner joint or bracket (no text or symbols)Sažetak
OPIS PROIZVODA 202
Zahtevi prostora....202
UPOTREBA 203
Upotreba....203
Prilagođena temperatura 204
Funkcija Super Cool....204
Funkcija Super Freeze....205
Eco režim rada ....205
Funkcija Holiday....205
Odmrzavanje 205
Režim demonstracije ....206
Kodovi greške 206
VEZA SA APLIKACIJOM ....207
1.korak 207
2.korak ....207
3.korak ....207

2. korak
3. korak
• Pratite uputstva za uparivanje u hOn aplikaciji
Upotreba „Wi-Fi“ mreže
natural_image
Pure technical line drawing of a mechanical bracket or angle (no text or symbols)
natural_image
Simple line drawing of a mechanical bracket or bracket with two protruding components (no text or symbols)
natural_image
Technical line drawing showing two views of a mechanical bracket or bracket assembly (no text or symbols)- Uklonite srednju š arku
- Uklonite donju š arku
- Postavite stopicu š arke
- Postavite srednju š arku
- Postavite pločicu gornje š arke
- Postavite poklopac gornje š arke
natural_image
Technical line drawings of three different mechanical or architectural components (no text or symbols)
natural_image
Technical line drawings of three different metal bracket mounting configurations (no text or symbols)Sammanfattning
PRODUKTBESKRIVNING....212

Steg 2
Steg 3
natural_image
Pure technical line drawing of a mechanical bracket or angle (no text or symbols)
natural_image
Simple line drawing of a mechanical or architectural component with two protrusions and a base (no text or symbols)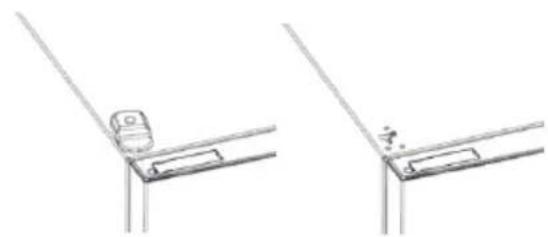
natural_image
Technical line drawing showing two mechanical bracket assembly steps (no text or symbols)
natural_image
Line drawing of a door handle and door panel assembly (no text or symbols)natural_image
Technical line drawing of a mechanical device with multiple ports and mounting brackets (no text or symbols)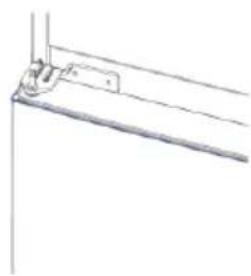
natural_image
Pure technical line drawing of a mechanical bracket or support structure without any text, numbers, or symbols
natural_image
Pure technical line drawing of a mechanical joint or bracket (no text or symbols)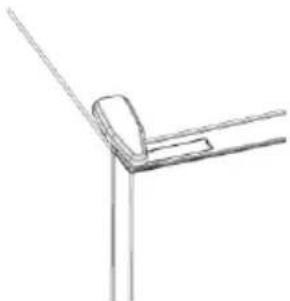
natural_image
Simple line drawing of a corner bracket with diagonal lines (no text or symbols)Резюме
ОПИС ПРИЛАДУ 222

Крок 2
Крок 3
natural_image
Pure technical line drawing of a mechanical clamp or bracket (no text or symbols)
natural_image
Simple line drawing of a mechanical or architectural component with no text or symbols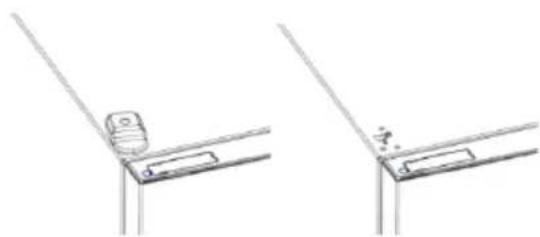
natural_image
Technical line drawing showing two views of a mechanical bracket or bracket assembly (no text or symbols)natural_image
Technical line drawings of three different air ducts or compartments with mounting brackets (no text or symbols)
natural_image
Three technical line drawings of metal bracket connections (no text or symbols)232 وصف المنج

2الخطوة
3الخطوة
natural_image
Line drawings of kitchen appliances and fixtures (no text or symbols)KULLANIM

Adim 2
Adım 3
natural_image
Pure technical line drawing of a mechanical bracket or angle (no text or symbols)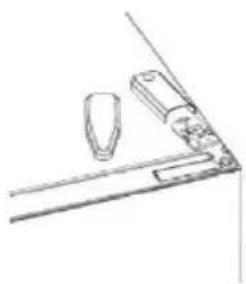
natural_image
Simple line drawing of a mechanical or architectural component with no text or symbols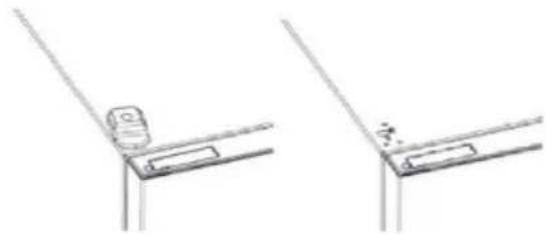
natural_image
Technical line drawing showing two views of a mechanical bracket or bracket with no visible text or symbols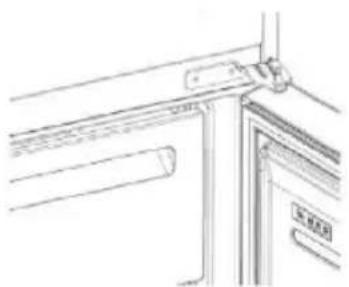
natural_image
Pure technical line drawing of a door frame with no text or symbolsnatural_image
Technical line drawing of a mechanical component with no visible text or symbols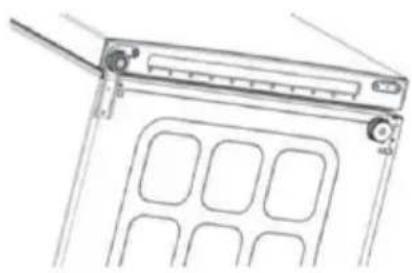
natural_image
Technical line drawing of a mechanical device with internal compartments and mounting bracket (no text or symbols)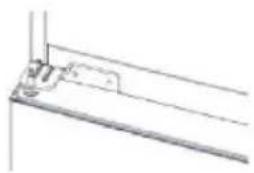
natural_image
Pure technical line drawing of a mechanical bracket or mounting detail (no text or symbols)
natural_image
Pure technical line drawing of a corner joint or bracket (no text or symbols)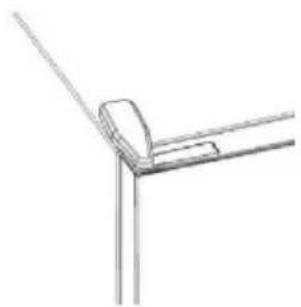
natural_image
Pure technical line drawing of a corner joint or bracket (no text or symbols)Sisukord
TOOTE ÜLEVAADE 252
Ruuminõuded 252
KASUTAMINE 253
Kasutamine 253
2. toiming
3. toiming
natural_image
Pure technical line drawing of a mechanical bracket or angle joint (no text or symbols)
natural_image
Simple line drawing of a mechanical setup with a tool and two components (no text or symbols)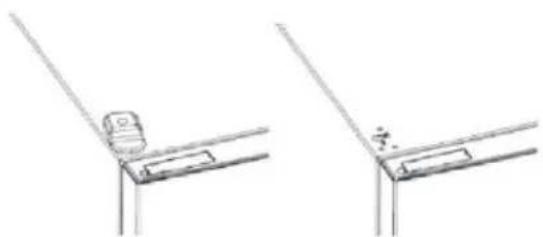
natural_image
Technical line drawing of two mechanical bracket components (no text or symbols)
natural_image
Pure architectural line drawing of a window frame with no text or symbolsnatural_image
Technical line drawing of a mechanical assembly with no visible text or symbols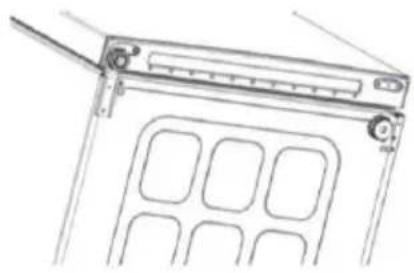
natural_image
Technical line drawing of a mechanical device with internal compartments and mounting bracket (no text or symbols)
natural_image
Pure technical line drawing of a bracket or mounting bracket without any text, numbers, or symbols
natural_image
Pure technical line drawing of a corner joint or bracket (no text or symbols)
natural_image
Simple line drawing of a corner joint or bracket structure (no text or symbols)Santrauka
PRODUKTO APRAŠYMAS 262

2 veiksmas
3 žingsnis
natural_image
Pure technical line drawing of a mechanical bracket or angle joint (no text or symbols)
natural_image
Simple line drawing of a mechanical or architectural component with no text or symbols
natural_image
Technical line drawing of two mechanical bracket components (no text or symbols)
natural_image
Pure architectural line drawing of a window frame with no text or symbolsnatural_image
Technical line drawing of a mechanical assembly with no visible text or symbols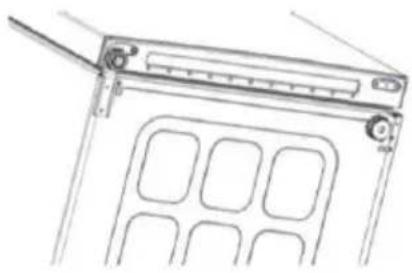
natural_image
Technical line drawing of a mechanical device with internal compartments and mounting bracket (no text or symbols)
natural_image
Pure technical line drawing of a bracket or mounting bracket without any text, numbers, or symbols
natural_image
Pure technical line drawing of a corner joint or bracket (no text or symbols)
natural_image
Simple line drawing of a corner joint or bracket structure (no text or symbols)Kopsavilkums
PRODUKTA APRAKSTS 272

2. darbība
3. darbība
natural_image
Pure technical line drawing of a mechanical joint or bracket (no text or symbols)
natural_image
Simple line drawing of a mechanical component with no text or symbols
natural_image
Technical line drawing of two mechanical bracket components (no text or symbols)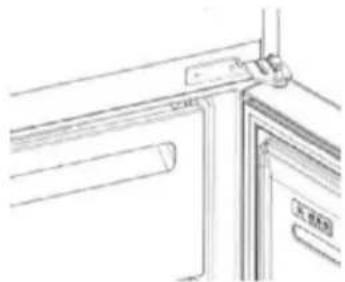
natural_image
Pure architectural line drawing of a window frame with no text or symbolsnatural_image
Technical line drawing of a mechanical assembly with no visible text or symbols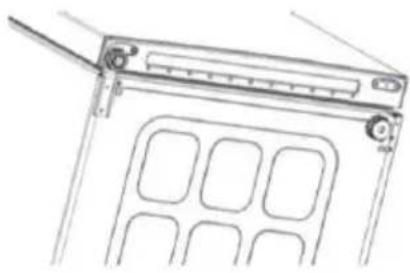
natural_image
Line drawing of a mechanical device with a handle and internal compartments (no text or symbols)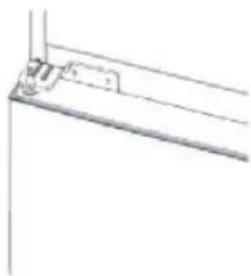
natural_image
Pure technical line drawing of a mechanical bracket or mounting bracket (no text or symbols)
natural_image
Pure technical line drawing of a corner joint or bracket (no text or symbols)
natural_image
Simple line drawing of a corner joint or bracket structure (no text or symbols)- Summary
- PRODUCT DESCRIPTION ...... 2
- USE....3
- Space requirements
- USE
- Customized temperature
- Super Cool function
- Super Freeze function
- Eco mode
- Holiday function
- Defrosting
- HCS
- Demo mode
- Error Codes
- APP CONNECTION IN APP PAIRING PROCEDURE
- Step 1
- Step 2
- Step 3
- Wi-Fi Use
- DOOR REVERSIBILITY
- Резюме
- ОПИСАНИЕ НА ПРОДУКТА .....12
- УПОТРЕБА ....13
- Стъпка 2
- Стъпка 3
- Shrnutí
- PROPOJENÍ S APLIKACÍ POSTUP PÁROVÁNÍ S APLIKACÍ
- Krok 1
- Krok 2
- Krok 3
- Oversigt
- PRODUKTBESKRIVELSE.... 32
- BRUG....33
- APP-FORBINDELSE FREMGANGSMÅDE VED PARRING I APP
- Trin 1
- Trin 2
- Trin 3
- Zusammenfassung
- Schritt 2
- Schritt 3
- ΧΡΗΣΗ
- Βήμα 2
- Βήμα 3
- Resumen
- Paso 3
- Yhteenveto
- TUOTEKUVAUS....72
- KÄYTTÖ....73
- Vaihe 2
- Vaihe 3
- Sommaire
- DESCRIPTION DU PRODUIT 82
- UTILISATION 83
- Étape 2
- Étape 3
- Sažetak
- OPIS PROIZVODA 92
- UPORABA....93
- korak
- korak
- Uporaba mreže Wi-Fi
- Összegzés
- TERMÉKLEÍRÁS....102
- HASZNÁLAT ....103
- HASZNÁLAT
- lépés
- lépés
- Indice
- Fase 2
- Fase 3
- Samenvatting
- PRODUCTBESCHRIJVING....122
- Stap 2
- Stap 3
- Sammendrag
- PRODUKTBESKRIVELSE....132
- BRUK....133
- D∅R-REVERSIBILITET....139
- Trinn 2
- Trinn 3
- Podsumowanie
- OPIS PRODUKTU....142
- Resumo
- Passo 2
- Passo 3
- Cuprins
- DESCRIEREA PRODUSULUI 162
- UTILIZAREA
- Pasul 2
- Pasul 3
- Оглавление
- War 2
- War 3
- Zhrnutie
- POUŽITIE
- Používanie Wi-Fi
- Povzetek
- OPIS IZDELKA 192
- UPORABA....193
- OPIS PROIZVODA 202
- UPOTREBA 203
- VEZA SA APLIKACIJOM ....207
- Upotreba „Wi-Fi“ mreže
- Sammanfattning
- PRODUKTBESKRIVNING....212
- Steg 2
- Steg 3
- Крок 2
- Крок 3
- KULLANIM
- Adim 2
- Adım 3
- Sisukord
- TOOTE ÜLEVAADE 252
- KASUTAMINE 253
- toiming
- toiming
- Santrauka
- PRODUKTO APRAŠYMAS 262
- veiksmas
- žingsnis
- Kopsavilkums
- PRODUKTA APRAKSTS 272
- darbība
- darbība
Brand : HAIER
Model : HDW3618DNPK
Category : Fridge