WT 537 - Alarm clock radio TECHNOLINE - Free user manual and instructions
Find the device manual for free WT 537 TECHNOLINE in PDF.

User questions about WT 537 TECHNOLINE
0 question about this device. Answer the ones you know or ask your own.
Ask a new question about this device
Download the instructions for your Alarm clock radio in PDF format for free! Find your manual WT 537 - TECHNOLINE and take your electronic device back in hand. On this page are published all the documents necessary for the use of your device. WT 537 by TECHNOLINE.
USER MANUAL WT 537 TECHNOLINE
text_image
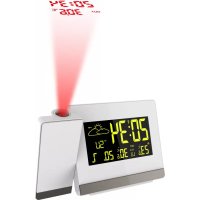
12:00 Z DAY WE TEMPERATURE HUMIDITY DATE MONTH 25.860% 30-4Batteriebetrieb
Main features / keys
text_image
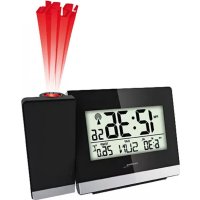
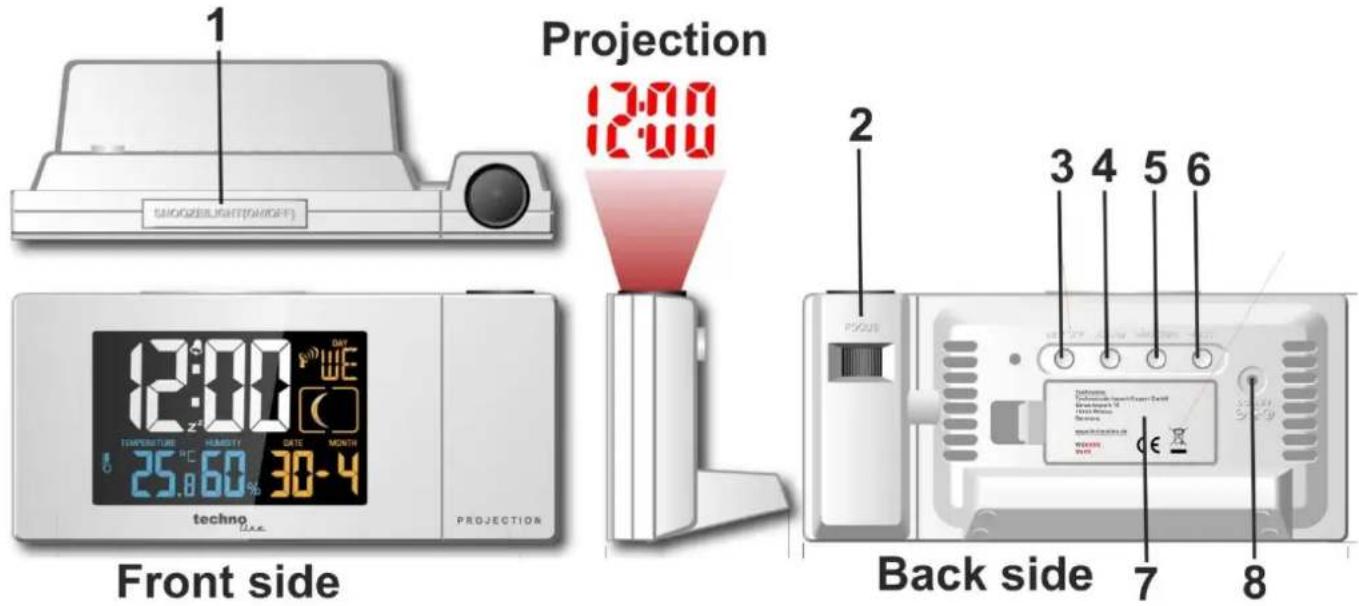
1 PROJECTION 12:00 STROZEBLIGHT(GMIGER) Temperature 25.8°C RUBERTY 30-4 day WE DATA MONTH TECHNO PROJECTION Front side 2 Back side 3 4 5 6 FOCUS 7 81) [SNOOZE/LIGHT] key
Press this button to switch the backlight / Press this button while alarm to activate snooze function / Hold this button for 2 seconds to switch the projection function on or off
2) [FOCUS]
Adjust the sharpness of the projection
3) [SET/°C/°F] key
Press this button to change temperature unit to °F or °C / Hold button for 2 seconds to change into setting mode
4) [ALARM] key
Press the button once to show alarm time / Press the button while alarm time is displayed to activate/deactivate alarm / Hold the button for 2 seconds to enter the alarm setting mode
Features:
• Calendar (Date/month,2000-2099 Default Year 2015)
• Radio controlled time
- Indoor temperature and humidity
- ^ C / ^ selectable
• Alarm and snooze function
- Moon phase display
• Maximum and Minimum temperature and humidity
• Seven languages for week (GE,IT,FR,NE,ES,DA,EN)
• Projection of time and temperature
5) [+ / MAX / MIN] key
Press the button to increase the setting value during setting. / Hold the button for 2 seconds during setting mode for fast adjust / Press this button to display maximum temperature/humidity Press this button once more to display minimum temperature/humidity. / Hold this button for 2 seconds to clear max or min temperature/humidity memory
6) [-/RCC] key
Press this button for 2 seconds to start/end time searching / Press to decrease the setting value during setting / Hold this button for 2 seconds for fast adjusting during setting mode
7) Battery compartment
Take off the battery cover to insert the batteries according to the polarity indications
8) DC jack
Use with the AC/DC adapter to connect to a household power socket
LCD Display:
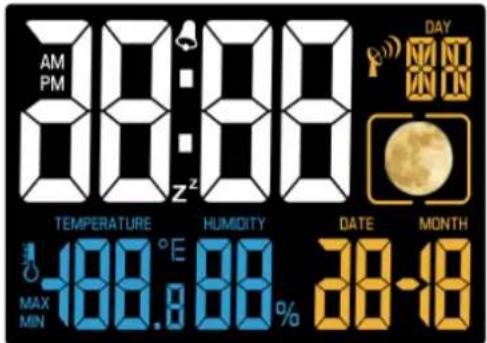
Full segment
Normal display
text_image
AM PM 22:00 Z² DAY TEMPERATURE HUMIDITY DATE MONTH MAX MIN -189.80% 38-18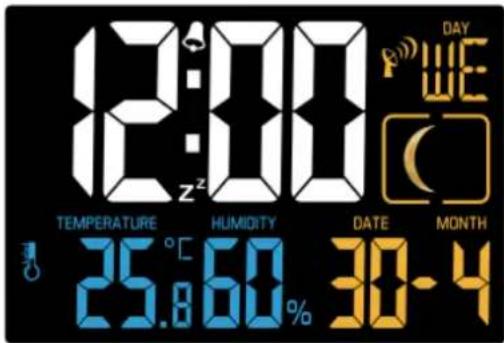
text_image
12:00 Z DAY WE TEMPERATURE HUMIDITY DATE MONTH 25.860% 30-4Back-up batteries
- Remove the battery door
- Insert 2x AAA size batteries into the battery compartment. Make sure you insert them the right way according to the polarity information marked on the battery compartment.
- Replace the battery door.
Note: No permanent backlight if station is only powered by back-up batteries.
Getting started:
- Plug the adaptor into the DC jack and the display full segment for 2 second.
- After complete display 2 seconds to start automatic search for the DCF signal
Automatic DCF reception

DCF reception icon with full signal strength will appear on screen if the reception of radio-controlled time is successful. The DCF reception icon is shown solid once a signal has been received. No DCF reception icon is displayed if the station was unable to receive a signal at this time. Reposition the station or try a new attempt during night time to support the receiving of a signal.
The station automatically tries to receive a DCF signal daily at 1:00, 2:00, 3:00, 4:00 and 5:00. Once received at any time, the will no longer try to receive at the same day and start again at the next day at 1:00.
If there is no signal or too much interference the receiver will only be on for 2 minutes.
If the signal is good it may catch a signal in about 2-3 minutes.
If the signal is marginal it will try to catch a signal for up to 10 minutes.
Setting Time / Date:
- Hold the SET button to enter the setting mode and 12Hr or 24Hr will flash. Press the UP (+) or DOWN (-) button to select the 12-hour or 24-hour time.
- Press the SET button and the selected time zone will blink. Press the + or - button to set the desired time zone (setting range is 0\~+12, 0\~-12).
- Press the SET button and the hour will flash. Press the + or - button to select the hour.
- Press the SET button and the minutes will flash. Press the + or - button to select the minutes.
- Press the SET button and the year will flash. Press the + or - button to select the year.
- Press the SET button and the month will flash. Press the + or - button to select the month.
- Press the SET button and the date will flash. Press the + or - button to select the date. The week day will be set automatically after the setting of year, month and date.
- Press the SET button and the language will flash with GE as the default setting. Press the + or - button to select a language: GE, IT, FR, NE, ES, DA, EN. Press the SET button to end the setting and to return to the normal display mode.
Note:
- If no buttons are pressed in a 20 seconds period, set mode will time out and return to live display mode, reflecting whatever adjustments were made by user before timed out
- Up/Down buttons - press once to adjust by 1 unit, hold for fast scroll adjustment
• The alarm tone is heard for up to 2 minutes with an increasing interval until it turns off automatically.
Seven languages for week days
German (GE) SO MO DI MI DO FR SA
French (FR) DI LU MA ME JE VE SA
Spanish (ES) DO LU MA MI JU VI SA
Italian (IT) DO LU MA ME GI VE SA
| Dutch (NE) | ZO | MA | DI | WO | DO | VR | ZA |
| Danish (DA) | SO | MA | TI ON TO | FR | LO | ||
| English (EN) | SU | MO | TU | WE | TH | FR | SA |
Alarm time setting:
- Hold the ALARM button to enter the alarm time setting mode and the alarm hour will flash. Press the UP (+) or DOWN (-) button to select the alarm hour.
- Press the ALARM button and the alarm minutes will flash. Press the + or - button to select the alarm minutes. Press the ALARM button to end the setting and to return to the normal display mode.
ALARM icon:

Alarm activation:
Press the ALARM button to show alarm time. Press the ALARM button once more to set the alarm ON/OFF.
Snooze function:
- Press the SNOOZE button while the alarm is sounding and a snooze time of 10 minutes will be triggered. The alarm icon flashes while the snooze feature is active.
- Press any button but the SNOOZE button while in snooze mode to stop alarm for one day. The alarm icon will be shown solid again.
MAX/MIN operation:
- In normal display mode, press the MAX/MIN button to display minimum temperature and humidity.
- Press the MAX/MIN button again to display maximum temperature and humidity.
- Press the MAX/MIN button again or don't press any button for 5 seconds to return to the normal display of temperature and humidity.
Note:
Hold the MAX/MIN button in the corresponding interface for 2 seconds to clear the MAX or MIN record.
The MIN/MAX values will also be automatically cleared at every midnight (0:00).
Moon Phase
| 00250 New moon phase | ||
| Display | Status | Lunar Calendar |
| NEW | 29, 30 &1 | |
| Waxing Crescent | 2,3 | |
| 4,5 | ||
| First Quarter | 6,7,8 | |
| Waxing Gibbous | 9,10 | |
| 11,12,13 | ||
| FULL | 14, 15, 16 | |
| 17,18 | ||
| Waning Gibbous | 19,20 | |
| Last Quarter | 21,22,23 | |
| 24, 25, 26 | ||
| Waning Crescent | 27,28 |
Hereby, Technotrade declares that this product WT 537 is in compliance with the essential requirements and other relevant provisions of Directive 2014/53/EU and ROHS 2011/65/EC. The original EU declaration of conformity may be found at: www.technoline.de/doc/4029665005379
Specifications
Dimensions: 165 x 55 x 75 mm
Power: AC/DC adapter HX0180500150A2E (included)
Back-up: 2 X AAA Micro batteries
Indoor Temperature:
Operating temperature range: 0C to 50C (32 F to122F)
Accuracy: ± 1 degrees Celsius 0C to 50C (32 F to 122F)
Resolution: 0.1 degree Celsius
When above 50C (122 F), the LCD will display: HH
When below 0C (32 F) the LCD will display: LL
Indoor Humidity:
Operating humidity range: 1% RH to 99%
Resolution: 1% RH
Default Setting:
Time: 0:00
Date/Day: Jan 1st, 2015, DO
Temperature: ℃
Week language: German
General safety
• This device is not a toy. It should be placed and used outside of the access area of children.
- Operate this device in a dry and dust-free environment and don't expose your device to humidity, vibrations, permanent heat, cold and mechanical strains.
- Do not leave the packaging material lying around carelessly, plastic foils / bags, polystyrene parts, etc., could become a dangerous toy for children.
- Do not use the device if it has such externally visible damage. B. on the housing, or in case of malfunction. If in doubt, get the equipment checked by a qualified electrician or our service.
- The device may be operated only with the supplied original AC/DC adapter!
- The device must not be opened and no manually repairs should be carried out.
Environmental reception effects
The station obtains the accurate time with wireless technology. Same as all wireless devices, the reception is maybe affected by the following circumstances:
- long transmitting distance
• nearby mountains and valleys - near freeway, railway, airports, high voltage cable etc.
- near construction site
- among tall buildings
• inside concrete buildings - near electrical appliances (computers, TV's, etc) and metallic structures
• inside moving vehicles
Place the station at a location with optimal signal, i.e. close to a window and away from metal surfaces or electrical appliances.
Precautions
- This main unit is intended to be used only indoors.
- Do not subject the unit to excessive force or shock.
- Do not expose the unit to extreme temperatures, direct sunlight, dust or humidity.
- Do not immerse in water.
- Avoid contact with any corrosive materials.
- Do not dispose this unit in a fire as it may explode.
- Do not open the inner back case or tamper with any components of this unit.
Batteries safety warnings
- Use only alkaline batteries, not rechargeable batteries.
• Install batteries correctly by matching the polarities (+/-).
• Always replace a complete set of batteries. - Never mix used and new batteries.
- Remove exhausted batteries immediately.
- Remove batteries when not in use.
- Do not recharge and do not dispose of batteries in fire as the batteries may explode.
- Ensure batteries are stored away from metal objects as contact may cause a short circuit.
- Avoid exposing batteries to extreme temperature or humidity or direct sunlight.
- Keep all batteries out of reach from children. They are a choking hazard.
Use the product only for its intended purpose!
Consideration of duty according to the battery law

Old batteries do not belong to domestic waste because they could cause damages of health and environment. You can return used batteries free of charge to your dealer and collection points. As end-user you are committed by law to bring back needed batteries to distributors and other collecting points!
Consideration of duty according to the law of electrical devices

This symbol means that you must dispose of electrical devices separated from the General household waste when it reaches the end of its useful life. Take your unit to your local waste collection point or recycling centre. This applies to all countries of the European Union, and to other European countries with a separate waste collection system.
text_image
12:00 Z² DAY WE TEMPERATURE HUMIDITY DATE MONTH 25.860% 30-4Piles de secours
text_image
12:00 Z² DAY WE TEMPERATURE HUMIDITY DATE MONTH 25.860% 30-4Pilas de respaldo
text_image
12:00 Z DAY WE Temperature HUMIDITY DATE MONTH 25.8-60% 30-4Back-upbatterijen
AC/DC-adapter HX0180500150A2E
(inbegrepen)
2 X AAA microbatterijen