AIRFRY 3010 - Deep fryer GUTFELS - Free user manual and instructions
Find the device manual for free AIRFRY 3010 GUTFELS in PDF.

| Product type | Air Fryer (Hot Air Fryer) |
| Brand | GUTFELS |
| Model | AIRFRY 3010 |
| Capacity | 5.5 liters |
| Power | 1500 W |
| Temperature range | 80 °C - 200 °C |
| Timer | 0 - 60 minutes, with automatic stop |
| Main functions | Oil-free frying, grilling, baking, reheating, dehydrating |
| Dimensions (L x W x H) | 30 x 30 x 35 cm |
| Net weight | 4.5 kg |
| Power supply | 220-240 V ~ 50/60 Hz |
| Basket material | Stainless steel with non-stick coating |
| Cleaning | Basket and tank dishwasher safe |
| Safety | Overheat protection, automatic shut-off, cool-touch handle |
| Included accessories | Frying basket, grill plate, recipe booklet |
| Warranty | 2 years |
| Repairability index | Available: spare parts (basket, heating element, fan) sold separately |
| General information | Operates by hot air circulation for even cooking without added oil. |
Frequently Asked Questions - AIRFRY 3010 GUTFELS
User questions about AIRFRY 3010 GUTFELS
0 question about this device. Answer the ones you know or ask your own.
Ask a new question about this device
Download the instructions for your Deep fryer in PDF format for free! Find your manual AIRFRY 3010 - GUTFELS and take your electronic device back in hand. On this page are published all the documents necessary for the use of your device. AIRFRY 3010 by GUTFELS.
USER MANUAL AIRFRY 3010 GUTFELS
MANUAL DE INSTRUÇÕES
DE
Technische Daten ; Technical information ; Caractéristiques techniques Technische gegevens; Especificaciones Técnicas Especificações técnicas
| Modell | CLEAN 3010 |
| Elektrischer Anschluss Volt / HzElectrical connection Voltage - frequencyRaccordement électrique (tension - fréquence)Elektrische aansluiting (Spanning - frequentie)Ligação eléctrica Volt / Hz | 220-240 V~50-60 Hz |
| Volumen Staubauffangbehälter; CapacityContenance; Capaciteit | 3,0 L |
| Leistung; PowerPuissance; Vermogen | 850 W |
| EAN | 4016572024951 |
CE-Kennzeichnung
At the time of its introduction on the market the product fulfills the requirements, which were specified in the directive for the standardization of the laws of the Member States concerning the electromagnetic compatibility (2014/30/EU) of electrical equipment within certain voltage limits (2014/35/EU). This product is identified by the CE marking and delivered with a declaration of conformity for inspection by the market monitoring authority.
Marquage CE
10.1 Safety and warnings....20
10.2 Safety and responsibility 21
10.3 Intended use 21
11 Installation 22
12 Using for the first time 24
13 Operating instructions....26
14 Cleaning and maintenance....26
15 General warranty terms ......29
16 Troubleshooting ....30
17 Élimination des appareils usagés ....32
18 Sécurité ....32
natural_image
Line drawing of a vacuum cleaner with attached pipe fitting (no text or symbols)
natural_image
Line drawing of a curved pipe or tube with a small inset component (no text or symbols)Abb.2
natural_image
Technical line drawing of a mechanical component with no visible text or symbolsAbb.3
natural_image
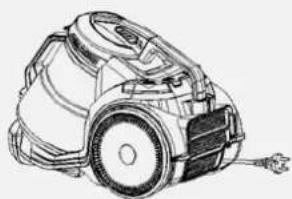
Line drawing of a compact vacuum cleaner with attached electrical plug (no text or symbols)Abb.4
natural_image
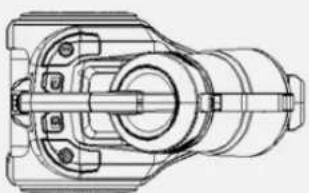
Technical line drawing of a mechanical assembly (no text or symbols visible)Abb.5
natural_image
Black cylindrical mechanical component with textured surface (no visible text or symbols)natural_image
Line drawing of a handheld vacuum cleaner with a cylindrical top and base (no text or symbols)natural_image
Black cylindrical object with textured surface, possibly a mechanical or electronic component (no visible text or symbols)natural_image
Technical line drawing of a vacuum cleaner and its side view (no text or symbols)Abb.6
natural_image
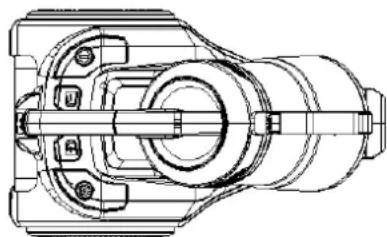
Technical line drawing of a mechanical assembly with no visible text or symbolsAbb.7
natural_image
Line drawing of a vacuum cleaner device (no text or symbols)Abb.14
natural_image
Technical line drawing of a vacuum cleaner with internal components and housing (no text or symbols)Abb.15
natural_image
Technical line drawing of a mechanical component or housing (no text or symbols)Abb.16
natural_image
Line drawing of a thermospan with lid open, showing internal structure and lid (no text or symbols)Abb.17

natural_image
Illustration of a decorative architectural element with vertical panels and diagonal bracing (no text or symbols)Abb.18
We thank you for purchasing one of our appliances.
You have made a good choice. Your Gutfels appliance was built for use in private households and is a quality product that combines the highest technical sophistication with practical ease of use, just like other Gutfels appliances that are in operation throughout Europe to the complete satisfaction of their owners.
Please read this instruction manual carefully before using the device for the first time. It contains important safety instructions and information on the installation, operation and maintenance of the appliance. Proper handling contributes to efficient use and minimises energy consumption during operation.
Improper use could result in hazardous situations, particularly for children. Keep this instruction manual in a safe place for future reference. Pass it on to the new owner if the product is sold or given away. In case of doubt regarding questions or topics not described in detail in this manual, please contact your dealer, an authorised technician or go to our homepage: www.ggv-service.de
The manufacturer is working constantly on the further development of all types and models. With all types and models, modifications in design, properties and configuration are possible without prior notice.
9 Disposal of old
appliances
This product is marked in accordance with the European Waste Electrical and Electronic Equipment (WEEE) Directive 2012/19/EU. This directive lays down the regulations for proper disposal of the product. Environmentally friendly disposal prevents possible negative impacts on health that could be caused by improper disposal. The symbol on the product or packaging indicates that this product must not be disposed of with the normal domestic waste. The user must return the product to a collection point for the recycling of electrical and electronic waste. The prevailing local regulations must be observed for disposal. For further information, please contact your local authority.
10 Safety
Explanation of the safety instructions
All safety instructions in this manual are marked with a warning symbol. They warn of potential hazards in good time. It is essential to read and follow this information.
Explanation of the safety instructions The following symbols and warnings are used in this instruction manual, on the vacuum cleaner or on the packaging.

WARNING
Indicates a hazardous situation which may result in serious injury or even death!
ATTENTION
Indicates a hazardous situation which may result in minor or moderate injury.
IMPORTANT
Describes a situation that may cause significant damage to property or the surrounding area.
10.1 Safety and warnings
- Avoid injuries and damage by transporting the appliance only when packed.
- Assemble and connect the appliance only according to the instructions in this manual.
- The plug must be accessible after installation.
- In case of emergency, unplug the appliance immediately.

WARNING
When connecting or disconnecting, do not touch the plug or the power supply cable with wet or damp hands.

WARNING
▲ELECTRIC SHOCK HAZARD!
- Hold the plug when removing the power cable. Do not pull on the mains power cable.
- Remove the plug before cleaning or maintenance.
- Have a damaged mains power cable replaced immediately by the supplier, dealer or After Sales Service. If the mains power cable or plug is damaged, you may no longer use the appliance.
- Except for the cleaning and maintenance procedures specified in this instruction manual, do not perform any modification.
- When leaving the appliance unattended, always unplug the appliance from the mains before any assembly, disassembly or cleaning of the accessories (nozzles, brushes, hoses, filters, etc.) or the appliance itself.
10.2 Safety and responsibility
Special safety instructions Safety regulations for children and persons with limited abilities.

WARNING
After removing the packaging, check that all appliance parts and accessories are present. If in doubt, do not use the appliance and contact a qualified technician. The packaging materials (plastic bags, styrofoam, metal clips, etc.) must be kept out of reach of children, as they are possible sources of danger and you must dispose of them in accordance with the applicable
regulations.
Keep the appliance out of the reach of animals, children or people who cannot use it.
Do not leave the appliance unattended if it is connected to the power supply.
• Take the necessary precautions to prevent children from playing with the appliance.
- This appliance can be used by children eight years of age and older and by people whose physical, mental or emotional capacity is limited or impaired, or who lack experience or knowledge, only if they are supervised and after they have received and understood the instructions on how to use the appliance safely and understand the hazards involved.
- Children must not be allowed to play with the appliance.
- Cleaning and maintenance to be performed by the user must not be carried out by children unless they are supervised.
10.3 Intended use
The vacuum cleaner is intended exclusively for vacuuming indoors. It is intended exclusively for use in private households and is not suitable for commercial use.
Do not use the vacuum cleaner to suck up water.
Only use the vacuum cleaner as described in this instruction manual. Any other form of use does not constitute an intended use and can result in material damage or even personal injury.
The manufacturer or dealer accepts no liability for damage or injury resulting from improper use or use for other than the intended purpose.
11 Installation
Assemble the device
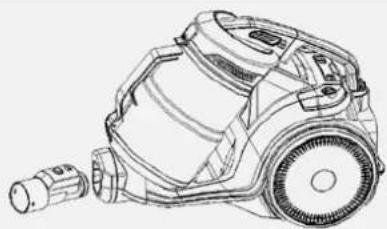
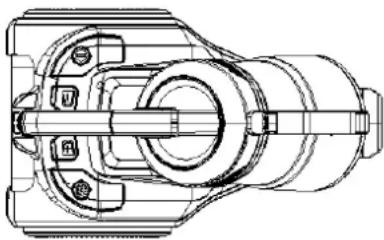
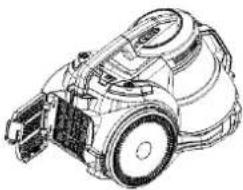
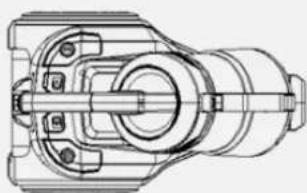
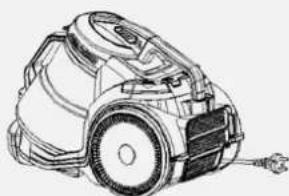
Fig.1: Plug in the hose connection (8) on the vacuum cleaner.
Fig.2: Hold the connector of the hose and insert it into the larger hole of the tube.
Fig.1
natural_image
Line drawing of a mechanical device with a cylindrical component attached (no text or symbols)
natural_image
Simple line drawing of a curved pipe or tube with a small inset detail (no text or symbols)Fig.2
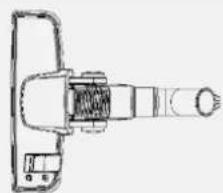
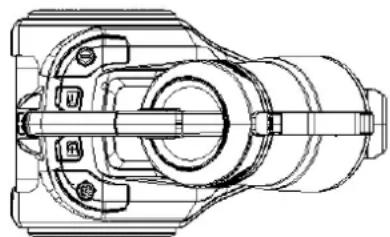
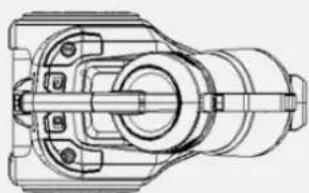
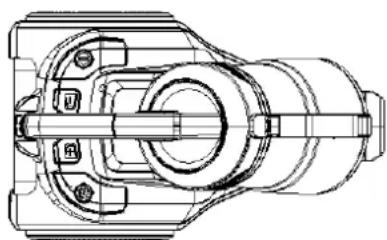
Fig.3: Insert the telescopic tube into the hole of the floor nozzle (10) and turn it.
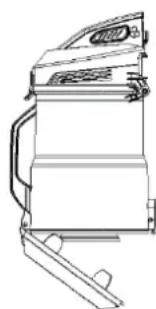
Fig.4: The mains power cable can be extended as far as the yellow marking.
Starting the appliance
Fig.5: Insert the plug into the socket, then press the ON/OFF button (5).
Ending vacuum cleaning
First switch off the appliance, then disconnect the plug from the socket and press the cable rewind button (3) until the cable is completely wound up.
CAUTION
When winding up the cable. Do not throw the power plug against persons, body parts, animals or objects when automatically rewinding the cable.
Fig.3
natural_image
Technical line drawing of a mechanical component with no visible text or symbols
natural_image
Line drawing of a vacuum cleaner with attached electrical plug (no text or symbols)Fig.4

natural_image
Technical line drawing of a mechanical assembly (no text or symbols visible)Fig.5
Using the accessories
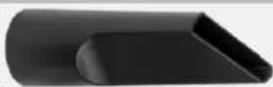
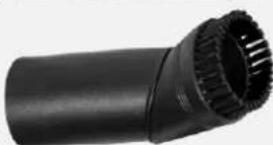
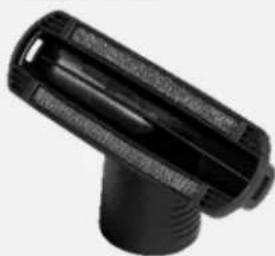
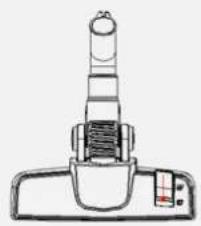
Fig.10: The crevice nozzle (12) is suitable for crevices and corners.
Fig.11: The floor nozzle (13) is for cleaning a sofa, curtains and dust on ornaments.
The parquet nozzle is particularly suitable for parquet, laminate and smooth floors.
Fig.10
natural_image
Black rubber hose component with textured grip (no text or symbols visible)Fig.11
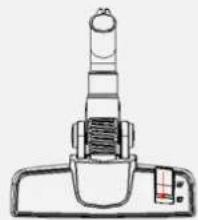
Fig.12: Step on the floor nozzle pedal (10) to release the bristles and clean the floor.
Fig.13: Press the pedal of the floor nozzle (10) again to use the bristles and clean the carpet.
Fig.12
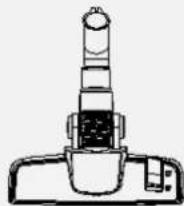
Fig.13
natural_image
Line drawing of a vacuum cleaner with a cylindrical top and base (no text or symbols)Fig.14: The upholstery nozzle (14) is suitable for vacuuming upholstered furniture
natural_image
Close-up of a black cylindrical mechanical component with threaded base (no visible text or symbols)Fig.14
12 Using for the first time
Faulty electrical installation or excessive mains voltage can result in electric shock.

WARNING!

ELECTRIC SHOCK
HAZARD!
- Connect the vacuum cleaner to 230 volts AC only. The socket should be protected with a 16-amp fuse. If other appliances with a high connected load are connected to the same circuit, the fuse may blow when the vacuum cleaner is switched on. This can be avoided if the lowest suction power (min.) is set before switching on and only increased to the desired power when the motor is running.
- Only connect the vacuum cleaner to an easily accessible socket so that it can be quickly disconnected from the power supply in the event of a malfunction.
- Do not operate the vacuum cleaner if it is visibly damaged or if the mains power cable or the mains plug is defective.
- If the mains power cable of the vacuum cleaner is damaged, it must be replaced by the manufacturer or its After Sales Service in order to avoid hazards.
-
Do not operate the vacuum cleaner with an external timer or separate telecontrol system.
-
Do not open the housing, leave the repair to professionals. Contact a specialist workshop for this purpose. Liability and warranty claims are excluded in the event of repairs carried out independently, improper connection or incorrect operation.
- When repairing, only use parts that correspond to the original device data. Inside this vacuum cleaner there are electrical and mechanical parts that are essential to protect against sources of danger.
- Do not touch the mains plug with wet hands.
- Do not pull the mains plug out of the socket by the mains power cable; always grasp the mains plug.
- Do not use the mains power cable as a carrying handle.
- Keep the vacuum cleaner, the mains plug and the mains power cable away from open flames and hot surfaces.
- Lay the mains power cable so that it does not become a tripping hazard.
- Do not kink the mains power cable or place it over sharp edges. Do not pinching, e.g. under doors.
- Avoid frequently running over the mains power cable with the vacuum cleaner.
- When not using the vacuum cleaner, changing accessories, cleaning the vacuum cleaner or when a malfunction occurs, turn off the vacuum cleaner and disconnect the mains plug from the socket.

WARNING!
Hazards for children and persons with reduced physical, sensory, or mental abilities (e.g., partially disabled, elderly persons with reduced physical and mental abilities) or lack of experience and knowledge (e.g. older children).

CAUTION!
Risk of injury! Improper use of the vacuum cleaner can lead to injuries.
- Do not vacuum people or animals.
- When vacuuming with a suction nozzle, do not come close to the head or hair.
- Risk of crushing: The vacuum cleaner contains moving parts. Take care of fingers and hands during assembly, daily use and cleaning.
NOTE!
RISK OF DAMAGE!
Improper use of the vacuum cleaner can result in damage to the appliance.
- Place the vacuum cleaner on an easily accessible, level, dry, heat-resistant and sufficiently stable work surface. Do not place the vacuum cleaner at the side or on the edge of a work surface.
- Do not allow the mains power cable to come into contact with hot parts.
- Do not expose the vacuum cleaner to high temperature (heating, etc.) or weather conditions (rain, etc.).
- Do not use the vacuum cleaner if the plastic parts of the vacuum cleaner are cracked or deformed.
- Do not use the vacuum cleaner without a HEPA filter.
- Do not vacuum burning or glowing objects such as cigarettes or apparently extinguished ashes.
- Do not vacuum liquids or damp dirt. Allow wet cleaned or shampooed carpets to dry before vacuuming.
- Do not vacuum up toner dust from printers or copiers. The filter
system cannot completely filter out the toner dust. The toner dust could get back into the chamber via the fan.
- Do not absorb highly flammable or explosive substances or gases.
- Do not vacuum sharp-edged, heavy or hard objects. The vacuum cleaner could get blocked.
Assembling the vacuum cleaner
NOTE!
Depending on what you want to vacuum, there are 2 attachments to choose from: - For a dusty carpet or hard floor, use the floor nozzle (10). The foot button can be used to lower or raise the integrated bristle ring for carpets.
- For corners that are difficult to reach, we recommend the crevice nozzle (12).
13 Operating instructions
NOTE!
Only use the appliance when all parts are completely and correctly assembled. If in doubt, have it checked and assembled by a qualified professional. Before each use, make sure that the appliance is in good condition and that the mains power cable is not damaged. If the cable is damaged, you must have it replaced by the manufacturer or the service centre or by someone with a similar qualification to prevent any hazards.
- Place the vacuum cleaner on the floor.
- Insert the suction nozzle of the flexible hose (9) into the hose connection (8) of the vacuum cleaner housing. The hose must click in.
- Push the handle of the hose onto the telescopic tube (11). The hose must click in.
- Attach the desired suction nozzle to the other end of the telescopic tube.
- Use the floor nozzle (10) to clean dusty carpets or hard floors.
- For corners that are difficult to reach, use the crevice nozzle (12).
- Carpet floor nozzle (10): step on the switch to adjust the position of the brush to "". This position is suitable for parquet and soft surfaces such as floors or tiles. For carpets or mats, step again on the brush"—".
- The crevice nozzle (12) is suitable for corners or hard to reach places.
- Unwind the cable completely.
- Insert the plug into the socket, press the ON/OFF button (5).
- When using the appliance, make sure that the flexible hose is not blocked, twisted or trapped.
- To switch off the vacuum cleaner, press the ON/OFF button (5), disconnect the plug from the socket and wind up the cord using the cable rewinder (3).
Easily carry the floor vacuum cleaner by the handle
14 Cleaning and
maintenance
Cleaning the dust container
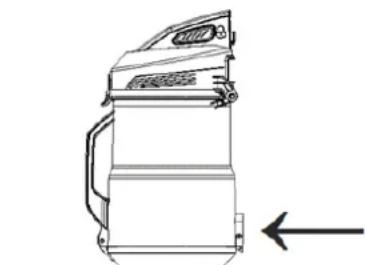
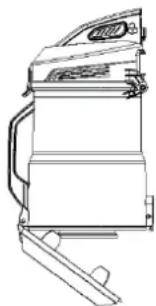
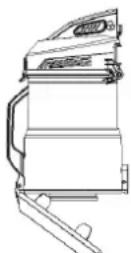
Fig.6: Hold the dust container (7) and carrying handle (2) and press the release button (1).
Fig.7: Remove the dust container (7) from the machine.

natural_image
Technical line drawing of a vacuum cleaner and its internal components (no text or symbols)Fig.6 Fig.7
natural_image
Technical line drawing of a mechanical assembly with no visible text or symbolsFig.8: Hold the dust container (7) over a rubbish bin, press the release button of the dust container to open the bottom of the dust collector. Dirt and dust fall into the trash can on its own.
Fig.9: Close the dust container (7) after cleaning.
natural_image
Technical line drawing of a mechanical device with no visible text or symbolsFig.8
natural_image
Line drawing of a mechanical device with no visible text or symbolsFig.9
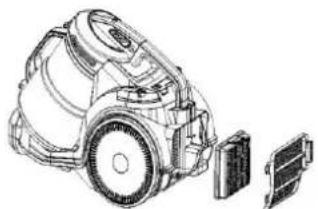
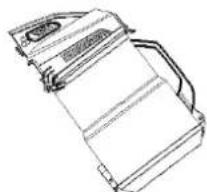
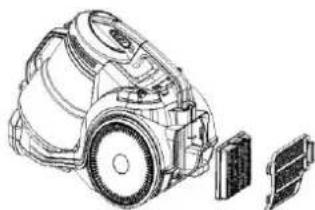
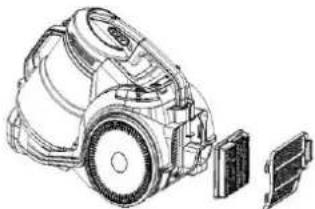
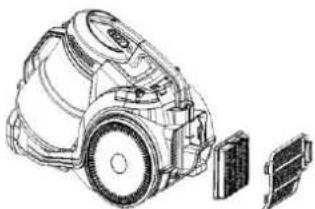
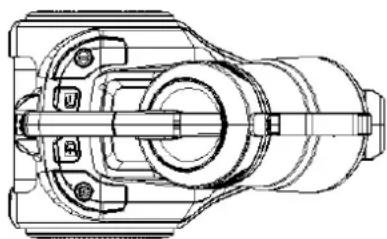
Replacing the HEPA filter
The HEPA filter is used to filter out viruses, respirable dusts, dust mite eggs and excretions, pollen, smoke particles, asbestos, bacteria, various toxic dusts and aerosols from the air.
Fig.14: Press the outlet latch to open the outlet plate.
Fig.15: Remove the outlet HEPA filter.
natural_image
Line drawing of a vacuum cleaner device (no text or symbols)Fig.14

natural_image
Technical line drawing of a mechanical device with exploded view and internal components (no text or symbols)Fig.15
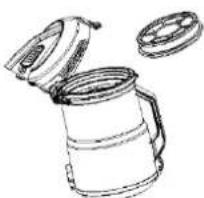
Fig.16: Open the cover to be able to remove the dust filter.
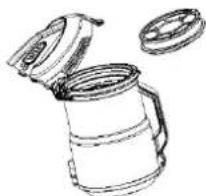
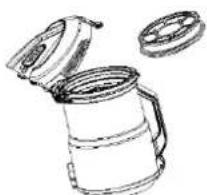
Fig.17: Remove the dust filter.
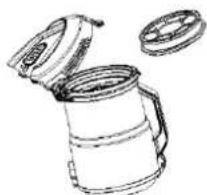
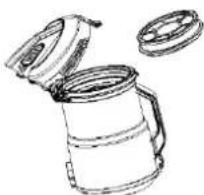
Fig.18: Remove the dust chamber and tap it out to remove the dust. If necessary, you can rinse it under a tap.
natural_image
Line drawing of a mechanical device with no visible text or symbolsFig.16
natural_image
Line drawing of a thermospan with lid and spout (no text or symbols)Fig.17
natural_image
Architectural illustration of a classical column capital with ribbed details (no text or symbols)Fig.18
-
Clean the cover, assembly, outlet sponge and dust chamber in water without detergent and dry before use.
-
Attach the dust unit to the chamber cover and ensure that three protruding cubes are in the grooves of the dust container.
-
Turn the dust unit in the direction of the marking on the chamber cover.
-
Mount the chamber cover assembly and the dust chamber externally according to the marking.
Insert the dust chamber assembly into the machine. And in this process, you should first put the chamber in the correct position, and then press the handle of the dust chamber. If there is a cackling sound, it means that the process was successful.
NOTE!
DANGER DUE TO
The HEPA filter must be replaced every 6 months.
Motor protection filters must be replaced every 12 months. A replacement filter set consisting of:
1x HEPA filter,
1x dust filter
is available at www.ggv-service.de

CAUTION
RISK OF INJURY!
Improper use of the vacuum cleaner can lead to injuries.
Switch off the vacuum cleaner and disconnect the mains plug from the socket before any cleaning or maintenance.
NOTE!
Switch off and unplug the appliance before cleaning. For optimal use of the appliance and to ensure a longer service life, regularly empty the container and clean its filters.
ATTENTION
- Do not immerse the motor unit, plug or mains power cable in water or any other liquid (clean only with a dry cloth).
- Regularly clean the brushes and nozzles.
- Use water and a sponge lightly soaked in a liquid detergent, then rinse thoroughly and dry. Do not use steel wool or abrasive products.
- If the appliance is not used for a long period of time, it must be covered and placed in a dry place, in an upright position. The appliance can be carried by the handle on the motor unit. It is recommended to put it back in the original packaging to protect it from dust and moisture.
- If the appliance is not going to be used, take it out of service, disconnect the mains power cable from the power supply and secure all parts that pose a risk to playing children.
15 General warranty terms
As the purchaser of a Gutfels appliance, you are entitled to the statutory warranty from the purchase contract with your dealer. In addition, we grant you a warranty on the following terms:
Warranty period
The warranty period is 24 months from the date of purchase (proof of purchase must be presented). During the first 6 months, defects in the appliance are remedied free of charge on condition that the appliance is accessible for repairs without any great effort. During the following 18 months, the buyer is obliged to prove that the defect already existed at the time of delivery.
For commercial use
(e.g. in hotels, canteens) or joint use by several households, the warranty period is 12 months from the date of purchase (proof of purchase must be presented). During the first 6 months, defects in the appliance are remedied free of charge on condition that the appliance is accessible for repairs without any great effort.
During the following 6 months, the buyer is obliged to prove that the defect already existed at the time of delivery. The claim under warranty does not prolong the warranty period for either the appliance or for newly installed parts.
Scope of the defect remedy
Within the periods indicated, we will remedy all defects in the appliance that are demonstrably attributable to poor workmanship or material flaws. Replaced parts become our property.
The warranty does not cover:
Normal wear and tear, deliberate or negligent damage, damage resulting from a failure to observe the operating instructions, improper installation and set-up or connection to the wrong mains power supply, damage caused by chemical or electrothermal effects or other abnormal environmental conditions, glass, paintwork or enamel damage and possible differences in colour as well as defective bulbs. Defects in the appliance resulting from transport damage are also not covered. We are also not obliged to perform defect remedies, if – without our express written authorisation – work is carried out on the Gutfels appliance by unauthorised persons or third-party parts have been used. This limitation shall not apply to faultless work carried out by a qualified person using our original parts to adapt the appliance to the technical safety regulations of another EU member state.
Scope
Our warranty applies to appliances purchased and in operation in the Federal Republic of Germany or Austria. In the case of complaints about defective appliances, the sender's and recipient's addresses must be in the Federal Republic of Germany or Austria. For appliances purchased and operated in other European countries, the warranty conditions of the seller apply.
For repairs outside the warranty period:
- If an appliance is repaired, the repair invoices are payable immediately without deduction.
16 Troubleshooting
| Fault | Possible cause | Remedy |
| The vacuum cleaner does not work. | The appliance is not switched on | Switch on the appliance. |
| The electrical plug is faulty | Contact a qualified technician. | |
| The appliance is not plugged into the plug socket | Plug the appliance into the plug socket. | |
| If the vacuum cleaner has no suction power. | An accessory: Hose or pipe, nozzles or brushes are blocked | Remove what is causing the blockage. |
| The HEPA filter is soaked/dirty | Clean the filter. | |
| If the vacuum cleaner does not work as it should or if there are noises and/or whistling sounds. | An accessory: Hose or pipe, nozzles or brushes are blocked | Remove what is causing the blockage. |
| The dust container is full | Empty and clean the dust container. | |
| The cover of the container is not positioned correctly | Close the cover properly. | |
| The dust container is not positioned correctly | Position the dust container correctly. | |
| The manual air flow regulator is open | Close the manual air flow regulator. | |
| If the cable does not wind up completely. | The cable winds up slowly | Unwind the cable and press the button again. If in doubt, consult a qualified expert. |
Cher Client,
natural_image
Line drawing of a vacuum cleaner with attached cylindrical component (no text or symbols)
natural_image
Line drawing of a curved pipe or tube with a small inset detail (no text or symbols)III. 2
natural_image
Technical line drawing of a mechanical component with no visible text or symbols
natural_image
Line drawing of a vacuum cleaner (no text or symbols)III. 4
natural_image
Technical line drawing of a mechanical assembly (no text or symbols visible)III. 5
natural_image
Black cylindrical object with a textured, mesh-like protrusion (no visible text or symbols)natural_image
Line drawing of a handheld vacuum cleaner with a cylindrical top and base (no text or symbols)natural_image
Black plastic mechanical component with threaded base and cylindrical body (no text or symbols visible)natural_image
Technical line drawing of a vacuum cleaner with a cylindrical lid and wheels (no text or symbols)III. 6
natural_image
Technical line drawing of a mechanical assembly with no visible text or symbolsIII. 7
natural_image
Technical line drawing of a mechanical device with no visible text or symbolsIII. 8
natural_image
Line drawing of a mechanical device with no visible text or symbolsIll. 9
natural_image
Line drawing of a vacuum cleaner (no text or symbols)III. 14
natural_image
Technical line drawing of a vacuum cleaner with internal components and external housing (no text or symbols)III. 15
natural_image
Line drawing of a mechanical device with handle and internal components (no text or symbols)Ill. 16
natural_image
Line drawing of a kettle with open lid and lid removed (no text or symbols)III. 17
natural_image
Architectural sketch of a column capital with decorative patterns (no text or symbols)III. 18
natural_image
Line drawing of a vacuum cleaner with attached pipe fitting (no text or symbols)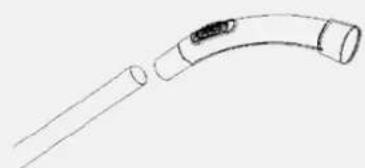
natural_image
Simple line drawing of a curved tool or device with a handle and a small inset showing a labeled component (no text or symbols)Afb. 2
natural_image
Technical line drawing of a mechanical component with no visible text or symbols
natural_image
Line drawing of a vacuum cleaner with attached electrical plug (no text or symbols)Afb. 4

natural_image
Technical line drawing of a mechanical assembly (no text or symbols)Afb. 5
natural_image
Black rubber hose with mesh texture (no text or symbols visible)natural_image
Line drawing of a vacuum cleaner with a cylindrical top and attached base (no text or symbols)natural_image
Black plastic mechanical component with threaded base and cylindrical body (no text or symbols visible)natural_image
Technical line drawing of a vacuum cleaner and its internal components (no text or symbols)Afb. 6

natural_image
Technical line drawing of a mechanical assembly (no text or symbols)Afb. 7
natural_image
Technical line drawing of a mechanical device with an arrow indicating direction (no text or symbols)Afb. 8
Afb. 9
HEPA-filter vervangen
natural_image
Technical line drawing of a vacuum cleaner (no text or symbols)Afb. 14
natural_image
Line drawing of a vacuum cleaner with internal components and housing (no text or symbols)Afb. 15
natural_image
Line drawing of a mechanical device with handle and internal components (no text or symbols)Afb. 16
natural_image
Line drawing of a thermospan with lid open and lid partially visible (no text or symbols)Afb. 17
natural_image
Architectural sketch of a building facade with diagonal bracing (no text or symbols)Afb. 18
natural_image
Line drawing of a vacuum cleaner with attached pipe fitting (no text or symbols)Fig.1

natural_image
Simple line drawing of a curved pipe or tube with a small inset detail (no text or symbols)natural_image
Technical line drawing of a mechanical component with no visible text or symbolsFig.3
natural_image
Line drawing of a vacuum cleaner with attached electrical plug (no text or symbols)Fig.4
natural_image
Technical line drawing of a mechanical assembly (no text or symbols visible)Fig.5
natural_image
Black rubber hose component with textured grip (no text or symbols visible)natural_image
Line drawing of a mechanical device with a cylindrical component and base mount (no text or symbols)natural_image
Close-up of a black plastic mechanical component with threaded base and cylindrical body (no visible text or symbols)Fig.14
natural_image
Technical line drawing of a vacuum cleaner with two views (top and side), no text or symbols present.Fig.6
natural_image
Technical line drawing of a mechanical assembly with no visible text or symbolsFig.7
natural_image
Technical line drawing of a mechanical device with no visible text or symbolsFig.8
natural_image
Line drawing of a mechanical device with no visible text or symbolsFig.9
natural_image
Line drawing of a vacuum cleaner with attached circuit board (no text or symbols)Fig.14
natural_image
Technical line drawing of a mechanical device with exploded view (no text or symbols)Fig.15
natural_image
Line drawing of a mechanical device with handle and mounting bracket (no text or symbols)Fig.16
natural_image
Line drawing of a kettle with open lid and lid, showing internal structure (no text or symbols)Fig.17

natural_image
Architectural sketch of a column with diagonal bracing and vertical panels (no text or symbols)Fig.18
natural_image
Line drawing of a vacuum cleaner with attached pipe fitting (no text or symbols)Fig.1

natural_image
Simple line drawing of a curved pipe or tube with a small inset detail (no text or symbols)natural_image
Technical line drawing of a mechanical component with no visible text or symbols
natural_image
Line drawing of a vacuum cleaner with attached electrical plug (no text or symbols)Fig.4

natural_image
Technical line drawing of a mechanical assembly (no text or symbols visible)Fig.5
natural_image
Black rubber hose component with textured grip (no text or symbols visible)natural_image
Simple line drawing of a mechanical component with no text or symbolsFig.13
natural_image
Line drawing of a mechanical component with no visible text or symbolsnatural_image
Close-up of a black plastic mechanical component with threaded base (no visible text or symbols)Fig.14
natural_image
Technical line drawing of a mechanical device with two views (top and side), no text or symbols present.Fig.6
natural_image
Technical line drawing of a mechanical assembly (no text or symbols)Fig.7
natural_image
Line drawing of a vacuum cleaner device (no text or symbols)Fig.14

natural_image
Technical line drawing of a mechanical device with exploded view and internal components (no text or symbols)Fig.15
natural_image
Line drawing of a mechanical component or housing (no text or symbols)Fig.16

natural_image
Line drawing of a thermospan with lid and spout (no text or symbols)Fig.17
natural_image
Architectural illustration of a column capital with decorative patterns (no text or symbols)Fig.18
GGV HANDELGES. MBH & CO. KG
AUGUST-THYSSEN-STR.8
D-41564 KAARST
GERMANY
CLEAN3010_G1-0_MULTI_2021-08