KM F3 THERMO - Coffee machine STEBA - Free user manual and instructions
Find the device manual for free KM F3 THERMO STEBA in PDF.
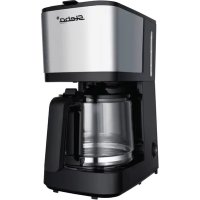
| Product type | Filter coffee machine |
| Brand | Steba |
| Model | KM F3 THERMO |
| Carafe | Thermal carafe with airtight lid |
| Permanent filter | Stainless steel included |
| Display | LCD screen |
| Delayed programming | Yes, up to 24 hours in advance |
| Automatic shut-off | Yes, after brewing |
| Keep warm | Yes, via thermal carafe |
| Anti-drip system | Yes |
| Control panel | Buttons ON/OFF, Prog, Hour, Min |
| Safety | Hot surface - risk of burns; Do not immerse; Do not use without water |
| Maintenance | Clean removable parts with soapy solution; Descaling regularly with vinegar or descaling agent |
| Cleaning the housing | With a damp cloth |
| Package contents | Machine, thermal carafe, permanent filter, instruction manual |
Frequently Asked Questions - KM F3 THERMO STEBA
User questions about KM F3 THERMO STEBA
0 question about this device. Answer the ones you know or ask your own.
Ask a new question about this device
Download the instructions for your Coffee machine in PDF format for free! Find your manual KM F3 THERMO - STEBA and take your electronic device back in hand. On this page are published all the documents necessary for the use of your device. KM F3 THERMO by STEBA.
USER MANUAL KM F3 THERMO STEBA
natural_image
Steba coffee maker with digital display and control buttons (no visible text or symbols on device body)220-240 V\~; 50/60 Hz; 900
Filterkaffeemaschine KM F3 THERMO
Instructions for use 12
Mode d'emploi 22
text_image
Technical diagram of a kitchen blender with labeled parts including a kettle, filter, and control panel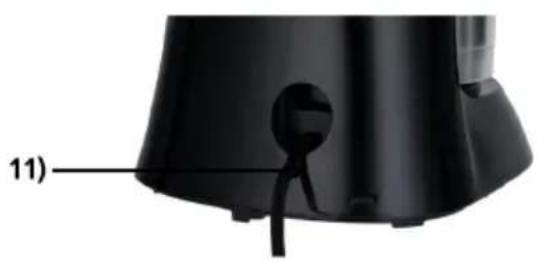
natural_image
Close-up of a black electronic device with a labeled component (11), no visible text or symbols on the body itself.
text_image
Hour Min 15:07 ON/OFF Run PROG. Auto 5)
natural_image
Black bucket with a handle, labeled with number 12 pointing to the side (no text or symbols on the bucket itself)text_image
Technical diagram of a kitchen blender with labeled parts including a kettle, filter, and control panel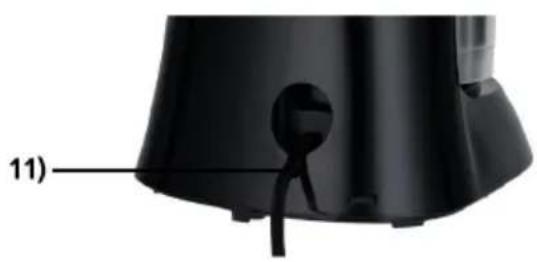
natural_image
Close-up of a black appliance component with a labeled part (11), showing no visible text or symbols.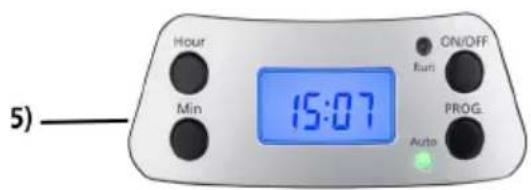
text_image
Hour Min ON/OFF Runi PROG Auto 5)
natural_image
Black bucket with beige base and handle, labeled with number 12 (no text or symbols on the bucket itself)1) Filter holder
2) Jug lid
3) Jug handle
4) Thermos jug
5) Panel
6) Cover
7) Water outlet
8) Water tank
9) Water gauge
10) Base
11) Backside with cable storage
12) Permanent stainless steel filter
Generally
This appliance is for private and indoor use only and must not be used commercially. Please read the instruction manual carefully and keep it at a safe place. When the appliance is given to another person the instruction manual should be passed to that person, too. Only use the appliance as described in the instruction manual and pay attention to the safety information. No liability for damages or accidents will be accepted, which are caused by not paying attention to the instruction manual. Remove all packaging and sticker (except the rating label). Wash up all parts carefully (see cleaning).
Safety information
Hot surface! There is danger of burning when touching the surface during operation.
- Connect and operate the appliance in accordance with the specifications shown on the rating label.
- Do not use if the plug cord is damaged. Verify before every use.
- Do not plug with wet hands.
- Connect the power plug to a properly installed and easily accessible socket only.
- To unplug the power plug, always pull the plug – not the cable.
- Plug off the appliance after each use or in case of failure.
- Do not pull at the cord. Don’t pull it over edges and don’t bend it too much.
- Keep the cord away from hot parts.
The appliance can be used by children aged 8 and above and persons with limited physical, sensory or mental capabilities or lack of experience/knowledge, provided that are supervised or have been provided with instruction in the safe use of the appliance and have understood the resulting dangers. Children must not use the packaging as a toy. Cleaning and user maintenance must not be carried out by children unless they are 8 years or older and are supervised.
- Children under the age of 8 must be kept away from the appliance and the connecting cable.
- Children should be supervised to ensure that they do not play with the appliance or packaging material (e.g. Plastic Bags).
-
The appliance must not be operated using a timer or a separate remote system!
-
Never leave the appliance unattended when in use.
- Do not leave the appliance outdoors or in a damp area.

Never place anything on top of the device and do not cover the ventilation slots.
- Never immerse the unit in water.
- Leave a space of about 10cm around the device.
- Never use the device after a malfunction, e.g. if it felt down or has been damaged in any other manner.
- The manufacturer is not liable for damage which is occurring due to the usage of the appliance in a different way as described or a mistake in the handling has been made.
- To prevent injury, repairs such as replacing a damaged cord, should only be carried out by a customer service. Only original spare parts have to be used.
- The device gets hot, only transport after it cooled down. Do not relocate the device during operation.
- Only use the device as described in this manual.
- You must not put any materials such as paper, cardboard, plastic etc. into the appliance.
- This appliance is intended to be used in household and similar applications such as:
o staff kitchen areas in shops, offices and others working environments
o by clients in hotels, motels and other residential type environments
o bed and breakfast type environments.
- Before initial use: clean all parts carefully and leave to dry. Heat up the device with water for about 2 – 3 times to eliminate the smell of newness.

Attention! Device gets hot. Danger of burns!
During operation, the temperature of the touchable surfaces can be very hot! Do not place the appliance on a sensitive surface (e.g. painted furniture) and keep a distance of at least 70cm to burnable materials.

Attention! Danger of burns! Never open the lid during the brewing process. During operation steam emerge. Keep hands and face away.
Attention! Danger of burns! Do not fill the device with water while it is still hot! Allow the device to cool down for 5 minutes after each use.
· If an extension cable is used, it has to have a cross-section of
1,5mm ^2 . A cable drum must always be unwound.
- If a GS-tested 16 A multi-pin extension is used, it may not be charged with more than 3680 watts due to fire hazard.
- Make sure that children do not tease the cable or that a trip hazard occurs.
- The device must always be disconnected from the power supply if it is not supervised and before assembling, disassembling or cleaning.
- To protect the electronics, never operate the device without water.
- Make sure that the jug is correctly inserted in the device during the brewing process and that the lid is properly closed.
- Only use the jug with this machine. Never use the jug for heating on stoves or other heat sources.
- Do not operate the device in a cupboard.
- Hygiene: Please always clean the device to avoid bacteria and mold formation.
Cleaning
Attention! Pull the plug before cleaning and allow the device to cool down.
- Never immerse the unit into water.
- Clean all removable parts in a mild soap solution, rinse well and
allow to dry.
- Clean the outside of the housing with a damp cloth.
- Drops of water can collect on the drip stop of the filter holder and drip onto the base. These can simply be wiped away after each use.
Descaling
- To keep the coffee machine in good technical condition, clean it regularly. Depending on the region and frequency of use, mineral deposits can form. Devices that are not descaled properly or too little can be damaged, no longer work properly and require more electricity.
- The following points can be an indication that the machine needs to be descaled:
o The appliance no longer brews coffee properly, it takes an unusually long time.
o Water remains in the water tank.
o Unusual noises during coffee preparation.
o Increased steam emission when making coffee.
o Significant limescale deposits in the machine.
- If one or more points occur, please descale the machine as follows:
- Fill the water tank with water and softening agent or vinegar (please follow the descaler manufacturer's instructions) to the maximum "Max".
- Insert the jug correctly.
- Make sure the permanent filter or a paper filter is properly seated in the filter holder.
- Switch on the device with the "ON/OFF" button and wait for the machine to start the brewing process.
- Turn off the machine after about one cup.
- Allow the softening agent to take effect for approx. 15 minutes, then repeat this process with steps 3-5 one more time.
-
Now switch the device back on and let the rest of the solution run through completely.
-
Remove the descaling solution from the vacuum jug and clean the machine by brewing at least 3 more times with clean water without coffee powder.
- Then clean the permanent filter of any solid residue or dispose of the paper filter afterwards.
Workplace
Important:
Never place this device on or next to hot surfaces (e.g. hot stoves). Only use it on a even, stable and a heat resisting surface. It is important that no inflammable items are near to the device. Do not place the device on the edge of the table so that it cannot be touched by children or fall down when touched.
Thermo Jug
This coffee machine is equipped with a thermal jug. This ensures that the coffee stays warm longer.
To open the jug, gently turn the lid counter-clockwise so that the arrow points to 📄. Lift off the lid. Please note that although the outside of the jug is cold, there may still be hot liquid inside.
To close the jug, put on the lid with the arrow to ☐ and then carefully turn the lid clockwise to ☐. Please make sure that the lid lies flat when you close it, otherwise it can tilt. Never lay the jug down or turn it upside down, as some liquid can always escape, even when the lid is completely closed.
To remove liquids from the jug when the lid is closed, press the lever on the lid and tilt the vacuum jug carefully. This may only be used when the lid is securely closed.
Getting started
- On the back of the device there is a cable compartment for space-saving storage. Before operation, the cable must be pulled out completely of the cable compartment.
- Connect the device.
Making coffee
- Open the top cover and fill the water tank with drinking water. The fill level must not exceed "MAX".
- Make sure that the filter holder is inserted correctly, otherwise the lid will not close properly. Then insert the paper filter (size 4) or permanent filter into the filter holder.
- Add the ground coffee into the filter. (1 to 1.5 teaspoons of fine to medium ground coffee per 125ml cup, but this can be varied to taste)
- Centre the jug on the base. Make sure that the jug is completely and correctly closed.
- Press the "ON/OFF" button once. The "Run" indicator lamp lights up red. "12:00" will appear on the LCD display and the device will start to work. During the brewing process, the other buttons "Min", "Hour" and "Prog" are disabled.
- The brewing process can be interrupted at any time by pressing the "ON/OFF" button. The "Run" control lamp goes out, indicating that the device is no longer working. The coffee machine continues the brewing process as soon as "ON/OFF" is pressed again.
- The coffee machine will switch off automatically and go into stand-by. The coffee is kept warm in the vacuum jug.
- Remove the coffee pot as soon as the machine is finished. A little less coffee is always extracted than water was put into the tank, since part of the water is needed to moisten the coffee powder.
- Always switch off and unplug the coffee maker when not in use.
Attention: The coffee is very hot after the brewing process. Danger of scalding! The ground coffee can also be very hot after the brewing process. Please note when removing.
Tip: Remove the coffee grounds from the machine after it has cooled down so that the machine remains hygienic. The coffee grounds can be put in the organic waste.
Making coffee with time preselection
This function is particularly suitable if you don't want to enjoy the coffee immediately but at a later time.
To use the automatic start function, first carry out steps 1 to 5 as described above.
Then please take the following steps:
- Press the "Prog" button. The word "Clock" will appear in the upper right corner of the LCD display.
- Press the Hour and Min buttons until the current time is set.
Note: The device is equipped with a 24-hour display and can be programmed up to 24 hours in advance.
-
Press the "Prog" button again and the word "Timer" will appear in the upper left corner of the LCD.
-
Press the Hour and Min buttons until the desired start time is set.
-
Press the "Prog" button again. The "Auto" indicator lights up. The current time is shown on the LCD display. The preselected start time can be displayed by pressing the "Prog" button.
Note: The automatic program can be cancelled by pressing the "ON/OFF" button once. If the "ON/OFF" button is pressed twice, the coffee maker will start the brewing process immediately. If the start time is to be changed, the programming should be aborted and the steps from 1-5 mentioned in this section repeated.
Tips for making coffee
- A clean coffee maker is important to make good coffee. Please clean your machine regularly.
• Use only clean, clear, cold water to brew coffee. - Store the ground coffee in a dry, cool place. Make sure that coffee packaging is closed well after opening.
- Only use ground coffee once. Coffee that has been warmed up again loses a lot of its taste.
The faster the coffee is drunk, the better it tastes. - If you rinse the coffee pot with hot water before the brewing process, the coffee stays warm longer.
Correct Disposal of this product
This marking indicates that this product should not be disposed with other household wastes throughout the EU. To prevent possible harm to the environment or human health from uncontrolled waste disposal, recycle it responsibly to promote the sustainable reuse of material resources. To return your used device, please use the return and collection systems or contact the retailer where the product was purchased. They can take this product for environmental safe recycling.
Packaging disposal: Do not throw away the package materials. Please put it in the recycling bin.


Gift box: Paper, should be put to the old paper collection point. Plastic packaging material and foils should be collected in the special collection containers.
Service and Repair:
If the appliance must be repaired, please get in touch with your trader or with the manufacturer:
text_image
Technical diagram of a blender with labeled parts including a funnel, kettle, and control panel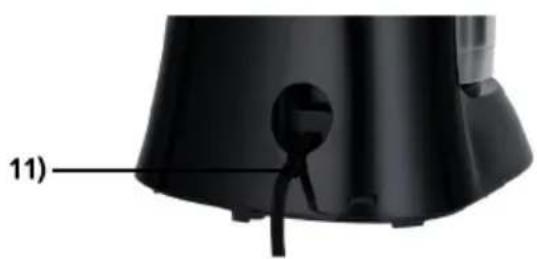
natural_image
Close-up of a black appliance component with a labeled part (11), showing no visible text or symbols.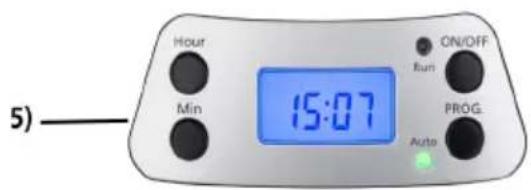
text_image
Hour Min 15:07 ON/OFF Run PROG Auto 5)
natural_image
Black bucket with a handle, labeled with number 12 pointing to the side (no text or symbols on the bucket itself)text_image
Technical diagram of a kitchen blender with labeled parts including a kettle, filter, and control panel
natural_image
Close-up of a black appliance component with a labeled part (11), showing no visible text or symbols.
text_image
5) Hour Min 15:07 ON/OFF Run PROG Auto
natural_image
Black bucket with beige base and handle, labeled with number 12 (no text or symbols on the bucket itself)1) Filter houder
2) Deksel kan
3) Handgreep
4) Thermoskan
5) Display
6) Deksel
7) Water uitloop
8) Water tank
9) Watermater
10) Basis
11) Achterkant met kabelopslag
12) Permanente roestvrijstalen filter
Algemeen
text_image
Technical diagram of a blender with numbered parts for identification and assembly reference.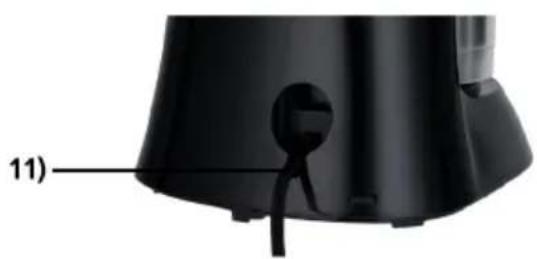
natural_image
Close-up of a black appliance with a labeled component (11), no visible text or symbols on the object itself.
text_image
Hour Min 15:07 ON/OFF Runt PROG Auto 5)
natural_image
Simple illustration of a bucket with a handle and label '12)' (no text or symbols on the bucket itself)1) Filterholder
2) Låg til kande
3) Håndtag
4) Termokande
5) Betjeningspanel med display
6) Topdæksel
7) Dråbefunktion
8) Vandbeholder
9) Vandstandsindikator
10) Sokkel
11) Bagside med kabelskjuler
12) Filter i rustfrit stål
Generelt
o bed and breakfast miljøer