TX295531 - Toys Merax - Free user manual and instructions
Find the device manual for free TX295531 Merax in PDF.
| Product Type | Electric Car for Kids |
| Brand | Merax |
| Model | TX295531 |
| Dimensions (L × W × H) | 100 × 65 × 72 cm |
| Recommended Age | 37 to 95 months (3 to 8 years) |
| Maximum Load Capacity | 30 kg |
| Speed | 3-5 km/h |
| Battery | 12 V, 4.5 Ah (Lead-Acid) |
| Charging Time | 8-10 hours (first charge: 8-12 hours) |
| Usage Time | 1-2 hours per charge |
| Remote Control Power Supply | 2 AAA 1.5 V batteries (not included) |
| Charger Input | 120-240 V AC |
| Main Functions | Forward/Reverse, High/Low Speed, Horn, Front Lights, Power Display, 2.4 GHz Remote Control |
| Assembly | Requires adult; tool included (wrench) |
| Safety | Seat belt, do not use on public roads, do not overload, adult supervision required |
| Maintenance | Charge the battery at least once a month if not in use; clean with a dry cloth; store away from moisture and fire |
| Spare Parts | Use only parts provided by the manufacturer |
Frequently Asked Questions - TX295531 Merax
User questions about TX295531 Merax
0 question about this device. Answer the ones you know or ask your own.
Ask a new question about this device
Download the instructions for your Toys in PDF format for free! Find your manual TX295531 - Merax and take your electronic device back in hand. On this page are published all the documents necessary for the use of your device. TX295531 by Merax.
USER MANUAL TX295531 Merax
natural_image
Two mechanical components: a black metal frame and two coiled springs (no text or symbols visible)
natural_image
Mechanical assembly diagram showing spring and bearing components (no text or symbols)natural_image
Close-up of a white toy vehicle chassis with black tire and mechanical components (no visible text or symbols)natural_image
Close-up of mechanical components with black and white blocks and metal hooks, no visible text or symbolsnatural_image
Two views of a 3D printer or mechanical assembly, showing a hand adjusting a black plastic component and a cable inserted into a white housing (no text or symbols visible)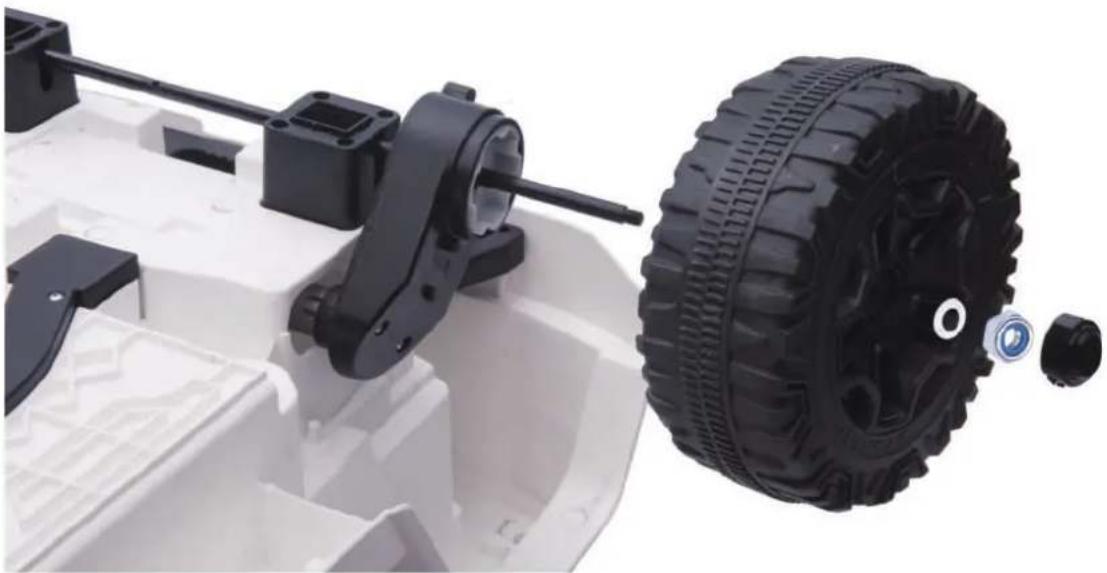
natural_image
Close-up of a white toy vehicle chassis with black mechanical components and a black tire, no visible text or symbols.natural_image
Close-up of a black plastic device with ventilation grilles and a green product box (no visible text or symbols)
natural_image
Close-up of a white off-road vehicle with black plastic frame and visible tire, no text or symbols present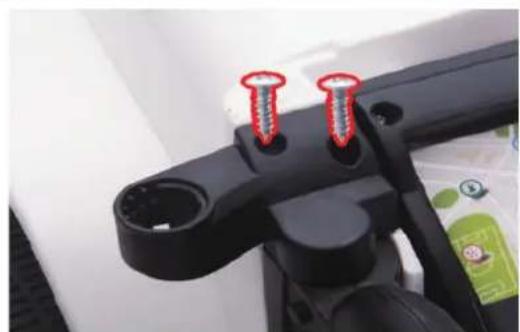
natural_image
Close-up of a black mechanical component with two red screw holes (no text or symbols visible)6. Lenkradbaugruppe
natural_image
Close-up of a white electric vehicle steering wheel and a black robotic car with visible control panels (no text or symbols)natural_image
Two views of a white off-road vehicle showing front and side views with black mesh head brackets (no text or symbols visible)natural_image
Two-panel photo showing hands connecting wires to a battery pack, no visible text or symbols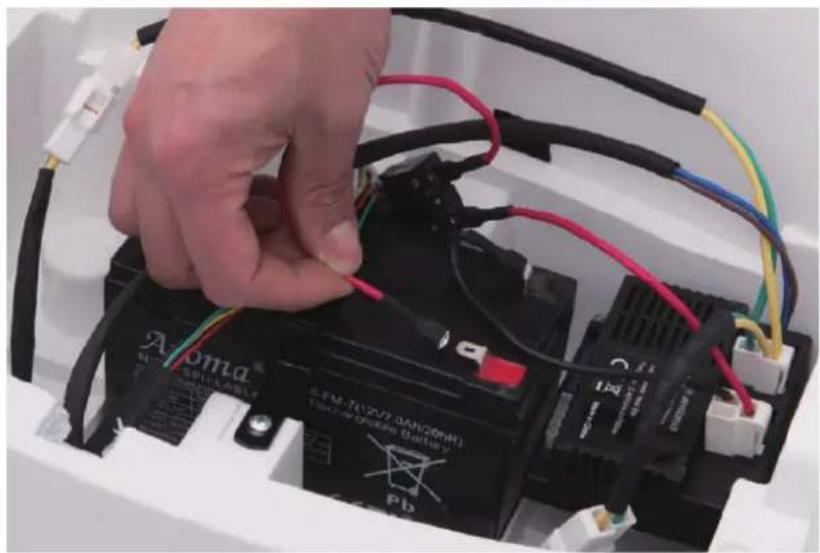
natural_image
Close-up of a hand connecting a black Alma battery to its cable, with visible wiring and components (no text or symbols on the battery itself)9.Sitzmontage
natural_image
Close-up of mechanical components with black plastic parts and a white curved surface (no visible text or symbols)
natural_image
Close-up of a toy car with black seats and a 4x4 display panel (no visible text or symbols)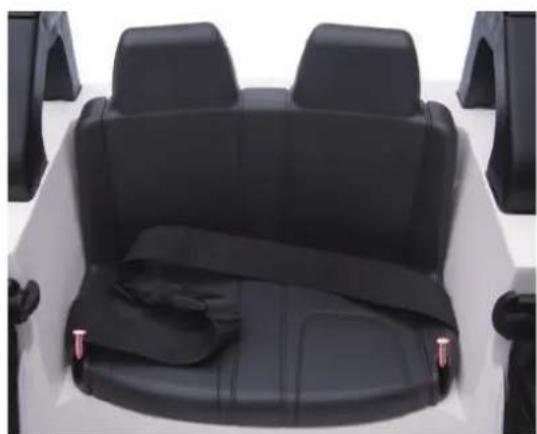
natural_image
Interior view of a white off-road vehicle showing rear seats and seatbelt (no text or symbols visible)Warnungen
text_image
High/Slow LAMP HORN R/D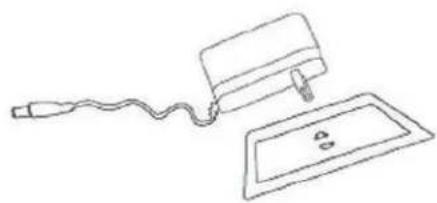
natural_image
Simple line drawing of a medical or laboratory setup with a bulb, tubing, and a rectangular plate (no text or symbols)- 2.4G remote control
● Light control switch - Power display
- Horn sound
- High and low speed
- Forward and backward
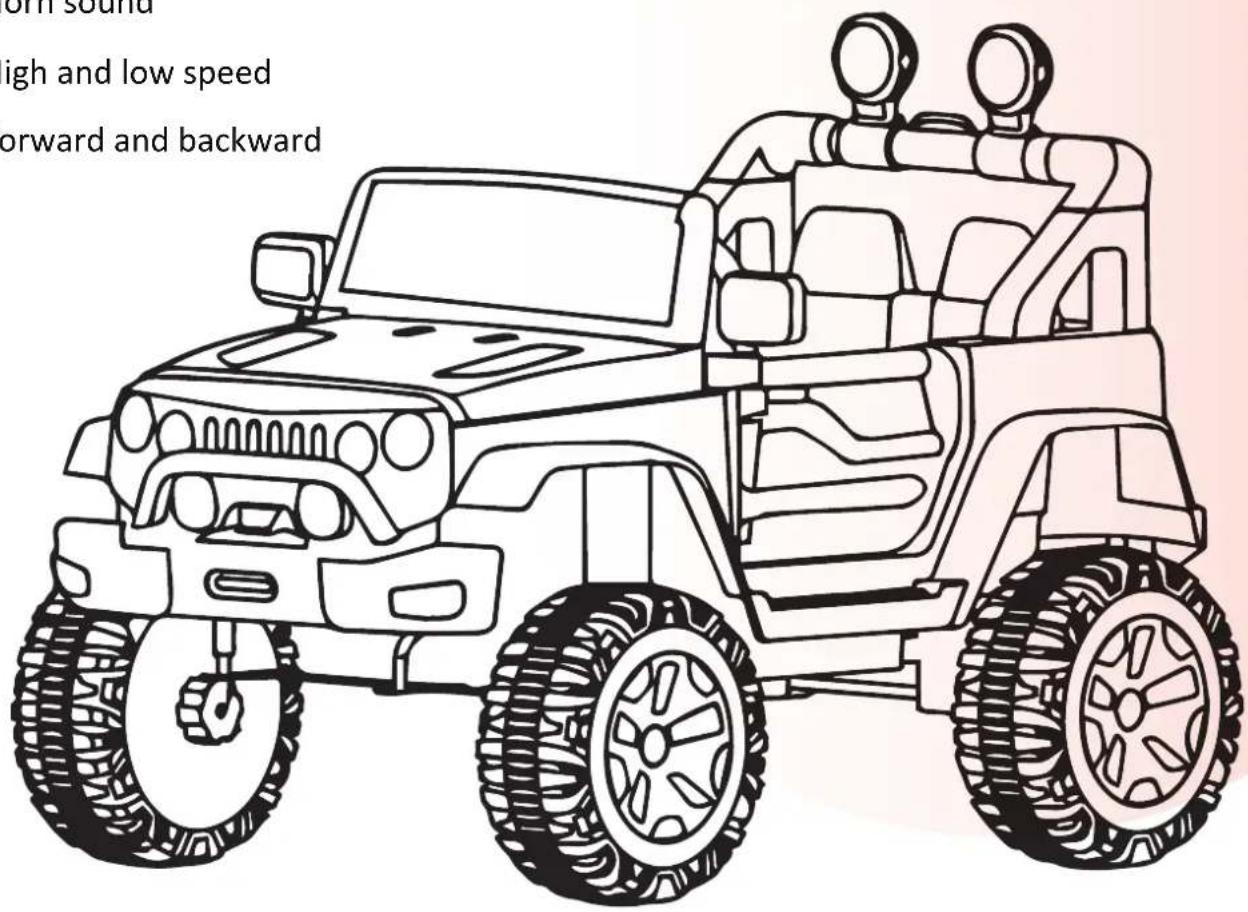
text_image
off sound high and low speed forward and backward
WARNING: The toy is to be assembled by an adult.
In unassembled state contain potentially hazardous sharp points,
sharp edges and small part, so please keep out of baby's reach

Warning: Not to be used in traffic.
Contents
PARTS LIST 16
PRODUCT SPECIFICATIONS 16
CONTROL SYSTEM....17
INSTALLATION ORDER DIAGRAM.... 18
PRECAUTIONS.... 24
CHARGING INSTRUCTION.... 24
MAINTENANCE AND SERVICE 26
Parts List:(Name and Quantity)
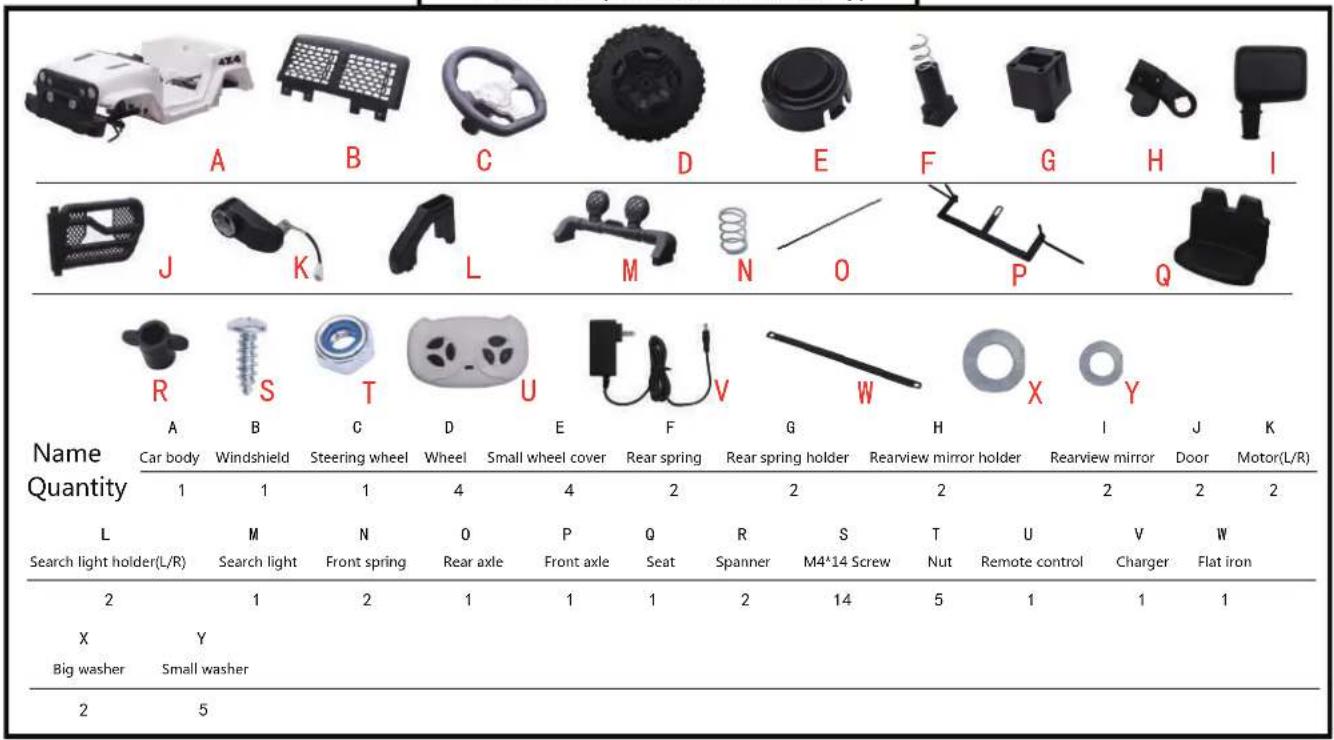

text_image
cifications: Specification 12V4.5AH*1Product Specifications:
| Name | Specification |
| Battery | 12V4.5AH*1 |
| Suitable age | 37-95 months |
| Maximum loading capacity | 30kg |
| Product size | 100×65×72cm |
| Speed | 3-5 km/h |
| Charge/Use time | Charge for 8-1 |
| Charger | Input: 120-240 |
| Remote control | AAA1.5V |
The above product specifications may have some slight errors,
the specific specifications are subject to the actual product.
Function
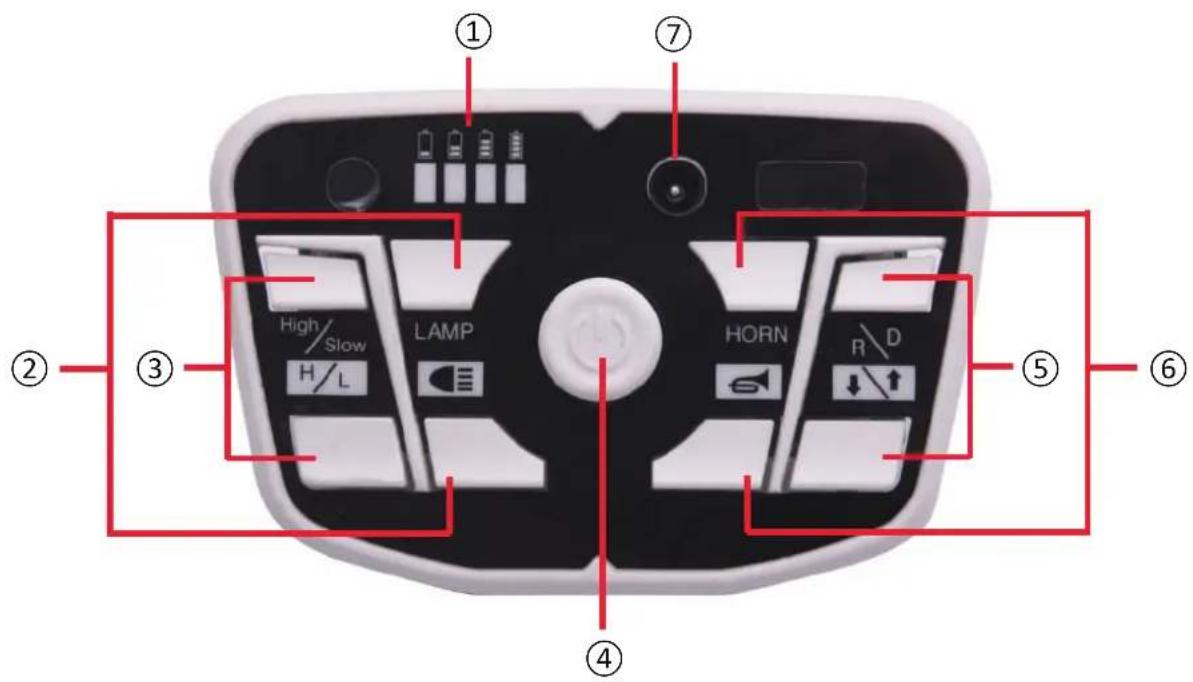
text_image
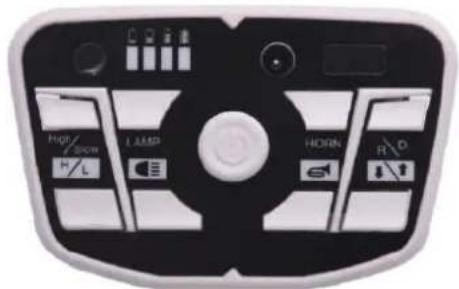
① ⑦ ② ③ High/ Slow LAMP H/L HORN R/D ④ ⑤ ⑥Button function
① Power display
⑤ Forward/Backward
② Light control
⑥ Horn sound
③ High/low speed
⑦ Charging hole
④ Power
Remote control function and explanation
- Do not swiftly switch forward/backward button when car is driving, or will damage the motor.
- Remote control can be used normally when batteries are assembled.
- Remote control should be used under adults supervision.
- Remote control is prior to manual control.

text_image
used under manual control. Forward Speed Stop Left Right Backward Light indicatorHow to adjust R/C frequency: Long press forward and backward button for 3 seconds, and the speed indicator flashes. Then turn on the power, the speed indicator goes to long bright, means the connection successfully. If the speed indicator no response, means the connection failed. Replace the batteries and retry.
Remote control battery operation
• Take off the battery cover. Put two AAA1.5V remote control battery in with right polarity.
- New and used batteries can not be used mixed.
- Do not insert batteries into wrong polarity, or will be short-circuited.
• Non-rechargeable batteries can not be recharged. Exhausted batteries should be replaced by adults.
- The exhausted battery must be handled and operated properly by adults only. Do not be played by children.
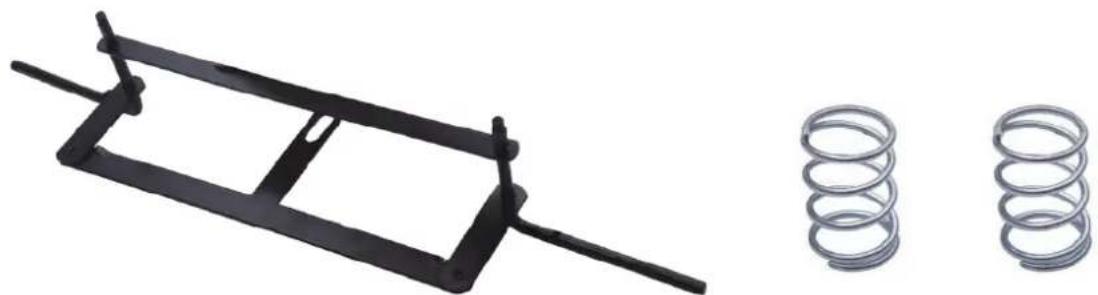
Installation Order Diagram
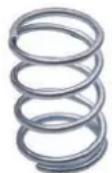
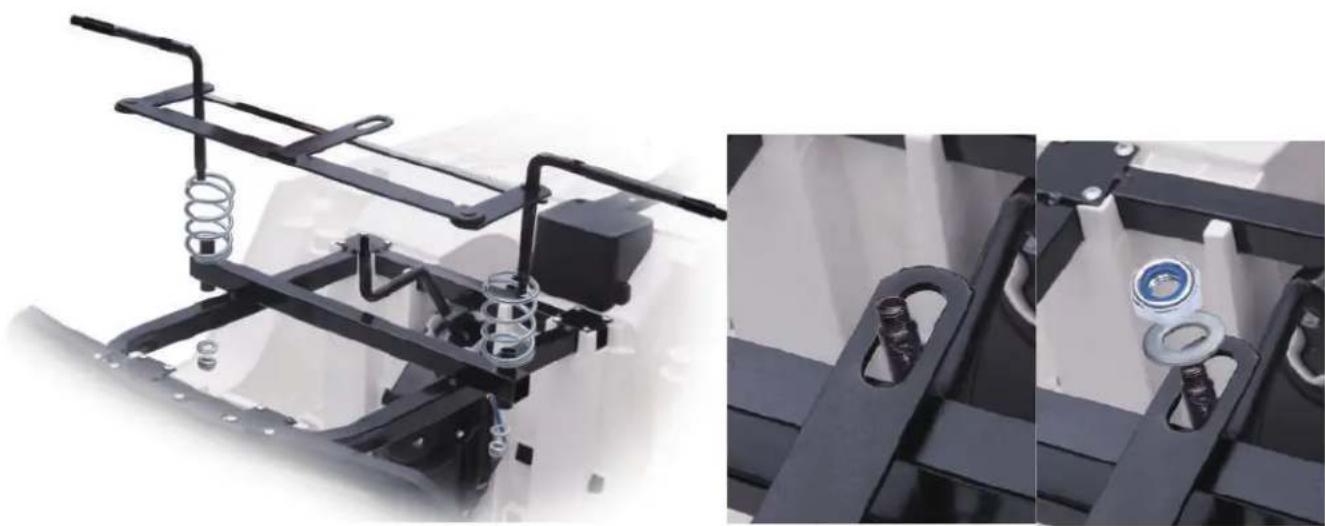
1.Front axle and front spring assembly
First, put the flat iron on the front axle. Put 1pcs front spring to each side of square tube. Then insert the front axle into the hole of square tube, add 1pcs washer and use spanner to tighten the nut. The same way for the other side. Direction lever should be passed through the hole of front axle, then add 1pcs washer and use spanner to thighten
the nut.
natural_image
Two mechanical components: a black frame with a handle and a coiled spring (no text or symbols visible)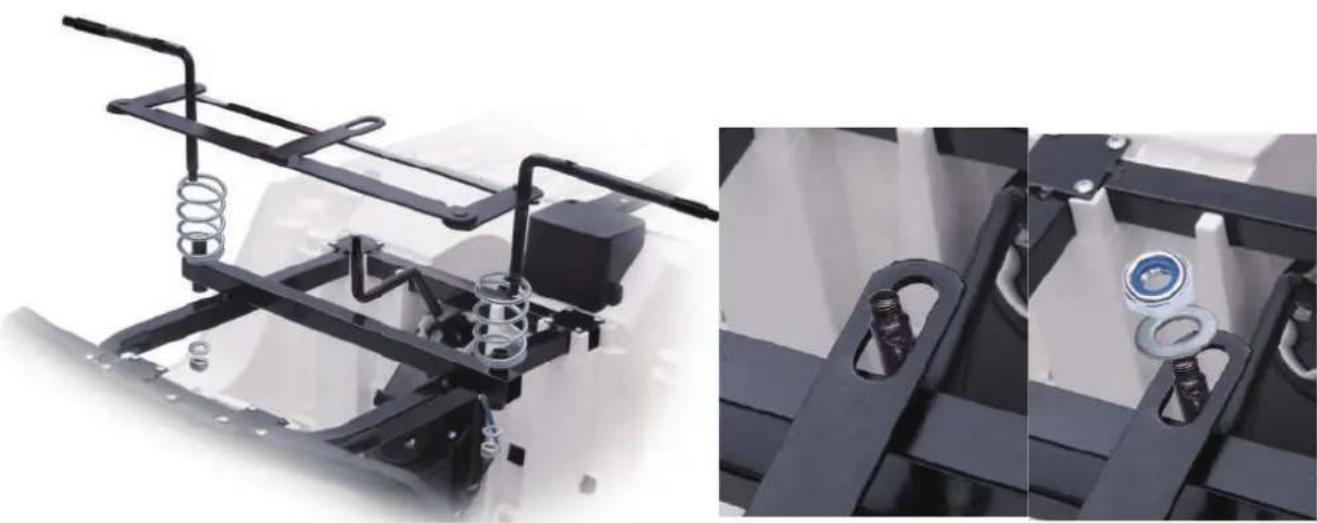
natural_image
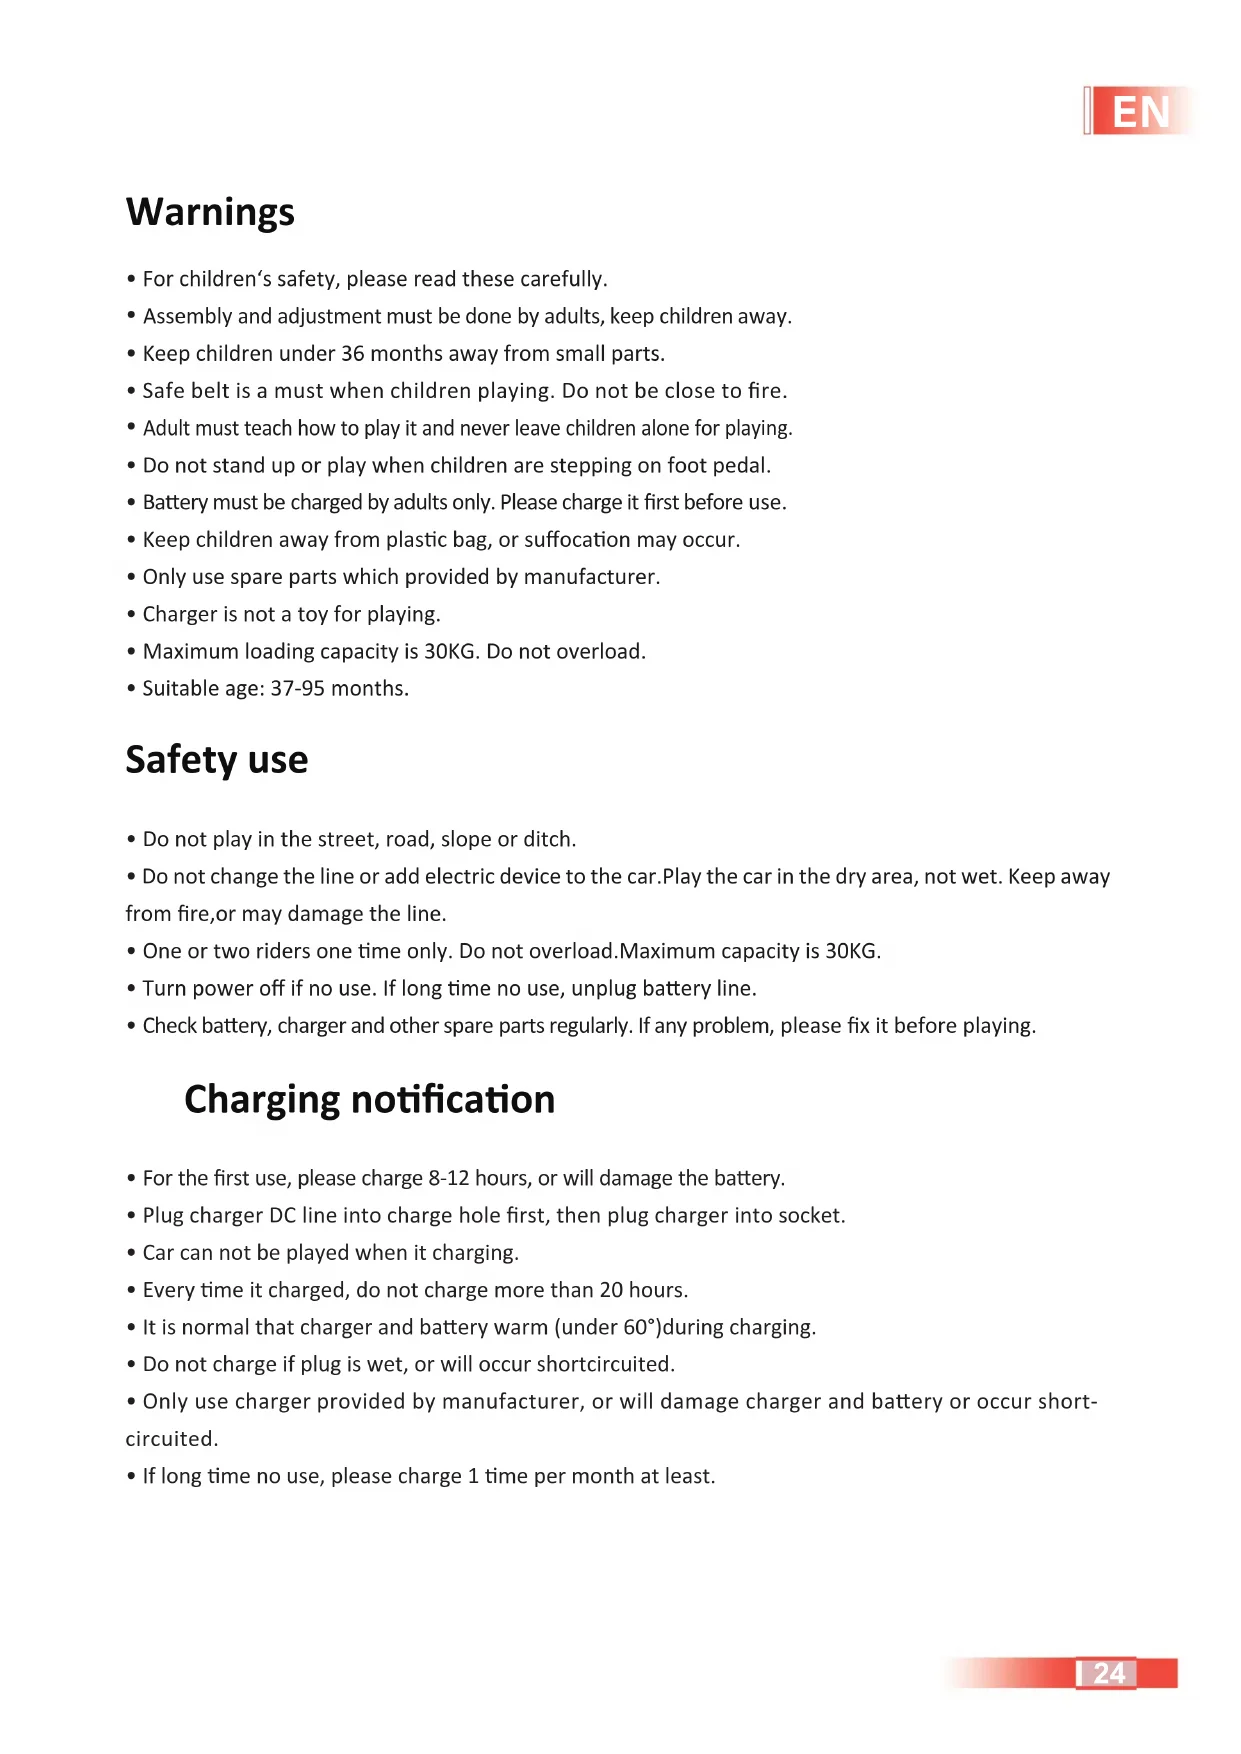
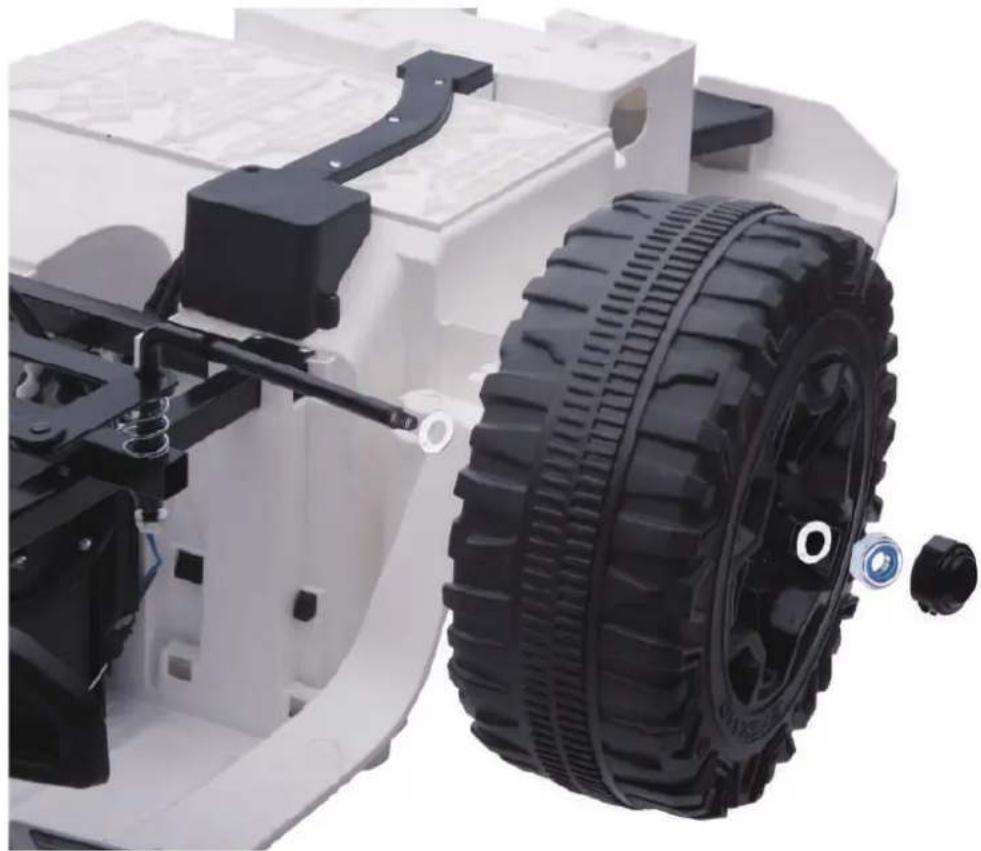
Mechanical assembly diagram showing spring and housing components (no text or symbols visible)2.Front wheel assembly
Add 1pcs big washer, 1pcs wheel, 1pcs small washer step by step, usespanner to tighten the nut. Finally put the small wheel cover on. Thesame way for the other side.
natural_image
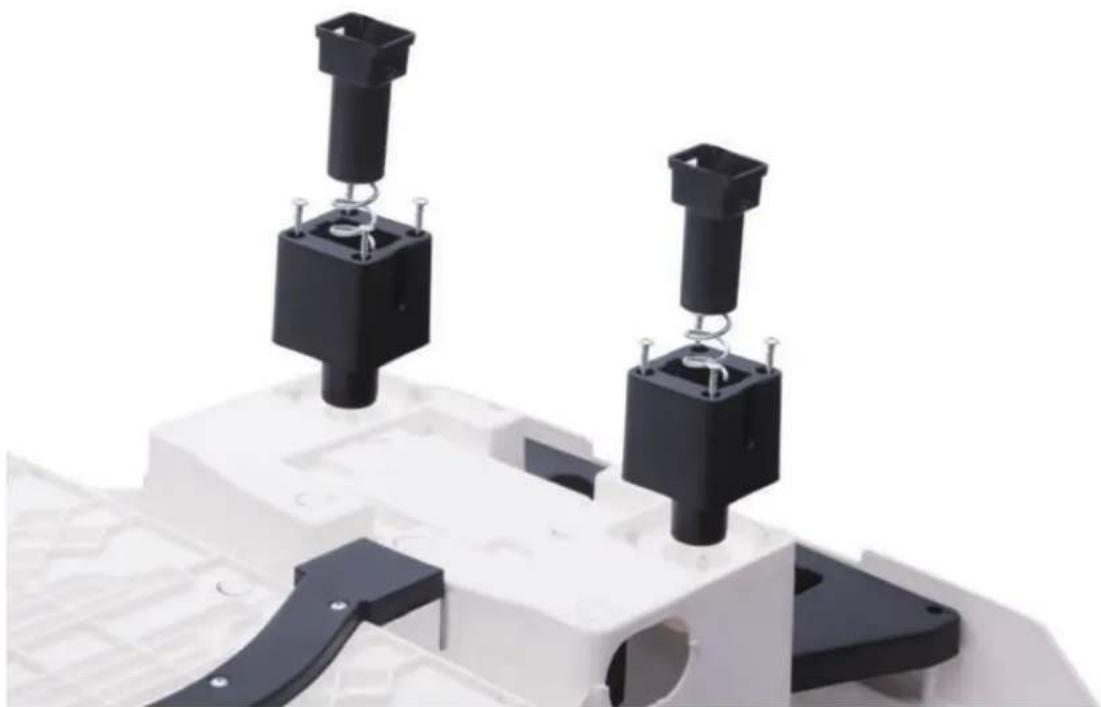
Close-up of a white toy vehicle chassis with black tire and mechanical components, no visible text or symbols3.Rear spring and rear spring holder assembly
Insert the rear spring holder into the reserved place on the car body, use 8pcs M4*14 screw to tighten. Then put rear spring into the hole of rear spring holder.
natural_image
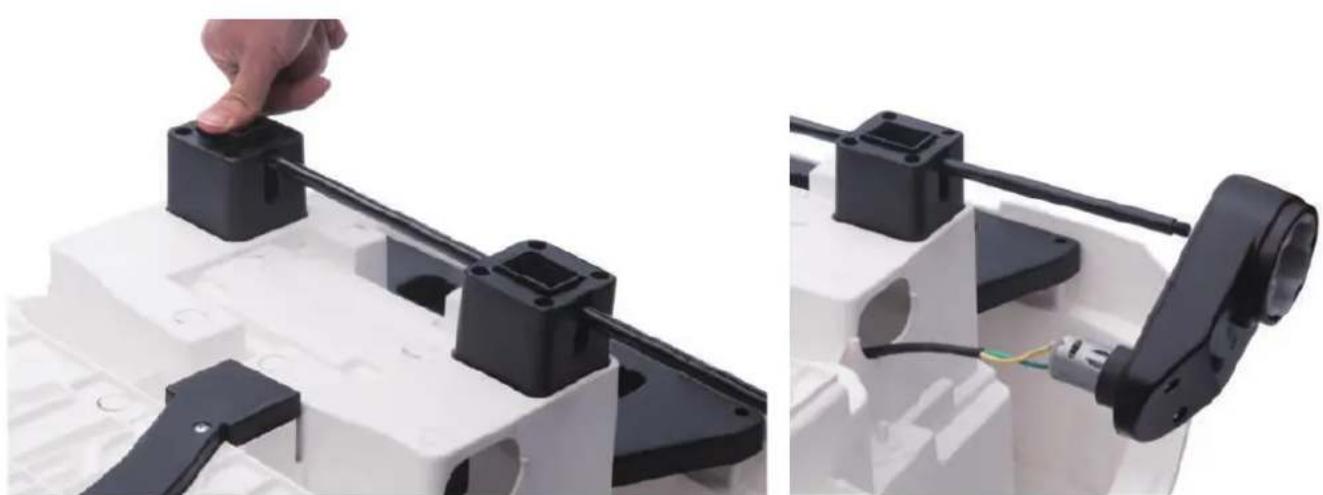
Close-up of mechanical components with black and white blocks, no visible text or symbols4.Rear axle and motor assembly
Press the rear spring, then insert the rear axle through the holes.Add 1pcs motor, 1pcs wheel, 1pcs washer step by step, use spanner to tighten the nut. The same way for the other side.
natural_image
Close-up of a robotic arm gripping a black plastic component, with a hand adjusting the part (no text or symbols visible)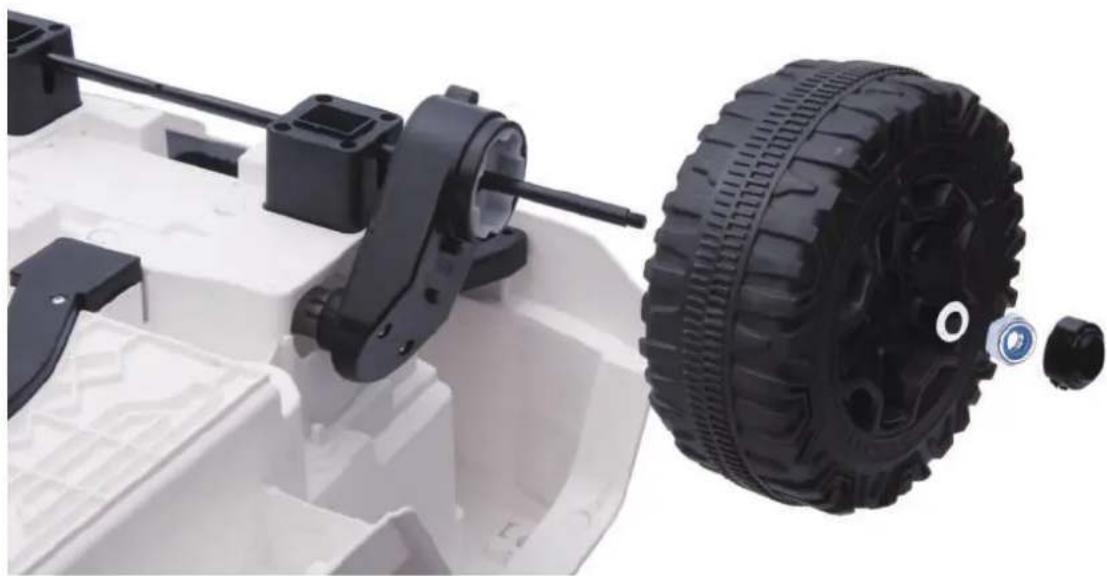
natural_image
Close-up of a white toy vehicle chassis with black mechanical components and a black tire assembly (no visible text or symbols)5. Door and rearview mirror holder assembly
Insert the door into the reserved place on the car, then insert the rearview mirror holder into the reserved place on the car and door. Use 2pcs M4*14 screw to tighten. The same way for the other side.
natural_image
Close-up of a black plastic device with ventilation slots and a green product box (no visible text or symbols)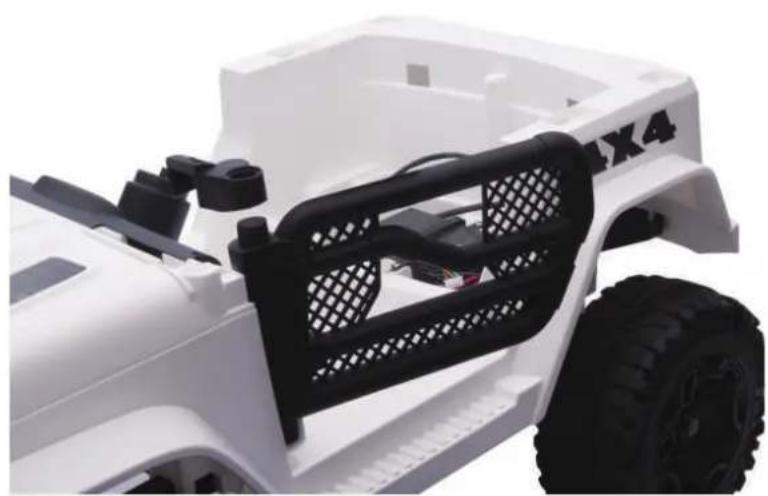
natural_image
Close-up of a white toy vehicle chassis with black mesh frame and tire, no visible text or symbols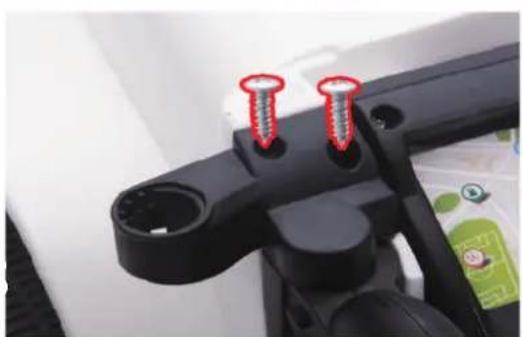
natural_image
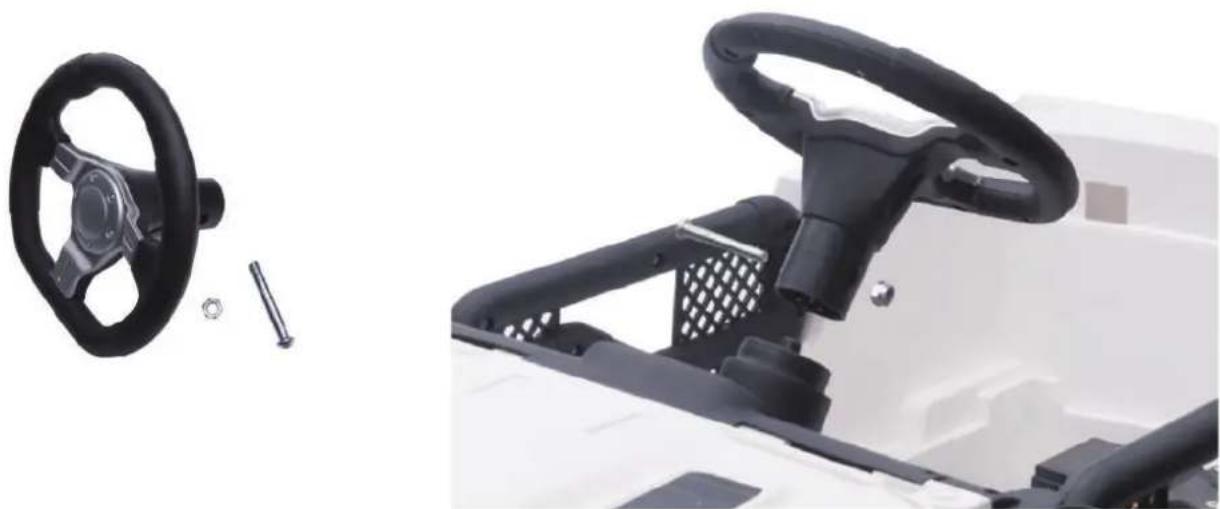
Close-up of a black mechanical component with two red screw holes (no text or symbols visible)6. Steering wheel assembly
Unscrew the steering wheel, insert steering wheel into the direction lever, use screw and nut to tighten.
natural_image
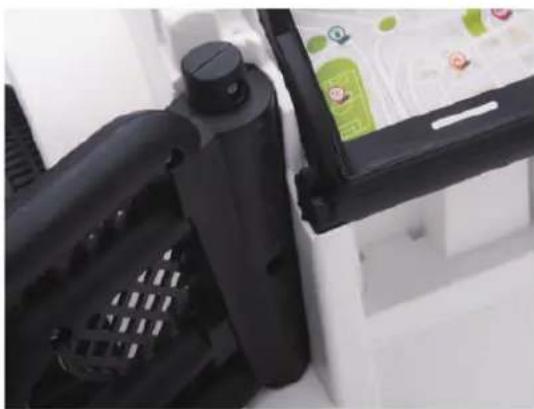
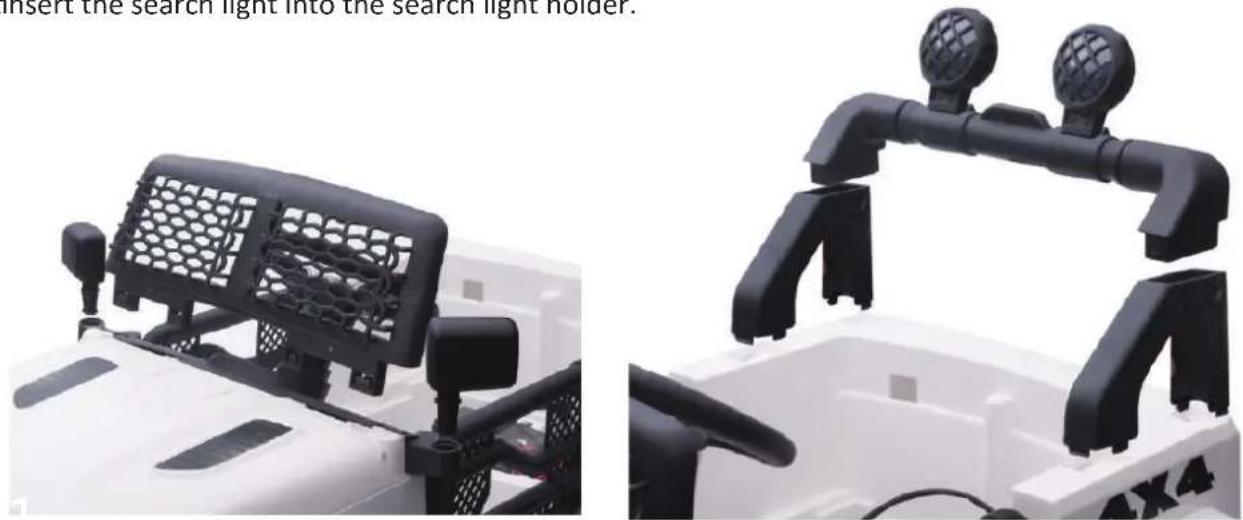
Close-up of a white electric motor with black steering wheel and control panel, alongside a small mechanical component (no visible text or symbols)7. Windshield, rearview mirror, search light holder, search light assembly
Insert the windshield, rearview mirror, search light holder into the reserved place on the car. Then insert tinsert the search light into the search light holder.
natural_image
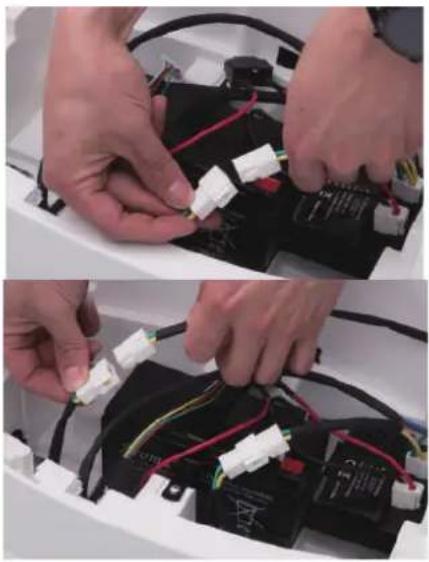
Two views of a white off-road vehicle showing front and side views with black mesh panels and traffic lights (no text or symbols visible)8.Motor line and battery line connection
Connect the motor line correctly. Connect the red battery line to the red terminal.
natural_image
Two-panel photo showing hands installing wires on a battery pack, no visible text or symbols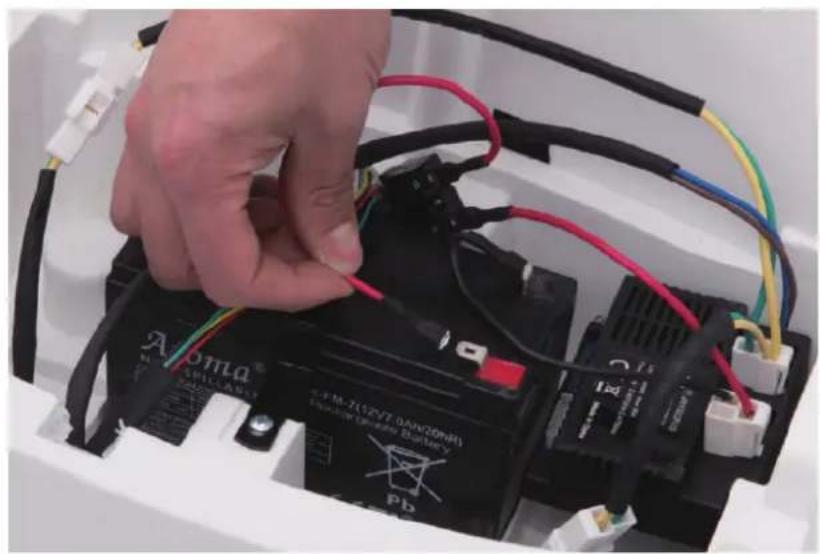
natural_image
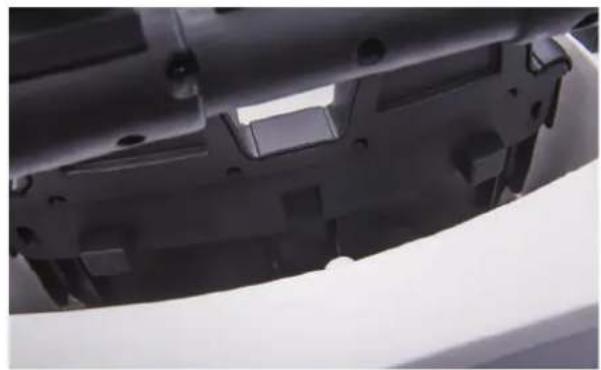
Close-up of a hand connecting a black battery to its electrical terminal, with visible wiring and components (no readable text or symbols)9.Seat assembly
Insert the seat into the reserved place on the car, usd 2pcs M4*14 screw to tighten.
natural_image
Close-up of a mechanical component with black plastic parts and a white sheet, no visible text or symbols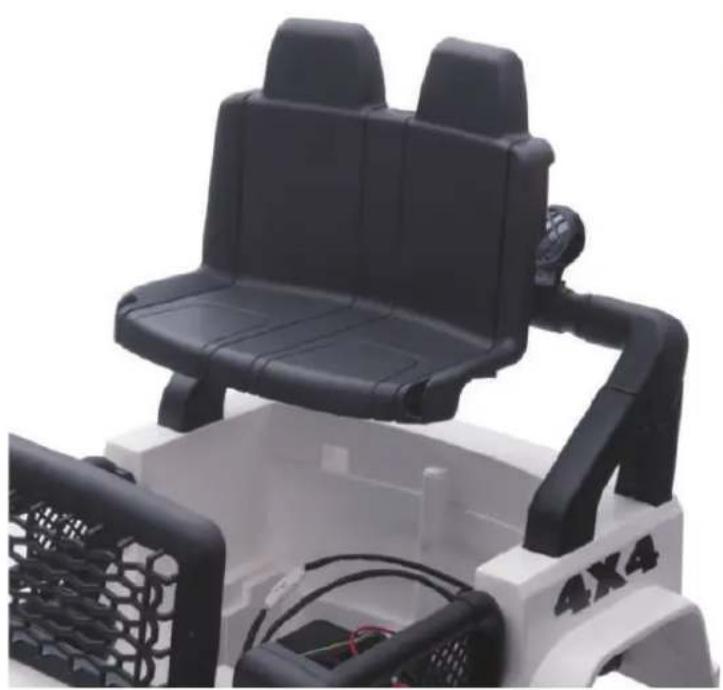
natural_image
Close-up of a black and white toy vehicle chassis with visible seats and motors (no text or symbols)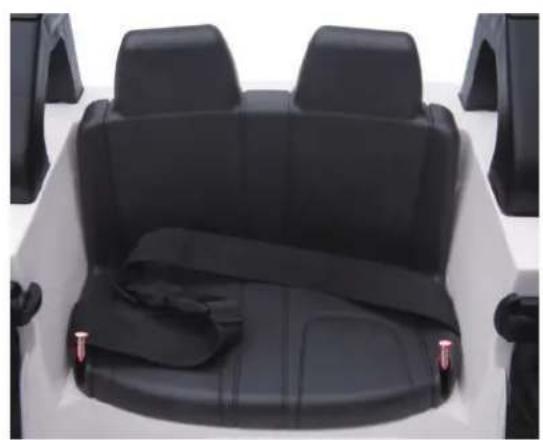
natural_image
Top-down view of a white off-road vehicle backseat with black seat covers and rear seats (no text or symbols visible)Warnings
- For children's safety, please read these carefully.
- Assembly and adjustment must be done by adults, keep children away.
- Keep children under 36 months away from small parts.
- Safe belt is a must when children playing. Do not be close to fire.
- Adult must teach how to play it and never leave children alone for playing.
- Do not stand up or play when children are stepping on foot pedal.
- Battery must be charged by adults only. Please charge it first before use.
- Keep children away from plastic bag, or suffocation may occur.
- Only use spare parts which provided by manufacturer.
- Charger is not a toy for playing.
• Maximum loading capacity is 30KG. Do not overload. - Suitable age: 37-95 months.
Safety use
- Do not play in the street, road, slope or ditch.
- Do not change the line or add electric device to the car. Play the car in the dry area, not wet. Keep away from fire, or may damage the line.
- One or two riders one time only. Do not overload.Maximum capacity is 30KG.
- Turn power off if no use. If long time no use, unplug battery line.
- Check battery, charger and other spare parts regularly. If any problem, please fix it before playing.
Charging notification
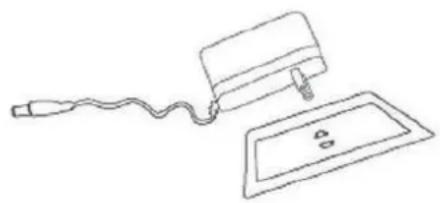
- For the first use, please charge 8-12 hours, or will damage the battery.
- Plug charger DC line into charge hole first, then plug charger into socket.
- Car can not be played when it charging.
- Every time it charged, do not charge more than 20 hours.
- It is normal that charger and battery warm (under 60^ ) during charging.
- Do not charge if plug is wet, or will occur shortcircuited.
- Only use charger provided by manufacturer, or will damage charger and battery or occur short-circuited.
- If long time no use, please charge 1 time per month at least.
Charging steps are as follows:
Step 1: The charging hole is on the multi-functional board.
Step 2: Put the charger plug into the plug hole.
Step 3: Connect the charger to the power socket.
text_image
HOP/ SHOW LAMP HORN R/D
natural_image
Simple line drawing of a device with a cable and a rectangular plate, no text or symbols present.Warning: Car must be charged by adults only.
Car is useless during charging
Maintenance and Service
- Check battery, charger and other spare parts regularly. if there is any problem, please fix it before playing.
- Use lubricating oil to care iron parts. Keep car away from fire and avoid long-time direct sunlight. Park it on the even place, do not reversal or gradient.
- Park it indoor and cover it with waterproof cloth.
- Keep car away from fire, like stove or heater, or plastic maymelt.
- Keep away from flammable things, or may occur fire accident.
- Charge it after use and must be done by adults only. If longtime no use, please charge it 1 time per month, in order to maintain battery.
- Clean the vehicle with a dry cloth only. Do not use chemical solvent to wipe plastic parts. Do not wash it with water or playit when raining or snowing. Water will damage motor, electrocsystem or battery.
- Please turn power off after each use.
- Only use charger provided by manufacturer.
- Do not change car's structure or electric line. Check jobrequest some skills or under specialists guidance.
TX288703
Illerax®
natural_image
Black metal frame with a diagonal handle and two vertical posts (no text or symbols visible)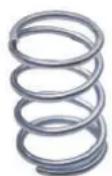
natural_image
Mechanical assembly components including spring, coil, and bearing housing (no visible text or symbols)natural_image
Close-up of a white automotive chassis with black tire and mechanical components (no visible text or symbols)natural_image
Close-up of a mechanical assembly with black and white components, no visible text or symbolsnatural_image
Close-up of a robotic arm gripping a black plastic component, with visible wiring and a hand adjusting the part (no text or symbols)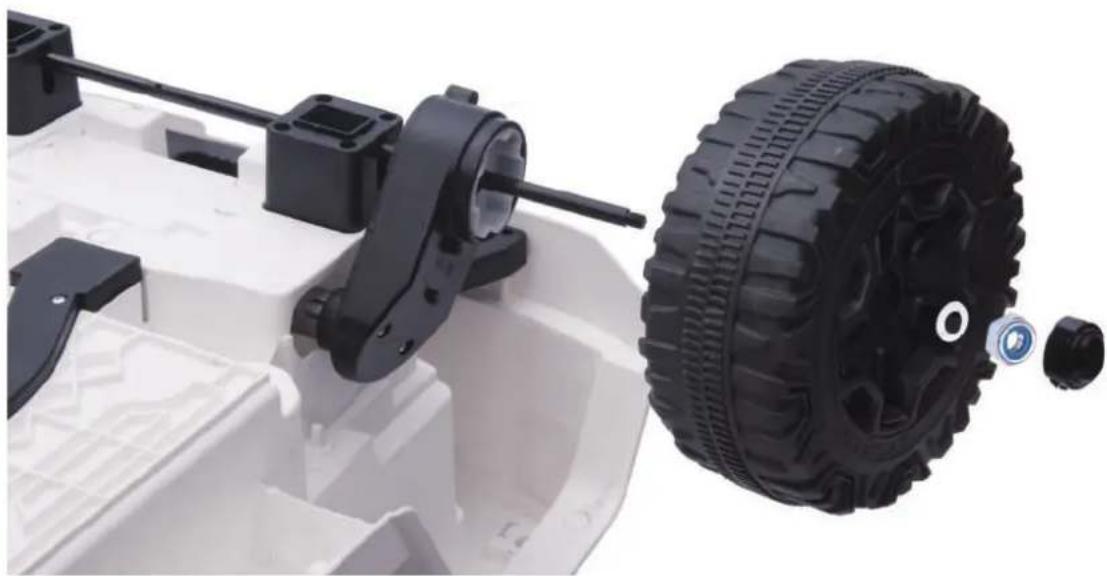
natural_image
Close-up of a white toy vehicle chassis with black mechanical components and a black tire, no visible text or symbols.natural_image
Close-up of a black plastic device component with screw fasteners inserted, showing internal structure and mounting points (no text or symbols visible)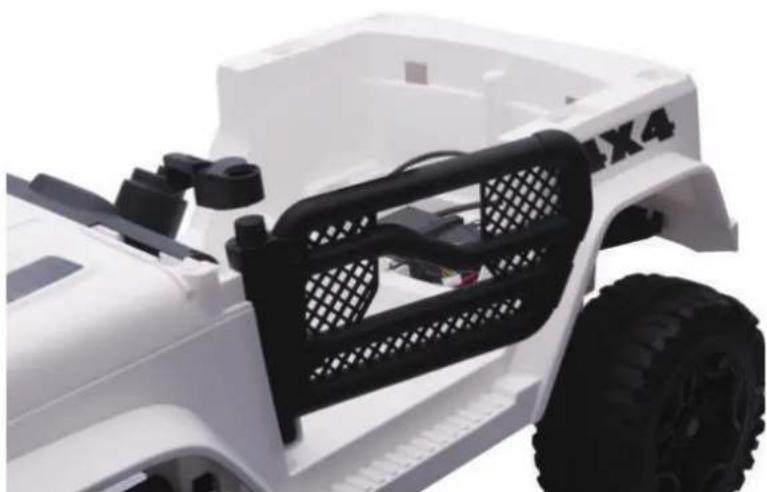
natural_image
Close-up of a white toy vehicle chassis with black plastic panel and visible tire, no text or symbols present.6. Ensemble de volant
natural_image
Close-up of a white electric vehicle steering wheel and interior dashboard (no text or symbols visible)natural_image
Two views of a white off-road vehicle showing front and side views with black mesh panels and mechanical brackets (no text or symbols visible)natural_image
Two-panel photo showing hands connecting wires to a battery pack, no visible text or symbols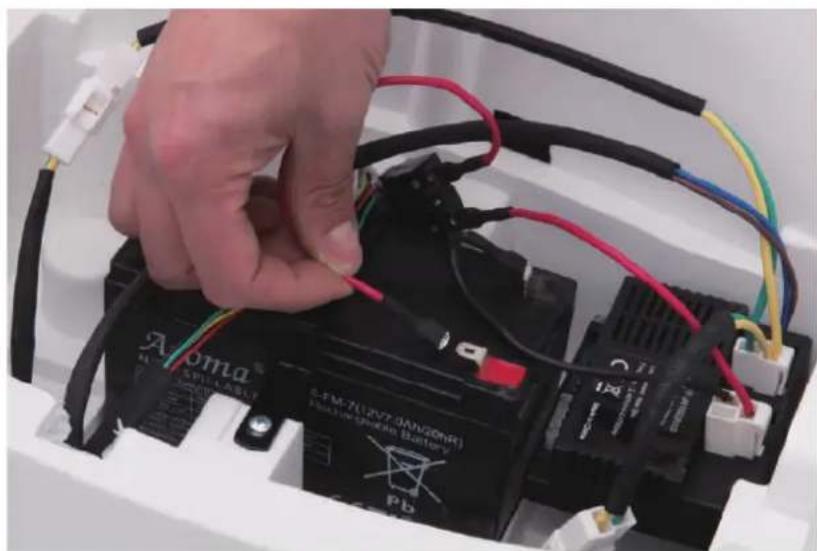
natural_image
Close-up of a hand connecting black and red wires to a battery pack labeled 'Aroma' (no text or symbols on the main subject)natural_image
Close-up of a mechanical component with black plastic parts and mounting holes (no visible text or symbols)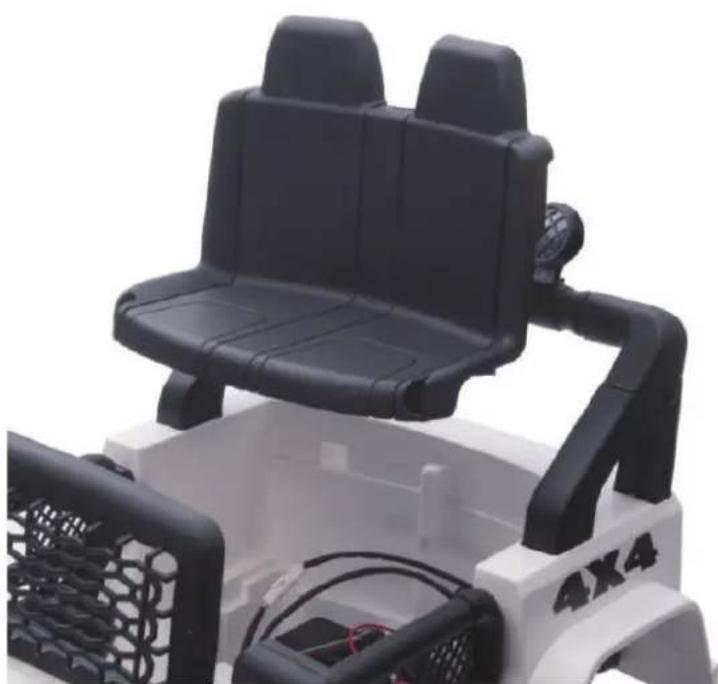
natural_image
Close-up of a toy car with black seats and black handlebars, no visible text or symbols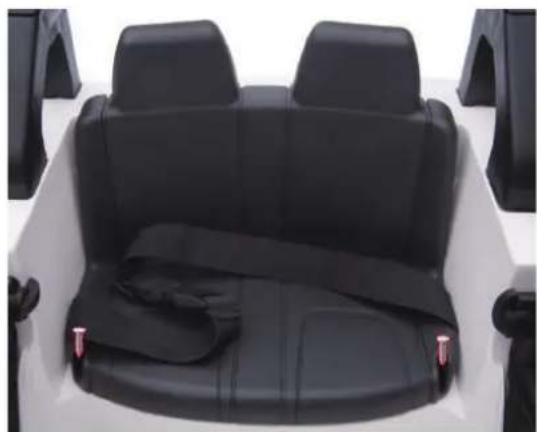
natural_image
Top-down view of a white off-road vehicle backseat with black seat covers and rear seats (no text or symbols visible)Mises en garde
text_image
High/low I AMP HORN R/P